
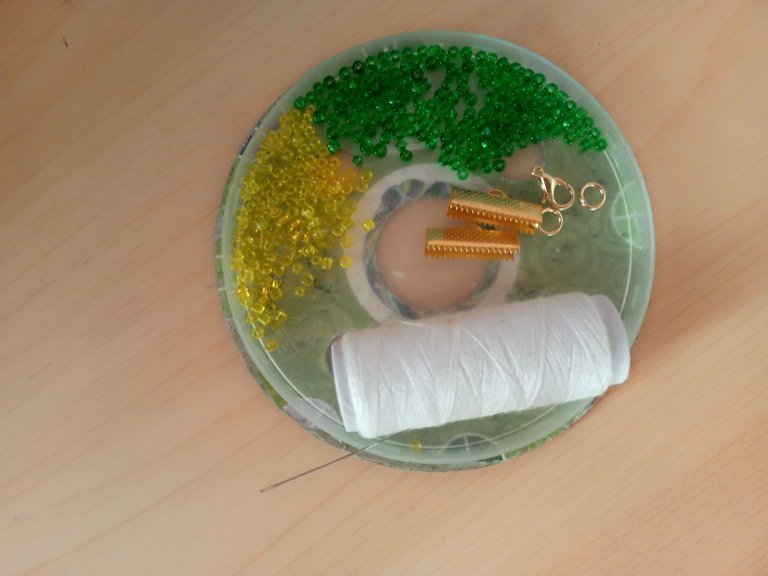
Next I will be presenting the materials used to make this beautiful bracelet.
MATERIALS
- Green beads
- Yellow beads
- White polyester thread
- Needle for beads #12
- 2 rings
- 2 loops
- Lock or locking ring
- 2 crocodile lugs
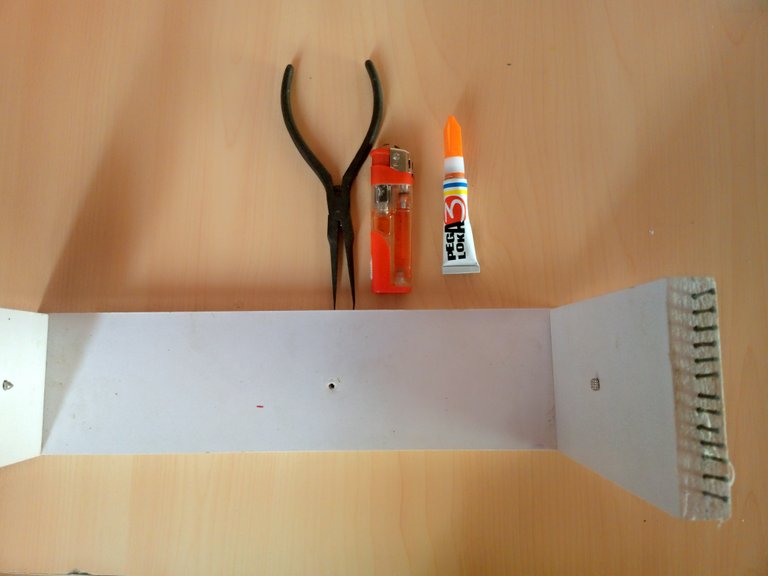
- Wooden loom
- Scissors
- Glue
- Pliers
- Lighter
Step by Step
Step 1
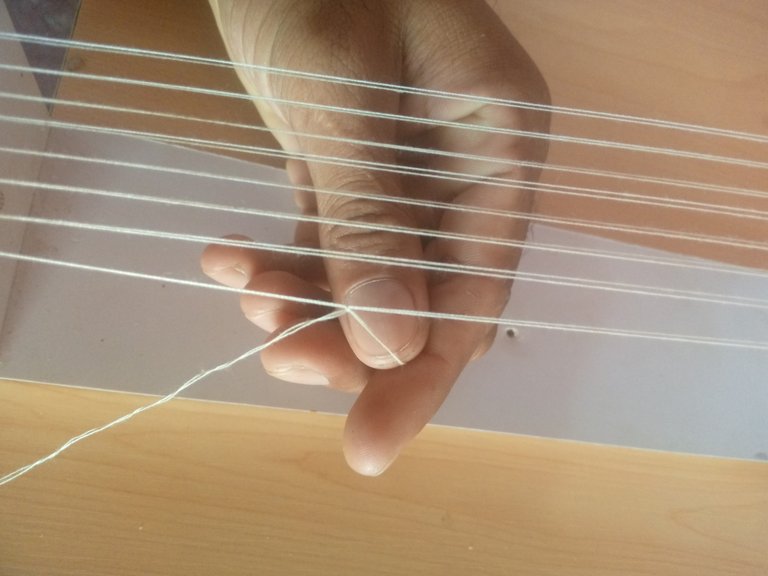
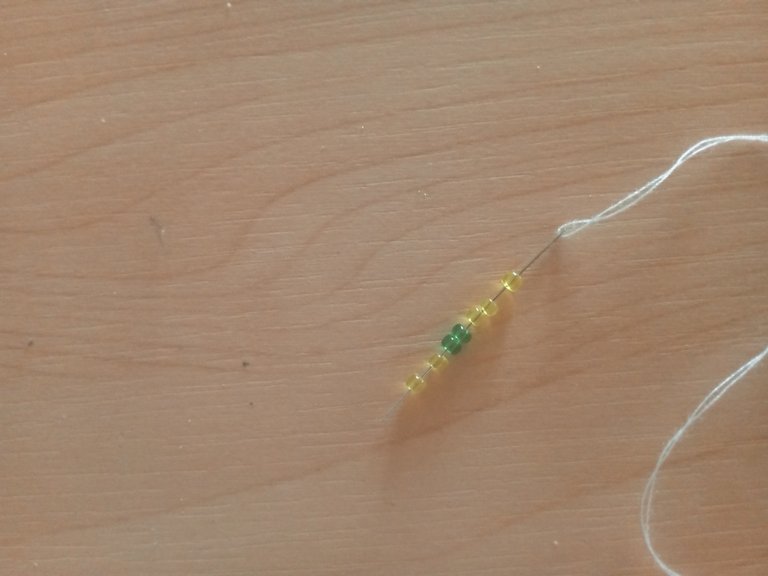
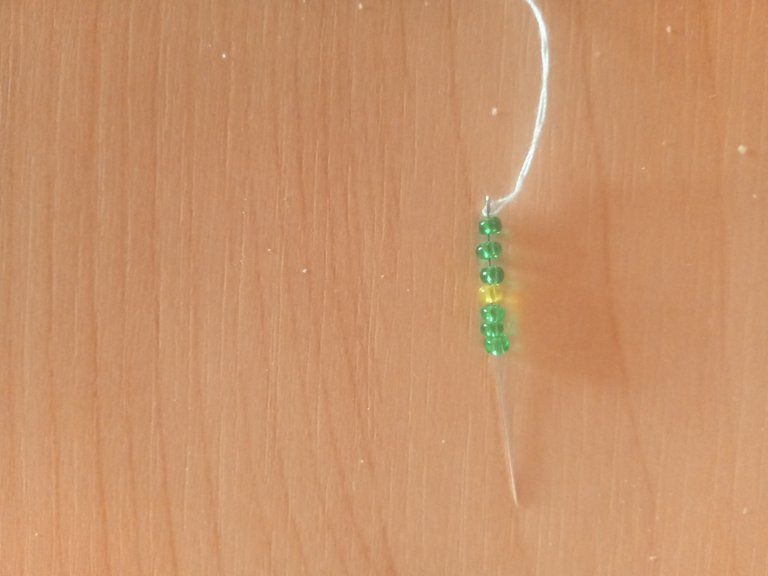
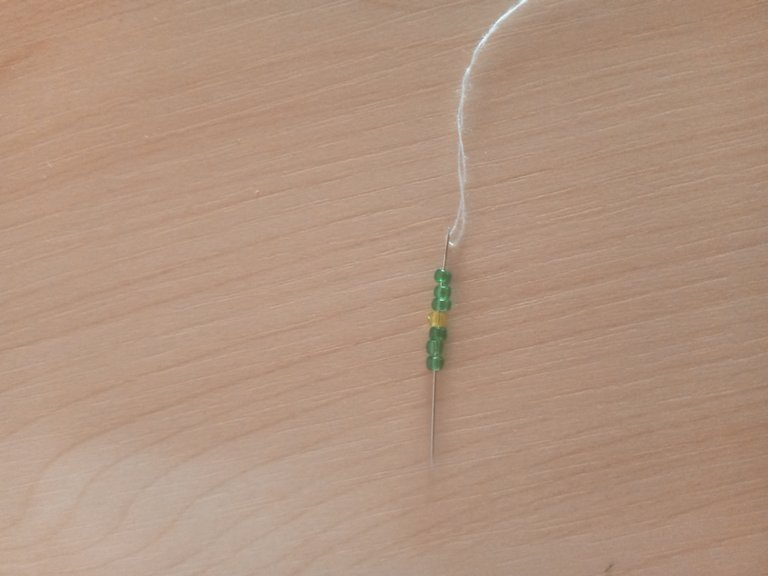
The first thing we did was to take approximately 3 meters of polyester thread and threaded our needle, then we placed 8 rows of thread on our loom, we took our needle with the thread to adjust one end to the loom threads making several knots, this to work more comfortable.
Step 2
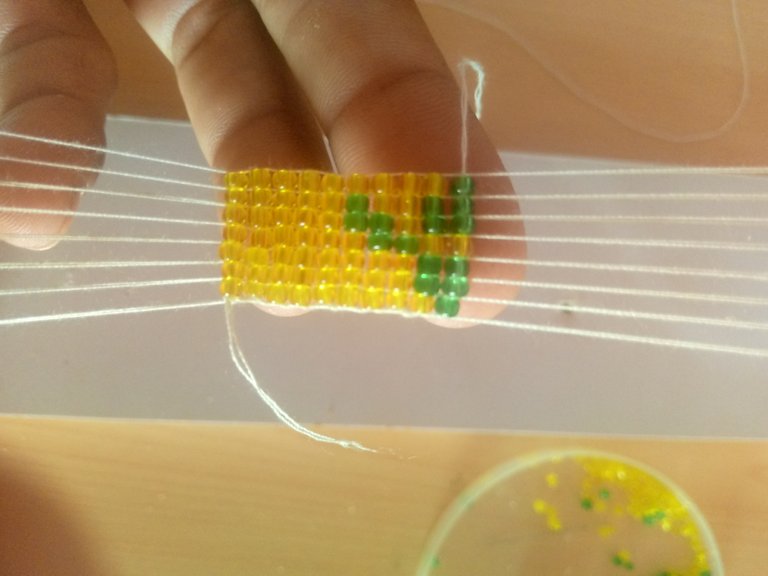
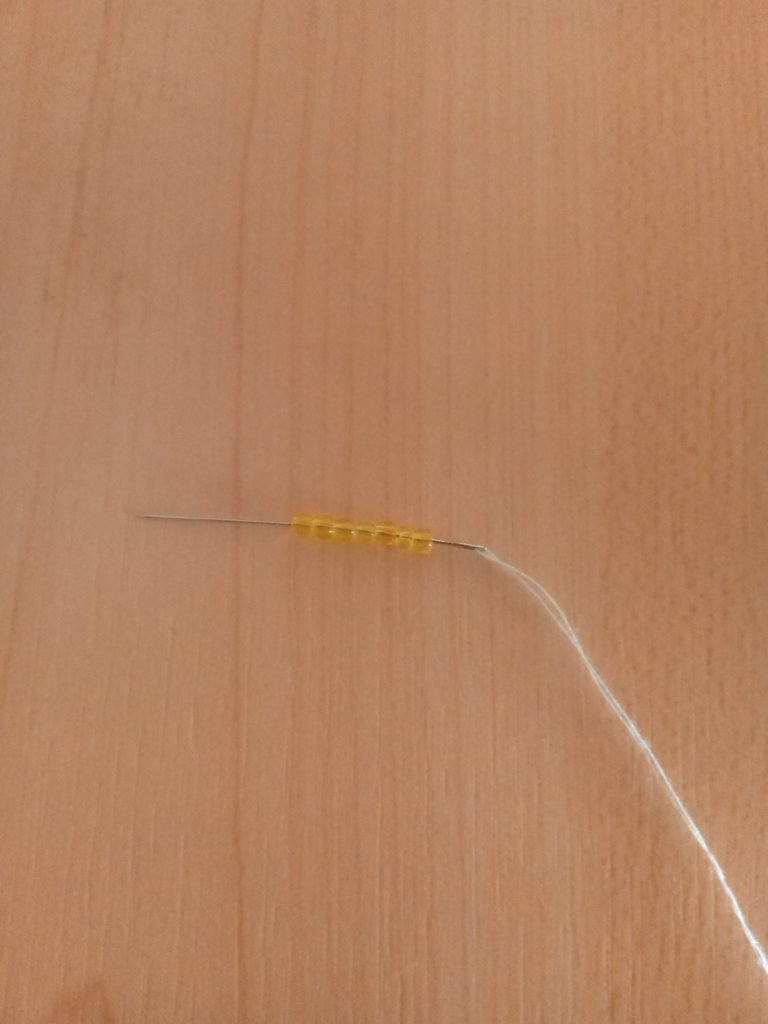
We are going to take six yellow beads and position them on our loom as follows:
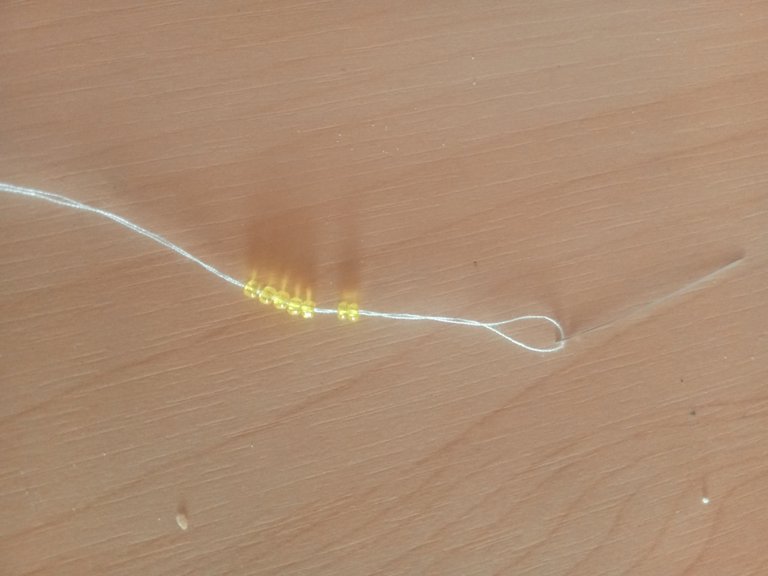
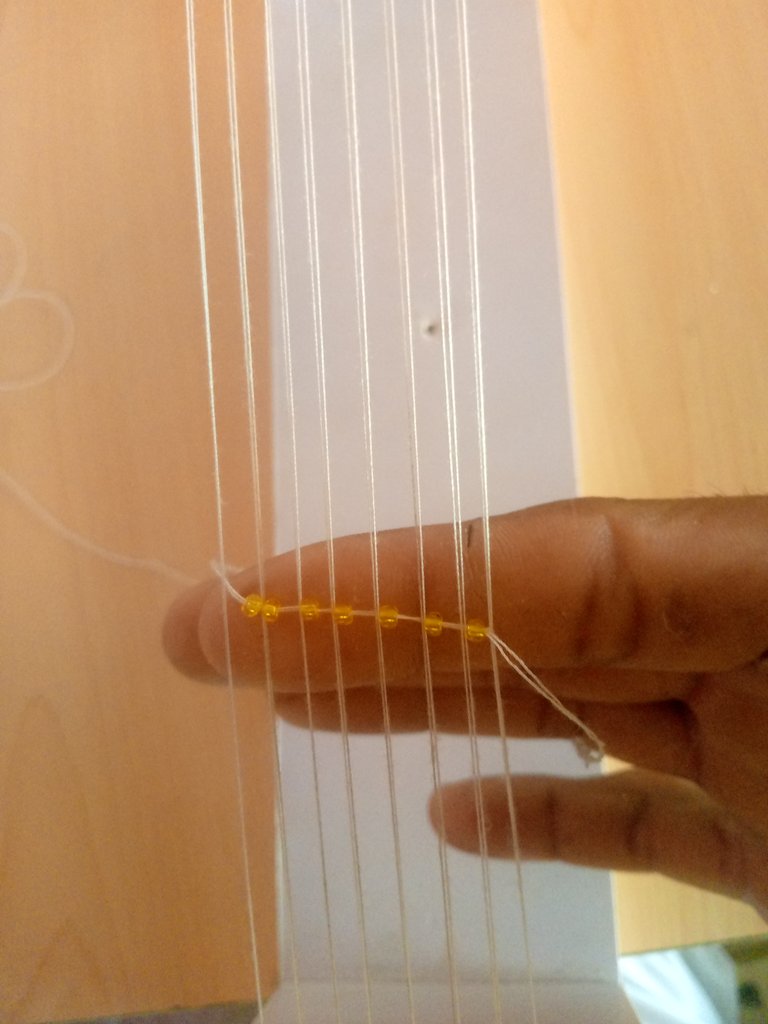
Then we will pass the needle through the top part and we are going to introduce it through each bead that is sticking out, to pull a little of our thread so that it is already tightening.
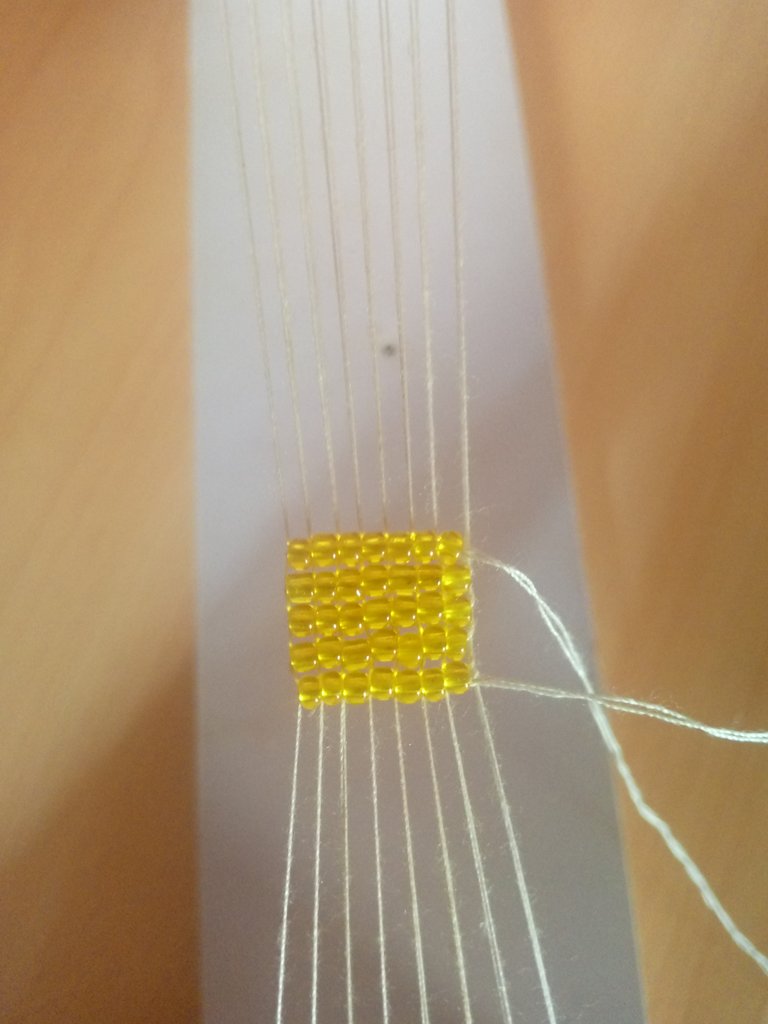
Again we will take seven beads and do the same procedure, position the bead on each thread of the loom and pass the needle through the top and pull it through.
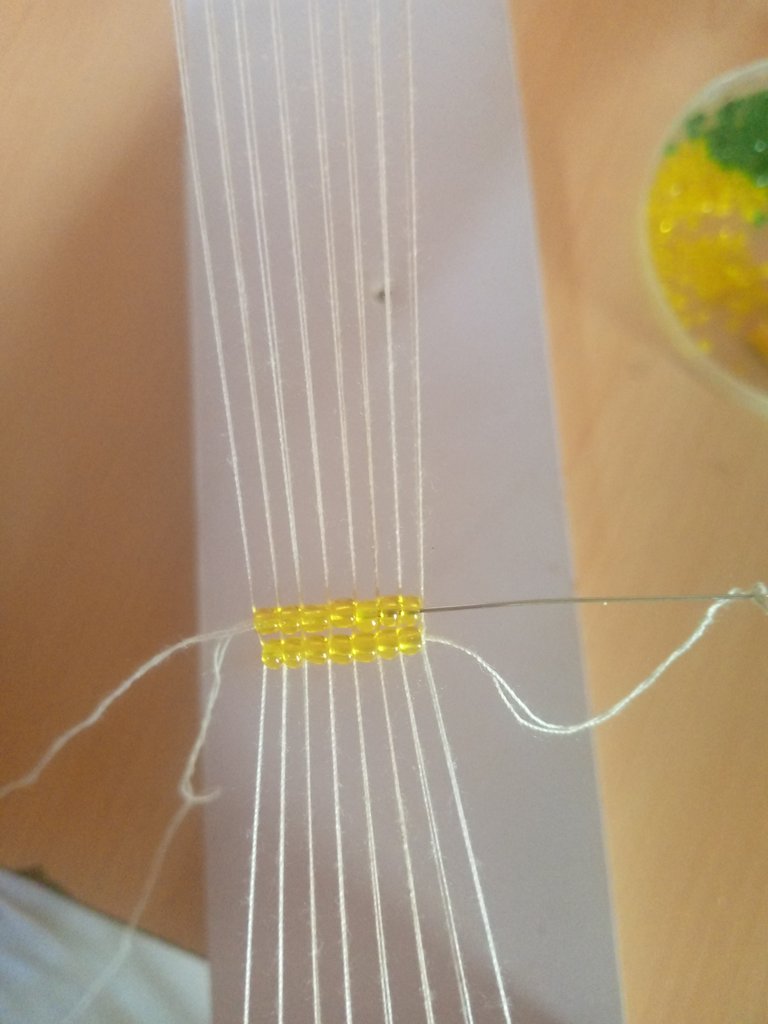
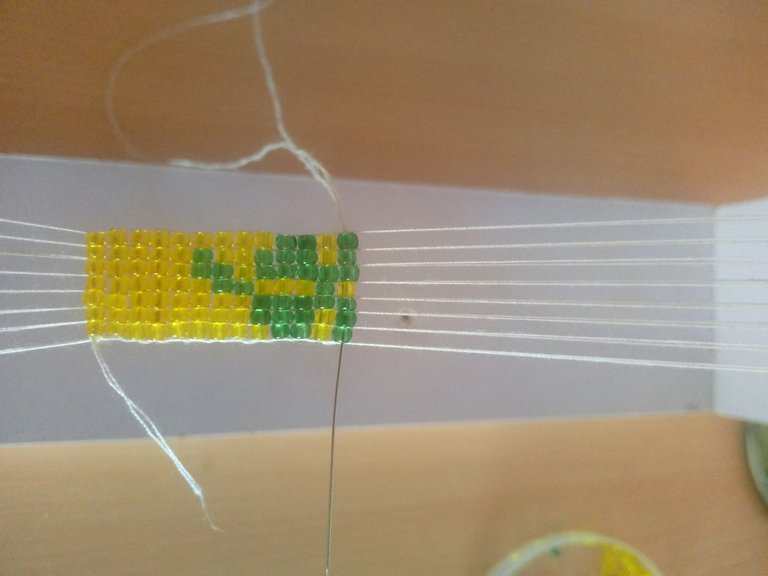
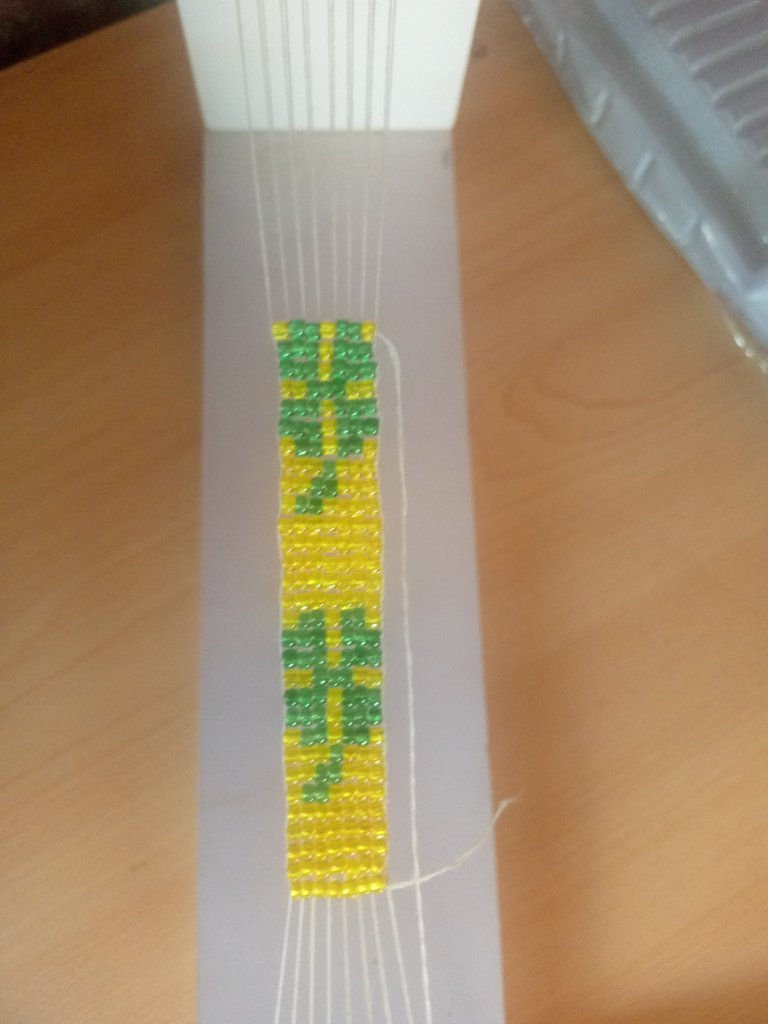
We are going to repeat this step five times to obtain the following result
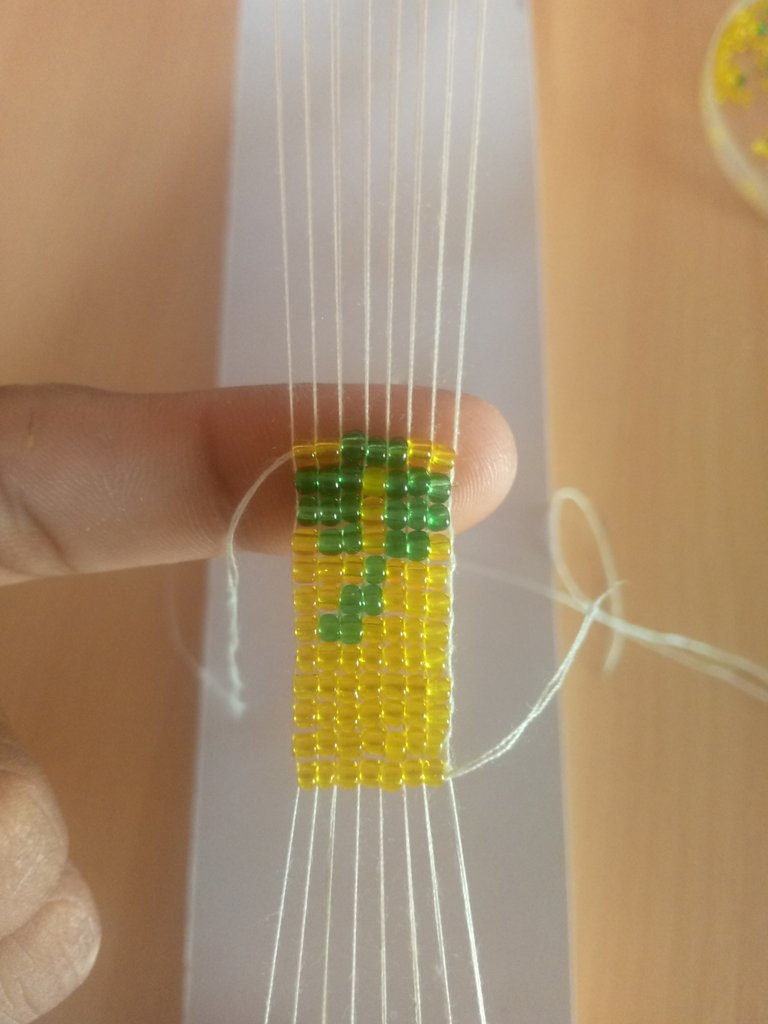
Step 3
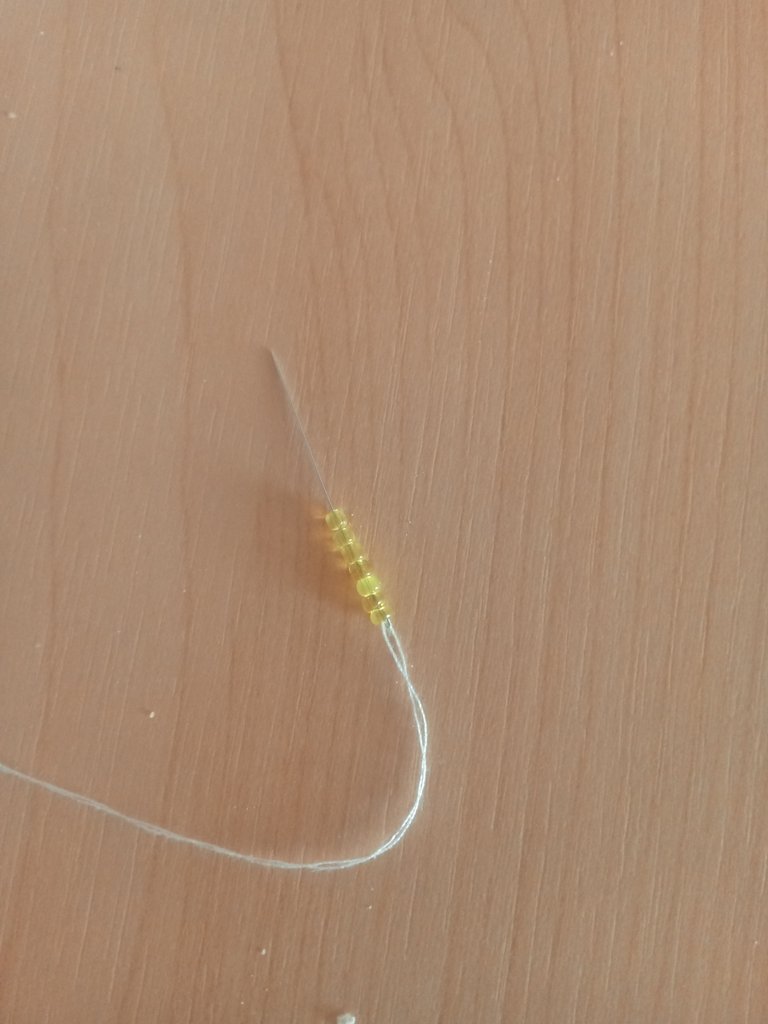
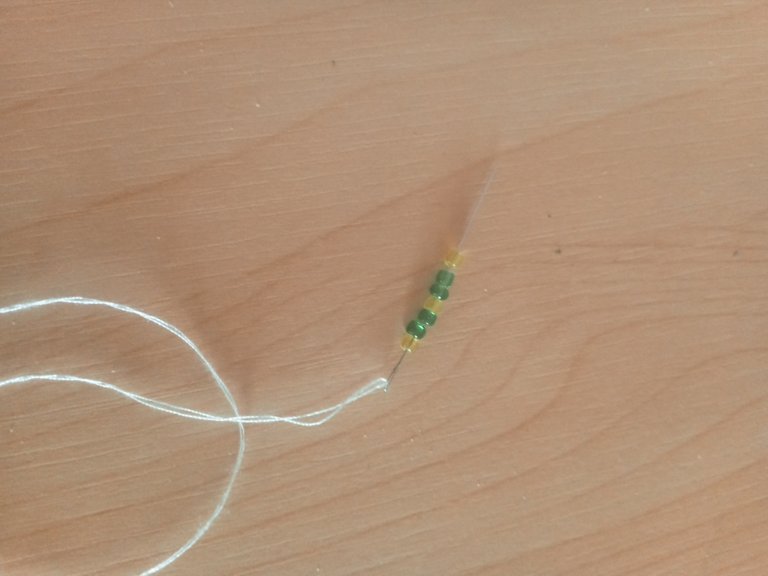
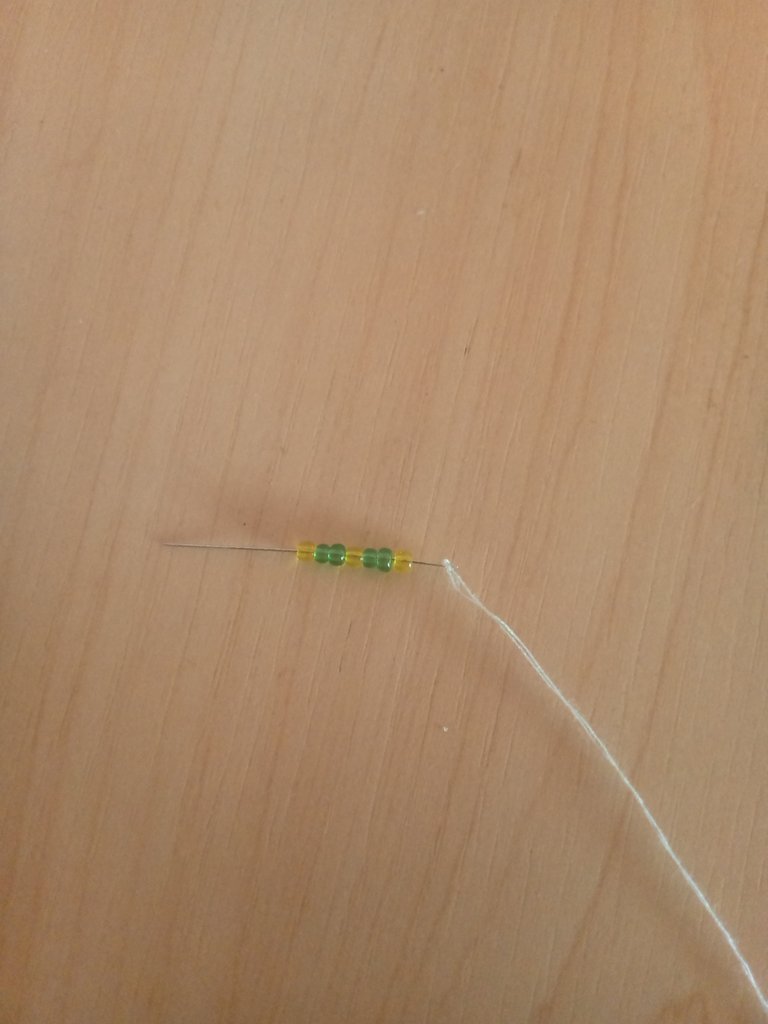
Then we are going to take 4 yellow Mostacillas, 2 green ones and again a yellow mostacilla.
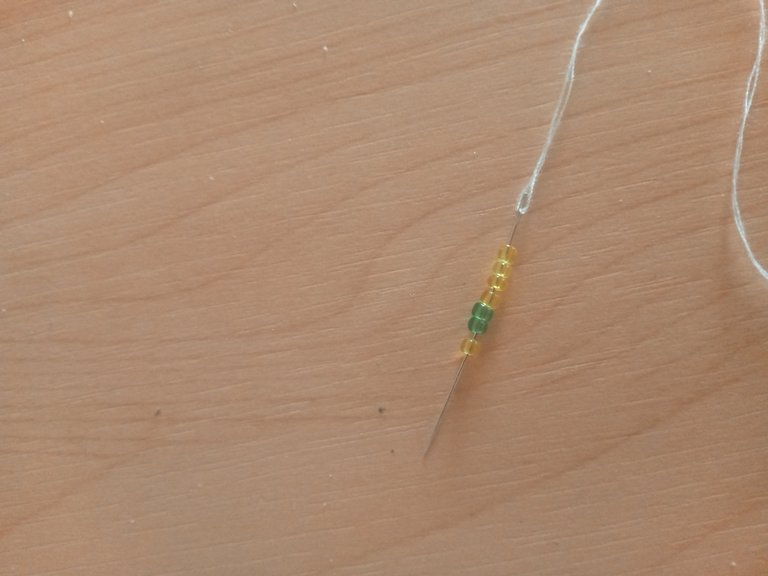
We are going to position them on our loom and then pass the needle through the top and through each of the protruding beads.
Next we are going to take three yellow beads, two green beads and two yellow beads.
In the same way as the previous one we are going to position them on the fabric and then we pass our needle with thread inside each bead and pull them again.
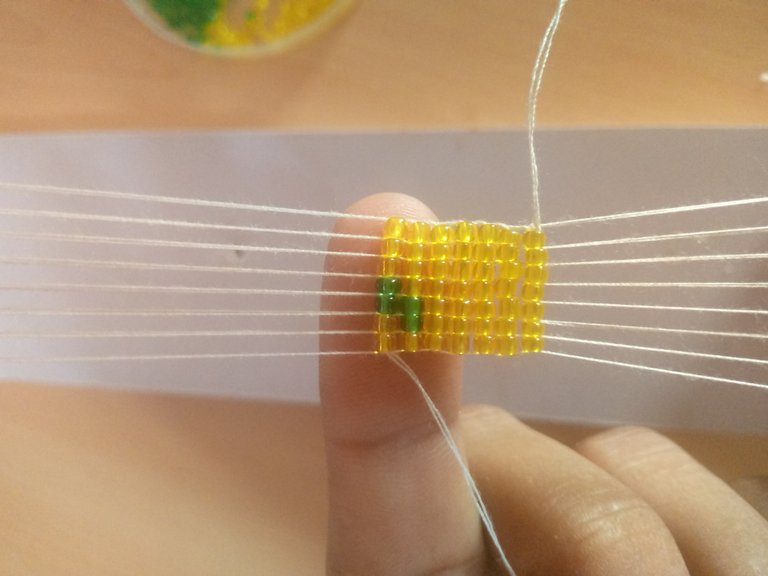
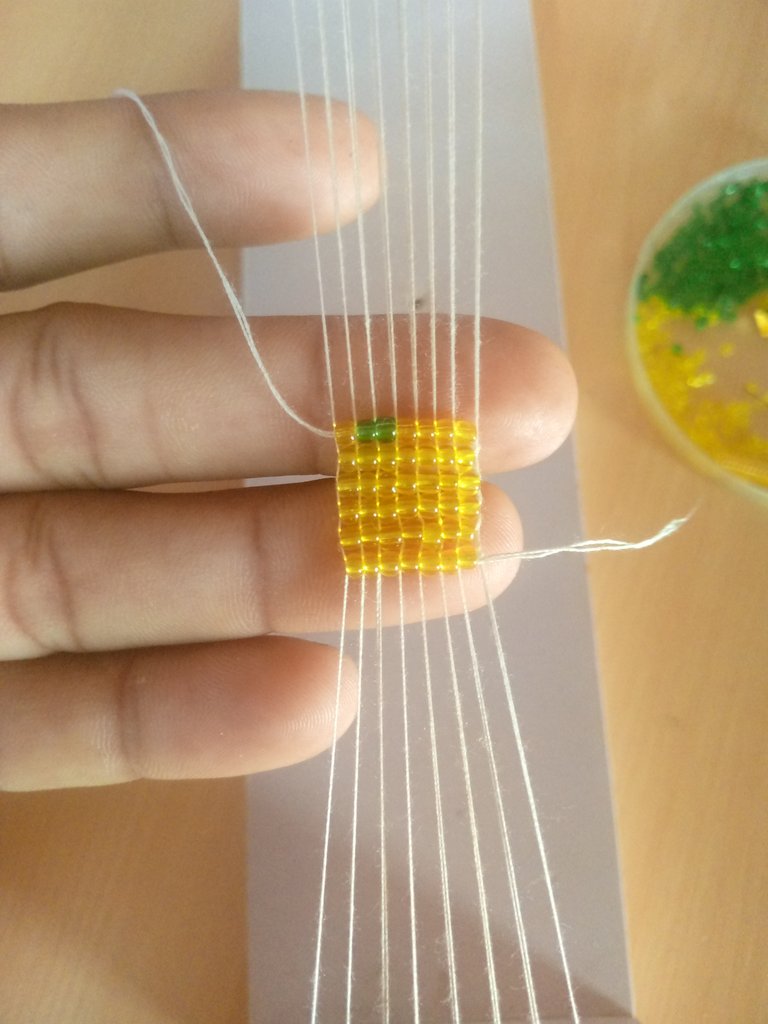
Now we take three yellow beads, one green bead and again three yellow beads, we pull the same procedure we are going to position it and then we pass our needle through the center of each one of them.
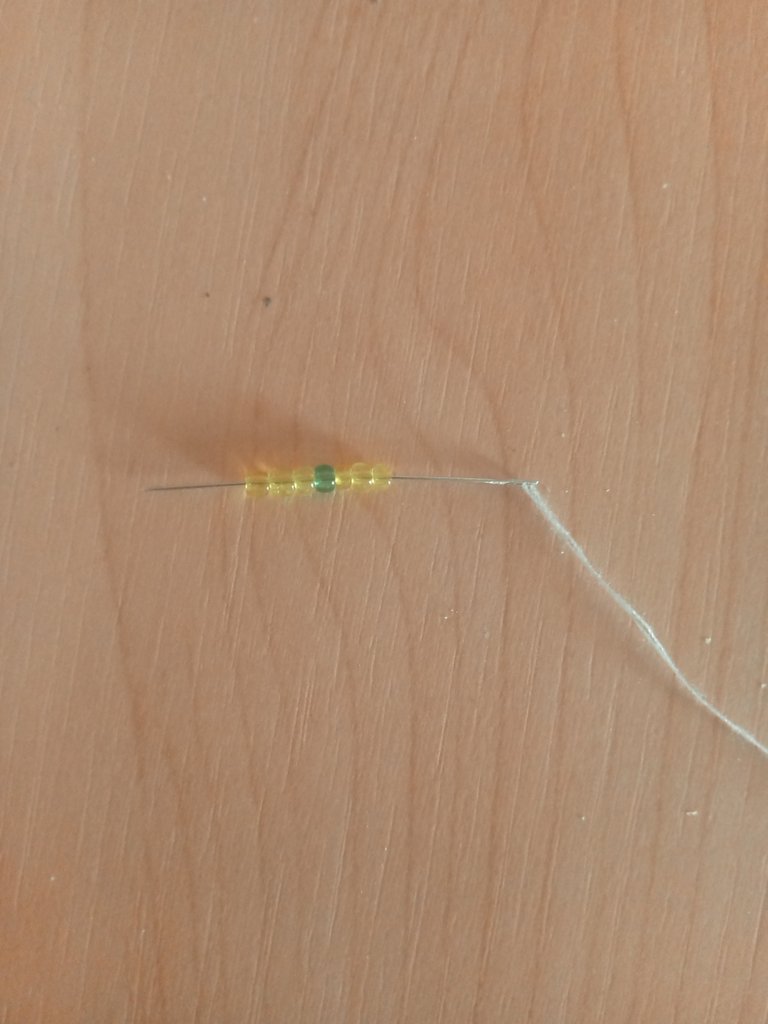
This way we would have ready the stem of our beautiful clover.
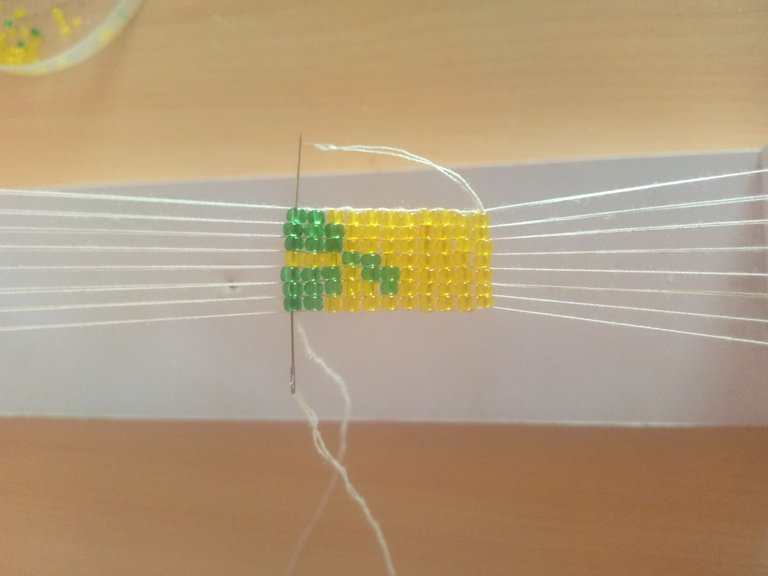
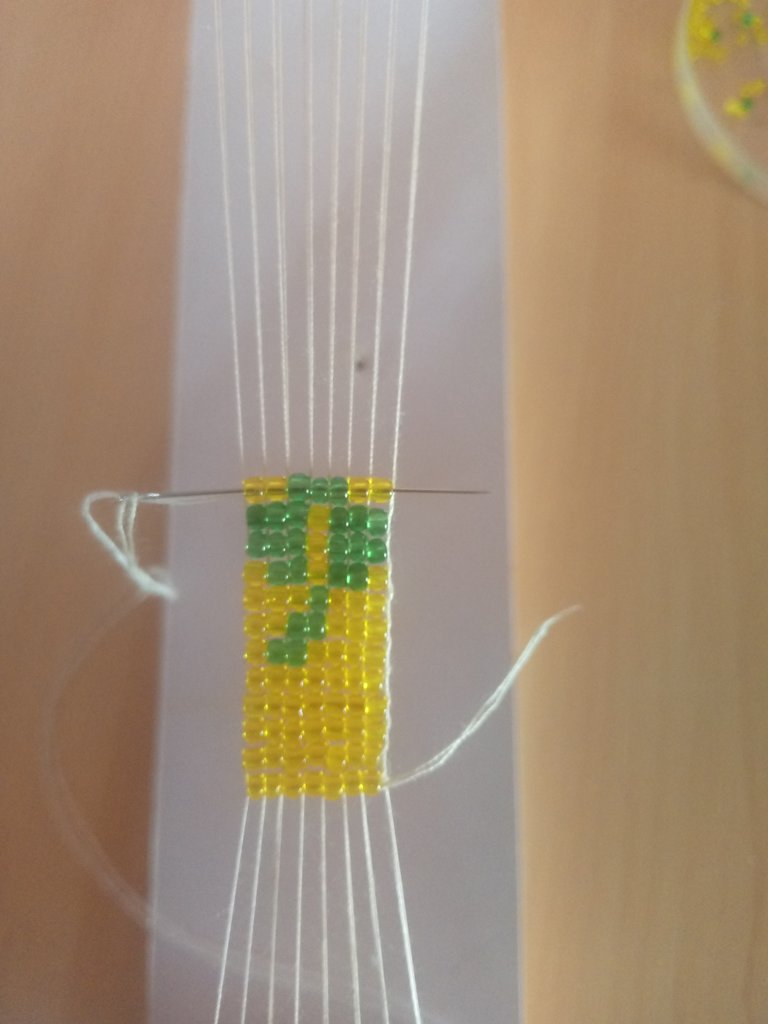
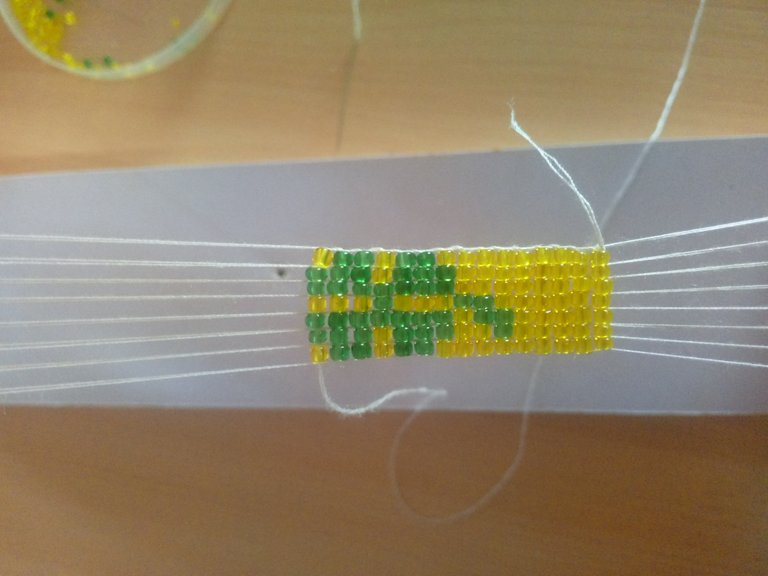
Step 4
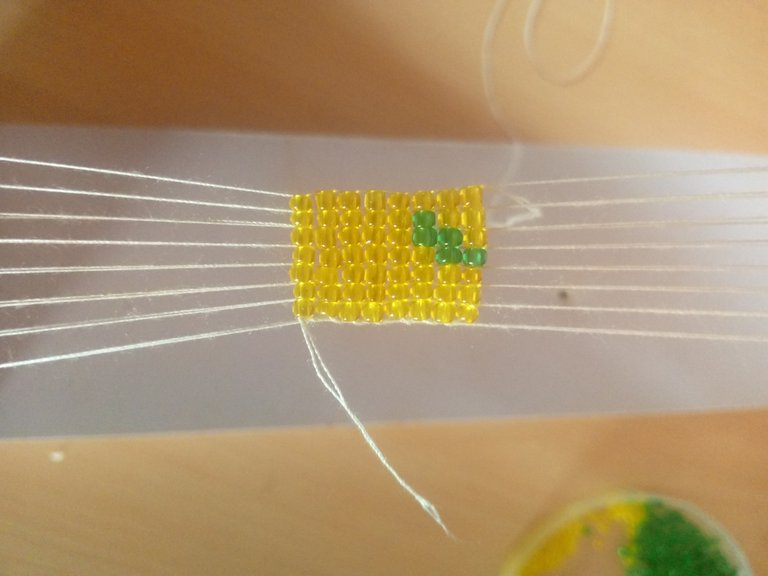
For this step we will take one yellow bead, two green beads, one yellow bead, two green beads and one yellow bead.
And we will repeat the same process of the previous ones, we are going to position the bead on each thread and then introduce our needle through each bead on the top.
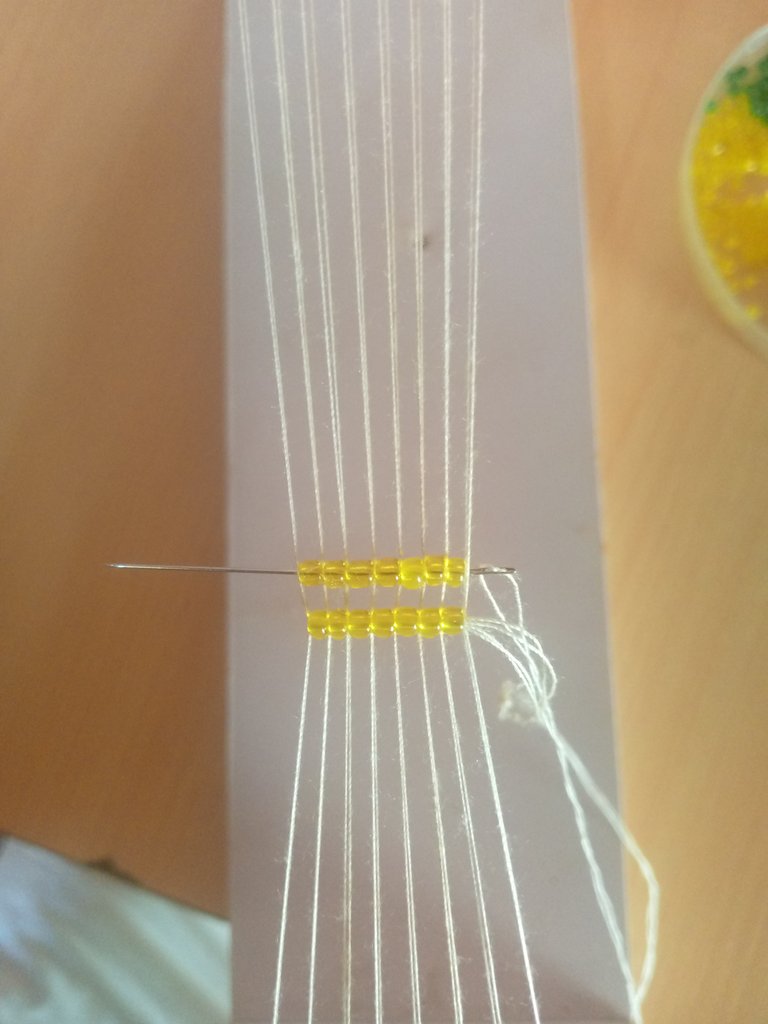
Next we take three green beads, one yellow bead and then three green beads, we are going to position it on the plane and pass our thread through the top.
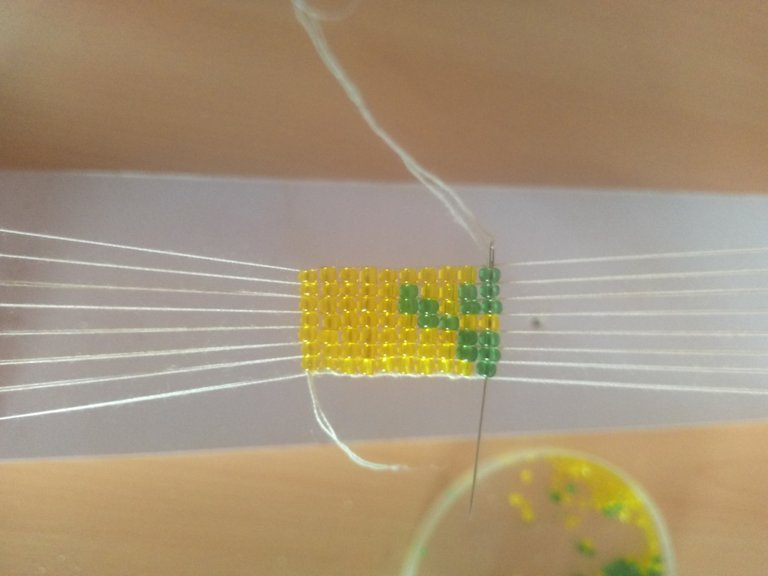
Again we are going to take three green beads, one yellow bead and three green beads, we repeat the same procedure as the previous one.
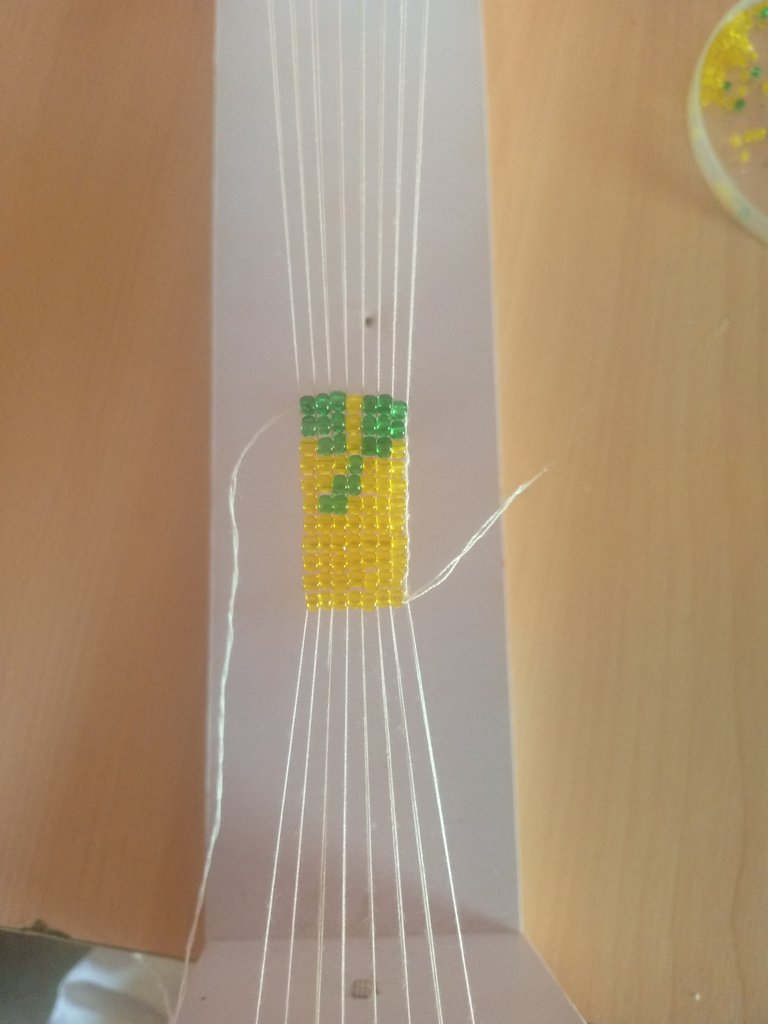
Step 5
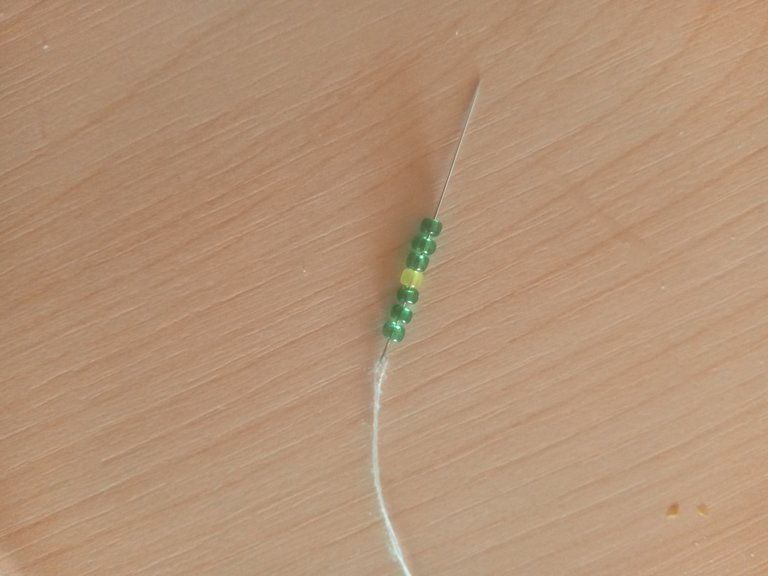
For this step we are going to place two yellow beads, three green beads and two yellow beads, we are going to position it on the loom then we run our water over the top and inside of each bead.

Next we will take three green beads, one yellow bead and again 3 green beads, we will position the bead on each thread of the loom and then we pass on each thread of the loom and then the top part we introduce our needle in each bead to pull the thread and adjust a little bit.
We are going to do this procedure 2 times.

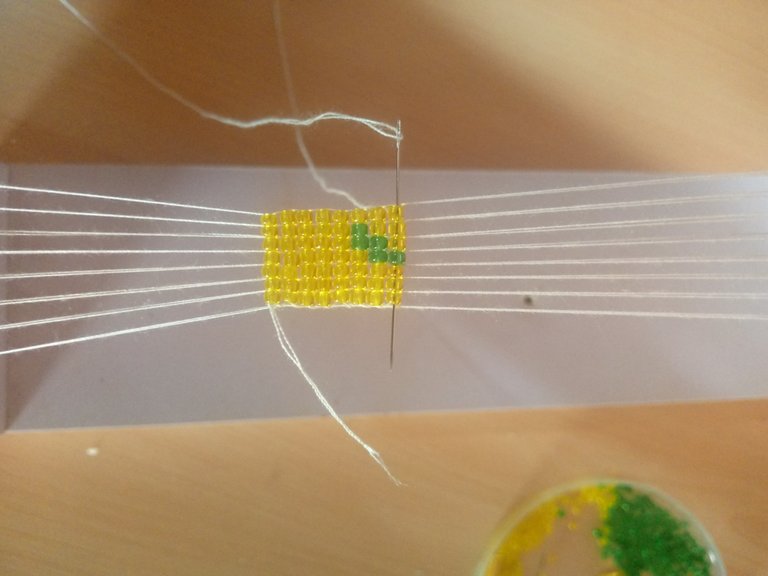
Then we are going to introduce a yellow bead, two green beads, a yellow bead, again two green beads and finally a yellow bead, repeat the same process, position the bead on the loom, pass the needle towards the top and return through each of the beads.
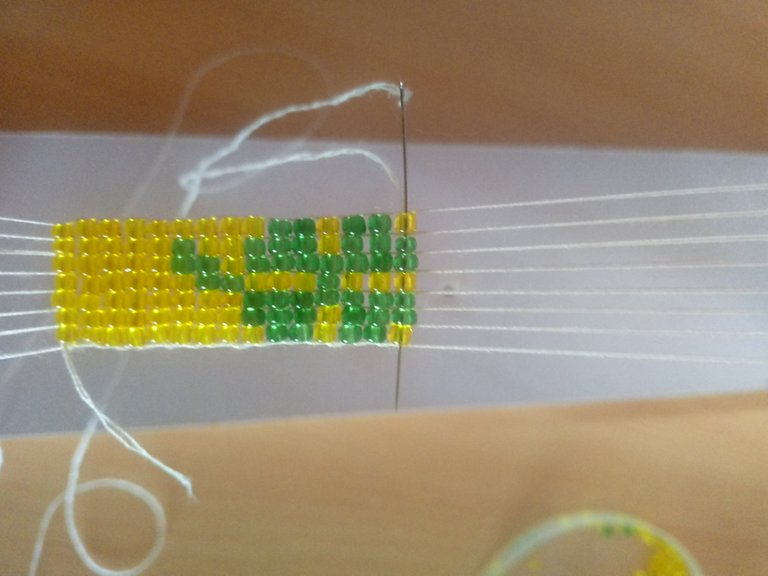
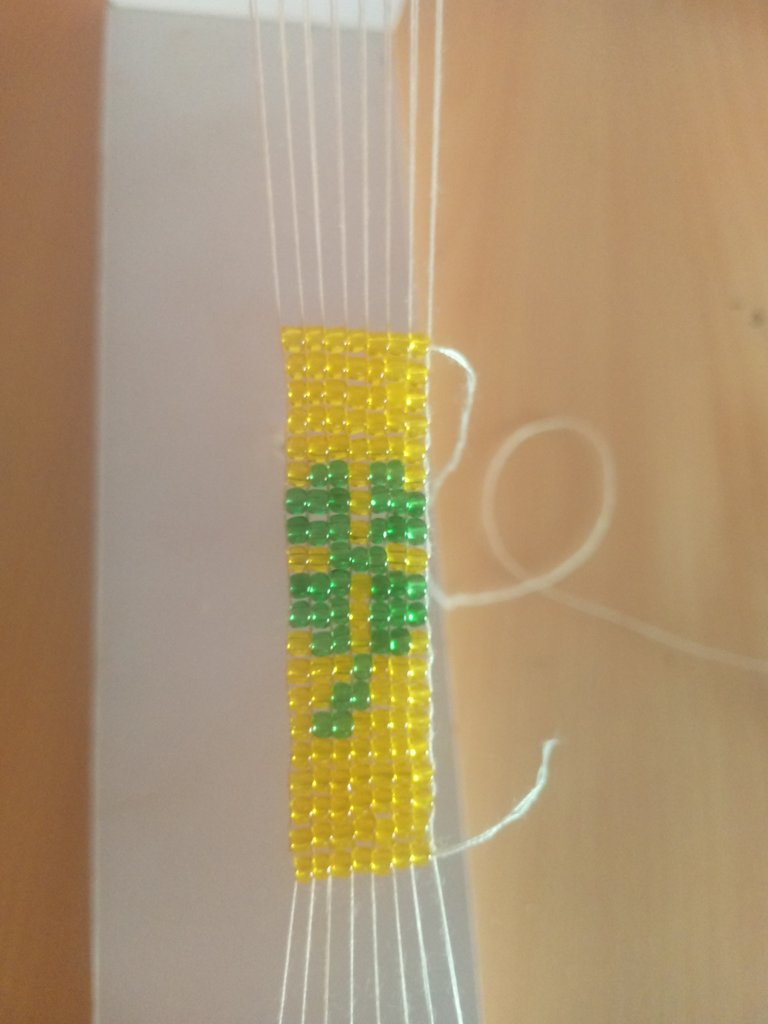
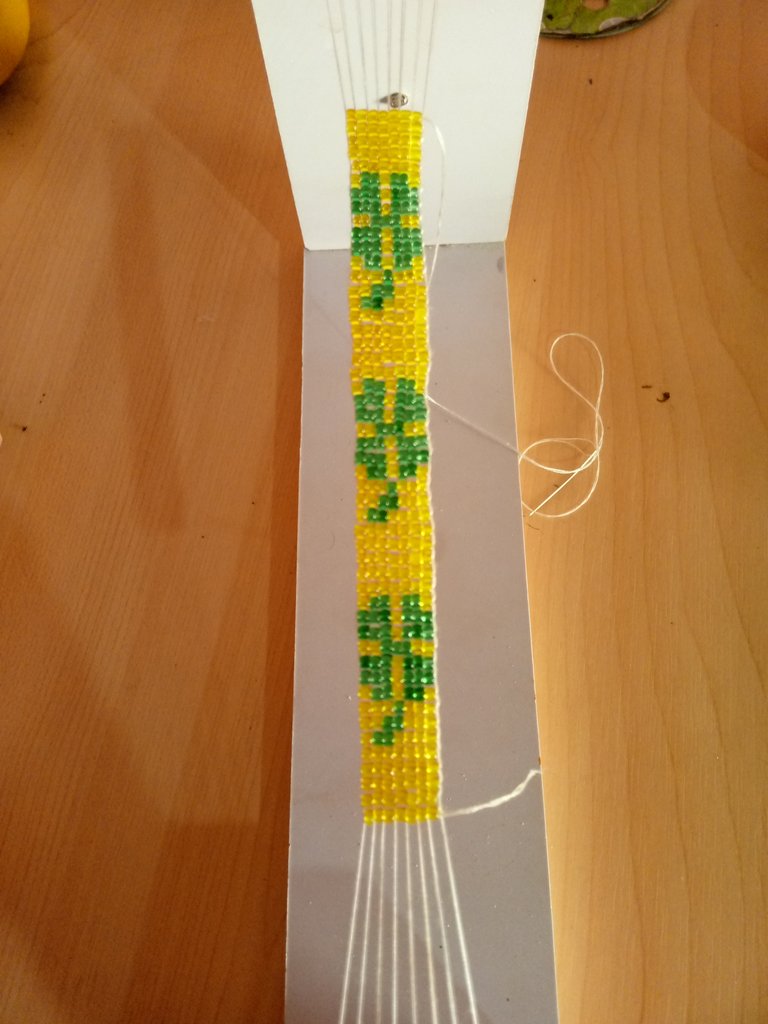
Thus we will have ready our beautiful clover inspired by this beautiful and elegant character the Healer of the Forest.
Step 6
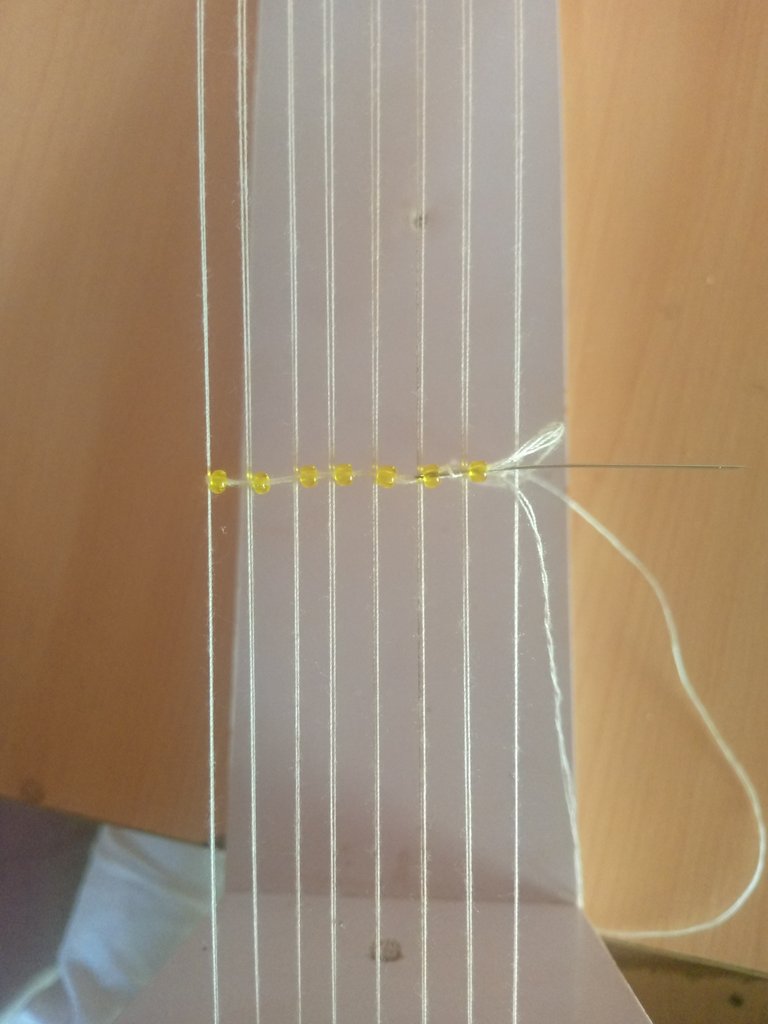
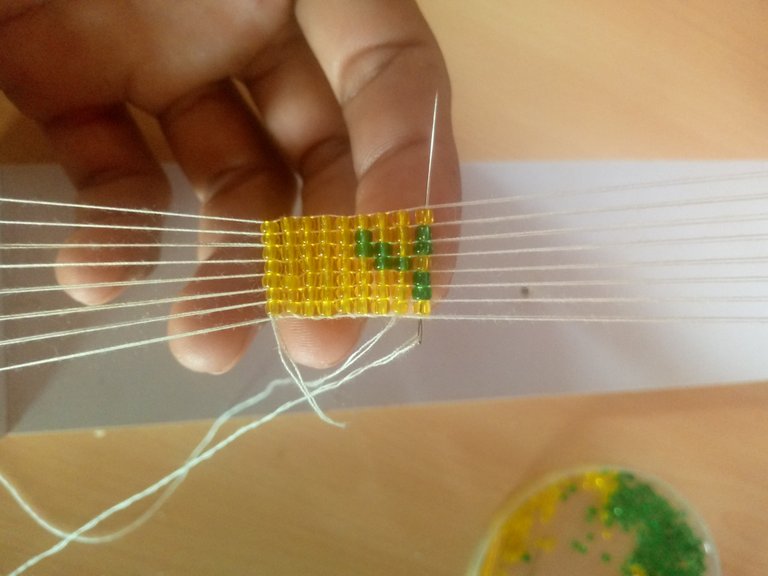
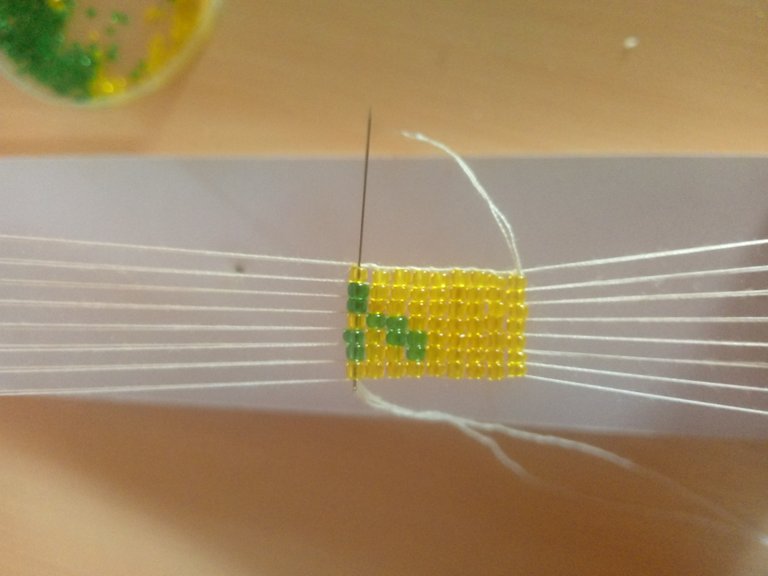
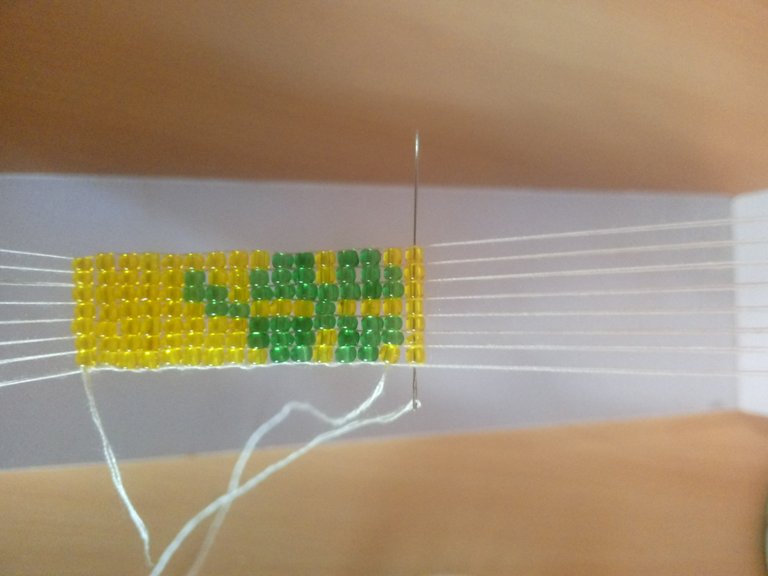
This time we will do as the beginning by introducing seven yellow beads we will position them on the loom and go back through each of the beads from the top,
We will repeat the process five times, this will be the separation between each clover.

This way we will continue giving texture to our beautiful bracelet, we will repeat each step already mentioned until we get the length or the measure we want.
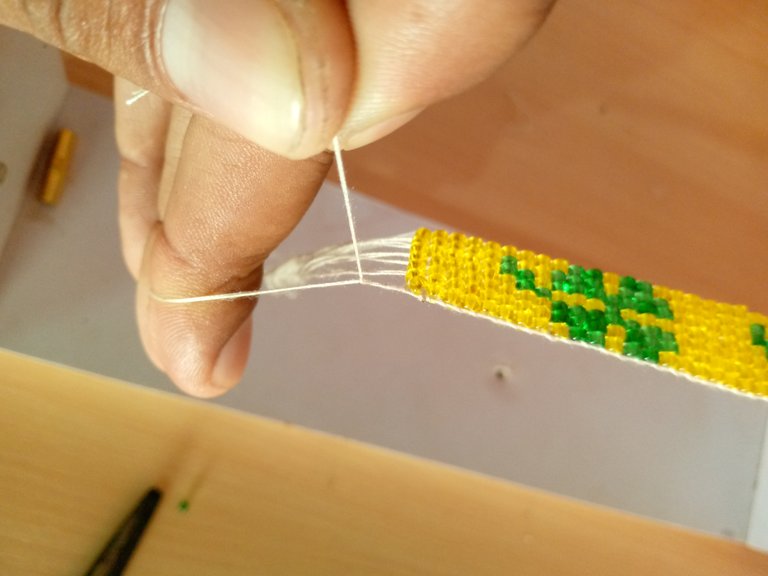
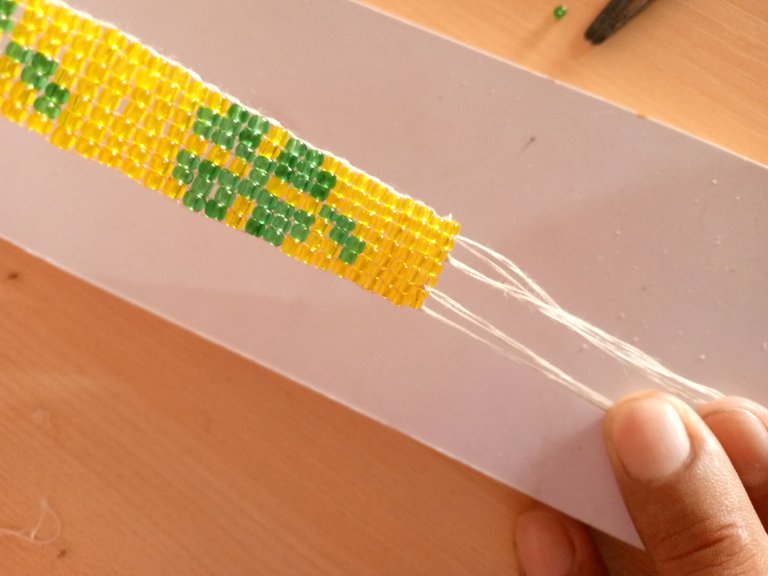
Step 7
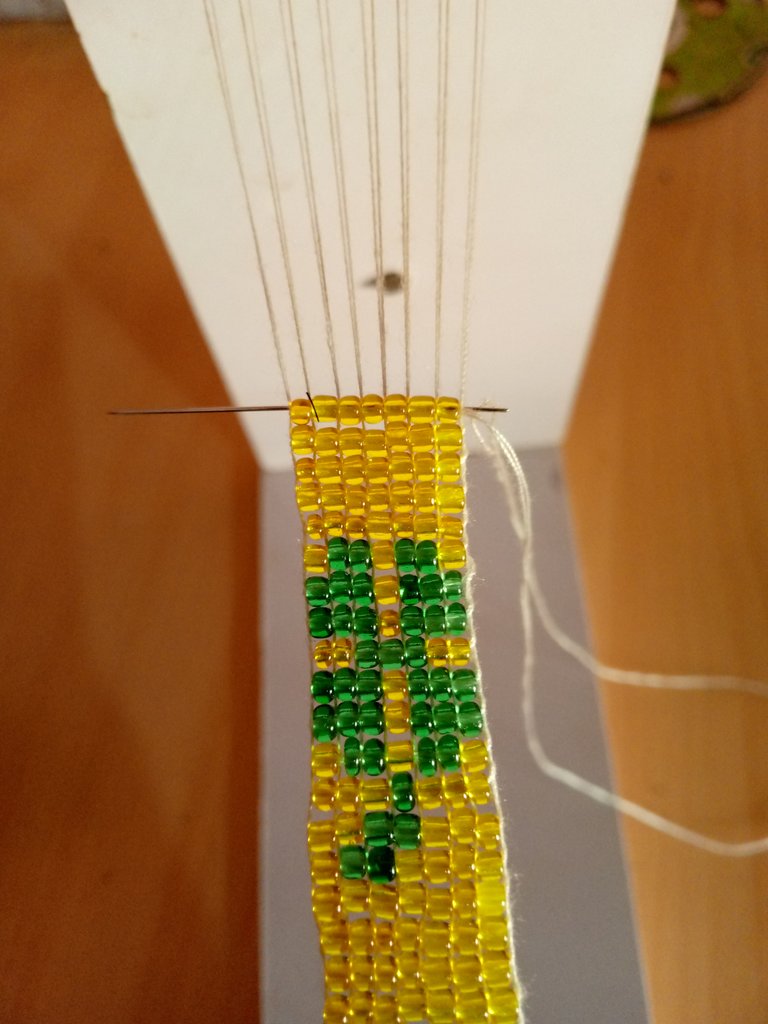
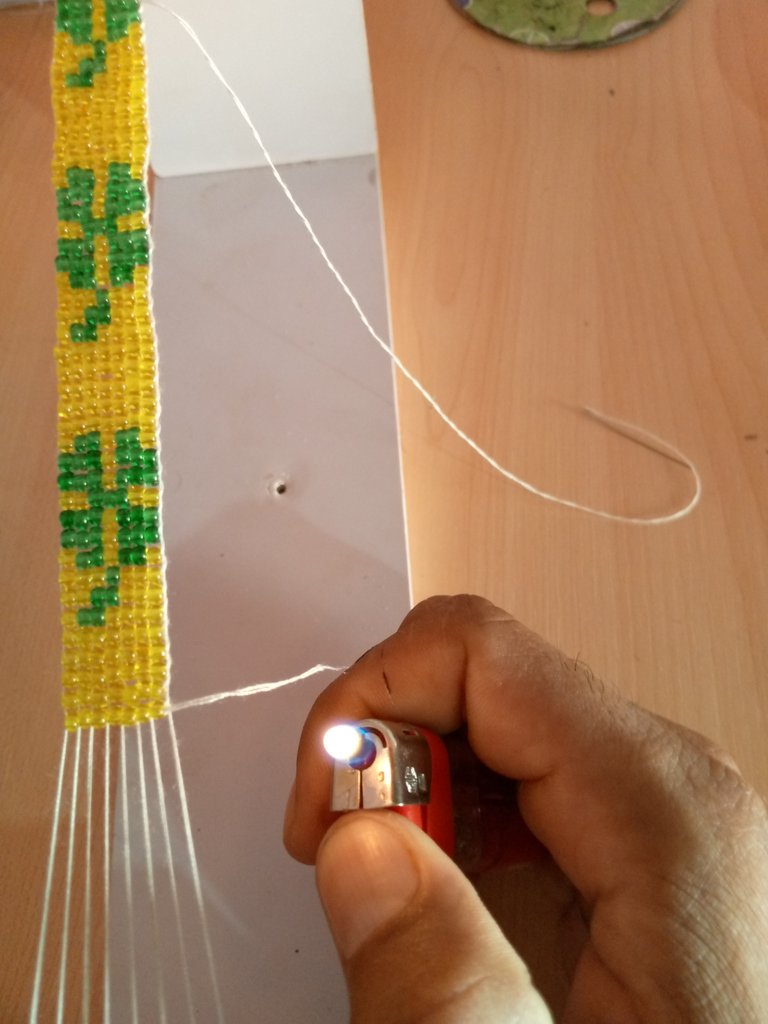
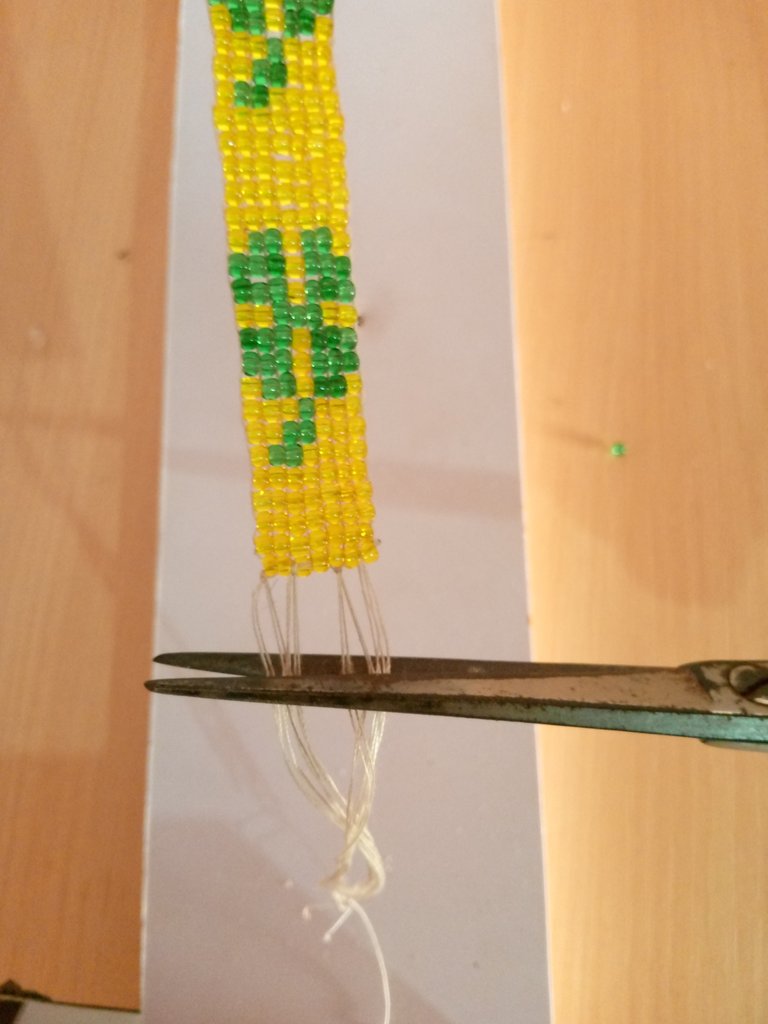
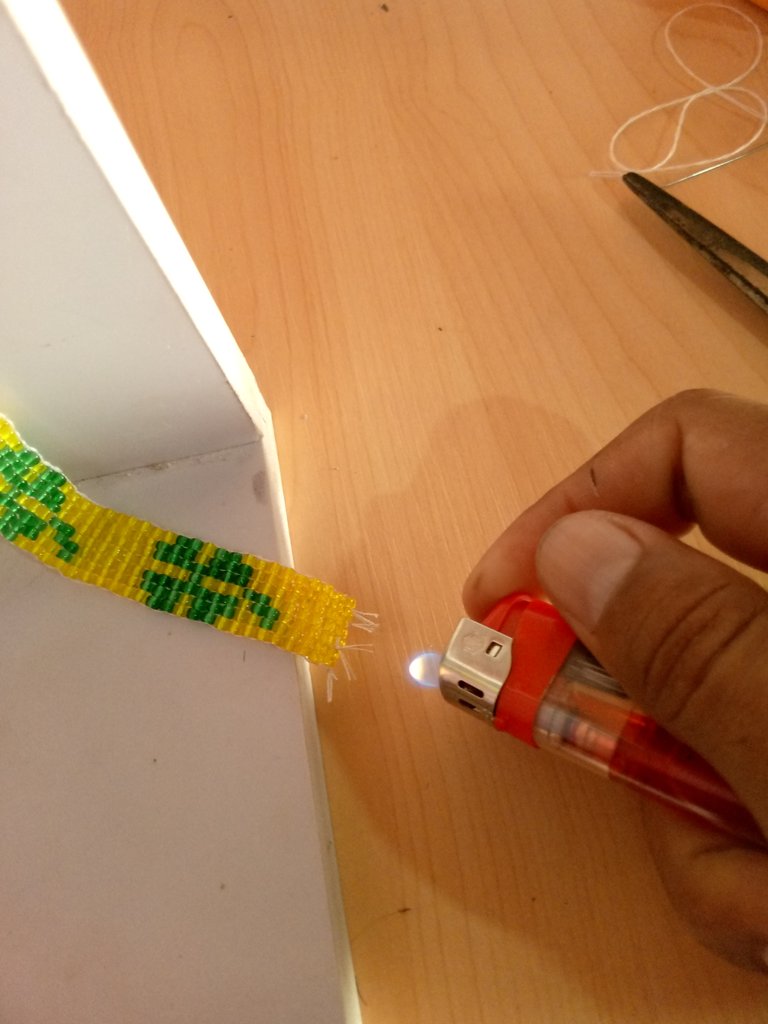
Once we have the size we need we are going to hide the thread going back through each row of mustard, then with the help of a scissors and a lighter we will cut and seal the excess.
After this with the help of the scissors we will cut one end of the threads of the loom, then we will take two threads and we will make simple knots, this so that the beads will not come loose.

With the help of the scissors we will cut the excess threads and seal them with the lighter.
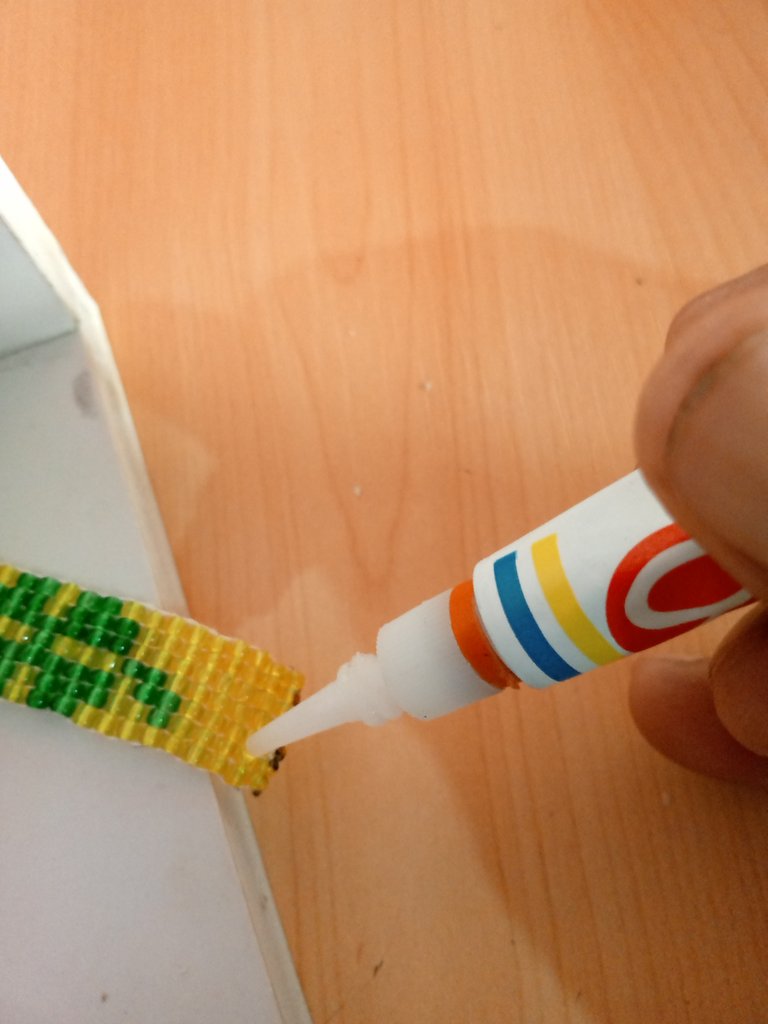
Step 8
With the help of a strong glue called crazy glue, we will apply a few drops to our bracelet, then take the crocodile terminal and with the help of pliers tighten it so that it is well adjusted.
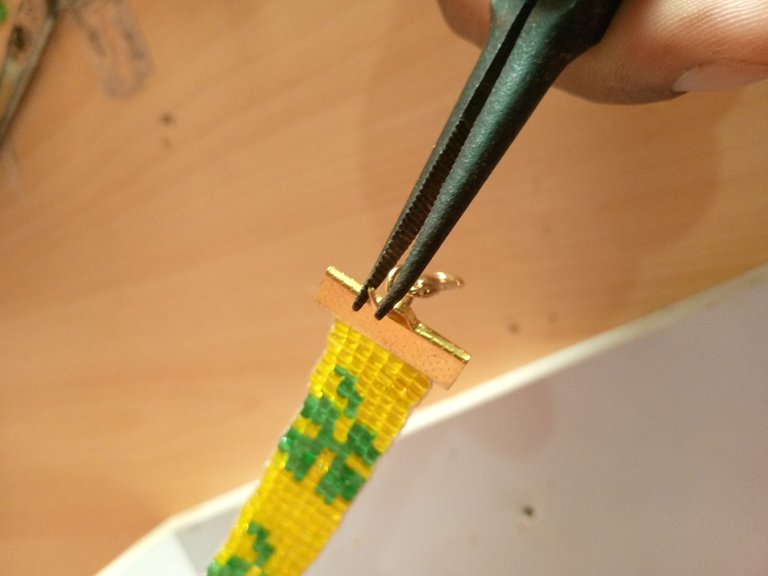
Then we will take a ring and a lock and adjust it, and then place it on the crocodile terminal and adjust it, to have this result.

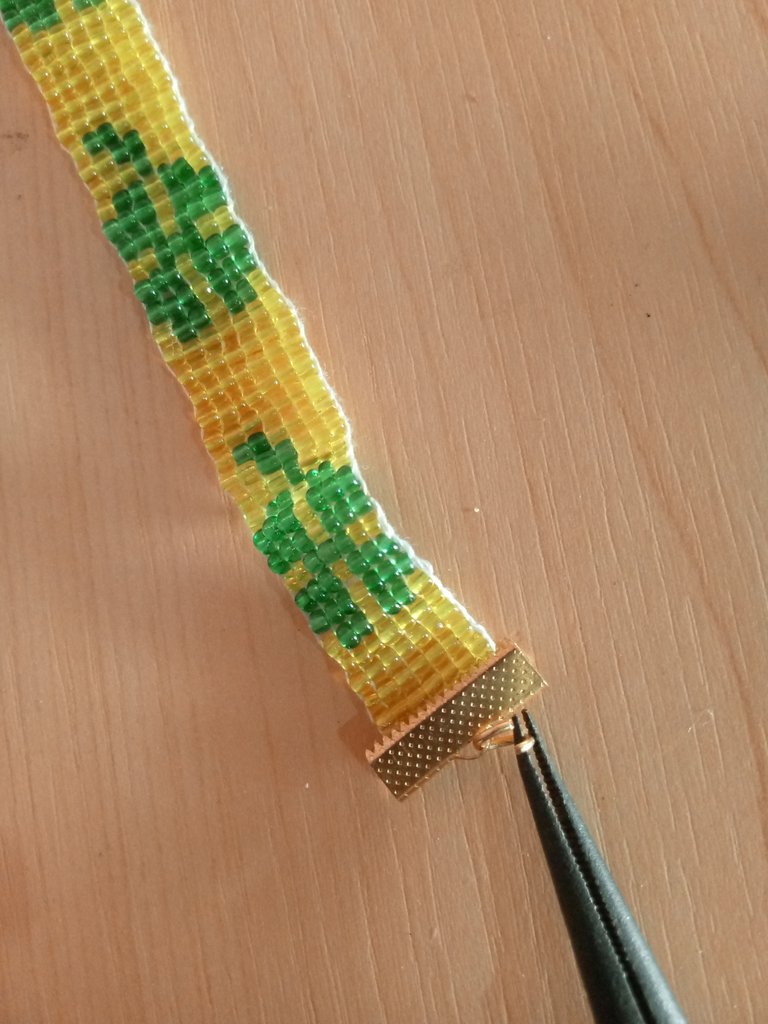
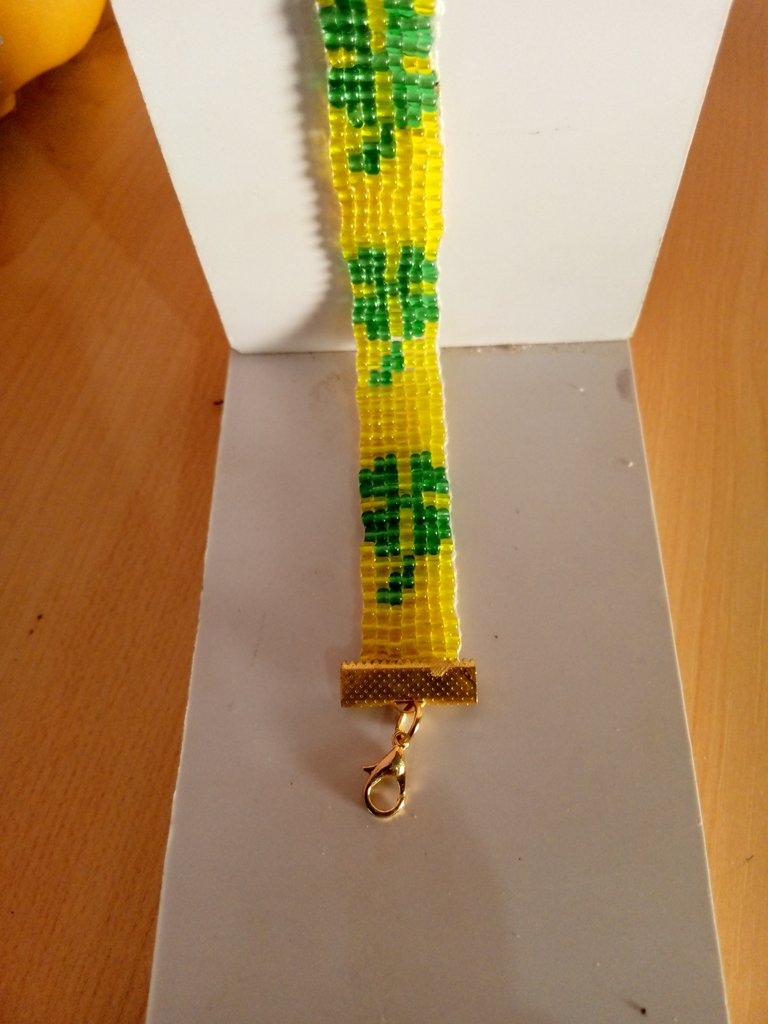
We will repeat the same step or procedure on the other side of the bracelet, cut the threads and make simple knots to secure, then cut and seal, add the glue and place the terminal, adjust with the pliers and then place the ring and adjust and thus we will have ready our beautiful bracelet of clover, inspired by the Healer of the forest.

So we have finished this beautiful tutorial that I have made with much affection for all of you, I hope it has been to your liking and you can read at ease, I wish you many blessings and success in your lives thank you very much.
The pictures were taken by my phone tecno spark Go 2023.
Translator Used:Deepl translator
The images are edited using the canva application.
A continuación les estaré presentando los materiales utilizados para la elaboración de esta hermosa pulsera.
MATERIALES
- Mostacillas de color Verde
- Mostacillas Amarillas
- Hilo poliéster color Blanco
- Aguja para mostacillas #12
- 2 Argollas
- Seguro o Trancadero
- 2 Terminales de cocodrilo
- Telar de madera
- Tijeras
- pegamento
- Alicate
- Encendedor
Paso a Paso
Paso 1
Lo primero que hicimos fue tomar un aproximado de 3 metros de hilo poliéster y enhebramos nuestra aguja, luego colocamos 8 filas de hilo en nuestro telar, tomamos nuestra aguja con el hilo para ajustar un extremo a los hilos del telar haciendo varios nudos, esto para trabajar mas comodos.
Paso 2
Vamos a tomar seis mostacillas de color amarillo y las vamos a posicionar en nuestro telar de la siguiente manera:
Luego pasaremos la aguja por la parte de arriba y vamos a introducirla por cada mostacilla que sobresalga, para tirar un poco de nuestro hilo para que se va ya ajustando.
Nuevamente tomaremos siete mostacillas y haremos el mismo procedimiento posicionamos la mostacilla en cada hilo del telar y pasamos la aguja por la parte de arriba y tiramos de ella.
Vamos a repetir este paso cinco veces para obtener el siguiente resultado
Paso 3
Luego vamos a tomar 4 Mostacillas amarillas, 2 de color verde y nuevamente una moscilla amarilla.
Vamos a posicionarlas en nuestro telar y luego pasamos la aguja por la parte de arriba y por cada una de la mostacilla que sobresalen.
Seguidamente vamos a tomar tres mostacillas amarillas, dos de color verde y dos de color amarillo
De igual manera que la anterior vamos a posicionarlas en el tela y luego pasamos nuestra aguja con hilo por dentro de cada mostacilla y tiramos nuevamente de ellas.
Ahora tomamos tres mostacillas amarillas una verde y nuevamente tres amarillas, tiremos el mismo procedimiento vamos a posicionarla y luego pasamos nuestra aguja por el centro de cada uno de ellas.
Asi tendriamos listo el tallo de nuestro hermoso trebol.
Paso 4
Para este paso vamos a tomar una mostacilla amarilla, dos de color verde, una amarilla, nuevamente dos verdes y una mostacilla amarilla
Y repetiremos el mismo proceso de la anteriores, vamos a posicionar la mostacilla en cada hilo para luego introducir nuestra aguja por cada mostacilla de la parte de arriba.
Seguidamente tomamos tres mostacillas de color verde, una de color amarillo y luego tres mostacillas verdes, vamos a posicionarla en el plano y pasamos nuestro hilo por la parte de arriba.
Nuevamente vamos a tomar tres mostacillas verdes, una amarilla y tres verdes, repetimos el mismo procedimiento que el anterior.
Paso 5
Para este paso vamos a colocar dos mostacillas amarillas, tres de color verde y dos mostacillas amarillas, vamos a posicionarla en el telar luego pasamos nuestra agua por la parte de arriba y por dentro de cada mostacilla.
Seguidamente tomaremos tres mostacillas de color verde, una amarilla y nuevamente 3 mostacillas de color verde, vamos a posicionar la mostacilla en cada hilo del telar y luego pasamos en cada hilo del telar y luego la parte de arriba introducimos nuestra aguja en cada mostacilla para tirar del hilo y ajustar un poco.
Este procedimiento lo vamos a realizar 2 veces.
Luego vamos a introducir una mostacilla amarilla, dos de color verde, una mostacilla amarilla, nuevamente dos de color verde y por último una amarilla, repetiremos el mismo proceso posicionamos la mostacilla en el telar pasamos la aguja hacia la parte de arriba y nos devolvemos por cada una de las mostacillas.
Así tendremos listo nuestro hermoso trébol inspirado en este hermoso y elegante personaje la Sanadora Del Bosque.
Paso 6
Esta vez haremos como el principio introduciendo siete mostacillas de color amarillo vamos a posicionarlas en el telar y nos devolvemos por cada una de las mostacillas por la parte de arriba,
Así repetiremos el proceso cinco veces, este será la separación entre cada trébol.
Así seguiremos dándole textura a nuestra hermosa pulsera, repetiremos cada paso ya mencionado hasta lograr tener el largo o la medida que deseamos.
Paso 7
Al tener la medida que necesitamos vamos a esconder el hilo devolviéndonos por cada fila de mostacilla, luego con la ayuda de una tijera y un encendedor cortaremos y sellaremos el excedente.
Después de esto con la ayuda de las tijeras cortaremos un extremo de los hilos del telar, después tomaremos dos hilos y haremos nudos simples, esto para que no se vayan a soltar las mostacillas.
Con la ayuda de la tijera vamos a cortar los hilos sobrantes y sellaremos con El encendedor.
Paso 8
Con la ayuda de un pegamento fuerte llamado pega loca, vamos a aplicarle unas gotas a nuestra pulsera, para luego tomar el terminal de cocodrilo y con la ayuda de un alicate apretarlo para que quede bien ajustado.
Después tomaremos una argolla y un seguro y ajustamos, para luego colocarlo en el terminal de cocodrilo y ajustarlo, para tener este resultado.
Repetiremos el mismo paso o procedimiento del otro lado de la pulsera, cortaremos los hilos y haremos nudos simples para asegurar, luego cortamos y sellamos, agregamos el pegamento y colocamos el terminal, ajustamos con el alicate y luego colocamos la argolla y ajustamos y así tendremos listo nuestra hermosa pulsera de trebol, inspirado en la Curadora del bosque.
Así hemos terminado este hermoso tutorial que he realizado con mucho cariño para todos ustedes, espero haya sido de su agrado y puedan leer a gusto, les deseo mucha bendiciones y éxitos en sus vidas muchas gracias.
Las fotografías fueron tomadas por mi teléfono tecno spark Go 2023.
Traductor Utilizado:Deepl traductor
Las imágenes son editadas mediante la aplicación canva
Me encanto.. esta hermosaaa felicidades amigo
Me alegro que te haya gustado amiga, muchas gracias, bendiciones
Quedó muy linda la pulsera. Felicidades! ❤️
Muchas gracias amiga bendiciones 🤗
Simplemente hermoso amigo .. éxitos y bendiciones para ti 🤗😍❤️❤️❤️❤️💮
Muchas gracias amiga, igualmente para ti bendiciones 🤗
Supera linda tu pulsera, muy bien elaborada.