Hola, compañeros de Holozing. Todos sabemos que el personaje más icónico de Holozing es el mapache, por ello hoy haré una figura del mapache pero con plastilina.
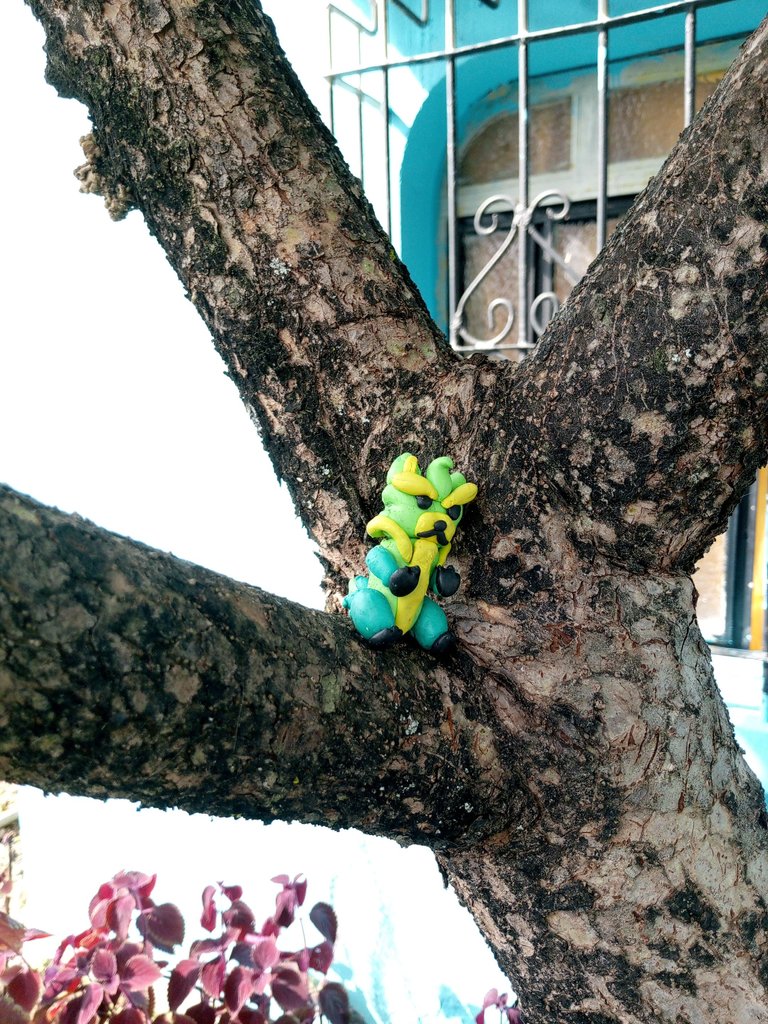
Este mapache la verdad, es ideal para colocarlo en tu espacio favorito o en tu pequeño jardín junto con unas hojas o arriba de un arbolito, yo en mi casa lo puse en un árbol que tenemos. La verdad, queda bastante bien.
También lo puedes colocar arriba de unas rocas o junto con unos cactus, debido a que este mapache 🦝 llamado Grass Racoon se ve que es de tipo vegetal o tipo planta 🪴🌲 se ve como una criatura amigable pero intimidante.
Ahora sí, sin más rodeos pasemos al tutorial.
Primero deberemos tener una caja de plastilina en donde debe de haber plastilina de color amarillo o color piel, verde, negro, verde oscuro y listo.
Después debemos asegurarnos de tener un palito de altura a nuestra disposición para juntar las piezas de nuestra criatura de una manera sencilla.
Seguido de esto podemos iniciar a ponernos manos a la obra con nuestro trabajo 🙌🏻
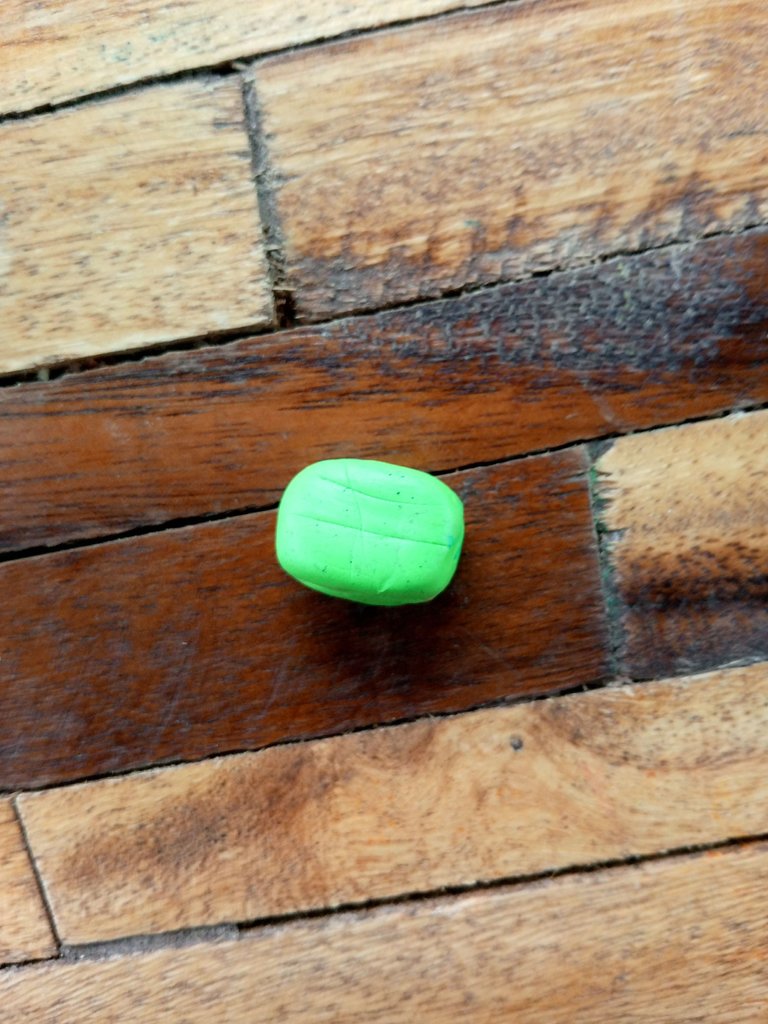
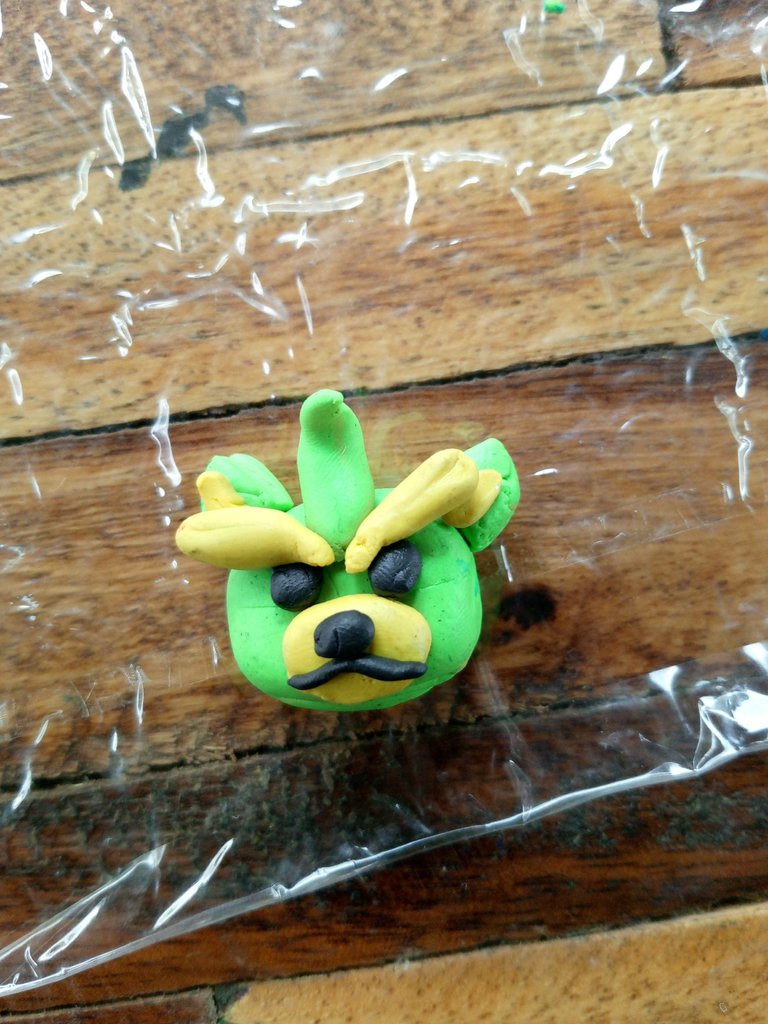
Empecemos primero la base de su cabeza. Está debe ser algo cuadrada y al mismo tiempo un poco curva.
Posteriormente haremos su cara en dónde deberemos usar plastilina color negro para la boca, la nariz y los ojos. Plastilina color amarillo para su hocico y cejas.
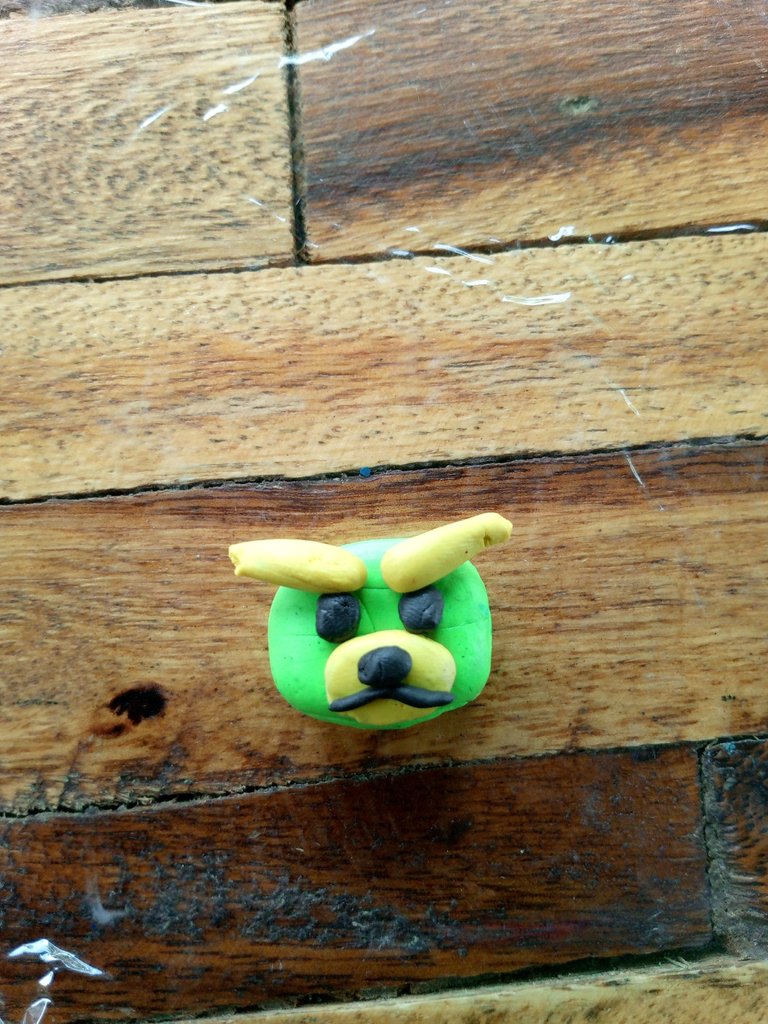
Luego empezaremos haciendo sus orejas con plastilina verde claro junto con su mechón de pelo.
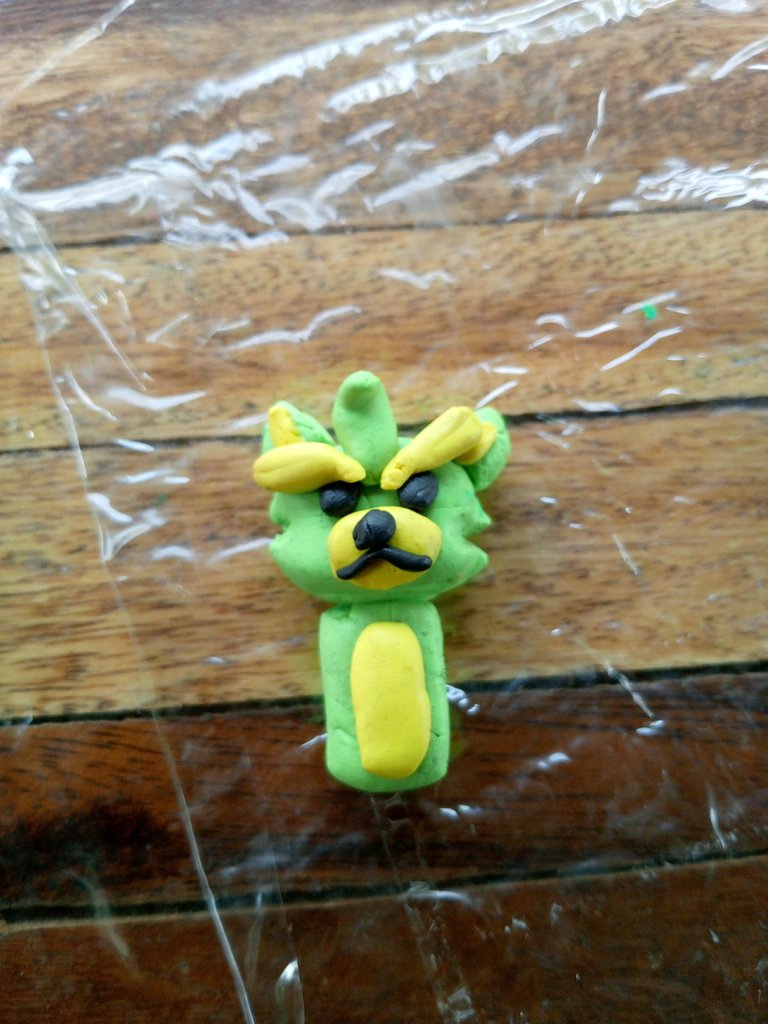
Ya teniendo la cabeza y la cara preparada. Empezaremos con el cuerpo. (Para el cuerpo o la barriga). Utilizaremos plastilina color verde y plastilina color amarillo para la parte de enfrente de la barriga.
Luego de eso realizaremos sus piernas con plastilina verde oscuro y sus patitas con plastilina color negro. Seguido de esto haremos su cuerno que está atrás de su espalda.
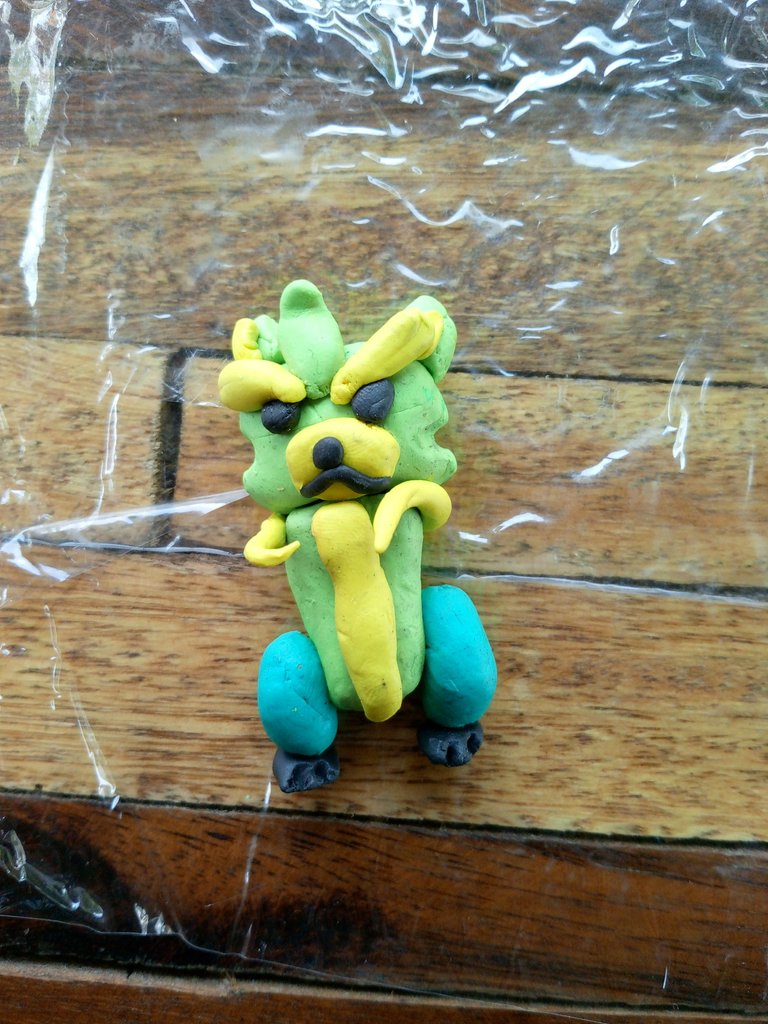
Ahora haremos sus brazos con plastilina verde oscuro y sus garritas con plastilina color negro.

Seguido de eso, realizaremos su cola con unos pequeños pétalos que parezca completamente como una flor 🪷
Ya con esto hecho la colocaremos en nuestro mapachito y ¡terminamos!
Resultado Final:
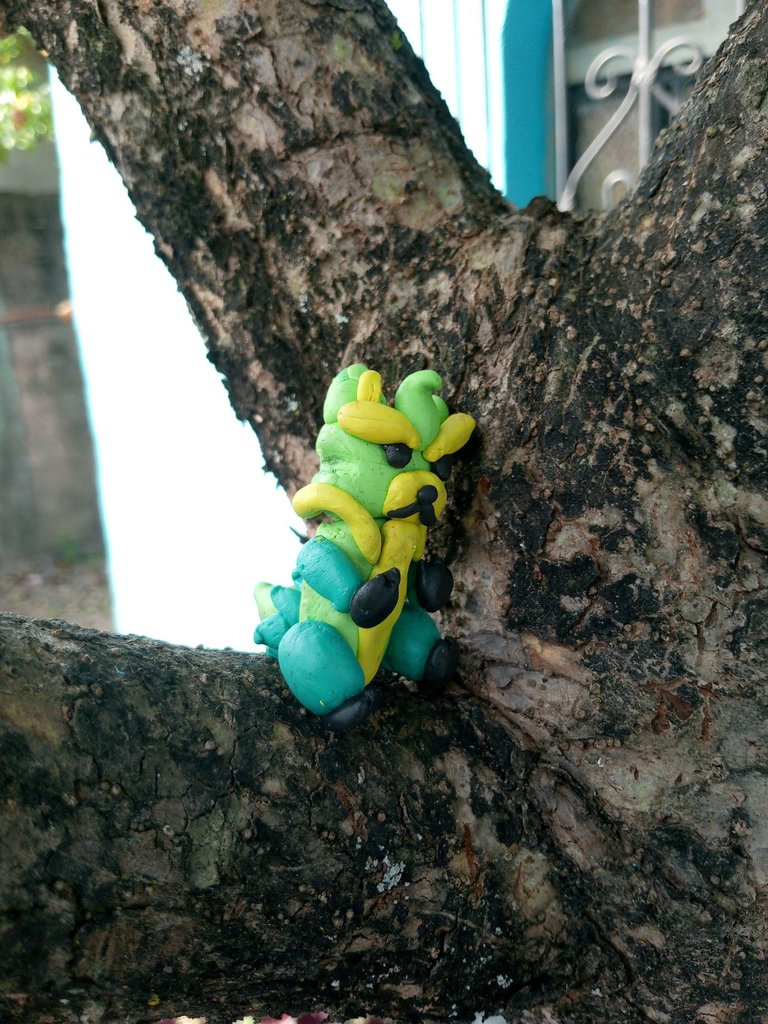
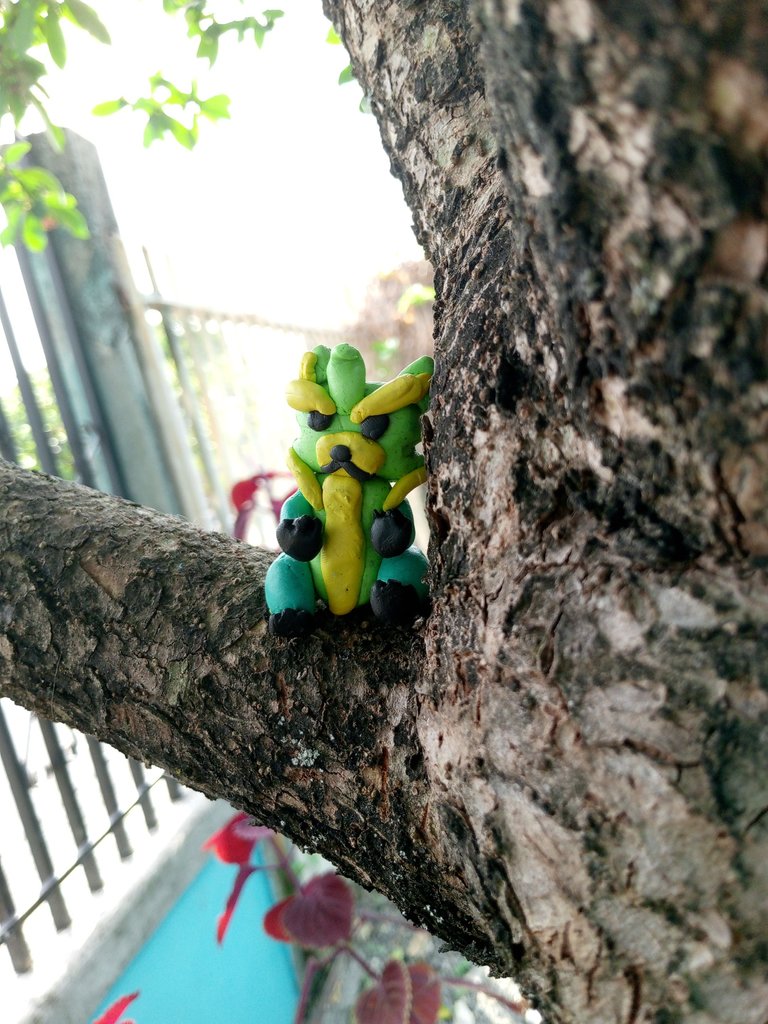
Otra fotito con el árbol 🌳
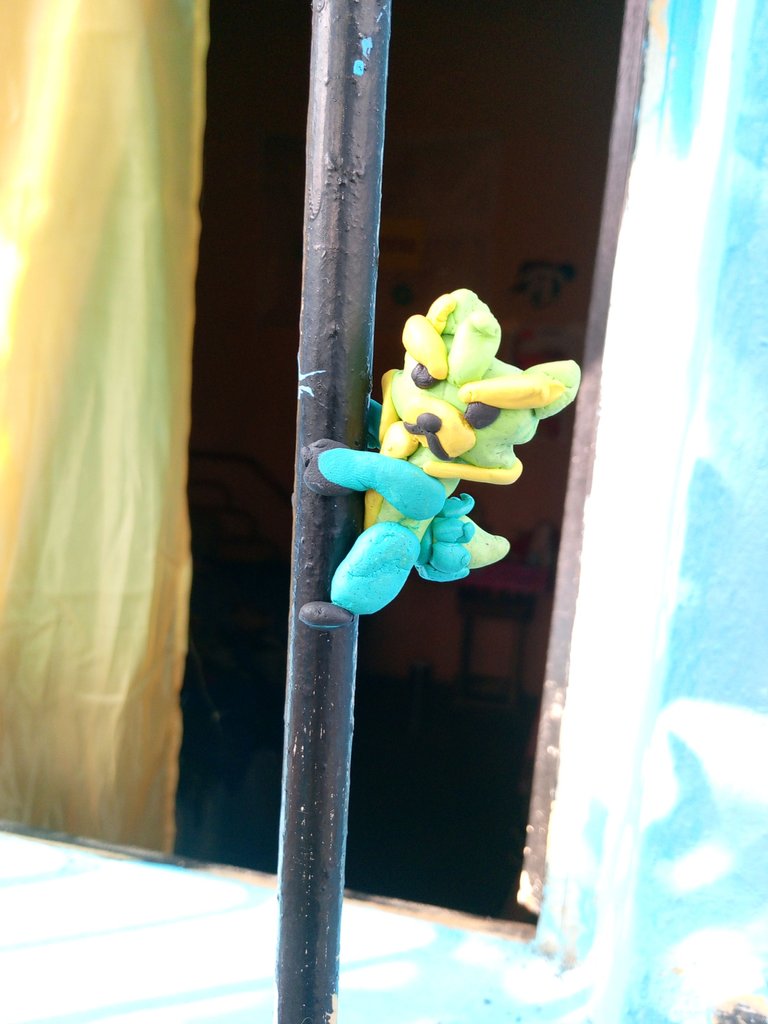
Fotito sosteniéndose en un tubo😸
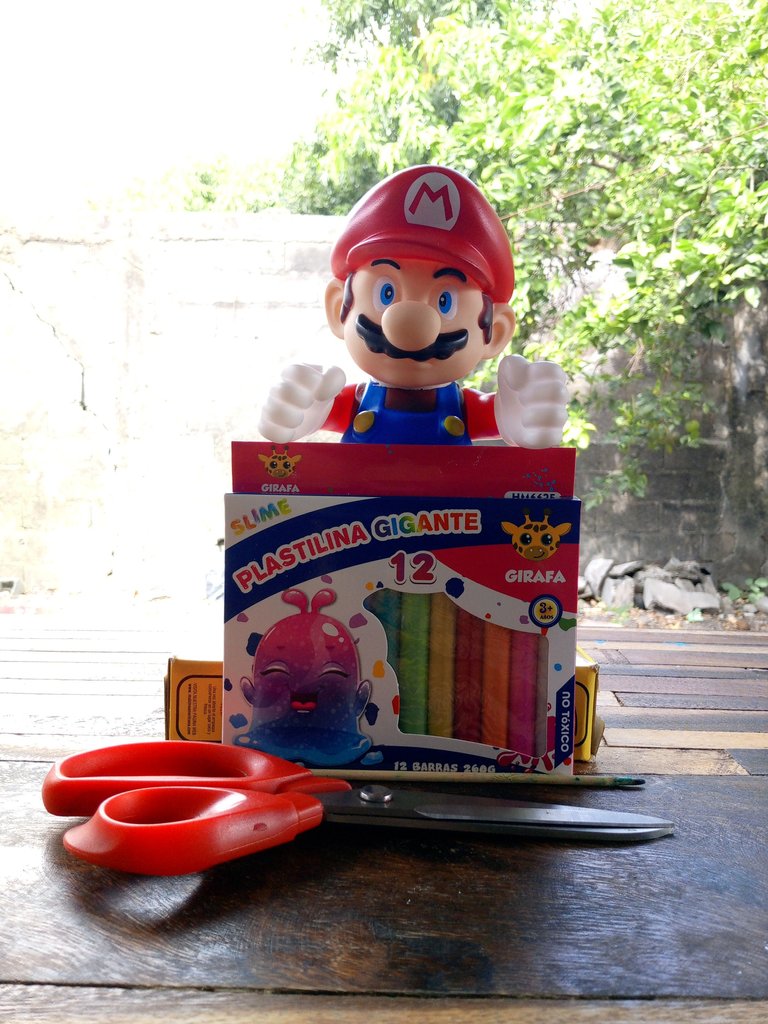
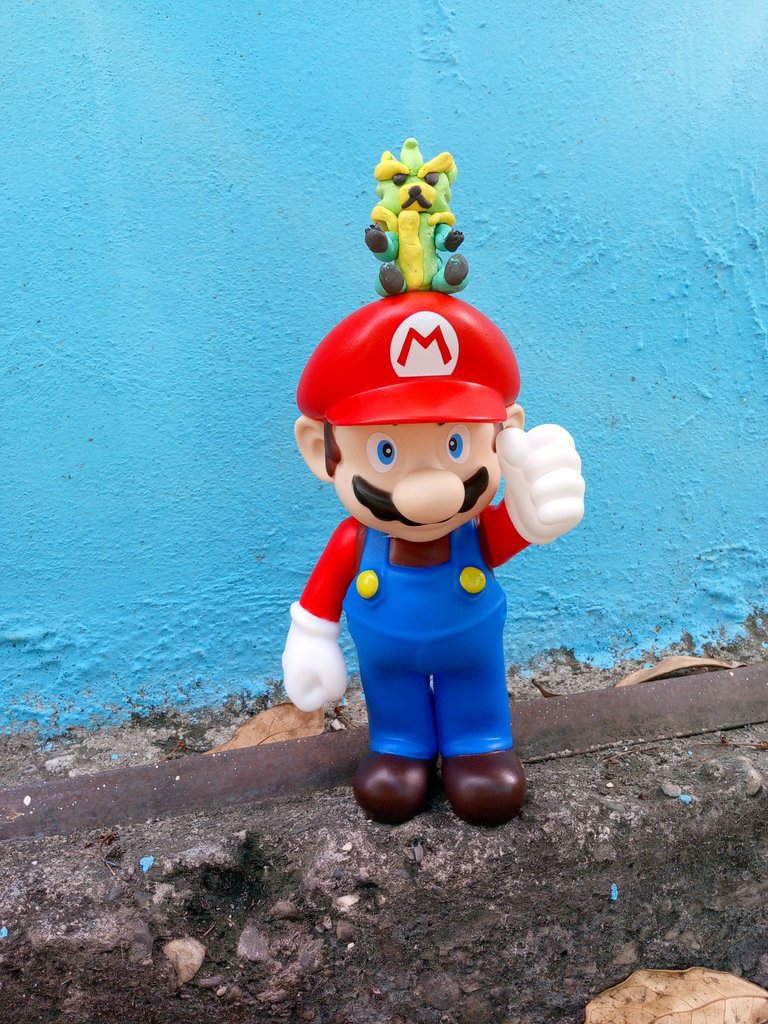
Una fotito con Mario 😎
Por cierto, hoy hice mi primera delegación de 30 HP con mi cuenta de Hive en Holozing. Ahora sí estoy empezando completamente a formar parte de esta bonita comunidad 🫶🏻
Pues bueno, sin más nada que decir, me despido. Espero les haya encantado esta figura y que la hagan en sus casas. Adiós😺
English Versión:
Hello, Holozing colleagues. We all know that the most iconic character in Holozing is the raccoon, so today I will make a figure of the raccoon but with plasticine.
The truth is that this raccoon is ideal to place in your favorite space or in your small garden along with some leaves or on top of a tree. In my house I put it on a tree that we have. The truth is, it looks pretty good.
You can also place it on top of some rocks or along with some cacti, because this raccoon 🦝 called Grass Racoon looks like it is a vegetable type or plant type 🪴🌲 it looks like a friendly but intimidating creature.
Now, without further ado, let's move on to the tutorial.
First we must have a box of plasticine where there must be yellow or skin-colored plasticine, green, black, dark green, and that's it.
Then we must make sure we have a tall stick at our disposal to put the pieces of our creature together in a simple way.
Following this we can start to get to work with our work 🙌🏻
Let's start with the base of his head first. It should be somewhat square and at the same time a little curved.
Later we will make his face where we will have to use black plasticine for the mouth, nose and eyes. Yellow plasticine for his snout and eyebrows.
Then we will start by making her ears with light green plasticine along with her lock of hair.
Already having the head and face prepared. We will start with the body. (For the body or belly). We will use green plasticine and yellow plasticine for the front part of the belly.
After that we will make his legs with dark green plasticine and his legs with black plasticine. Following this we will make his horn that is behind his back.
Now we will make his arms with dark green plasticine and his paws with black plasticine.
Following that, we will make its tail with some small petals that looks completely like a flower 🪷
With this done we will place it on our little raccoon and we are done!
Final score:
Another photo with the tree 🌳
Photo holding on to a tube😸
A photo with Mario 😎
By the way, today I made my first 30 HP delegation with my Hive account on Holozing. Now I am completely beginning to be part of this beautiful community 🫶🏻
Well, without anything else to say, I say goodbye. I hope you loved this figure and that you make it at home. Goodbye😺