¡Hola a todos los fans de Holozing!
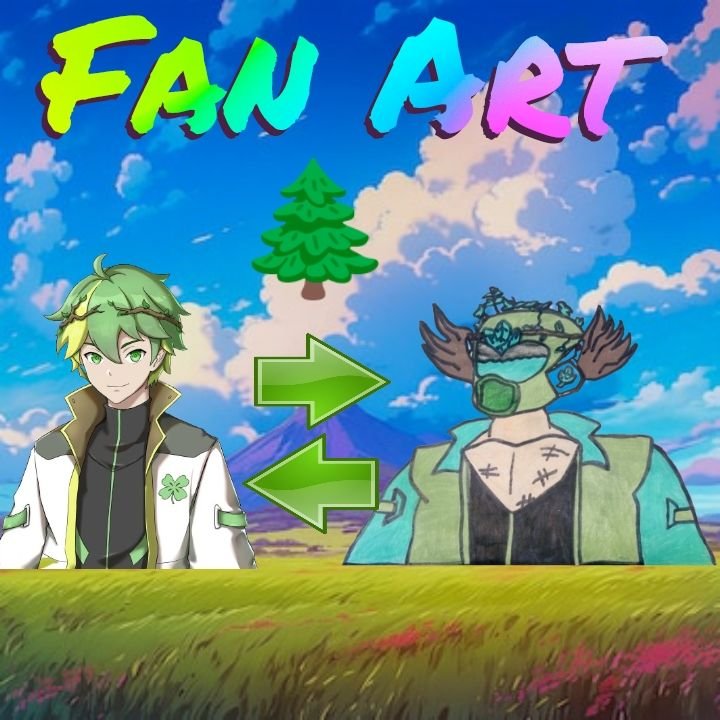
Sé que he estado un poco ausente, ¡casi 4 meses sin publicar! Pero he vuelto con un nuevo dibujo que les encantará. En esta ocasión, he transformado al entrenador del bosque en una versión más musculosa e intimidante, ¡equipado con un accesorio que no querrán perderse!
Sin más preámbulos, ¡vamos a ver el dibujo!
Como mencioné antes, este dibujo presenta al entrenador del bosque con un aspecto más imponente. Además, luce un casco con temática forestal que le da un toque único.
¿Preparados para ver el paso a paso?
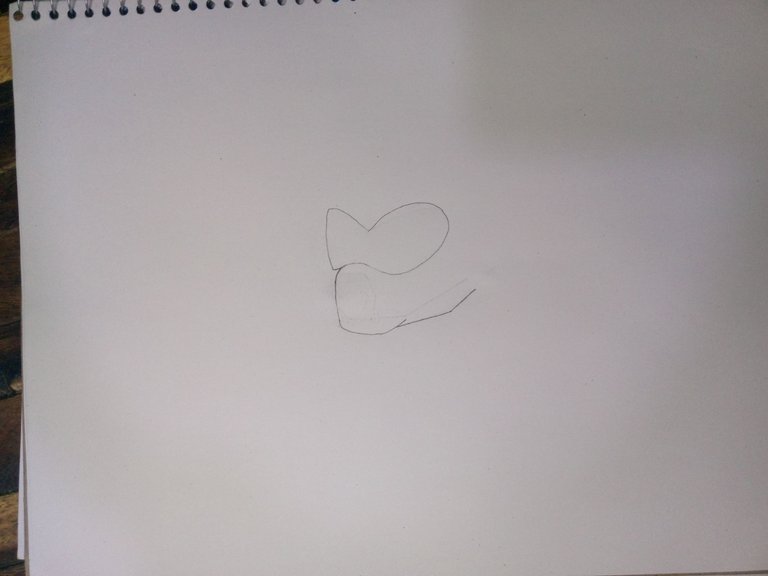
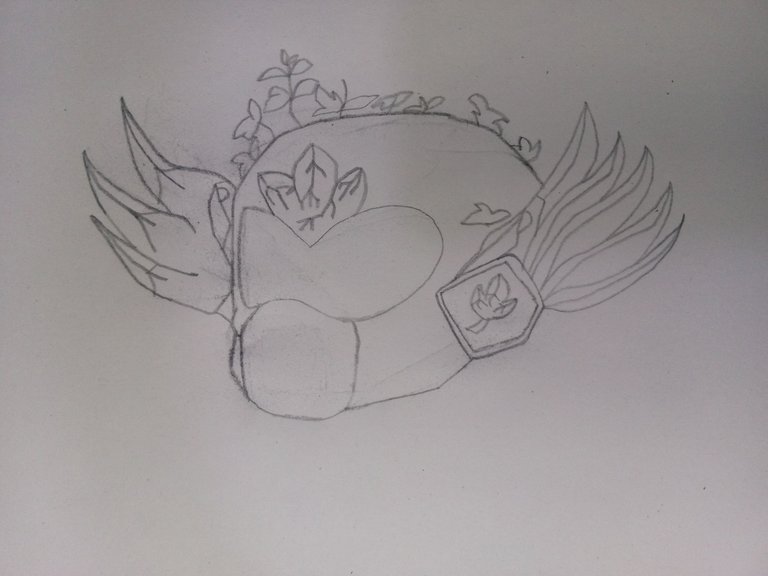
- Casco y anteojos: Comenzamos dibujando los anteojos o vidrios del casco, junto con la parte delantera del mismo.
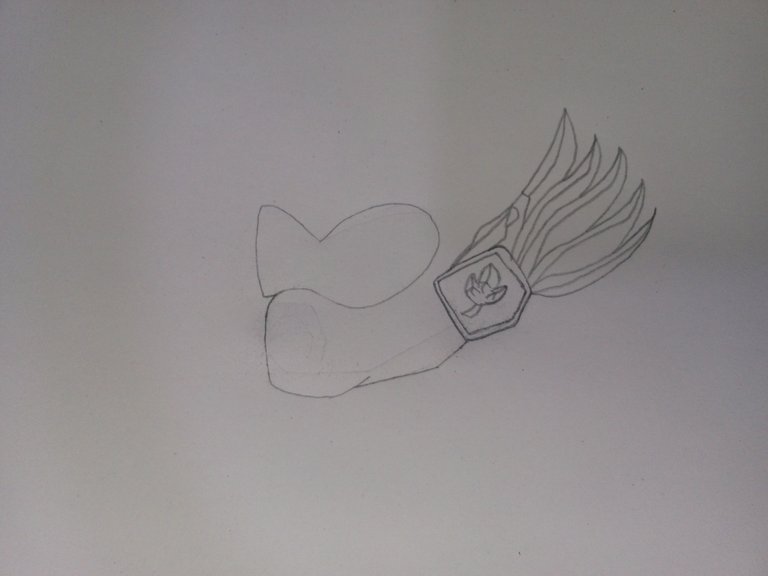
- Cabello y accesorio: Damos vida al mechón de cabello derecho del entrenador, que se encuentra alborotado por el viento. También agregamos un aparato en el cabello que forma parte del casco.
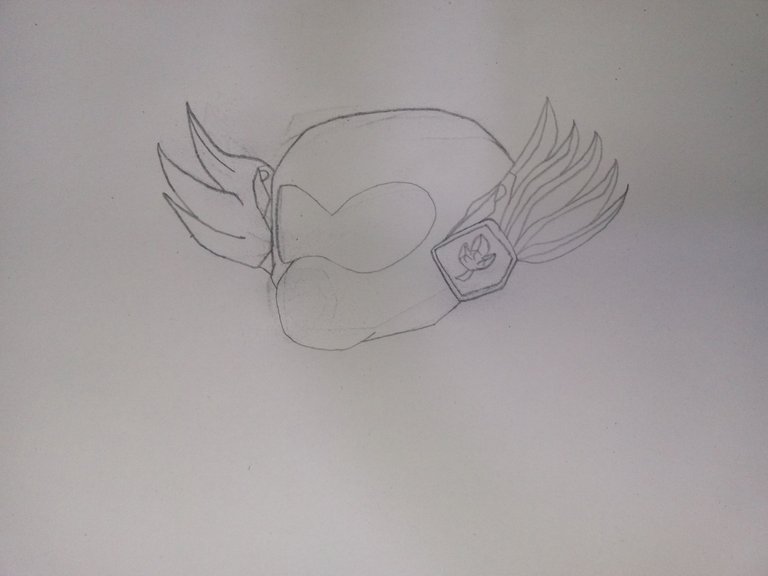
- Completando el casco: Dibujamos el cabello por completo y el aparato del lado contrario, y terminamos la parte superior del casco.
- Detalles y hojas: Incorporamos detalles significativos que caracterizan al entrenador del bosque, como algunas hojas que simbolizan su conexión con la naturaleza.
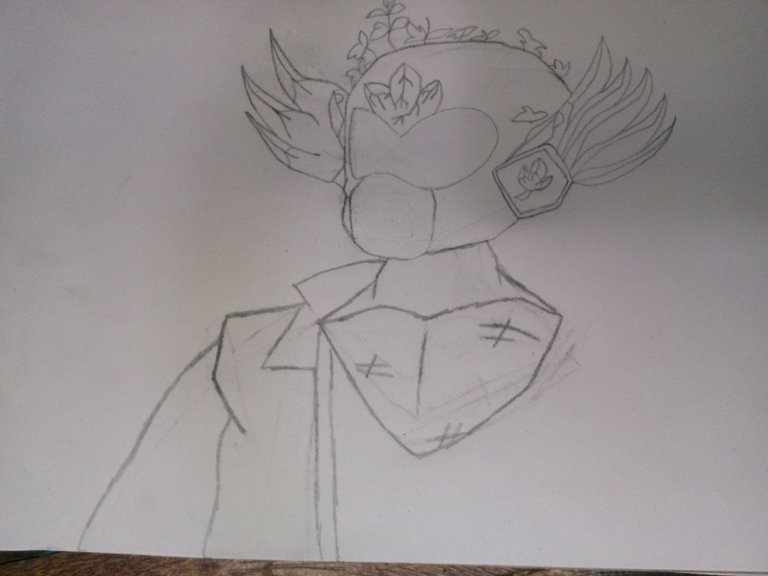
- Músculos y cuello: Es hora de darle volumen al entrenador. Exageramos un poco sus músculos para resaltar su fuerza e imponencia. No olvidamos dibujar su cuello con cuidado.

- Chaqueta (parte izquierda): Comenzamos a dibujar la chaqueta del entrenador, empezando por la parte izquierda.
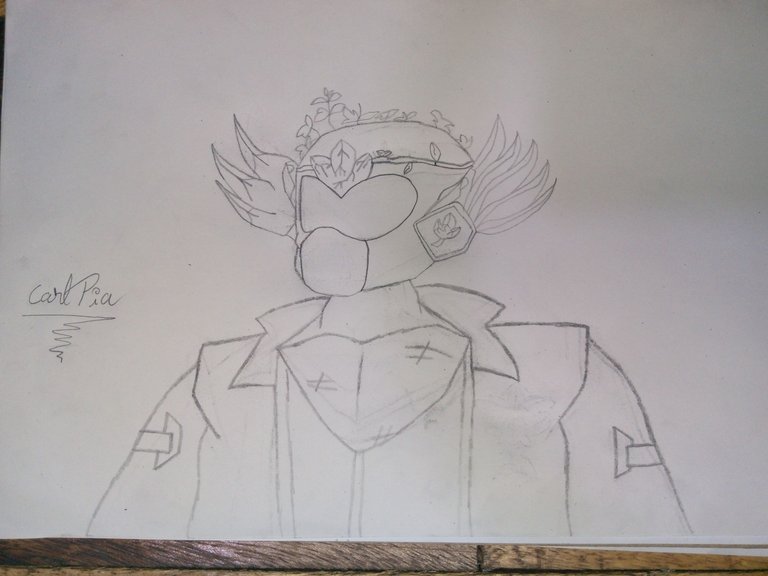
- Chaqueta (parte derecha y detalles): Completamos la chaqueta dibujando la parte derecha. Agregamos detalles como una línea en la camisa, dobleces en las mangas y algunos rasguños en los músculos para darle un toque realista.
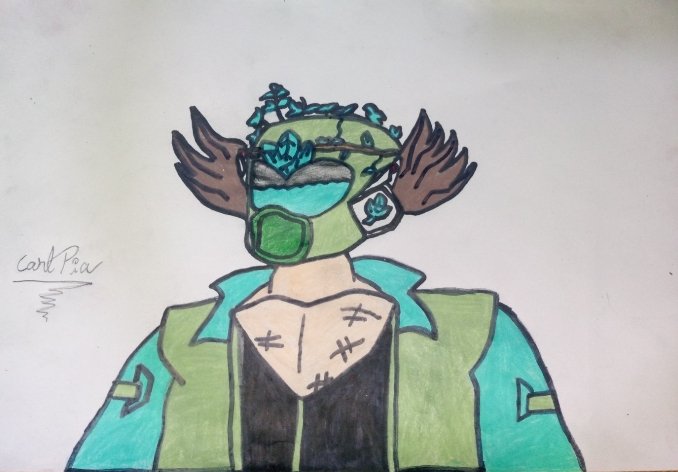
- ¡Y listo! El dibujo está terminado, pero queremos darle un toque final para que cobre vida. Aplicamos color y algunos efectos para resaltar los detalles.
¡Y así quedó!
¿Qué les parece? Espero que les haya gustado este nuevo dibujo del entrenador del bosque. Aunque he estado un poco fuera de práctica, creo que el resultado no está nada mal para tener 4 meses sin dibujar.
¡Hasta la próxima, amigos de Holozing!

English Version:
Hello all Holozing fans!
I know I've been away a bit, almost 4 months without posting! But I'm back with a new drawing that you will love. This time around, I've transformed the forest trainer into a more muscular and intimidating version, equipped with an accessory you won't want to miss!
Without further ado, let's see the drawing!
As I mentioned before, this drawing presents the forest trainer with a more imposing appearance. In addition, it sports a forest-themed helmet that gives it a unique touch.
Ready to see the step by step?
- Helmet and glasses: We start by drawing the glasses or glasses of the helmet, along with the front part of it.
- Hair and accessory: We give life to the coach's right hair strand, which is tousled by the wind. We also added a hair device that is part of the helmet.
- Completing the helmet: We draw the hair completely and the device on the opposite side, and we finish the top part of the helmet.
- Details and leaves: We incorporate significant details that characterize the forest trainer, such as some leaves that symbolize his connection with nature.
- Muscles and neck: It's time to give the trainer volume. We exaggerated his muscles a little to highlight his strength and imposingness. We don't forget to draw his neck carefully.
- Jacket (left side): We begin to draw the coach's jacket, starting from the left side.
- Jacket (right part and details): We complete the jacket by drawing the right part. We added details like a line on the shirt, folds on the sleeves, and some scratches on the muscles to give it a realistic touch.
- And that's it! The drawing is finished, but we want to give it a final touch to make it come to life. We apply color and some effects to highlight the details.
And that's how it stayed!
What do you think? I hope you liked this new drawing of the forest trainer. Although I have been a little out of practice, I think the result is not bad at all for having 4 months without drawing.
Until next time, Holozing friends!