I work from home doing IT work. So I am a tech minded individual who has been behind a computer for 9+ hours a day for the last 15 years professionally.
I love writing documentation for work and teaching people how to do things. I may not do things the most efficient way but my life motto has always been "Jack of All Trades.. Master of None" and that sums up how I operate in life. I can figure out how to do anything, it just might not be the "right" way or the best way.
So with that in mind I wanted to walk you all through how I make my Blog dividers. On the surface the process I use is STUPID simple but very labor intensive as there are a million steps but mostly rinse and repeat.
(I already made some Blog Dividers for Splinterlands for an Art Contest they held. And since Holozing is my new fixation I figured why not give the Holozing community the same treatment!)


Those are just some of the ones I created for the Splinterlands community. But enough of that let's get into....

Table of Contents
Step 1: Think of an idea
Step 2: Gather the Images
Step 3: Remove any Backgrounds
Step 4: Put it all together in 1 file
Step 5: Start the tedious process of creating your Images
Step 6: Convert all those images to a GIF

Step1
Think of an idea that you want to do
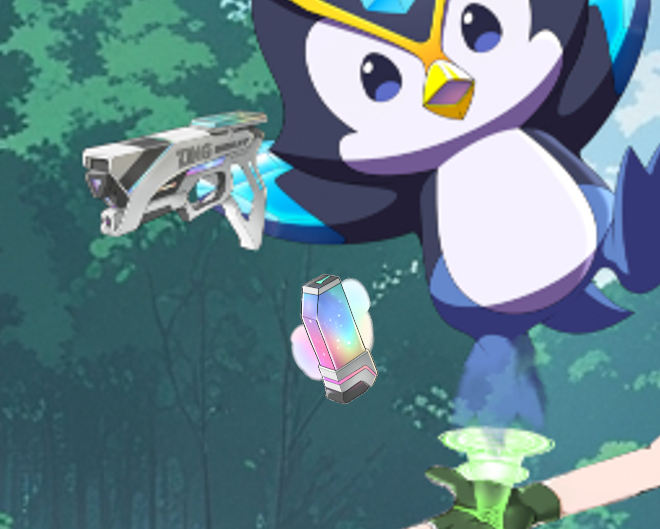
I grew up on Pokemon and Holozing just SCREAM pokemon right? Well I wanted to do something with a Trainer and catching a "mon" (Pokemon/Animal/Pet/Monster whatever you want to call it). Then I started to play around and came up with this image.
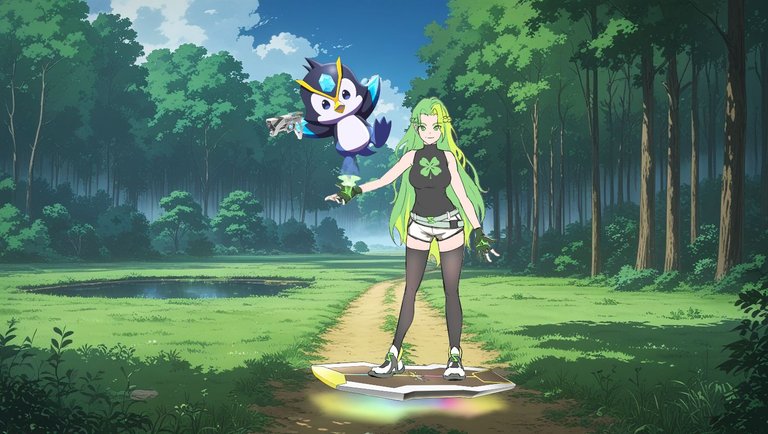
The background image of the forest is AI created and I suck at giving AI the right prompts. That image is supposed to be a forest with a dirt path going left to right so that it made sense with the Hoverboard/Healer but whatever I made it work. I spent way to long cutting and getting the 'Gun' to work with the Penguins hand wrapped around the trigger but I forgot at that small of a scale you wouldn't even be able to see it.
I also tried to make it semi look like the Penguin was coming out of the device on the Trainer's (Healer?) hand. But again... you can't see that on that scale so here is a better look at it.
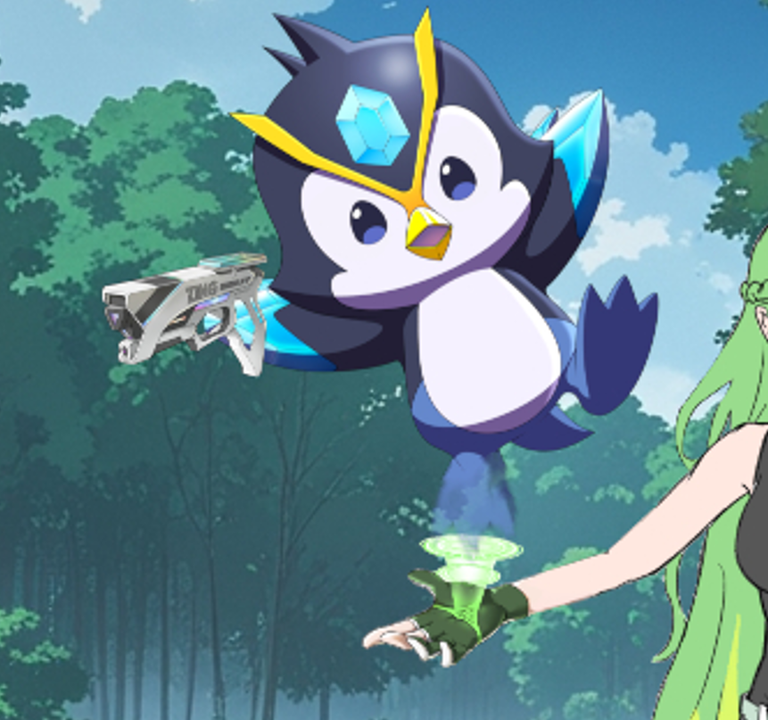
Oh and I had to take 3 separate images of the Healer and crop and paste and smudge together her Right hand to make it the right angle I wanted with the hand device that way.
Is it going to win any awards? No. That's why I scrapped it and started on something else but still wanted to show where I started.
I went back to the drawing board and decided to stick to what I knew. Making Page Dividers, Blog Footers, etc. And then the idea popped up. I am going to have a "Trainer" move across the screen and attack various enemies along the way. Will it be practical? Not really but it will would be fun as hell to create!
With that idea in mind let's get into it!
Step2: Gather the Images
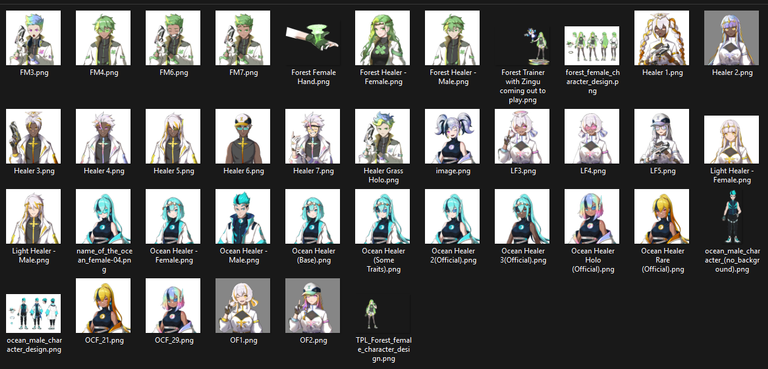
So anytime I start this process for a new project my real #1 step is gather all the source material I can get my hands on. I need to know what I have to work with before I can begin to imagine what I am going to make. But for sanity sake I made this step 2.
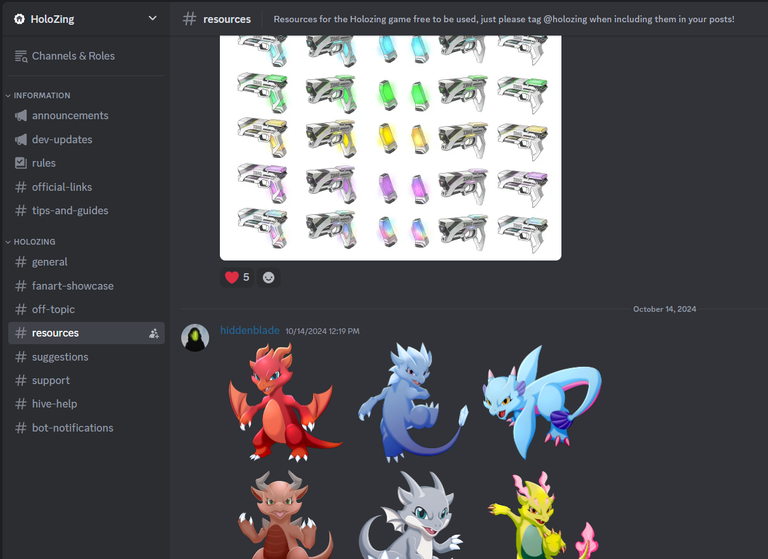
There are 2 places to get all the original IP source material for Holozing.
Discord: https://discord.gg/StQxYnVRxw
The Resources channel has a bunch of original artwork easy to download for use.
Hive posts: https://peakd.com/@holozing/posts
You can go through all the posts and find any information you want and any images that are NOT in the Discord channel.
But be warned... There are a LOT of variations so you might get overwhelmed haha

Step3: Remove Any Backgrounds
Now, I use the software called GIMP for all my image editing. It is an Open Source software that I have used for over a decade at this point. It's like the cheap mans version of Photoshop.
You get download it at their website gimp.org. I always highly recommend manually typing in websites of places where you are going to download software from but if you are lazy here is a link https://www.gimp.org/
I am not going to go into much detail on HOW to use the software because that would be it's own 2 hour video tutorial but YouTube it if you need help.
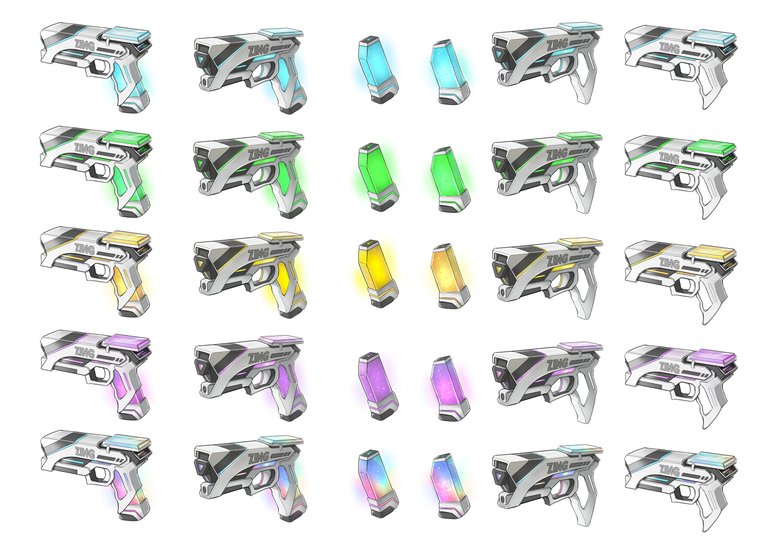
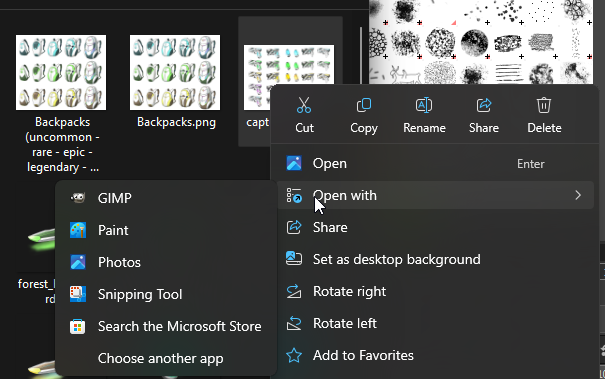
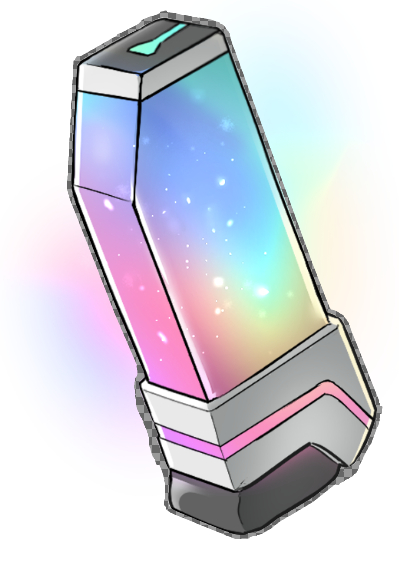
For this step we are going to try to isolate a Ammo clip just to show you how. So get the image you want to edit
Then Right-click on that image and select "Open with GIMP".
Once it is open the first thing to do is find that layer in the bottom right and Right-Click on it and select "Add Alpha Channel" if it is not already selected.
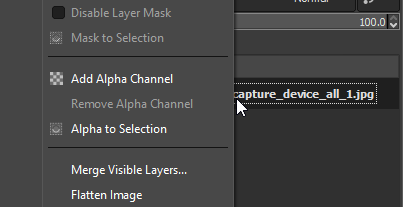
Alpha Channel is... well basically think of it as a Invisible Background. It can NEVER hurt to add this Alpha Channel to an image EVEN if it will have a full background.
In the upper left corner are the icons you will use.
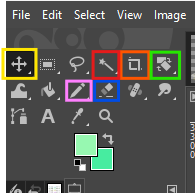
Yellow = Move Tool: select this to move a layer around
Red = Fuzzy Select Tool: which lets you select a color
Orange = Crop Tool: you can crop the whole image
Green = Rotate Tool: it will let you rotate a layer
Pink = Pencil Tool: draw lines or whatever you want
Blue = Erase Tool: if the image has a alpha channel this removes color completely from that layer
You have to remember all those tools are useable for the specific layer you have selected. This can get confusing but with time becomes second nature. Also if you right-click on any of those icons with a little arrow in the bottom corner it will popup other options you can select.
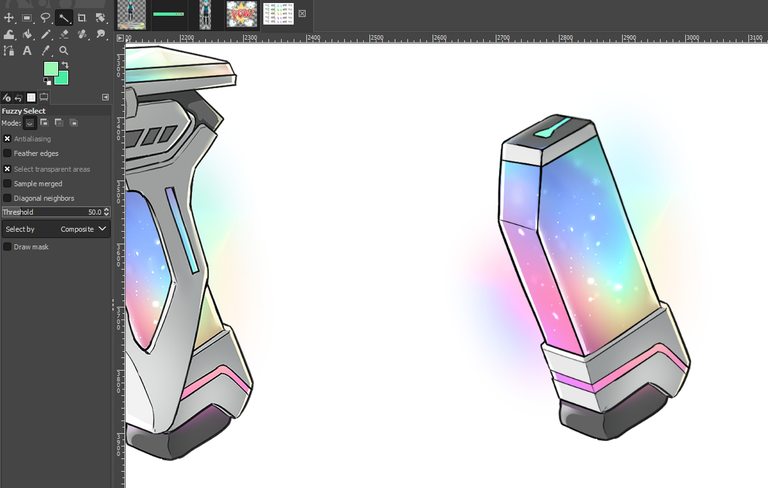
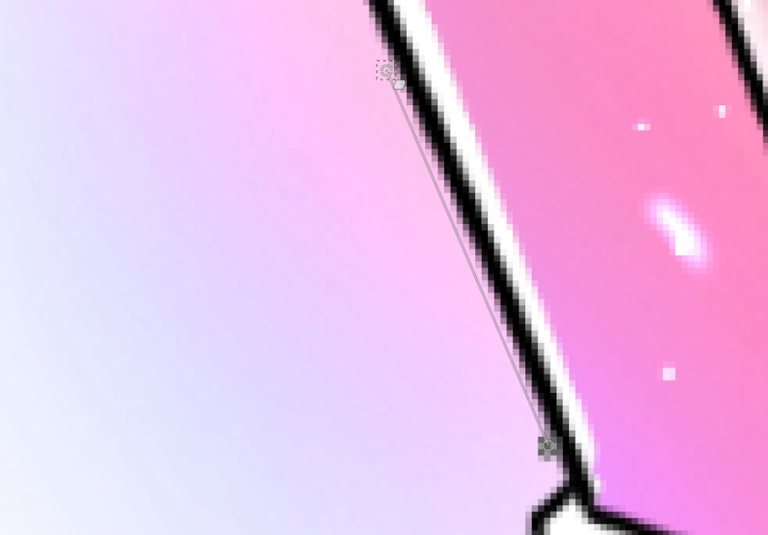
We are going to zoom into the Rainbow/Holo Ammo clip and select the "Fuzzy Select Tool.
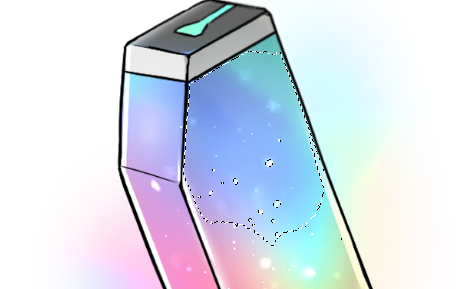
You can't really see but there are dotted lines selecting how much is selected. Here is a better depiction of it. I am going to click on the Blue color in the Ammo Clip.
What you need to do is play the game of how much color to remove. On the left hand side there is a 'threshold' slider that you can move left or right to select more or less of that color in the image.
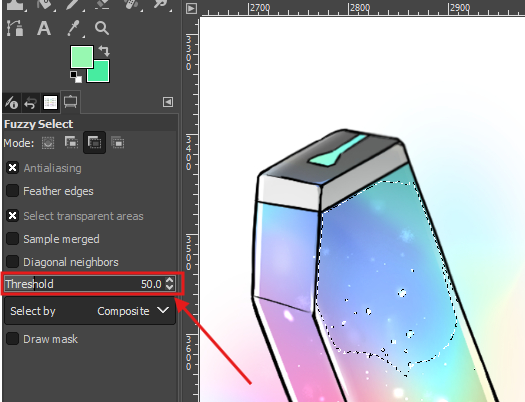
Clicking back in the white area with a threshold of 50% and then clicking the Delete button gets rid of all the white, but it also gets rid of a lot of the glow that comes from the Ammo Clip. That glow has a opacity that I want to keep.
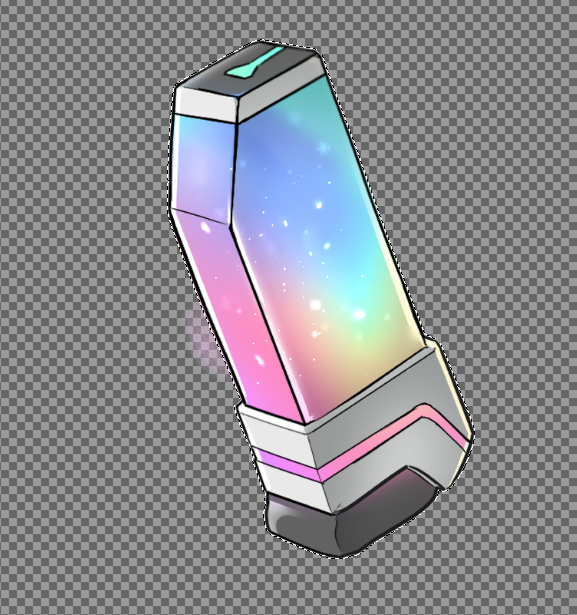
So press CTRL = 'Z' to undo the deleting action. Lower the threshold to say 13% (I cheated and tried a few percentages to find the right amount) and click in the white area again then press delete and you get this:
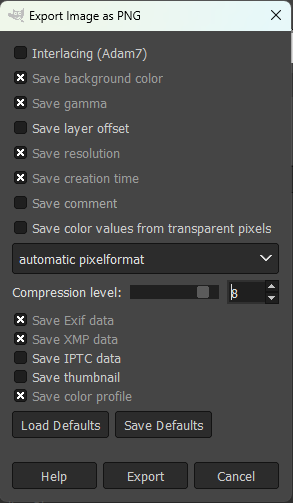
That is better but you can play around with it. Once you are happy crop the image and export it to save it as a PNG file. Here are my default settings for exporting.
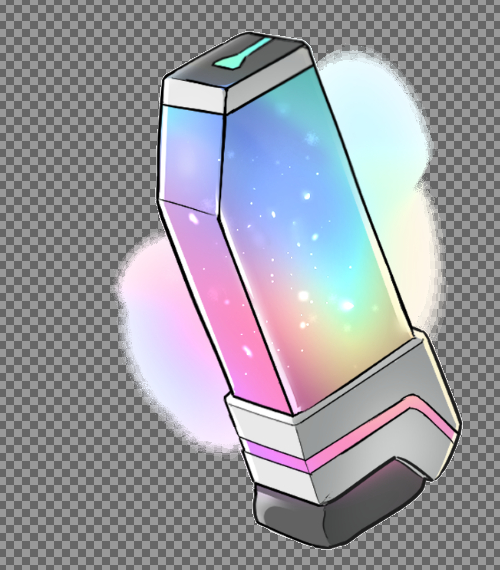
Now you can add it to another and see it is looks good (or just add a new layer to that image and make the background a random color that has good contrast).
I hate it. That glow is all wrong, I should have increased the threshold. We all make mistakes. But now I want to show you another way. Open that same Ammo image again and select the Erase tool and lower it's size down to single digits.

Then zoom all the way in to get a close of the black outline of the ammo clip. Click right next to that to make it invisible. Then hold the SHIFT button and click another area further up in a straight line.
If you click again it will make that whole line invisible.
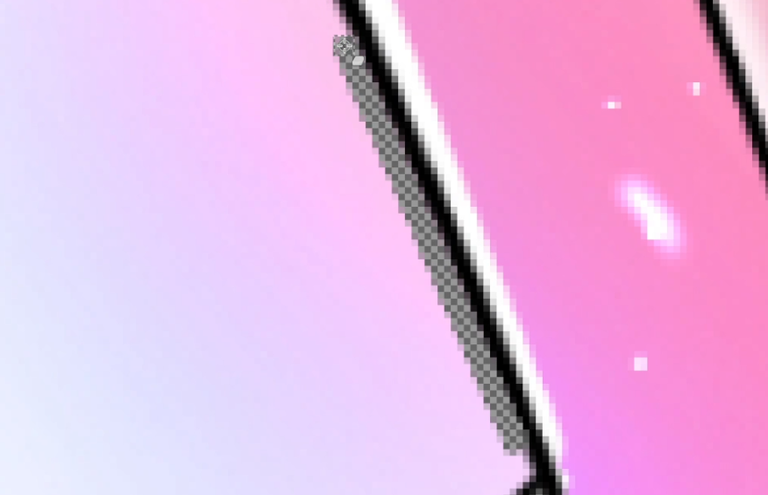
Now just repeat that around the entire image you want to 'cutout'. It will look something like this.
Then you can increase the size of your Erase Tool and go around again and again until all the background that you want removed is removed.
Then crop around your image and export it.

That is probably the longest way to edit images to remove backgrounds but it will ALWAYS work. Also the end image turns out so much better if you start with the highest resolution image possible.
This ammo clip has nothing to do with what I am creating today but I wanted to edit it so figured why not show you how with an image I actually wanted anyways ;)
Step4: Put it all together in 1 file
First open GIMP and create a new File and specify the size. Now personally I go WAY bigger then needed because you can ALWAYS reduce the size later but increasing it can be crap. So something like 11,000 wide by 500 tall is a good place to start.
Make sure you have each image and item and text as it's own Layer.
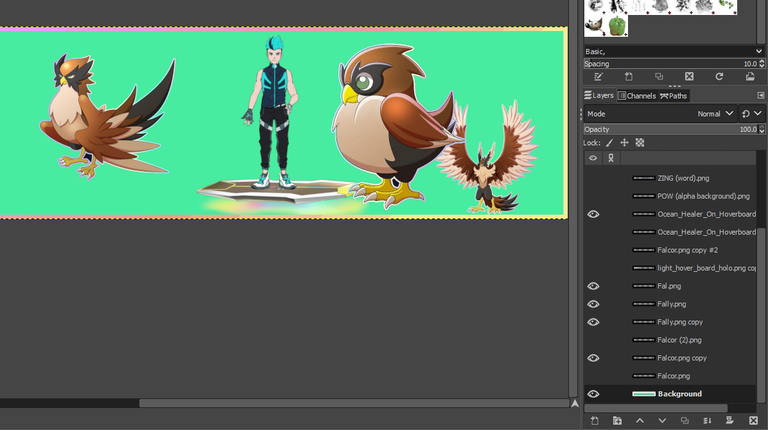
It is also my own best practice that once I have everything inputted and where I want it. I Duplicate each layer and hide them and put them all the way at the bottom. That way if I end up editing/rotating/cropping whatever to the image I have another full resolution one at the exact same size to put back in if needed. (It may be overkill for what you are doing though).
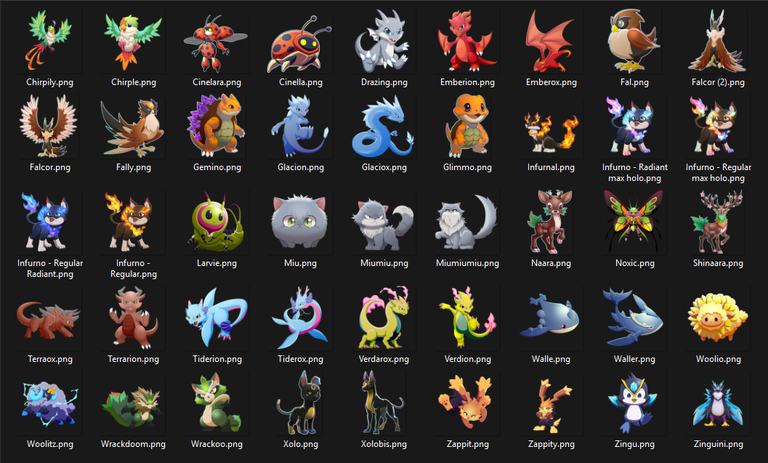
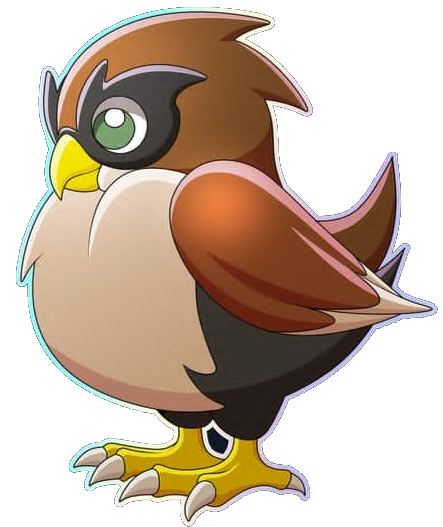
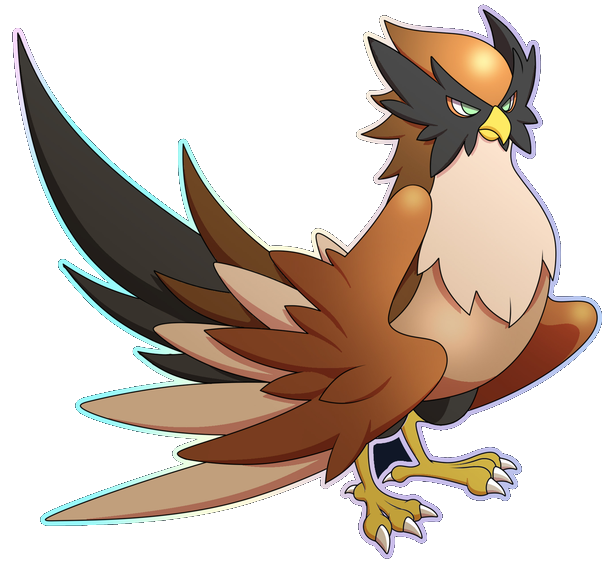
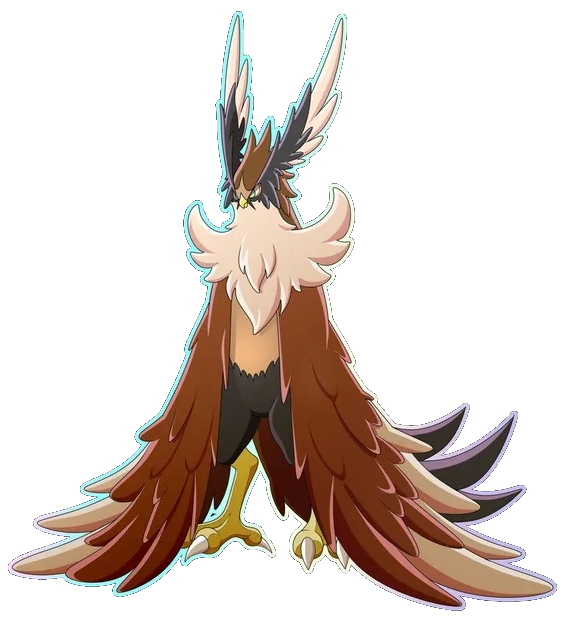
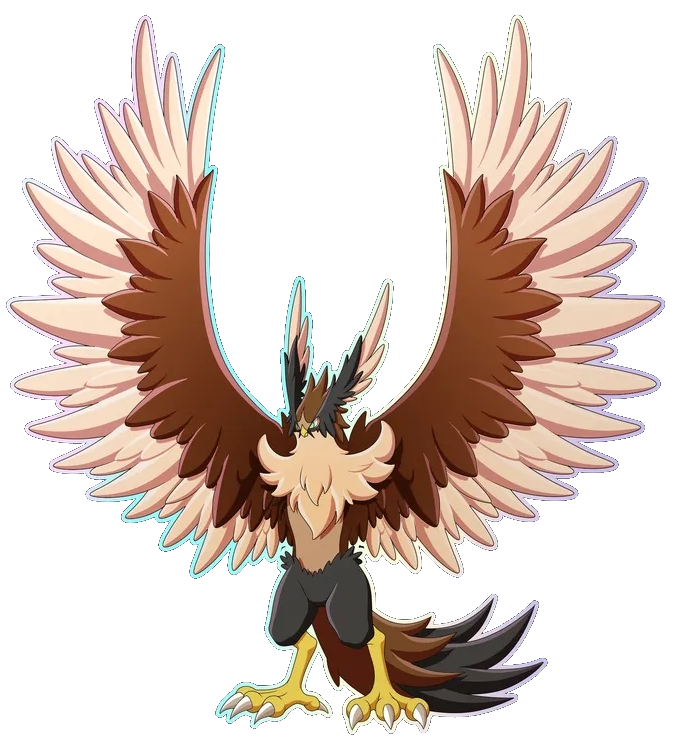
You can see that the FAL image is way bigger then the other evolution line guys so I need to scale that 1 image a little smaller to make sense before I begin.
Place every image where they are going to end up starting from. Then hide any layer you do NOT want visible to begin with.
Step5: Start the tedious process of creating your static images
Be warned... this is going to take a while and it is VERY easy to forget where you are in the steps and lose your track and that sucks. So get a drink, sit down and get ready to go pixel by pixel and frame by frame.
Now something to keep in mind is that the GIF make I use has a MAX upload capacity of 200MB for 1 GIF. That means you can upload 200MB of files and covert them into a GIF. This GIF I am making is 135 images in total which totals 57.7 MB. The resolution of each image is 5913x600.
Create a new folder to save your images into. If you are using GIMP then do NOT use the "save as" function as that will save the file as a .xcf file and you don't want that. You want to "export as" option to save it as a .png file.
Here is my Folder and all the images:
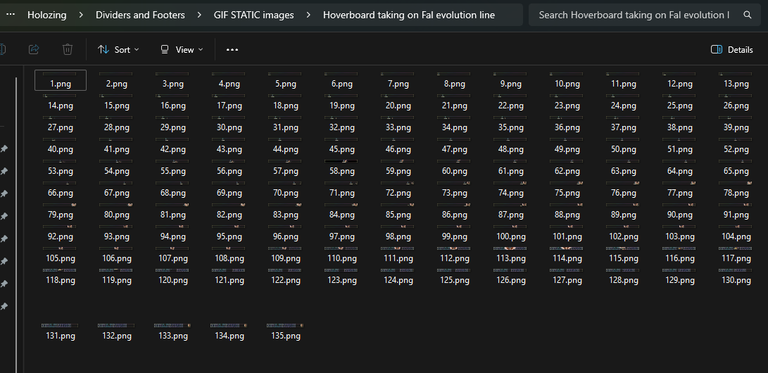
Here is my process for creating the static images. You basically move what you want a little and export that as an image and then move them a little more and repeat that over and over again.
I used that Ammo Clip we edited to hide my file structure cause I am overly paranoid lol
Step6: Convert all those images to a GIF
Now that you edited the images you wanted...
You put them all into 1 File...
You moved them around and did whatever to each image for each frame...
You exported each frame as it's own PNG...
It's time to take all of those images and convert them into a GIF.
I personally use: https://ezgif.com/maker to make my GIF's because it is easier then if I was to do it on my Computer (which you totally can if you want). So you upload all the images you created (the reason I use Numbers for naming the images is that the GIF maker sorts the images alphabetically so it is just easier.

Click on "Choose Files" and find your images and select them all and click open.
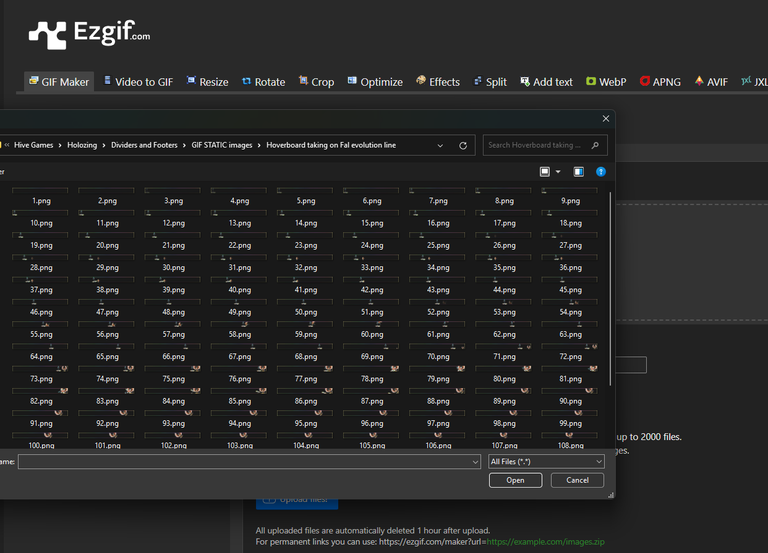
Now scroll down and click on 'Upload Files'.
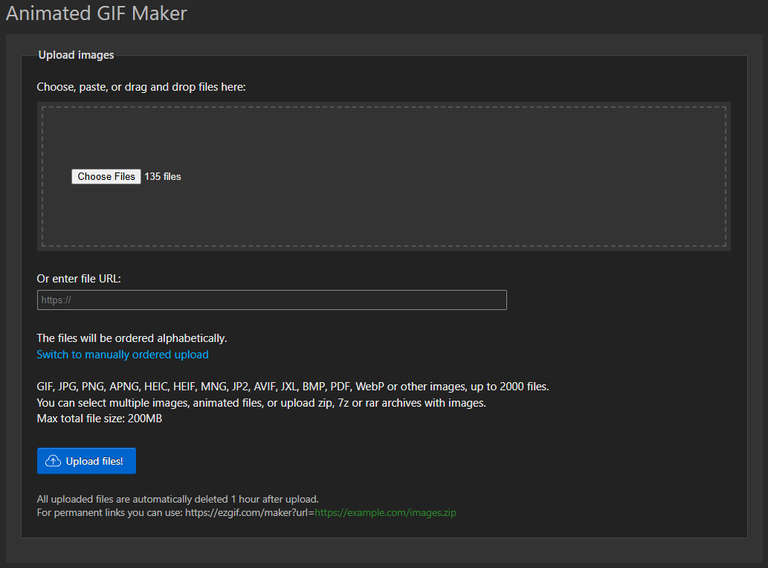
If there are a lot of images it will take a while but be patient. Also something worth mentioning is that all the files you upload are deleted in 1 hour (so they say) so don't leave this here and forget about and then come back to make the gif cause they will be gone and you gotta upload them all again.
These 135 images I uploaded took about 2 minutes to upload.
Now you scroll down and there are 2 sections to pay attention to:
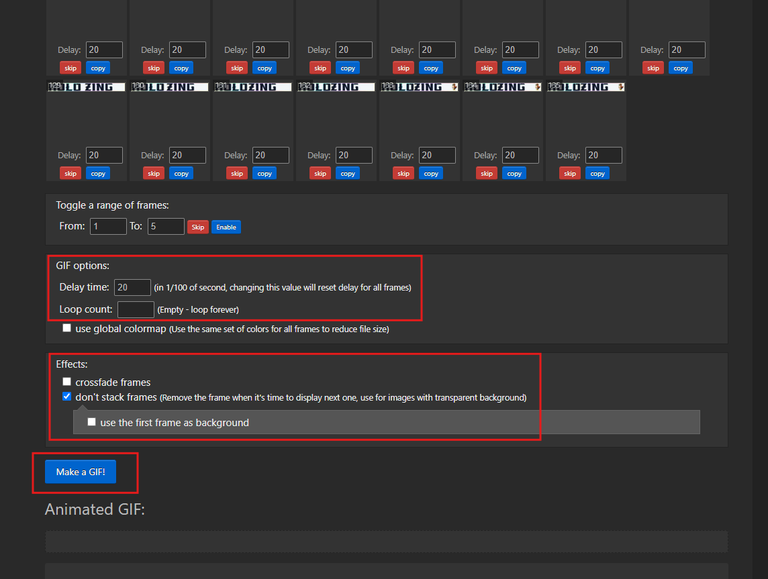
GIF options: default is 20 of 100th of a second per image. You can change this up or down as you want.
Effects: Normally I do not stack frames because that is just the kind of GIF's I create. But you can play around with this on yours.
Once done click on "Make a GIF!"
Even after it creates you can always change those setting and Make a new GIF but make sure to save the old one before you make changes and make a new one if you want to keep the old one.
The cute little cat will popup while they create your GIF. Have patience and wait.
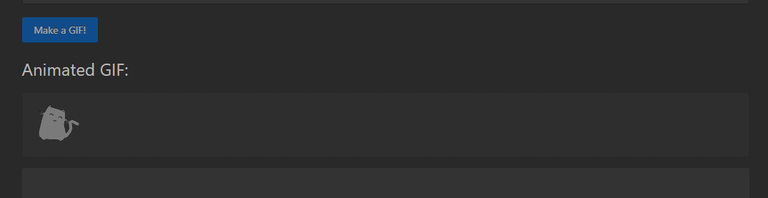
Without further ado let's take a look at my GIF.

Could it have been smoother? 100% I should have made more frames with the Hoverboard guy not moving as far in between each frame. But regardless I like my GIF! :)
If you want the images I used without backgrounds already editted out then here you go!

i like how you break down every details
Thank you! I am always open to feedback or suggestions if you have them too :)
I just want to help others learn tools to help them right better posts and articles.
GIMP is a powerful image tool, it's an open source software so anyone can use it freely. It's an alternative for Photoshop. But for some reason, I never tried to use GIMP. Maybe this someday I give it a try. By the way, thank you for step by step guide.
Amazing work., You ARE SO TALENTED. Keep it. Not everybody can do it. You are unique
aw thank you that was really nice. I tried to break it down so that hopefully anyone could have the confidence to start to do the same and create cool content for themselves and the community!
I really admire your work, it looks easy but it is not.
The steps are "simple" it's just the execution that takes time and a little patience and understanding of the tools is all!
Give it a go! Worst case scenario you don't post whatever you end up making :) nobody gets to see all my failures either haha
Interesting to work with the explanation. Keep it up.
!ALIVE
Very awesome work, I love using dividers in blog posts!
Excellent.
I can say you are amazing in this, I so impressed with your positive attitude towards creativity and skills to impact your skills to others to learn from. Thank you for sharing such important skills I'm learning new things daily and this is one I'm grateful for your effort.
A lot of people seemed to appreciate this guide so I think I am going to write a few more "How To" guides when it comes to image editing or other graphical editing for writing articles.
Thank you!
!BBH
!LUV
Thanks, that's great to hear, do well to drop, more of such models here to help others learn that's the real goal.
!BBH
!LUV
This is a great tutorial on how to make blog dividers/footers using GIFs.I really appreciate the detailed steps and the screenshots that you included.I especially liked how you explained the different tools in GIMP and how to use them to remove backgrounds from images.I'm going to try this out myself!
DO IT!!!! Let me know how it goes or if you have any questions I will try to help. I am not an expert, I have just been doing this method for a few years now so I might be able to help :)
It's encouraging and helpful,offering support and guidance to those who are trying out the blog divider/footer method.The commenter's enthusiasm for helping others is evident, and their willingness to share their knowledge is commendable.It's a great example of how community support can be valuable in learning new skills. thank you.
The animated dividers take me back to early internet. I think in some ways it was better. This may be part of why I like Hive, some of the conventions here generate that nostalgic experience.
Well done!
Awesome tutorial, need to give this a try when things clear up a bit in the near future!
thanks! :) I am definitely not a graphic artist... as you can probably tell but just having a little image alteration knowledge helps a lot :)