Water whale, by Holozing Water In Amigurumi! πŸ³πŸƒπŸŒΈ Ballena de agua, de Holozing Water En Amigurumi!πŸ³πŸƒπŸŒΈ By Danhyelita24

in Holozing Community β€’ 3 months ago

πŸ‹πŸƒπŸŒΈπŸŒΏπŸ³πŸŒ·πŸ³πŸƒπŸŒΈπŸ‹πŸŒΏπŸŒ·πŸ³πŸƒπŸŒΈπŸ‹πŸŒΏπŸŒ·

1707416883882.jpg

πŸ³πŸƒπŸŒΈπŸ‹πŸŒΏπŸŒ·πŸ³πŸƒπŸŒΈπŸ‹πŸŒΏπŸŒ·πŸ³πŸƒπŸŒΈπŸ‹πŸŒΏπŸŒ·

Hello hello! Greetings friends, I am very excited to start my first blog in this community, sharing a nice amigurumi pattern, besides being easy and quick, this is the colorful character Water Whale, from Holozing Water. This little whale measures approximately 8 cm in diameter, and 6cm high. The material to use is very little, which makes it ideal for quality time and a fun project.

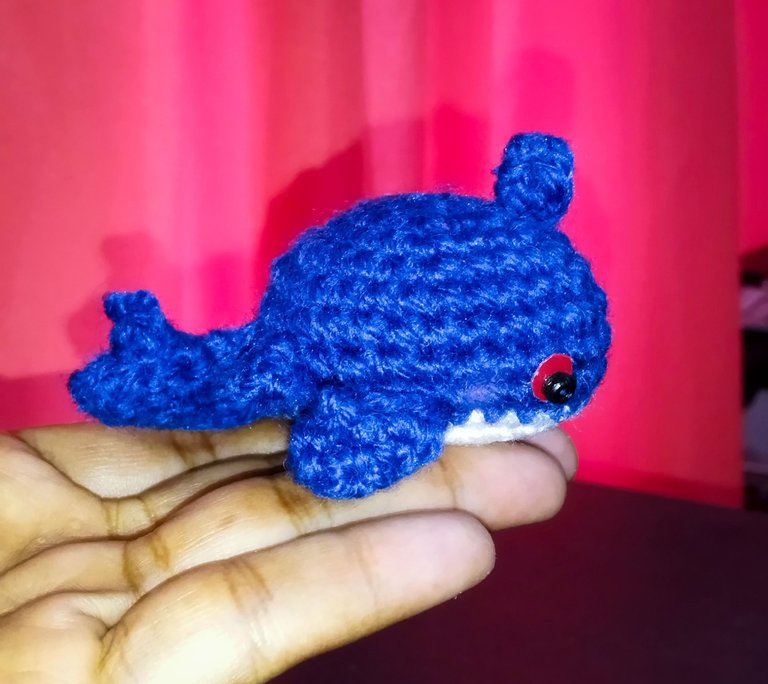
Hola hola!! Saludos amigos, me hace mucha ilusiΓ³n empezar mi primer blog en esta comunidad, compartiendo un patrΓ³n de amigurumi bonito, ademΓ‘s de ser facilito y rΓ‘pido, se trata del personaje pintoresco Water Whale, de Holozing Water. Γ‰sta ballenita mide aproximadamente unos 8 cm de diΓ‘metro, y 6cm de alto. El material a utilizar es muy poco, lo que la hace ideal para emplear tiempo de calidad y un proyecto divertido.

πŸ³πŸƒπŸŒΈπŸ‹πŸŒΏπŸŒ·πŸ³πŸƒπŸŒΈπŸ‹πŸŒΏπŸŒ·πŸ³πŸƒπŸŒΈπŸ‹πŸŒΏπŸŒ·

1707416883911.jpg

πŸ³πŸƒπŸŒΈπŸ‹πŸŒΏπŸŒ·πŸ³πŸƒπŸŒΈπŸ‹πŸŒΏπŸŒ·πŸ³πŸƒπŸŒΈπŸ‹πŸŒΏπŸŒ·

In order to make this little whale we will need:50 gr of blue wool,25 gr of white wool,Crochet hook needle number 1.5mm, Wool needle,2 black basins,Hypoallergenic stuffing,Red Foami,Scissors.

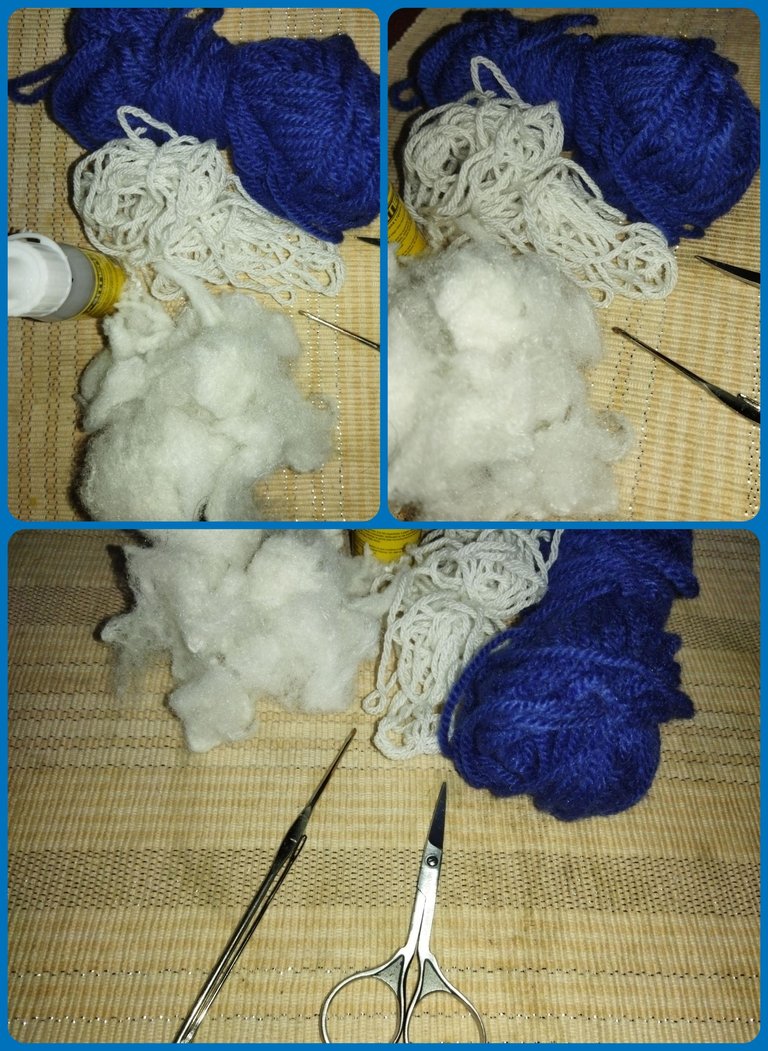
Para poder hacer esta ballenita necesitaremos: 50gr de lana color azul, 25 gr de lana color blanco, Aguja de ganchillo del nΓΊmero 1.5mm,Aguja lanera,2 cuencas negras, Relleno HipoalergΓ©nico,Foami Rojo,Tijera.

πŸ³πŸƒπŸŒΈπŸ‹πŸŒΏπŸŒ·πŸ³πŸƒπŸŒΈπŸ‹πŸŒΏπŸŒ·πŸ³πŸƒπŸŒΈπŸ‹πŸŒΏπŸŒ·

1707416883966.jpg

πŸ³πŸƒπŸŒΈπŸ‹πŸŒΏπŸŒ·πŸ³πŸƒπŸŒΈπŸ‹πŸŒΏπŸŒ·πŸ³πŸƒπŸŒΈπŸ‹πŸŒΏπŸŒ·

The first step in this pattern is to make the two fins and the tail of the whale, since later we will join them to the body by sewing with the wool needle.
To do this we are going to take the blue yarn and make a magic ring of six single crochet stitches, the second round we make one increase for each stitch for a total of twelve single crochet stitches, we make a slip stitch, cut the yarn and close, fold in half and sew along the edge.
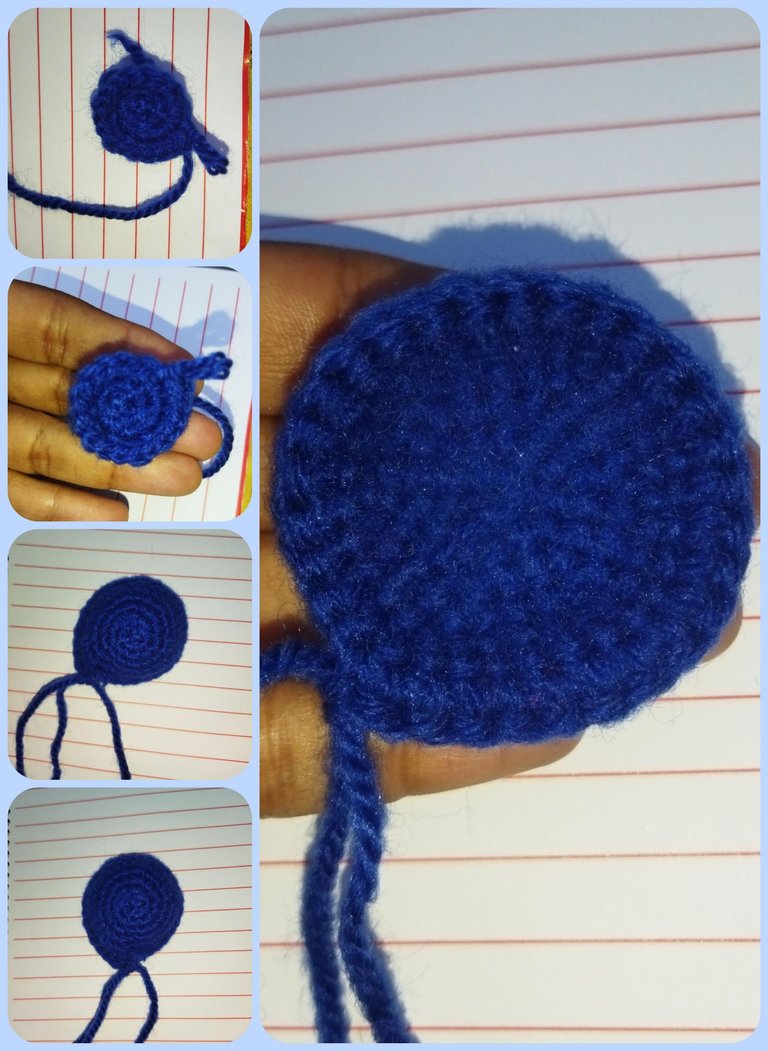
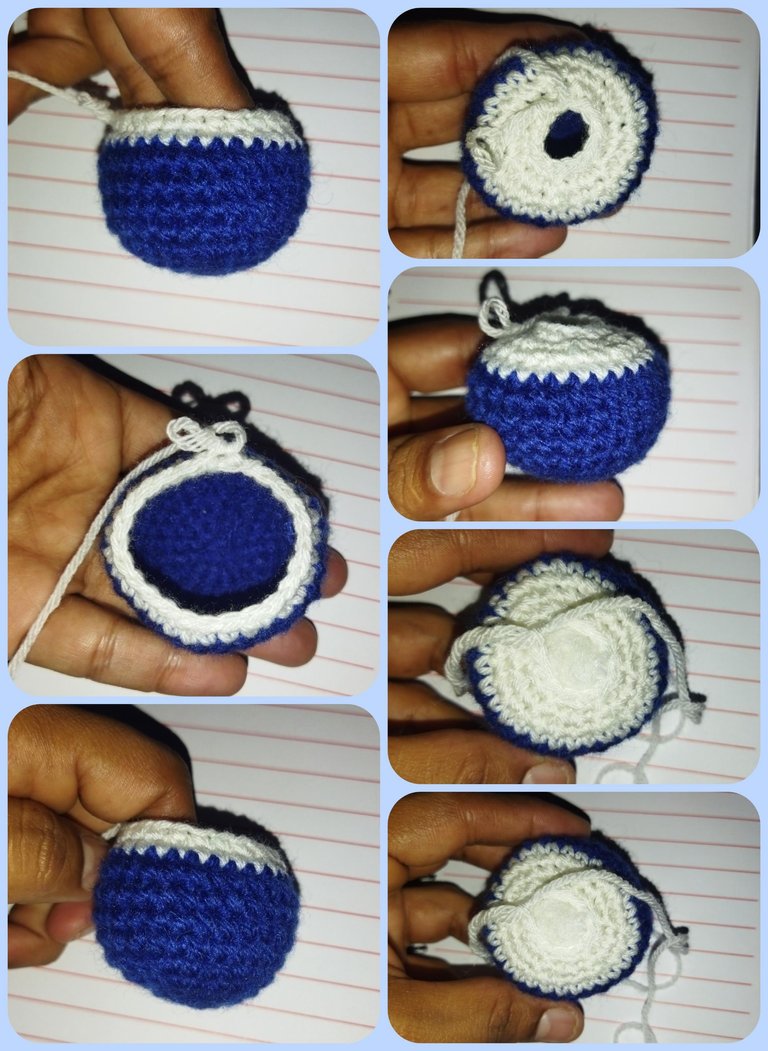
El primer paso en la de este patrΓ³n es hacer las dos aletas y la cola de la ballena, ya que mΓ‘s adelante las uniremos al cuerpo cosiendo con la aguja lanera. para ello vamos a tomar el hilo azul y montamos un anillo mΓ‘gico de seis puntos bajos, la segunda vuelta hacemos un aumentos por cada punto para un total de doce puntos bajos,hacemos punto deslizado cortamos hilo y cerramos, doblamos a la mitad y cosemos por el borde.

For the back flippers we will make two equal pieces, mounting a magic ring of six stitches, for the second round we will make an increase for each stitch, for a total of twelve stitches, the third round we will make the sequence of one stitch under one increase, we slip stitch and cut long yarn, we sew with the wool needle until the middle and we glue both pieces by the upper end.

Para las aletas traseras haremos dos piezas iguales, montando un anillo mΓ‘gico de seis puntos, para la segunda vuelta haremos un aumento por cada punto, para un total de doce puntos, la tercera vuelta haremos la secuencia de un punto bajo un aumento, hacemos punto deslizado y cortamos hebra larga , cosemos con la aguja lanera hasta la mitad y pegamos ambas piezas por el extremo superior.

πŸ³πŸƒπŸŒΈπŸ‹πŸŒΏπŸŒ·πŸ³πŸƒπŸŒΈπŸ‹πŸŒΏπŸŒ·πŸ³πŸƒπŸŒΈπŸ‹πŸŒΏπŸŒ·

1707416883939.jpg

πŸ³πŸƒπŸŒΈπŸ‹πŸŒΏπŸŒ·πŸ³πŸƒπŸŒΈπŸ‹πŸŒΏπŸŒ·πŸ³πŸƒπŸŒΈπŸ‹πŸŒΏπŸŒ·

For the body of the whale, we will take blue yarn and make a magic ring of six single crochet stitches, the second row we will make an increase of single crochet stitches in the same hole, row three we will make a single crochet and increase, row four two single crochets and an increase, row five we will make three single crochets and an increase, from rows six to nine we will make a stitch over each stitch to give height to the design. Once these rows are finished we change to white thread and repeat the same single crochet stitches, that is, one stitch over each stitch. In row eleven we will make three single crochets and a decrease for a total of twenty-four single crochets, in row twelve we will make the sequence of two single crochets and a decrease for a total of eighteen single crochets and finally in row thirteen we will make a single crochet and a decrease for a total of twelve single crochets, we fill and close with the wool needle, and in this way we have finished the body of our little whale.

Para el cuerpo de la ballena, tomaremos hilo azul y hacemos un anillo mΓ‘gico de seis puntos bajos, la segunda vuelta haremos un aumento de puntos bajos en el mismo huequito, la vuelta tres haremos un punto bajo y aumento, la vuelta cuatros dos puntos bajos y un aumento, la vuelta cinco haremos tres puntos bajos y un aumento, de la vuelta seis hasta la nueve haremos un punto sobre cada punto para darle altura al diseΓ±o. Una vez finalizadas estas vueltas cambiamos al hilo color blanco y repetimos los mismos puntos bajos, es decir, un punto sobre cada punto. la vuelta numero once haremos tres puntos bajos y una disminucion para un total de veinticuatro puntos bajos, la vuelta doce haremos la secuencia de dos puntos bajos y una disminucion para un total de dieciocho puntos bajos y por ultimo la vuelta numero trece haremos un punto bajo y una disminucion para un total de doce puntos bajos, rellenamos y cerramos con la aguja lanera, y de esta manera tenemos culminado el cuerpo de nuestra ballenita.

πŸ³πŸƒπŸŒΈπŸ‹πŸŒΏπŸŒ·πŸ³πŸƒπŸŒΈπŸ‹πŸŒΏπŸŒ·πŸ³πŸƒπŸŒΈπŸ‹πŸŒΏπŸŒ·

1707416883958.jpg

πŸ³πŸƒπŸŒΈπŸ‹πŸŒΏπŸŒ·πŸ³πŸƒπŸŒΈπŸ‹πŸŒΏπŸŒ·πŸ³πŸƒπŸŒΈπŸ‹πŸŒΏπŸŒ·

πŸ³πŸƒπŸŒΈπŸ‹πŸŒΏπŸŒ·πŸ³πŸƒπŸŒΈπŸ‹πŸŒΏπŸŒ·πŸ³πŸƒπŸŒΈπŸ‹πŸŒΏπŸŒ·

1707416883948.jpg

πŸ³πŸƒπŸŒΈπŸ‹πŸŒΏπŸŒ·πŸ³πŸƒπŸŒΈπŸ‹πŸŒΏπŸŒ·πŸ³πŸƒπŸŒΈπŸ‹πŸŒΏπŸŒ·

We glue the fins at both ends and at the back, taking care of the symmetry of the design so that it is even.

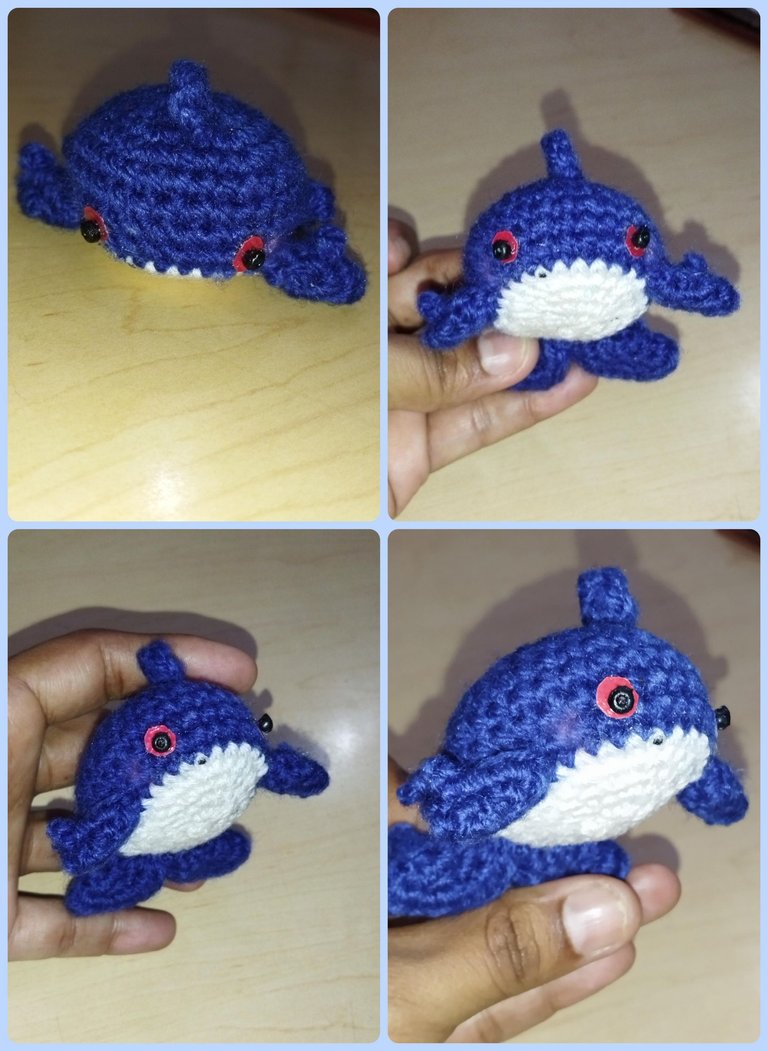
Pegamos las aletas en ambos extremos y en la parte trasera, cuidando la simetrΓ­a del diseΓ±o para que nos quede parejo.

πŸ³πŸƒπŸŒΈπŸ‹πŸŒΏπŸŒ·πŸ³πŸƒπŸŒΈπŸ‹πŸŒΏπŸŒ·πŸ³πŸƒπŸŒΈπŸ‹πŸŒΏπŸŒ·

1707416883929.jpg

πŸ³πŸƒπŸŒΈπŸ‹πŸŒΏπŸŒ·πŸ³πŸƒπŸŒΈπŸ‹πŸŒΏπŸŒ·πŸ³πŸƒπŸŒΈπŸ‹πŸŒΏπŸŒ·

For the details of the face, we are going to cut out two circles in red foami and with textile glue we place them on the piece and on top we glue the black eye sockets, to form the eye part. We are going to weave with blue thread all the details of the little pieces that this character has to give it more realism, starting with the fin of the head, the four of the sides, the two of the fins and the two of the tail. To give it that cute touch we retouch the cheeks with pink blush and that's it, our Water Whale character is finished. The result made me fall in love and I wish from my heart that you liked it too.

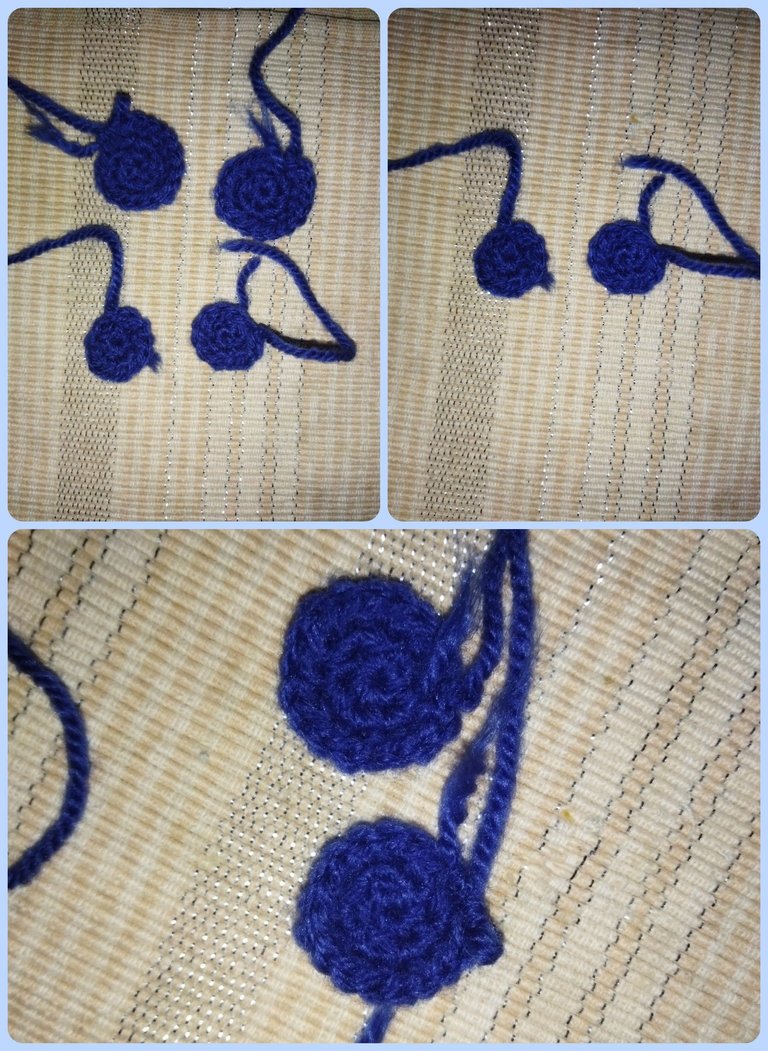
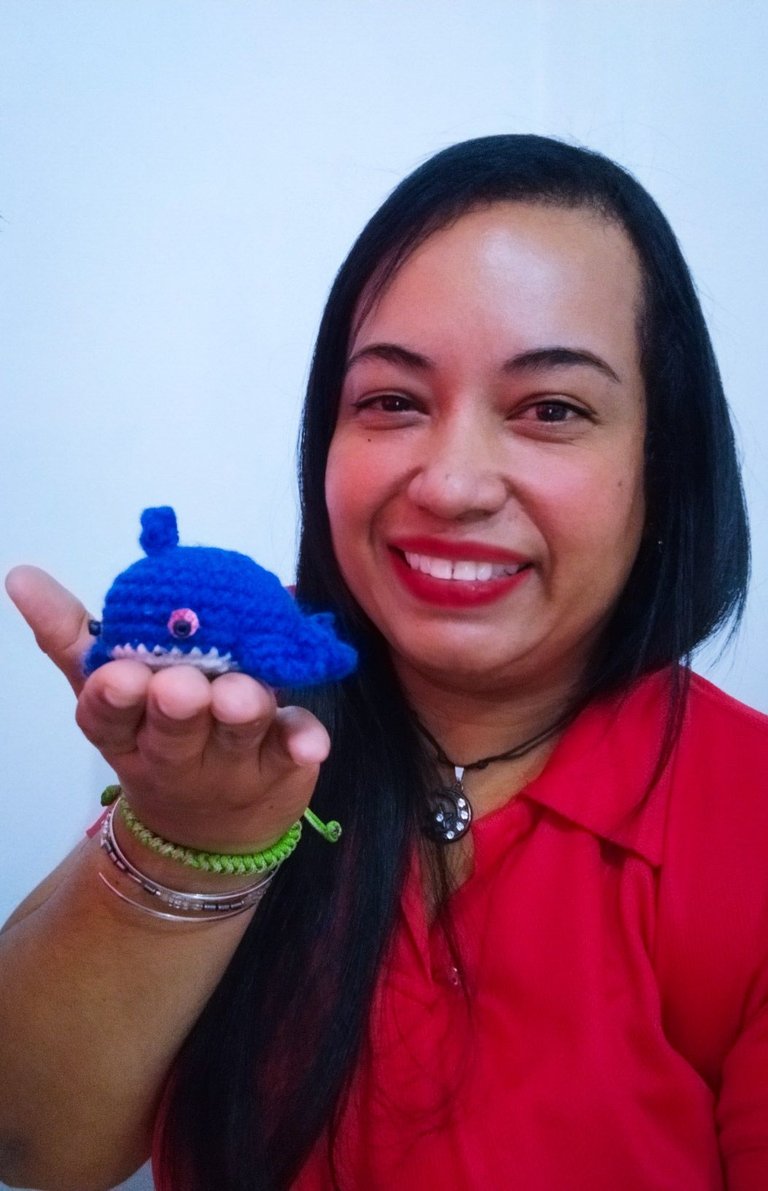
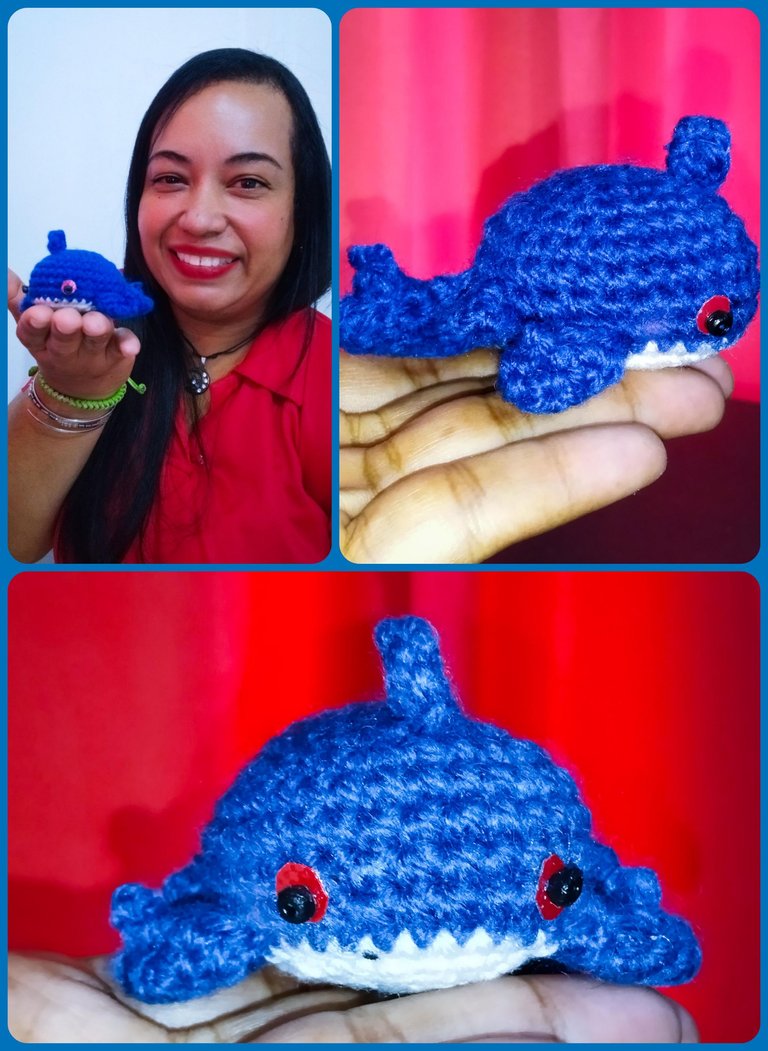
Para los detalles de la cara, vamos a recortar dos cΓ­rculos en foami rojo y con pegamento textil lo colocamos a la pieza y encima le pegamos las cuencas negras, para conformar la parte del ojo. vamos a tejer con hilo azul todos los detalles de los cachitos que tiene Γ©ste personaje para darle mayor realismo, comenzando con la aleta de la cabeza, las cuatro de los laterales, las dos de las aletas y las dos de la cola. Para darle ese toque cute retocamos las mejillas con blush en tono rosa y listo ya tenemos culminado nuestro personaje de Water Whale. El resultado me enamoro y deseo de corazΓ³n tambiΓ©n haya sido de su agrado.

πŸ³πŸƒπŸŒΈπŸ‹πŸŒΏπŸŒ·πŸ³πŸƒπŸŒΈπŸ‹πŸŒΏπŸŒ·πŸ³πŸƒπŸŒΈπŸ‹πŸŒΏπŸŒ·

1707416883920.jpg

πŸ³πŸƒπŸŒΈπŸ‹πŸŒΏπŸŒ·πŸ³πŸƒπŸŒΈπŸ‹πŸŒΏπŸŒ·πŸ³πŸƒπŸŒΈπŸ‹πŸŒΏπŸŒ·

πŸ³πŸƒπŸŒΈπŸ‹πŸŒΏπŸŒ·πŸ³πŸƒπŸŒΈπŸ‹πŸŒΏπŸŒ·πŸ³πŸƒπŸŒΈπŸ‹πŸŒΏπŸŒ·

1707416883892.jpg

πŸ³πŸƒπŸŒΈπŸ‹πŸŒΏπŸŒ·πŸ³πŸƒπŸŒΈπŸ‹πŸŒΏπŸŒ·πŸ³πŸƒπŸŒΈπŸ‹πŸŒΏπŸŒ·

I'll say goodbye until a new opportunity, Cheers!

Me despido hasta una nueva oportunidad, Saludos!!

All images are my property, taken with Redmi 9T and edited with Photoshop express for Android.

Todas las imΓ‘genes son de mi propiedad, tomadas con Redmi 9T y editadas con la aplicaciΓ³n Photoshop express para Android.

πŸ³πŸƒπŸŒΈπŸ‹πŸŒΏπŸŒ·πŸ³πŸƒπŸŒΈπŸ‹πŸŒΏπŸŒ·πŸ³πŸƒπŸŒΈπŸ‹πŸŒΏπŸŒ·

1707416883874.jpg

πŸ³πŸƒπŸŒΈπŸ‹πŸŒΏπŸŒ·πŸ³πŸƒπŸŒΈπŸ‹πŸŒΏπŸŒ·πŸ³πŸƒπŸŒΈπŸ‹πŸŒΏπŸŒ·

Sort: Β 

untitled.gif

Thanks

Siempre he querido aprender a tejer, la ballenita te quedΓ³ muy linda, me gusta para un llavero, gracias por compartir bendiciones πŸ’š

Hola @nill2021 me alegra que le haya gustado, anΓ­mese a aprender es muy fΓ‘cil

Loading...

Te quedo muy lindo, y tierno

Ay que bella te quedΓ³ esa ballenita 😍😍 felicidades por el excelente trabajo que nos compartes, una creatividad pieza en Amigurumi, saludos πŸ«‚

Really cute design for holozing character! thanks for share!

Hermoso amigurumi tengo que aprender a hacerme uno!

Congratulations, your post has been upvoted by @dsc-r2cornell, which is the curating account for @R2cornell's Discord Community.

Curated by Blessed-girl

r2cornell_curation_banner.png

Enhorabuena, su "post" ha sido "up-voted" por @dsc-r2cornell, que es la "cuenta curating" de la Comunidad de la Discordia de @R2cornell.

Visit our Discord - Visita nuestro Discord