Greetings to all! I hope you are enjoying a great day and I welcome you all to my blog. On this occasion, I share with you my digital illustration of the Light Healer from Holozing. Let's get started.
¡Saludos a todos! Deseo que estén disfrutando de un excelente día y les doy la más cordial bienvenida a mi blog. En esta ocasión, les comparto mi ilustración digital de la Light Healer de Holozing. Comencemos.

Start / Inicio
To begin, I started by tracing the base structure of the character's body using a blue color. This color choice allowed me to clearly differentiate the structure from the sketch I will do next.
After establishing the base structure, I continued with the sketch using a red color. During this stage, I focused on adding all the characteristic elements of the character, such as his clothing, hair and other details that define him.
Para comenzar, empecé trazando la estructura base del cuerpo del personaje utilizando un color azul. Esta elección de color me permitió diferenciar claramente la estructura del boceto que haré a continuación.
Luego de establecer la estructura base, continuó con el boceto utilizando un color rojo. Durante esta etapa, me enfoqué en agregar todos los elementos característicos del personaje, como su vestimenta, cabello y otros detalles que lo definen.

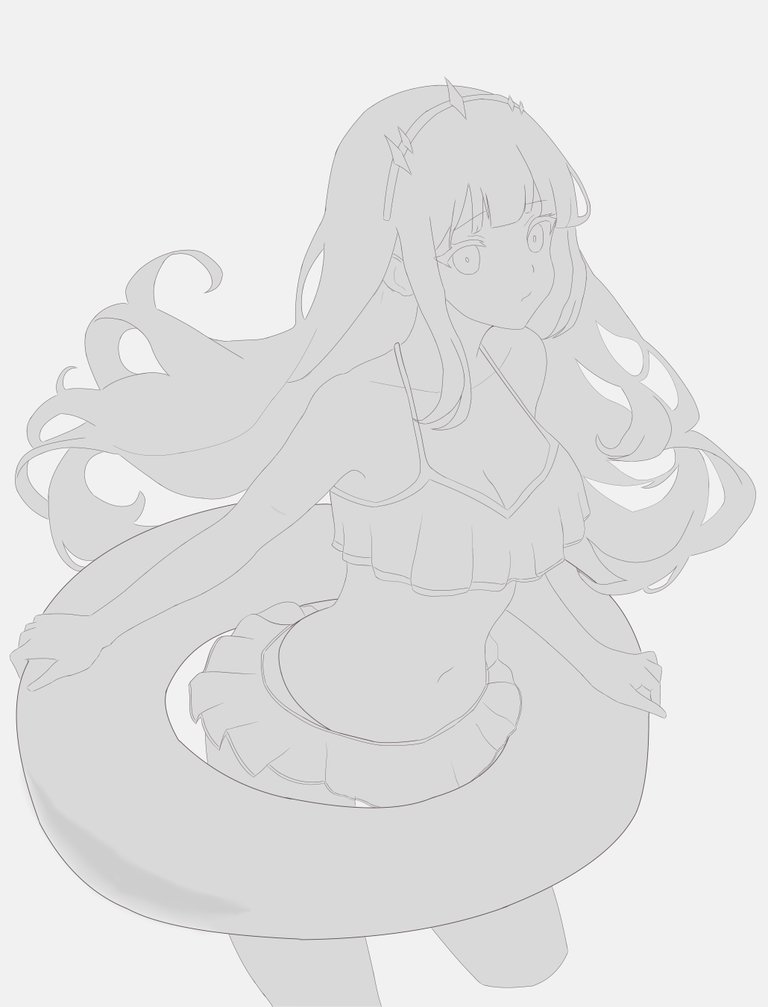
Once the sketch was completed, I proceeded to give it more definition by means of LineArt or outlining. I used a black tone to outline the contours of the character, highlighting each of its features and details.
Una vez completado el boceto, procedí a darle mayor definición mediante el LineArt o delineado. Utilicé un tono negro para trazar los contornos del personaje, destacando cada uno de sus rasgos y detalles.

After finishing the LineArt, I chose to include an extra layer with a gray tone as a base throughout the illustration. This layer will provide the necessary base to later add lights and shadows, giving more depth and realism to the image.
Después de finalizar el LineArt, opté por incluir una capa extra con un tono gris como base en toda la ilustración. Esta capa proporcionará la base necesaria para añadir posteriormente luces y sombras, otorgando mayor profundidad y realismo a la imagen.
Once I applied the base layer to the illustration, I went on to add shadows to the character using a slightly darker shade of gray than the base gray.
After establishing the initial shadows, I opted to further intensify the contrast and depth by using a darker shade of gray than the previous one. This allowed me to incorporate more pronounced shadows in specific areas of the character.
Una vez que apliqué la capa base a la ilustración, prosiguió agregando sombras al personaje empleando un tono de gris ligeramente más oscuro que el gris base.
Después de establecer las sombras iniciales, opté por intensificar aún más el contraste y la profundidad utilizando un tono de gris más oscuro que el anterior. Esto me permitió incorporar sombras más pronunciadas en áreas específicas del personaje.
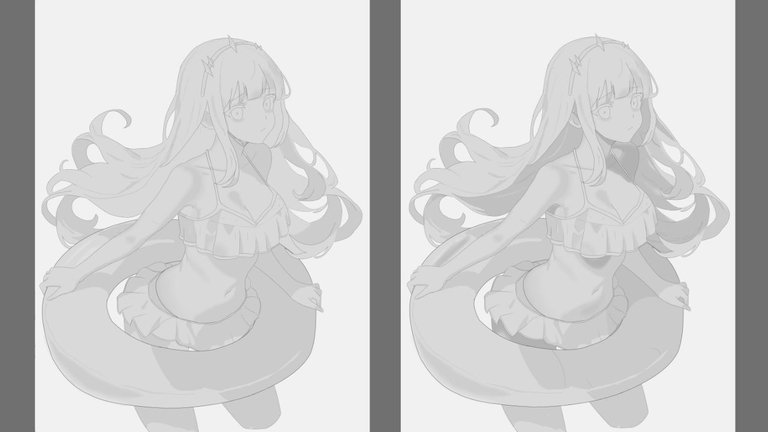
Once the shadows are finished, it's time to add lights and details to the character. To start, I chose a lighter shade of gray than the base color and the shadows applied previously. Using this tone, I started to add soft lights in the areas where the light hits directly on the character.
Una vez finalizadas las sombras, es el momento de añadir luces y detalles al personaje. Para comenzar, elegí un tono de gris más claro que el color base y las sombras aplicadas anteriormente. Usando este tono, comencé a agregar luces suaves en las áreas donde la luz incide directamente sobre el personaje.

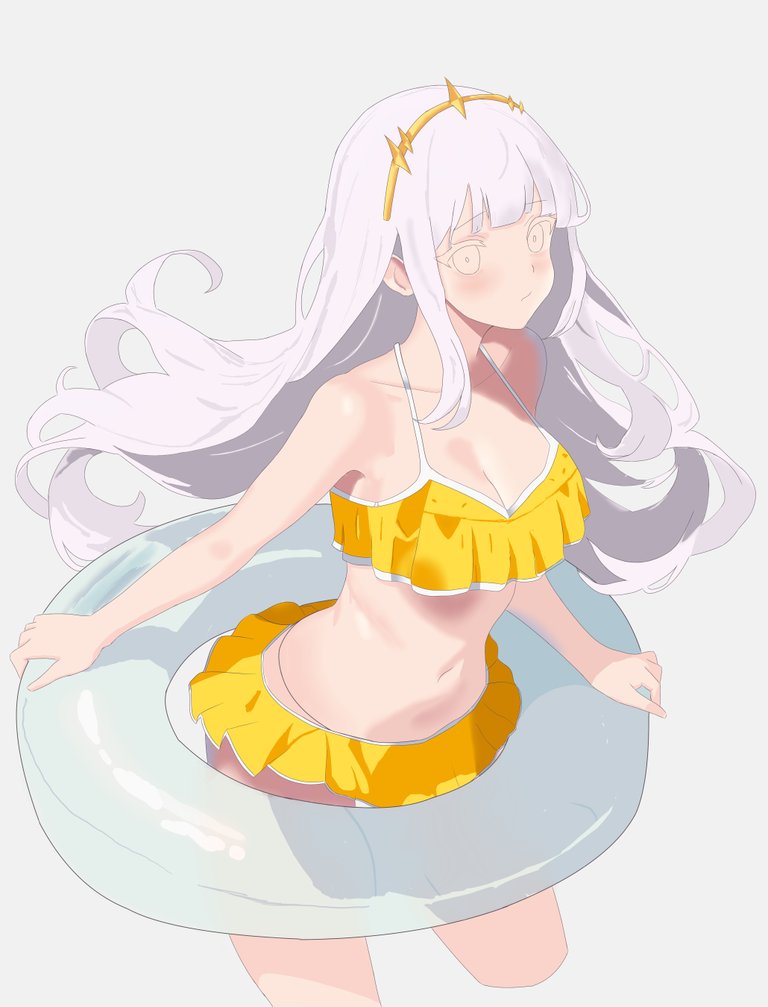
After completing the shading process, the LineArt and all the other details, it was time to color the character in its entirety. This step is fundamental, as it transforms the illustration from gray tones into a vibrant and full of life image. The only part I didn't color were the eyes, as I will leave them for later.
Después de completar el proceso de sombreado, el LineArt y todos los demás detalles, llegó el momento de dar color al personaje en su totalidad. Este paso es fundamental, ya que transforma la ilustración de tonos grises en una imagen vibrante y llena de vida. La única parte que no coloreé fueron los ojos, ya que los dejaré para mas adelante.
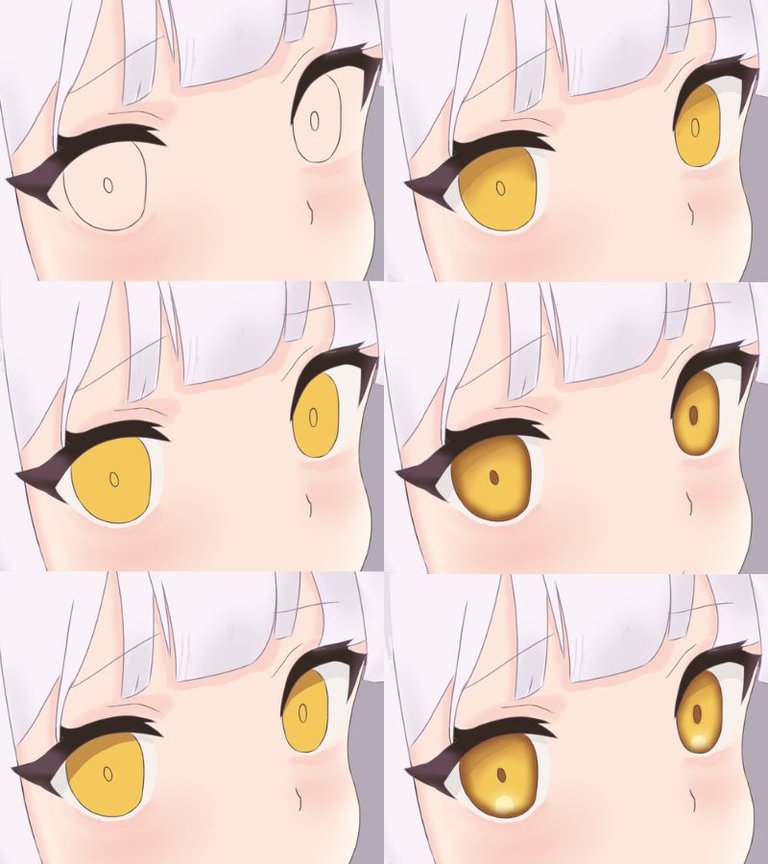
After adding all the color to the drawing, it was time to color the eyes. To create striking and expressive eyes, I started by shading the iris with a darker shade of yellow than the base color. Next, I made the pupil with an even darker yellow. Finally, I added sparkles to the iris using a low opacity white color to give it a more realistic and bright look. As seen in the image below
Después de añadir todo el color al dibujo, llegó el momento de colorear los ojos. Para crear ojos llamativos y expresivos, comenzando a sombrear el iris con un tono de amarillo más oscuro que el color base. A continuación, hice la pupila con un amarillo aún más oscuro. Finalmente, agregué destellos al iris usando un color blanco de baja opacidad para darle un aspecto más realista y brillante. Como se ve en la imagen de abajo.
And as a final step, I used different shades of blue to create the beach background to complement the image of the character.
Y como paso final, empleé distintos matices de azules para crear la playa de fondo que complemente la imagen del personaje.
Final Result / Resultado Final:
El dibujo lo hice yo, en mi computadora con un tableta gráfica usando Clip Studio Paint.
Para la miniatura utiliza la aplicación Canva en su versión Pro.
Para la versión en inglés use el traductor DeepL
El dibujo fue hecho por mi, en mi computadora con una tableta gráfica con el programa Clip Studio Paint
Para la miniatura utiliza la aplicación Canva en su versión Pro.
Para la versión inglesa utilice el traductor DeepL
Congratulations @dashiro! You have completed the following achievement on the Hive blockchain And have been rewarded with New badge(s)
Your next target is to reach 100 comments.
You can view your badges on your board and compare yourself to others in the Ranking
If you no longer want to receive notifications, reply to this comment with the word
STOPCheck out our last posts: