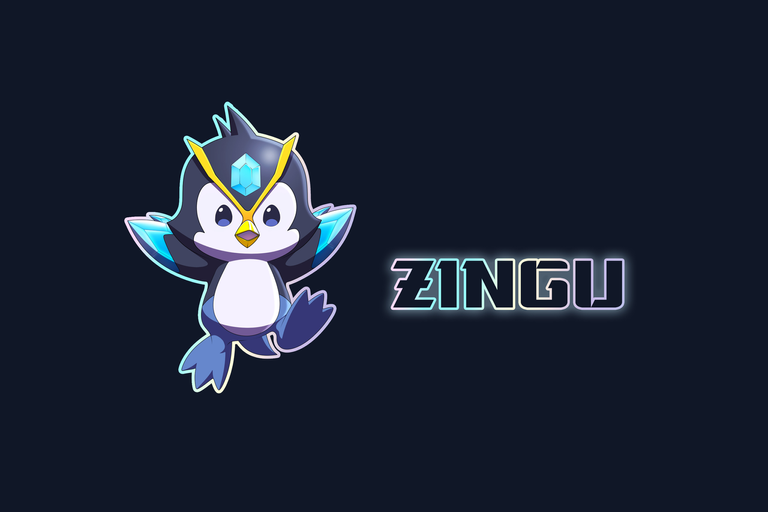
Zingu! ❄️

Hello to the whole Holozing community!
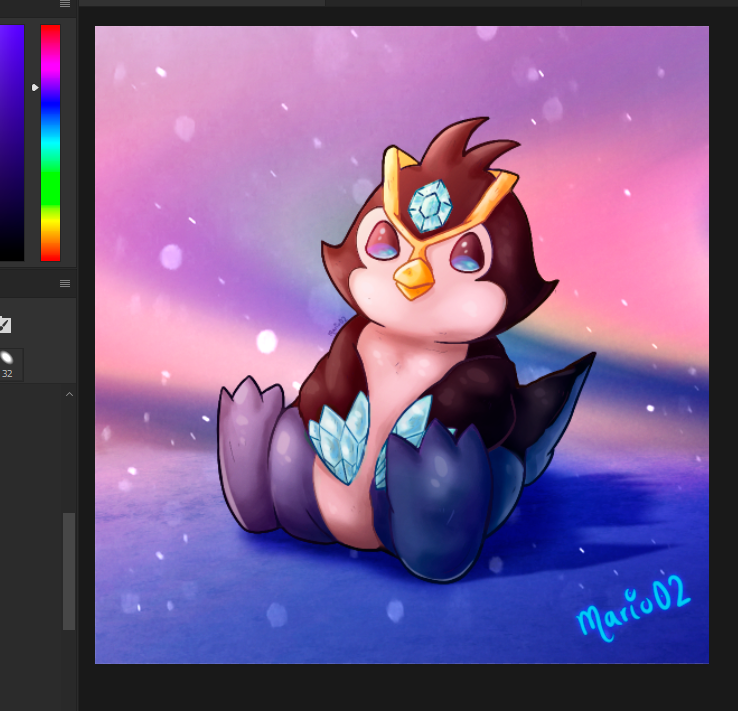
Taking advantage of these holidays I've been working on a new Fan-Art illustration of one of the Holozing characters. This time I decided to make my own version of Zingu, this little and adorable penguin that I liked a lot for his great design. Making this illustration was a challenge, I wanted to experiment with my style and try different ways of colouring and finishing, so after several hours of work I was very satisfied with the final result. I hope you like this version, let's start....
¡Hola a toda la comunidad de Holozing!
Aprovechando estos días festivos he podido ir trabajando en una nueva ilustración Fan-Art sobre uno de los personajes de Holozing. Esta vez he decidido realizar mi propia versión de Zingu, este pequeño y adorable pingüino que me gusto mucho por su gran diseño. Hacer esta ilustración fue todo un reto, quería experimentar con mi estilo y probar diferentes formas de coloreado y acabados por lo que luego de varias horas de trabajo quede muy satisfecho con el resultado final. Espero les guste esta versión, comencemos...

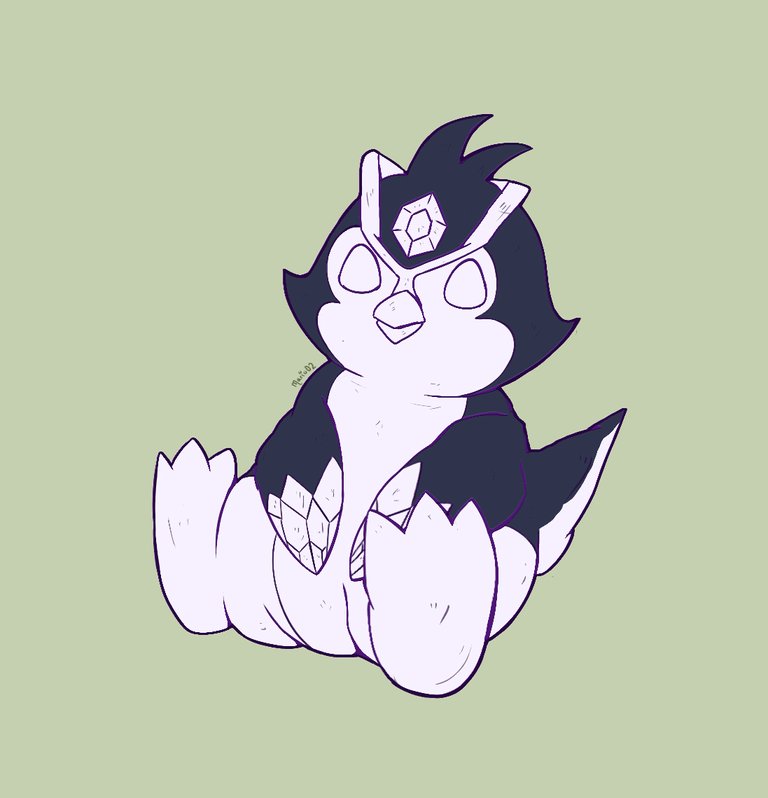
REFERENCE
Creative Process | Proceso Creativo💡
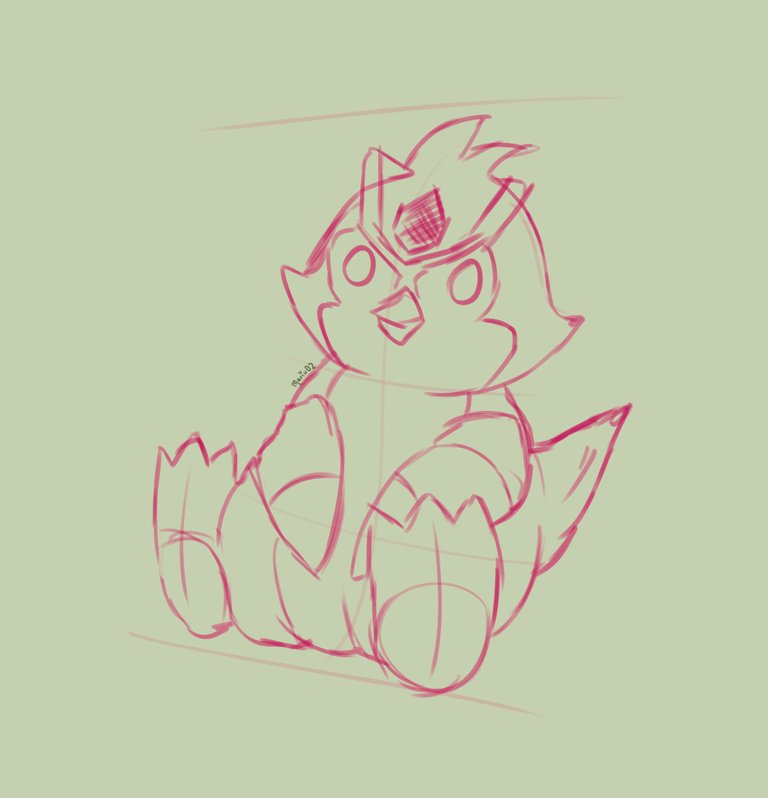
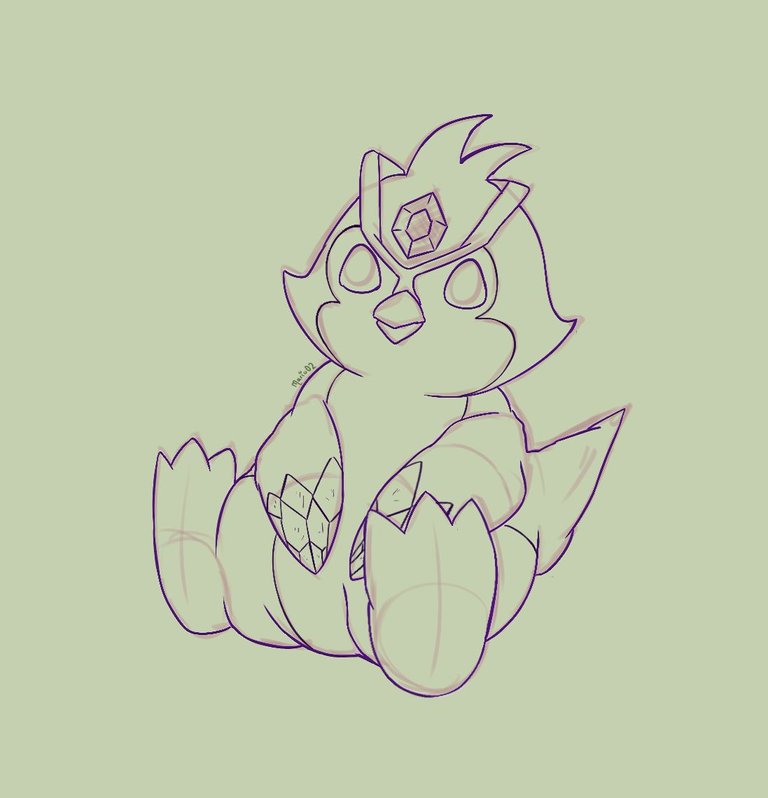
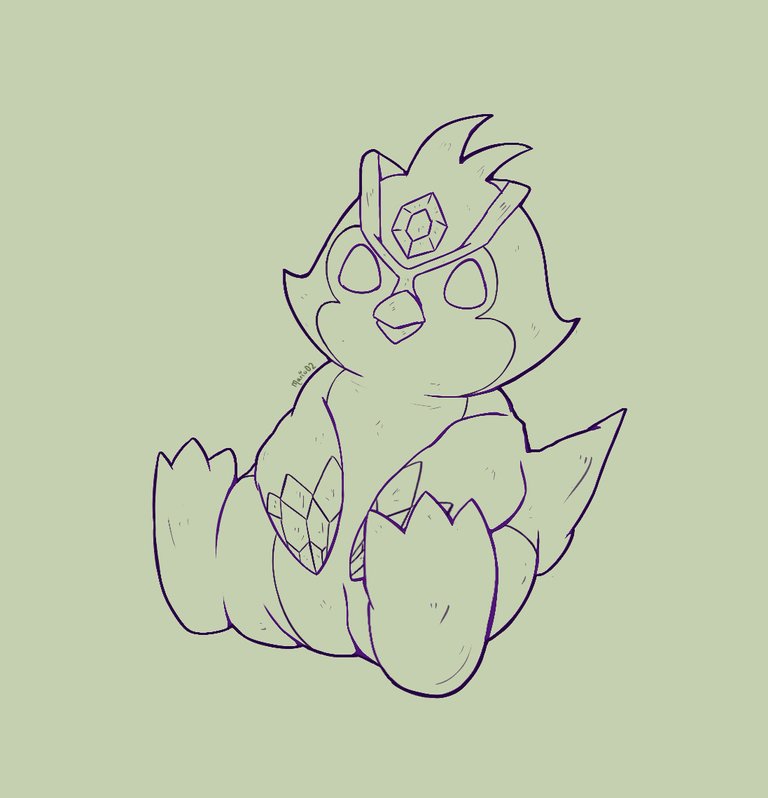
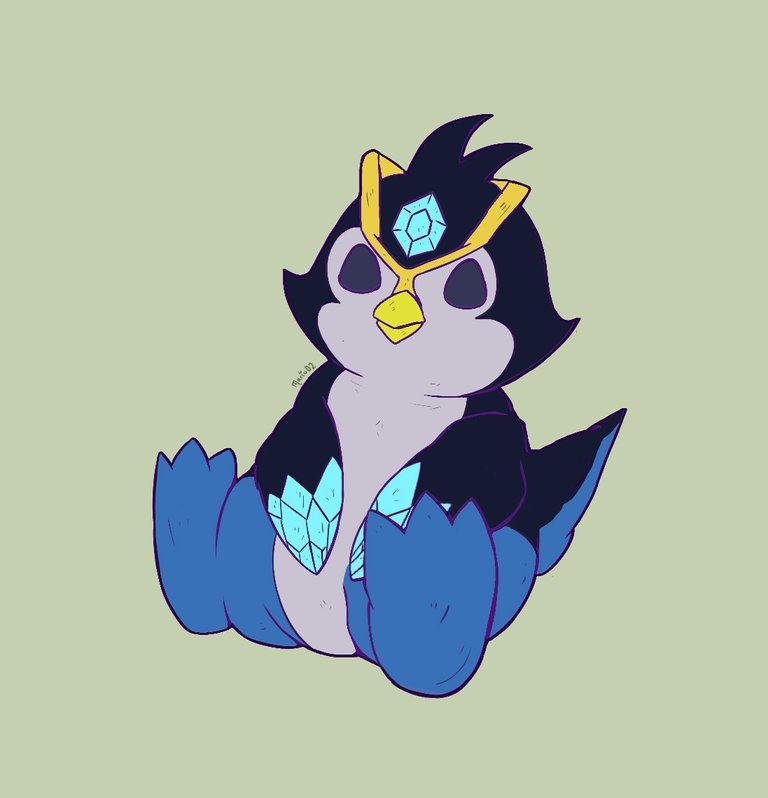
I started with the sketch of the character, in this step I used a thick tip brush and low opacity to work the character in a freer way without giving so many details. Once I had the sketch ready and with the necessary detail, I went on to draw the lineart, in this step I changed the brush for one with a pixelated finish. After marking the character I gave a little more value to the line and its details.
Comencé realizando el boceto del personaje, en este paso utilice un pincel de punta gruesa y baja opacidad para ir trabajando el personaje de forma mas libre sin dar tantos detalles. Una vez tuve el boceto listo y con el detalle necesario pase a trazar el lineart, en este paso cambie de pincel por uno con acabado pixelado. Luego de marcar al personaje le di un poco mas de valor a la línea y sus detalles.
Then I applied the base tones that the character would have, starting first with a general tone and then layering all the tones on top of it in separate layers.
Luego fui aplicando los tonos base que tendría el personaje, comenzando primero por un tono general y por encima fui colocando todos los tonos en capas separadas.
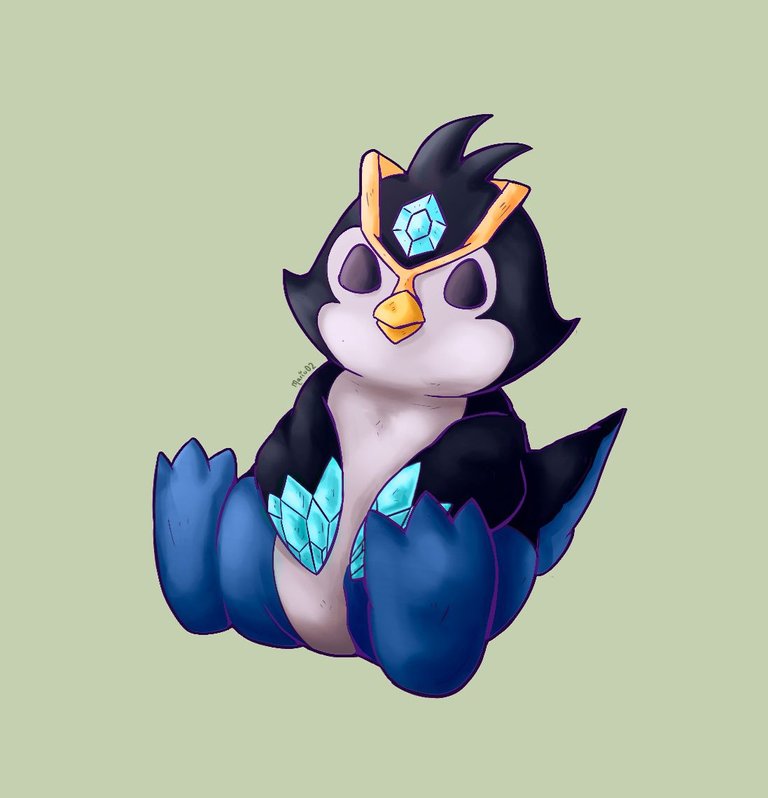
Then I placed the shadows on the character, with a soft brush I was giving volume to the elements of the character separately, I also did this with two levels of intensity to give more depth. Then with the same airbrush and a lighter tone I placed the illuminations, giving more detail on the side with more light intensity.
To give even more detail I applied a gradient with an orange tone and put some glitter with the brush, as well as giving colour to the eyes. Finally I made a blue gradient to work on the background.
Después pase a colocar las sombras en el personaje, con un pincel suave fui dándole volumen a los elementos del personaje por separado, esto también lo hice con dos niveles de intensidad para dar mas profundidad. Luego con el mismo pincel tipo aerógrafo y un tono mas claro fui colocando las iluminaciones, dando mayor detalle en el lado con mas intensidad de luz.
Para dar aun mas detalle aplique un degradado con un tono naranja y coloque unos brillos con el pincel, además de dar color a los ojos. Por último realice un degradado de color azul para trabajar en el fondo.

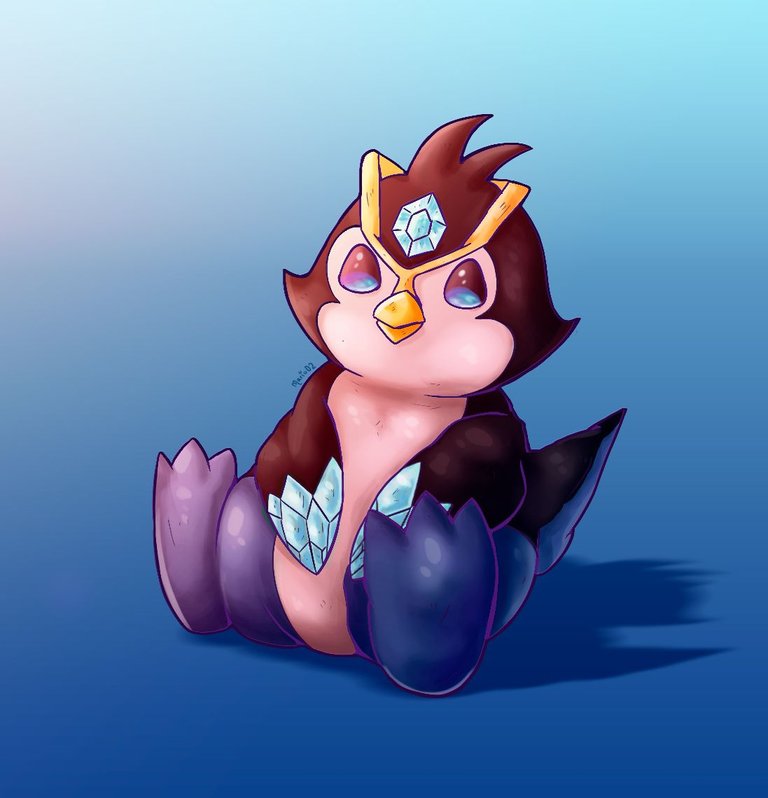
Finally apply colour to the lines to make the character and its elements stand out even more. Finally make the background with the help of paint brushes and textures as well as some colour adjustments.
Thanks so much for watching and see you next time! 🙏
Para finalizar aplique color a las líneas para destacar aun mas al personaje y a sus elementos. Por último realice el fondo con ayuda de pinceles de pintura y texturas ademas de algunos ajustes de color.
¡Muchas gracias por ver y hasta la próxima! 🙏
Tools Used | Herramientas Utilizadas:
- Photoshop CC versión 64 bits
- Tablet Huion H610 PRO V2

The illustration and separators used in the post are my property.
Translated with DeepL (free versión)
Hola Mario, te ha quedado demasiado tierno y hermoso, lo amé.
Holaaaa @equipodelta muchas gracias!!
Te mando un gran saludo!
Love the colours bro 🤩
Thank you bro! 🙏
Simple but very cute, job well done Bro..
!PIZZA
Thank you very much my friend! I'm glad you liked it
$PIZZA slices delivered:
@eustace-kidd(1/5) tipped @mario02
Congratulations @mario02! You have completed the following achievement on the Hive blockchain And have been rewarded with New badge(s)
Your next target is to reach 20000 upvotes.
You can view your badges on your board and compare yourself to others in the Ranking
If you no longer want to receive notifications, reply to this comment with the word
STOPCheck out our last posts: