Famele Forest Healer

English
Greetings Holozing Community, I hope you are doing well.
This is my first post for the community, a few days ago I saw that several artists that I follow uploaded some very cool Fanart:
Holo Fanarts
I want to try it too!
Before I get down to work I was checking the game page, I even bought some game coins beads, I'm not sure how all this goes, but I promise to learn well hehe.
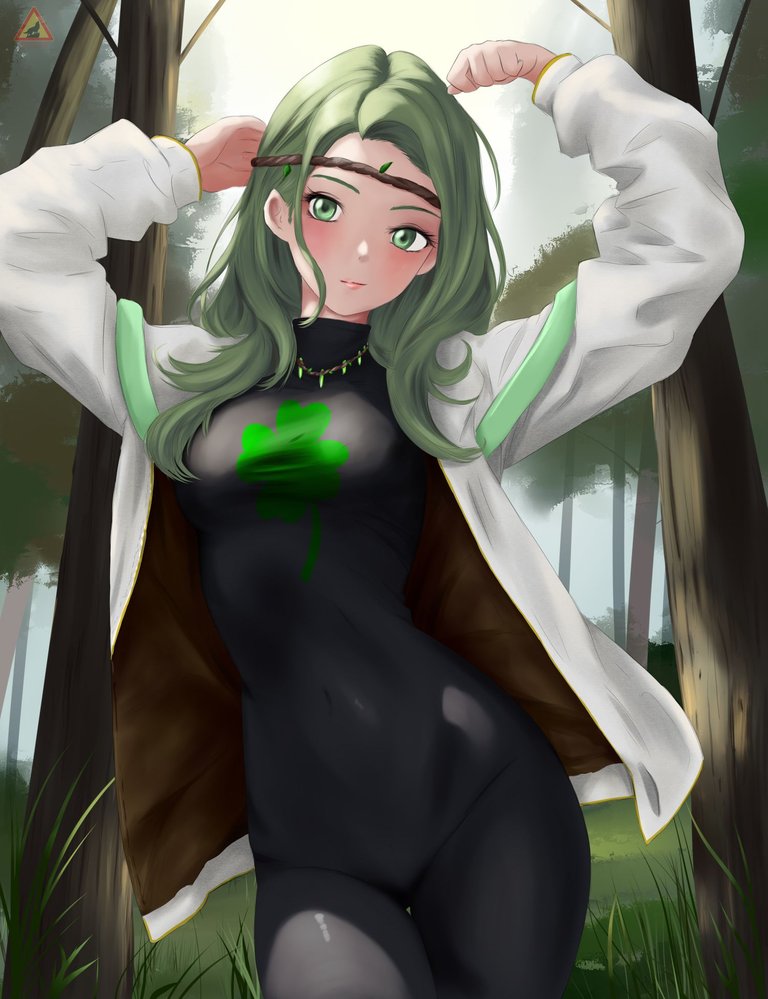
The character I chose is Forest Healer I really liked his design and especially his green hair I love the color green....
This illustration took me some time to finish it, but I am very happy with the result. I hope you like it.
Español
Saludos Comunidad de Holozing, espero esten muy bien.
Este en mi primer post para la comunidad, hace unos dias atrás vi que varios artistas a los que sigo subieron varios Fanart muy geniales:
Holo Fanarts
Yo tambien quiero intentarlo!
Antes de ponerme manos a la obra estuve revisando la página del juego, incluso compré unas cuentas monedas del juego, no estoy seguro de como va todo esto, pero prometo aprender bien jeje.
El personaje que elegí es Forest Healer Me gusto muchísimo su diseño y sobre todo su cabello verde amo el color verde...
Esta ilustración me llevo algo de tiempo terminarla, pero estoy muy feliz con el resultado. Espero les guste.
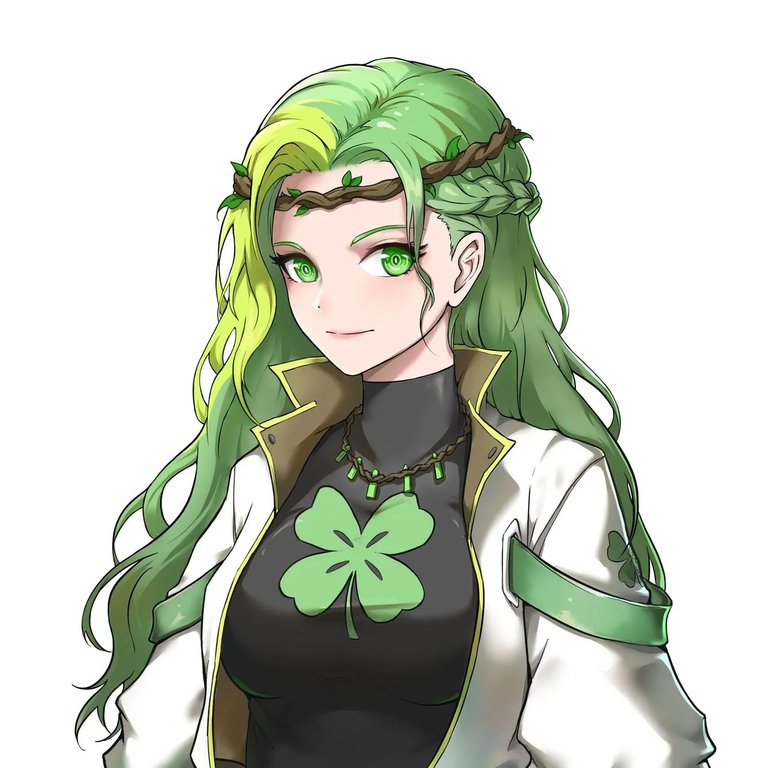
Reference
Character: Forest Healer
Process/Proceso
I will briefly describe or at least try to be as brief as possible in describing the process, it really takes a lot of steps and also a lot of time to finish it.
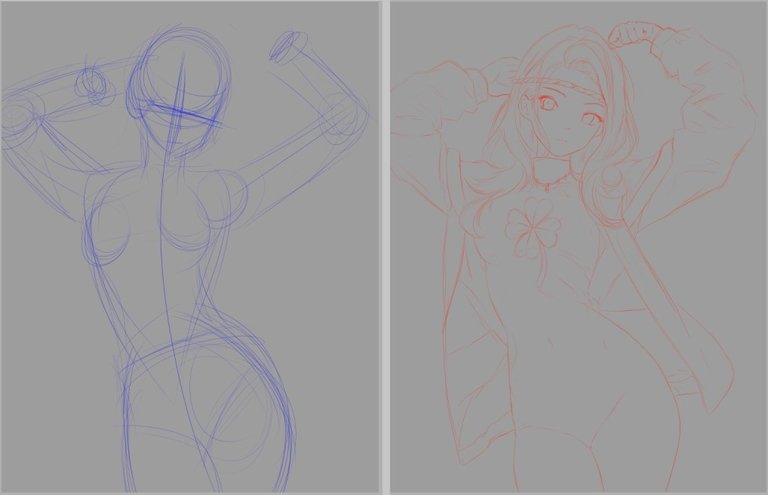
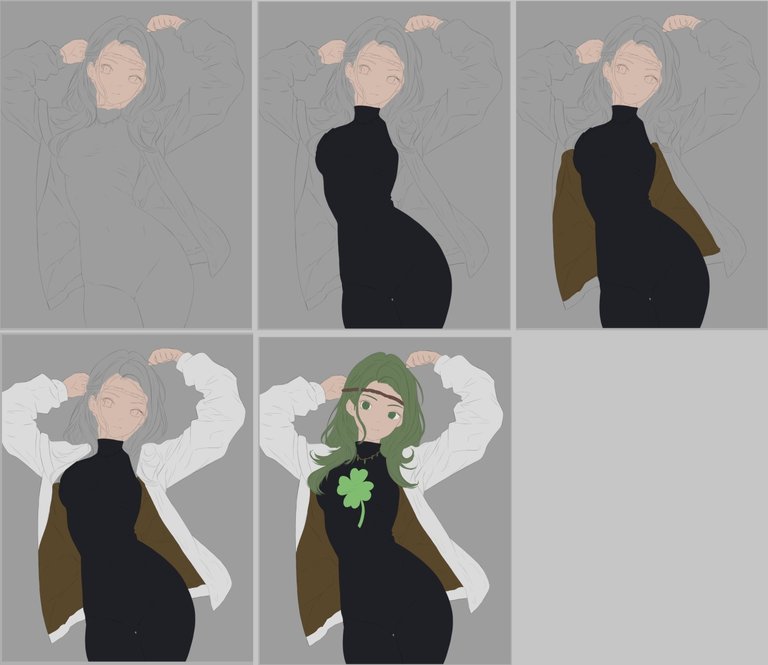
The first step was to create the sketch, for this we start with the basic shape in blue color, the next step will be to create the sketch in red color in a new layer.
Describiré brevemente o al menos trataré de ser lo más brevemente posible en la descripción del proceso, realmente lleva muchos pasos y también mucho tiempo para terminarlo.
El primer paso fue crear el boceto, para esto iniciamos con la forma básica en color azul, el siguiente paso será crear el boceto en color rojo en una nueva capa.
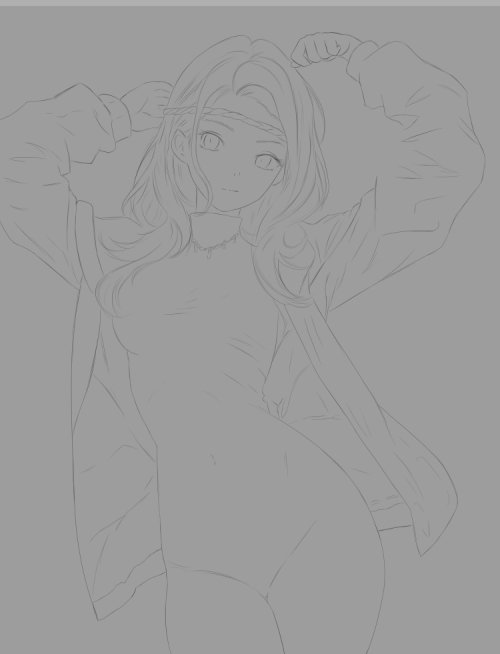
Well, on a new layer we will create the lineart, basically it would be to draw all the lines that we will leave in the final drawing, as you could notice the clover is not here, because I plan to do it with colors without lines.
Bien, sobre una nueva capa crearemos el lineart, básicamente sería dibujar todas las líneas que dejaremos en el dibujo final, como pudieron notar el trébol no está aquí, pues tengo pensado hacerlo con colores en sin líneas.
We apply the base color using different layers, this step is long and somewhat repetitive so we will make a summary.
The palette used is very similar to the one in the reference.
Aplicamos el color base usando diferentes capas, este paso es largo y algo repetitivo por lo que haremos un resumen.
la paleta usada es una muy similar al de la referencia.
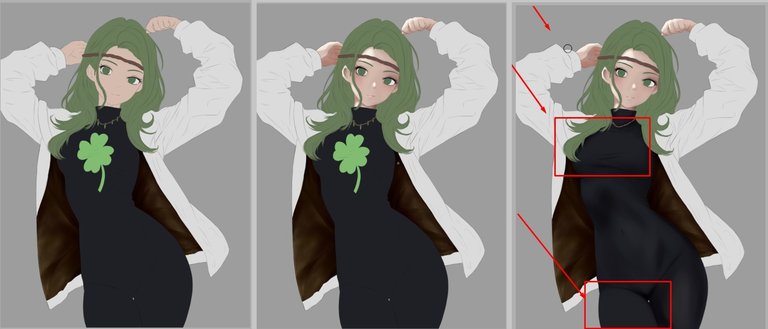
With the base color ready, we can apply the shadows and highlights.
We must keep in mind where the main source of light will come from and apply this lighting logically on the body and clothes of our character.
Con el color base listo, podemos aplicar las sombras y luces.
Debemos tener presente de donde vendrá la mayor fuente de luz y aplicar esta iluminación con logica sobre el cuerpo y ropa de nuestro personaje.
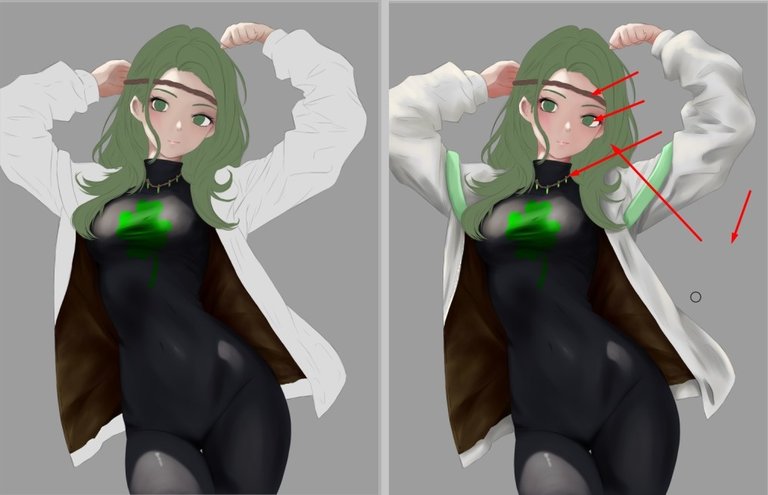
After applying all the lights, effects and shadows, we have little left to finish.
Regarding the clover use the multiply effect to make it fit the shadows of the lower layer.
Después de aplicar todas las luces, efectos y sombras nos queda poco para terminar.
Con respecto al trébol use el efecto multiplicar para que se ajuste a las sombras de la capa inferior.
Once the character is ready it is time to create a background with a similar quality, the first step is to create the farthest layer and add more details on it, with this we achieve that depth and facilitates editing when adding lights.
Una vez listo el personaje es momento de crear un fondo con una calidad similar, el primer paso es crear al capa más lejana y sobre esa agregar más detalles, con esto logramos esa profundidad y facilita la edición al momento de agregar luces

As well as the character we must give it logic where the light interacts.
Al igual que el personaje debemos darle lógica en donde interactúa la luz.
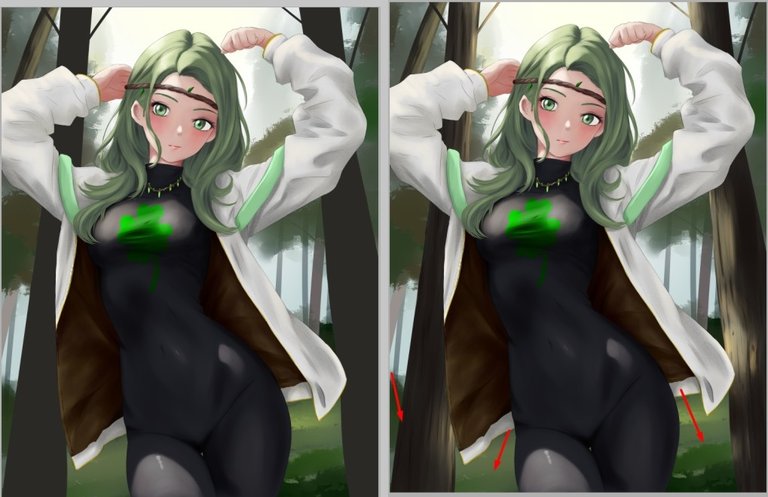
Finally, this was the final result, it took me some time to finish it, but I think the result was very good, with respect to the steps I tried to summarize a lot the whole process to not bore you jeje
Finalmente, este fue el resultado final, me llevo algo de tiempo terminarlo, pero creo que el resultado fue muy bueno, con respecto a los pasos trate de resumir muchísimo todo el proceso para no aburrirlos jeje
Friends we reached the end of the post, I hope you liked the final result, I hope to be with you in a new opportunity, See you cowboys!
Amigos llegamos al final del post, espero les haya gustado el resultado final, Espero poder estar con ustedes en una nueva oportunidad, Nos vemos vaqueros!
Tools:
- PaintTool SAI 2
- Inspiroy H640 Pen Tablets
- Corel photo paint x3
- Translator Deepl

Lol sphinwolf has mejorado una barbaridad o:!
Amigo! Que bueno verte de vuelta! Hay mucho que contar. Espero ver pronto tus obras por aquí ! Saludos!
Gras bro ^^ espero quw pronto!
!giphy wow
@sagarkothari88 vote 15%
Via Tenor
| Hive Curators Community | Join Discord | Support Witness | Follow Curation Trail |
Keep Up the good work on Hive ♦️
simply amazing pal!
Awesome~ 😍😍
Arte ante mis ojos hermoso trabajo.
Great job! The pose highlights her body shape nicely. 😍😍
Beautiful job I love the pose and the lighting @sephiwolf 😍