
🔸Sin más que añadir, a continuación los dejo con el paso a paso:
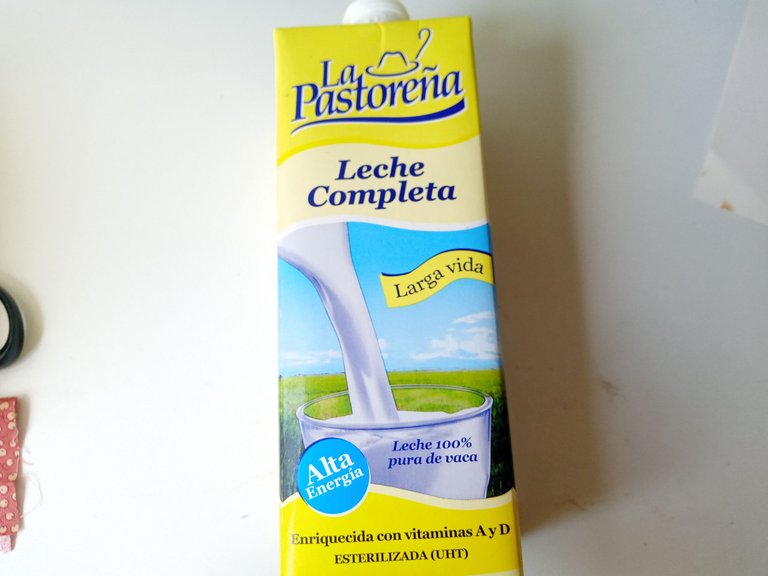
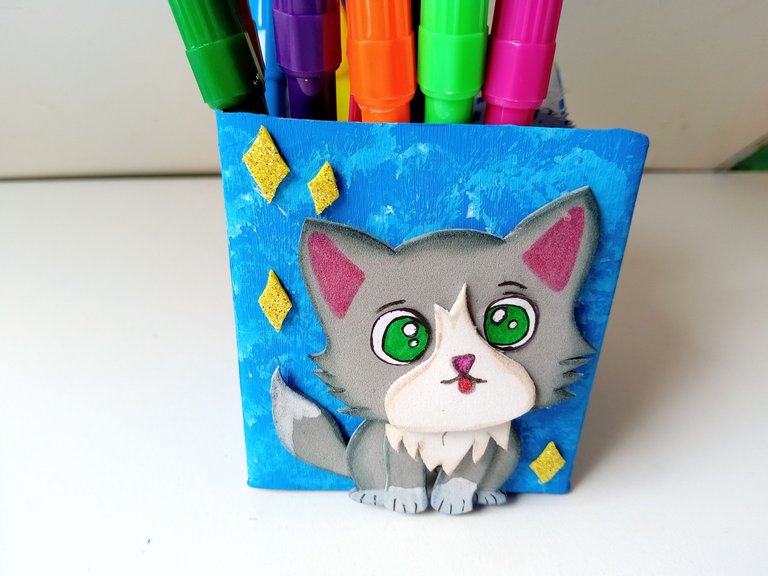
Good afternoon, holozing friends! As always, I'm happy to stop by here again to share a nice Miu Miu-inspired organizer idea. It's been a while since I shared an idea with little Miu Miu. I've mentioned many times that it's my favorite creature. The thing is, when I come up with ideas with it, I never manage to get them to have a nice finish or how I'd like. Even so, I keep trying to improve. This organizer is for a desk and is perfect for the little ones' homework area.
🔸Without more to add, then I leave you with the step by step:
♥️ESPERO QUE TE GUSTE,
¡Empecemos!
♥️I HOPE YOU LIKE IT,
Let's start!

✂️ MATERIALES | ✂️ MATERIALS
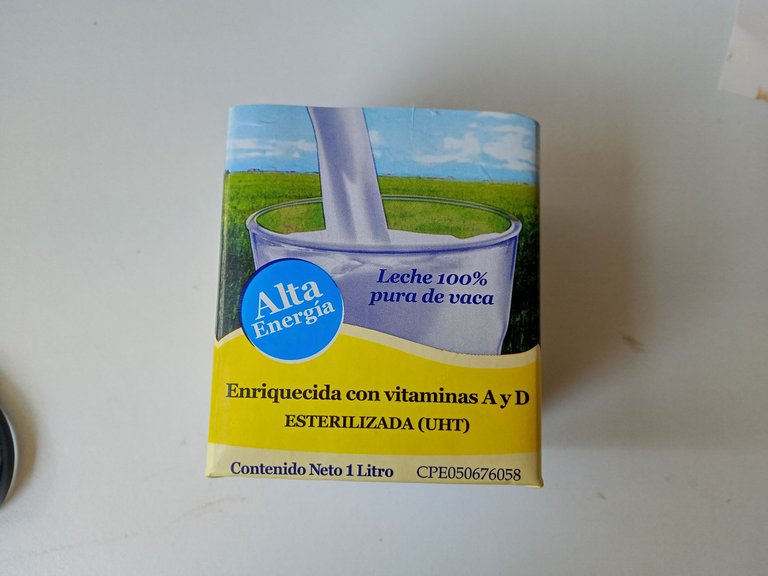
- Envase de cartón.
- Foami escarchado dorado.
- Foami gris.
- Foami blanco.
- Pinturas y marcadores.
- Hoja blanca.
- Pegamento.
- Tijeras.
- Regla.
- Lápiz.
- Cardboard container.
- Gold frosted foam.
- Gray foam.
- White foam.
- Paints and markers.
- White sheet.
- Glue.
- Scissors.
- Ruler.
- Pencil.
PROCEDIMIENTO | PROCESS
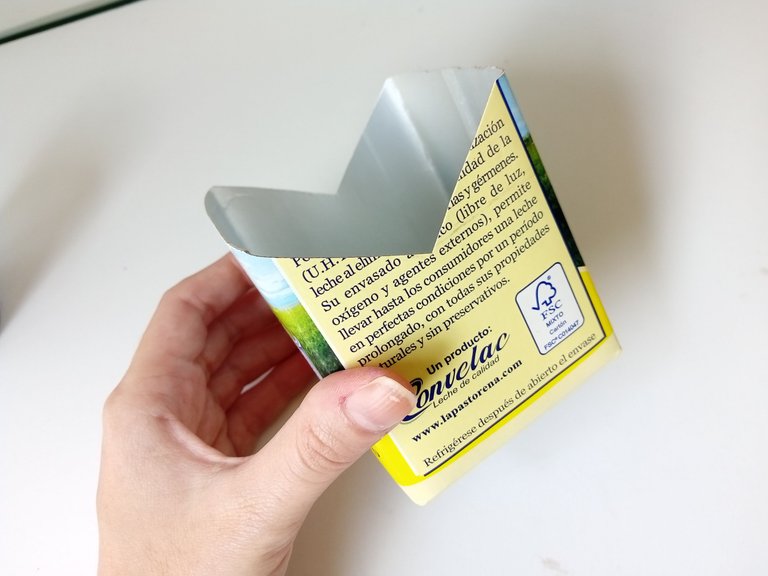
- ✨ PASO 1:
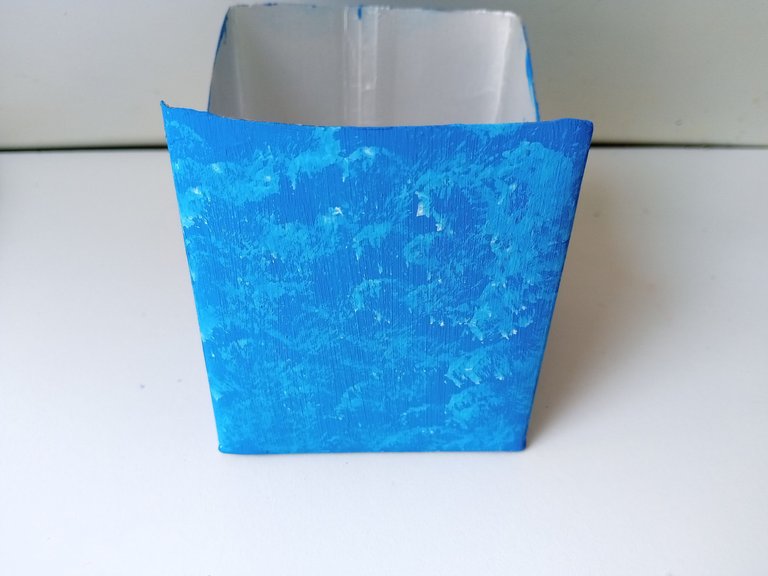
Lo primero que hice fue tomar el envase de cartón y recortar a 8,5 cm de altura. Al estar listo el tamaño deseado, quise dar un diseño diferente a las paredes laterales, así que recorté unos triángulos invertidos de cada lado a los 6 cm de altura.
- ✨ STEP 1:
The first thing I did was take the cardboard container and cut it to 8.5 cm in height. Once I had the desired size, I wanted to give a different design to the side walls, so I cut out some inverted triangles on each side at 6 cm in height.
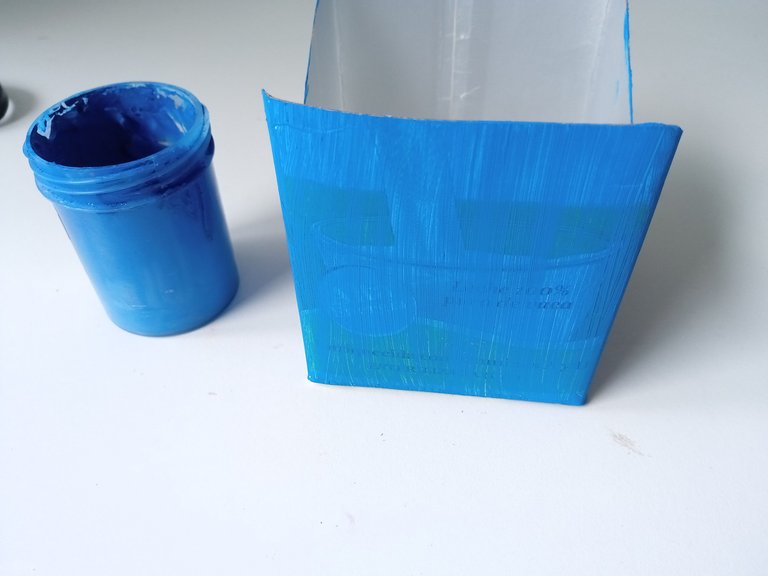
- ✨ PASO 2:
Seguidamente, tomé pintura azul y di aproximadamente dos capas de pintura para cubrir muy bien el fondo del envase. Dejé secar muy bien y luego, con pintura blanca y el mismo pincel, di pequeños golpes para hacer algunas manchas y así dar un contraste. Nuevamente, dejé secar.
- ✨ STEP 2:
Next, I took blue paint and applied about two coats of paint to cover the bottom of the container very well. I let it dry very well and then, with white paint and the same brush, I gave small strokes to make some spots and thus give a contrast. Again, I let it dry.
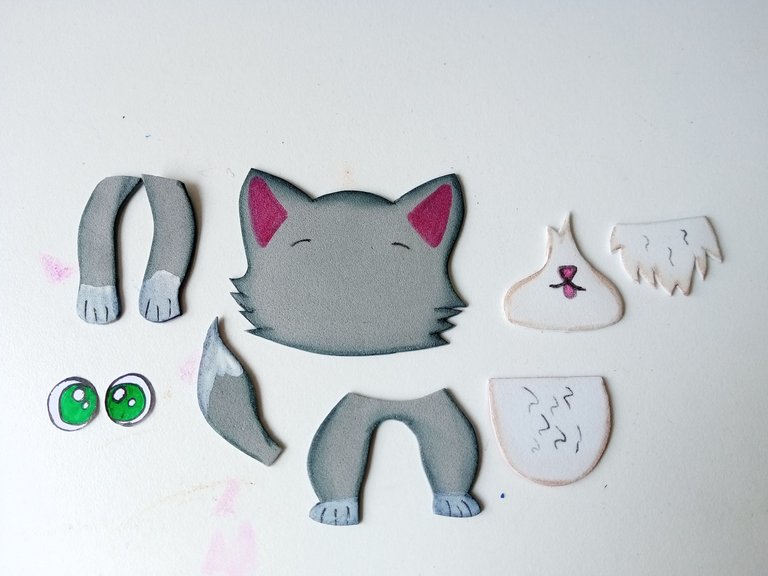
- ✨ PASO 3:
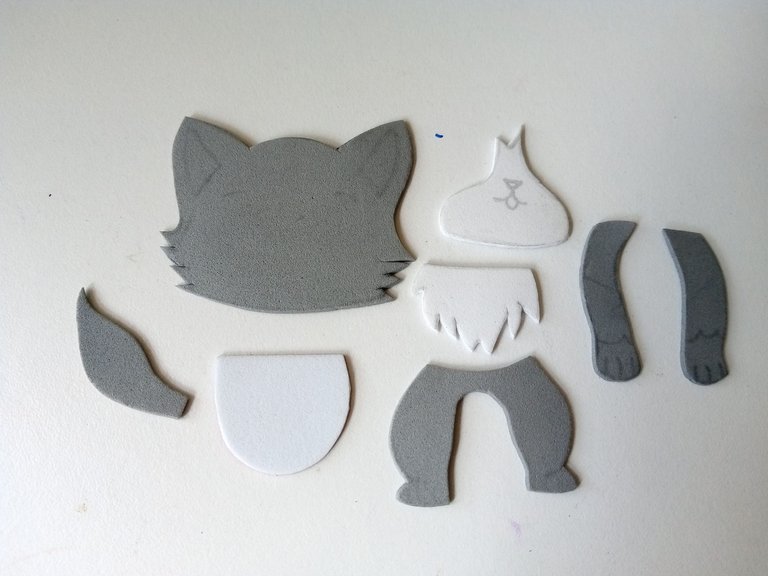
Ahora es momento de dibujar a Miu Miu en una hoja blanca y luego, transferir cada una de las piezas a los colores correspondientes de foami, como explico a continuación:
✨Cabeza de 5 cm x 4 cm, patas 3 cm y cola de 3 cm en foami gris.
✨Hocico 3 cm, parte baja 2 cm y panza de 2 cm en foami blanco.
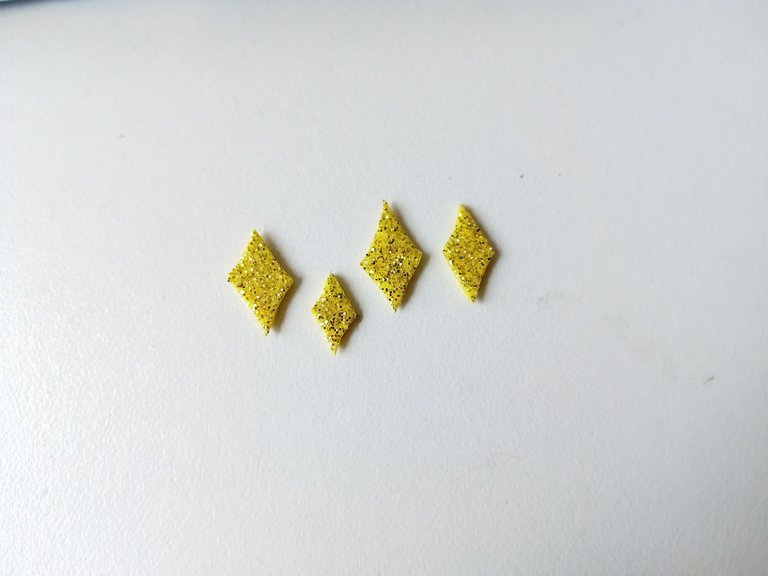
✨Estrellitas en foami escarchado dorado.
- ✨ STEP 3:
Now it's time to draw Miu Miu on a white sheet and then, transfer each of the pieces to the corresponding colors of foam, as I explain below:
✨Head 5 cm x 4 cm, legs 3 cm and tail 3 cm in gray foam.
✨Snout 3 cm, lower part 2 cm and belly 2 cm in white foam.
✨Stars in golden frosted foam.
- ✨ PASO 4:
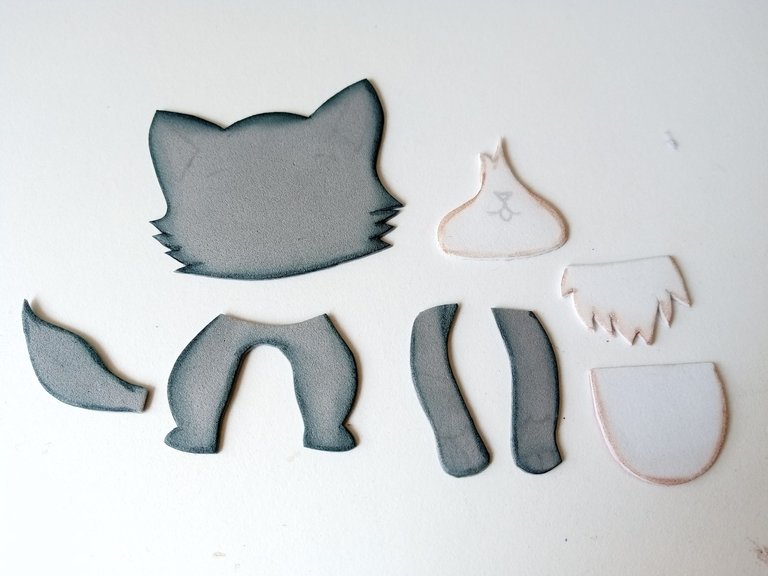
Luego, llegó el momento de dar color con pinturas a los bordes de cada una de las piezas y utilizando colores que combinen o hagan contraste. En este caso, para las piezas en gris utilicé pintura negra y para las piezas en blanco un tono marrón. Al estar secos, llegó el momento de dibujar los detalles de la boca, nariz y parte interna de las orejas. Además, pinté partes de las patas y cola con pintura blanca y los ojos los pinté y recorté del mismo dibujo de la hoja blanca.
- ✨ STEP 4:
Then, it was time to color with paints the edges of each of the pieces and using colors that combine or contrast. In this case, I used black paint for the grey pieces and a brown tone for the white pieces. Once they were dry, it was time to draw the details of the mouth, nose and inner part of the ears. In addition, I painted parts of the legs and tail with white paint and I painted and cut out the eyes from the same drawing on the white sheet.
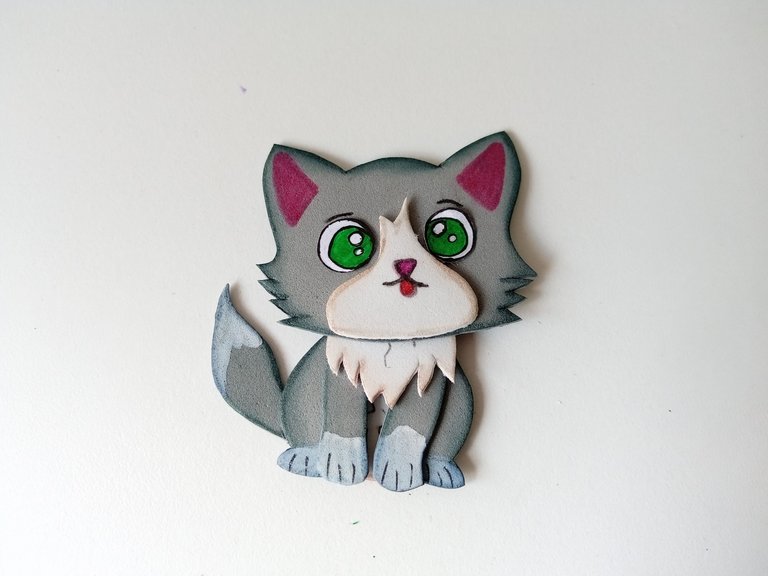
- ✨ PASO 5:
Al estar listas todas las piezas, es momento de pegar. Así que comencé pegando las piezas de la cabeza, luego las del cuerpo y finalmente uní y pegué a una de las paredes del organizador, junto con las estrellas en el fondo. Ya estaría listo para colocar los marcadores, colores o lapiceros si desean.
- ✨ STEP 5:
Once all the pieces were ready, it was time to glue. So I started by gluing the head pieces, then the body pieces and finally I joined and glued them to one of the walls of the organizer, along with the stars in the background. It would now be ready to place the markers, colors or pencils if you wish.
❤️ Hasta la próxima publicación.
❤️ Until the next post.

Todas las fotografías son de mi propiedad.
Separador y Fotos editadas en Canva
All photographs are my property.
Photos edited in Canva
Posted Using INLEO
Ay no pero qué tierno este organizador. Necesito uno 🥰🥰
Gracias mi bella 🤭💕
Congratulations, your post has been curated by @dsc-r2cornell. You can use the tag #R2cornell. Also, find us on Discord
Felicitaciones, su publicación ha sido votada por @ dsc-r2cornell. Puedes usar el tag #R2cornell. También, nos puedes encontrar en Discord
Muchas gracias amigos 💕
Te quedó súper lindo Ami, seguro que tu escritorio quedó bellísimo con ese organizador 🥰🥰