Hello, splinter-warriors. I hope you all are doing well.
Today, I will share a battle that locked me in a stalemate until the units got tired. Eventually, I won because of my overall higher HP. This battle had unique monsters that were well placed by the opposition and me, and perfectly complemented each other's decks with the necessary supports and traits. Also, this game has pointers for strategy hunters and new players.
Without further ado, let's begin!

Battle Conditions

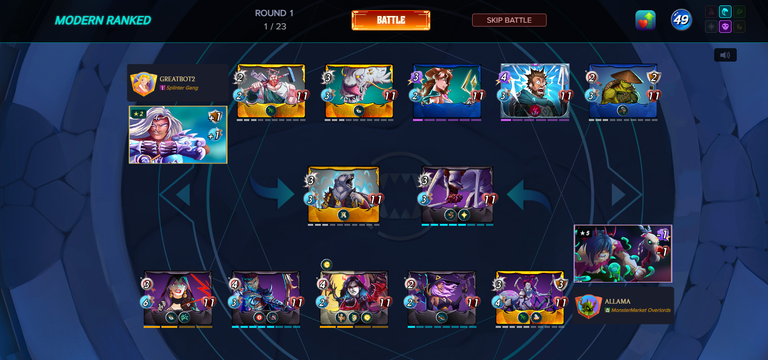
The mana cap is a staggering 49 and there are only 2 summoners to choose from: Water and Death.
Battle Rules:-
- Equalizer: The initial HP of all the units is equal to that of either team's monster with the highest base HP.
Keeping the mana cap, available summoners, and battle rules, I decided to use the summoner that would give me a tactical advantage over my opposition thanks to its abilities and also would provide me high-levelled monsters for cheaper mana.

Battle Details
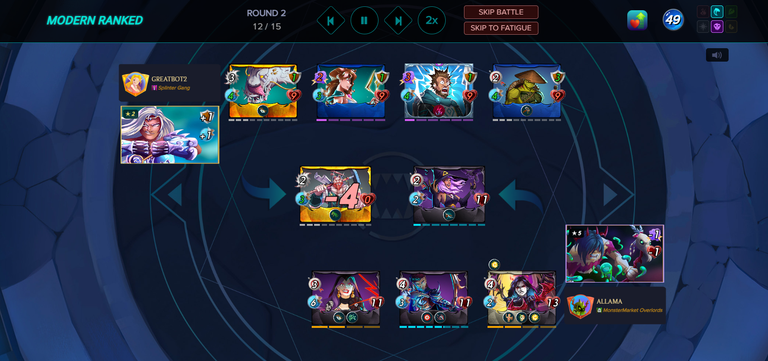
Let's start the deck deconstruction from my side:
Summoner: Thaddius Brood(Ability: Decrease in HP and Magic damage for all enemy units)(Level 5)
Tank: Cursed Windeku(Ability: Thorns, Heal).
Melee Attacker: Arachne Thug(Ability: Reach, Trample).
Ranged Attackers: Queen of Crows(Ability: Close Range), Zyriel(Ability: Weapons Training, Life Leech, Divine Shield), Dhampir Stalker(Ability: True Strike, Deathblow), Lira The Dark(Ability: Opportunity, Snare).
My strategy was to have a tank that would do damage when physically attack me while having the ability to self-heal and have a supporting melee attacker right behind my tank. Then, I put 4 ranged attackers at the back with 4 different abilities. I put the one with close range in front of the rest. In the end, I put the one that had the highest speed, that way it could deter any incoming attacks from the sneak attackers. I placed the leech attacker behind the Queen as it would have more HP should the rest of the ones fall. Lastly, I used Stalker in second last position as a guarantee that I would have a constant damage.
My overall damage per round is 21 with 3 healing and 2 HP gain.

Now, for the opposition's turn.
Summoner: Keyla Frendul(Ability: Increase in Speed and Shield by 1 for all ally monsters)(Level 2 Gold Foil)
Tank: Arkemis The Bear(Ability: Protect).(Highest Base HP in the game).
Melee Attackers: Junker(Ability: Reach), Deeplurker(Ability: Opportunity).
Magic Attackers: Nerissa Tridawn(No Ability), Shock Trooper(Ability: Electrified).
Ranged Attacker: Swamp Spitter(Ability: Repair).
His strategy was to have high shield for all ally units and instantly repair the ones that would fade away. He used a tank that grated the rest of the units an extra 2 shield on top of the shiedl gain from the summoner and used Spitter to ensure the shield are restacked. Additionally, he used a melee attacker to support his tank's onslaught and an opportunity attacker to seek the weakest link. He used 2 magical ttackers to ensure a consistent damage but one of them would cost his 1 HP from each alive monster per round.
His overall damage per round is 17 with 2 shield repair and -6 HP starting from round 2.
Major Events


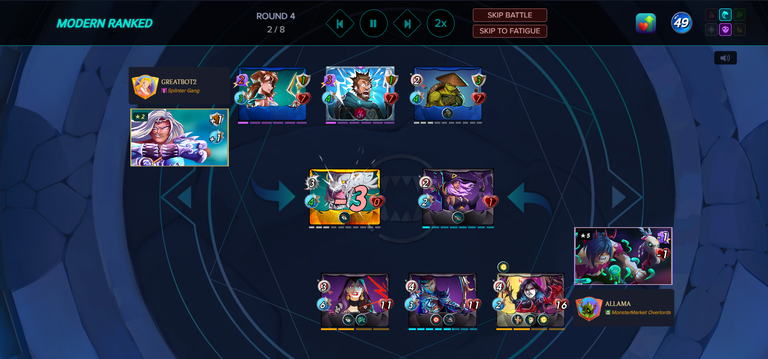
The first unit to fall was my tank while the rest of his units were going strong and unharmed.
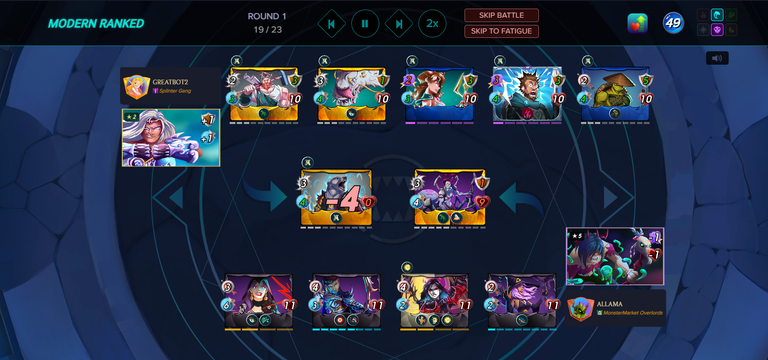
The second unit to fall was his tank. That way, the odds were evened and we got a 5 v 5 situation.
The third unit to fall was my second and final melee attacker. while his second melee attacker was at its low point.
Shortly after, his other unit fell and thus we got a 4 v 4.
At the first quarter of the round, his only melee attacker fell making a 3 v 4 though my close ranged attacker was at his final HP.
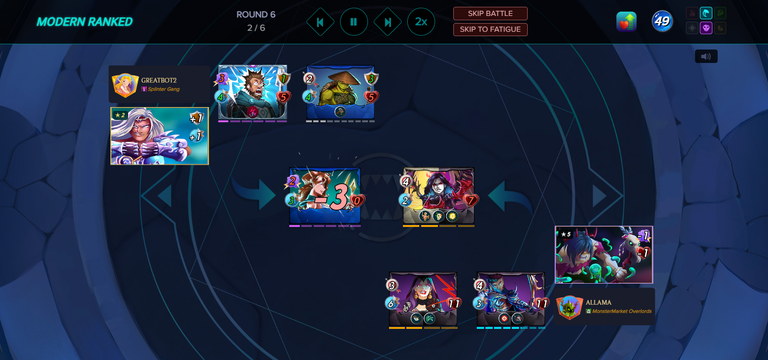
At the first half of the round, his magic attacker fell leaving his attackers while I still had 2 units with full HP. This difference was humongous.
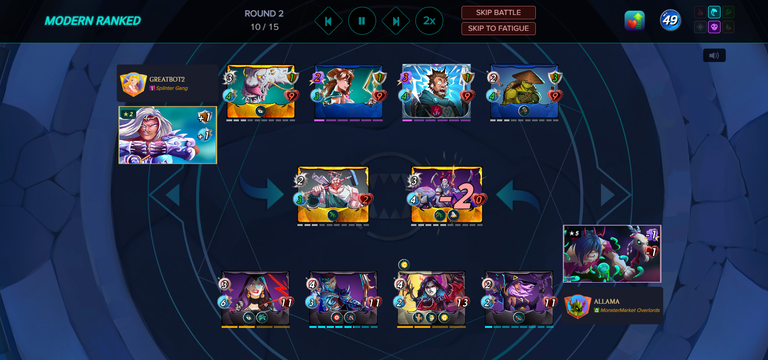
At the first half of the round, my Zyriel fell while making it a 2 v 1 since I can now use only 1 ranged attacker.

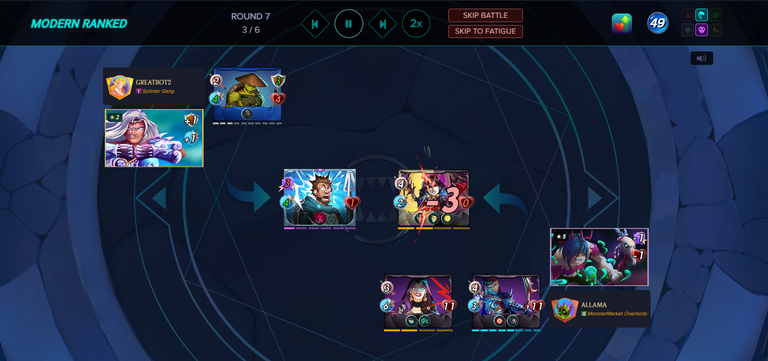
At the start of the round, his Shock Trooper got electrocuted due to it's own ability and also damage his final ally by 1.
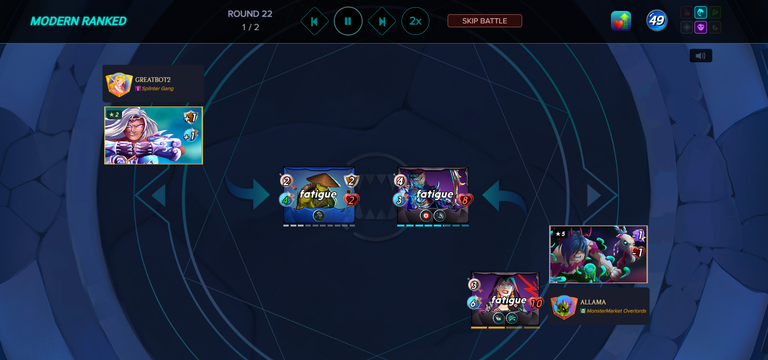
From then onwards, a stalemate assumed where my Lira would attack his Spitter and his Spitter would repair itself without much effort. After round 20, we finally get to the Fatigue effect and thus his unit with the lower HP goes down.
Results
Both of us put the best of everything we had on our arsenal and boy was it anyone's game. The core mistake for him was to use a unit that would grant him high damage but at a cost of 6 HP per round. He did try to minimise that effect by taking advantage of the battle rules but it simply was not enough. He was doing pretty good at the start and even knocked out my tank first but there was a big gap in damage per round where I reduced his by 2 and mine was still at 21. That also got him to sink down as the game progressed.
Battle Link

Thanks for sharing! - @yonilkar
