

As you probably already know the Battle Mage Secrets Weekly Challenge involves showcasing a battle involving a particular ruleset which is different every week. The ruleset we are to talk about this week is Earthquake.
Let us see what this ruleset does before we get into the nitty-gritty of the line-up and the battle itself.
The Earthquake ruleset is pretty straight-forward - Non-flying Monsters take 2 Melee damage at the end of each round.
Now that we've got a good idea of what the Earthquake ruleset practically does, let's see now how it can be effectively utilized.
I normally describe a couple of options here if it ruleset allows for some variation but this one in particular is pretty clear, so here's in short:
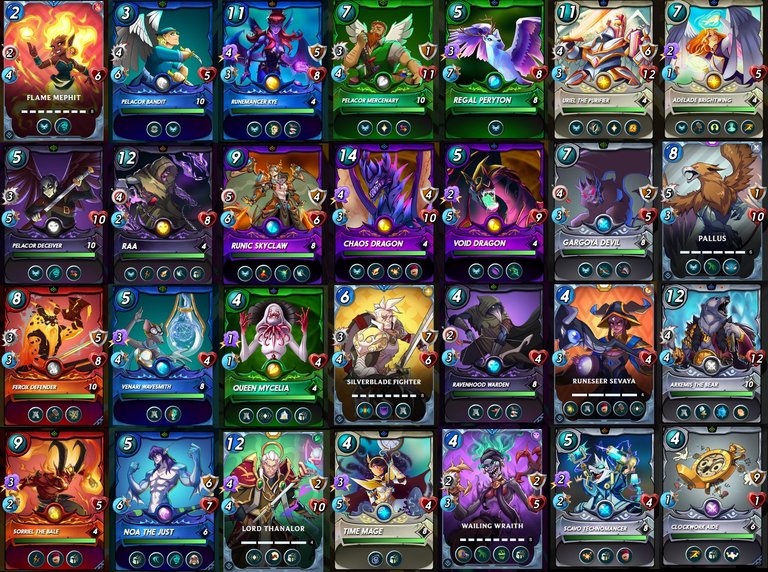
The first two rows of the picture above showcase a lot of Flying Monsters which are currently available for play in Modern League. The idea is absolutely clear - the more Flying Monsters you include in your line-up, the less Earthquake damage they are going to take. Of course, that is not always the best approach since some other combos could prove more viable, especially if some of the other rulesets have a bigger influence on the battlefield. I that case the 3rd and 4th rows on the picture above also play an important role. The 3rd row shows Monsters with the Protect ability - they provide +2 Armor to all Monsters on their team (including themselves. The more armor the Monsters have, the longer they will survive the brutal oppression of the Earthquake ruleset - that's a fact. Finally the 4th row consists of Monsters with the Rust ability - they remove 2 Armor from all Monsters on the opponent's side. That's a nice way to make your opponent feel the pain the Earthquake causes fully.
Now that we have a decent understanding of the featured Ruleset and its potential advantages and disadvantages, let us have a look at the battle I have chosen to showcase.
<>>>>>>>>>>>>>>>>>>>>>>>>>>>>>>>>>>>>BATTLE<<<<<<<<<<<<<<<<<<<<<<<<<<<<<<<<<<<<<<>
- The line-up of the Battle and the Ruleset:

The rulesets for this battle are Earthquake (Non-flying Monsters take 2 Melee damage at the end of each round), Heavy Hitters (All Monsters have the Knock Out ability (Does double damage when attacking an enemy that is stunned)) and Holy Protection (All Monsters have the Divine Shield (The first time the Monster takes damage it is ignored)) ability. The mana budget is 60 which is a very decent amount so I will be able to splurge a bit more on chunkier Monsters. Four out of six Elements are available - Fire, Water, Earth and Life. I'll obviously go with the Life Element.
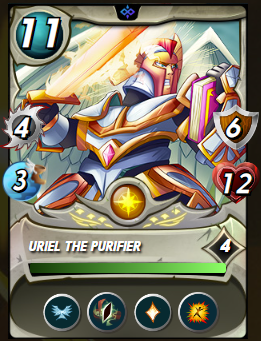
I have chosen to go with my maxed Uriel as the main tank. I like it a lot due to its considerable armor amount and self-heal. The armor is especially useful when paired with Rathe, and makes me feel more confident that it can withstand a bit of a beating involving magic damage. Its other upside is that it has the Flying (Has an increased chance of evading Melee or Ranged attacks from Monsters who do not have the Flying ability) ability so that makes it immune to the Earthquake ruleset. It also has Redemption (When this Monster dies, it does 1 damage to all enemy monsters) as its last ability, which is very useful to remove the Divine Shield of all enemies when Uriel dies.
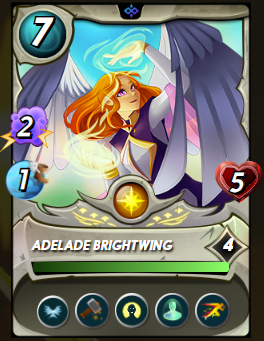
The 2nd spot is for Adelade Brightwing. This is another Monster I basically constantly use due to its ability to Repair (restores some armor to the friendly unit whose armor has taken the most damage) armor , paired with its ability to Resurrect (when a friendly unit dies it is brought back to life with 1 Health. This ability can only trigger once per battle a fallen ally (once per battle)), which is also huge if the right friendly Monster gets to be revived. It also has Flying (this unit has an increased chance of evading melee or ranged attacks from units who do not have the flying ability) which is also really helpful. And lastly it also have Swiftness (all friendly units have increased speed) at level 4 which could be very important or detrimental depending on the rulesets.
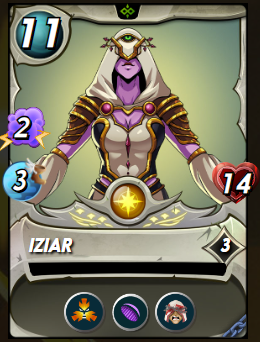
In the 3rd spot I have Iziar. She has definitely been one of the my favorite Soulbound Legendaries, and even though Martyr (when this Monster dies, adjacent Monsters get +1 to all stats) does not really pair that well with Reverse Speed, I think having a beefy Taunt (all enemy Monsters target this Monster (if they are able to) Monster such as her in this battle will allow me to let Jared Scar do his thing. Iziar also has Void (reduced damage from Magic attacks) which is great for Magic attack mitigation.
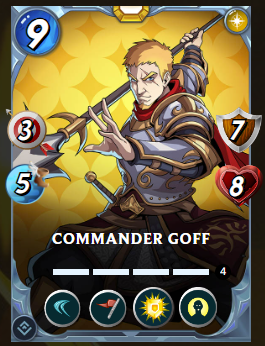
The 4th spot is for Commander Goff. He is a Legendary Monster. At level 1 he has 3 Ranged Attack, 5 Speed, 7 Armor and 8 Health and he starts off with the Dodge (Has an increased chance of evading Melee or Ranged attacks) ability which makes him decent for a Monster in the last spot of a line-up. At level 2 he gains a 2nd ability - Inspire (Gives all friendly Monsters +1 Melee attack). This ability makes him useful for a bit more melee-heavy line-ups. At level 3 he gains 1 Speed point and 1 Health point but more importantly he gains his third ability - Divine Shield (The first time the Monster takes damage it is ignored). This gives him even more survivability in the backline. Finally, maxed out at level 4 he has 3 Ranged Attack, 5 Speed, 7 Armor and 8 Health. However, he also gains the most useful ability of them all - Resurrect (When a friendly Monster dies it is brought back to life with 1 Health. This ability can only trigger once per battle). Resurrect is an ability which is always useful and you can never go wrong with including a Monster who has it in your line-up.
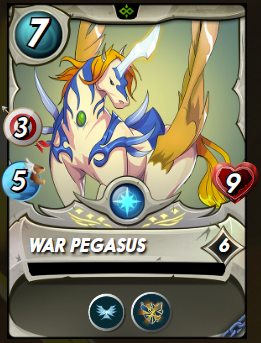
In the 5th spot is one of the Soulbound Reward cards I still need to get a lot of copies of - the War Pegasus. I have it at level 6 currently and it does its job decently but I would like to get it to max level sooner rather than later. At level 6 it has Flying and Shatter (Target's armor is destroyed when hit by an attack from Monsters with Shatter). Both abilities are great for the Earthquake ruleset.
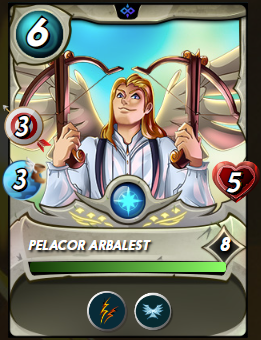
The last spot goes to the Pelacor Arbalest. It is neither slow nor fast so it should basically perform the same way in both Reverse Speed and normal speed scenarios. It has Double Strike (monster attacks twice each round) and Flying (has an increased chance of evading Melee or Ranged attacks from Monsters who do not have the Flying ability). It is one of the Ranged Attackers I use most often when playing with the Life Element.
It is time for a quick round by round analysis:
- The Summoner I am going with for the battle is Grandmaster Rathe. He is my usual go-to Summoner when playing Life in Diamond/Champion unless I am absolutely positive that General Sloan is a better pick for the particular situation. He is generally a great fit for Earthquake as he provides nice defensive bonuses in the form of +1 Armor and Void Armor. My enemy has chosen to go with Lux Vega and they have also chosen the Life Element. I don't have Lux Vega but I am always fearful when I happen to face her in a battle since I more often lose to her than beat her. Let's see how it goes this time.
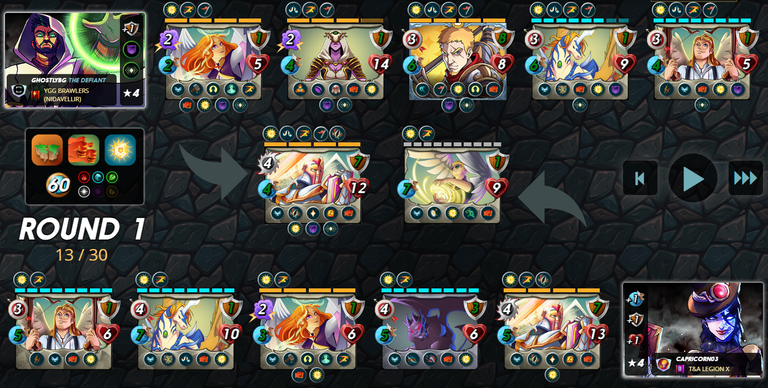
- After 1 round of exchanging blows I have not lost any Monsters while my opponent's Pelacor Conjurer is close to dying.
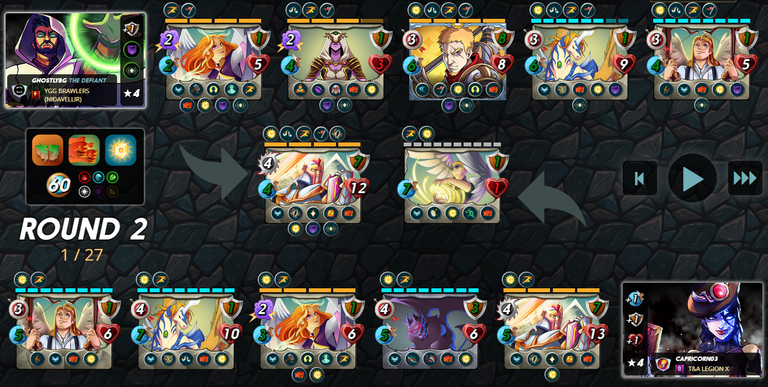
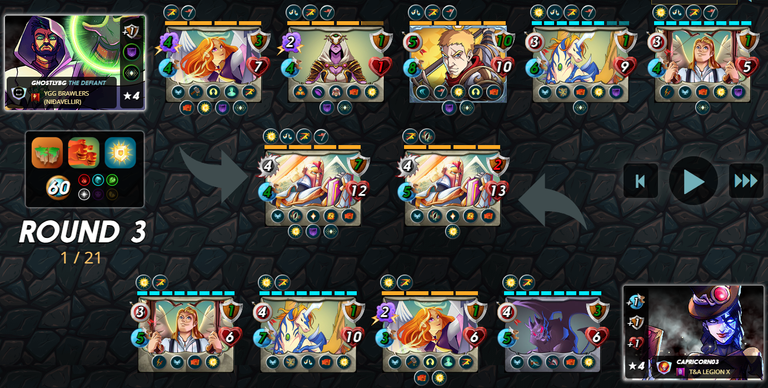
- Round 3 begins and my Iziar has died twice already buffing my Adelaide Brightwing and Commander Goff. That's fine since that was the whole point of including her in a line-up with 2 Resurrect Monsters anyway. My opponent has also used up their resurrect on the Pelacor Conjurer and it fell again.
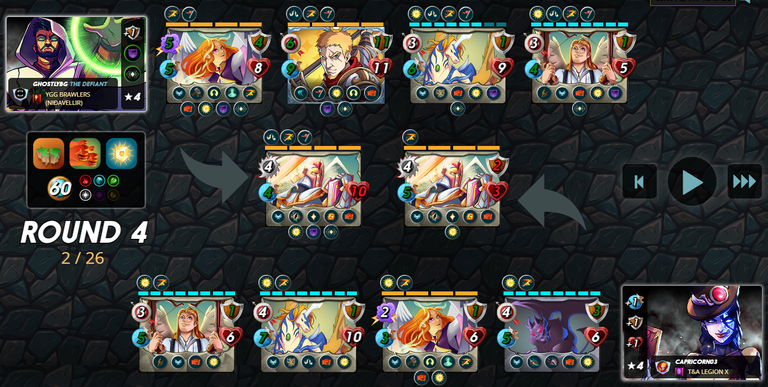
- Round 4 - it's a show off of Uriel vs Uriel and their supporting Monsters, mine is a bit ahead in terms of Health.
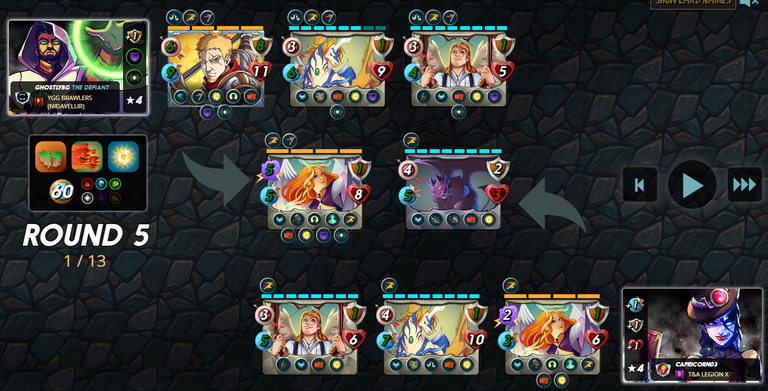
- Round 5 - both Uriels have fallen and triggered their Redemption ability. My side of the board seems at an advantage at this point of the battle.
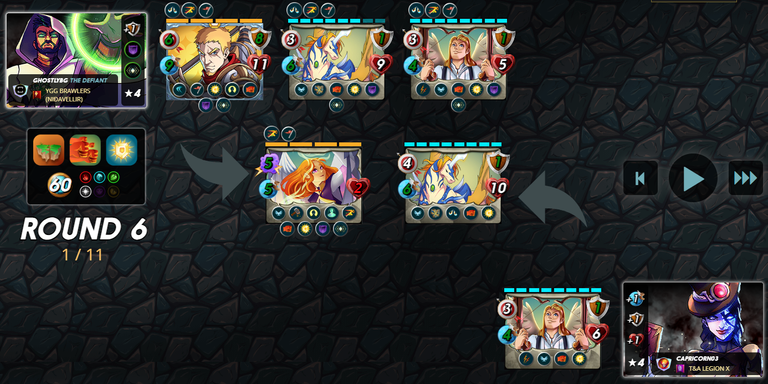
- Round 6 - two more enemy Monsters have fallen while my Adelaide is still alive at the beginning of this round.
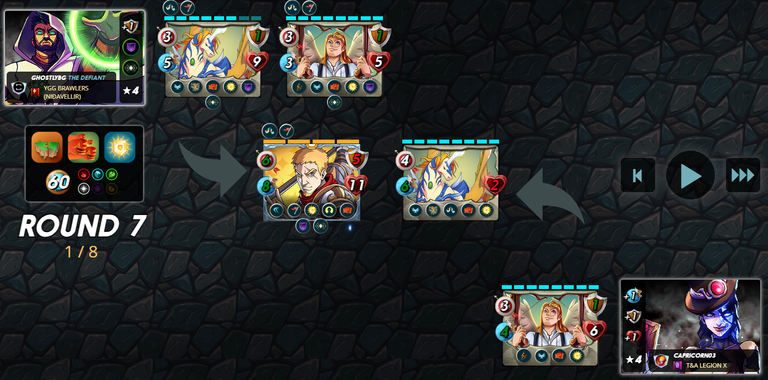
- Round 7 - all that is left for my team is to finish off the remainder of the enemy forces.
Well this was definitely a fast but fun battle, and an entertaining way to showcase the Earthquake ruleset. See you next week with another exciting post related to the brand new Battle Mage Secrets Weekly Challenge!
Over and Out,

Referral

Thanks for sharing! - @alokkumar121
