Ruleset:

Earthquake
"Non-flying Monsters take 2 Melee damage at the end of each round."
"Using monsters with Flying or Heal is the trick for this ruleset, but if you are unable to choose such monsters, use monsters that have high HP and high damage. Don't keep heal units up front. Shield has a very important role. Using Brighton Bloom as summoner can help in this ruleset. Keep monsters with Flying in last positions when Earthquake has done enough damage to both sides." - Splintercards


Going the Distance

Ranged attacks only.
Line up:

By adding armour and speed to my lineup, I am aiming to deal as much damage to the opponent as fast as possible so they are weakened by the time the Earthquake occurs. At the same time, I am hoping that the armour provided by Kelya should give additional protection and stave off at least one round of Earthquake damage.

By using a Taunt monster, I am looking to control the battle by direction their attention toward the Wave Brood. With the Close Range ability, I am confident that the Wave Brood will also be able to dish out some damage to the opposing lineup despite being in first position.

As I mentioned before, I am looking to utilise speed and the Swiftness ability further support this strategy by increasing the speed of my lineup making it far harder to hit but also giving my lineup the chance of attacking first. This is a great support ability and for six mana a good cost as well.

With the Life Leech ability and the Cripple ability, I am hoping to boost my own health and reduce the opponent's at the same time. This should help the longevity of the Merdhampir to help it become excellent value for four mana.

A classic water ranged damage card. Great health and damage for four mana. I am happy with this selection as its speed of three will be boosted to five by Kelya Frendul and Swiftness.

With the Triage ability, I am hoping to be able to keep backline monsters alive for as long as possible and with six health, three speed - boosted to five, I am confident three mana is well spent here.

A card I love, three damage, health and speed combined with three different abilities make this great value. Flying makes it impervious to Earthquake damage and the Deathblow will make killing off final opponents easier should it need to. Close Range is always helpful but could be useful should it come down to it.
Opposing Lineup

A very similar strategy seems to be in play here by the opposing team. For four mana Kelya Frendul is a great card, the Gold Foil will earn the victor an additional 10% per Gold Foil as well. One key point to note here is the second level Kelya Frendul compared to the fourth level on my lineup. This could be a significant difference...
The exact same card as my own, so far the same and presumably same reasons too.

The Rune Crafter has armour and the Fury ability which will not be effective in the battle against my lineup. The three armour will certainly be a nuisance but should not cause too much of an issue. A slow card with one speed and relatively low health for an eight mana card. This is not a card I would have selected for the battle here because it diverts away from my plan of attack.

Very similar card choice to my own here but we do see the difference in summoner level in play. With my Merdhampir, I have access to cripple which will reduce opposing health in addition to the normal damage taken.

Another card choice and another similarity with a key difference being the level of my Supply Runner offering the Swiftness ability which will speed up my lineup. This could be quite significant as it will make the opposing lineup miss more often.
At the same time it will make my lineup more effective and will also increase my chances of attacking first.

With less damage and fewer abilities we may have a strong advantage swing into my favour here. Gold foil does boost the opponent's earning potential. Be interesting to see this play out from here.

Armour repair could be very useful in this battle. This is a great choice and one that I could have taken myself. A great selection and really great value for the mana.
Overall, two fairly similar lineups but the key differences come down to level and speed. I think I have the edge here and the battle should be fairly close.
The Battle
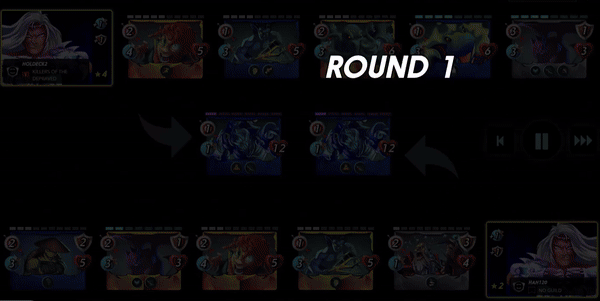
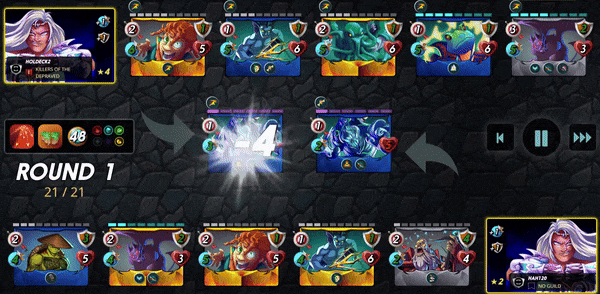
Round 1:
Round 2 & 3:
Final Rounds:

Post Battle Thoughts:
A particularly close battle with a real clutch ability kicking in to turn the tide right at the end.
Final Thoughts:
With the new update to ranked coming imminently levelling cards is going to be critical to succeed at the highest levels. The difference between a second or third level card will really be key to victory and this was noticed in this battle here.
Deathblow is an awesome ability and it can become clutch at times as it was in this battle. The armour repair was hugely important at sustaining the opposing lineup and is something I should perhaps consider going forward more often.

Join Splinterlands:
https://splinterlands.com?ref=holdeck
Join Splex
...and rent out your cards for some juicy DEC rental fees. Save yourself the hassle of listing and relisting and let the Rental Golem take over for you:
https://splex.gg/?ref=3s5haoqkjteadpf8
How to invest without FIAT in a bear market? : https://peakd.com/hive-167922/@holdeck/how-i-am-investing-for-after-the-bear-market
Setting and redefining goals in a bear market: https://peakd.com/hive-13323/@holdeck/setting-and-redefining-goals-in-a-bear-market
Splinterlands Fire divider by freeztag
Splinterlands Icon Divider made by holdeck and available here
All card, icons, Splinter images and stats courtesy of Splinterlands
Ability and Ruleset blurbs taken from Splintercards
Splinter Element Icons taken from Splinterlands
I have reformatted them into PNG files which you are welcome to use here
Round 2 & 3:
Final Rounds:
Post Battle Thoughts:
A particularly close battle with a real clutch ability kicking in to turn the tide right at the end.
Final Thoughts:
With the new update to ranked coming imminently levelling cards is going to be critical to succeed at the highest levels. The difference between a second or third level card will really be key to victory and this was noticed in this battle here.
Deathblow is an awesome ability and it can become clutch at times as it was in this battle. The armour repair was hugely important at sustaining the opposing lineup and is something I should perhaps consider going forward more often.
Join Splinterlands:
https://splinterlands.com?ref=holdeck
Join Splex
...and rent out your cards for some juicy DEC rental fees. Save yourself the hassle of listing and relisting and let the Rental Golem take over for you:
https://splex.gg/?ref=3s5haoqkjteadpf8
How to invest without FIAT in a bear market? : https://peakd.com/hive-167922/@holdeck/how-i-am-investing-for-after-the-bear-market
Setting and redefining goals in a bear market: https://peakd.com/hive-13323/@holdeck/setting-and-redefining-goals-in-a-bear-market
Splinterlands Fire divider by freeztag
Splinterlands Icon Divider made by holdeck and available here
All card, icons, Splinter images and stats courtesy of Splinterlands
Ability and Ruleset blurbs taken from Splintercards
Splinter Element Icons taken from Splinterlands
I have reformatted them into PNG files which you are welcome to use here
Checkout our BDVoter Daily Hive Showcase & Participate into our Daily giveaway to win various prize.
Thanks for sharing! - @alokkumar121

Congratulations @holdeck2! You have completed the following achievement on the Hive blockchain And have been rewarded with New badge(s)
Your next target is to reach 8000 upvotes.
You can view your badges on your board and compare yourself to others in the Ranking
If you no longer want to receive notifications, reply to this comment with the word
STOPCheck out our last posts: