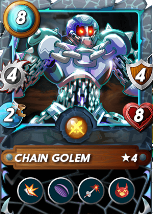
Hello again, my coffee loving friends. This week, we'll be focusing on Chain Golem and about how awesome Chain Golem is in Splinterlands. It's amazing how his skills can handle all sorts of enemy attacks, may it be melee, range or magic!
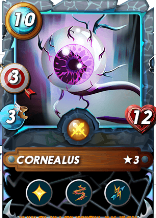
For this week's rule set as well, let me tell you about Heavy Hitters. It gives your units this cool Knock Out ability that doubles the damage against stunned enemies. I very fortunate to show off this interaction when Cornealus took down the enemy Drybone Barbarian in one shot some time during the battle.
Heavy Hitters is definitely a hard rule set to show off due to the number of preparations needed just to see its effect but I am glad I was able to pull it off.

RULE SETS
 | Active:  Earth, Earth,  Life, Life,  Death, Death,  Dragon DragonInactive:  Fire, Fire,  Water, Water, |
|---|---|
 | Heavy Hitters: All Units have the Knock Out ability. |
Click here to see the lists of all the rule sets
STRATEGY
Using Chain Golem was very effective as his skills mitigated the mixed damage from the enemies. I was also able to show off the Knock Out from Heavy Hitters during Round 3 when Cornealus deals twice the damage to ENEMY Drybone Barbarian executing him on the spot at 6 health.
CARD POSITIONING

In this battle, I used the summoner, Camila Sungazer and units, Chain Golem, Kron the Undying, Oshuur Constantia, Creeping Ooze, Chaos Agent and Cornealus .
Quick Stats
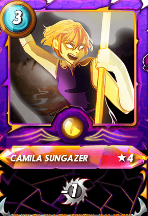 |
Level 4: Legendary Summoner. Allows level 1 common, level 1 rare, level 1 epic and level 1 legendary.  +1 Melee: Gives all friendly Units +1 Melee attack +1 Melee: Gives all friendly Units +1 Melee attack |
 |
 |
 |
     Shield - Void - Piercing - Stun - Knock Out |
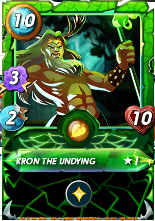
 Heal - Knock Out |
   Resurrect - Reflection Shield - Tank Heal - Knock Out |
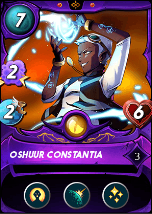
| 1. Level 4: Chain Golem is a very good overall tank just like The Kraken. He has defensive abilities like Shield and Void while also having strong offensive abilities like Piercing and Stun assisting his high damage. | 2. Level 1: Kron the Undying is a good secondary tank due to his high health and Heal. His 3 magic damage is also good in making sure to keep piling damage on the enemy tank. | 3. Level 3: Oshuur Constantia's Resurrect and Tank Heal will make sure that you main tank is always alive. He has 2 magic damage which is decent enough to add on the damage. |
 |
 |
 |
 Slow - Knock Out |
 Dodge - Knock Out |
  Heal - Thorns - Return Fire - Knock Out |
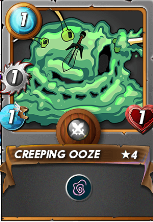
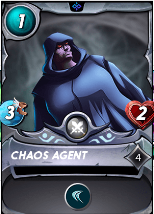
| 4. Level 4: I had extra mana so I put this very useful 1 mana unit with a Slow ability. The decreased speed makes my unit attack first while also making sure their melee and range attacks hit. | 5. Level 4: In case the Back tank dies, at least I have something. Other than that, the Gold foil also add rewards for when I win this battle. | 6. Level 3: My very trusted back tank. His high health and Heals assure that it would stand a long time against enemies with Sneak. Thorns also help reduce the health of the melee Sneaks who dare to touch my back line. |
⚔️ ROUND 1 ⚔️
| Turn | Description |
|---|---|
| 1-4 | Summoners and Units with abilities that can be applied at the start of battle, used their effects to the appropriate targets. |
| 5 | ENEMY Time Mage attacks! ENEMY Time Mage deals 0 damage to Chain Golem's Health. |
| 6 | ENEMY Iziar attacks! ENEMY Iziar deals 1 damage to Chain Golem's Health. |
| 7 | Cornealus attacks! Cornealus deals 3 damage to ENEMY Iziar's Health. |
| 8 | ENEMY Venari Crystalsmith attacks! ENEMY Venari Crystalsmith deals 1 damage to Chain Golem's Armor. |
| 9 | Oshuur Constantia used Tank Heal! Oshuur Constantia heals Chain Golem's Health by 1. |
| 10 | Oshuur Constantia attacks! Oshuur Constantia deals 1 damage to ENEMY Iziar's Health. |
| 11 | Kron the Undying attacks! Kron the Undying deals 2 damage to ENEMY Iziar's Health. |
| 12 | ENEMY Pelacor Arbalest attacks! ENEMY Pelacor Arbalest deals 2 damage to Chain Golem's Armor. |
| 13 | ENEMY Pelacor Arbalest attacks! ENEMY Pelacor Arbalest deals 2 damage to Chain Golem's Armor. |
| 14 | ENEMY Xenith Archer attacks! ENEMY Xenith Archer deals 1 damage to Chain Golem's Health. |
| 15 | Chain Golem attacks! Chain Golem deals 4 damage to ENEMY Drybone Barbarian's Health. Chain Golem's attack stunned ENEMY Drybone Barbarian. |
| 16 | ENEMY Drybone Barbarian was Stunned! ENEMY Drybone Barbarian skips his turn. |
⚔️ ROUND 2 ⚔️
| Turn | Description |
|---|---|
| 1 | ENEMY Time Mage attacks! ENEMY Time Mage deals 0 damage to Chain Golem's Health. |
| 2 | ENEMY Iziar attacks! ENEMY Iziar deals 1 damage to Chain Golem's Health. |
| 3 | Cornealus attacks! Cornealus deals 3 damage to ENEMY Iziar's Health. |
| 4 | ENEMY Venari Crystalsmith used Tank Heal! ENEMY Venari Crystalsmith heals Drybone Barbarian's Health by 3. |
| 5 | ENEMY Venari Crystalsmith attacks! ENEMY Venari Crystalsmith deals 1 damage to Chain Golem's Armor. |
| 6 | ENEMY Drybone Barbarian was Stunned! ENEMY Drybone Barbarian skips his turn. |
| 7 | Oshuur Constantia used Tank Heal! Oshuur Constantia heals Chain Golem's Health by 2. |
| 8 | Oshuur Constantia attacks! Oshuur Constantia deals 1 damage to ENEMY Iziar's Health. |
| 9 | Kron the Undying attacks! Kron the Undying deals 2 damage to ENEMY Iziar's Health. |
| 10 | ENEMY Iziar dies! ENEMY Iziar is unable to continue! |
| 11 | ENEMY Xenith Archer attacks! ENEMY Xenith Archer deals 1 damage to Chain Golem's Health. |
| 12 | ENEMY Pelacor Arbalest attacks! ENEMY Pelacor Arbalest deals 2 damage to Chain Golem's Health. |
| 13 | ENEMY Pelacor Arbalest attacks! ENEMY Pelacor Arbalest deals 2 damage to Chain Golem's Health. |
| 14 | ENEMY Drybone Barbarian is now Unstunned and can move again in the next round. |
| 15 | Chain Golem attacks! Chain Golem deals 4 damage to ENEMY Drybone Barbarian's Health. Chain Golem's attack stunned ENEMY Drybone Barbarian. |
⚔️ ROUND 3 ⚔️
| Turn | Description |
|---|---|
| 1 | ENEMY Time Mage attacks! ENEMY Time Mage deals 0 damage to Chain Golem's Health. |
| 2 | Cornealus attacks! Cornealus deals 6 damage to ENEMY Drybone Barbarian's Health. Since ENEMY Drybone Barbarian was stunned, Cornealus's Knock Out attack deals twice the damage. |
| 3 | ENEMY Drybone Barbarian dies! ENEMY Drybone Barbarian is unable to continue! ENEMY Time Mage takes the front! |
| 4 | ENEMY Venari Crystalsmith attacks! ENEMY Venari Crystalsmith deals 1 damage to Chain Golem's Armor. |
| 5 | Oshuur Constantia used Tank Heal! Oshuur Constantia heals Chain Golem's Health by 2. |
| 6 | Oshuur Constantia attacks! Oshuur Constantia deals 2 damage to ENEMY Time Mage's Health. |
| 7 | Kron the Undying attacks! Kron the Undying deals 2 damage to ENEMY Time Mage's Health. |
| 8-9 | ENEMY Time Mage dies! ENEMY Time Mage is unable to continue! ENEMY Xenith Archer takes the front! |
| 10 | Chain Golem attacks! Chain Golem deals 4 damage to ENEMY Xenith Archer's Health. |
| 11 | ENEMY Xenith Archer dies! ENEMY Xenith Archer is unable to continue! ENEMY Venari Crystalsmith takes the front! |
| 12 | ENEMY Pelacor Arbalest attacks! ENEMY Pelacor Arbalest deals 2 damage to Chain Golem's Health. |
| 13 | ENEMY Pelacor Arbalest attacks! ENEMY Pelacor Arbalest deals 2 damage to Chain Golem's Health. |
| 14 | Chain Golem dies! Chain Golem is unable to continue! |
| 15 | Oshuur Constantia used Resurrect! Chain Golem gets resurrected and returns back to life! All abilities and effects applied at the start of this battle will apply again. |
⚔️ ROUND 4 ⚔️
| Turn | Description |
|---|---|
| 1 | Cornealus attacks! Cornealus deals 3 damage to ENEMY Venari Crystalsmith's Health. |
| 2 | Oshuur Constantia used Tank Heal! Oshuur Constantia heals Chain Golem's Health by 2. |
| 3 | Oshuur Constantia attacks! Oshuur Constantia deals 2 damage to ENEMY Venari Crystalsmith's Health. |
| 4 | ENEMY Venari Crystalsmith dies! ENEMY Venari Crystalsmith is unable to continue! ENEMY Pelacor Arbalest takes the front! |
| 5 | Kron the Undying attacks! Kron the Undying deals 3 damage to ENEMY Pelacor Arbalest's Health. |
| 6 | ENEMY Pelacor Arbalest dies! ENEMY Pelacor Arbalest is unable to continue! |
| END | ENEMY NAMDDDDA have no more Units to play! KPGAMINGCH wins this battle! |
https://splinterlands.com/?p=battle&id=sl_586bcab4a0e8c7db49f5007e38633c1d
If you have suggested combos or questions, feel free to comment it down below.
If you are planning to play and is inspired by my post, please consider using my referral link: https://splinterlands.com?ref=kpgamingch
I do not own any of the photos in this post. All credits goes to:
- Splinterlands
- Peakmonsters
- Canva
- Giphy
Are you looking for Tier 5 brawl guild? THE GUILD OF NEOXIAN looking for brawl players who have good win ratio on brawls. If you are interested then join our Discord & Let our Guild officer
xawiknow that you are interested for guild brawl participation and Also Don't Forgot to Checkout our BDVoter Daily Hive Showcase & Participate into our Daily giveaway to win various prize. Best of Luck 😉Thanks for sharing! - @mango-juice
