Hola, comunidad de Hivearte, soy yo nuevamente, Cristhenos. El día de hoy les presento la segunda parte de mi post anterior, donde abarqué una técnica para practicar los ojos en un ángulo frontal. En este post abarcaremos los ojos en posición ¾ y de perfil. Así que quédate hasta el final para aprender juntos. Recuerden que al final del post pueden encontrar el link del video que utilice como referencia.
Hello, Hivearte community, it's me again, Cristhenos. Today I present to you the second part of my previous post, where I covered a technique to practice eyes in a frontal angle. In this post we will cover eyes in ¾ and profile position. So stick around until the end to learn together. Remember that at the end of the post you can find the link to the video I used as a reference.
Para el ojo de perfil utilizaremos la misma técnica que con el ojo frontal. Que para aquellas personas que hayan leído el post anterior, igual lo voy a explicar.
For the profile eye we will use the same technique as with the front eye. For those who have read the previous post, I am going to explain it anyway.
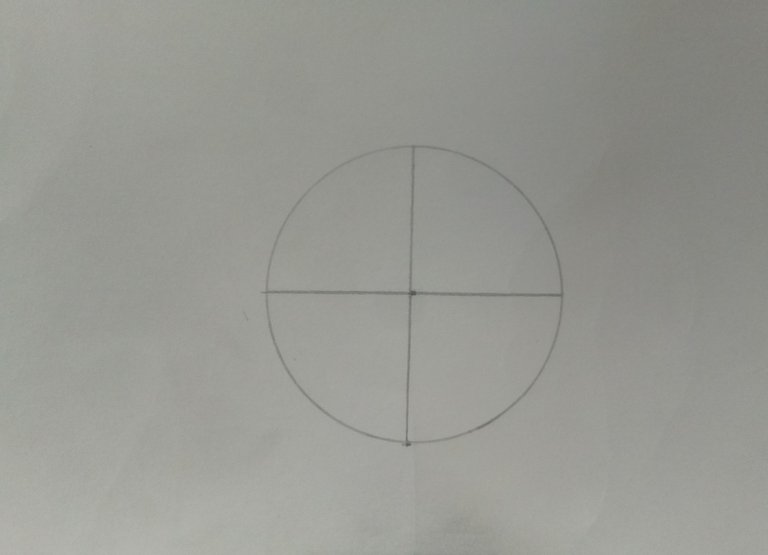
Lo primero que hay que hacer es un círculo con la ayuda de un compás; pueden hacerlo a pulso, ya que es una muy buena manera de comenzar a soltar esos trazos fuertes que uno como artista está buscando. En mi caso, utilizo un compás para hacer el boceto un poco más abstracto.
The first thing to do is to make a circle with the help of a compass; you can do it by hand, as it is ja very good way to start to release those strong strokes that one as an artist is looking for. In my case, I use a compass to make the sketch a little more abstract.
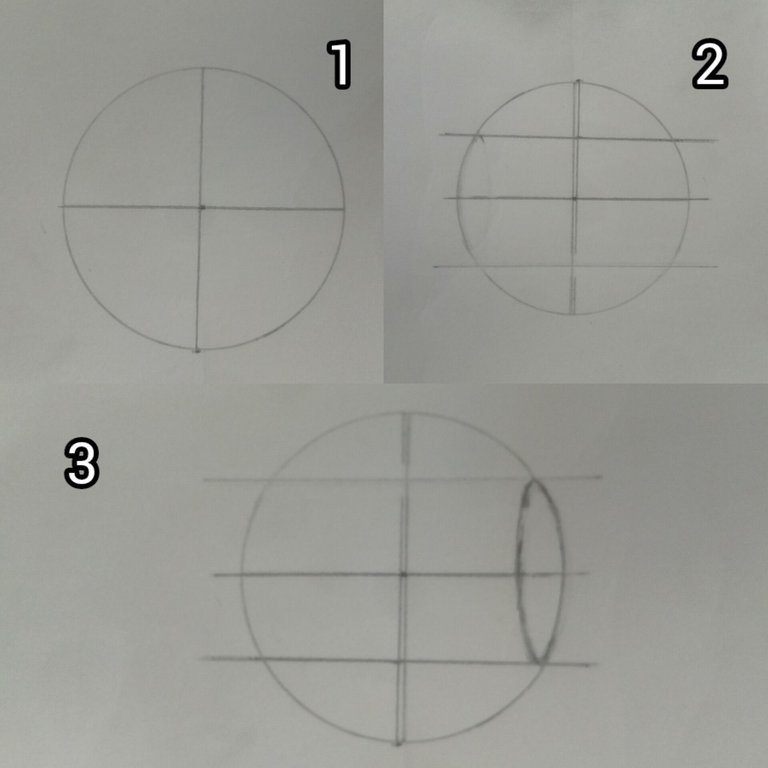
A este mismo círculo lo vamos a dividir con una cruz y luego lo vamos a segmentar en 3 partes; esto puede variar dependiendo del tamaño que quieran hacer el iris. Recuerden que el iris no sobresale del ojo ocular, ya que esta parte es la córnea y, si se fijan bien, esta tiene forma de un domo. Un conejo a la hora de dibujar el iris es que este tiene un parentesco con un dígono.
We are going to divide this same circle with a cross and then we are going to segment it in 3 parts; this can vary depending on the size you want to make the iris. Remember that the iris does not protrude from the eye, since this part is the cornea and, if you look closely, it is shaped like a dome. A rabbit when drawing the iris is that it is related to a digit.
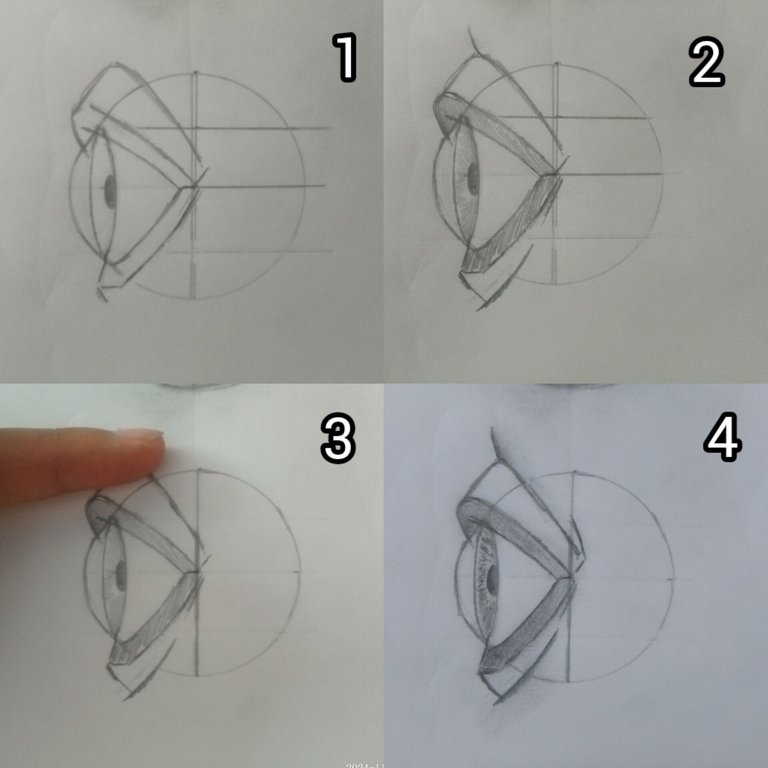
Ya con toda la estructura hecha, pasamos a los párpados superior e inferior. Traten de conectar con su dibujo, intenten materializar esa sensación que quiere transmitir su dibujo. Agregamos sombras para darle un poco de profundidad y realismo; no soy muy bueno con las sombras, pero lo importante es aprender con los errores.
With all the structure done, we move on to the upper and lower eyelids. Try to connect with your drawing, try to materialize that feeling that you want to transmit your drawing. We add shadows to give it some depth and realism; I'm not very good with shadows, but the important thing is to learn from mistakes.
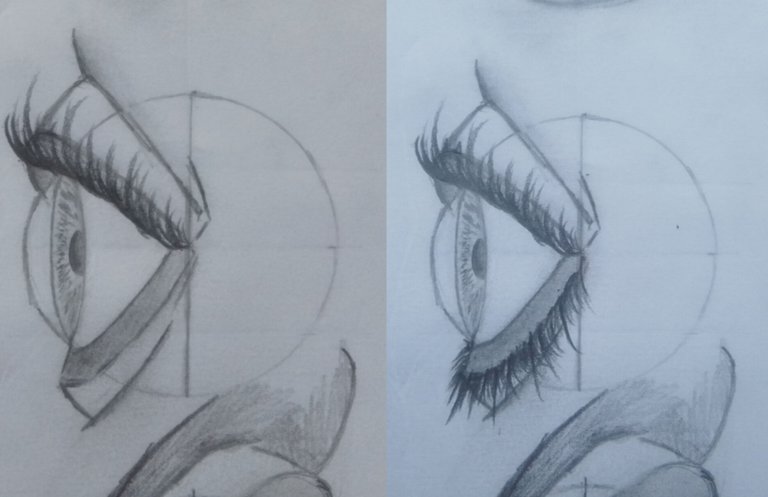
Ya para poner la cereza del pastel pasamos a las pestañas. Todavía sigo siendo un poco principiante al momento de plasmarlas en unos ojos, pero la intención es lo que cuenta.
Y listo.
To put the icing on the cake, let's move on to the eyelashes. I'm still a bit of a beginner when it comes to creating them on eyes, but it's the thought that counts.
And that's it.
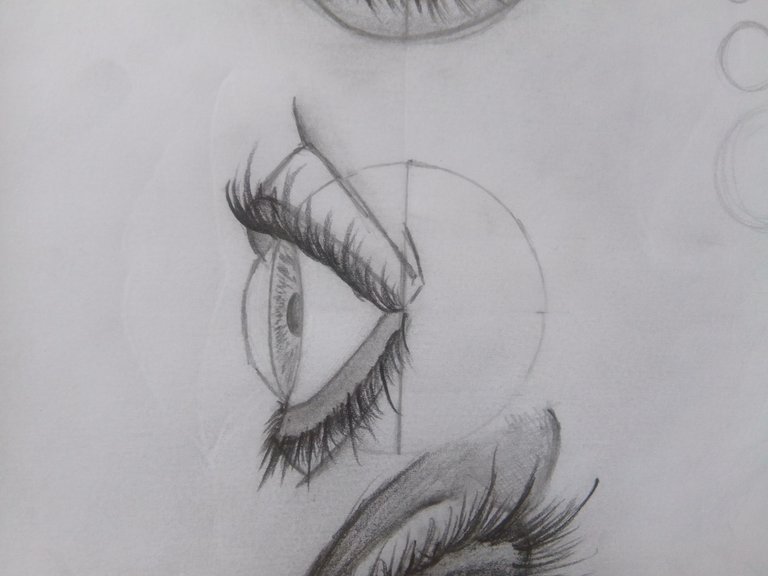
Para este tipo de ojo seguimos la misma lógica que lo dicho anteriormente. Comenzamos con un círculo, pero en vez de dividirlo con una cruz, lo vamos a dividir a la mitad y lo segmentamos en dos, dependiendo del tamaño que vaya a tener el iris de su dibujo.
For this type of eye we follow the same logic as above. We start with a circle, but instead of dividing it with a cross, we are going to divide it in half and segment it in two, depending on the size that the iris of your drawing is going to have.
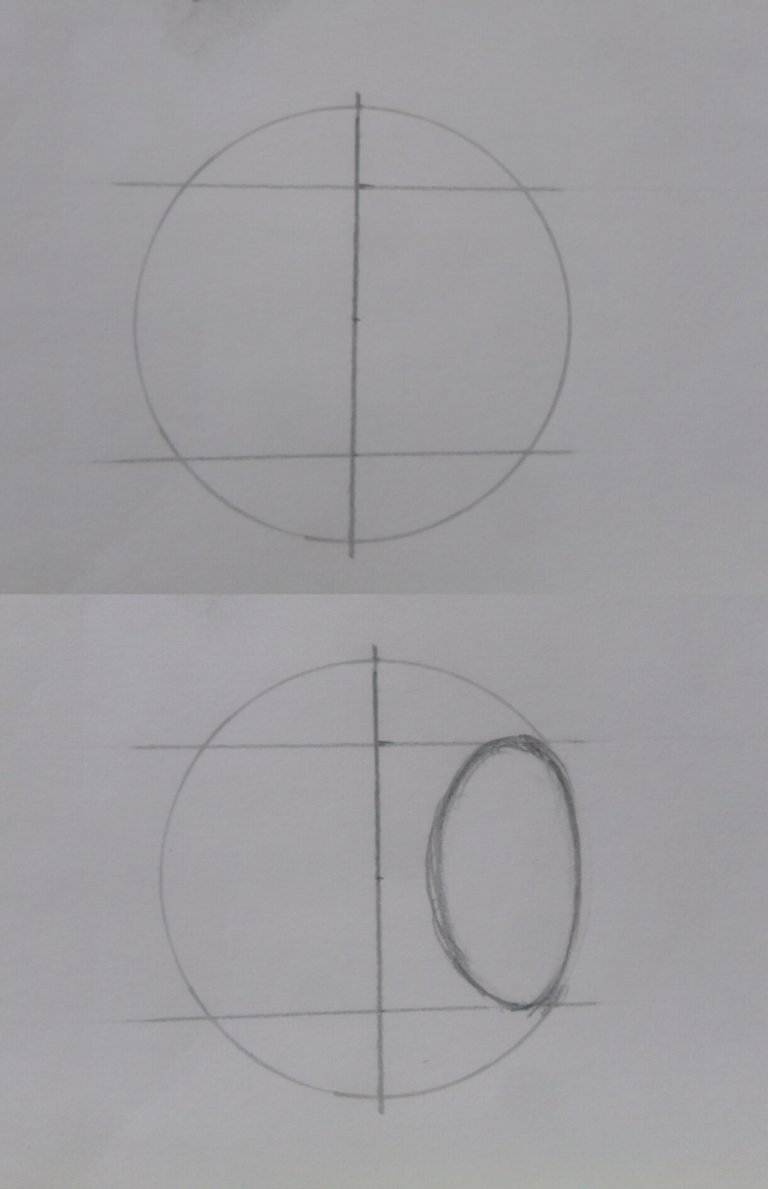
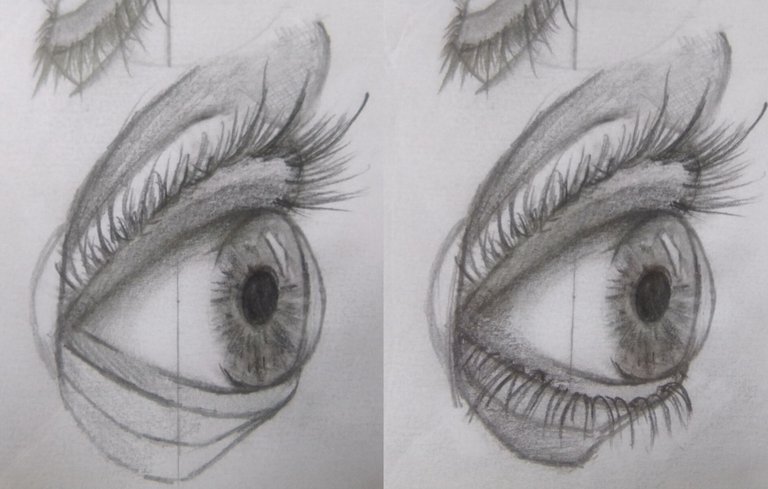
El iris en este tipo de ojos es un poco ovalado (corríjanme si me equivoco); ya con el iris dibujado pasamos a los párpados inferior y superior y agregamos un poco más de detalles. Tuve algunos problemas al tratar de darle un poco de realismo al iris, pero nada que el sombreado no arregle. Si nos fijamos, la córnea sigue teniendo la misma forma como de domo aquí también.
The iris in this type of eyes is a little oval (correct me if I'm wrong); with the iris drawn we move on to the lower and upper eyelids and add a little more detail. I had some problems trying to give a little realism to the iris, but nothing that the shading couldn't fix. If you notice, the cornea still has the same dome-like shape here as well.

Ya solo le dibujamos las pestañas y listo. La verdad, este post fue bastante corto, ya que toda la explicación está en el post anterior y al principio también reforzamos todo esto.
Now we just draw the eyelashes and that's it. To be honest, this post was quite short, since all the explanation is in the previous post and at the beginning we also reinforced all this.
Muchas gracias por quedarse hasta aquí. Espero que les haya gustado mucho mi publicación e intentaré traer contenido más seguido a esta hermosa comunidad. Sin más nada que decir, sigan practicando y nos vemos hasta la siguiente publicación.
Thank you very much for sticking around. I hope you liked my post and I will try to bring more content to this beautiful community. With nothing more to say, keep practicing and see you until the next post.
|
|
|  |
|---|
Congratulations @cristhenos! You have completed the following achievement on the Hive blockchain And have been rewarded with New badge(s)
Your next target is to reach 100 upvotes.
You can view your badges on your board and compare yourself to others in the Ranking
If you no longer want to receive notifications, reply to this comment with the word
STOP@tipu curate 8
Que esperas para unirte a nuestro trail de curación y formar parte del "proyecto CAPYBARA TRAIL"
Upvoted 👌 (Mana: 0/75) Liquid rewards.
Contáctenos para saber más del proyecto a nuestro servidor de Discord.
Si deseas delegar HP al proyecto: Delegue 5 HP - Delegue 10 HP - Delegue 20 HP - Delegue 30 HP - Delegue 50 HP - Delegue 100 HP.