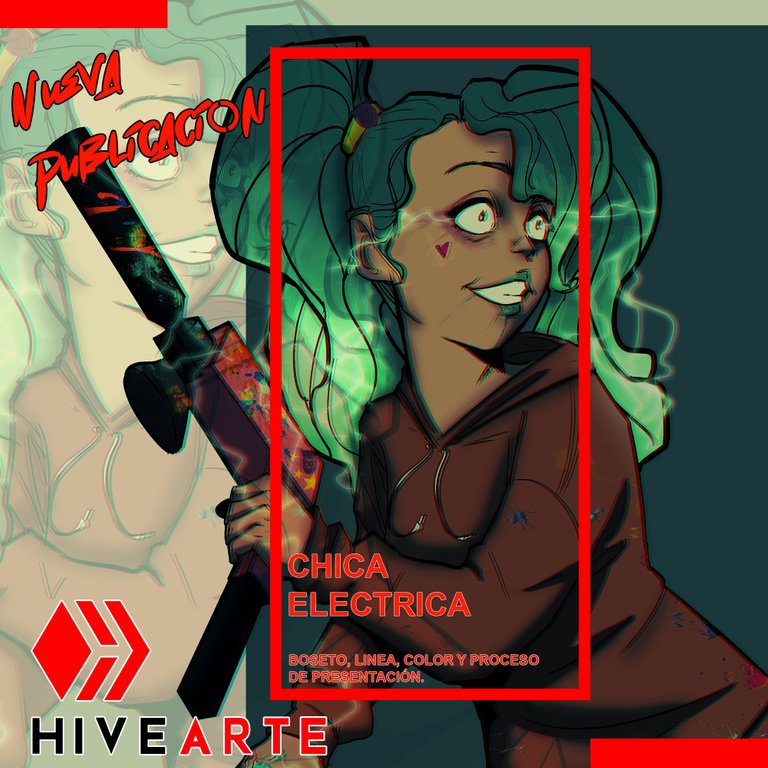
Ha pasado un tiempo desde mi ultima publicación. Un poco de trabajo, pero nada complicado. Ahora a lo que importa. si bien en la ultima publicación deje un teaser de lo que podría llegar a ser, lo cierto es que al final en todo proceso cretivo termina explorando mil y un opciones hasta encontrar la que uno considere la más adecuada.
It's been a while since my last post. A bit of work, but nothing complicated. Now to what matters. Although in the last publication I left a teaser of what it could become, the truth is that in the end, in every creative process, you end up exploring a thousand and one options until you find the one that you consider the most appropriate.
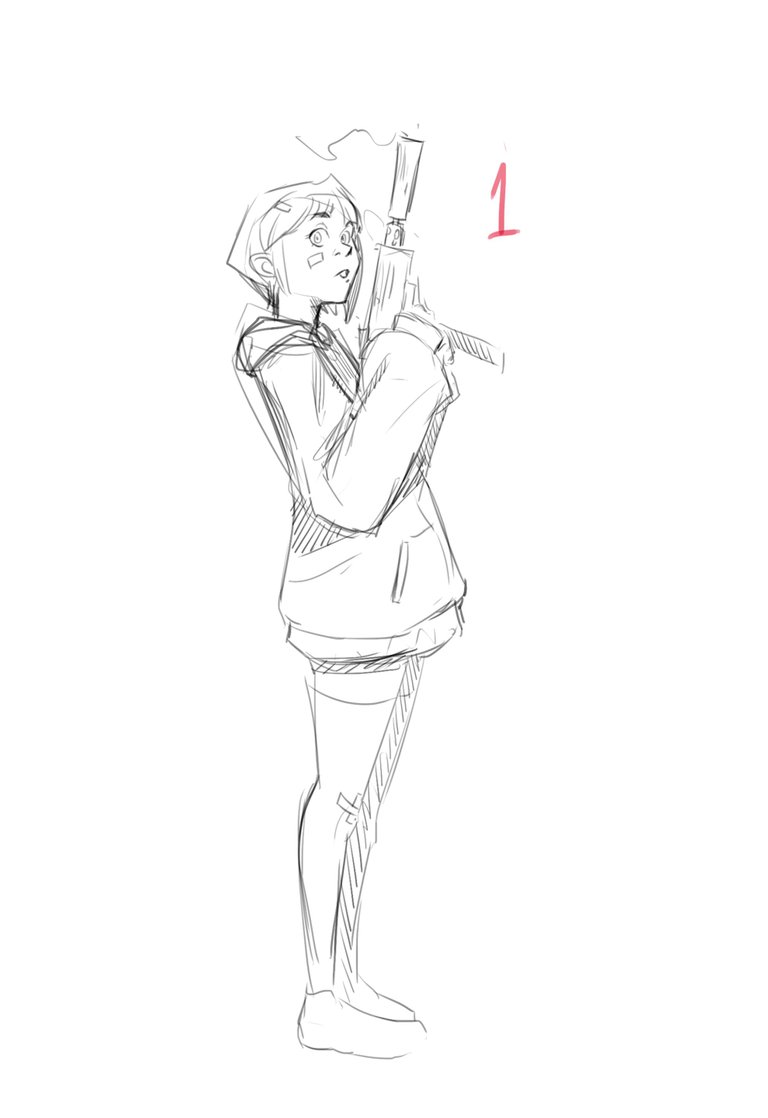
La idea original paso de esto...
The original idea came from this...
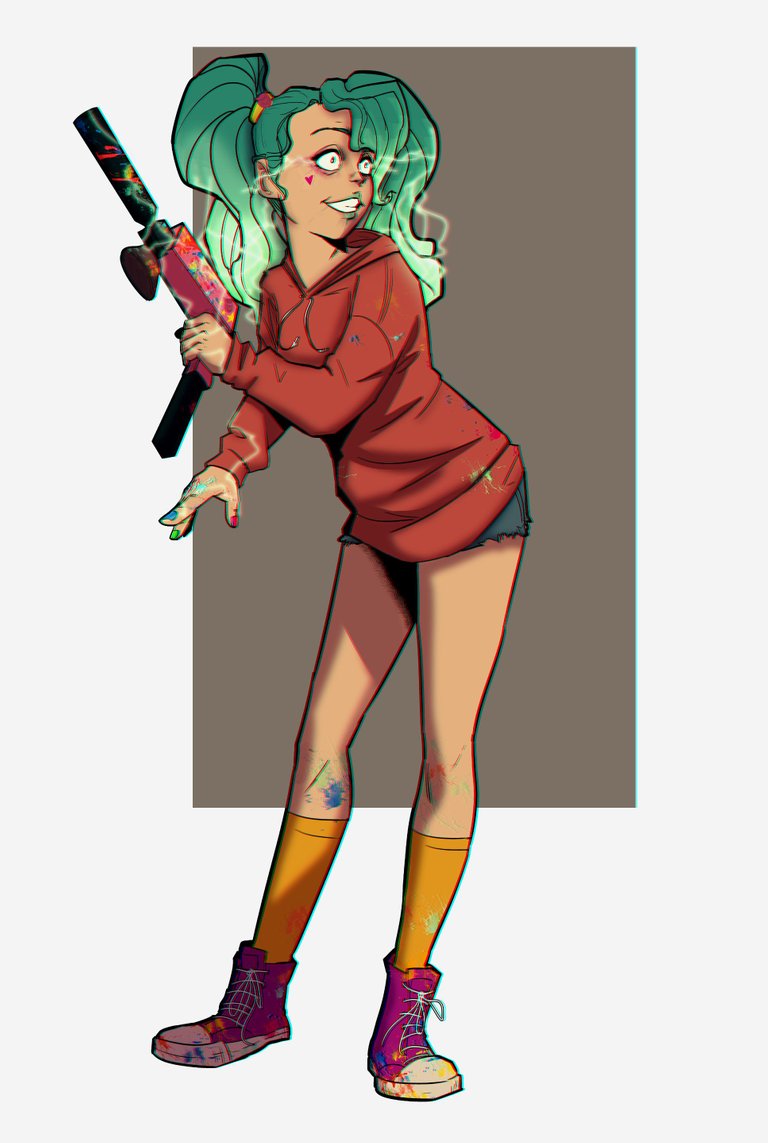
A esto. Al complicado, ya que suelo tomar muchas opciones a la hora de realizar un proyecto sin importar la escala de este, Aun asi. Comenzaré a mostrar el proceso que lleve a cabo para la creación de esta chica.
To this. To the complicated, since I usually take many options when carrying out a project regardless of its scale, even so. I will begin to show the process that I carried out for the creation of this girl.
El proceso que siempre llevo a cabo a la hora de cualquier proyecto es el basico. Es decir... Boseto, Proporciones, LineArt, Colores base, sombras y detalles extras. Pero lo cierto es que solamente en el mero boseto puedo llegar a complicame a la hora de decidir.
The process that I always carry out at the time of any project is the basic one. That is to say... Sketch, Proportions, LineArt, Base colors, shadows and extra details. But the truth is that only in the mere sketch can I complicate myself when deciding.
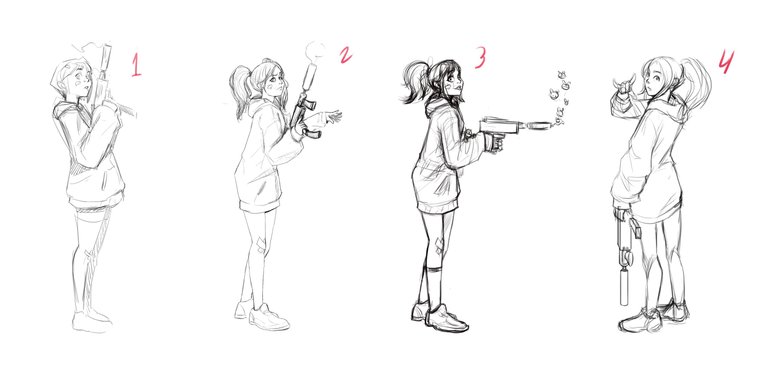
Como pueden ver, la idea original se ubica de primera en la fila. Sin embargo la intensión es buscar opciones.
As you can see, the original idea is at the top of the line. However, the intention is to look for options.
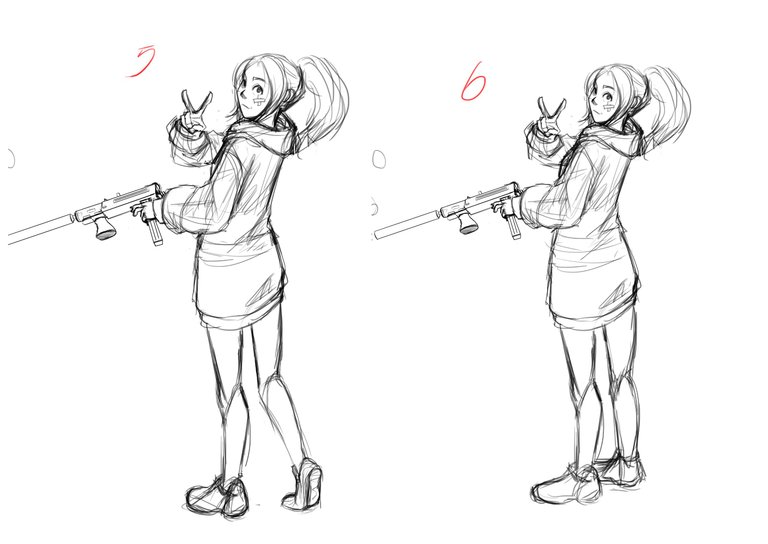
Por un largo rato de debate personal sentí que todo concluiria entre las ideas 5 ó 6.
For a long time of personal debate I felt that everything would end between ideas 5 or 6.
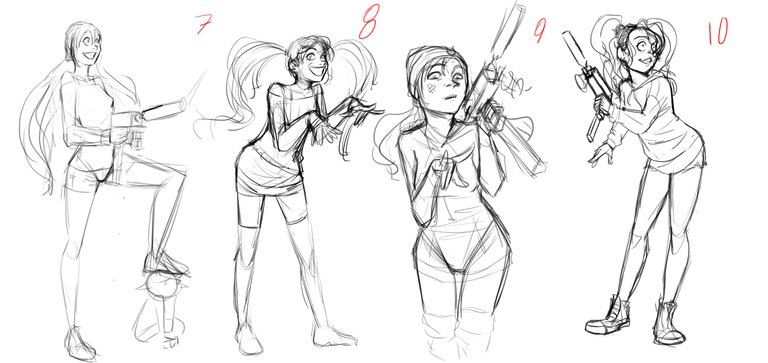
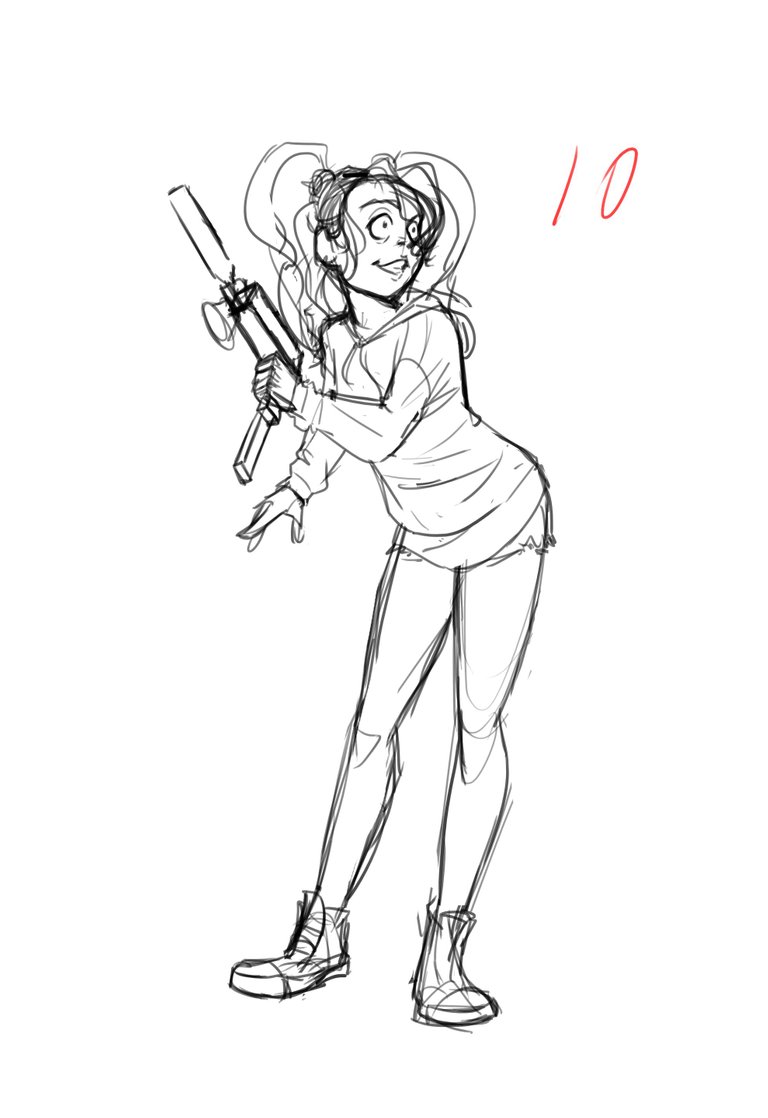
Al final continúe en la busqueda de cual seria la idea correcta para trabajar. si bien, todas tenian el pontecial para serlo. Una debía transmitir la energía que buscaba. De igual manera el arma en las manos de este personaje era algo que ya me habia propuesto como meta en realizar. Al fianl me decidi por la N 10.
In the end, continue in search of what would be the right idea to work on. although, they all had the potential to be. You had to transmit the energy you were looking for. In the same way, the weapon in the hands of this character was something that I had already set myself as a goal to achieve. In the end I decided on the N 10.
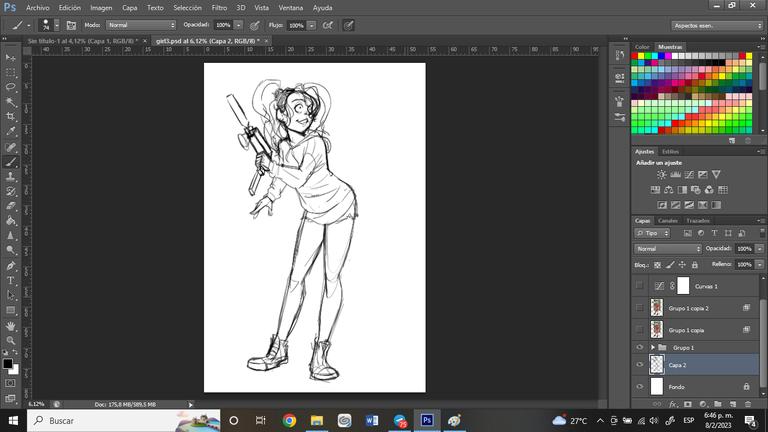

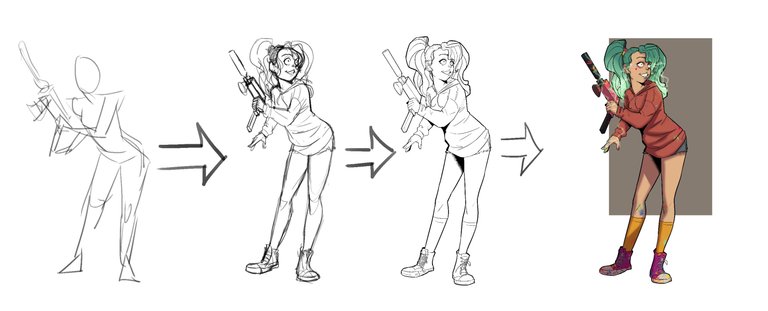
Una vez que la idea es definida, bajo la opacidad entre 50 ó 40%
Once the idea is defined, lower the opacity between 50 or 40%
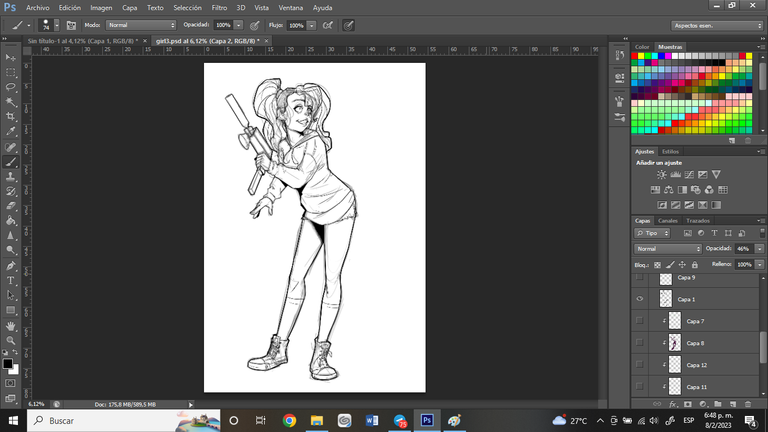
Aplico el Line art en una capa nueva por encima de la capa del boseto opaco.
I apply the Line art on a new layer above the opaque sketch layer.
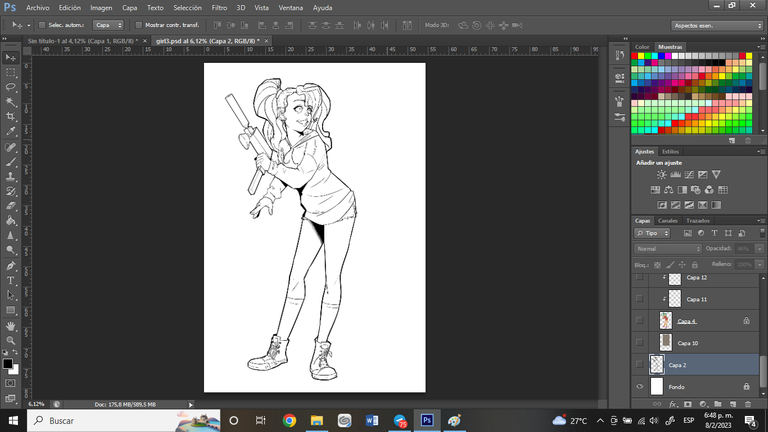
En esta ocasión opte por hacer que el line art sea bastante notorio y oscuro. Esto con la intensión de darle una estetica más gráfica.
This time I chose to make the line art quite noticeable and dark. This with the intention of giving it a more graphic aesthetic.
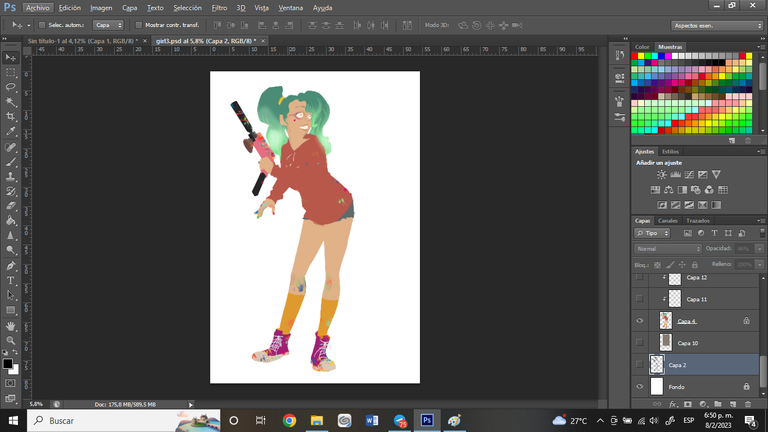
Los colores base son aplicados en una capa por debajo de la capa del line art. Generalmente los colores los coloco planos, sin tanto degradado hasta colocar las sombras y luces.
Base colors are applied on a layer below the line art layer. Generally I place the colors flat, without so much gradient until I place the shadows and lights.
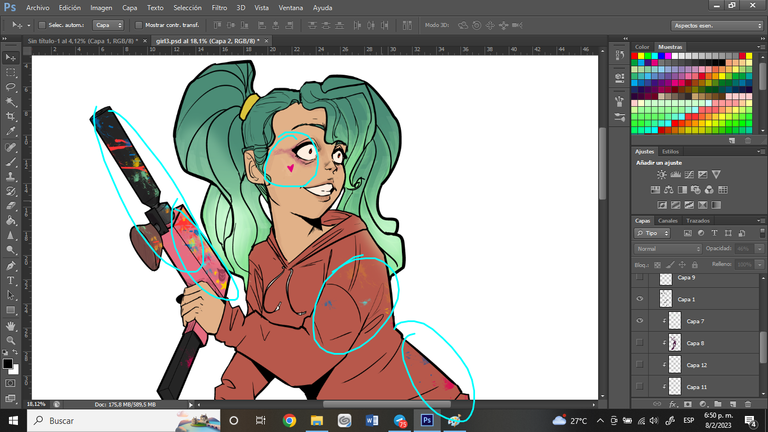
Aqui señalo unos pequeños detalles dentro de la aplicación de los colores base los cuales sirven para agregarle "personalidad y esencia" para el personaje.
Here I point out some small details within the application of the base colors which serve to add "personality and essence" to the character.
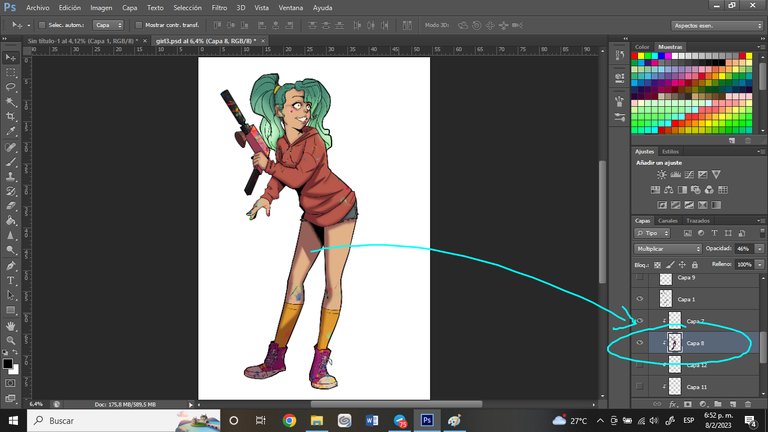
La aplicación de las sobras en otra capa, arriba de la de los colores base. Importante saber que capa tiene cada cosa.
The application of the shadows in another layer, on top of the one of the base colors. Important to know what layer each thing has.
Mencioné que la capa de la sobra esta arriba de la de los colores base. Bueno, lo cierto es que previo a esta, hice dos capas extras antes de la capa de sombras en donde realize detalles extras acorde al personaje.
I mentioned that the shadow layer is on top of the base colors layer. Well, the truth is that prior to this, I did two extra layers before the shadow layer where I made extra details according to the character.

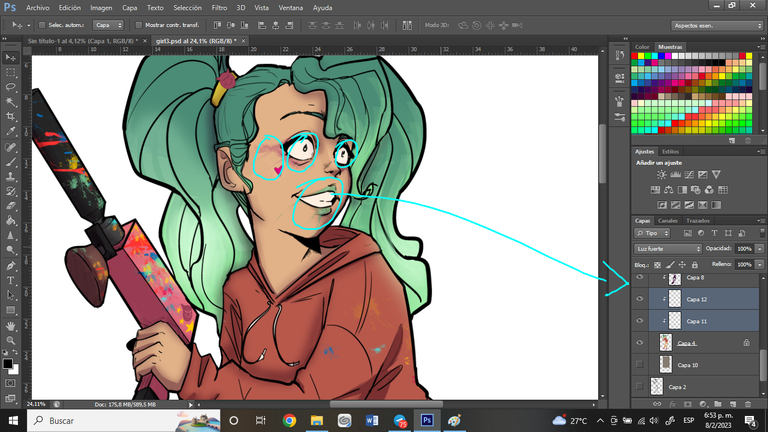
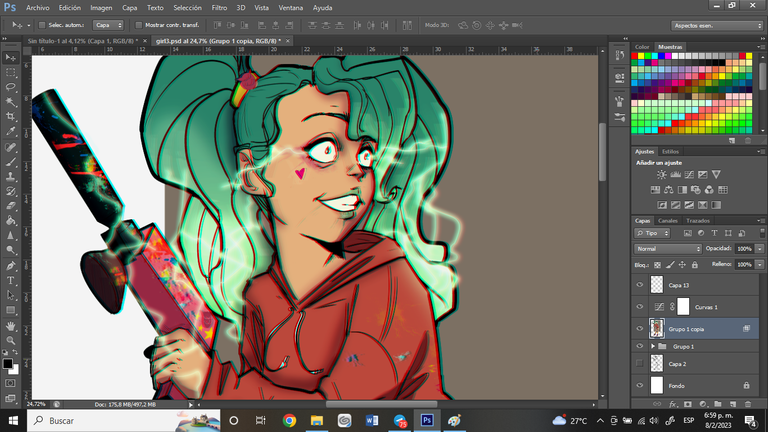
Decidí casi en ultima instancia (practicamente fue improvisar) agregarle efectos de rayos. Dando la ilusión de que los mismos son canalizados del mismo cabello.
I decided almost as a last resort (it was practically improvising) to add lightning effects to it. Giving the illusion that they are channeled from the same hair.
Sin Rayos...
no lightning

Con Rayos.
with lightning

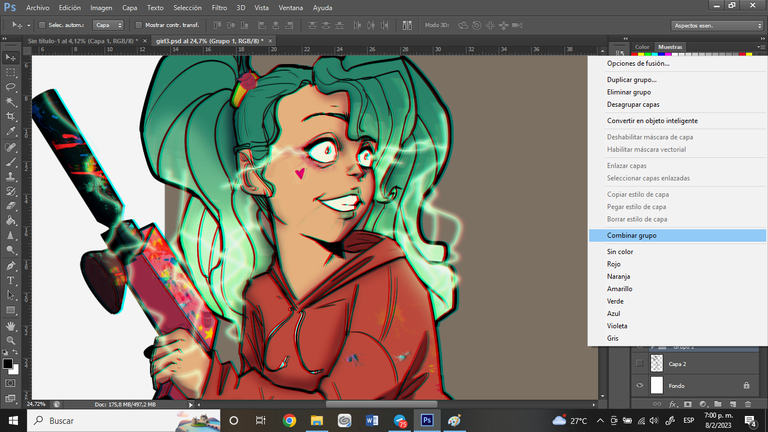
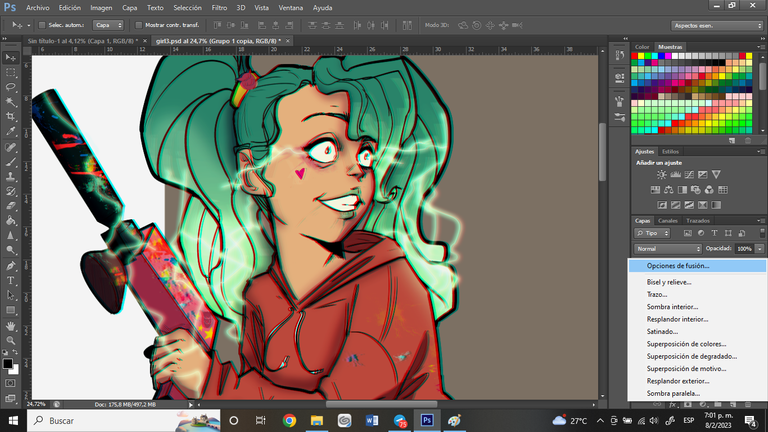
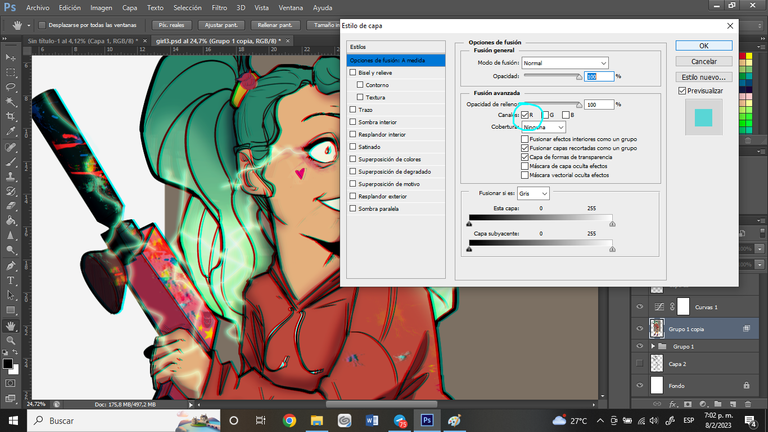
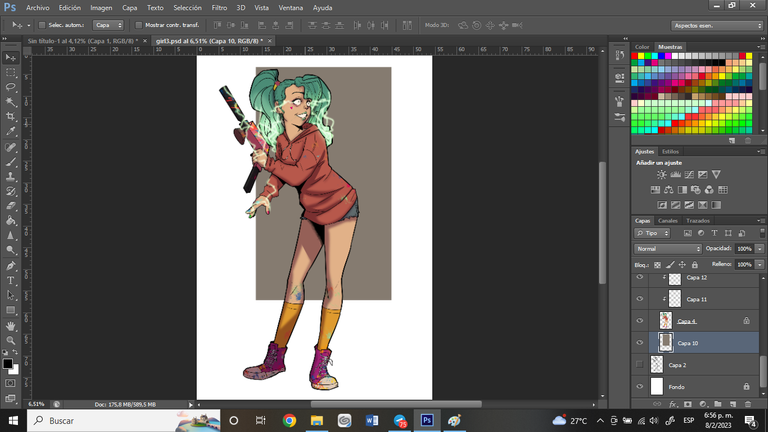
Aqui procedo a darle un efecto de Glitch muy sutil y simple de hacer. primero, procedo en duplicar el grupo en donde se encuentran todos los cambios de la ilustrasión, luego de esto, y con el click derecho aparecera una ventana en donde se visualizara la opción de Combinar grupo. Esto unira de manera inmediata todos los cambios y los convierte en una unica capa ó imagen si lo prefieren. Una vez que la imagen duplicada es creada, dentro de la ventana de Opciones de fusión se desactivan las cuadros de G y B. dejando solo el cuadro de R activo. claro que esto es a criterio personal, se puede dejar cualquiera de las casillas activas.
Here I proceed to give it a very subtle and simple to do Glitch effect. First, I proceed to duplicate the group where all the changes of the illustration are found, after this, and with the right click a window will appear where the Combine group option will be displayed. This will immediately merge all the changes and convert them into a single layer or image if you prefer. Once the duplicate image is created, within the Blend Options window the G and B boxes are unchecked. leaving only the R box active. Of course, this is at personal discretion, you can leave any of the boxes active.
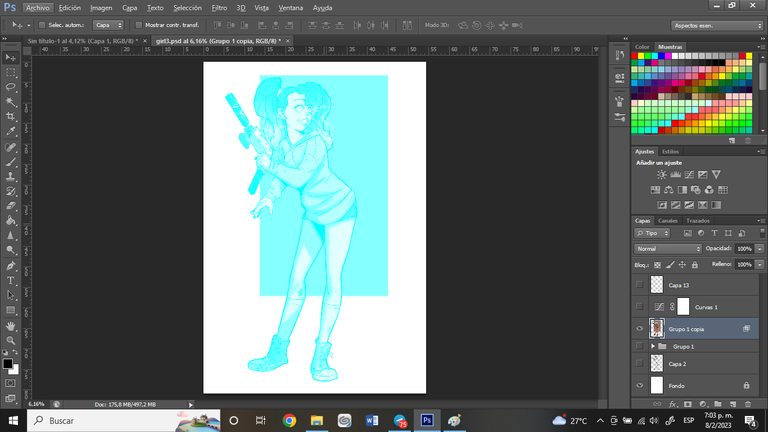
No pasa nada, es normal que se muestre de esta manera.
It's okay, it's normal for it to show up this way.

Luego de esto, se mueve en la dirección que a uno mejor prefiera. Bien séa de lado izquierdo ó derecho. Al final la intensión es que el efecto de glitch este presente de manera muy sutil.
After this, it moves in the direction that one prefers best. Either on the left or right side. In the end, the intention is that the effect of glitch is present in a very subtle way.
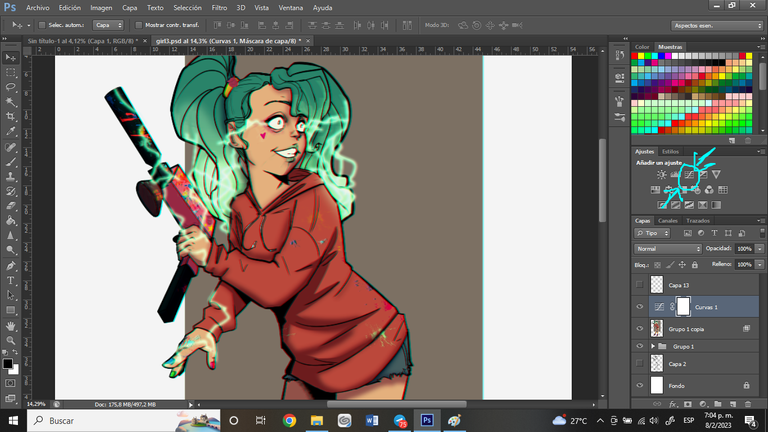
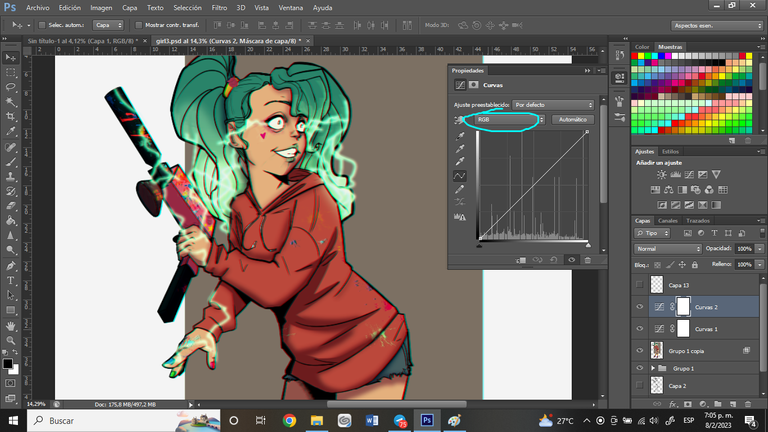

Por ultimo y como parte de la costumbre, activo la opción de curvas, esto con la intensión de darle equilibrio a los tonos dentro de la imagen. jugar un poco con esto para llegar al efecto deseado.
Lastly, and as part of the habit, I activate the option of curves, this with the intention of giving balance to the tones within the image. play around with this a bit to get to the desired effect.
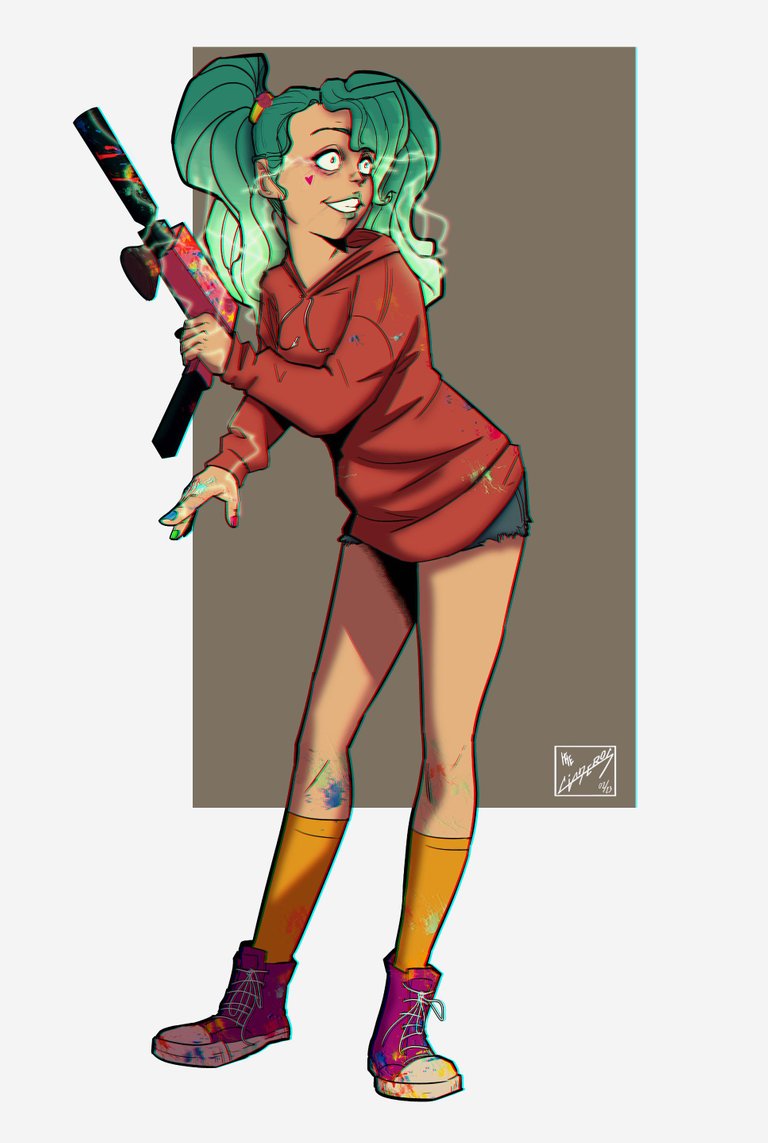
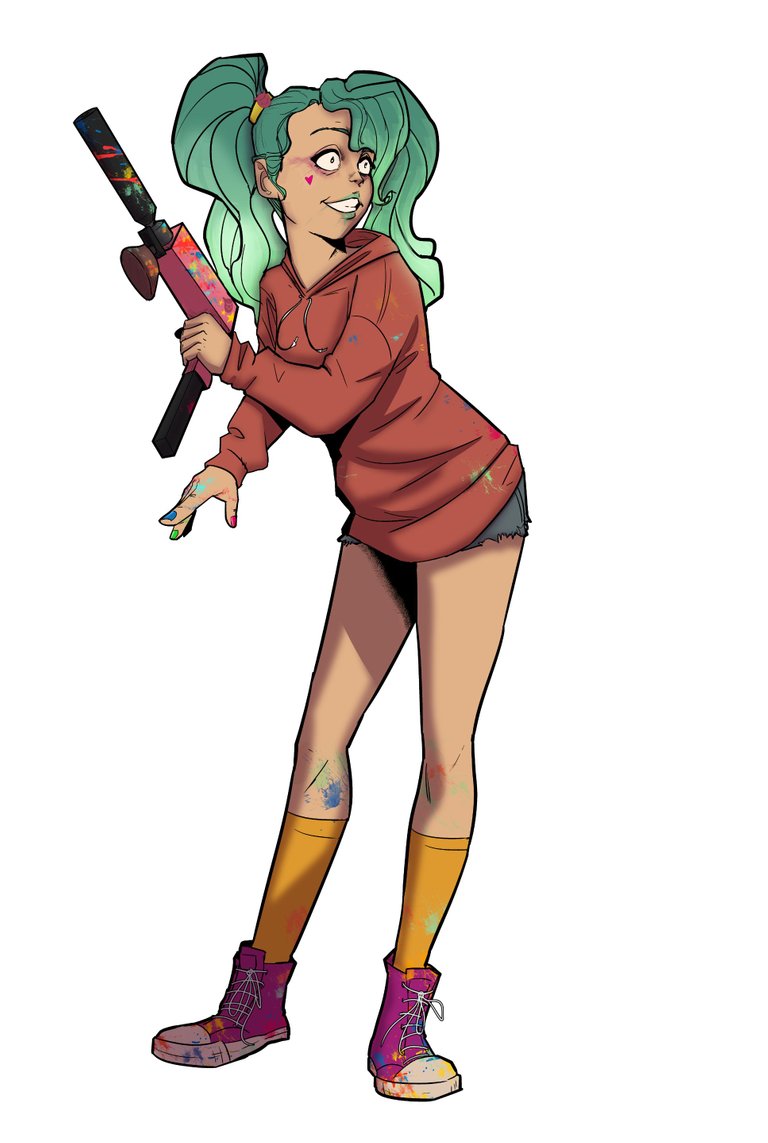
Al final se coloca la firma personal y listo.
At the end the personal signature is placed and that's it.
until next time


Congratulations @thecisneros! You have completed the following achievement on the Hive blockchain And have been rewarded with New badge(s)
Your next target is to reach 300 upvotes.
You can view your badges on your board and compare yourself to others in the Ranking
If you no longer want to receive notifications, reply to this comment with the word
STOPCheck out our last posts:
Support the HiveBuzz project. Vote for our proposal!
@tipu curate 6
Upvoted 👌 (Mana: 0/52) Liquid rewards.