
While this may not be particularly about some gold or silver stacks, I couldn't find a better place than the #SilverGoldStackers community to share this in. As it is directly related, and ultimately the end result is actually a stack of gold!
A while back in my early days on Hive, I shared a process of recovering some gold from trash electronics. A hobby of mine that I enjoy doing when I get the chance.
I enjoy the magical aspect of chemistry, and what feels like actual mining or scavenging for precious metals.
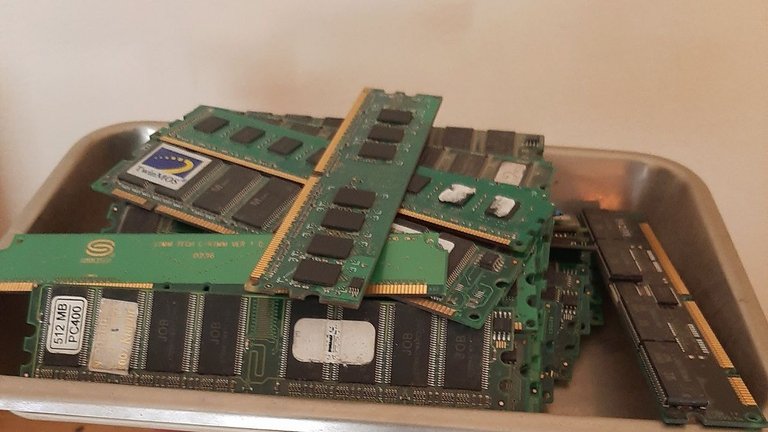
Back then, I did some recovery from gold plated electronic materials. Mainly the fingers of ram sticks, the pins that are found on PC motherboards and the such.
I promised at the time to make a post about recovering the gold from IC chips, which I wasn't able to get to until now, for various reasons related to life, but here goes.

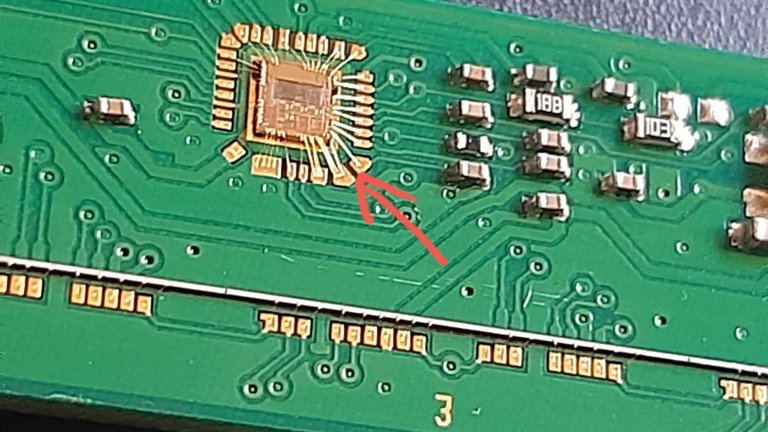 |
IC chips on electronic devices have a much higher gold yield than any other gold plated electronic parts. Because those actually contain wires of of 24 karats SOLID gold! Albeit very tiny, micro even, but still.
 |  |
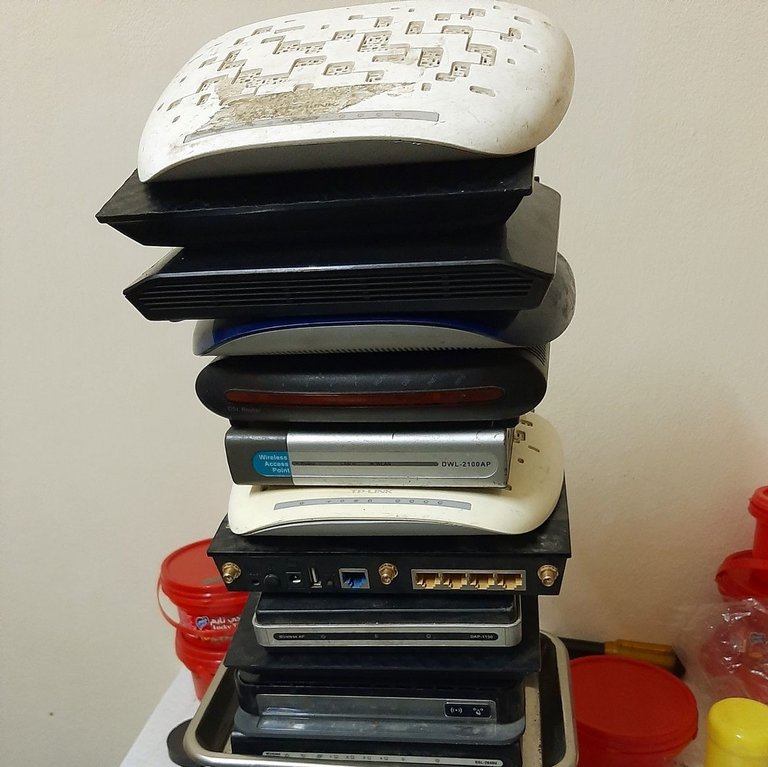 | 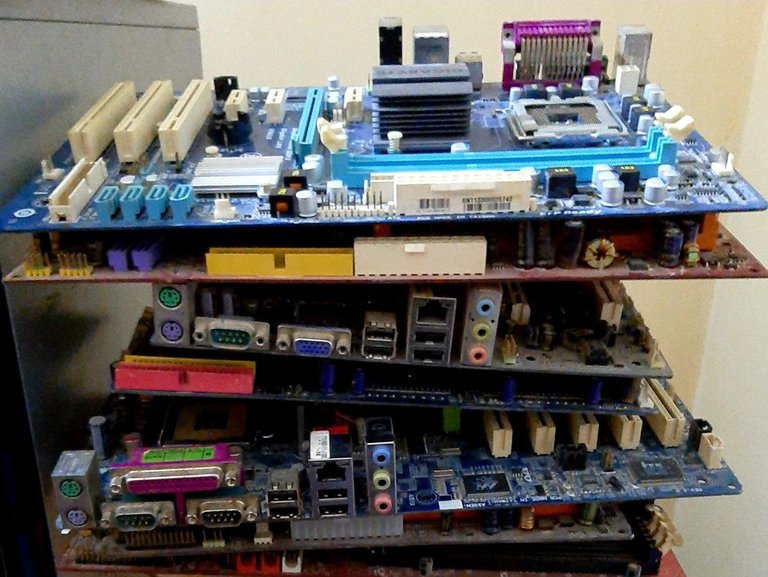 |
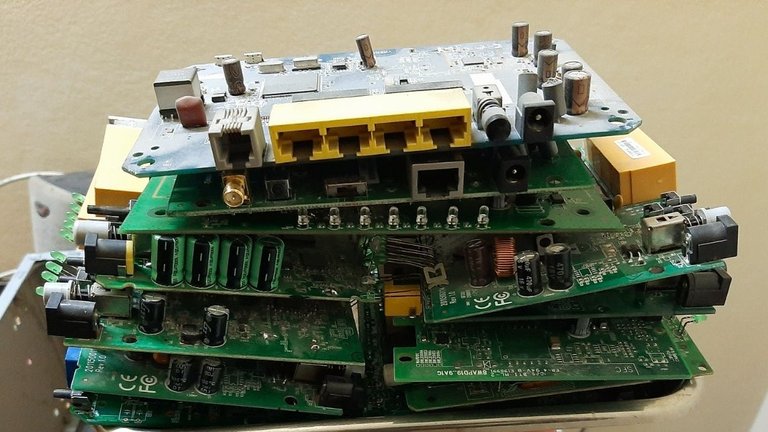
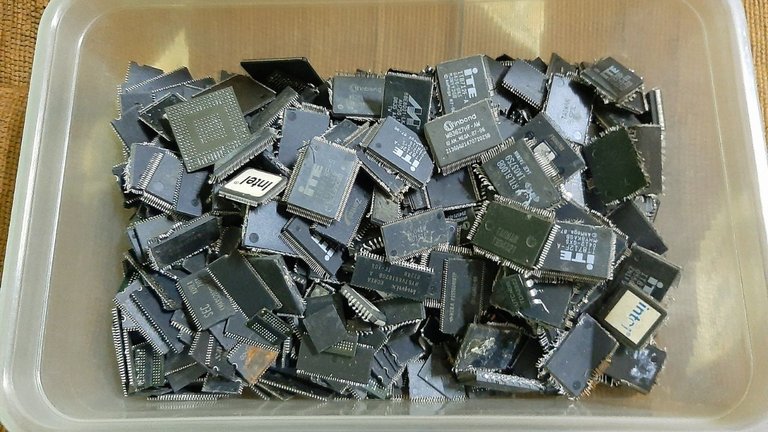
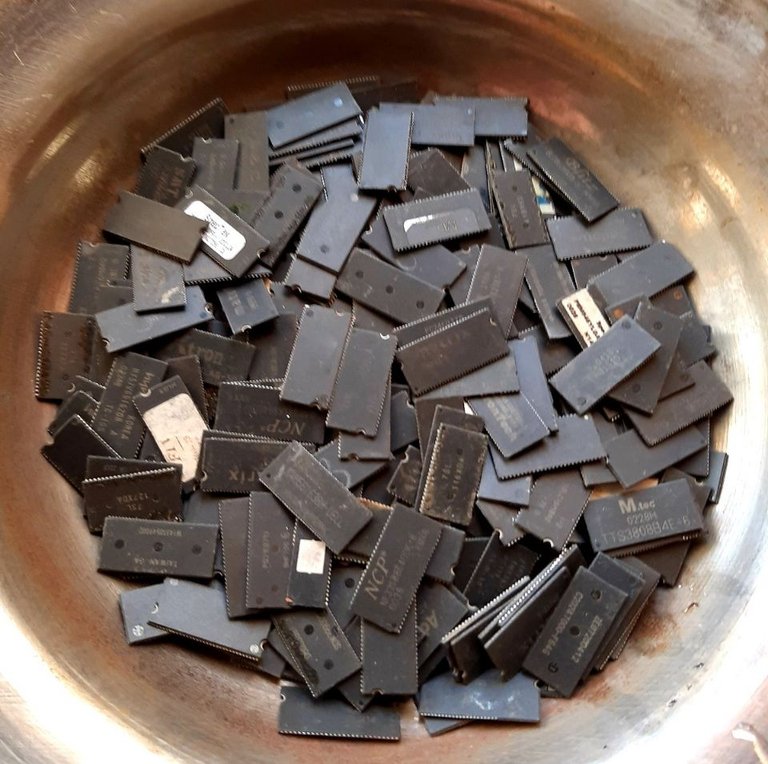
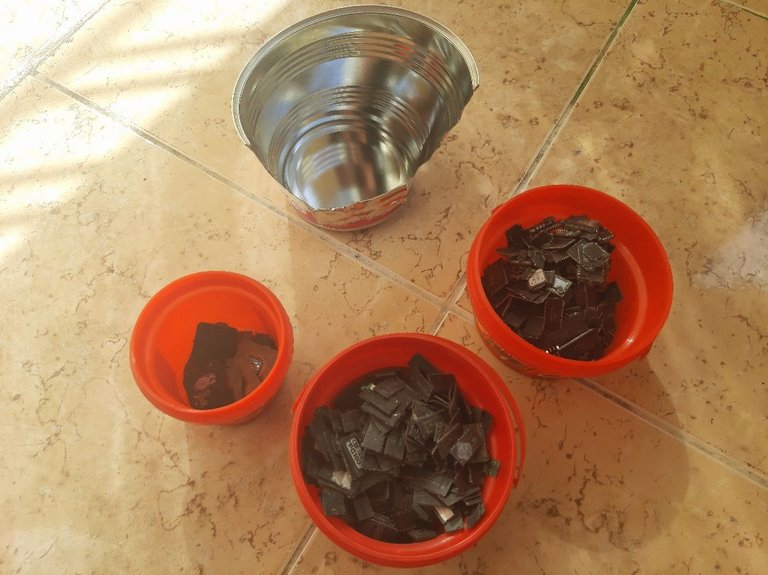
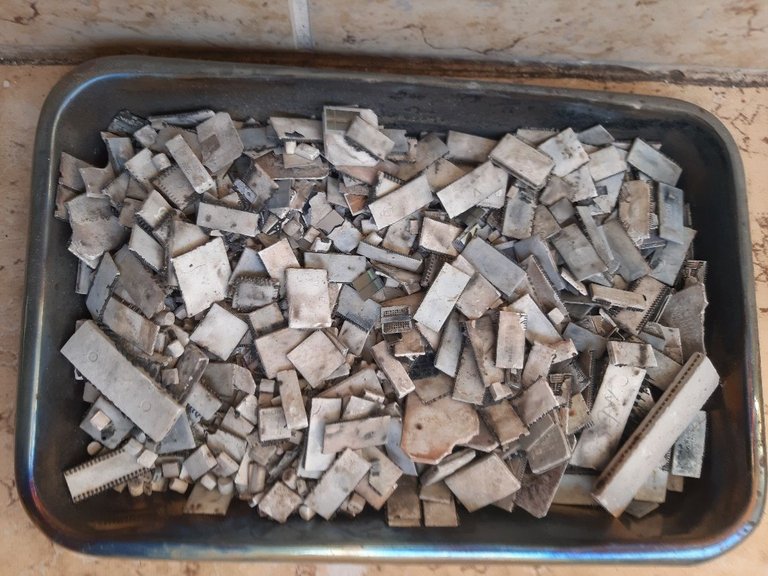
I don't go dumpster diving or all out hunting for electronic trash, I just collect what easily comes my way. So I ended up collecting an okay amount of IC chips over the course of a year or two, mainly from motherboards, ram sticks, graphics cards, modems and hard disk drives.
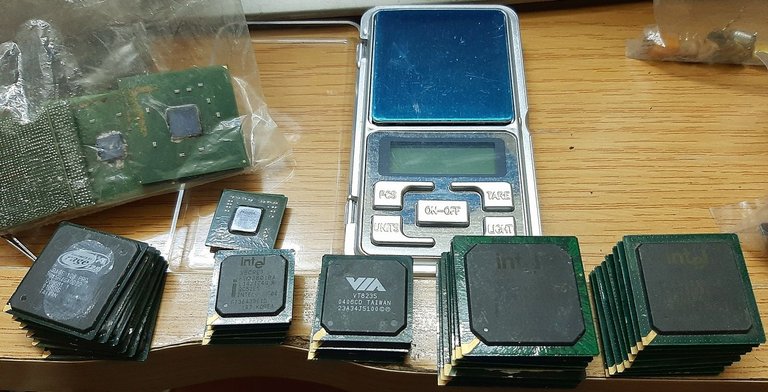
Not all IC chips are equal, some have much more gold wires inside them than the others, some don't even have any. It also depends on the brand, when and where it was manufactured, and its purpose.
Generally speaking however, the main chip on a motherboard or a GPU card usually contain the highest amounts.
 |
 |
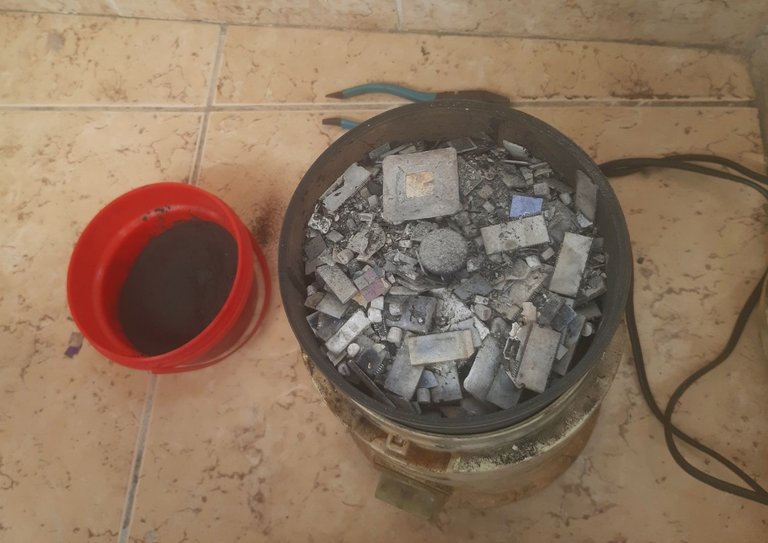
After pulling the IC chips out of the boards by any means necessary, and collecting a good sized batch to process. I only needed to wait for the opportune moment, and by that I mean some extra butane gas that I can spare so I can BURN THEM ALL! ermm incinerate the IC chips with minimal unhealthy smokes released into the atmosphere, if any.
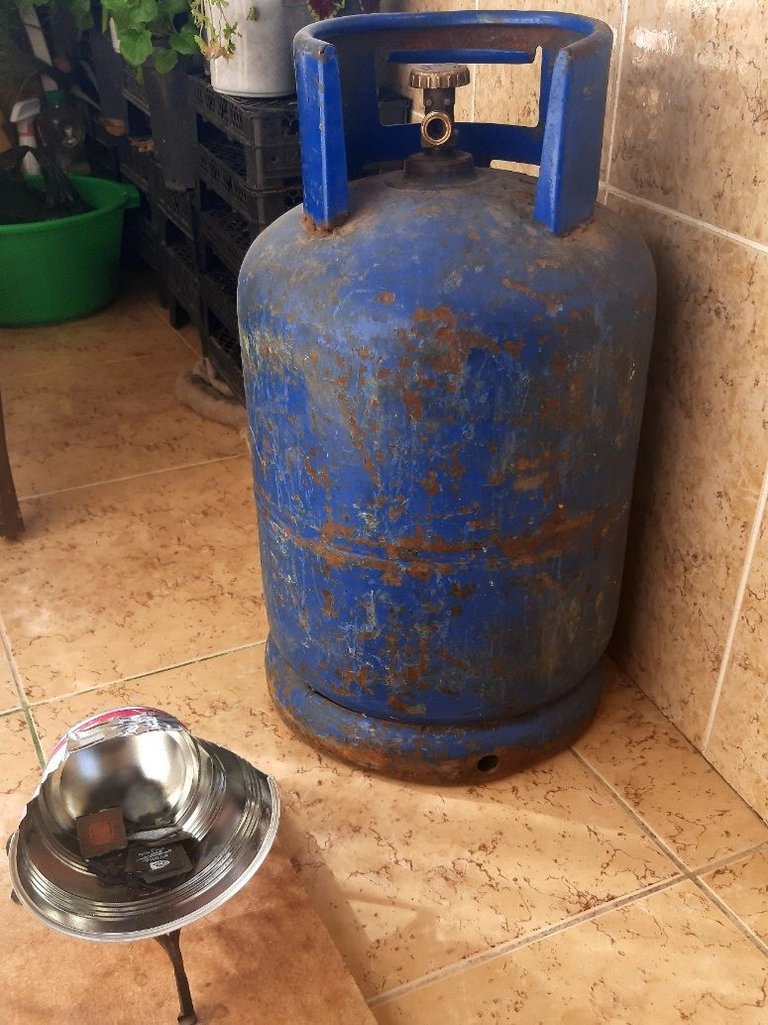
Gas canisters are rationed in these parts, and I can't usually get more as needed before x amount of time.
That moment eventually arrived, and I managed to spare some by holding in some of the gas I had, and not letting it all out too fast! 😅
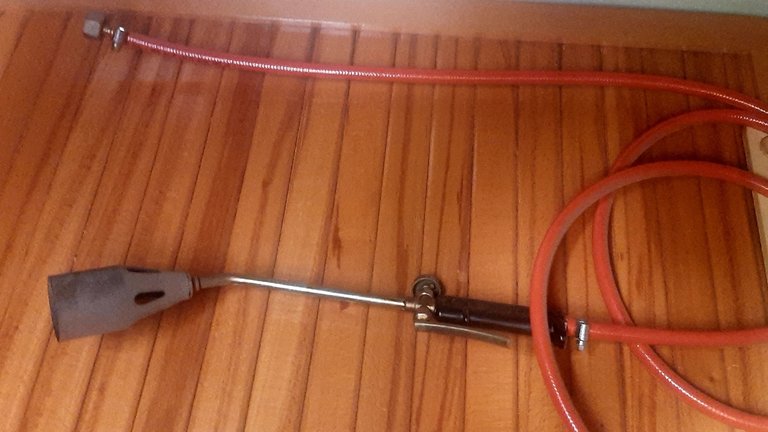
Well, not quite the flamethrower but close enough I guess. Always handy to keep that thingie near-by hanging to the side of the closet just in case...
 | 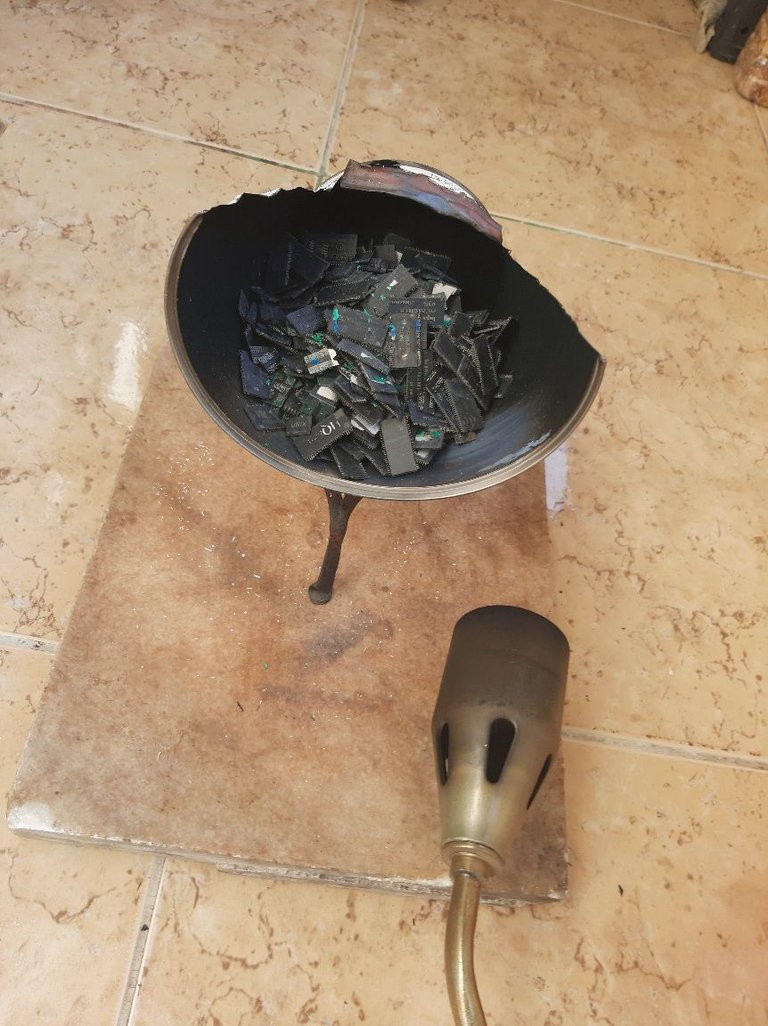 |
To get everything ready for the chip genocide. I cut out a baby formula milk can to use it as a pot for holding the chips so I can concentrate the heat. Who said babies aren't useful sometimes!
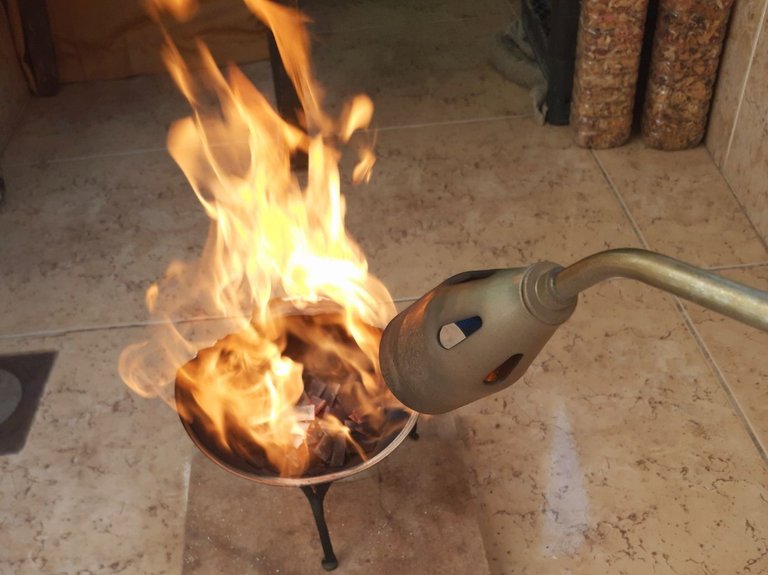
With my flamethrower plugged and ready, I started the incineration process. The point is really to burn them all, until the point where the chips become white in color after you've burnt them instead of a black carbon-y look. Basically burning as much of the carbon as possible.
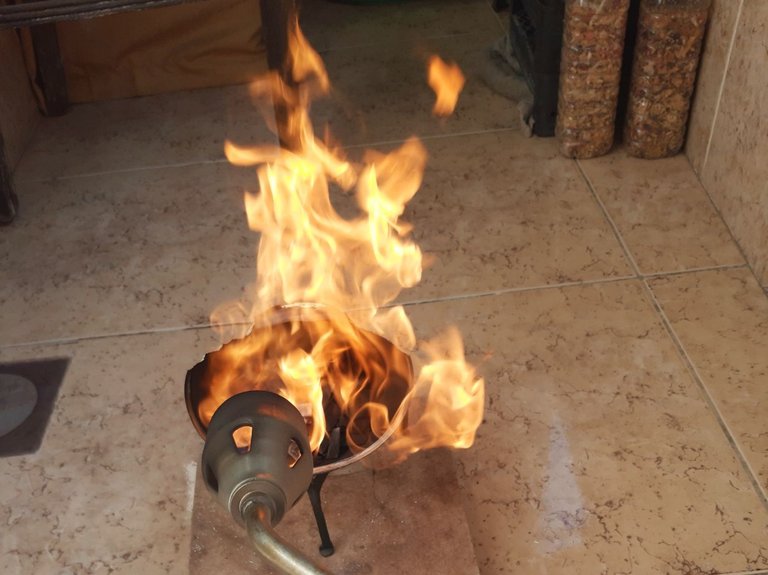 | 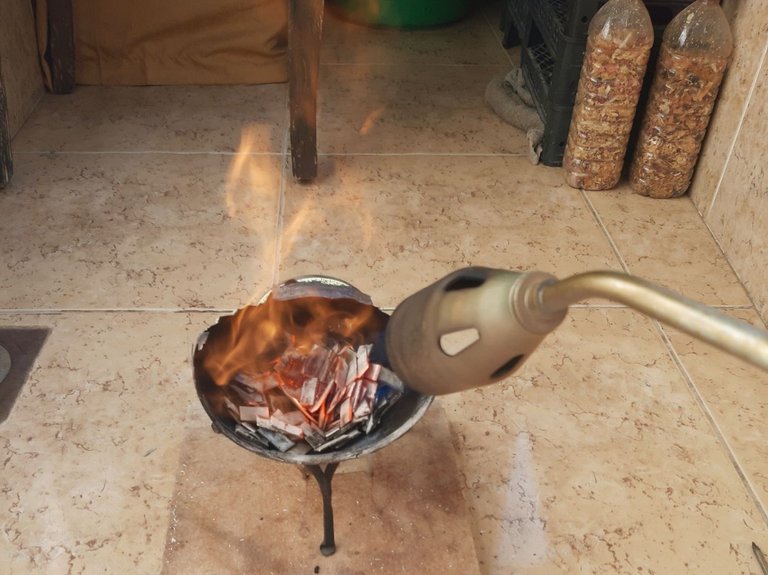 |  | 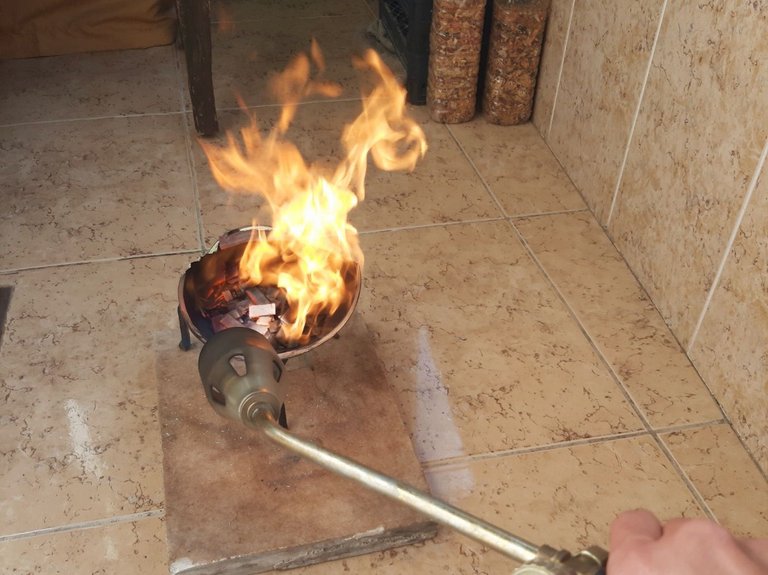 |
To achieve that, they have to turn bright red hot during the incineration.
PS. I lowered the pressure of the gas when I took most of the photos and video, because otherwise the camera won't capture the bright transparent/blue color of the flame.
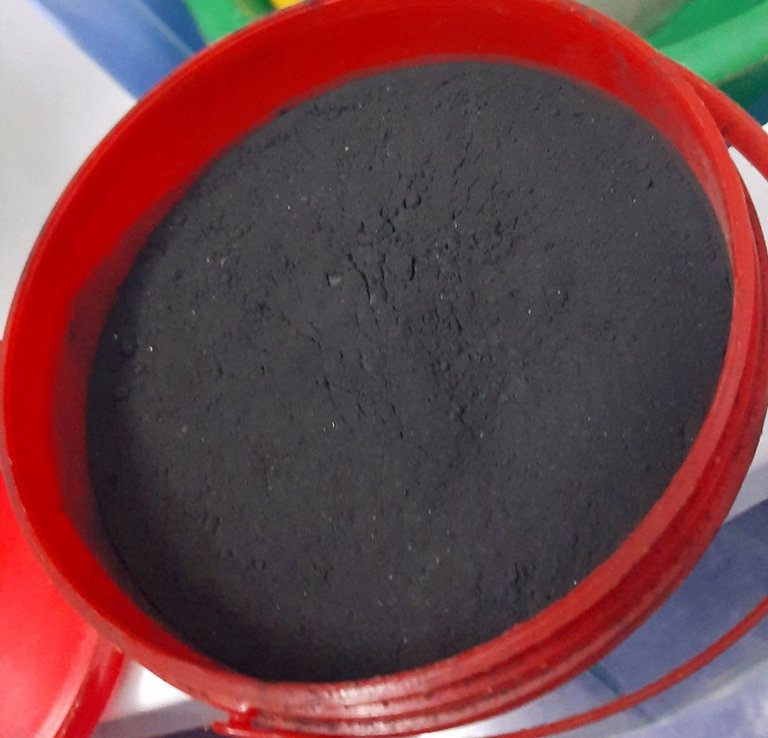
I went through a couple of batches like that, until everything was fully baked. Almost all the chips are white colored now after incinerating them thoroughly.
Sadly though, nothing lasts forever. Some didn't get fully burnt because I ran out of gas, so you probably can spot some partially black chips sitting here and there.
I might be guilty of getting somewhat distracted while burning the IC chips and having some fun with the flamethrower. 🤪
I wouldn't say it's the best idea to steal a grinder from the kitchen and grind everything up with the metals in them like this. But sometimes you gotta do what you gotta do.
And I keep this one dedicated for that sort of stuff.
There's no amount of crushing that can do a better job turning them chips into some sort of floury-like form, so you'd end up needing to sift and re-crush etc.
And this is essential, due to the micro nature of the wires we're interested in recovering, and the water gravity separation process that comes next!
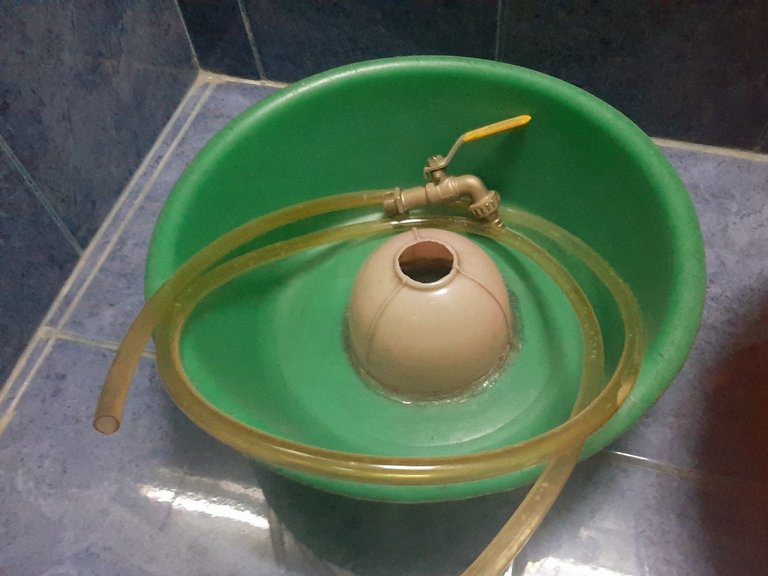
I know.. I know... That ain't blue and looks a bit weird for a bowl, so let me explain.
The original thing is called "the blue bowl" and it's one of the tools used for water gravity separation of metals from dirt (Well known amongst hobbyist miners.)
I don't have a ready made one, so I improvised and made a DYI one by cutting a circle in the middle of a green bowl, as I didn't have a blue one I could spare for that, so green it was. And the color only really matters to make tiny gold beads stand out against the background.
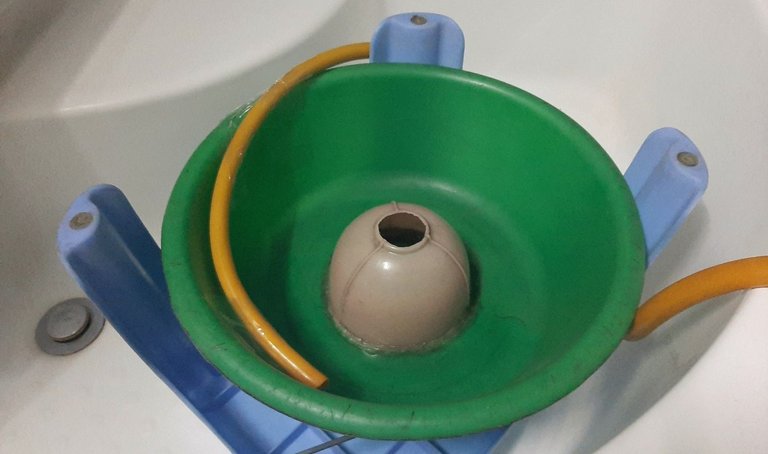
I also cut off the tip of a funnel, then glued it upside down above that cut out circle in the center of the bowl.
Attached a water hose to go around the outer area, so it gives the circular stream of water needed.
And Voila!
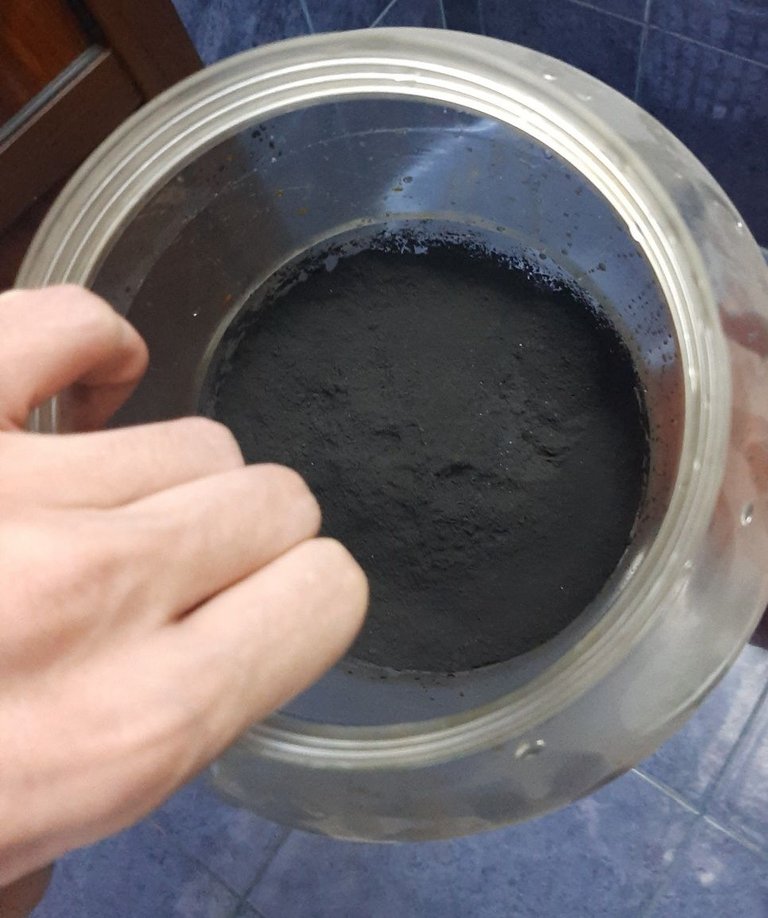 |  |
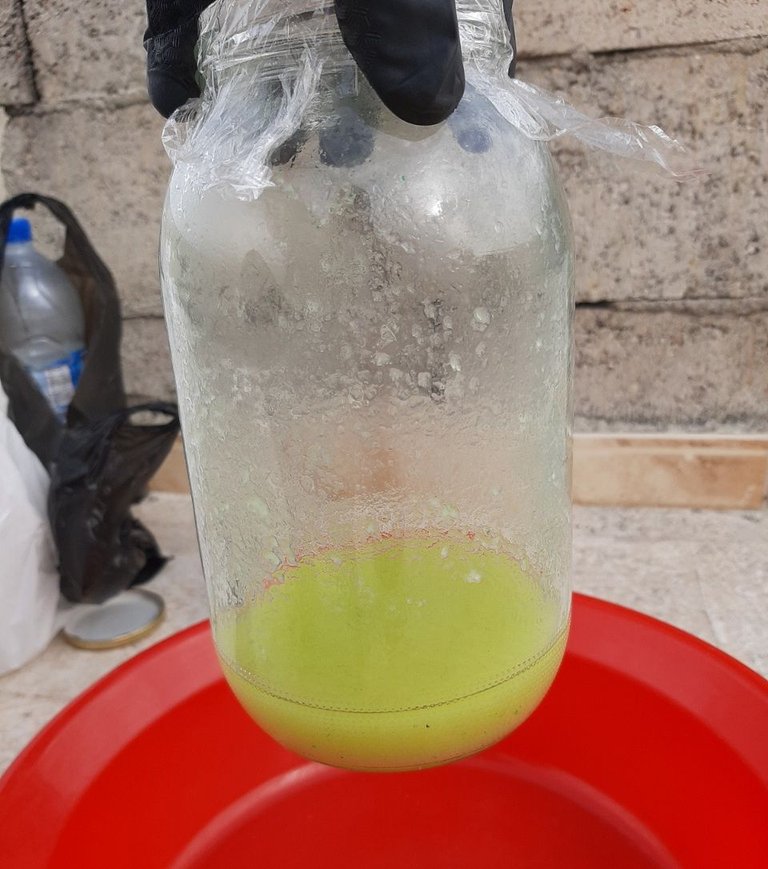
I threw the burnt flour in a BIG JAR first, to wash off most of the ash by filling it with water. Waiting for everything to settle down to the bottom each time, and pouring the dirty water off, a couple of times.
When the initial washing was done, I filled up the bowl with water, added in the ash concentrate, and fired up the water hose!
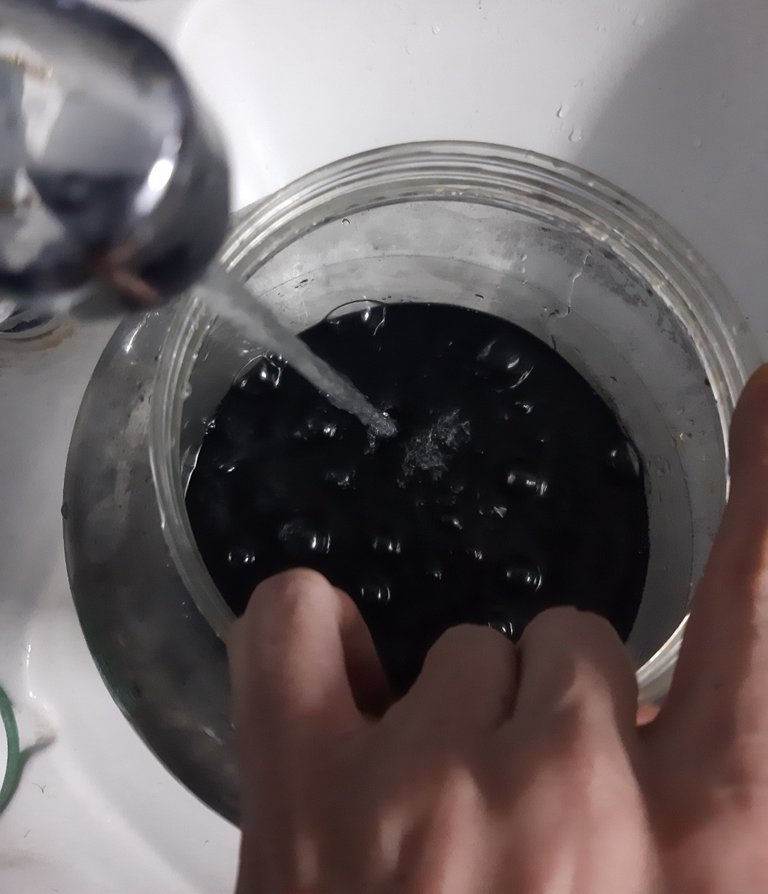
The idea behind it is very basic, but yet so efficient and creative. The water stream pushes the ash and all the lighter material up and around in the bowl with the flow.

The denser/heavier elements such as metals would sink to the bottom, and are much harder to push up in the water stream. Unless the water flow is super crazy strong, you wouldn't lose any of the metals, especially a metal as heavy as gold.
The dirty water with whatever lighter particulates just spiral around and up with the water, and get spilled over from the opening in the center.
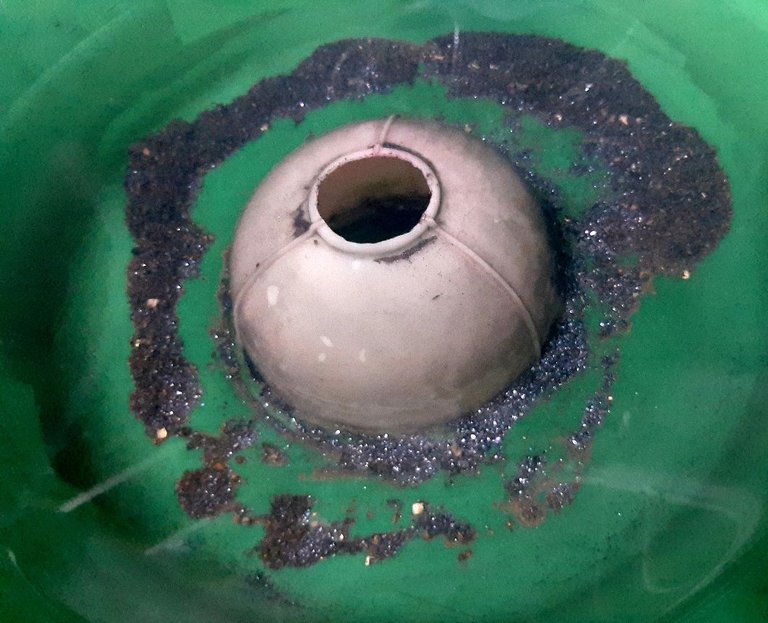
As soon as the water clears up, you can see what's left at the bottom are all the metallic wires, and some glass like silicon from the chips. Which I could've gotten rid of before grinding, but I went with the lazy way and threw everything whole in the grinder.
 This is an image from an older batch, where I've done both of those things.
Another option I had, was to make the water stream stronger to get rid of all that silicon. And also I could've used a magnet to pull out all the iron, leaving mostly the copper and the gold wires at the bottom during this water gravity separation process.

I decided against doing so this time for multiple reasons, but mainly because neither was really necessary to do other than for saving up on some chemicals at the cost of a slight loss in the yield, and the chemical process that follows will take care of both.
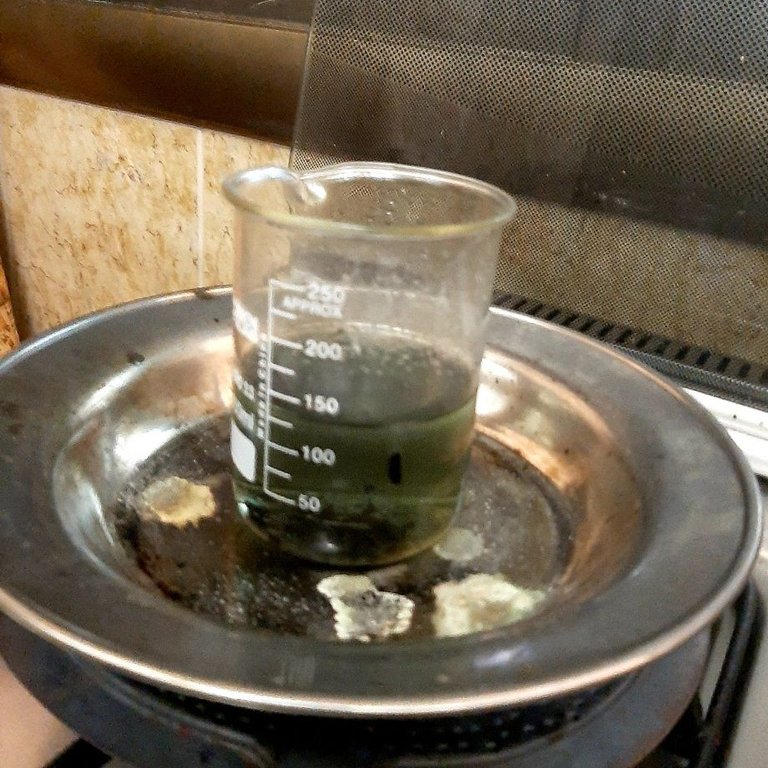
As long as we got rid of all the ash (Really, the Carbon is the issue here,) they're good to go for an acid bath! 🙂
A somewhat strong reaction started happening as soon as I added the Hydrochloric Acid, which was expected because of whatever aluminum is sitting in the pile. The rest of the base metals don't go in the solution as fast.

The initial diluted Hydrochloric Acid bath turns any base metals from that pile into their respective salts (except copper,) I filter all the liquid out, leaving only the gold and some copper behind as solids, along with the silicon and whatever solid dirt leftovers there might be.

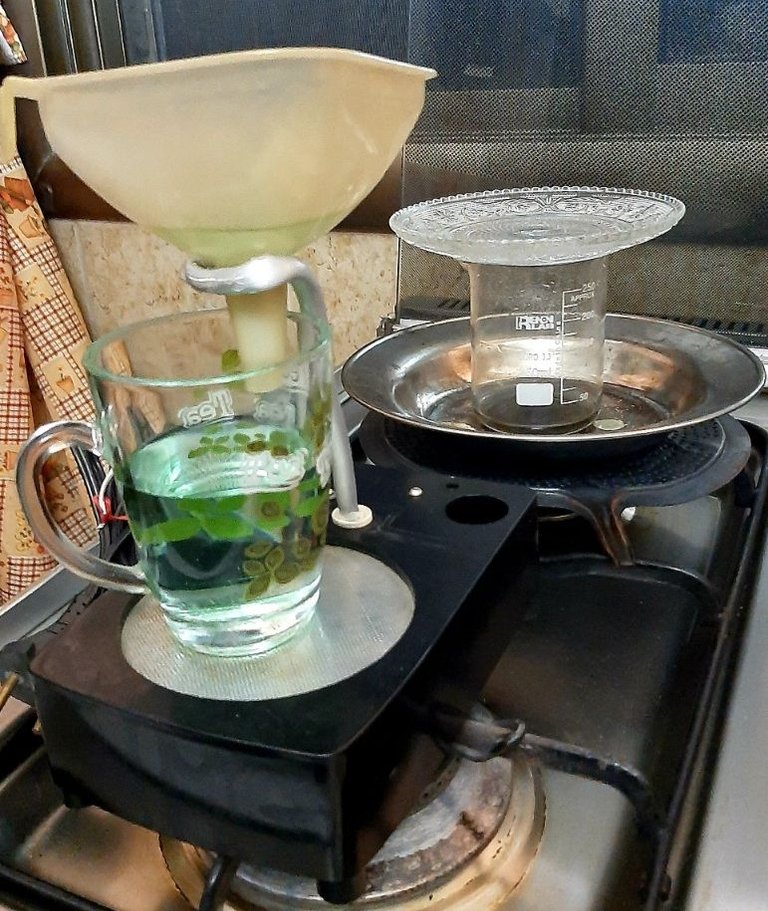
I add concentrated Hydrochloric Acid on the solids and some Copper II Chloride (Which can easily be made by oxidizing some copper and adding HCL on it.)
The CuCl2 etches whatever copper metal left in the solids, only leaving the gold behind this time.
The final step of extracting the gold is getting the gold in its liquid form and filtering that liquid out. This is usually done by making an Aqua Regia solution, but that requires some Nitric Acid to make which I didn't have.
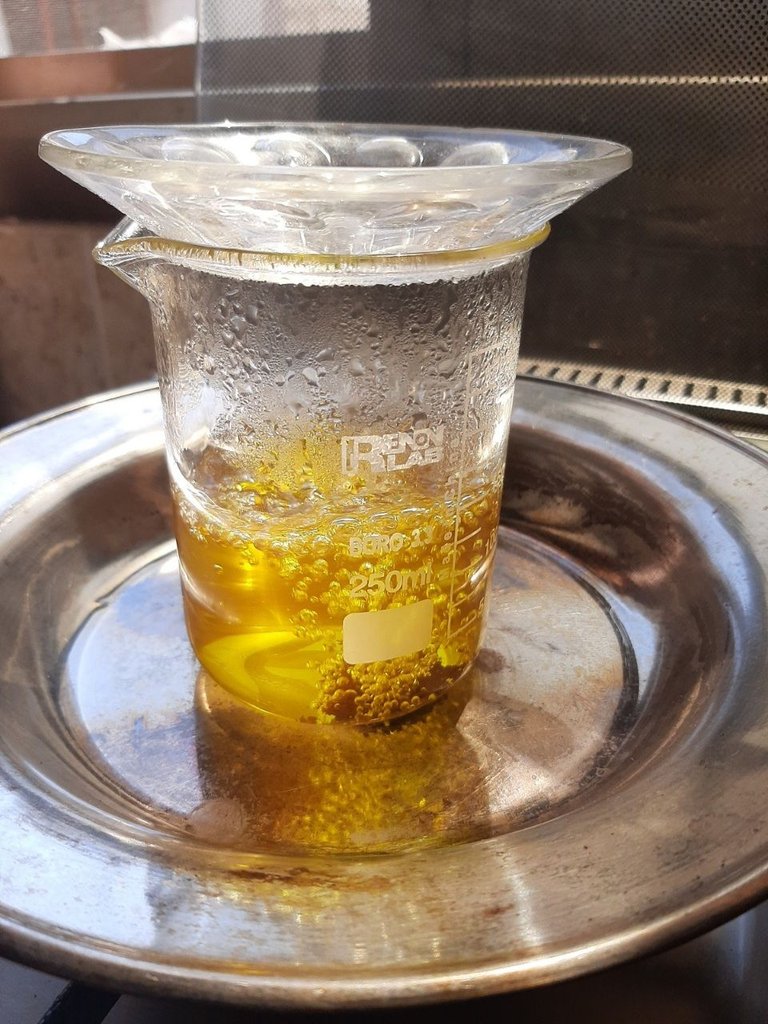
Alternatively, I use Hydrochloric Acid and I add Sodium Hypochlorite to it. Creating a high concentration of Chlorine gas in the solution. Which is sufficient to oxidize the small gold wires to get them into solution as Auric Chloride.

Once all the gold has gone into the solution, a tiny amount of Sulphuric Acid can be added to drop any Lead that might be contaminating it, and then the solution needs filtering one last time. Throwing away any solids this time, and keeping the crystal clear Chloroauric Acid.
To precipitate the gold, Sodium Metabisulfite would do the job, but again I didn't have any, and it isn't the best anyways.
 |  |
I cooked some iron in a dilute Sulphuric Acid to create the Ferrous Solphate needed, AKA Copperas (A well known reducing agent widely used in the olden days.)
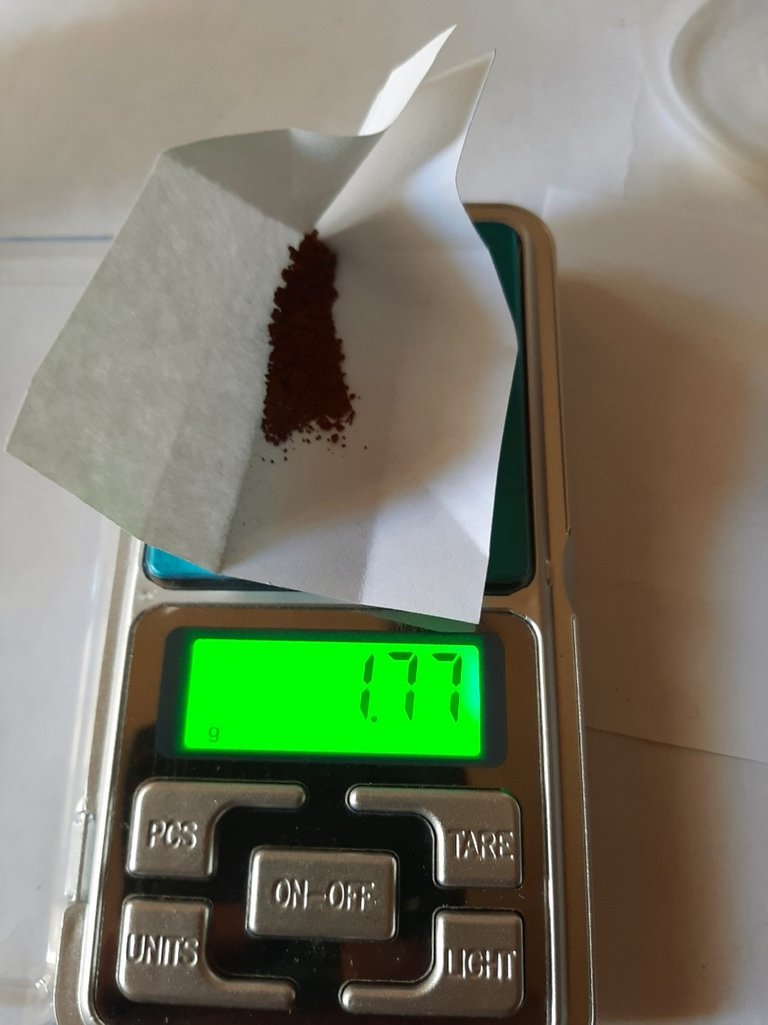
This is a reduction reaction, where the gold particles oxidize the iron turning the Ferrous Solphates into Ferric Solphates, thus dropping the gold out of the solution as pure gold metal powder.
Once the gold powder completely settles down to the bottom. The liquid is poured off and the pure gold powder gets washed with some hot HCL and water to clean any contaminations.
 |  |
Melting that 24k gold powder into a cool and shiny gold bead is a different animal that I'm going to skin once I have a sufficient amount to justify the melt.
But for now, I'm happy stacking that gold in any shape or powdered form. 😎
 |
Your Friendly Discord Bot For Your Hive Community And Delegations Curation Rewards Distribution Needs! |
I'm very late to the party, @yaziris, but just had to tell you that this is absolutely amazing. I couldn't even begin to put such a system together, even from your highly detailed descriptions. I'm just so impressed with everything you built and processed to get the resulting gold. And I had no idea you're a chemist!
Never late my friend, part of the beauty of publishing on the blockchain. It'll just be there for whenever someone get the time and see it. :)
I'm pretty sure you also can do whatever you'd want to put your mind into. It's just a hobby that fascinates me, and I get to do it every once in a while.
Thank you so much for your kind words @jayna !
Haha! What a revelation 😆
WoW! You are quite a chemist, aren't you?
This is truly amazing, but I'll need a pot of coffee to process it all👏
Haha, indeed. That realization was surprising, but it struck me like that. 😁
Thanks for the nice compliment from the queen of coffee chemistry!
PS. Hopefully we'll hear about you starting your CCC coffee shop business one day. Because it only makes sense! 😉 ☕
😊🤗
Thank you! Indeed, it would be nice to own a coffee shop one day😉☕️
I thought of the same thing, I used to commute by bike to work and I often find many junked computers by the street and collected all the ICs chips. I have a few pounds but never got to actually going through the whole process.
Good for you giving this a go. @yaziris
Ooooo NICE! Yeah, I'd keep pliers and a screwdriver handy if that was the case, salvaging the ICs and some other small stuff on site. They do add up quick!
The process actually looks more daunting than it really is, as long as you know what you're doing with the chemicals and keeping safe, I'd say go for it! 😎
aha! So, your really are a Mad Scientist! This is so cool! Bravo!
You must be killin' it out here!
@thekittygirl just slapped you with 1.000 PIMP, @yaziris.
You earned 1.000 PIMP for the strong hand.
They're getting a workout and slapped 1/2 possible people today.
Read about some PIMP Shit or Look for the PIMP District
Mhmm.. I really am Mad. That part we already fully confirmed!
Thank you for having that folder with the big stash of the coolest images on the interwebz! 😁
You must be killin' it out here!
@yaziris just slapped you with 1.000 PIMP, @thekittygirl.
You earned 1.000 PIMP for the strong hand.
They're getting a workout and slapped 1/1 possible people today.
Read about some PIMP Shit or Look for the PIMP District
Damn bro, how can one guy be this talented. I was following the process until you brought Chemistry into it and all the fancy chemicals, oxidisation, reduction, reagents and what not. 😅
I knew they contain Gold but didn't know it can be any significant amount. At the incinerating stage I was saying to myself it doesn't look safe but the chemical part looked even more dangerous to me with concentrated acids and what not...lol
What a beautiful display of application of chemistry. Wish my school taught me chemistry like this. Chemistry 101 - How to extract Gold from ICs 😎
!LUV to read your posts as always.
!PIZZA
@pravesh0 sent you LUV 🙂 (6/10)
Made with LUV by crrdlx
There would only be significant amounts of gold if you have a significant amount of material to start with.
It's usually around 100-150 grams per metric ton of e-waste material.
So, the financial aspect of it would be more relevant when you go on larger scales. Otherwise, It's more of a hobby and a justification to play with dangerous stuff 🤪
Appreciate your visit. Much !LUV
@yaziris sent you LUV 🙂 (1/1)
Made with LUV by crrdlx
Whoah what a production site you've created there! Really cool to see the whole process explained. Quite the work for the amount. But then again, gold diggers in Alaska and the like spent similar amounts of effort for a bit of the precious metal :D
Oh, I definitely agree! xD
Ideally, the work should be done with larger batches than what I showed up there. Because the time, effort, and chemical use, would basically be almost the same.
Thank you for stopping by.
This was very cool to see and very educating! Thanks for posting this!
!DHEDGE
Glad you enjoyed it. Thank you for stopping by.
Appreciate the kind comment!
No problem! Have a great day! 🙂
Very cool a whole lot of work though 🤣 !BBH
@yaziris! Your Content Is Awesome so I just sent 1 $BBH (Bitcoin Backed Hive) to your account on behalf of @bitcoinman. (14/50)
Indeed it is! Always better to have more material to work with, so the yield would justify the work required.
Thanks for stopping by!
Really cool to see the step by step process involved!
Glad you like it, appreciate your comment!
$PIZZA slices delivered:
@pravesh0(5/5) tipped @yaziris
Thanks for your contribution to the STEMsocial community. Feel free to join us on discord to get to know the rest of us!
Please consider delegating to the @stemsocial account (85% of the curation rewards are returned).
You may also include @stemsocial as a beneficiary of the rewards of this post to get a stronger support.
This post has been selected for upvote from our token accounts by @bulliontools! Based on your tags you received upvotes from the following account(s):
- @dhedge.bonus
- @dhedge.pob
- @dhedge.stem
@bulliontools has 2 vote calls left today.
Hold 10 or more DHEDGE to unlock daily dividends. Hold 100 or more DHEDGE to unlock thread votes. Calling in our curation accounts currently has a minimum holding requirement of 100 DHEDGE. The more DHEDGE you hold, the higher upvote you can call in. Buy DHEDGE on Tribaldex or earn some daily by joining one of our many delegation pools at app.dhedge.cc.
Yay! 🤗
Your content has been boosted with Ecency Points, by @grindan.
Use Ecency daily to boost your growth on platform!
Support Ecency
Vote for new Proposal
Delegate HP and earn more
Gold powder is great gold too! The hard part is coming by enough of them to be able to process them! I bet that was a whole lot of dumpster diving!
Well done!
Ho Ho Ho! @yaziris, one of your Hive friends wishes you a Merry Christmas and asked us to give you a new badge!
The HiveBuzz team wish you a Merry Christmas!
May you have good health, abundance and everlasting joy in your life.
To find out who wanted you to receive this special gift, click here!
You can view your badges on your board and compare yourself to others in the Ranking
Check out our last posts: