
So, What has happened with Hive Streamer since the hackathon?
Well, not much actually. But it is functional.
How to setup Hive Streamer
TL;DR
docker pull anarcist/hive-streamer
docker run -d -p 8080:80 -p 3334:3334 -p 1935:1935 anarcist/hive-streamer:latest
The longer version
You will need to download and install Docker (This guide will cover Windows only)
Once you have Docker installed its best to restart your computer to be sure everything is installed and running.
Next, we open a Powershell terminal. You can do this from your start menu by simply typing "powershell" which will perform a search. Otherwise, it should be located under it's own folder called "Windows Powershell"
In powershell we first pull the image from Docker Hub with the following command. This may take a few minutes to download the image.
docker pull anarcist/hive-streamer
After the latest image has been downloaded we need to spin up a new Docker container. For this we will use the following command.
docker run -d -p 8080:80 -p 3334:3334 -p 1935:1935 anarcist/hive-streamer:latest
A little bit of a breakdown of this command so that you can understand:
-d- This will run the container in detached/background mode-p 8080:80- This will bind the local port 8080 to port 80 (web) of the container-p 3334:3334- This will bind the local port 3334 to port 3334 (api) of the container-p 1935:1935- This will bind the local port 1935 to port 1935 (RTMP) of the container
This will boot the container and bind the appropriate ports to your local machine.
We give the container about a minute to fully initialise and then we will navigate to http://localhost:8080/ in our favourite web browser.
You will be blessed with this lovely screen:
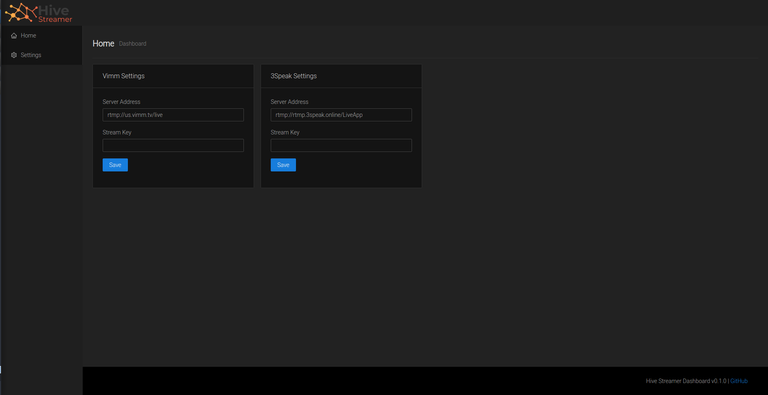
On this screen, you can simply enter your respective stream keys and hit save on each. It's as simple as that!
Once you hit save, the backend will embed the stream key into the nginx configuration file and restart the nginx service for you.
The final step is to set up your favourite streaming software with the custom RTMP URL: rtmp://localhost/live (No key required)
After that is updated, you are set to go!
Keep in mind, this will use twice as much bandwidth because you are send two streams at once.
What is next for Hive Streamer?
Next will be an authentication method. This is a priority as it will allow users to host remotely on a VPS or Dedicated Server and eliminate to "Double Bandwidth" issue. This will also open it up to adding more streaming platforms, i.e. Twitch.tv, Theta.tv, Mixer
GitHub: https://github.com/hive-streamer
Docker Hub: https://hub.docker.com/r/anarcist/hive-streamer
Donate
![]()
![]()
![]()
![]()
Bitcoin: 17gqqZZnr57maB3Ze5UnosBo9mtU1RTrD5
Bitcoin Cash: qpu8736yqqhkfd5gsyph6a0wy0e4r83ap50tdsknv2
ETH: 0x927ad35fDc46Dc727fccd1E10A0ebe70a57BAA7D
Thank you @anarcist69, for using the CO2 Compensation Coin (COCO) to reduce your CO2 footprint.