
I go over creating the Underground Ruins map in my game. This includes showcasing different stages of building the map from a bunch of different meshes. Along with my though process or anything else I felt like sharing. With this being my 13th map now I am starting to like some of the results I’m getting.
A fresh map. Since I had plans for using the landscape layer it comes with I kept it for later us. I just love the thrill of a fresh start. With how blank and inviting it is for fresh ideas to spill onto it. I had a general idea of how I wanted the thing to go. Some of them worked out and others were modified to better fit in.
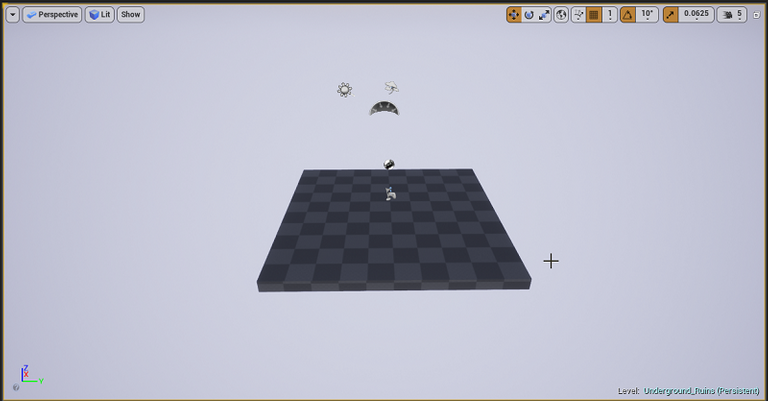
As I often do. I laid out a little bench to sit quite a few meshes onto. Using the floor mesh I was planning to use for most of the map to see how different things looked. I was also spawning in as the character to get a feel for the scale and make some adjustments when needed.
I also expanded out the landscaping layer. It ended up being way too big for what I needed it for. I ended up adding a water feature that has some reflection off it when the player is near the edge. The whole thing is in a cave and this area has some water going around it.
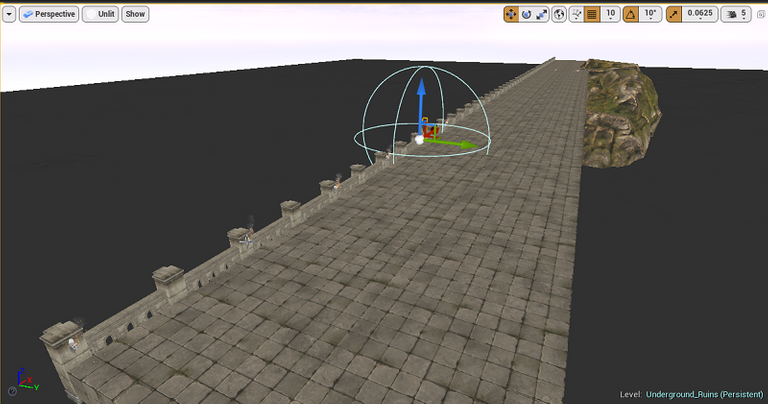
I took this screenshot when I was in the middle of working out how giant the main platform the player would be running around on would be. I ended up putting in some torches since light is going be the main concern with how wide open everything is going to be. I thankfully duplicated this a few times to give myself quite a long runway.
Later on, I ended up shorting things down by a couple of sections. I had over a six-minute run and I was starting to see a steady decline in framerate over time as I was expanding things out. While there are some things I can do to better increase performance. I also want to keep the area reasonable to run through and clear.
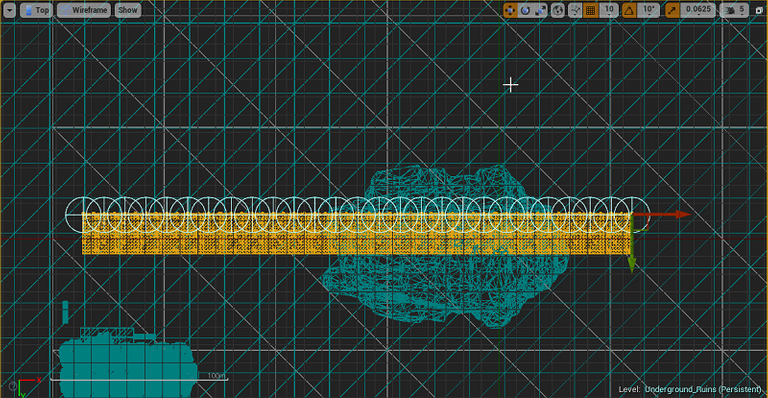
As I oftentimes do I changed my view while working on this very large section. Unreal Engine 4 lets you change the view to a top-down, left, or right, and so on in a more reasonable way to handle large scale areas. I also had the wireframe view on as it helps for me to alien things sometimes so it’s my default view when working from this window.
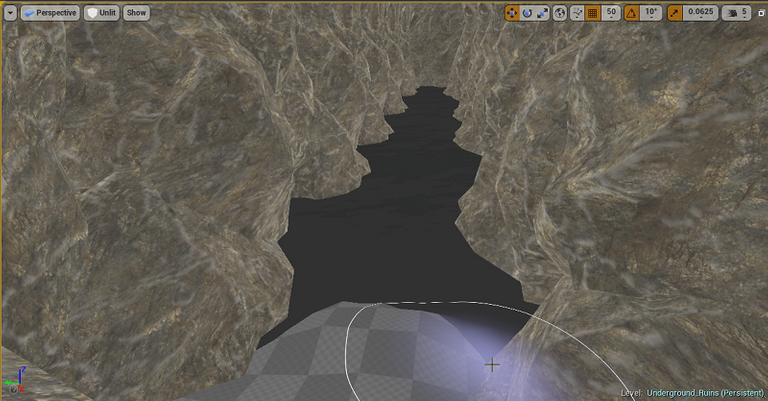
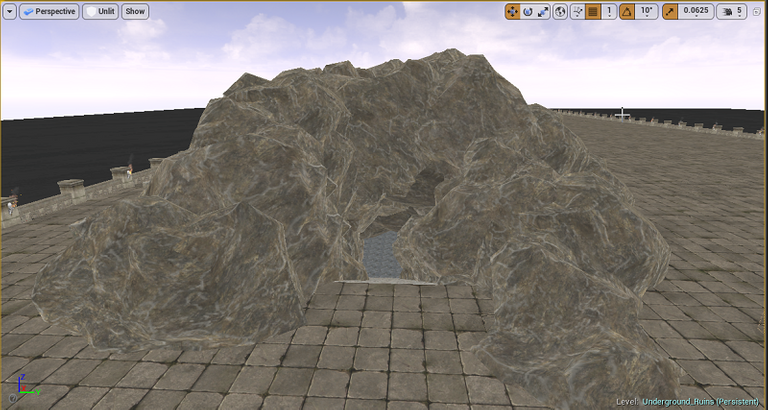
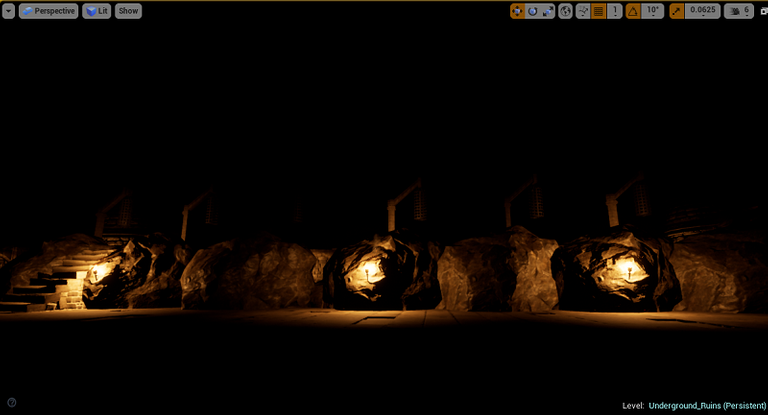
In this map, the player climbs several stairs and landing areas to get up onto the large ruin area. Here I was increasing the dirt landscape layer high enough to go over the water layer I had put down for the rest of the zone. I also placed some rocks to create this small cavern the player is starting in.
In this screenshot, I’m working on one of the floors the player will be running through to get up onto the main area. It ended up changing slightly a couple of times. The lower levels where mostly rock and the closer you got to the exit the less rocky it got.
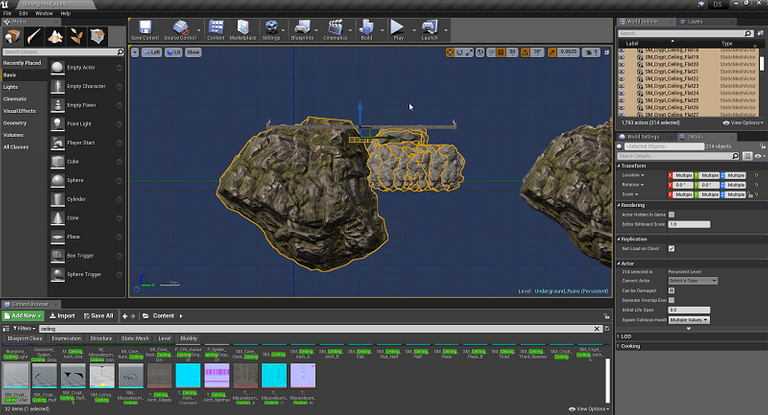
One challenge is I wanted to keep a rocky ceiling for all for these rooms. As you can see from the see-through sections above I did not have a lot of space to put in that kind of ceiling. I ended up reducing the Y scale flatting the ceiling mesh I used so it did not stick up through the main level.
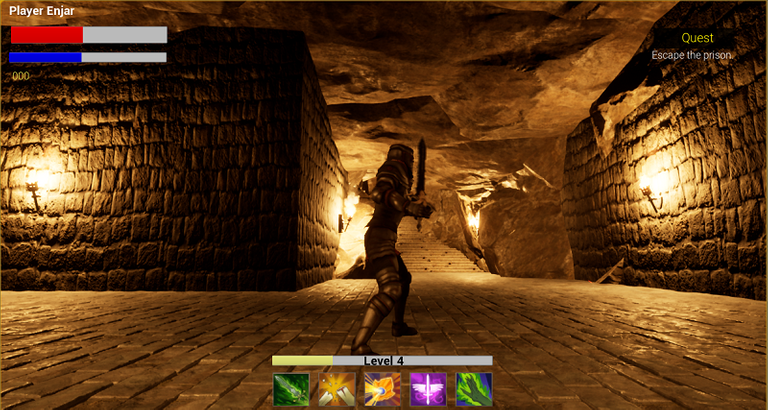
This is the same floor as featured above. Expect this time everything is finished including the lighting. I spawned the player in to show a feel of scale. You can see the ceiling is rather flat but it still worked out.
The stairs in the distance lead up and out onto the larger area. I love using rocks for the walls around that staircase and the many others on this map. It also makes it easier to create when trying to deal with ceilings and forcing the player to move around a tad to get around larger sections of rock that half block the stairs.
Often you find yourself having to move something over. I was not exactly happy at where the stairs were going to exit. I wanted it to be over a tad more and towards the back. That would leave me some room to have an area for the player to explore before they start moving forward in the other direction.
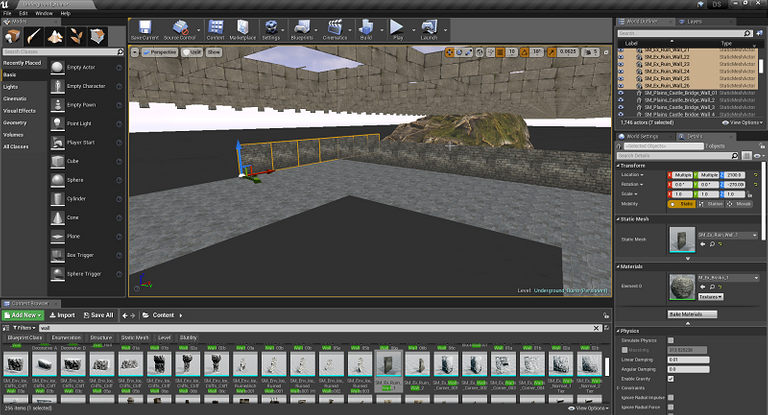
The easiest way to select everything I had been working without getting too many other things was having the right viewpoint. I then went in and clicked the control key on a couple of items that I did not want to be included.
While I could have made everything in its separate folder for easy selection I’ve never liked going that route. I’ve had some interesting fails when trying to stay organized in the past using a folder method.
After that, it was time to delete some floor tiles for the staircase and exit point. As I’ve said in a former post when their lots of rocks conveniently placed well there a chance it’s covering something up. I had to delete a couple of tiles which meant I had a giant hole I needed to cover with something.
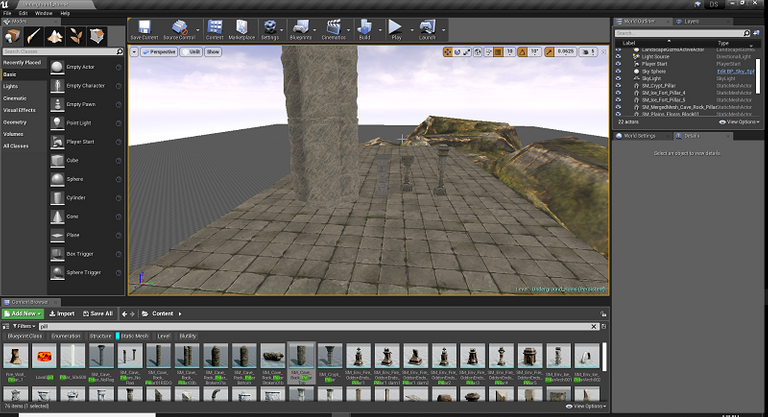
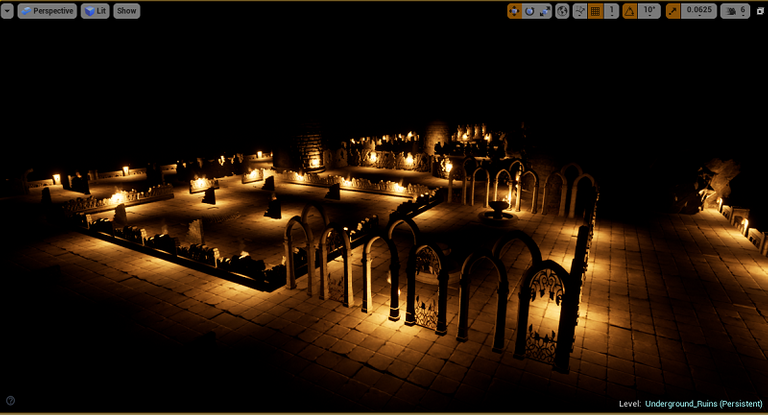
With this map being a giant area of ruins I set up a lot of areas that still had some structures standing. While I had the mindset that this was a giant underground town or castle. There are even several pathways set out that give a feeling they use to be hallways.
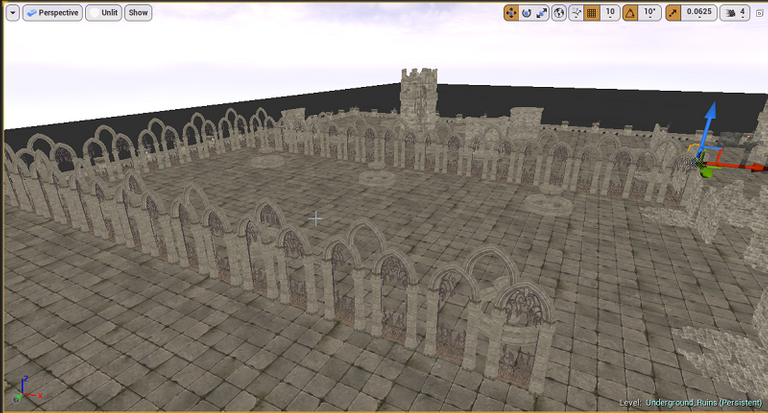
This giant area I was thinking of an outdoor court of sorts. There were several dried foundations placed down. Along with some rather fancy meshes for walls with broken metal windows placed in them.
After that, I went and filled out the majority rest of the map. Quite a few foundations of the building that were once there for the player to explore, pathways, and other sights of interest. This ended up being the bulk of my time spent on this map. You will get a bit of a glimpse of some of the areas in other screenshots below.
Up next it was time to add in a ceiling and sides to escape everything in. coming up with height was rather easy. Since I already had several large towers already placed around the map that helped break up different areas. I about double their height making them more like pillars.
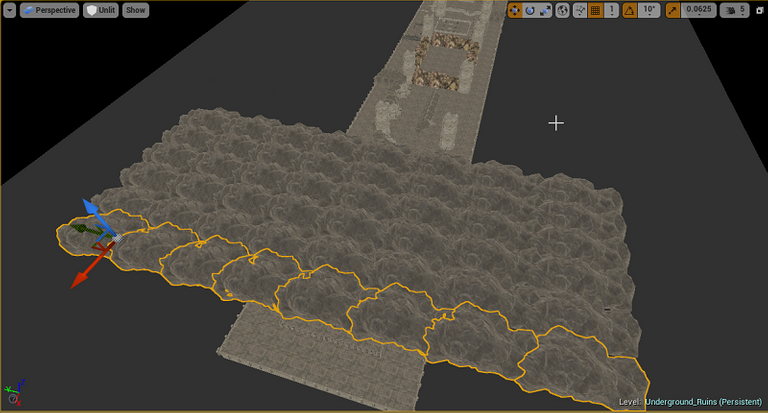
After making a decent-sized section of a rock layer I duplicated it across the rest of the map. They are over wide enough area with enough of them being placed down manually that the repeating pattern should not be seen to much by the player.
Depending on someone's settings they might not even notice the ceiling and sides of the cavern anyways. While I could have gotten away with not adding in over 1,100 rock meshes if I spent some time on lighting. I wanted to make sure they were there anyways for those who like to crank up the brightness on their screens. Gradients in black colors are also not the best on my monitor. So I did not want to leave anything got a chance that the player could see the edge of the map and nothing else but space.
There is one downside to having a ceiling. It will block whatever low lighting I would have to emit for a source light representing the scene being lit by a moon or sun. While my knowledge of lighting is growing and I try out slight little things here or there from time to time. It’s still something I’m working on and did not want this map to be overly dark either.
As a result, I ended up manually placing over 300 torches for light sources on this map. I ended up switching a lot form having the scene lit like it is from the player's point of view and toggling unlit so I could get a perfect view of what I was doing.
With how open this map is another concern was how long it would take to render lighting. While some sections of the ruins are blocked off forcing the player down a certain path. This also meant there are areas of the map that don’t need any light rendering what so ever since they are empty with no path to them. There were still quite a lot of volumes to cover.
Since I know Unreal Engine 4 is not a fan of you just dropping one large light mass importance volume. I took my time placing them in the lower sections of the map. While breaking them up into more manageable chunks on the top larger section. It seemed to have worked as I did not get any warnings/recommendations back from the lighting log. It also only took 40 minutes the first time and 25 minutes therefore after when I was making small changes to lighting.
I do think this map could benefit greatly from using a post-processing volume for lighting. My noonish attempts did not result in anything I considered to be an improvement. In the future when I do another pass of lighting on all my maps some things I don’t like should be resolved. If not it’s fine the way it is.
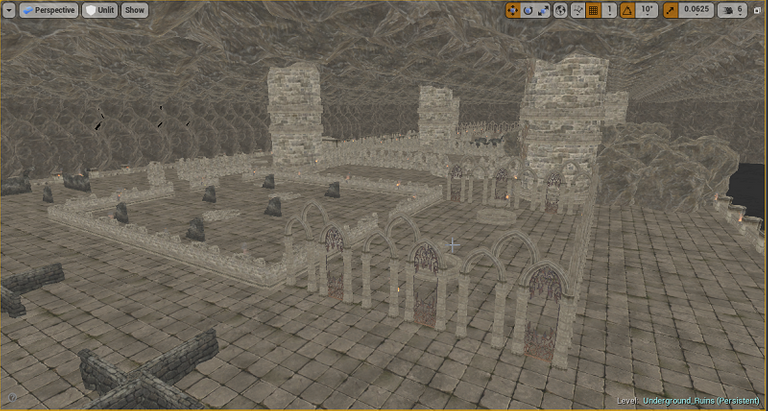
This is about the midway section of the ruins with me being up in the air. You can see there are a few places for the player to check out. This is without any lighting effects enabled and just using the developer unlit function to see.
This is the space exact spot. This time with lighting and other in game settings enabled.
I did not have anything major that I needed to clean up in the end. There were a couple of oddly placed things from one sloppy copy and paste I did where I had something selected I did not notice. Otherwise, things not matching up or a large gap just adds to the overall feeling. Which was great as I purposely placed things down and around the map in that kind of manner. It was a rather carefree map.
Final Thoughts
This is another map I’m rather pleased with how it turned out. Expect maybe some lighter lighting is needed in some areas which might resolve themselves when I compile production-quality lighting at a later date when I won’t be doing anything else to this map.
From a map design standpoint, this was different enough from what I’ve done in the past that it presented some new ways of thinking about things. It was also not too far out there that I did not have things to fall back onto if I was not happy about something for the most part. This was quite the explore an open wide area of a map to make.
Other Posts:
Information
Screenshots were taken and content was written by @Enjar. Screenshots are from Unreal Engine 4.


Increíble trabajo! imagino que son muchas horas de estudio y trabajo. Es genial!
Thanks!
Yes, it take a while. I still have a lot to learn as well. It’s going to take me a couple of years to make the game.
Me gustaría aprender lo que haces, se ve muy complejo, estoy aprendiendo Blender por mi cuenta, y es super.
I only started a few months ago myself.
First thing is to work out which game engine you want to develop on if any.
https://www.youtube.com/user/gamefromscratch
This YouTube channel has a lot of decent information on different game engines and other great stuff as well.
If you end up using something like Unreal Engine 4 they have a massive library of information.
https://learn.unrealengine.com
Video library. They go over basics to some very complex concepts.
https://docs.unrealengine.com/en-US/index.html
Then you have the documentation pages themselves.
Que bien! Aunque no domino el ingles y el contenido en español es muy pobre, pero estoy practicando siempre el modelado en blender y muy poco de animación, pero me gusta mucho, siempre publico lo que hago.
Nice job! Also what could be cool is if you want to keep certain parts of level dark to make the game more scary, you could give players the ability to craft some sort of flares they have to throw on the ground to light up a room to be able to see, each flare could stay lit for a couple of minutes... would increase the difficulty and you could even make it scary by having a monster spawn from the darkness when a flare is thrown :)
I’m tempted to make certain spells craftable and tradeable on a future players market. Which could include a torchlight spell.
There are a lot of ideas I have that I’ve not put much thought into yet.
#Posh it Thursday! Almost the weekend but not quite.
Bravo, bud! Looks like you've been keeping yourself busy.
Yep. Going to be busy for quite some time on this. The world can take it's time to open back up.
Thank you for taking us through your development process. I am curious about the actual design. Do you give some thought over how the ruins have arisen, or are you more driven by how they would be used in play?