¿Coincidencia? no lo creo
Hola familia de Hive y amigos Gamers. En estos días me pasó una cosa extraña, revisando entre toda la basura vieja de mi casa, encontré discos de música, unos cuantos peluches de los años 20 o algo así, muchos cartones, pero nada de mi interés. ¿Qué cosa estaba buscando? Pues ni idea😅, ya ni me acuerdo porque estaba husmeando en el rincón más oscuro de la casa, pero entre esas cosas había un gran porcentaje de cosas del viejo taller de mi tío que lo vendió y tuvo que traer sus cosas para acá.
Revisando y revisando encontré muchos cables que no servían, controles de televisores de los años no sé 40, una CPU de escritorio totalmente destrozada, cables y más cables, pero encontré algo que no esperaba, encontré primero un joystick para un mando de Wii de color negro que dicho sea de paso funcionó a la perfección y la otra cosa la cual va a tratar este post es sobre un mando de PlayStation 2 que encontré en esa caja.
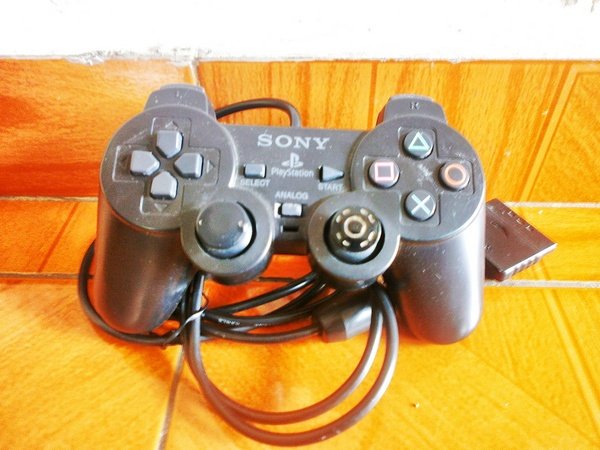
🤷♂No sé porque mi tío tendría eso, supongo que arreglaba también videoconsolas o algo por el estilo, pero el mando parecía estar en buen estado excepto por el polvo, que quién sabe cuanto tiempo estuvo ahí. Bueno lo agarré para mí, por lo visto mi tío no lo iba a necesitar, entonces me dispuse a probarlo en mi PlayStation 2 con el juego Call of Duty no me acuerdo, y coloque el modo de entrenamiento, cuando estoy ya estoy jugando me doy cuenta que la cámara se vuelve loca, giraba siempre a la derecha, la movía y no pasaba nada, los demás botones estaban bien, incluso la palanca principal.
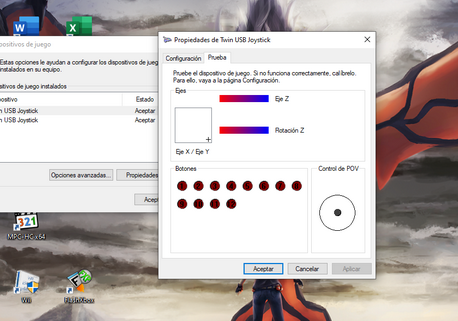
Lo puse en mi laptop para verificar que pasaba, no pasaron 2s después de que lo conecté y se puso así, efectivamente como lo ven en la imagen apenas lo conecté al pc y las palancas se volvieron locas. Los controles de PlayStation 2 los conecto a mi computadora por medio de un adaptador de color azul.
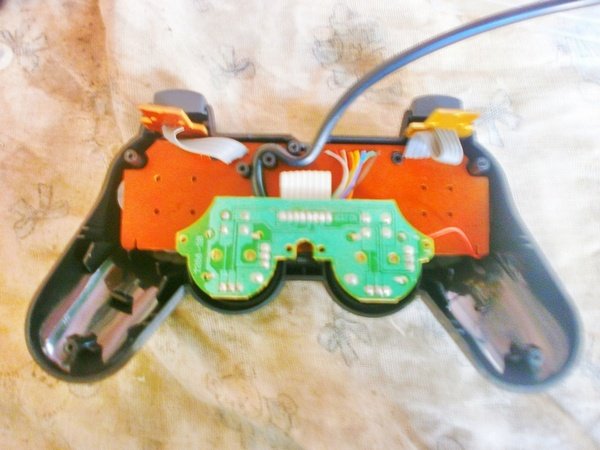
Pero bueno tocaba desarmarlo y limpiarlo, he aprendido mucho sobre como desarmar controles de videoconsolas, hice el mismo procedimiento que hice con mi control de tv, cuando desarmé el mando me di cuenta que no tenía el esqueleto blanco que tiene los mandos originales, lo que quiere decir que este control posiblemente sea una copia, al menos eso explica porque es tan liviano a comparación del mando original que llegó con mi consola.
Posteriormente saqué las piezas una por una con una pinza de mi mamá, saqué la placa electrónica sin las palancas, este control no tenía mucha electrónica al parecer, tampoco contaba con una goma que evitaba que los mandos de Sony se volvieran locos, un caso extraño, usé alcohol para limpiar la placa, sobre todo el lado de la palanca que estaba fallando.

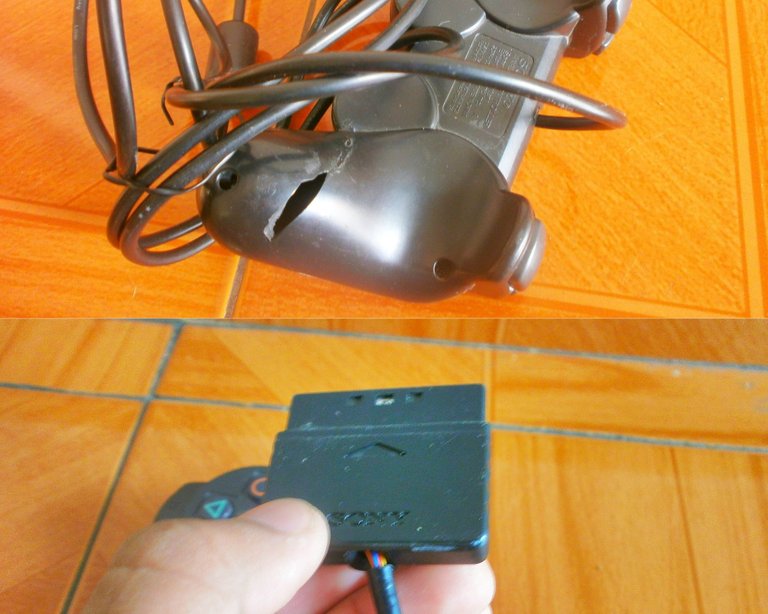
Cepillar, cepillar, cepillar y cepillé hasta más no poder, luego les eché a las palancas un poco de lubricante para que puedan estar duras otra vez y no irse de lado cuando se ponen viejas, esperé un rato para que el aceite llegara hasta los circuitos para volver a cepillar esa palanca que estaba fallando, por debajo también lo cepillé y bueno un poco de alcohol tampoco estaría mal, luego de eso limpié el cable también con alcohol, no sé si eso tenga algo que ver con los contactos de las palancas pero lo hice igual, el cable por cierto donde se enchufa a la consola esta un poco rota, así que la limpié con cuidado y sobre todo los contactos que están adentro con alcohol.
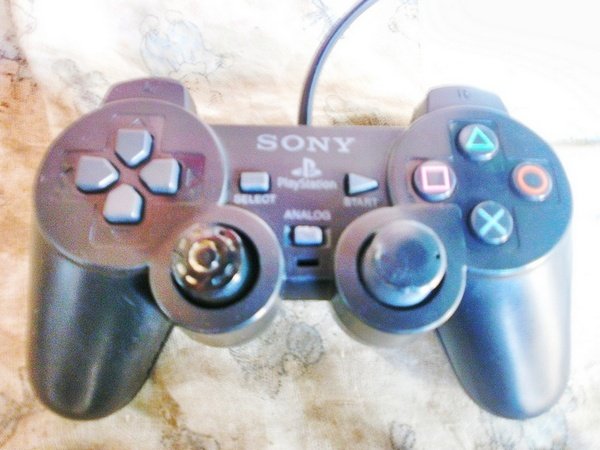
Para el plástico lo que hice fue ir a mi lavabo y puse una caja de plástico con agua y usé lava plastos como jabón (porque no había dinero💲) y empecé a revolver el jabón en el agua con un cepillo, las carcasas del mando (que por cierto estaba roto por el lado izquierdo) las sumergí para quitarles el polvo que tenían adentro, por fuera lo fregué con más jabón para que las letras de Sony salgan a relucir y con el mismo cepillo azul quité la grasa en las zonas donde estaban los botones y la cruceta.
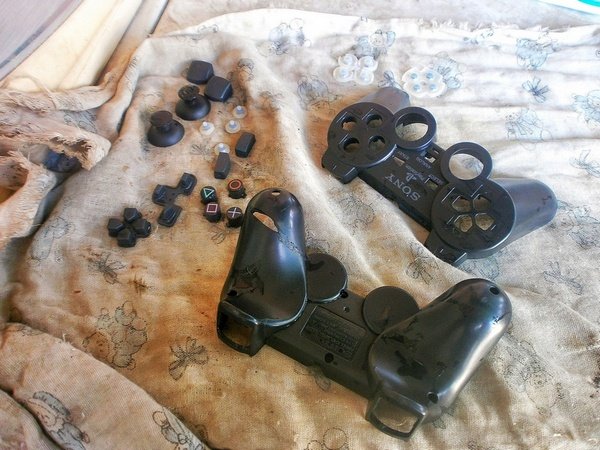
En cuanto a los botones debo decir que se me hizo raro que los botones R1, L1, L2 Y R2 tengas sus propias gomas de contacto individuales, no como en los controles originales que usan solo dos gomas apoyadas al esqueleto.
Cada uno de los botones y las gomas las fui cepillando individualmente con jabón, es por eso que quise usar una caja de plástico porque algunos botones se pueden resbalar de nuestros dedos y pueden caer al desagüe y lo único que nos quedará decirles es: ¡Adiós!
Otra cosa que me di cuenta es que este mando no tenía los tambores de vibración, por esa razón cuando disparaba en el Call of Duty el control se quedaba estático, aunque a eso no le di mucha importancia lo más importante en un mando son el buen funcionamiento de sus palancas si no la experiencia se vuelve injugable.
Ya después de esperar como 4 horas a que se secaran los botones, palancas, gomas y la carcasa del mando, pues lo armé (uno de los tornillos casi se va por la ventana de mi habitación) la placa electrónica no tenía su tornillo para adherirse a la carcasa, eso lo hizo un poco incomodo porque la placa se movía, todos los botones en su lugar con sus gomas y fue más cómodo poner en orden los botones R1, L1, L2 Y R2 ya que en este mando tenían sus propias gomas así que daba igual como los ponía harían contacto igual.
Como lo pueden ver se ve limpió ¿no? Ahora vamos al pc para verificar si el trabajo funcionó.
Ahí lo tienen familia la limpieza fue un éxito lo conecte y no se mueve, activo los análogos y tampoco se mueven hasta que toque las palancas, este programa de Windows 10 es muy útil para probar mandos de este calibre.
Y bueno familia esto ha sido todo, espero que mi historia les haya fascinado, no todo el mundo puede encontrar un mando de cualquier consola así de gratis jajajaja🤣🤣, pronto haré más contenido de este estilo sobre otros mandos de otras consolas.
Sin nada más que decir, nos vemos en otro post, Adiós. :D
¡¡Muchas Gracias!!

Translated with www.DeepL.com/Translator

English
Coincidence? I don't think so.
Hello Hive family and Gamers friends. These days a strange thing happened to me, going through all the old junk in my house, I found music records, a few stuffed animals from the '20s or something like that, a lot of cardboard, but nothing of my interest. What was I looking for? Well, I have no idea😅, I don't even remember because I was snooping in the darkest corner of the house, but among those things, there was a large percentage of things from my uncle's old workshop that he sold and had to bring his stuff here.
Going through and going through I found many useless cables, TV controls from the '40s, a destroyed desktop CPU, cables, and more cables, but I found something that I did not expect, I found first a joystick for a black Wii controller that worked perfectly and the other thing that this post is about is a PlayStation 2 controller that I found in that box.
🤷♂I don't know why my uncle would have that, I guess he fixed game consoles too or something, but the controller seemed to be in good condition except for the dust, who knows how long it was there. Well, I grabbed it for me my uncle wasn't going to need it, then I set out to try it on my PlayStation 2 with the game Call of Duty I don't remember, and set the training mode, when I'm already playing, I realize that the camera goes crazy, it always turned to the right, I moved it and nothing happened, the other buttons were fine, even the main joystick.
I put it on my laptop to check what was happening, it was not 2s after I connected it and it was like this, indeed as you can see in the picture as soon as I connected it to the pc and the levers went crazy. I connect the PlayStation 2 controllers to my computer through a blue adapter.
But well, it was time to disassemble and clean it, I have learned a lot about how to disassemble game console controllers, I did the same procedure I did with my tv controller, when I disassembled the controller, I realized that it did not have the white skeleton that has the original controllers, which means that this controller is possibly a copy, at least that explains why it is so light compared to the original controller that came with my console.
Subsequently, I removed the parts one by one with tweezers from my mom, I took out the electronic board without the levers, this control didn't have much electronics, it also didn't have a rubber that prevented the Sony remotes from going crazy, a strange case, I used alcohol to clean the board, especially the side of the lever that was failing.
I brushed, brushed, brushed, and brushed as much as I could, then I poured some lubricant to the levers so they can be hard again and not go sideways when they get old, I waited a while for the oil to reach the circuits to brush again that lever that was failing, underneath I, also brushed it and well a little alcohol would not be bad either, after that I cleaned the cable also with alcohol, I do not know if that has something to do with the contacts of the levers but I did it anyway, the cable by the way where it plugs into the console is a little broken, so I cleaned it carefully and especially the contacts that are inside with alcohol.
For the plastic what I did was to go to my sink and put a plastic box with water and used lava plastics as soap (because there was no money💲) and began to stir the soap in the water with a brush, the housings of the controller (which by the way was broken on the left side) I dipped them to remove the dust they had inside, on the outside, I scrubbed it with more soap so that the letters of Sony come to light and with the same blue brush removed the grease in areas where the buttons and the crosshairs were.
As for the buttons, I must say that I found it strange that the R1, L1, L2, and R2 buttons have their own individual contact pads, unlike the original controls that use only two pads supported by the skeleton.
For each one of the buttons and rubber bands, I brushed them individually with soap, that's why I wanted to use a plastic box because some buttons can slip off our fingers and fall down the drain and the only thing left to say to them is: Goodbye!
Another thing I noticed is that this controller did not have vibration drums, for that reason when shooting in Call of Duty the control remained static, although I did not give much importance to that, the most important thing in a controller is the proper functioning of its levers if not the experience becomes unplayable.
After waiting about 4 hours for the buttons, levers, rubbers, and the casing of the controller to dry, I assembled it (one of the screws almost went out the window of my room) the electronic board did not have its screw to adhere to the casing, that made it a little uncomfortable because the board moved, all the buttons in place with their rubbers and it was more comfortable to put in order the R1, L1, L2 and R2 buttons since in this controller they had their own rubbers so it did not matter how I put them they would make the same contact.
As you can see it looks clean, doesn't it? Now let's go to the pc to check if the job worked.
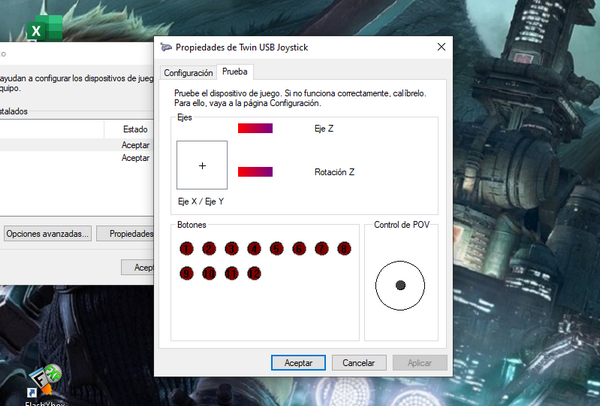
There you have it, family, the cleaning was a success I connect it and it does not move, I activate the analogs and they do not move either until I touch the levers, this Windows 10 program is very useful for testing controls of this caliber.
And well family this has been all, I hope my story has fascinated you, not everyone can find a controller of any console for free like this hahahaha🤣🤣, soon I will make more content of this style about other controllers of other consoles.
With nothing more to say, see you in another post, bye. :D
Thank you very much!!
Translated with www.DeepL.com/Translator
Congratulations @mclarenf11! You have completed the following achievement on the Hive blockchain and have been rewarded with new badge(s) :
Your next target is to reach 3750 upvotes.
You can view your badges on your board and compare yourself to others in the Ranking
If you no longer want to receive notifications, reply to this comment with the word
STOPCongratulations @mclarenf11!
You raised your level and are now a Minnow!