Last year, I was given a budget by the state to grow microgreens and conduct workshops in the region where I live now, so that anyone can easily practice gardening at home and nourish themselves.
Growing microgreens and sprouts has been done for a long time, and there are many different methods and kits, but some of them don't work for me. Moreover some people may be worried about insects and fungus when using soil, so I was looking for a way to make it really doable for everyone.
The three important things are:
- Budget friendly (there are 49 cent organic microgreens in German supermarkets)
- Not too much work
- Can be practiced using things in regular home kitchens
Now that I have a solid methodology, I thought I would start by sharing it on Hive Blog.
What are microgreens?
You can think of them as young leaves of plants that are a bit more mature than sprouts. Sprouts can be grown with just a jar, but microgreens are better with a growing medium because they grow more consistently.
Let me start with a mistake...
I tried a kit from an organic store in January, but it was a plastic, airtight container, and it grew mold. It turned to be like @riverflows 's comment on the post I wrote when I bought this kit ... 😅
From the experience, I started looking for a way to create an environment that is somewhat airtight, but still there was air movement.
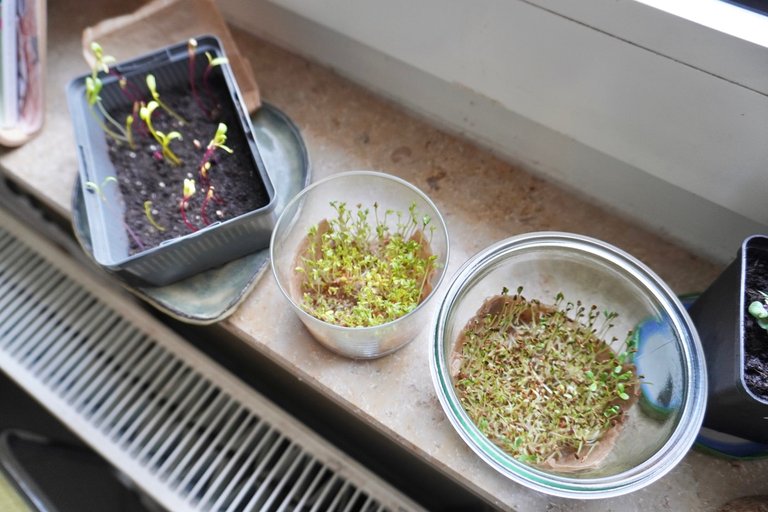
Growing containers
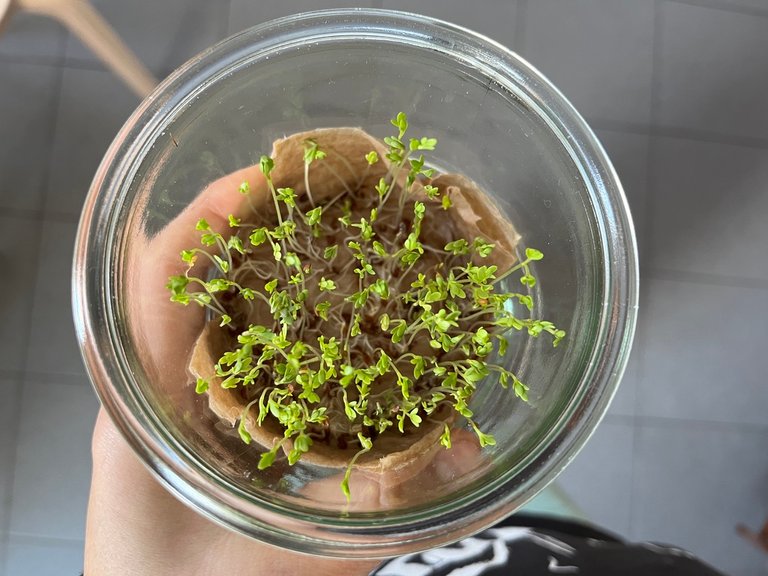
Actually I had an ideal container already; Weck glass jars! Their glass lid will not seal the container completely. You can wait with the lid on for a few days after sowing the seeds and then open the lid when they have grown to a certain degree.
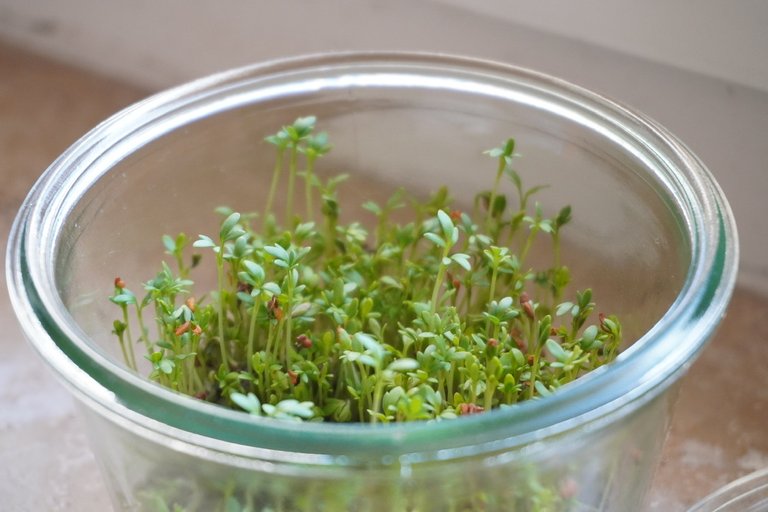
When they have grown, turn the container upside down and take them out, cut them like giving it a haircut, and use them for cooking. If you don't use it up, put the lid back on and put it in the fridge.

But the Weck glass jars are not that big. Also, because they are glass, you need to shield them from light or keep them in a cool, dark place, otherwise the light will get in and they will be chunky sprouts. Not for those who prefer delicate, slender sprouts 😅 I like the strong ones though. Keeping containers in a cool dark place is a good idea but I certainly forget about them.
So, ideally, a dish with a large flat bottom surface and a few inches high. Terra cotta dishes seem to be too dry and not suitable for growing microgreens. A dish like the one below would be perfect.
I was looking around for plates that could be stacked so I could grow more in a smaller space... and I found the perfect one at IKEA.
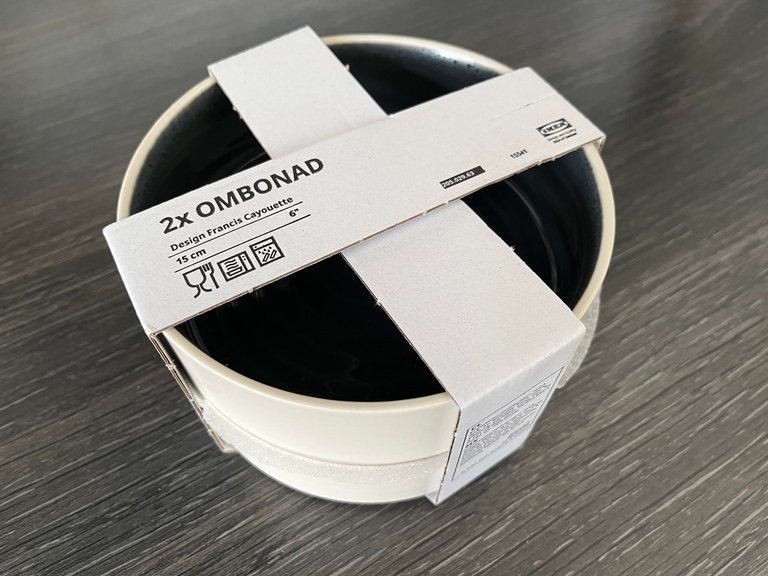
OMBONAD OMBONAD bowl, dark grey, 15 cm - IKEA
With this you can make a micro green tower in a 15 cm x 15 cm space in your kitchen. I haven't tested it yet, but if you have about 5 of them, you can always have microgreens in rotation. Sounds good!
What about the culture medium?
I don't want to use soil in my home ... I don't want to get little flies or moldy growth.
There are mats made of natural materials for growing micro greens, but they are not available at local stores, so the hurdle for growing microgreens rises. There are also kits that include mats with seeds, but they are expensive and did not germinate completely.... I think I can understand why they were half price at a supermarket.
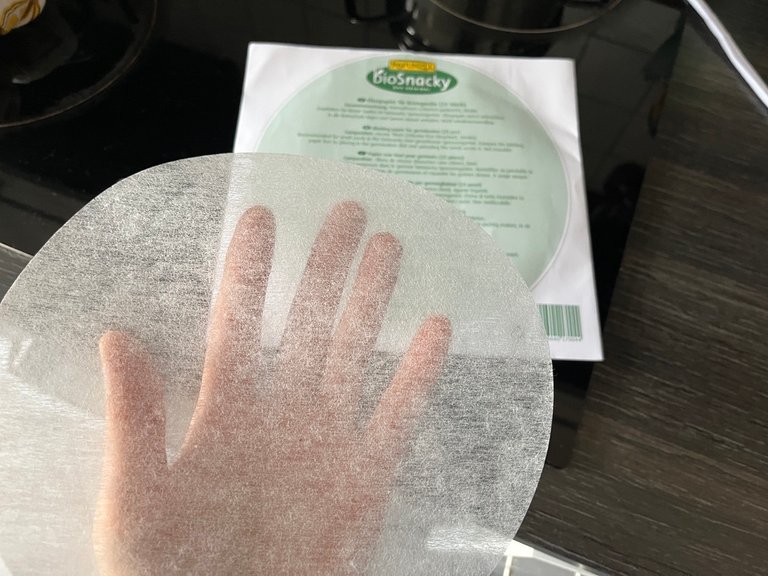
So, what I use is unbleached kitchen paper. Some people are growing on kitchen paper, and if it is done properly, it seems to work fine to use as a culture medium for a few days. I needs to investigate some more and plan to get expert opinions for safety.
If you are not comfortable with kitchen paper, paper culture media from organic stores are also a good option. However, they are in away pricey, about 20-30 cent per sheet.
Tools needed
As you have seen so far, few tools are needed. Let's list the tools once again:
- Growing container: a Weck glass jar, a deep dish, or even a shallow empty bottle. And a lid that do not seal the container.
- Culture medium: kitchen paper or a special medium.
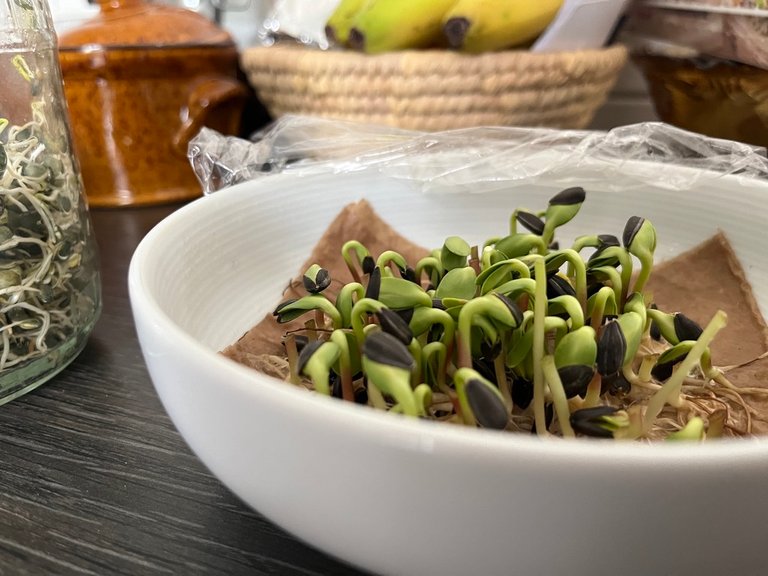
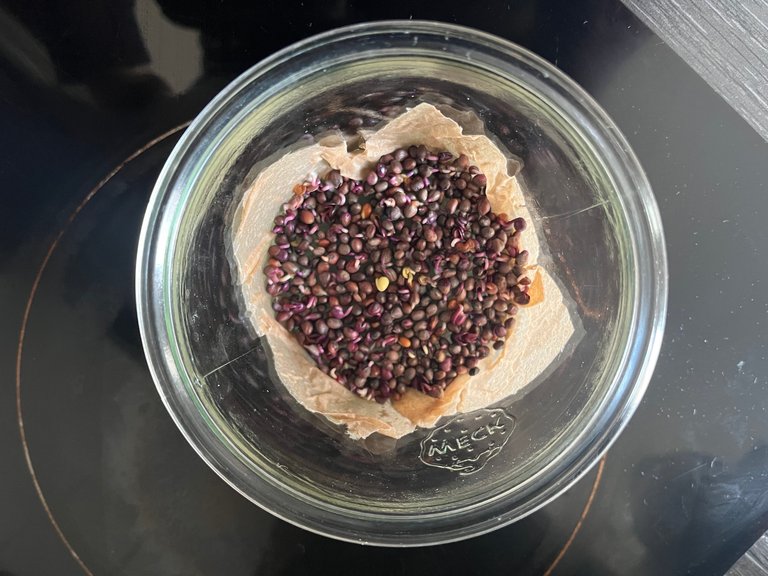
- Seeds: from the standard alfalfa, radish, mustard, chard, carrot, dill, sunflower, lentils, etc. I will write about this in one separate post. Personally, I love lentils that are always in my kitchen for cooking and unique sunflower.
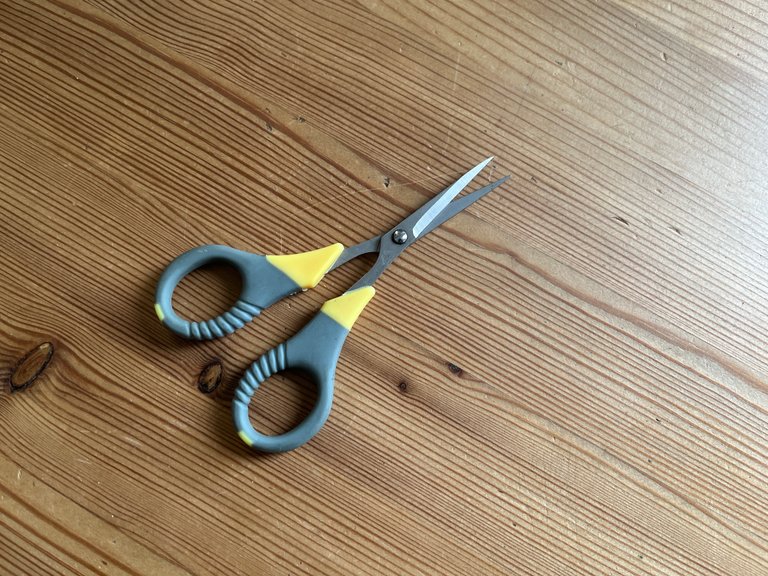
Also, a watering spray makes it easier to water the seeds without seeds are moving, but it is not essential. A small pair of scissors for harvesting would be handy. I use a pair of mini scissors with an extra fine tip that I had for crafts.
How to grow
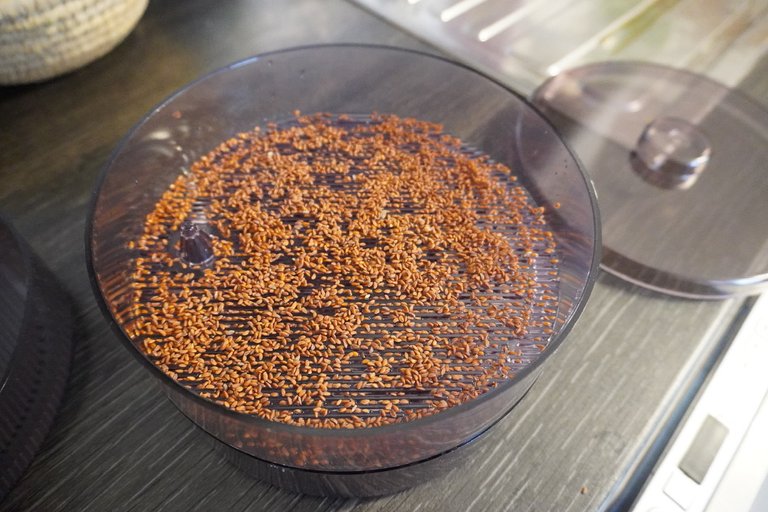
Sow the seeds very densely, though not overlapping, on a wet medium. Place a lid on the container. Don't tightly sealed it but the water does not evaporate too much. If the medium is dry, water gently from the sides.
The plants will be ready to harvest in about 5 days to a week. Growth may speed up as the weather gets warmer.
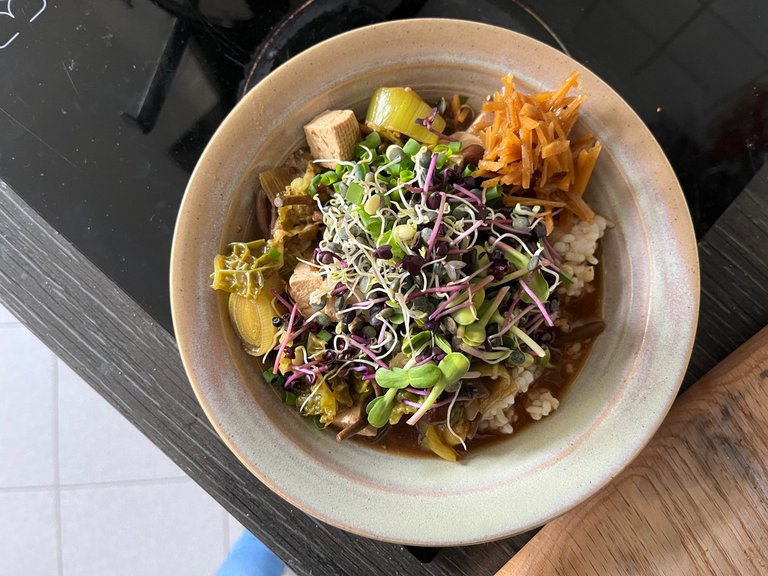
How to use
I recently summarized how to use microgreens and sprouts in a post.
[How to integrate sprouts and microgreens in daily meals](https://hive.blog/hive-120586/@akipponn/using-sprouts-and microgreens-in)
It also fit well with Japanese flavors. Excuse me for the picture of my quickly made miso soup rice for weekday lunch 😅
Conclusion
Micro-green cultivation can be started with less tools, less investment, and less worries about insects and mold. Moreover you can see results in a short period of time 😊
I hope to compile and verify the findings some more and host workshops at a local market this spring/summer.
Happy gardening, everybody! Yes, really everybody 💪🌱
昨年、今住んでいる地域で、誰でも気軽に自宅でガーデニングを実践できるように、マイクログリーンの栽培とワークショップの実施に州に予算をつけてもらいました。
マイクログリーンやスプラウトの栽培は古くから行われているもので、いろいろなメソッドがありますが、私にはうまくいかないものがあったり、土使うと虫やカビが心配な人もいるだろうなと思ったりで、本当に誰でも気軽にできる方法を模索していました。
大事なのは以下の3点:
- 費用がかかりすぎない
- 手間がかかりすぎない
- 身近にあるものを使って実践できる
方法論が固まってきたので、まずはHive Blogでシェアしてみようと思います。
マイクログリーンって?
スプラウトよりももう少し育った植物の若葉と考えると良いと思います。スプラウトは瓶だけで栽培できますが、マイクログリーンは培地があった方が安定して成長するので良いです。
まずは失敗談を・・・
1月にオーガニックショップで売っていたキットを試してみたのですが、プラスチックの密閉度の高い容器で、カビが生えてしまいました。このキットを買った時の投稿に @riverflows さんからのコメントの状態がうちでも・・・😅
失敗作の写真は控えます。ここからある程度は密閉度がありつつも、風通しの良い環境づくりを模索し始めます。
身近にあった栽培容器
Weckのガラス容器です!ガラスのふたであれば密閉されません。種をまいてから数日はふたをして待って、ある程度育ってきたらふたをあけてあげるとよいです。
深さもちょうどよく、育ったら容器をひっくり返してぼこっと取り出して、散髪するように切って料理に使います。使い切らなかったらふたをして冷蔵庫へ。
ただ、Weckのガラス容器はそこまで大きくないんですよね。あと、ガラスなので遮光するか、冷暗所におかないと、光が入ってしまうため、がっしりしたスプラウトになります。ひょろっとした繊細なスプラウトがいい人には向きません😅 冷暗所に置いておけばいいのですが、目に入るところに置いてないと忘れるんですよね。
ということで、理想的なのは、底の平たい面が大きくて、数センチの高さのあるお皿です。テラコッタのお皿では乾燥し過ぎてしまうようで、マイクログリーン栽培には向きませんでした。下のようなお皿がぴったりです。
さらにスタッキングできるとより小さなスペースでたくさん栽培できるな・・・とお皿を見て回っていたらIKEAにぴったりのお皿がありました。
日本のIKEAにもあるようです。ドイツで9.99ユーロで、日本では1499円って1ユーロ150円換算・・・・・・・・・・・・IKEA良心的。
OMBONAD オンボナド ボウル, ダークグレー, 15 cm - IKEA
これを使えば台所の15cm x 15cmのスペースにマイクログリーンタワーを作れます。未検証ですが5個くらいあればローテーションで常にマイクログリーンがある状態を実現できそうです。
培地は?
家の中で土使うの嫌ですよね、私は嫌です。この時期、夏野菜の育苗は家の中でしていますが、小蝿が出たりカビが生えたりしたら嫌だなあとあまり乗り気ではありません。
育苗用の自然素材のマットなどもありますが、身近なお店で手に入らないので、これを使うことにするとマイクログリーン栽培のハードルが上がってしまいます。マット込みのキットなどもあるのですが、高い、そして完全には発芽しませんでした・・・。スーパーで半額になっていたのがわかる気がします。
そこで、使ってみてよかったのが無漂白のキッチンペーパーです。キッチンペーパーで育てている人もいるようで、きちんとしたものなら数日培地として使うのは問題なさそうです。この点は要調査で専門家の意見を聞く予定です。
キッチンペーパーに抵抗がある場合はオーガニックショップの紙製の培地も良い感じです。ただし、一枚30円くらいとまあまあお値段がします。
必要な道具
ここまで見てきたように道具はほとんど入りません。今一度道具をリストアップしてみます。
- 栽培容器:Weckのガラスジャー、深さのあるお皿、浅めの空きびんなどでも。密閉しないふた。
- 培地:キッチンペーパーや専用の培地
- 種:定番のアルファルファから、ラディッシュ、マスタード、チャード、にんじん、ディル、ひまわり、レンズ豆など。これはまた別途一つの投稿で書きます。個人的には変わり種のひまわりと、台所に常にあるレンズ豆が大好きです。
あと、水やり用のスプレーがあると種が動かず水やりしやすいですが、必須ではありません。収穫用に小さなハサミがあると便利で。私は工作用に持っていた先端が極細のミニバサミをマイクログリーン用に使っています。
育て方
濡らした培地に重ならない程度ではあるもののかなり密に種をまきます。これに密閉状態にならないように、でも水分が蒸発しすぎないようにふたをして置いておきます。培地が乾いていたらサイドから優しく水をあげます。
5日から一週間ほどで収穫できます。これから暖かくなると成長が早まるかもしれません。
使い方
マイクログリーンやスプラウトの使い方については先日一つの投稿にまとめました。
How to integrate sprouts and microgreens in daily meals / スプラウトやマイクログリーンの使い方
和の味とも合いました。平日お昼の味噌汁ご飯の写真で失礼します😅
まとめ
マイクログリーン栽培は、実は少ない道具、少ない投資で始められて、虫やカビの心配も少なく、さらに短期間で成果が見えてよいのではないでしょうか😊開拓してみると、こんなものまで!?という種があるのも楽しいです。
楽しすぎてものすごく長い投稿になってしまいました😅
もう少し知見をまとめて検証をして、この春夏は地域のマーケットでワークショップを開催できたらと思います。
ハッピーガーデニング💪🌱
Happy to read that my post is curated. Thank you a lot @curator!
Are these microgreens? They look amazing!