It's time... it's planting time!
In this brief garden update, I'll be sharing photos and descriptions about how I grew plants from seeds in containers outside, and how I started to plant them into the garden soil.
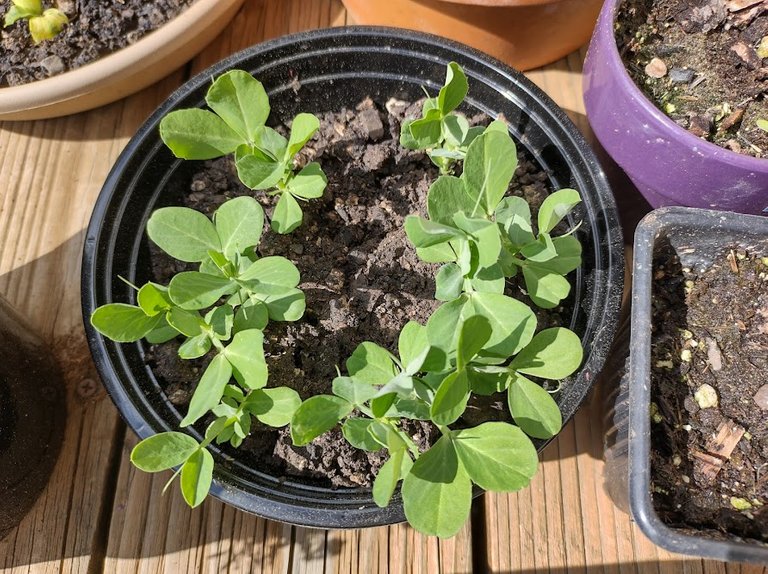
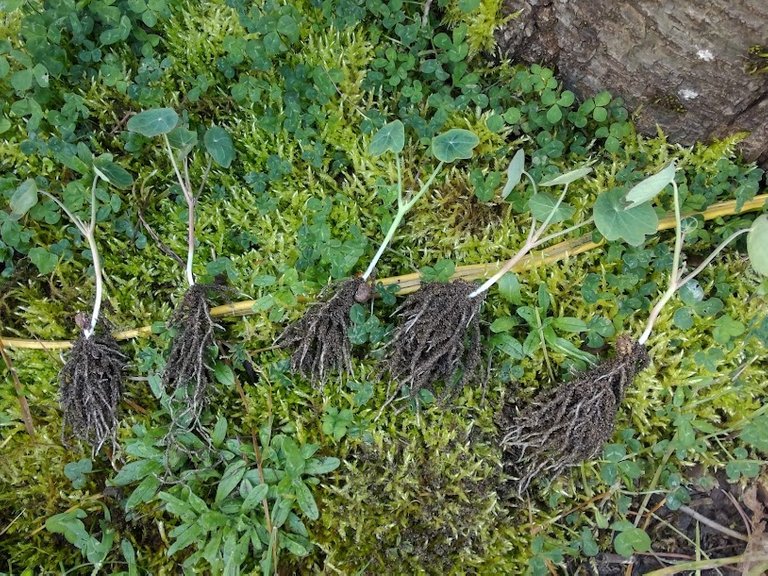
Up above in the cover photo is peas.
Every time I get take-out from the Koba Grill, I save the plastic container because it includes a clear lid. This is great for making a mini green house for starting seeds. I water the soil and seeds once, and in a week or two, I get new sprouts. No need to poke drainage holes in the container, and reusable.
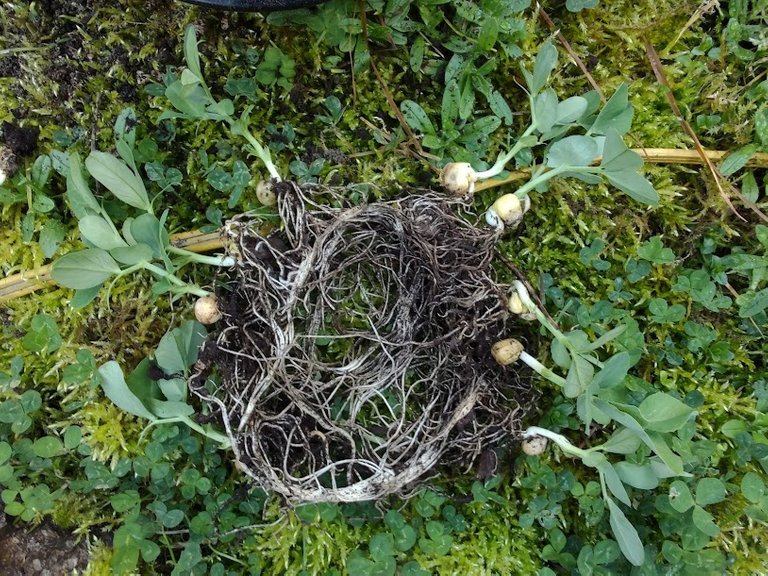
To get the seedlings out, I basically flipped it over onto the soft moss, and it came out in one piece.
Gently, I jostle the soil with my fingers until the larger soil clumps fall away, leaving only the interconnected roots.
The roots are very tender and will snap easy. The only way to pull them apart is to look for the seedlings that are easiest to pull apart first, and separate them out. Each time one is removed, the rest of them will all be easier to separate as well.
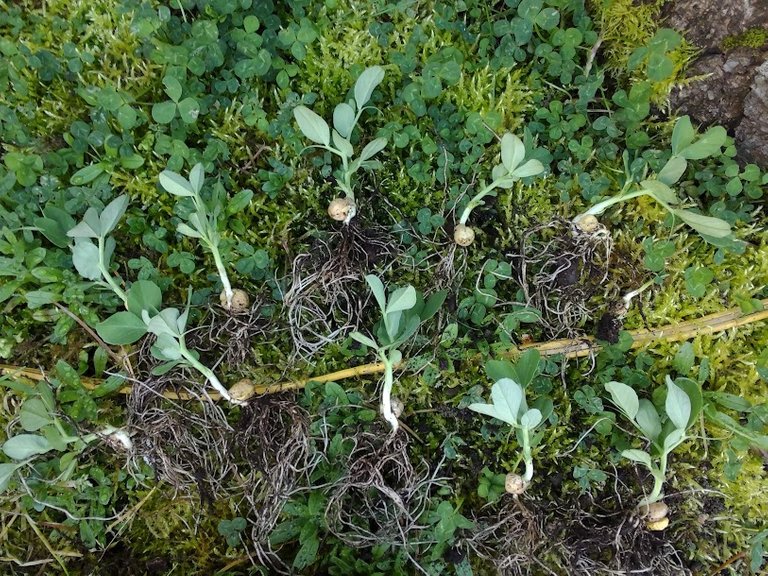
The exposing of the roots has to be done in the cool shade. Laying them on the wet moss also helps to keep the roots from drying out so fast.
The remaining potting soil was returned to the bowl, where fresh pea seeds were planted. These seedlings will be planted straight into the garden.
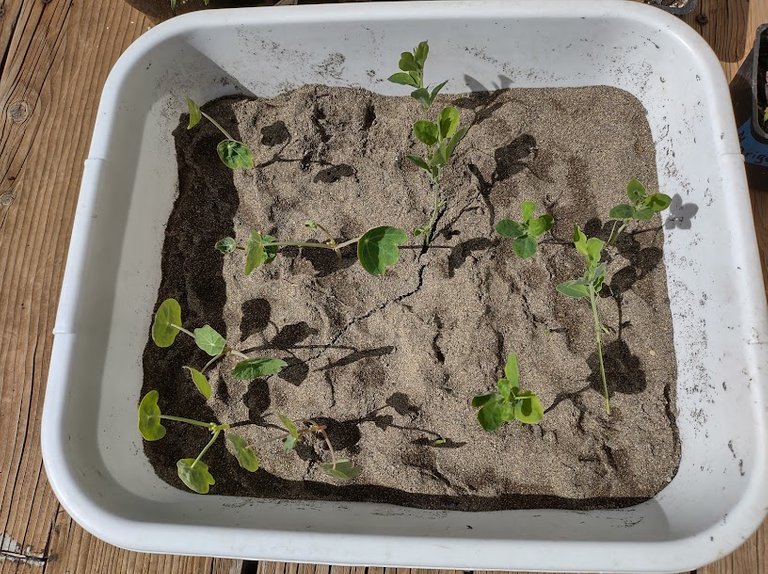
Above and below are nasturtiums and flowering sweet peas which I had grown in ordinary playground sand. I did not even bother to wash the sand.
As long as I keep the sand wet every few days, the seeds and roots remain damp and soft enough for the roots to burrow through. I did not bother to cover this container, nor drill holes, since it has a wide base to spread the water level out. Water also evaporates quickly through sand.
Below are some pumpkin seeds I planted into a dish filled with potting soil.
This, the pizza pie method, I believe works the best out of the three outdoor seed starting methods I demonstrated for transplanting. The resulting seedling were short, squat, and sturdy.
Normally pumpkin needs warmer weather, yet I've managed to sprout them outdoors in March, ready to be planted in April. The yellow leaves are due to the cold air stress. New green true leaves are starting to form. The roots, not shown, were also short yet plentiful in all directions. I think the cold air must have also trained the roots to stay short and slow-growing.
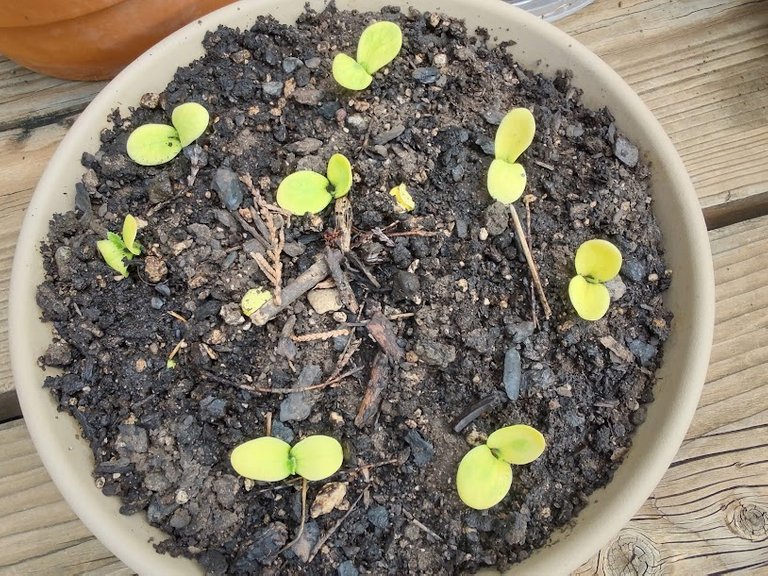
Personally, I think small clusters of roots is much better for transplanting than allowing a single long-thread taproot, which pumpkins normally form. Also it wastes a lot of containers and expensive soil to grow each pumpkin separately, only to be transplanted later.
If the plant only has one root when transplanting, it is incredibly easy to accidentally snap that root when removing it from the pot. If too much root or stem is bent or broken, the entire plant dies.
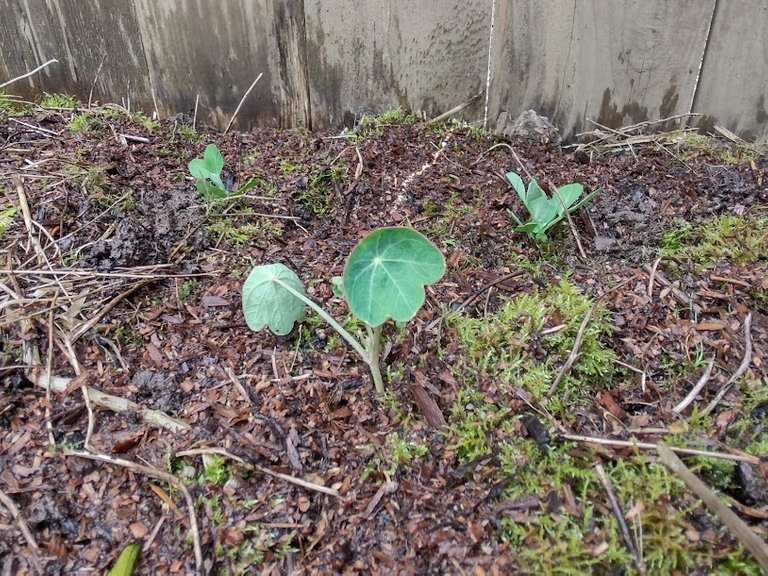
The nasturtium and peas in the background are shown above in their new beds.
The soil here is wet with clay and moss, and I recently top dressed with mushroom compost, which has a wonderful mealy, soft texture of organic wood crumbles, and little odor.
After transplanting, I always use the watering can or hose to give the roots an extra drink from the stress. A bit of seaweed extract mixed into the water is supposed to ease transplant stress.
That's it for my article today. Hope you enjoyed!
Post Beneficiaries:
- 1% @cryptopie
This is my way of thanking each of you for your friendship and support. By sharing my talents on Hive, I can also share to help with your needs.
Let my success also grant you some happiness too.

Hi @creativetruth, your post has been upvoted by @bdcommunity courtesy of @rem-steem!
Support us by voting as a Hive Witness and/or by delegating HIVE POWER.
JOIN US ON
Very interesting and informative post. We have some seeds germinating and seedlings under grow lights in the garage. Here in Vermont we are still awhile from being warm enough to plant outside. First learning of the new garden, we started our seeds too soon. I like the mini-greenhouse idea. We started wrapping container in plastic wrap which was too much waste for our liking. We switched to some re-purposed zip up blanket/bedding plastic bags. Love the before and after seedling separation photos. Because we started too early we are having to transplant some seedlings into bigger containters. Good tip on seaweed extract when transplanting. I googled on it for awhile and will try it out. Do you make any of your own compost? Great post!
The compost I make in my yard isn't as enriched as compost sold by stores, so I use it more when planting trees or backfilling beds, and less with seedlings. If I can find a way to enrich my compost into black gold without store-bought additives, I would use it much more.
I agree, I always try to have a really nice root system to transplant. I find the small pots are bad for this.
Thanks for sharing
The roots are very impressive, I think they have a high chance of surviving.