Drying is least laborious of the techniques that you can use to preserve your herbs. As with anything, though, there are different ways to achieve the same goal. It’s really a case of ‘horses for courses’ as the old saying goes but this page will see you right.
We dry herbs to enjoy them and use them after their season has finished or to make them into a more convenient form to use. They are generally more convenient and save a lot of space.
What does drying actually do?
Drying allows you to store herbs by removing the moisture that is one of the primary causes of spoilage. The presence of water in a herb allows chemical reactions (enzymes) which break down the herb, destroying its value to us. The presence of moisture also allows bacteria and fungi to live in the herb material, which also leads to spoiling.
Drying breaks down cell walls, making the cell’s contents easy to extract. It also concentrates the beneficial constituents into a smaller volume making them easier to use and store.
What do we need to dry herbs?
To dry herbs, we only need a space where we can dry our herbs out of direct sunlight and where there is a source of gentle, dry air. Warm air is preferred but, as long as it isn’t humid, cool air can work.
Many foods can be dried in full sunlight, but most herbs tend to lose their potency when dried this way. The heat and UV reacts with plant constituents, breaking them down.
How will I know when they’re dry?
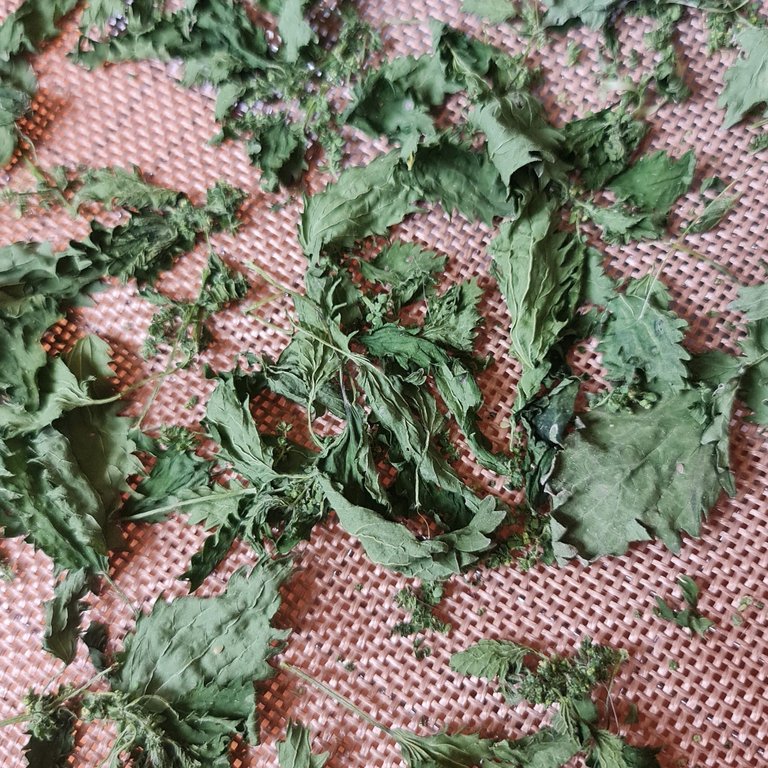
Perfectly dried herbs retain the look and most of the smell and taste of the undried source. They will be crispy and cruble easily when rubbed between your fingers. Harder plant parts, when fully dry, will snap when bent.
If your dried herbs are brown, dull and insipid looking, those will be the type of results that you will achieve with your remedies.
Of course, some herbs are dry and brown anyway, so keep that in mind!
Preparation for drying
Whatever drying method you have chosen, you may want to rinse your herbs to remove dirt and other contaminants. This is important if you’re wildcrafting on roadsides or public spaces in cities.
Pat dry your herbs to remove as much excess surface moisture as possible. Make sure you flip them over and get the back too. If you’re hanging your herbs to dry, ignore the next couple of paragraphs about size and spacing.
If you are drying leaves, make sure that the stems are removed. With some herbs, these can take much longer to dry than the rest of the leaf. Cut or tear them into smallish pieces, similar in size. That will help speed up moisture loss.
Space your herb evenly on the tray or rack. It can be hard but try not to let pieces touch. Having space between the herbs to be dried allows good airflow, which is the secret to good drying.
Doing these things will help your herbs dry quicker and more evenly.
Natural air drying
Air drying is the probably the oldest and certainly the easiest way to dry herbs.
You can dry your herbs laid out on open racks or trays or tie them in bundles and hang them somewhere convenient. There are also mesh racks that can be suspended from above to allow excellent air flow and prevent access to bugs. Cane baskets work a treat for small amounts.
If you use a wire or plastic mesh tray or rack, you will have no more work to do until you pack the herbs for use or storage. You can use solid trays, such as you will find in your kitchen but the airflow will be restricted. In this situation, I recommend turning the herbs several times during the drying process to ensure even and complete drying.
Before drying, make sure that your racks or trays are clean. Depending on how fine the spaces are between the wires, you may want to place a layer of paper over them but don’t use newspaper or paper printed with inks, the toxins in those can leach into the herb, ruining it.
Hanging
Tying your herbs into a bunch and hanging them somewhere safe with good ventilation is the easiest way to dry them. You generally leave the leaves attached to the stems until the whole bunch is dry before removing them.
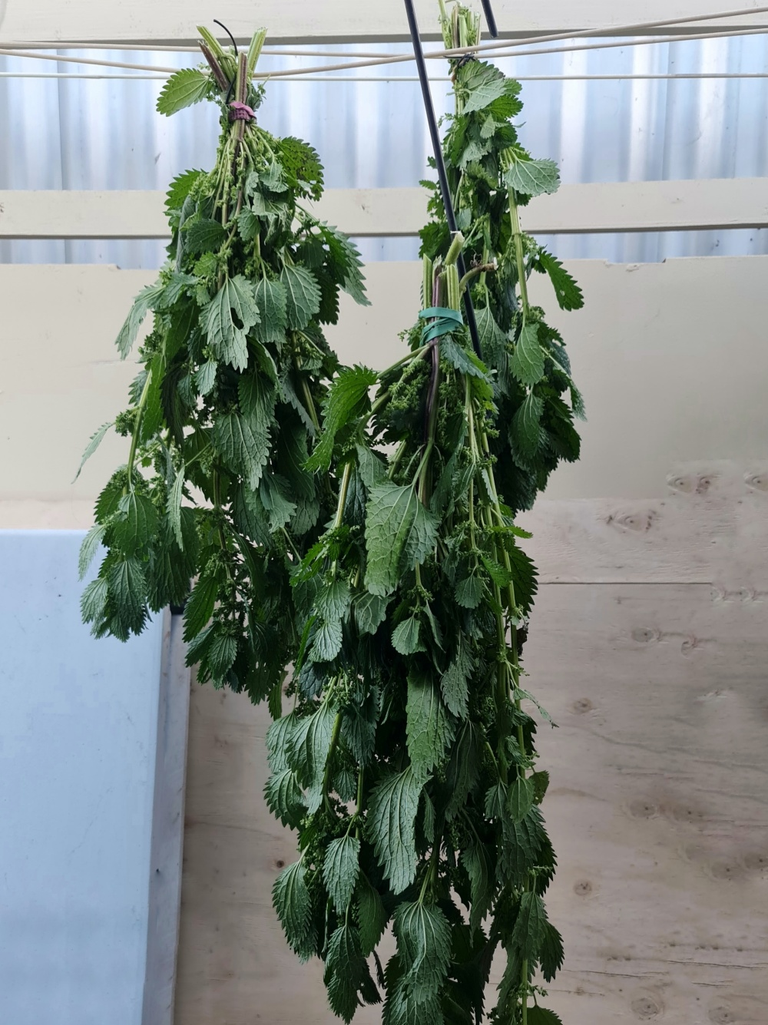
Simply tie together 6 – 10 stems or small branches and hang them in the appropriate place. Rubber bands work better than string or wire because, as the stems shrink with drying, the bands tighten automatically. With herbs that shrink a lot, wire or string may let them slip through.
Don’t be tempted to make too big a bunch or the air won’t be able to get to the middle stems and that will alolow moisture to hang around and spoil the batch.
If you are drying plant parts that have seeds on them, you may want to place a piece of paper or fabric below the bunches to catch the seeds as they drop.
Solar drying
Drying herbs in a solar dryer is an excellent use of abundant, free energy when the Sun shines. It can be a bit awkward in Winter though.
Solar driers work by creating a convection current of warm air that rapidly dries herbs. They’re not as ferocious in their heat as solar ovens but can still get quite warm.
Dehydrators and ovens
Dehydrators are the perfect way to dry your herbs. You can control the both the heat that the herbs are dried at and the time that they dry for.
You have good control of the temperature, allowing you to keep it constant rather than it being subject to the vagaries of Sun and clouds. The air flow is also constant.
They do, however, use electricity and generate heat. The perfect solution is to use them in Winter and to use them in living areas where they can take the chill off of a room.
I’ve found that the box style dryers are better than the round, stacked tray variety but other folks swear differently. The trick with both is to keep the temperature below 40°C. That ensures slow, even drying as well as the preservation of most of the medicinal constituents of the herb. If you’re buying your first dehydrator, look fir one that allows you to set the temperature to 35°C or below.
Leaves can take 4 – 12 hours to dry in a dehydrator.
Dry weight
Plants contain a lot of water and this amount varies from plant to plant, season to season and therefore, batch to batch. As you become more proficient with preparation methods such as tincturing, this water can become important.
Here’s a couple of examples of fresh weight vs dry weight bases on 100g of fresh plant material.
Chickweed 10 grams dry = 90%waterFumitory 12 grams dry = 88% waterNettles 25 grams dry = 75% waterHoarhound 27 grams dry = 73% water
Part by part
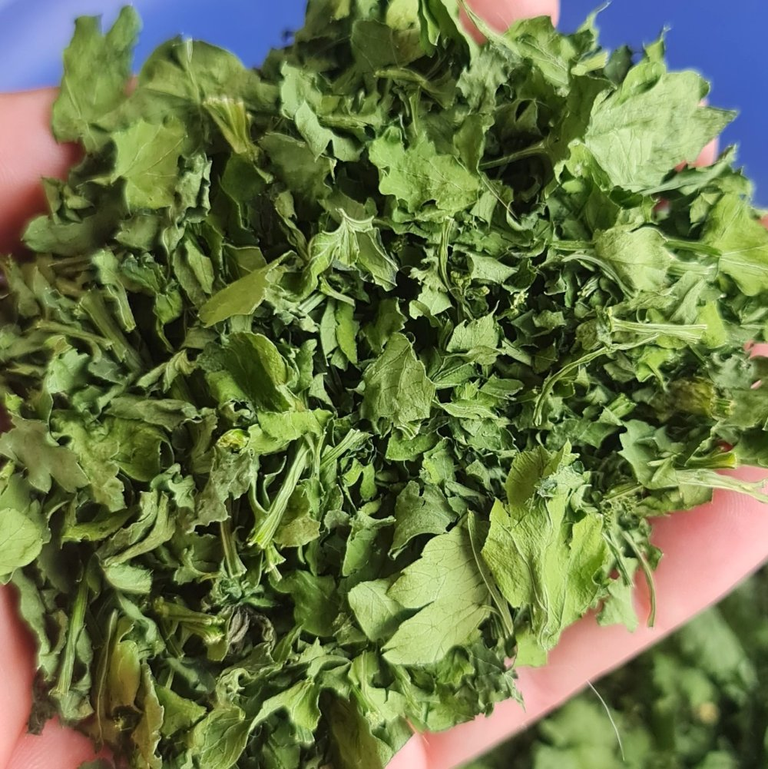
Flowers and leaves
Spread evenly on a tray and try to make sure parts don’t touch. Don’t overload your trays, you will get faster and better results from a tray with plenty of space for airflow than you will from a densley packed one.
Don’t succumb to the urge to crank up the temperature at any stage, keep things even.
Leaves are ready when you can crumble them between your fingers.
Bark and wood
Cut into small pieces and allow to dry slowly in a warm place with good airflow. Turn regularly to ensure even drying. They ae usually ready when you can snap piece between your fingers.
Roots and rhizomes
Wash and pat dry, cut into small, even sized chunks or thin slices. I like diagonal slices, a couple of millimetres thick and about 2 cm long. Turn regularly to ensure even drying. They’re ready when they’re tough. Slices should be hardand snap when bent.
Bulbs and corms
There are two great ways to dry bulbs. One is to clean them and hang them, singly or in bunches, somewhere where the airflow is good. Think of Onions or Garlic hanging with their leaves braided together.
The other way is to remove the leaves and slice the bulb or corm thinly and dry as you would a root or rhizome.
Normalising (or equalising) the freshly dried herbs
When your herbs have been dried to your satisfaction, gather them and place them in a sealable container for 12 -24 hours. This allows any remaining moisture (and there’s always traces) to become more evenly distributed throughout the herb material. It’s a way of reducing the chance of moist spots in parts of the herb that may have not dried completely such as a particularly thick piece of stem that you didn’t notice.
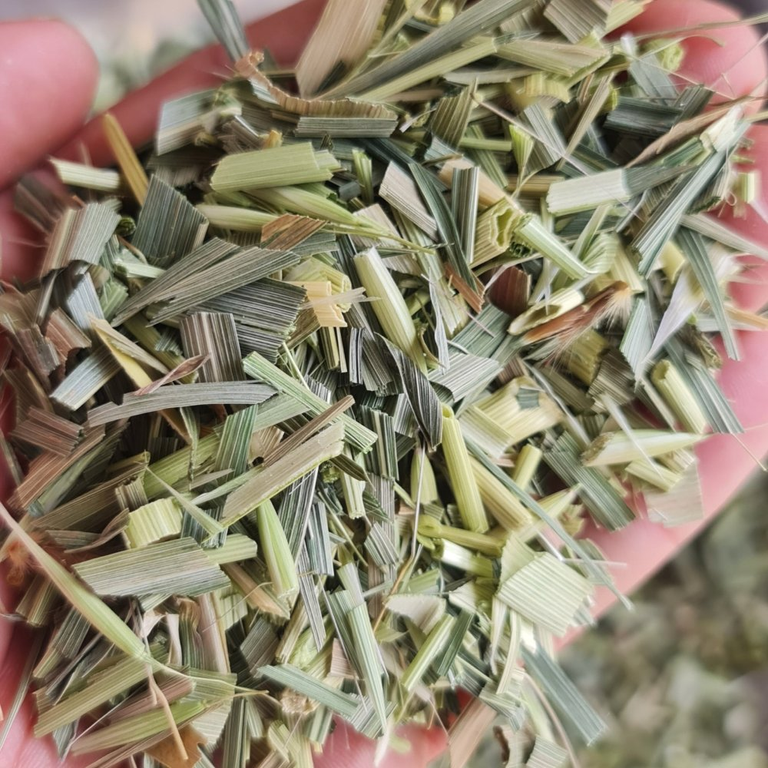
Getting the right size.
To achieve better consistency in your remedies, it’s better to reduce your dried herbs to an (almost) uniform size. You can do a lot of this when you are cutting your herbs for drying or you can put them through a grinder (the blade type, not the crushing variety) or pass them through several sieves of reducing mesh size. I like to crush them by hand to a reasonable size, then pass the herbs through a 6 mm stainless steel soil sieve. Anything that can’t be broken up and passed through this size aperture is put aside. Then I pass the finer material through a #6 sieve (stainless steel of course) which reduces the pieces to approximately 3mm which is perfect for teas, infusions and tinctures.
The larger pieces that didn’t make it through are then put into a small coffee grinder and reduced to a finer size. I don’t reduce them any further, to powder, until they are needed.


What a very good post on preserving herbs! I wish I could just dry herbs here. In the summer the humidity is usually in the 90% or above range. So I have to use the dehydrators. And the instant I turn them off I must get the item in a jar and vacuum seal it. Otherwise it just starts absorbing moisture immediately.
Humidity is a big issue. I d9nt know how many times I've put herbs out to dry undercover and it's decided to rain, letting mold start to grow. Dehydrators are definitely a winner.
Do you add silica gel to your jars or vacuum seal them?
I just vacuum seal because I was using them all up in a year.
Silica gel can help to remove the excess moisture from air humidity while the herbs are in the container.
This reminds me of making hay for feeding farm animals. Yeah, most of the Herbalists dry their herbs before using them for medicinal purposes.
It's the easiest way to store them.
You just gave me an idea that I can also do this, to dry my herbs. Good evening!
Glad to help!