Hello, I recently discovered the existence of this community and I loved the idea of joining and participating, the bad thing is that I am very inconsistent when it comes to gardening and land cleaning. If you are a bit detailed, you will see in the background of the image that the patio of my house is not very clean 😂
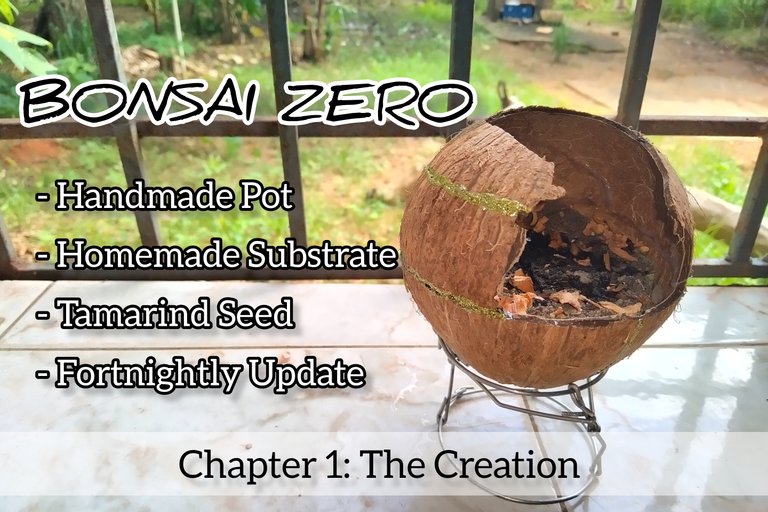
Although, I would still like to participate, so today I bring you something completely different and that I have not seen in Hive until now, a Bonsai made from scratch..

To begin with, it is necessary to clarify a little what a Bonsai really is, since there is a lot of confusion and little information about it. Bonsai literally means "potted", so yes, a bonsai can be absolutely any tree or shrub that is planted in a pot ☺️
Logically, there are varieties in terms of size, the type of pot and logically there are trees that give us very good visual characteristics when making a bonsai, small leaves, close together branches and rustic bark are usually the most desired, since visually they are they more closely resemble their counterpart in normal size.
So, with that cleared up, we need to go back to the beginning and talk about the other part of the meaning of the word, the pot.
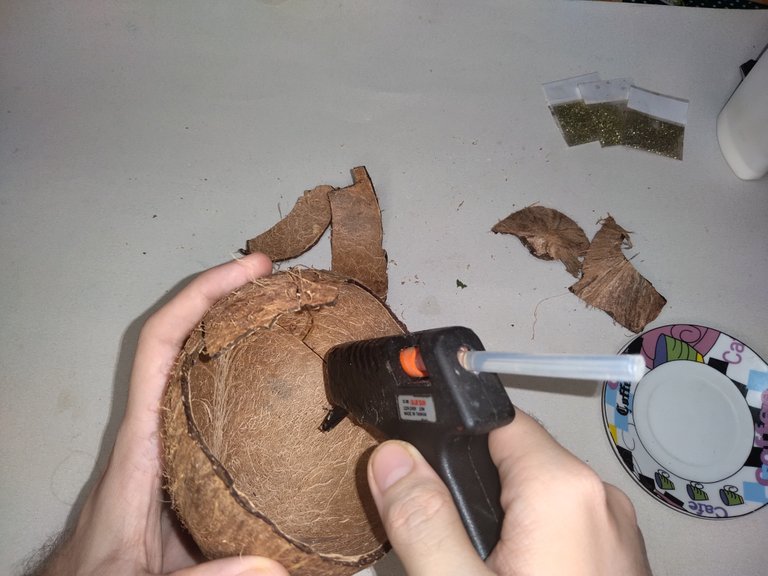
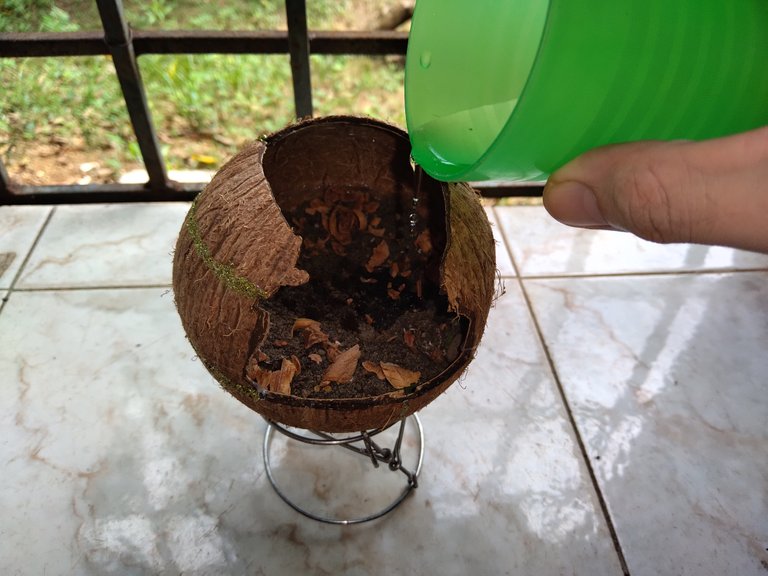
Generally, the pots are made of clay and are an art in itself, although there is no exact specification of how it should be or what material it should be made of, so in my case, I am going to recycle the shell of a coconut that I bought few days. Art is very subjective and according to me, this will be perfect for the tamarind plant ☺️

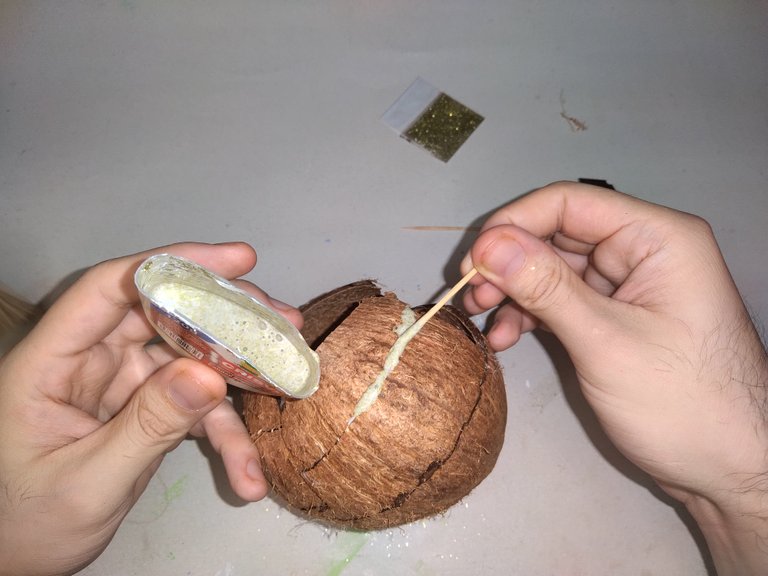

One thing I'm going to do, since I'm rebuilding the coconut, is use a little bit of gold glitter on the seams. Referring to a very little known practice in the world of bonsai, where gold sheets are placed in the cracks of a pot.
I honestly don't know a bit about that tradition, I only know that it must be in pots that have been accidentally broken, in fact, it is illegal to do so on purpose. Within 15 days that I share the progress, I promise to investigate more about it and tell you what I learned ☺️
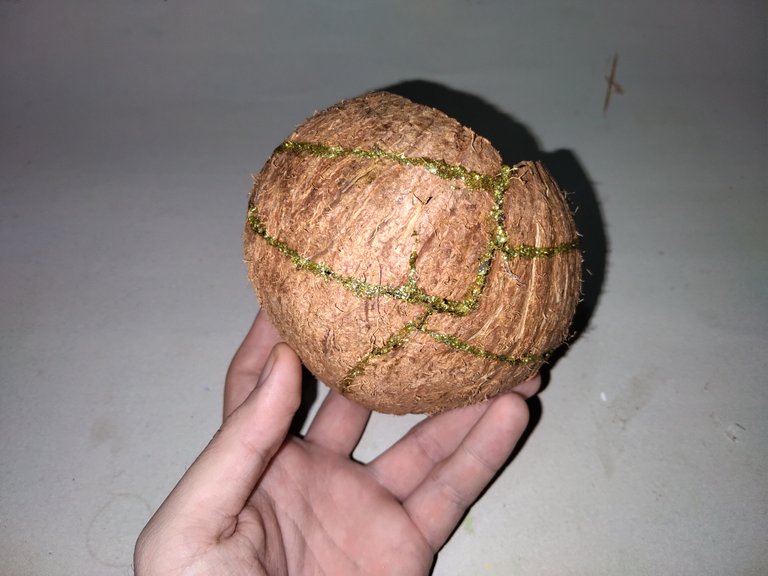
At first, I must confess that I thought it would be horrible, but after it dried it got better and I got the result I was looking for ☺️

The substrate that I am going to be using is a homemade one, traditionally a special substrate is used, based on annealed clay and volcanic stone. Although we return to the same thing, in the literary translation of the word bonsai, there is no specification in this regard.
So I took the liberty of using a mixture of black earth, gravel I picked up from the patio, crushed egg shells, coffee grounds from what's left in the strainer, bits of charcoal, and as an experiment some pine wood shavings, since I I would like to know if its strong smell keeps the ants away. What do you say?


For reasons of the materials that I am using, I placed a small plastic covering on the inside of the pot, logically I left its hole for drainage and I was worried that it would not protrude too much, that way I will make the wood last longer and that the glue does not become liquid again. We'll see in the next post how it turned out 😂
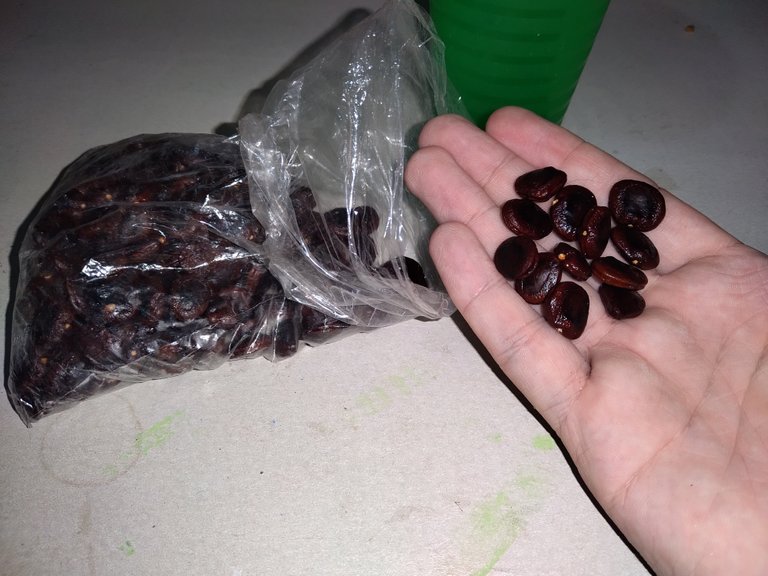
As for the seeds, I chose the tamarind, because I know that its tree has very small leaves that would help me maintain a proportionate design. Where did I get them? Well, they were left over from a juice I made last month and I kept them in the fridge, I know it's not optimal, although I assure you it will grow ☺️
And so we finish today's post, the only thing left for us is to talk a little about care and maintenance. And it's not like there's much to talk about really, bonsai are a plant like any other and need the same care as any other. Water when the substrate is dry, access to sunlight and fertilizer if necessary ☺️
From now on I will be taking pictures every 3 days so I can show you the progress every 15 days. In the next post I hope to talk a little about pruning and alternative cultivation methods, where we can accelerate the growth of our plant x3.
So, see you in 15 days. Thank you very much for reading ☺️
Wow! This is the first time that I have seen this style. I love it. With that being said, I am going to try this one out. Greetings!
That would be great, it would certainly be wonderful to see someone else try it and see the different designs with the different plants from different countries ☺️
Thank you for stopping by to leave your comment :D
You're welcome and good evening!
Awesome. Good luck with your bonsai journey! Right now I will not be doing too much other than looking after my wife's potted plants but some of those are really massive beasts haha.
!PIZZA
Hahaha, well, according to the Japanese, if it measures less than a meter and is in a pot, it is a bonsai, although everything really originated in China... story for the next post 😂
Thank you very much for stopping by to comment and review my post, greetings and a hug from Venezuela ☺️
Hehe and a warm greetings from South Africa! 😁
First of all let me tell you that this is the most interesting post I've seen today and trust me, I've scrolled through a lot today.
Congrats for being brave and trying to build your project up from scratch. This is DIY 100% and a nice one too as you're recycling as well. Also documenting the whole process is a good idea. maybe more people can follow your example.
Anyway, I'm looking forward to reading your next post, to see where the project will be at, so please feel free to tag me so I don't miss it :)
Yes, hopefully more people will be encouraged, as a kind of gardening metamorphosis challenge 😂
Without a doubt, your comment fills me with pride because I know that when you say that you have seen a lot of content today, it is true. It is an honor for me that you say it.
And of course I'll take your word for it and tag you in 15 days for the next post. Wish me much success and that a cannibal ant does not end my experiment 😂
I really appreciate the effort and originality. It is interesting as I've never seen such a project. And I really mean it :)
Tell the ants to **ck off and find something else to eat 🤣
Te felicito @oscargonzalez123, es una idea excelente y sobre todo muy muy creativa, me gustó muchísimo, como se ve y seguro tendrás un arbolito precioso! Muchas gracias por compartir tan linda iniciativa! Muchos saludos!🌳
Es una idea muy creativa y si todo sale bien, que espero que así sea, tendrás un arbolito de tamarindo muy bonito.
Congratulations @oscargonzalez123! You have completed the following achievement on the Hive blockchain and have been rewarded with new badge(s):
Your next target is to reach 2000 upvotes.
You can view your badges on your board and compare yourself to others in the Ranking
If you no longer want to receive notifications, reply to this comment with the word
STOPTo support your work, I also upvoted your post!
Support the HiveBuzz project. Vote for our proposal!
Thank you for sharing this post on HIVE!
Your content got selected by our fellow curator hafizullah & you received a little thank you upvote from our non-profit curation initiative. Your post will be featured in one of our recurring curation compilations which is aiming to offer you a stage to widen your audience within the DIY scene of Hive.
Next time make sure to post / cross-post your creation within the DIYHub community on HIVE and you will receive a higher upvote!
Stay creative & hive on!