Hola amigos de hive espero se encuentren muy bien.
El día de hoy Quiero compartir con ustedes este tutorial de cómo elaborar un hermoso Delfín de Origami paso a paso y espero les guste tanto como a mi.
Hello friends of hive I hope you are very well.
Today I want to share with you this tutorial on how to make a beautiful Origami Dolphin step by step and I hope you like it as much as I do.
Los Materiales que vamos a necesitar son:
The materials we will need are:
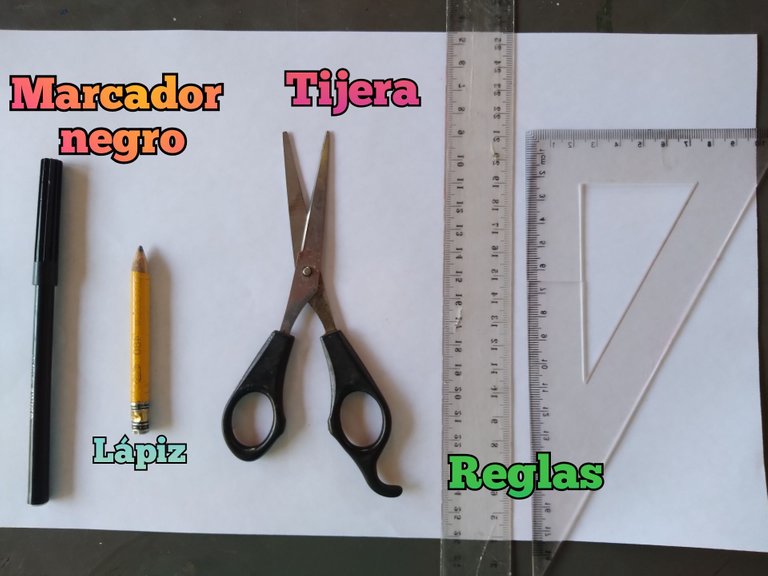
1.- Un marcador negro
2.- Un lápiz
3.- Una hoja blanca
4.- Una regla y una escuadra
5.- Una tijera
1.- A black marker
2.- A pencil
3.- A white sheet of paper
4.- A ruler and a square
5.- A scissors
Y eso es todo lo que necesitaremos.
And that's all we'll need
Comencemos // Let's start
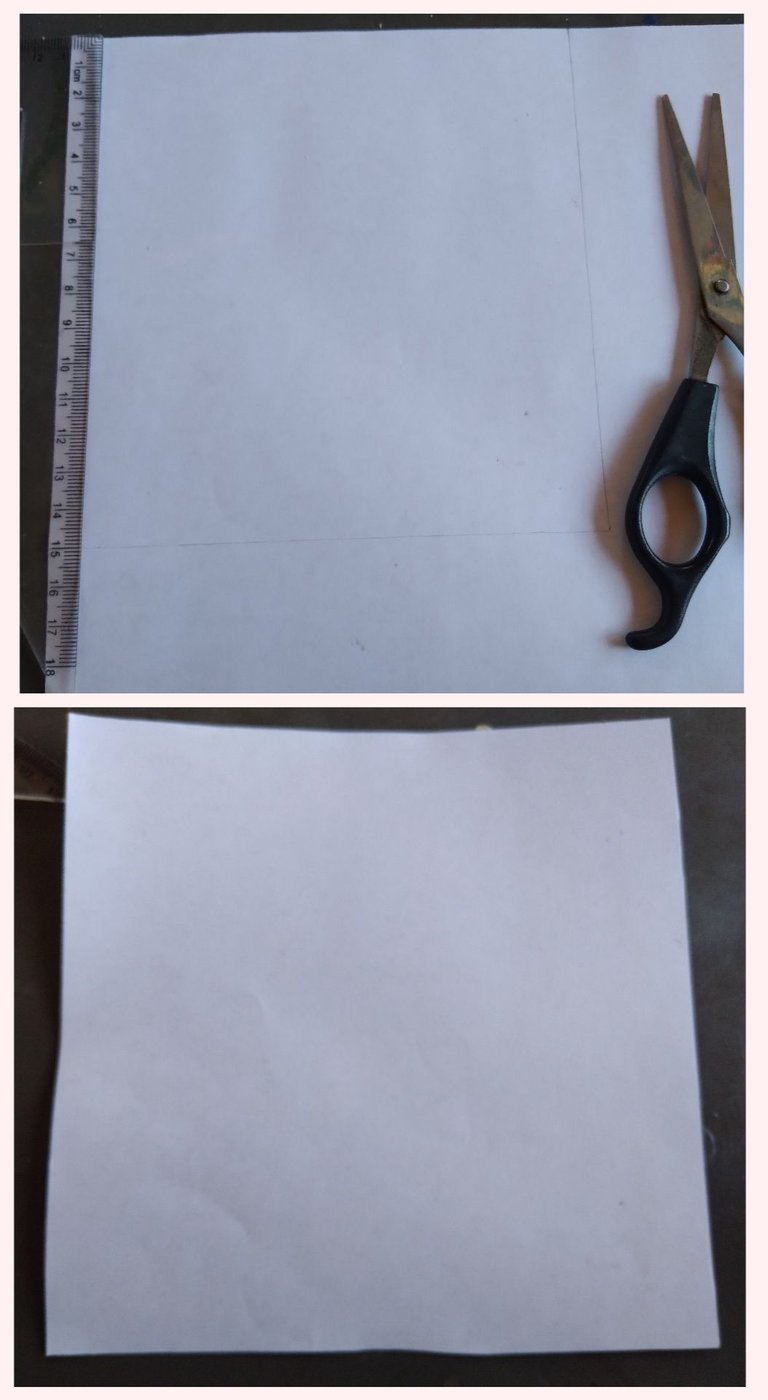
Bueno lo primero que vamos a hacer es dibujar un cuadro de 15x15 centímetros en la hoja Blanca y con la tijera lo cortamos.
Well, the first thing we are going to do is to draw a 15x15 centimeters square on the white sheet and cut it with the scissors.
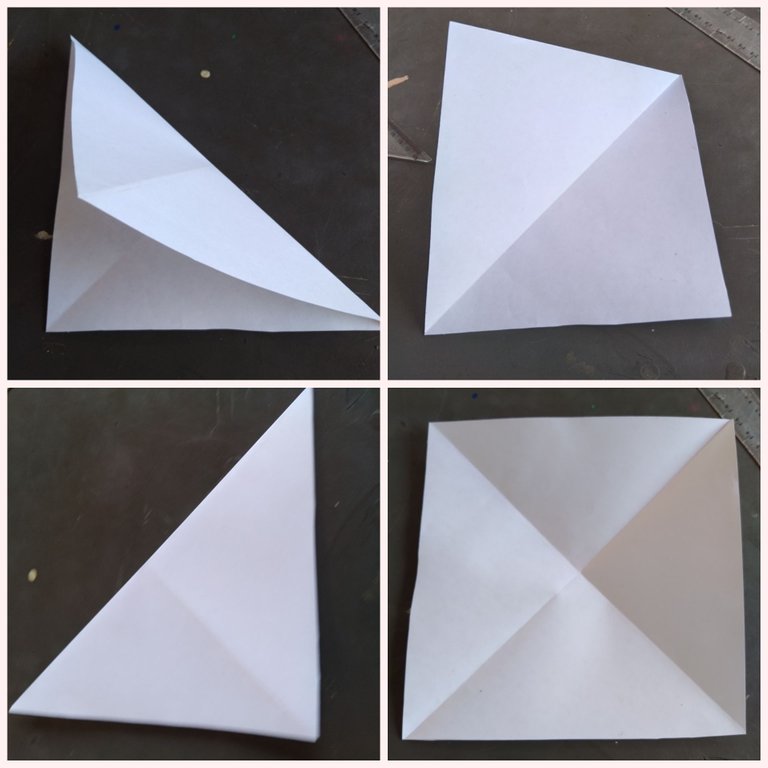
Cuando tengamos listo nuestro cuadro de 15 centímetros juntamos la esquina superior izquierda con la esquina inferior derecha y luego la esquina superior derecha con la esquina inferior izquierda, para que nos quede igual que en las fotografías.
When we have our 15-centimeter square ready, we join the upper left corner with the lower right corner and then the upper right corner with the lower left corner, so that it looks the same as in the photographs.
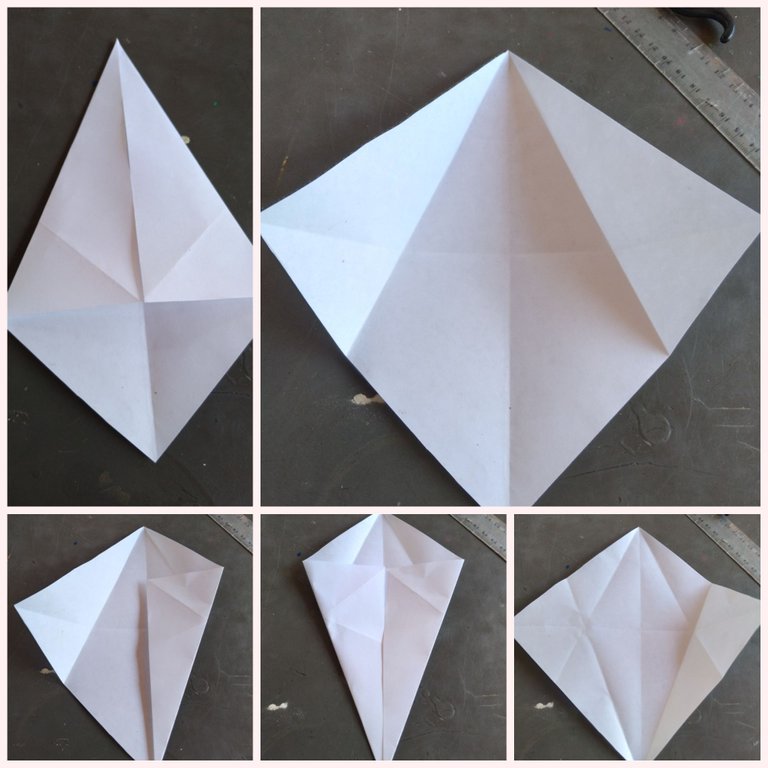
Ahora lo que tenemos que hacer es doblar la hoja paso a paso tal y como se muestra en las fotografías.
Now what we have to do is to fold the sheet step by step as shown in the pictures.
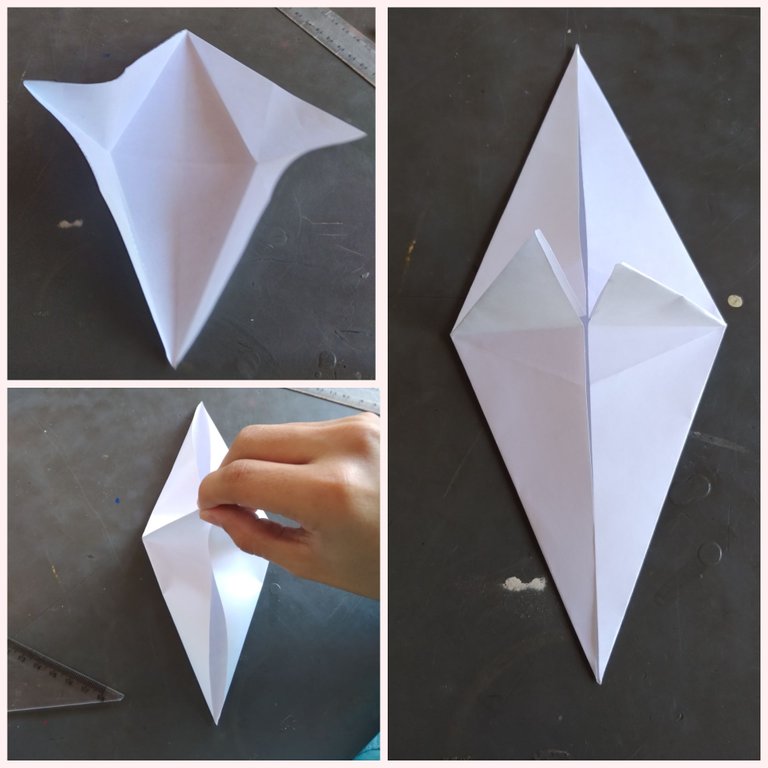
Luego tal y como hacemos en la foto tomamos los 2 extremos de los lados y los juntamos, entonces nos debe de quedar el papel en forma de diamante tal y como en las fotos.
Then as we do in the photo we take the 2 ends of the sides and join them together, then we should have the paper in the shape of a diamond as in the photos.
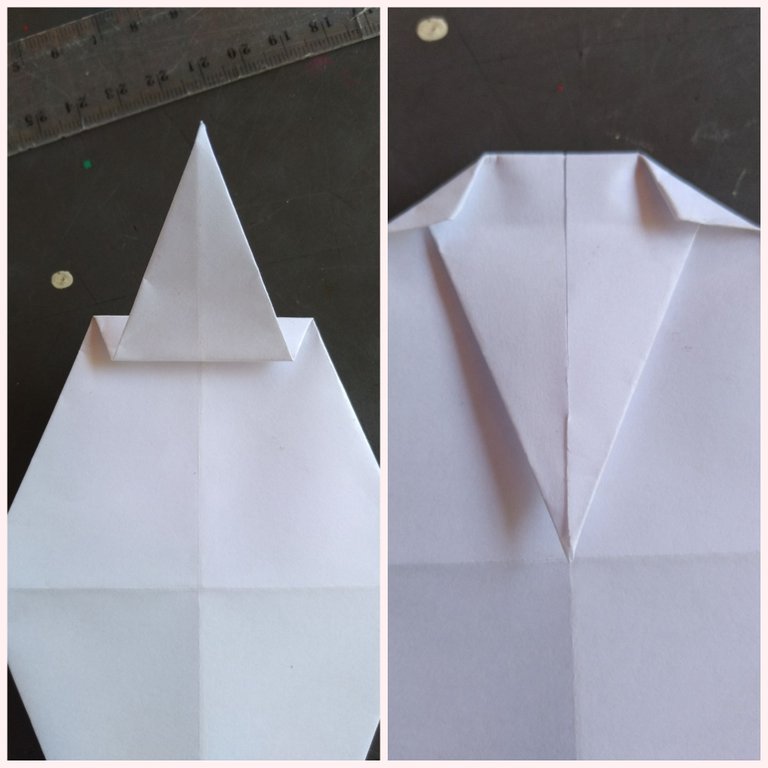
El papel, que tiene forma de diamante va a tener como 2 orejas en el medio del diamante, entonces lo que vamos a hacer es doblar las 2 orejas hacia adelante y hacia atrás para marcar bien la forma de las líneas.
The paper, which has a diamond shape, will have 2 ears in the middle of the diamond, so what we are going to do is to fold the 2 ears forward and backward to mark the shape of the lines.
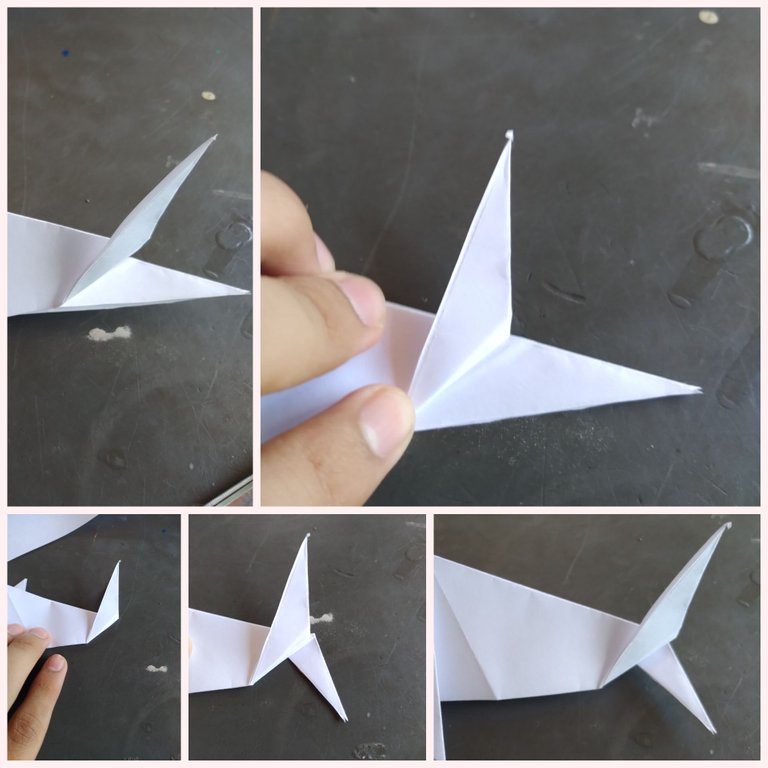
Ahora volteamos el diamante por la parte de atras y doblamos la punta de la parte de arriba hasta la mitad.
Now flip the diamond over from the back side and fold the tip of the top halfway.
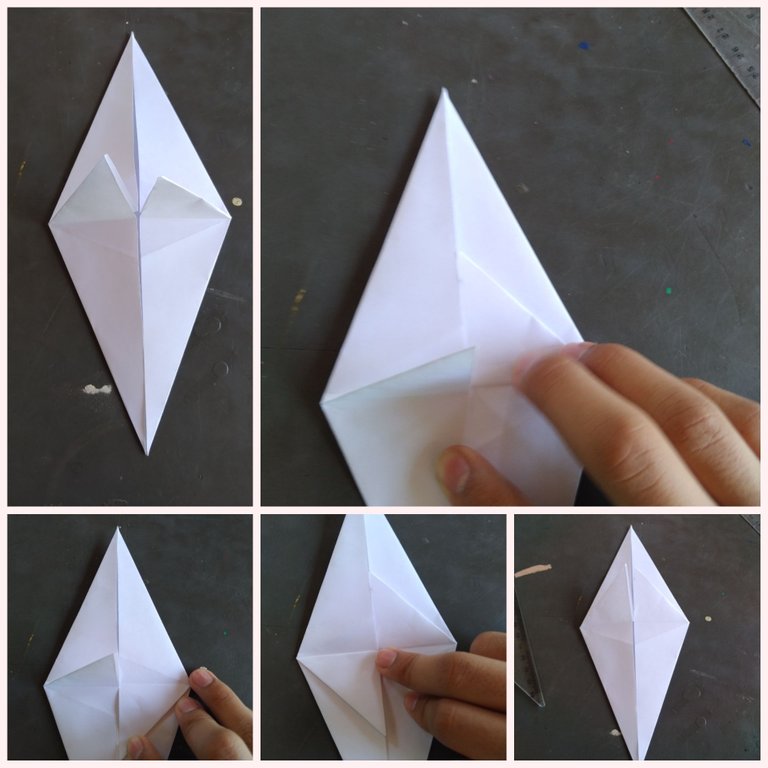
Ahora el dobles que acabamos de hacer lo desdoblamos pero dejamos al menos un centímetro sin desdoblar, luego de eso debolvemos el dobles a como estaba antes de desdoblarlo y las 2 esquinas de la misma parte de arriba las doblamos hasta la línea de un centímetro.
Now we unfold the double that we just made but we leave at least one centimeter without unfolding, after that we return the double to the way it was before unfolding it and the 2 corners of the same top part we fold them up to the line of one centimeter.
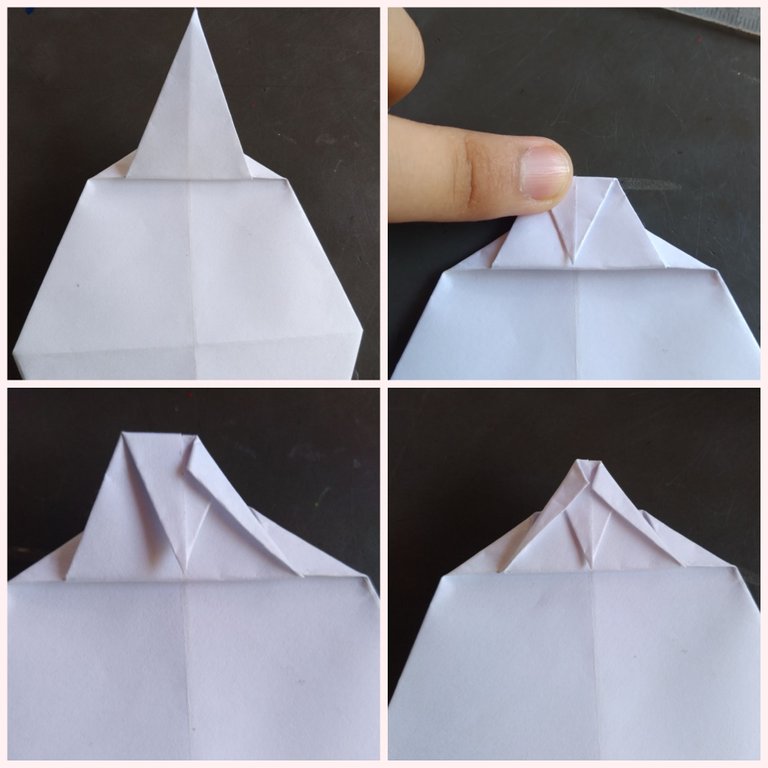
Lo siguiente que tenemos que hacer es realizar los mismos dobleces que podemos observar en las fotografías.
The next thing we have to do is to make the same folds that we can see in the photographs.
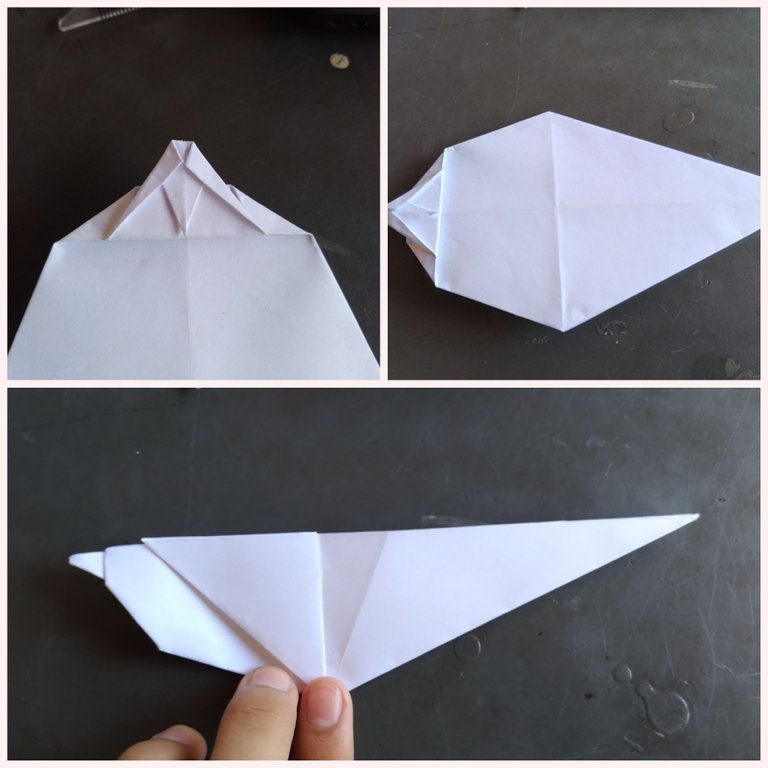
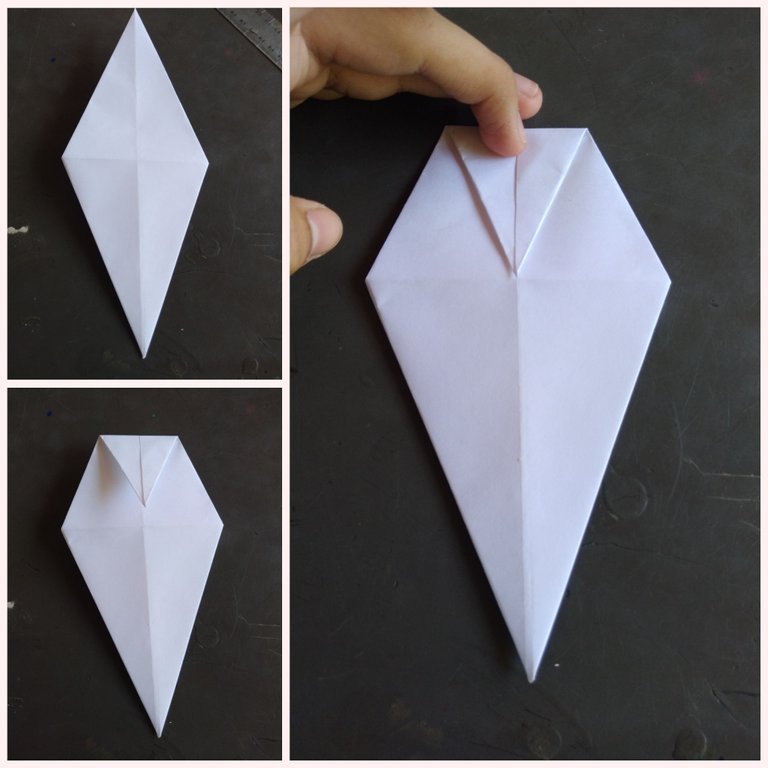
Luego lo que tenemos que hacer es doblar por la mitad la hoja de papel.
Then what we have to do is to fold the sheet of paper in half.
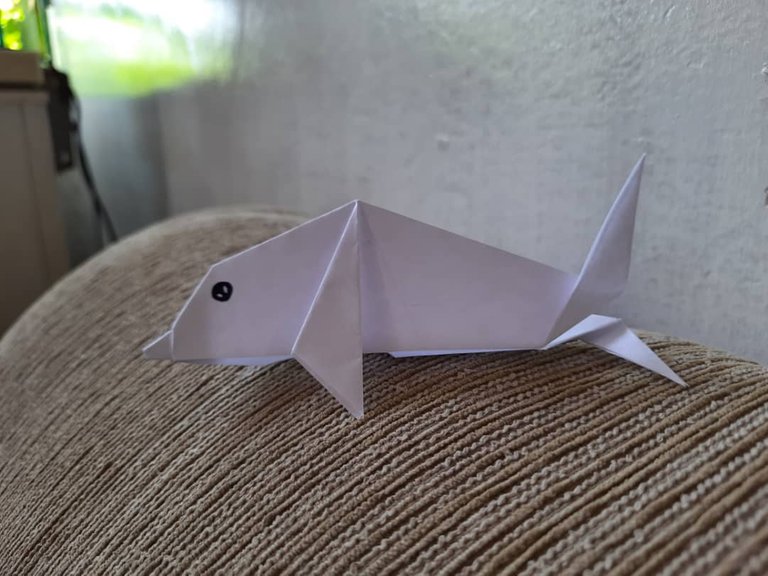
Ahora doblamos las aletas del Delfín para que queden como tal.
Now we fold the fins of the dolphin so that they look like a dolphin.
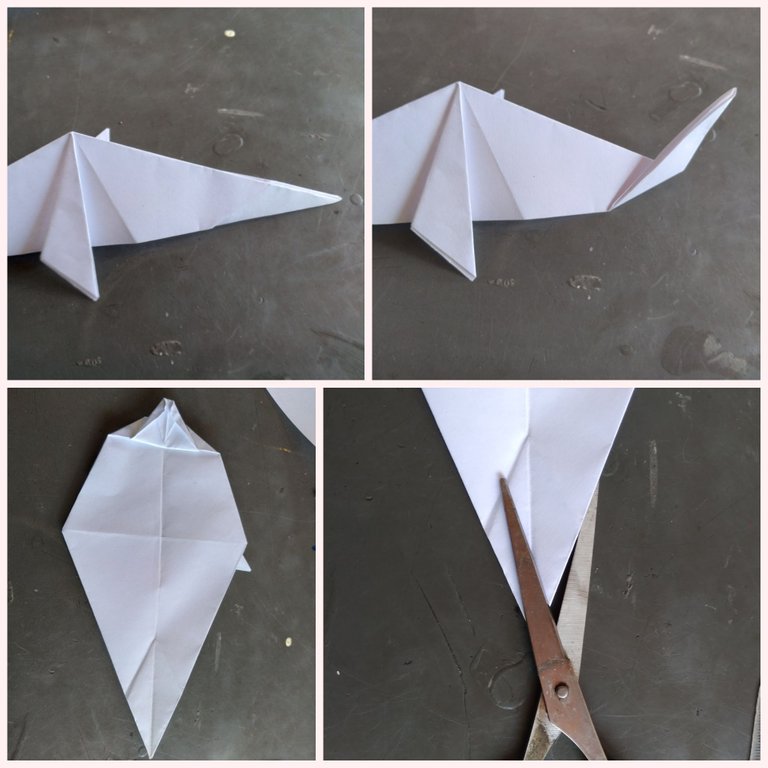
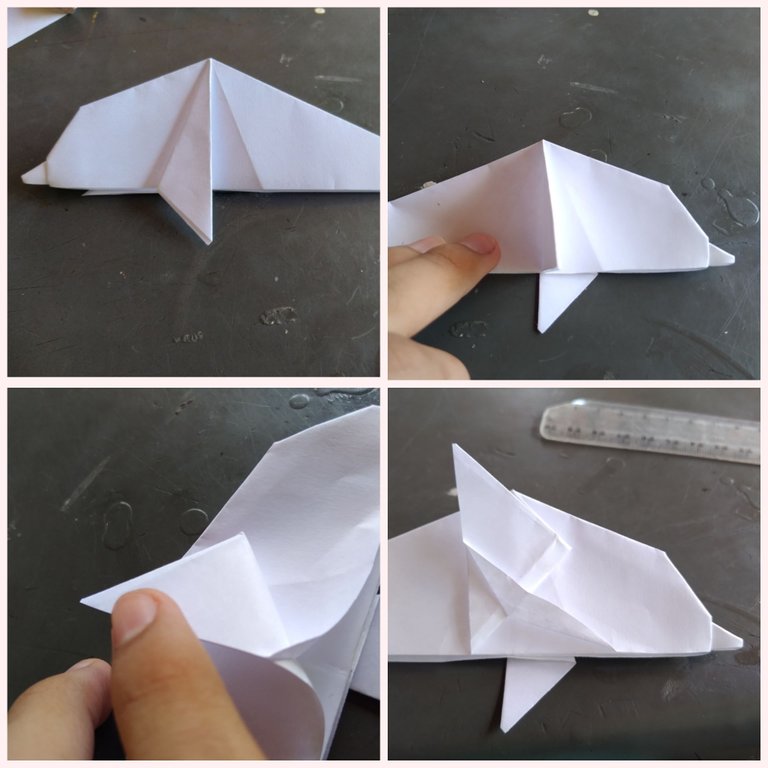
Ahora para hacer la forma de la cola del Delfín desdoblamos el papel por la mitad tal como en la imagen cortamos y doblamos para que agarre la forma de la cola del Delfín.
Now to make the shape of the Dolphin's tail we unfold the paper in half as shown in the image, cut and fold it so that it takes the shape of the Dolphin's tail.
Y cuando hallamos terminado la cola lo siguiente que debemos hacer es dibujar los ojos del Delfín con el marcador.
And when we have finished the tail, the next thing to do is to draw the Dolphin's eyes with the marker.
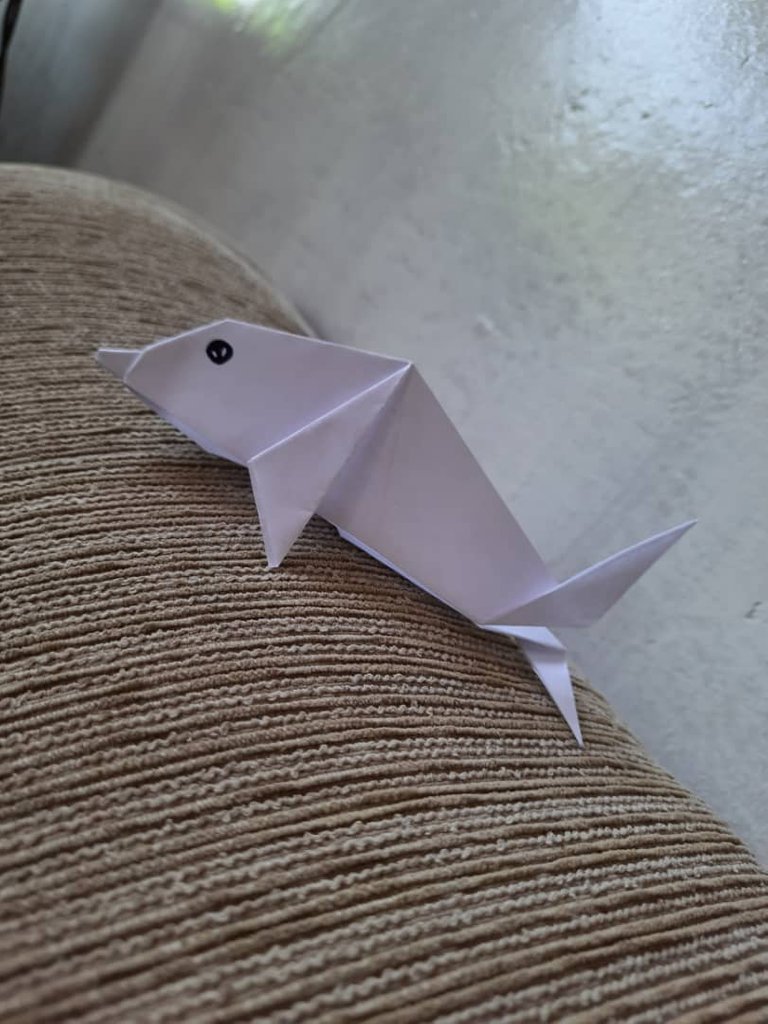
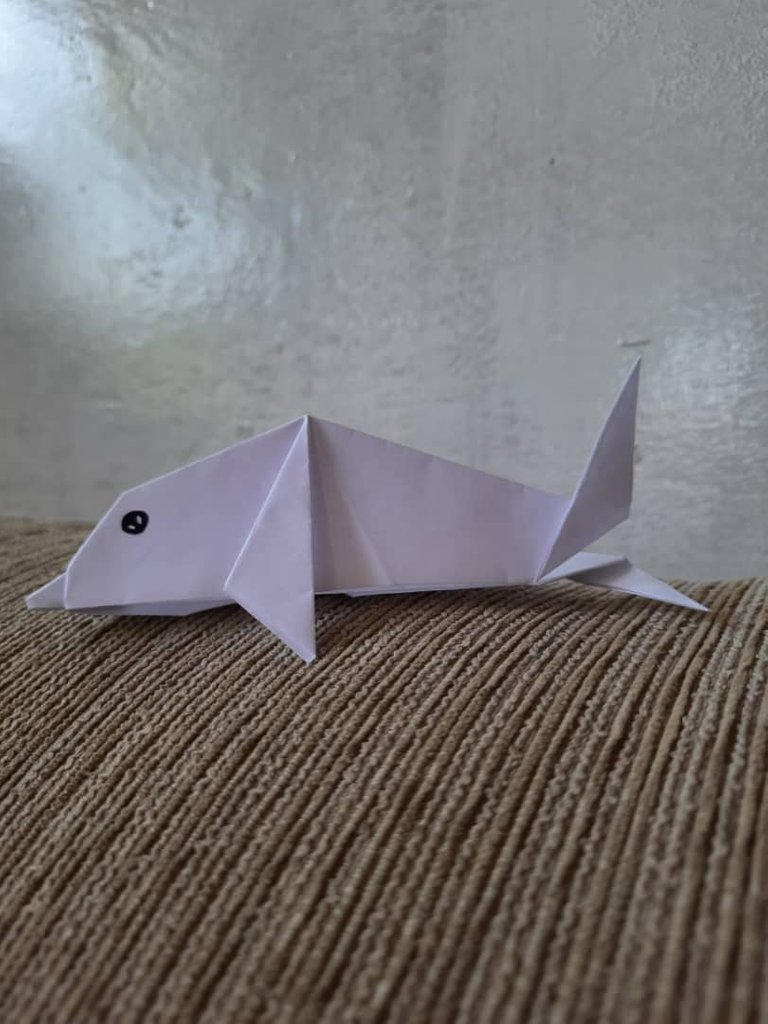
Y Listo ya hemos terminado nuestro hermoso he increible Delfín En Origami Paso a Paso.
And that's it, we have finished our beautiful and amazing Origami Dolphin Step by Step.
Bueno queridos lectores hasta aqui mi post de hoy Espero les haya encantado tanto como a mí nos vemos en un próximo post adiós.
Well dear readers, this is the end of today's post. I hope you loved it as much as I did, see you in the next one.
Gracias por leerme!!
Thanks for reading me!!
Your post has been curated by us! Received 20.00% upvote from @opb. Do consider delegate to us to help support our project.
Do join our discord channel to give us feedback, https://discord.gg/bwb2ENt
* This bot is upvoting based on the criteria : 1. Not plagiarised, 2. Persistent previous quality posts, 3. Active engagement with other usersDo upvote this commment if you 💚 our service :)
Thank you for sharing this amazing post on HIVE!
Your content got selected by our fellow curator @stevenson7 & you just received a little thank you via an upvote from our non-profit curation initiative!
You will be featured in one of our recurring curation compilations and on our pinterest boards! Both are aiming to offer you a stage to widen your audience within and outside of the DIY scene of hive.
Join the official DIYHub community on HIVE and show us more of your amazing work and feel free to connect with us and other DIYers via our discord server: https://discord.gg/mY5uCfQ !
If you want to support our goal to motivate other DIY/art/music/homesteading/... creators just delegate to us and earn 100% of your curation rewards!
Stay creative & hive on!