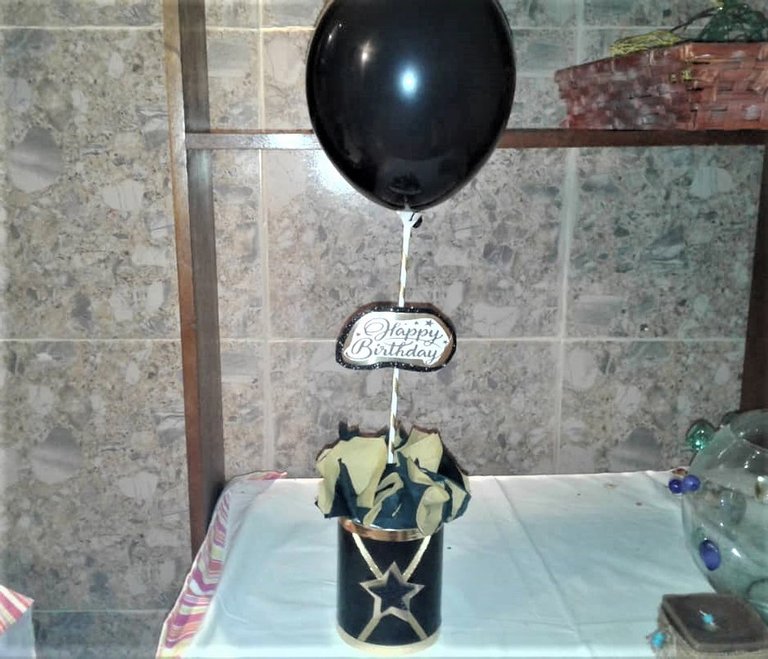
Hola amigos de hive, hoy quiero mostrarle como hacer un modelo de centro de mesa que hice para decorar con motivo de cumpleaños, hay muchas formas y combinaciones para hacerlo, a mí personalmente me gusta bastante estos dos colores aparte que como se ven juntos me encanta, claro todo dependerá del gusto de cada quien para escoger los colores que se utilizaran, este tipo de manualidades son muy útiles aprenderlas aparte que sirven para cualquier ocasión que se quiera como una fiesta de cumpleaños y el resultado final seguramente les encantara ya que queda muy lindo
Hello friends of hive, today I want to show you how to make a model of centerpiece I made to decorate for birthdays, there are many ways and combinations to do it, I personally like these two colors apart as they look together I love, of course everything will depend on the taste of each one to choose the colors to be used, this type of craft is very useful to learn apart that serve for any occasion you want as a birthday party and the final result will surely love because it is very nice
Hello friends of hive, today I want to show you how to make a model of centerpiece I made to decorate for birthdays, there are many ways and combinations to do it, I personally like these two colors apart as they look together I love, of course everything will depend on the taste of each one to choose the colors to be used, this type of craft is very useful to learn apart that serve for any occasion you want as a birthday party and the final result will surely love because it is very nice
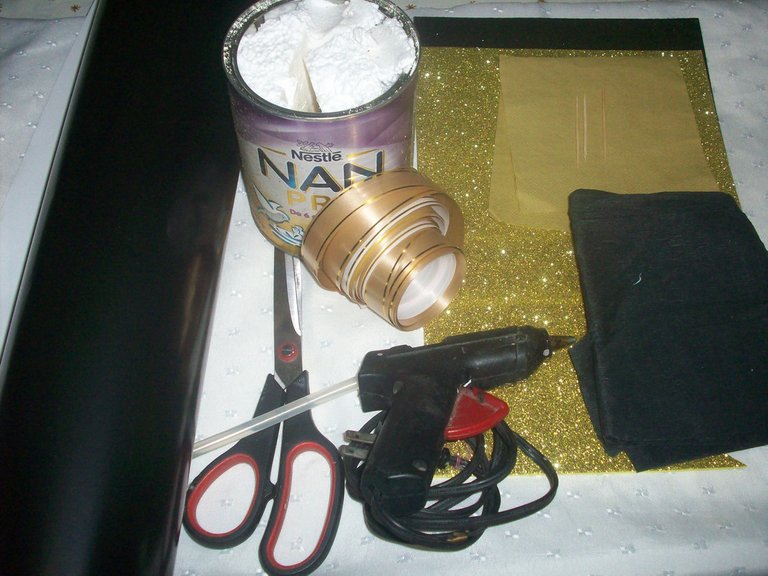
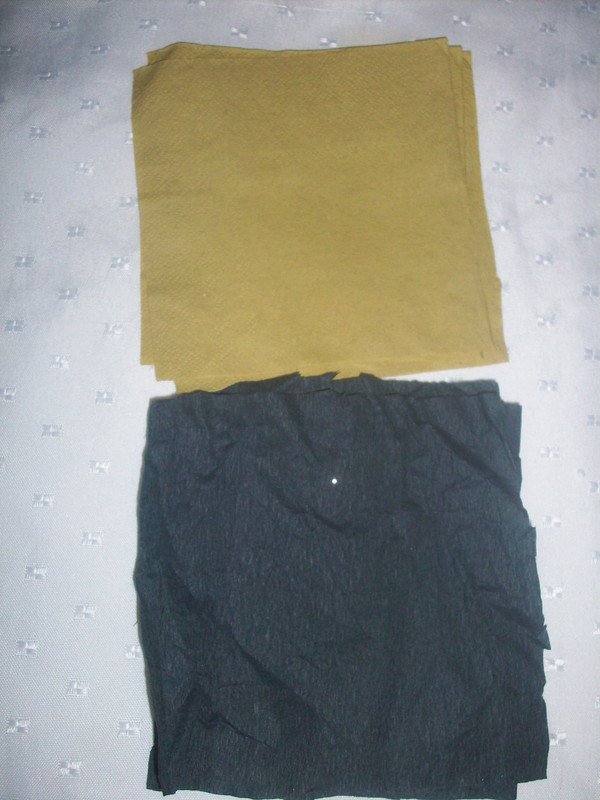
Materiales – Materials
- Lata
- Papel lustrillo
- Tijera
- Silicón
- Foami
- Papel de seda
- Papel crepe
- Globo
- Cinta
- Palillos
- Anime
- Can
- Shine paper
- Scissors
- Silicone
- Foami
- Tissue paper
- Crepe paper
- Balloon
- Tape
- Chopsticks
- Encourage
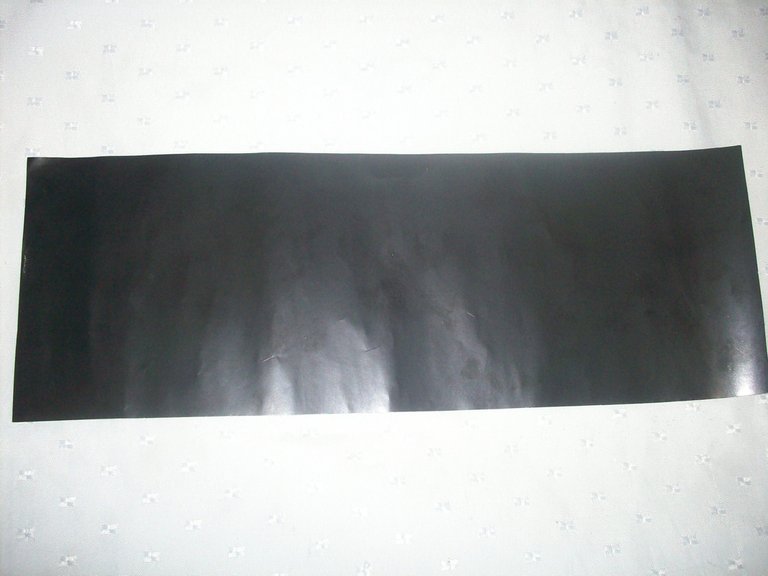
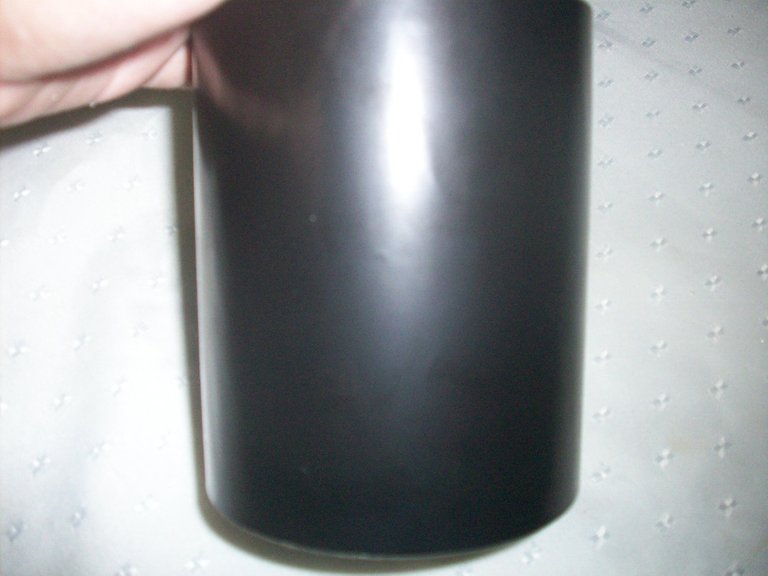
Primero cortamos el papel lustrillo de la misma altura y un poco más ancho de la lata para que cubra completamente, luego lo pegamos con silicón.
First we cut the glossy paper of the same height and a little wider from the can to cover it completely, then we glue it with silicone.
First we cut the glossy paper of the same height and a little wider from the can to cover it completely, then we glue it with silicone.
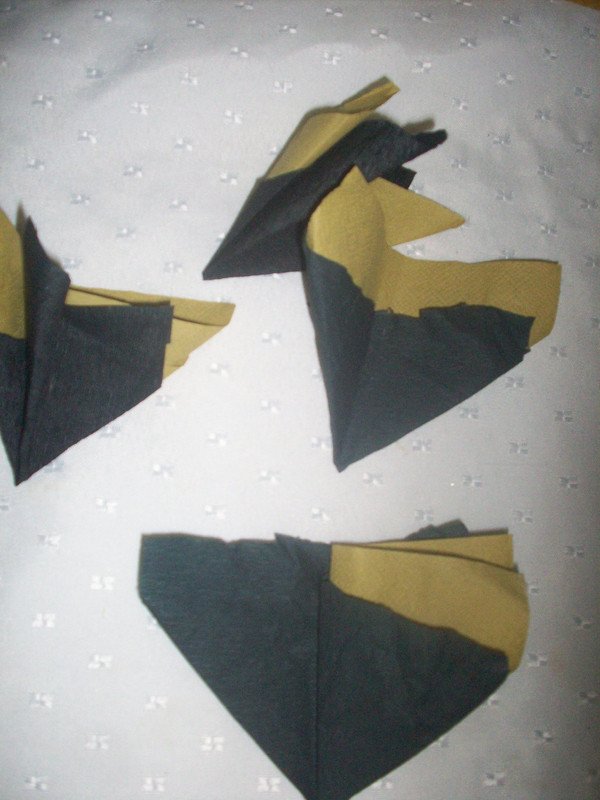
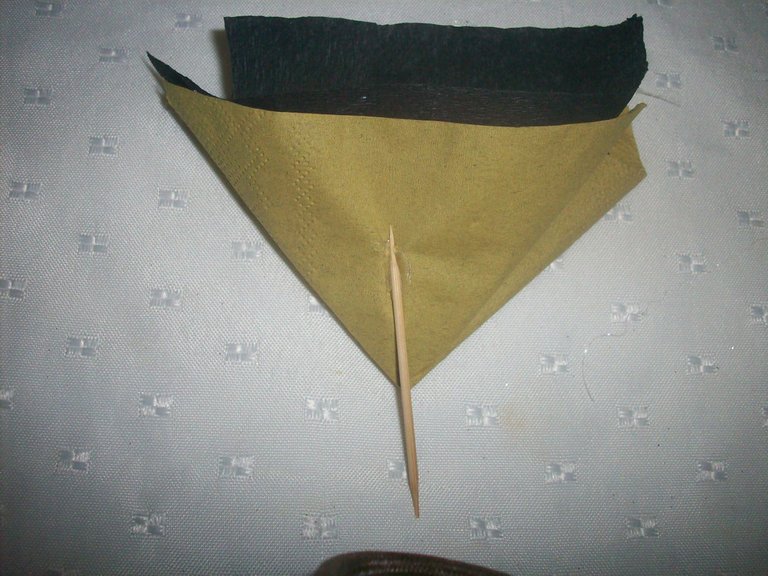
Picamos el papel de seda y lustrillo en cuadrados para hacer pañuelos, después con silicón pegamos un palillo para poder ponerlo en la lata hasta que quede completamente cubierta.
We cut the tissue paper and polish in squares to make handkerchiefs, then with silicone we stick a toothpick to be able to put it in the tin until it is completely covered.
We cut the tissue paper and polish in squares to make handkerchiefs, then with silicone we stick a toothpick to be able to put it in the tin until it is completely covered.

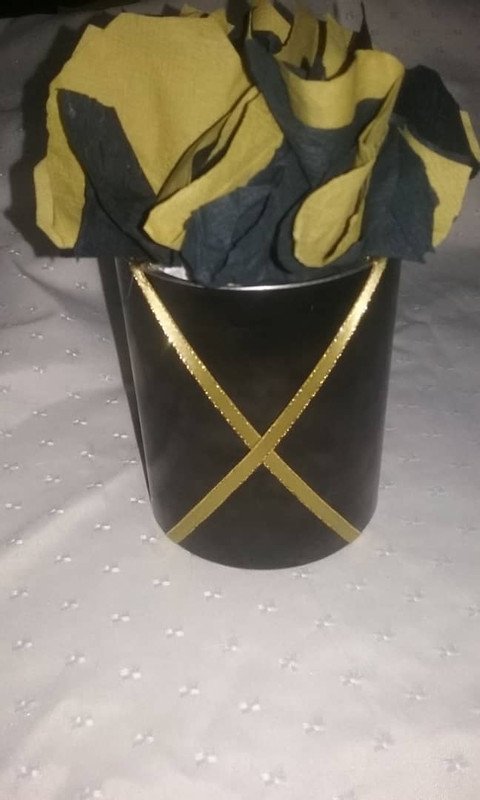
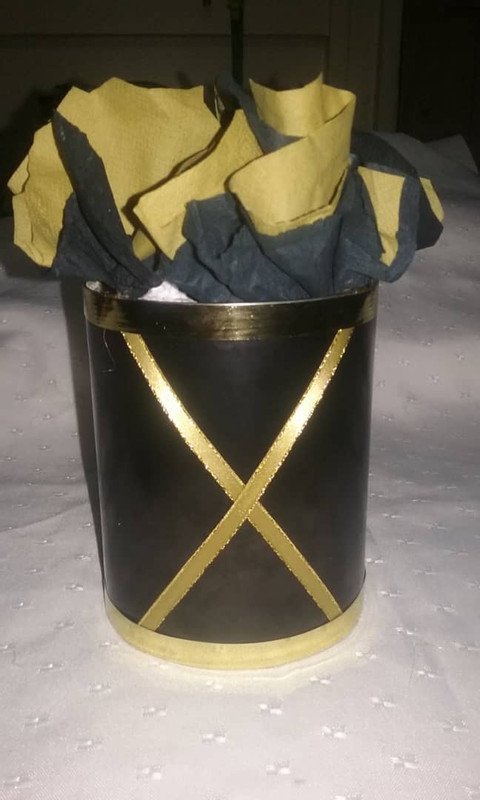
Cortamos dos pedacitos de cinta y la colocamos en la forma de X, luego picamos dos pedacitos más de otra cinta para los bordes.
We cut two small pieces of tape and place it in the shape of X, then we cut two more pieces of another tape for the edges.
We cut two small pieces of tape and place it in the shape of X, then we cut two more pieces of another tape for the edges.
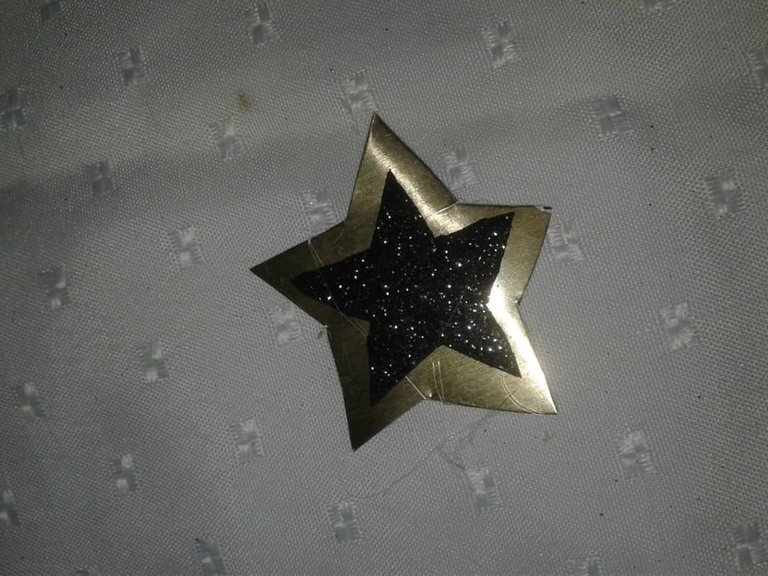
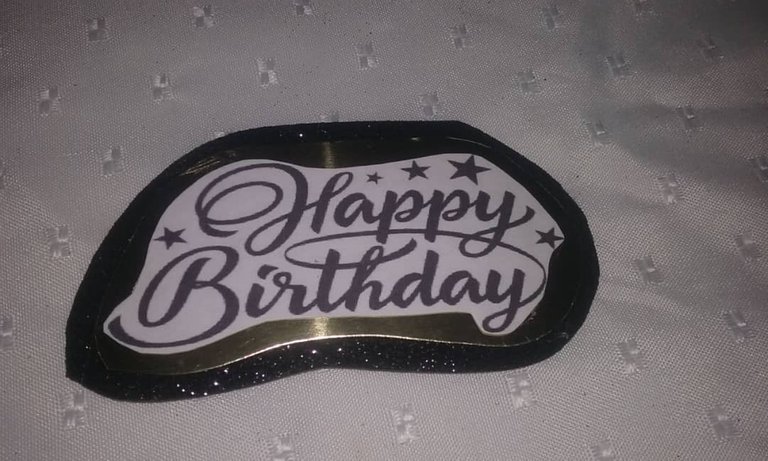
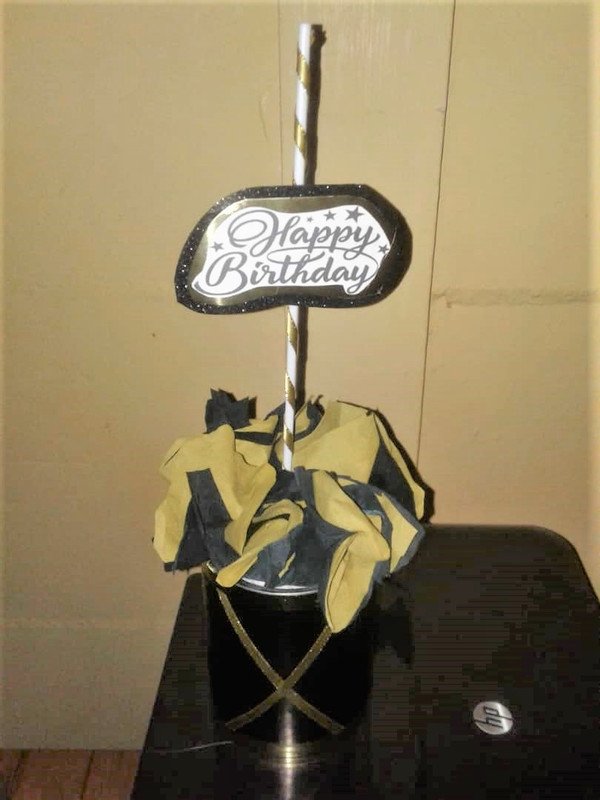
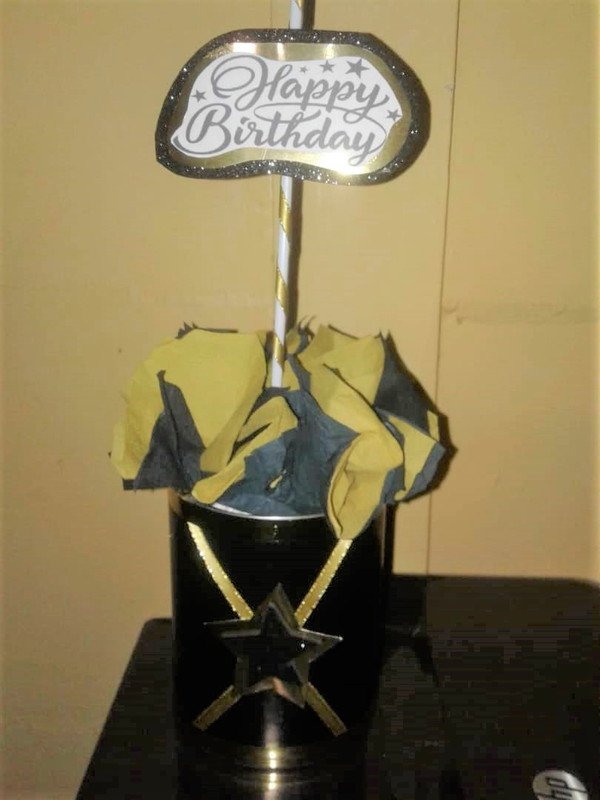
Hacemos una Estrella para decorar y un topper del motivo que queramos, este sera de feliz cumpleaños.
We make a star to decorate and a topper of the motif we want, this will be happy birthday.
We make a star to decorate and a topper of the motif we want, this will be happy birthday.
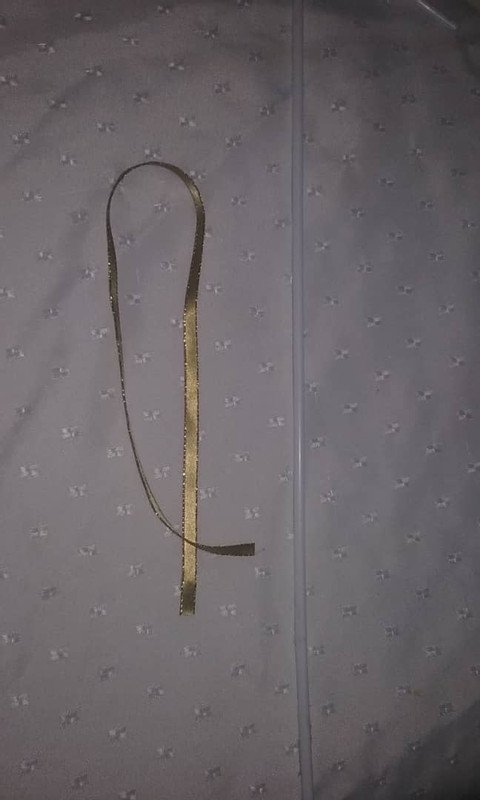
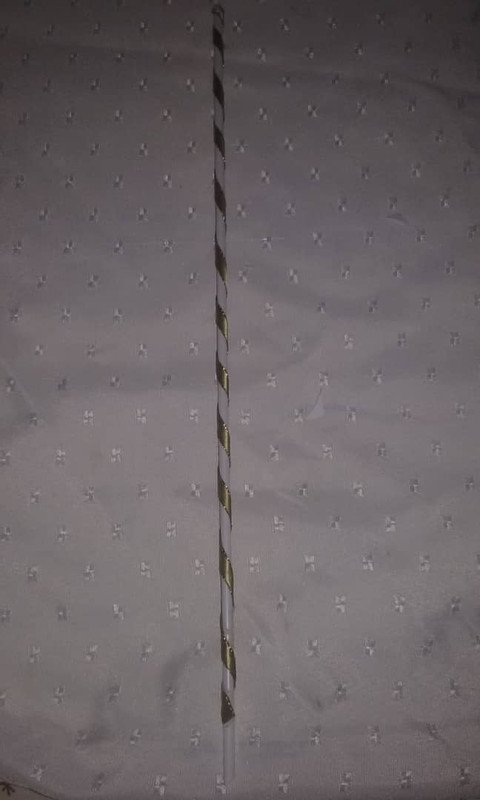
Medimos y cortamos un pedazo de cinta para enrollarla en el palito del globo.
We measure and cut a piece of tape to wrap around the balloon stick.
We measure and cut a piece of tape to wrap around the balloon stick.
Colocamos el palito del globo para poder pegar el topper y pegamos la estrella en el centro de la X.
We put the balloon stick to stick the topper and paste the star in the center of the X.
We put the balloon stick to stick the topper and paste the star in the center of the X.
Por ultimo inflamos el globo y lo colocamos así terminamos con nuestro lindo centro de mesa.
Finally, we inflate the balloon and place it so that we end up with our beautiful centerpiece.
Finally, we inflate the balloon and place it so that we end up with our beautiful centerpiece.
Espero les guste.
I hope you like it
Gracias por Leer.
Thanks for reading
Fotos de mi propiedad.
Cámara Kodak M753

Congratulations @anyelit! You have completed the following achievement on the Hive blockchain and have been rewarded with new badge(s) :
You can view your badges on your board and compare yourself to others in the Ranking
If you no longer want to receive notifications, reply to this comment with the word
STOP