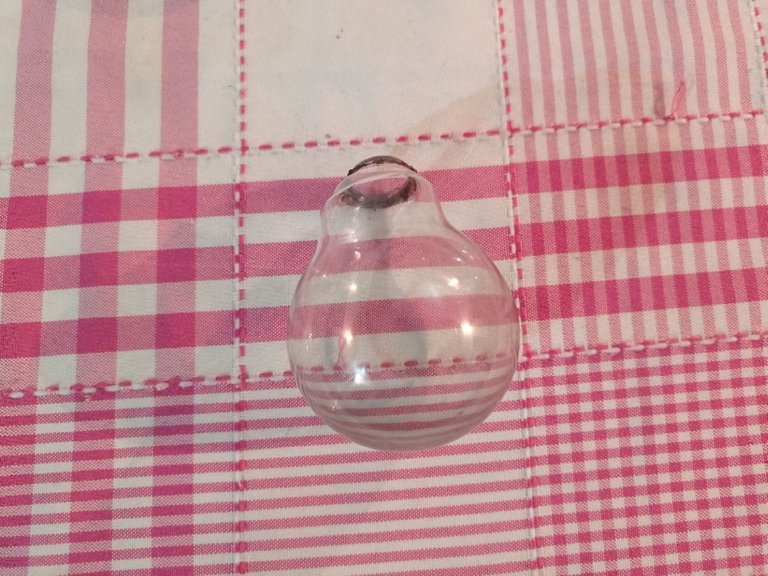
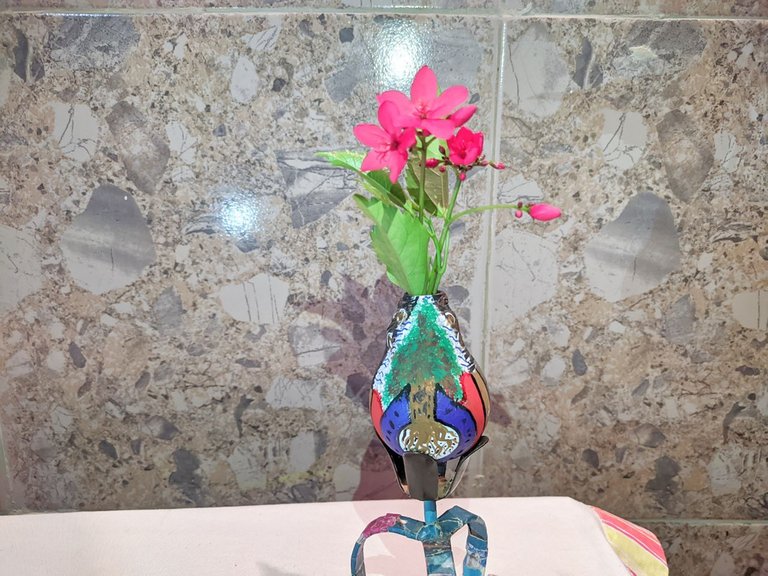
Hola amigos de hive, hoy quiero quiero compartir con ustedes como hice este lindo florero con una bombilla que tenía quemada en mi casa, como siempre estoy innovando me pareció buena idea realizar el florero para decorar la sala así darle un toque más fresco, podemos decorarlo como queramos esta vez decidí pintarlo y dejé que la imaginación fluyera mientras pintaba, podemos colocarle adentro sin ningún problema, tierra, piedritas o agua lo que se prefiera eso ya depende de cada persona.
Hello friends of hive, today I want to share with you how I made this cute vase with a light bulb that had burned in my house, as I am always innovating I thought it was a good idea to make the vase to decorate the living room and give it a fresher touch, we can decorate it as we want this time I decided to paint it and let the imagination flow while painting, we can place inside without any problem, soil, pebbles or water what you prefer that's up to each person.
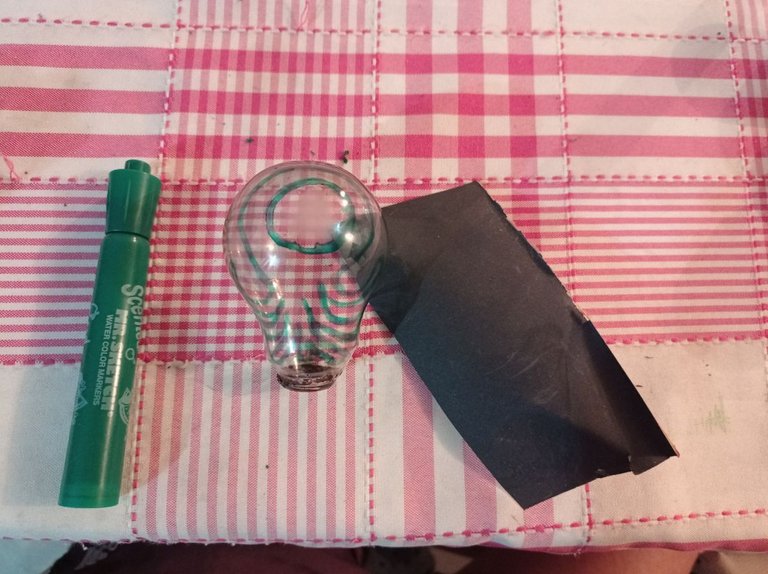
Materiales – Materials
- Bombilla
- Pinturas
- Pinceles
- Lima
- Marcadores
- Bulb
- Paints
- Brushes
- Paintbrushes
- Markers
Primero lo que hacemos es agarrar la bombilla quemada y con mucho cuidado sacamos todo lo que tiene adentro para eso lijamos el pie de contacto eléctrico hasta que rompamos el estaño, luego quitamos el casquillo metálico para lijar el vidrio hasta que llegue el punto que podamos extraer lo de adentro y de esta forma es más segura ya que es el riesgo que rompamos la bombilla es mínimo, para hacer esto tuve un poco ayuda para que no ocurriera ningún tipo de incidente, cuando tengamos eso listo marcamos el diseño que queramos hacer para que así sea más fácil a la hora de comenzar a pintar.
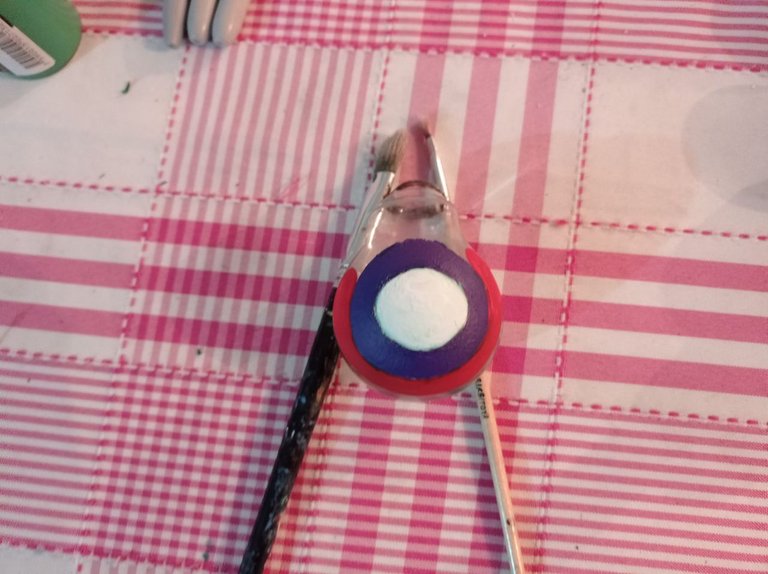
First what we do is grab the burned bulb and carefully remove everything inside for that we sand the electrical contact foot until we break the tin, then remove the metal cap to sand the glass until it reaches the point that we can extract the inside and this way is safer because it is the risk that we break the bulb is minimal, to do this I had a little help to avoid any kind of incident, when we have that ready we mark the design we want to do so it will be easier when we start painting. Ahora comenzamos a pintar en la bombilla lo que marcamos previamente, el círculo principal es con la pintura blanca y alrededor de eso hacemos 2 círculos más con colores diferentes a esto le tenemos que echar aproximadamente como 3 manos de pintura para que se vea bien.
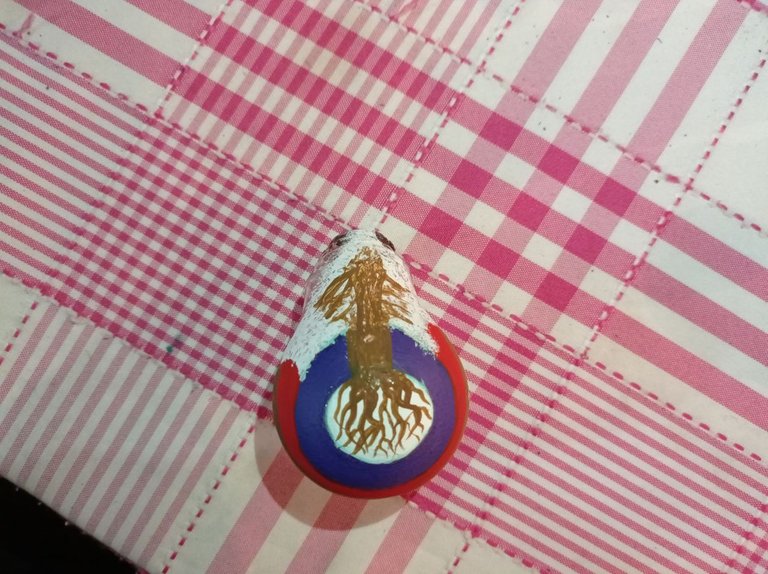
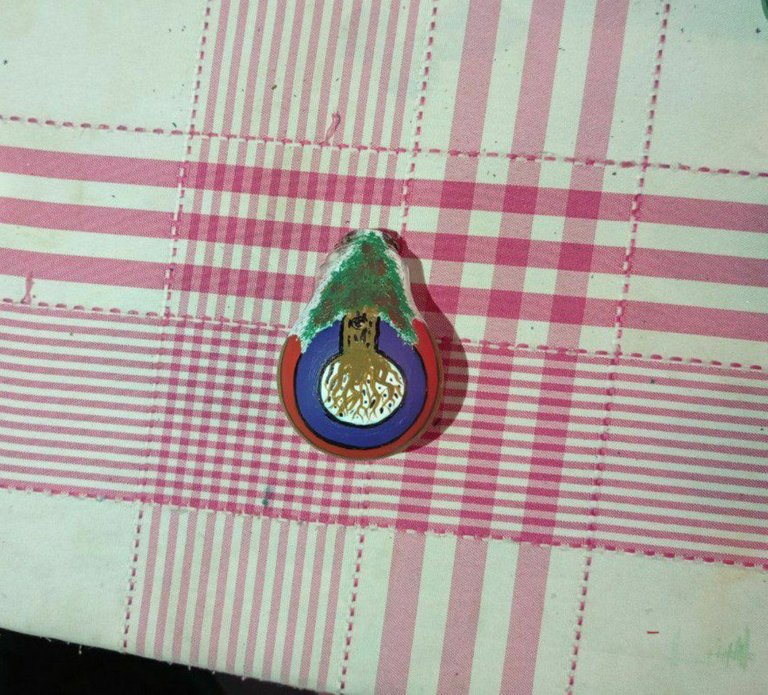
Now we begin to paint on the bulb what we previously marked, the main circle is with white paint and around that we make 2 more circles with different colors to this we have to throw about 3 coats of paint to make it look good. Luego lo que hacemos es agarrar un pincel más delgado para hacer un diseño más preciso lo que dibujamos son unas raíces y vamos dando forma al dibujo agregando en la parte superior como una combinación de verde y marrón que sería la grama y la tierra, para darle un toque más visual utilizamos un marcador para definir mejor unas partes del dibujo.
Then what we do is to take a thinner brush to make a more precise design, what we draw are some roots and we give shape to the drawing adding in the upper part a combination of green and brown that would be the grass and the earth, to give it a more visual touch we use a marker to better define some parts of the drawing. Por último lo que hacemos es con un pincel delgado vamos haciendo los detalles finales al dibujo y como toque final con un marcador resaltamos algunas partes así ya estará listo este lindo florero ecológico.
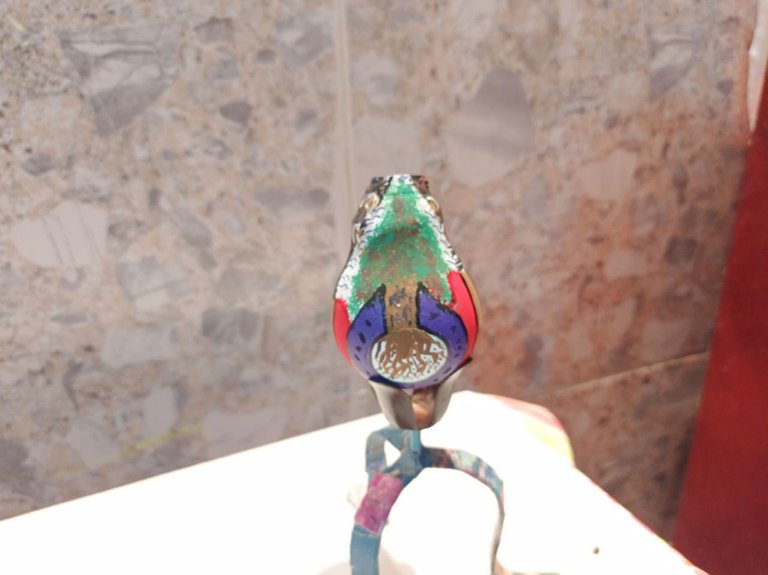
Finally what we do is with a thin brush we make the final details to the drawing and as a final touch with a marker we highlight some parts so this nice ecological vase will be ready. Espero les guste. I hope you like it. Gracias por Leer. Thanks for reading. Fotos de mi propiedad. Camara: Telefono Xiaomi Redmi note 9