Hy hive mates, I'll be illustrating a trouser pattern. With the advancement of fashion, trouser has really grown to have different types, unlike during the 90's when baggy trouser were in vouge. Now we have pencil trouser, Palazzo,pant,flared and so on. You can always pick from the varieties and not just stick to one species. I'm a lover of tight-fitted trousers, what's your type?
I'll be detailing the basic trouser block for our understanding.
First the measurements
- waist circumference
- hip circumference
- empire line
- crotch depth
- waist to knee
- waist to floor
- knee circumference
- ankle circumference
- upper thigh measurements for plus size customers
PROCESS
A trouser is mostly cut into four pieces ( 2 for front and 2 for back). Both front and back are cut separately.
Divide hip circumference by 4, what ever your answer is, divide by 4 again. This measurement is used to measure the spacing between the edge of the fabric and the starting line. (Hip 40/4=10,10/4=2.5 inches) most times I had half an inch for allowance. All measurements start from the new line.
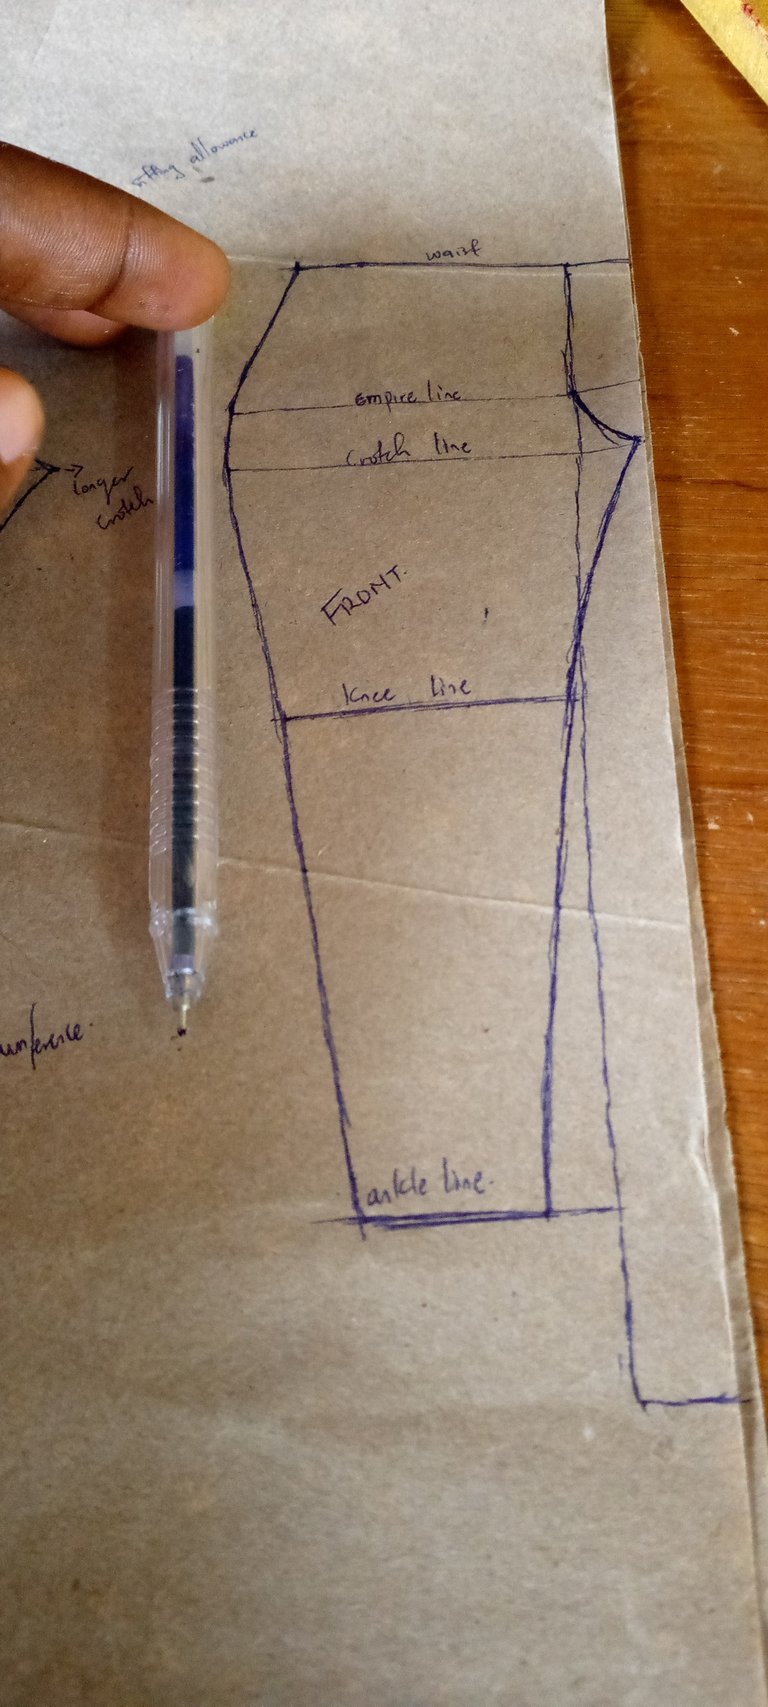
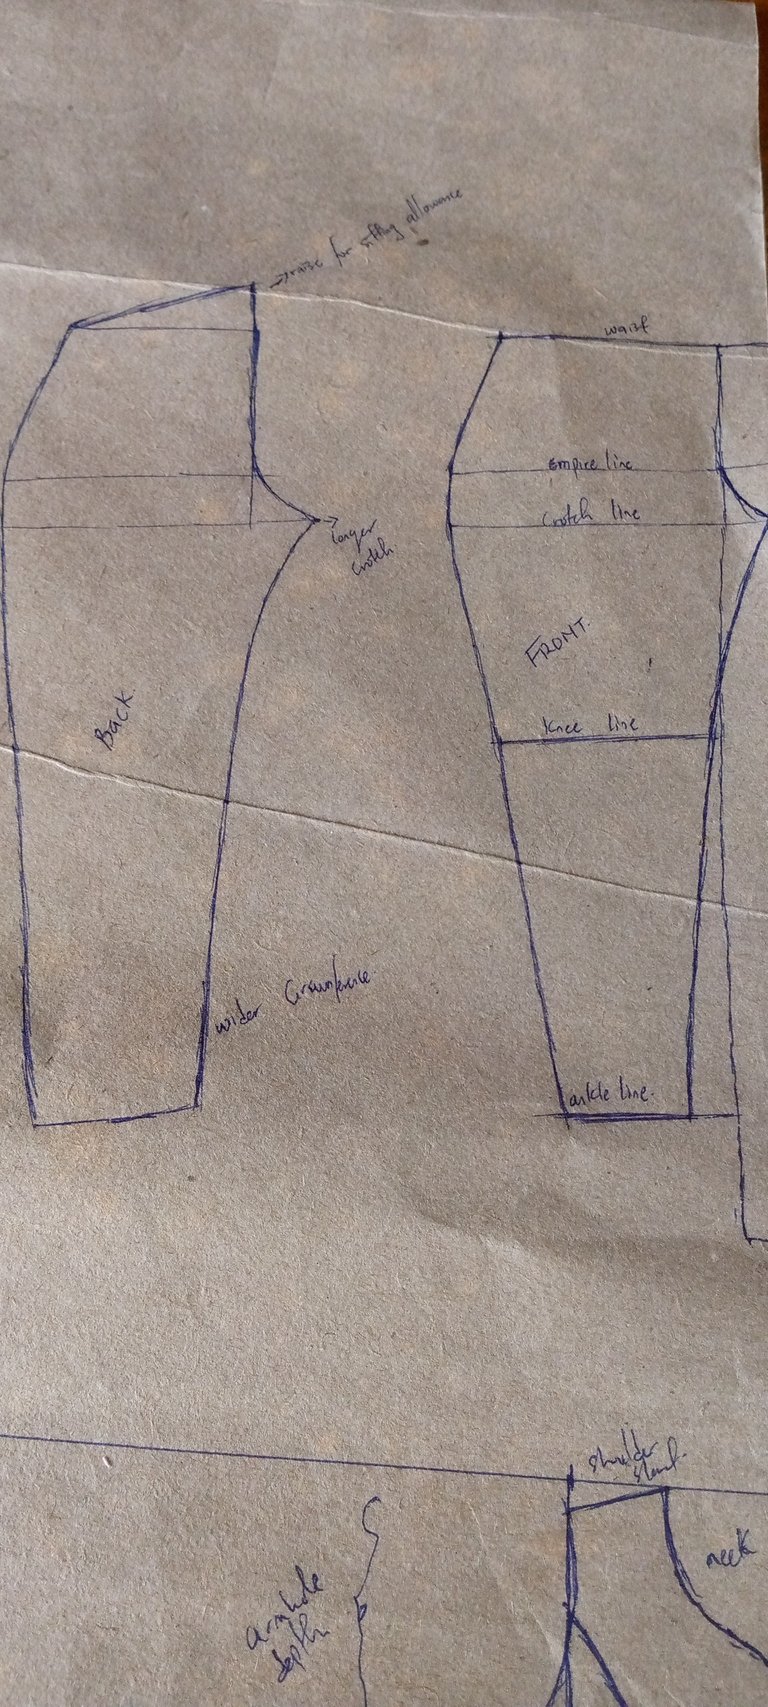
Measure waist circumference divide by 4( since we are working on 4 piece). From the waist measure down the empire line and rule through, measure as well the crotch depth and rule through also. I measure crotch depth on sitting ( there are various method of measuring it). Measure the waist to knee and also waist to floor, mark all points and rule through.
On the empire and crotch line, mark quarter of the hip. Determine the perfect dart line for the customer, and use that measurements to rule a straight line down the trouser lenght. Both knee and ankle circumference are divide by 2,and half of the answer stays on the dart line i.e the measurement is evenly distributed on both sides of the line. Connect your lines as shown in the picture.
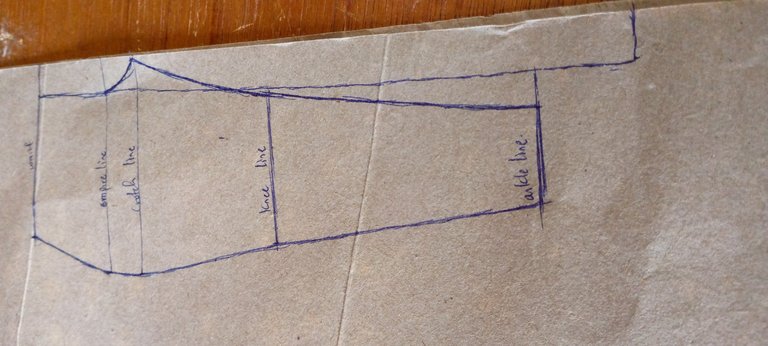
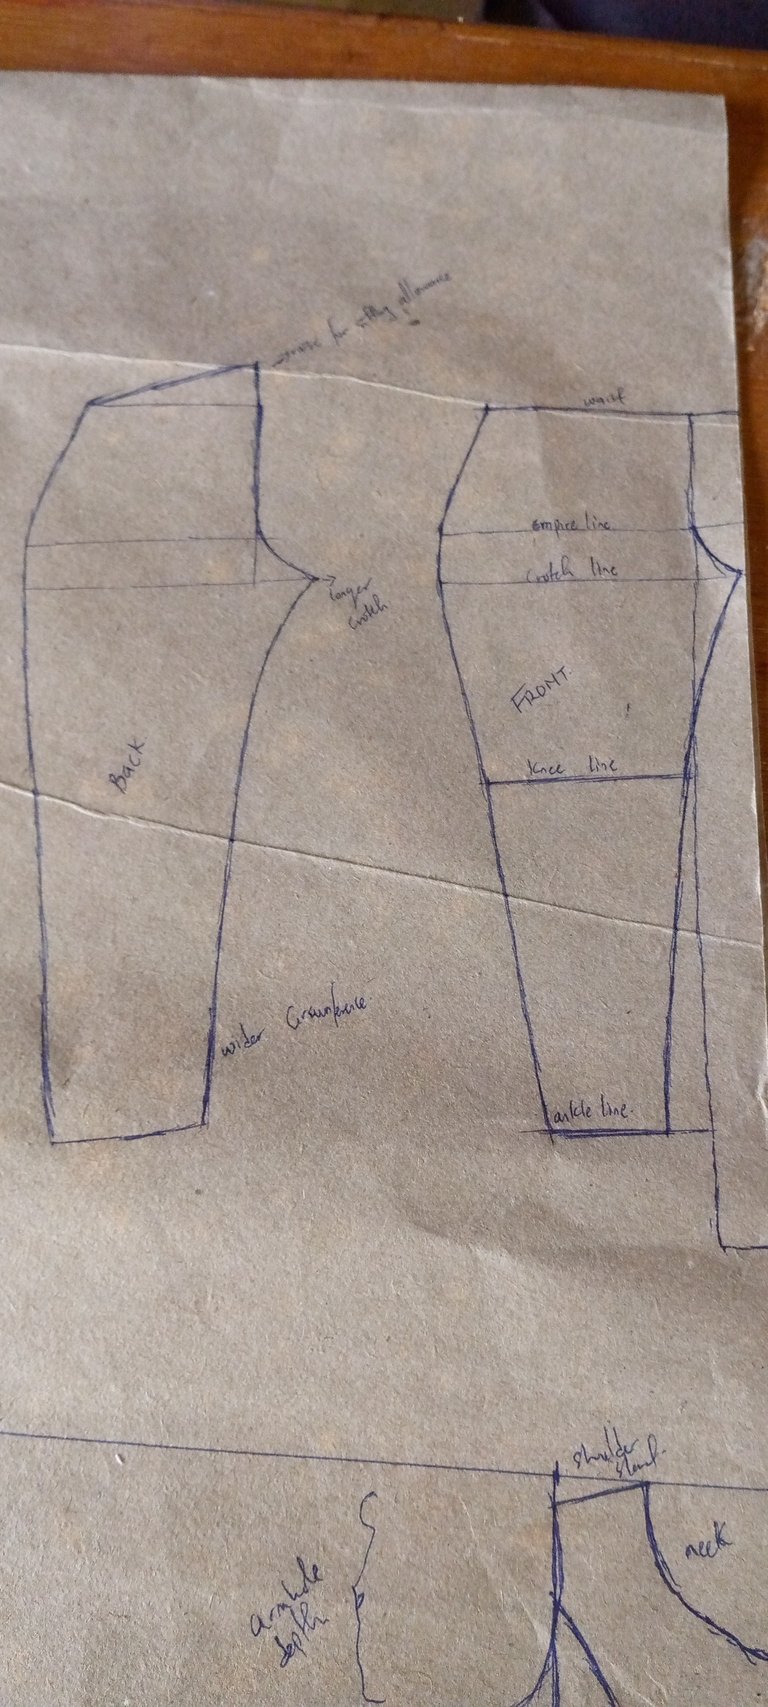
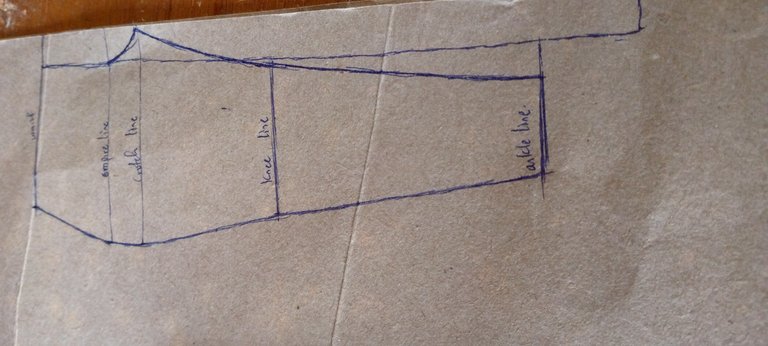
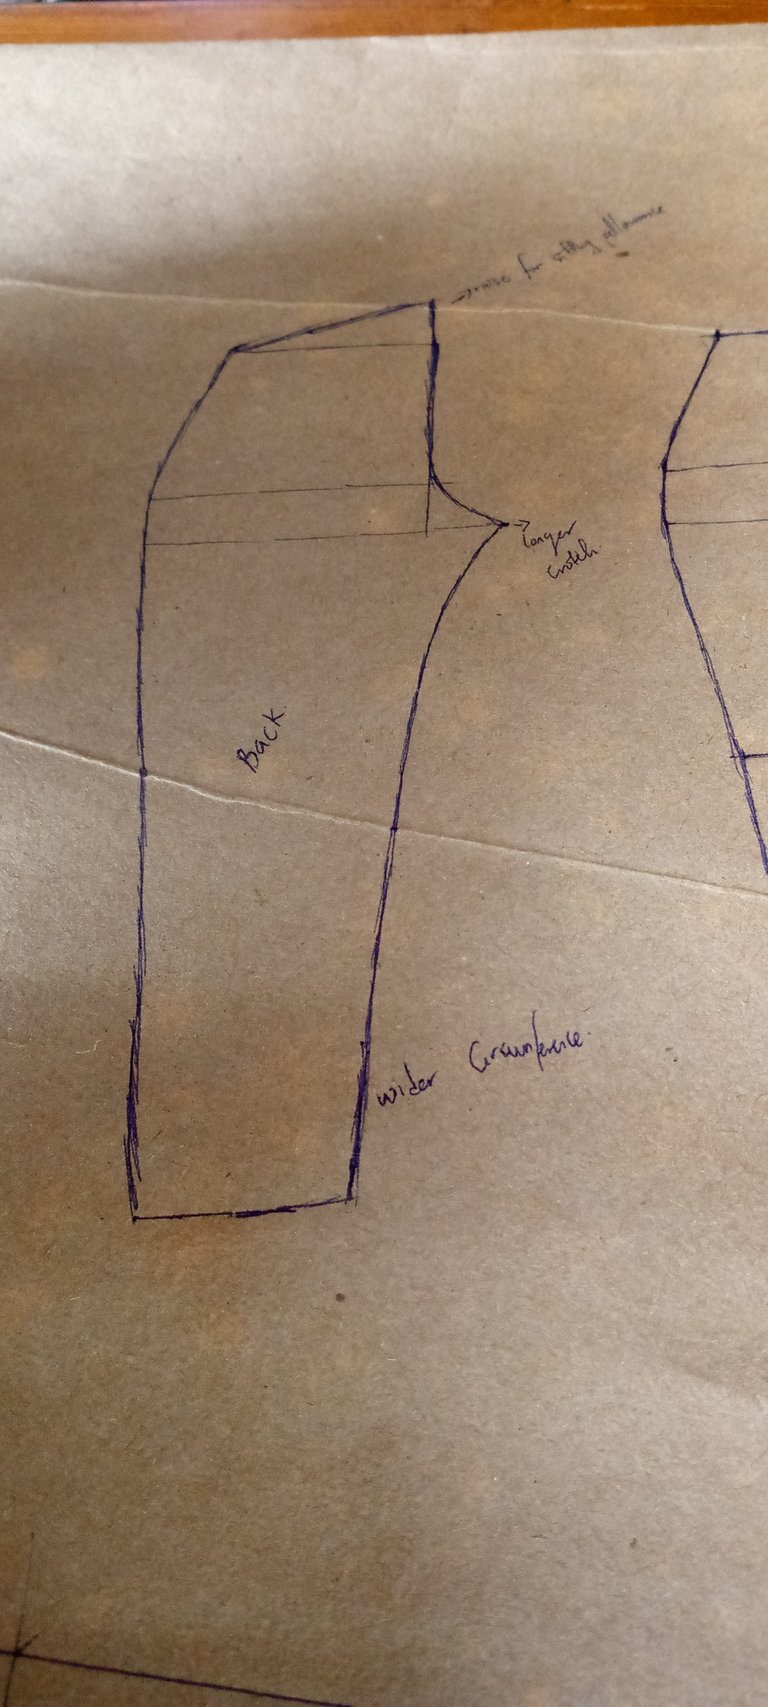
Trace out front for back, raise the center back by 4cm for sitting allowance, the crotch curve for the back piece isn't always as curvy as the front,it is drawn slightly straight.the back crotch is also longer than the front by simply doubling the measurement ( if 2.5 is used at the front, 5.0 is used at the back). Add 0.5inch allowance at the lower part of the trouser for back ease.
Add all seam allowance and that's all.
I hope this is explanatory enough for you, try this and give me feedback on it.
Thanks for reading
You can reblog and comment, I'll be glad to answer your questions.
Congratulations @billkiss! You have completed the following achievement on the Hive blockchain and have been rewarded with new badge(s) :
You can view your badges on your board And compare to others on the Ranking
If you no longer want to receive notifications, reply to this comment with the word
STOPDo not miss the last post from @hivebuzz: