Hi GEMS friends, Today I want to bring you this technique called handpoke, after seeing some information about this technique, I decided to use it on my own skin to see if it is recommended and how was the experience. It should be noted that I had never used it before, so let's just hope for the best hahahaha.
Let's start first with knowing what handpoker is:
The handpoke is the ancestral tattooing technique that was used before any type of tattoo machine existed. It is not better or worse because it is done in this way, since nowadays many tattoo artists continue to opt for this option. With a needle the ink is introduced puncture by puncture into the first layer of the dermis so that later it heals and remains permanently.
Hola amigos de GEMS, hoy quiero traerles esta técnica llamada handpoke, después de ver alguna información sobre esta técnica, decidí usarla en mi propia piel para ver si es recomendable y cómo fue la experiencia. Cabe destacar que nunca la había utilizado, así que esperemos lo mejor jajaja.
Empecemos primero por saber qué es el handpoker:
El handpoke es la técnica ancestral de tatuaje que se utilizaba antes de que existiera cualquier tipo de máquina de tatuar. No es mejor ni peor porque se haga de esta manera, ya que hoy en día muchos tatuadores siguen optando por esta opción. Con una aguja se introduce la tinta pinchazo a pinchazo en la primera capa de la dermis para que luego cicatrice y quede de forma permanente.
Now that we know this, let's begin
#1materials: A tattoo needle for 120/5rl lines, dynamic black ink, petroleum jelly, hectographic paper, gloves, alcohol, a surgical field, lubrix or stencil fluid, tuallin or kitchen napkins, a trowel, a razor and adhesive tape.
ahora que sabemos esto,vamos a empezar
#1 materiales: Una aguja de tatuajes para lineas 120/5rl,tinta negra marca (dynamic),vaselina,papel hectografico, guantes, alcohol,un campo quirúrgico, lubrix o líquido para stencil,tuallin o servilletas de cocinauna paletauna afeitadora y cinta adhesiva
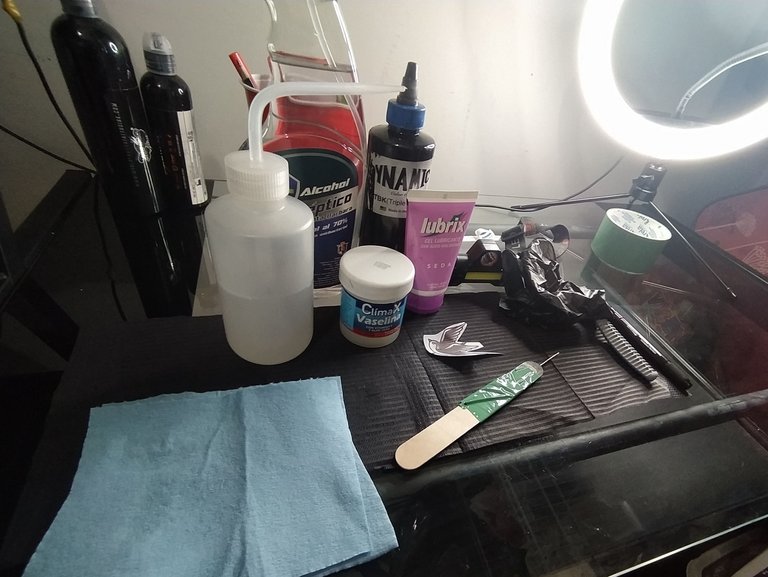
Note: Before setting up your workbench, disinfect it with alcohol or other antibacterial products. Remember that we are dealing with our skin and do not want any contamination or infection.
Nota: Antes de montar tu mesa de trabajo, desinféctala con alcohol u otros productos antibacterianos. Recuerda que estamos tratando con nuestra piel y no queremos ninguna contaminación o infección.
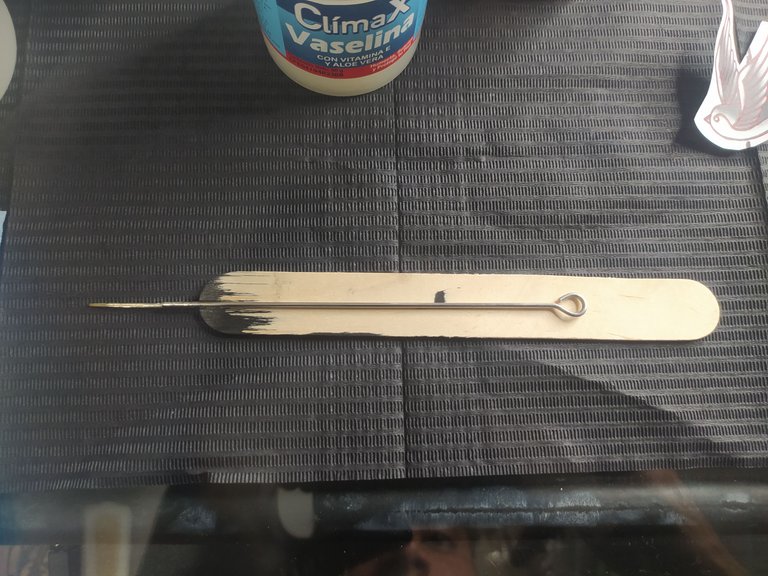
to make our "tattoo machine".
We take our needle and palette, we place our needle in this way so that the needle has a point of support and does not move.
para hacer nuestra "máquina de tatuar".
Cogemos nuestra aguja y paleta, colocamos nuestra aguja de esta manera para que la aguja tenga un punto de apoyo y no se mueva.
After that we proceed to fix it with adhesive tape and it will look something like this image
Después procedemos a fijarlo con cinta adhesiva y quedará algo parecido a esta imagen
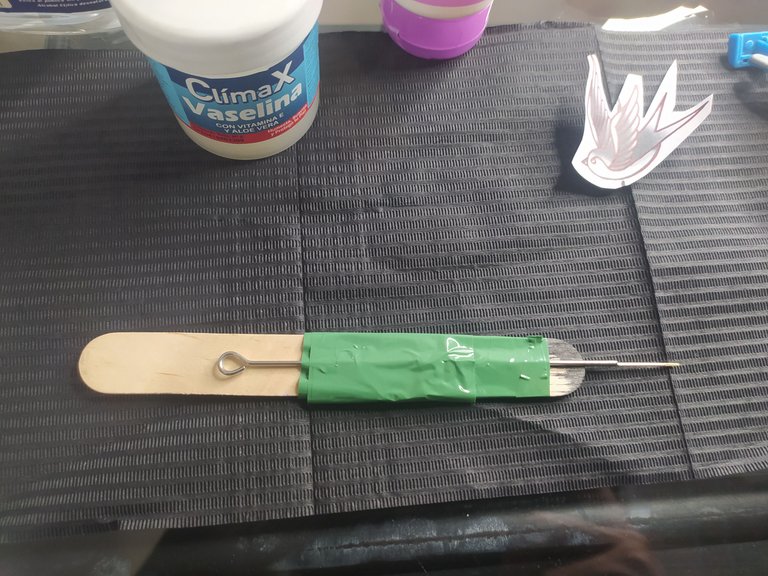
Note: do all these procedures with gloves on.
Nota: realice todos estos procedimientos con guantes.
#2 design: this is very important, we have to be clear that we must choose a small and simple design for our first time using this technique, for example: a letter, silhouette, symbol, etc.
Once we have chosen the design we proceed to paste it on our skin, once we have gone over the design with hectographic paper and with the lubrix or (liquid for stencil) we put the right amount and we place our design there keeping the pressure on it for a few seconds.
#2 diseño: esto es muy importante, tenemos que tener claro que debemos elegir un diseño pequeño y sencillo para nuestra primera vez haciendo esta técnica, por ejemplo: una letra, silueta, símbolo, etc.
una vez elegido el diseño procedemos a pegarlo en nuestra piel, una vez repasado el diseño con papel hectográfico y con el lubrix o (líquido para stencil) ponemos la cantidad adecuada y colocamos nuestro diseño allí manteniendo la presión sobre el mismo durante unos segundos.

Note: shave and disinfect the skin area before gluing the guide to the skin.
Nota: afeite y desinfecte la zona de la piel antes de pegar la guía a la piel.
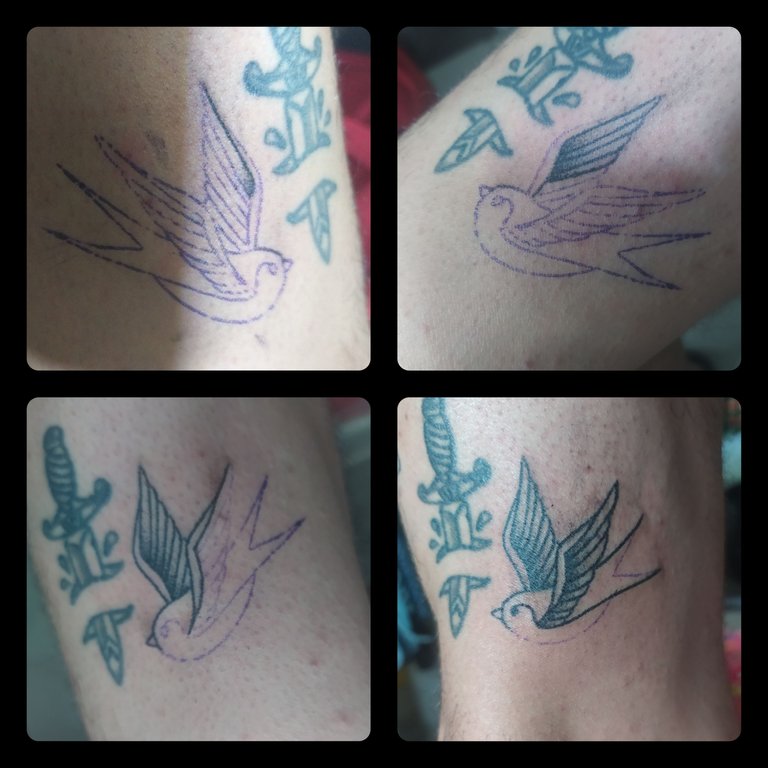
#3 ink injection
We take our "tattoo machine" and dip the tip of the needle in ink. Once this is done, we start to prick the skin at angles between 90° to 60° so that the needle injects the ink perfectly into the skin.
#3 inyección de tinta
Cogemos nuestra "máquina de tatuar" y sumergimos la punta de la aguja en tinta. Una vez hecho esto, empezamos a pinchar la piel en ángulos de entre 90° y 60° para que la aguja inyecte la tinta perfectamente en la piel.
The ideal depth for the ink to be well injected into the skin varies between 1.5 and 2 millimeters, since we are injecting into the second layer of the skin (dermis).
La profundidad ideal para que la tinta quede bien inyectada en la piel varía entre 1,5 y 2 milímetros, ya que estamos inyectando en la segunda capa de la piel (dermis).
To make lines, we will join point by point to form a solid line.
To make fills we will only have to do the same as in the lines but in a wide space.
In the case of the shadows we will go making agglomerations of points and while we go advancing we will leave more blank spaces and points more separated to this we can call it pointillism.
Para hacer lineas, iremos juntando punto por punto hasta formar una linea solida.
Para hacer rellenos solo tendremos que hacer lo mismo que en las lineas pero en un espacio amplio.
En el caso de las sombras vamos a ir haciendo aglomeraciones de puntos y mientras vallamos avanzando vamos dejando mas espacios en blanco y puntos mas separados a esto lo podemos llamar puntillismo.
Tips:
•Use your free hand to stretch the skin to make it easier to inject the ink.
•Apply Vaseline on the tattoo area to make it easier to clean the ink spilled on the tattoo.
• do the tattoo from the bottom to the top to avoid erasing the guide
•have a good lighting
•use some neutral soap mixed with water to clean the tattoo after the tattoo is finished.
Consejos:
•Utilizar la mano libre para estirar la piel y facilitar la inyección de la tinta.
•Aplica vaselina en la zona del tatuaje para facilitar la limpieza de la tinta derramada en el tatuaje.
•hacer el tatuaje de abajo hacia arriba para evitar que se borre la guía
•tener una buena iluminación
•utilizar un poco de jabón neutro mezclado con agua para limpiar el tatuaje una vez terminado.
Resultado final/Final result
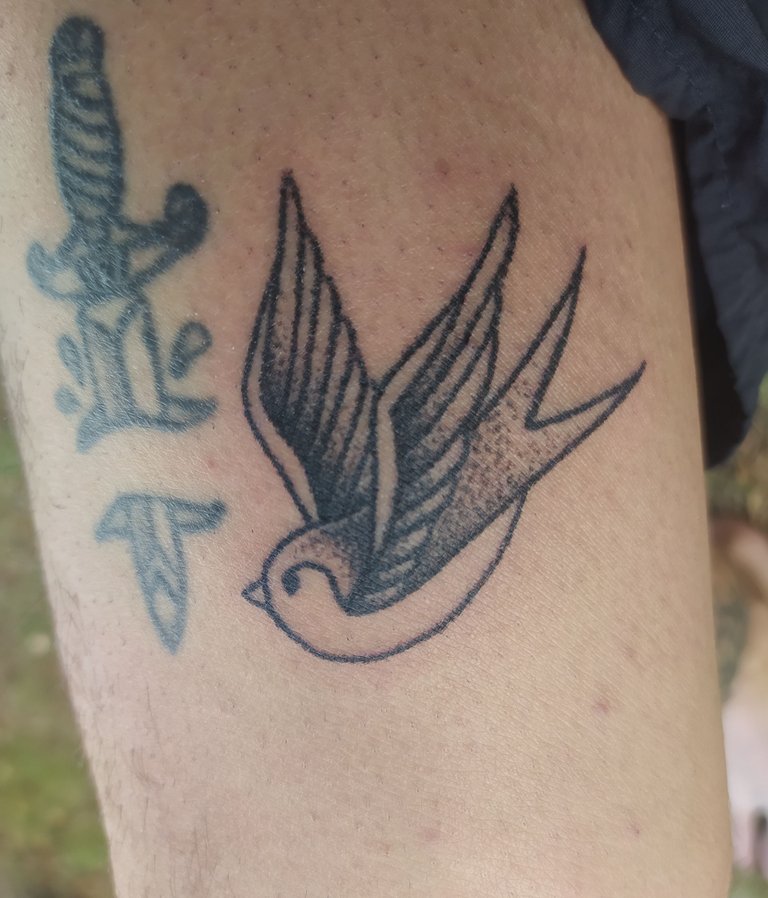
Positive points of this body art technique
•Compared to conventional tattooing with a machine, handpoke is less painful.
- it is less expensive in terms of materials
- it is more symbolic for the person as it is handmade.
Puntos positivos de esta tecnica de arte corporal
•en comparación de un tatuaje convencional con maquina, el handpoke resulta ser menos doloroso
• es menos costosa en cuestión de materiales
• es algo mas simbólico para la persona al ser algo hecho a mano
Negative points of this body art technique
- its elaboration is slower than one made with tattoo machines (this design took me about 3 hours)
- being handmade it is difficult to make very elaborate or detailed designs.
Puntos negativos de esta técnica de arte corporal
- su elaboración es más lenta que la realizada con máquinas de tatuar (este diseño me llevó unas 3 horas)
- al estar hecho a mano es difícil hacer diseños muy elaborados o detallados.
Tips
- be patient when implementing this technique and take the necessary time to do things calmly.
- have a comfortable seat
- use needles smaller than 120/07 rl, these will help us to better inject the ink into the skin.
- Hold the needle well to the palette.
- If it is your first time, do not tattoo very delicate areas of the body such as the neck or fingers.
- Everything used in the process must be discarded.
Consejos
- tenga paciencia al aplicar esta técnica y tómese el tiempo necesario para hacer las cosas con calma.
- tener un asiento cómodo
- utilizar agujas más pequeñas de 120/07 rl, estas nos ayudarán a inyectar mejor la tinta en la piel.
- Sujetar bien la aguja a la paleta.
- Si es tu primera vez, no tatúes zonas muy delicadas del cuerpo como el cuello o los dedos.
- Todo lo utilizado en el proceso debe ser desechado.
Thank you
This is my first publication for this community I hope you like it and receive it in the best way, thank you for taking your time to read it.
Agradecimiento
Esta es mi primera publicación para esta comunidad espero que les guste y la reciban de la mejor manera, gracias por tomarse su tiempo para leerla.
All photos are authoritative
Translated in Deelp
GIFGiphy
Collages and dividers made in Picsart
Banner in canva
Mis redes sociales/my social media
Instagram
(bruno.tattooer)
I've never had a tattoo before. I guess the needle must hurt. But in the end, it looks good on the body :)
Interesante técnica, de hecho existe muchas culturas que aun la utilizan, creo que mas que todo en África, si estoy equivocada me disculpo de ante mano.
Gran trabajo @brunoelr,
Se han visto muchas personas que han decidido tatuarse de esta manera últimamente, asi que podemos decir que esta retomando fuerza esta tecnica. Y si n
En parte pero ya en muchas partes del mundo hacían esto desde los tiempos de los egipcios hasta los mallas.
Gracias menol @oscariart
Congratulations @brunoelr! You have completed the following achievement on the Hive blockchain and have been rewarded with new badge(s):
Your next payout target is 50 HP.
The unit is Hive Power equivalent because post and comment rewards can be split into HP and HBD
You can view your badges on your board and compare yourself to others in the Ranking
If you no longer want to receive notifications, reply to this comment with the word
STOPTo support your work, I also upvoted your post!
Check out the last post from @hivebuzz:
Support the HiveBuzz project. Vote for our proposal!