Saludos a toda la gente bella de esta colmena, hoy vengo con una linda energía y motivación ferviente para mostrarles un poco más sobre los cuidados y recuperaciones del cuerpo. Lo cuál abrirá paso a caminos más internos y llenos de diversas perspectivas, enriqueciendo aún más todo lo que nos compone.
Greetings to all the beautiful people of this beehive, today I come with a beautiful energy and fervent motivation to show you a little more about the care and recovery of the body. This will open the way to more internal paths and full of diverse perspectives, enriching even more everything that composes us.
El enfoque de esta publicación va hacia la rehabilitación que se centra en el cuidado, recuperación y mejoraría de las capacidades que se necesitan para la vida diaria. Estas pueden ser físicas, mentales y/o cognitivas (pensamientos y aprendizaje). Las cuales se pueden perder a causa de una enfermedad o lesión, y en otros casos por efectos secundarios de un tratamiento médico. Tiene como objetivo alcanzar nuevamente el funcionamiento e independencia de la parte afectada. Sin embargo, las metas son diferentes para cada individuo, estás dependiendo de la causa del problema (temporal, repetitiva o degenerativa).
The focus of this publication is on rehabilitation that focuses on the care, recovery and improvement of skills needed for daily life. These can be physical, mental and/or cognitive (thoughts and learning). These can be lost due to illness or injury, and in other cases due to side effects of medical treatment. It aims to restore the affected party's functioning and independence. However, the goals are different for each individual, depending on the cause of the problem (temporary, repetitive or degenerative).
En las rehabilitaciones las palabras claves son paciencia y constancia, aliadas en estos procesos que suelen ser muy complejos, sobretodo a nivel mental y físico (dependiendo de la causa). Lo digo por experiencia propia, porque a lo largo de mi vida he tenido que realizarlas (terapias). Por esto motivo les quiero compartir unos ejercicios para rehabilitar el tobillo. Son ejercicios que yo he realizado durante años solo que ahora los pongo más complejos y con mayor uso de la fuerza. Pero los que les traigo son los básicos para comenzar y no maltratar nuestro amado cuerpo después de la lesión. Importante: siempre realizar por lo menos el primer mes de terapia con un profesional y preguntar cuáles cosas puedes hacer y cuáles no (por tu cuenta).
In rehabilitation the key words are patience and perseverance, allied in these processes that are usually very complex, especially at the mental and physical level (depending on the cause). I say this from my own experience, because throughout my life I have had to perform them (therapies). For this reason I want to share some exercises to rehabilitate the ankle. They are exercises that I have done for years only now I put them more complex and with greater use of force. But what I bring you are the basics to start and not mistreat our beloved body after the injury. Important: always do at least the first month of therapy with a professional and ask what things you can do and what you can't do (on your own).
Hacer está terapia después de que te quiten la férula o cuando el doctor lo recomiende. Recuerden ser constantes porque la articulación del tobillo es una de las estructuras de mayor soporte de peso del cuerpo humano, y tener en cuenta que si queda débil o mal recuperada, volverá a recaer y tendrás un mayor porcentaje (40% y un 70%) de una nueva lesión. Por esta razón es importante trabajar el fortalecimiento y el estiramiento de las estructuras cercanas a la articulación del tobillo.
Do this therapy after the brace is removed or when the doctor recommends it. Remember to be consistent because the ankle joint is one of the most weight-bearing structures in the human body, and keep in mind that if it becomes weak or poorly recovered, it will relapse and you will have a higher percentage (40% and 70%) of a new injury. For this reason it is important to work on strengthening and stretching the structures near the ankle joint.
Toda rehabilitación y manejo del cuerpo debe ser llevado de manera inteligente. Por eso los ejercicios tienen procesos y etapas: sin resistencia, de amplitud, de resistencia (fuerza), equilibrio y estiramientos. Ahora haremos un recorrido por los ejercicios de rehabilitación más utilizados y eficaces para la recuperación de una lesión en el tobillo. ¡Vamos y motivación ante todo!
All rehabilitation and management of the body must be carried out in an intelligent way. That is why the exercises have processes and stages: without resistance, of amplitude, of resistance (strength), balance and stretching. Now we will take a tour of the most used and effective rehabilitation exercises for recovery from an ankle injury. Let's go and motivate above all!
Rehabilitación / Rehabilitation
Primera etapa: (Para recuperar rango de movimiento)
First stage: (To recover range of motion)
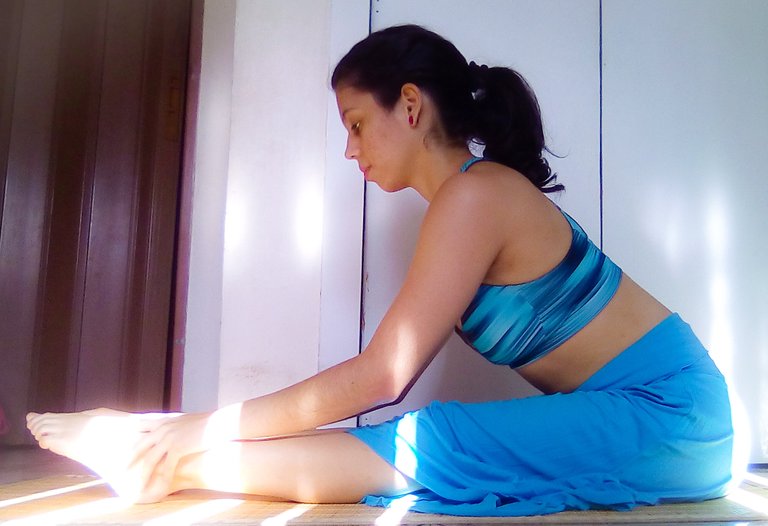
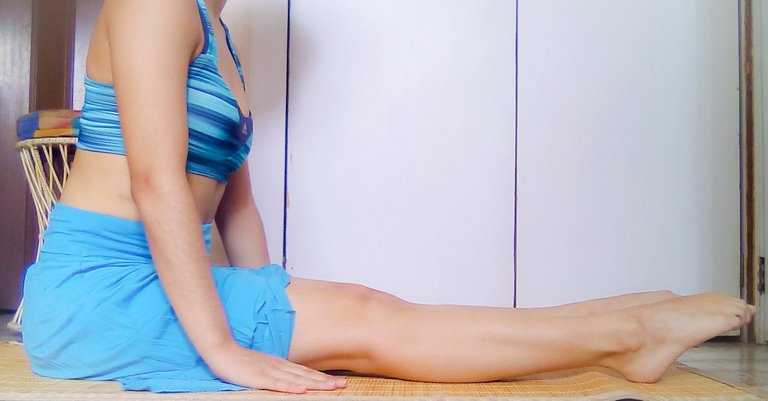
- Dorsiflexión: Siéntate derecho en la cama o en una colchoneta con las piernas extendidas y rodillas rectas. Ahora tu pie debe tratar de hacer un ángulo de 90° grados con la pierna (flexión). Siempre manteniendo la rodilla recta (estirada). Solo llega hasta el punto antes de sentir dolor, no forzar, pero sí movilizar. Mantén esa posición por 10 segundos, luego regresa a la posición neutral y Repite los pasos anteriores 10 veces.
- Dorsiflexion: Sit upright in bed or on a mattress with your legs extended and knees straight. Now your foot should try to make a 90° angle with the leg (flexion). Always keep your knee straight (stretched). Just get to the point before you feel pain, not force, but mobilize. Hold that position for 10 seconds, then return to the neutral position and repeat the previous steps 10 times.
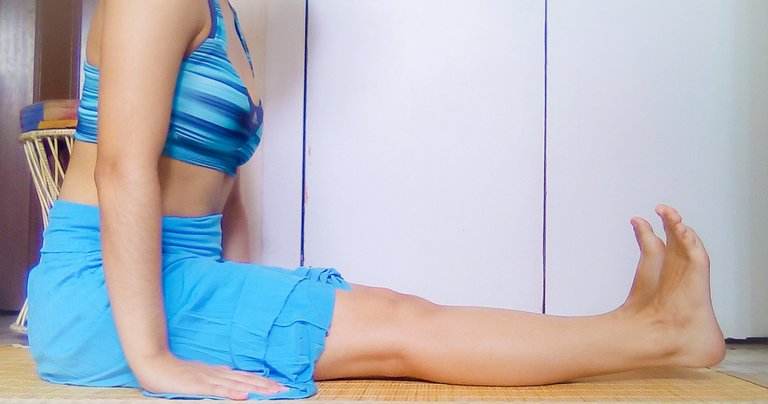
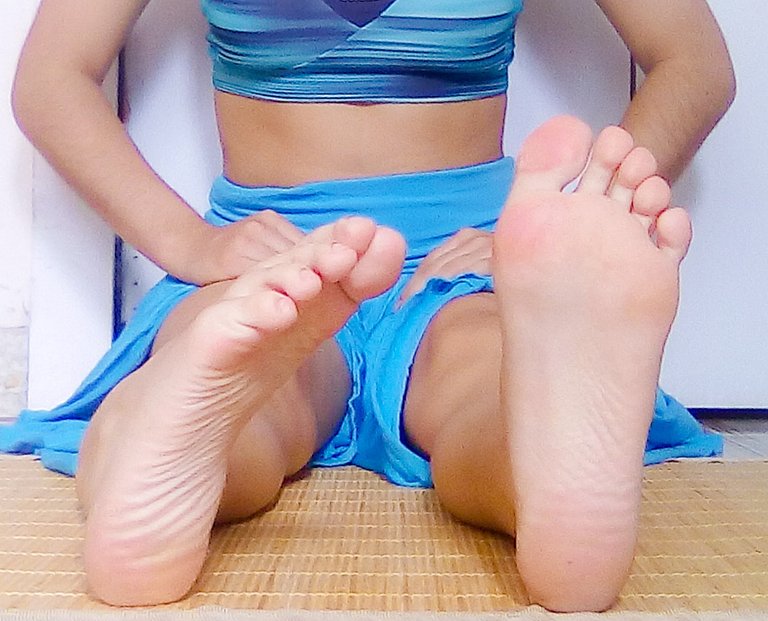
- Flexión Plantar: Desde la misma posición anterior, empuja el pie hacia abajo (punta de pie), "siempre manteniendo la rodilla recta", continua hasta el punto antes de sentir dolor o cuando sientas que no puedes moverlo más. Mantén la posición por 10 segundos y regresa a la posición neutral.
Repitir los pasos anteriores 10 veces.
- Plantar Flexion: From the same position as above, push the foot down (toe-down), always keeping the knee straight, continue to the point before you feel pain or when you feel you can't move it anymore. Hold the position for 10 seconds and return to the neutral position.
Repeat the above steps 10 times.
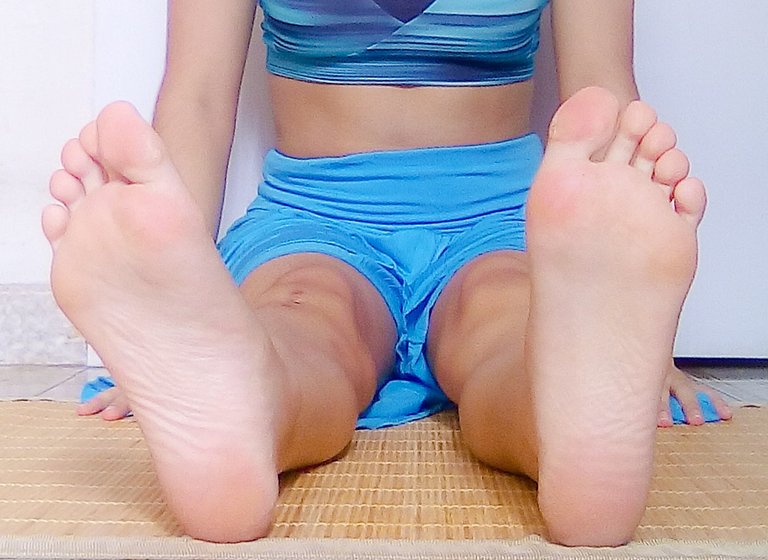
- Inversión del tobillo: Seguimos en la misma posición, tienes que mover tu pie hacia dentro. Recuerda llegar hasta donde te permita el dolor o el pie. Mantener la posición por 10 segundos, luego posición neutral. Realizar los pasos anteriores 10 veces.
- Ankle Reversal: Still in the same position, you must move your foot inward. Remember to go as far as the pain or the foot will allow. Hold the position for 10 seconds, then return to neutral position. Perform the above steps 10 times.
- Eversión del tobillo: Movilizar el pie hacia afuera. Hasta donde tu pie lo permita, manteniendo la rodilla estirada y en su lugar, sin rotarla. Permanencia de 10 segundos y regresa a la posición neutral. Realizar los pasos anteriores 10 veces.
- Ankle Eversion: Move your foot outward. As far as your foot will go, keeping your knee straight and in place, without rotating it. Stay 10 seconds and return to neutral position. Perform the above steps 10 times.
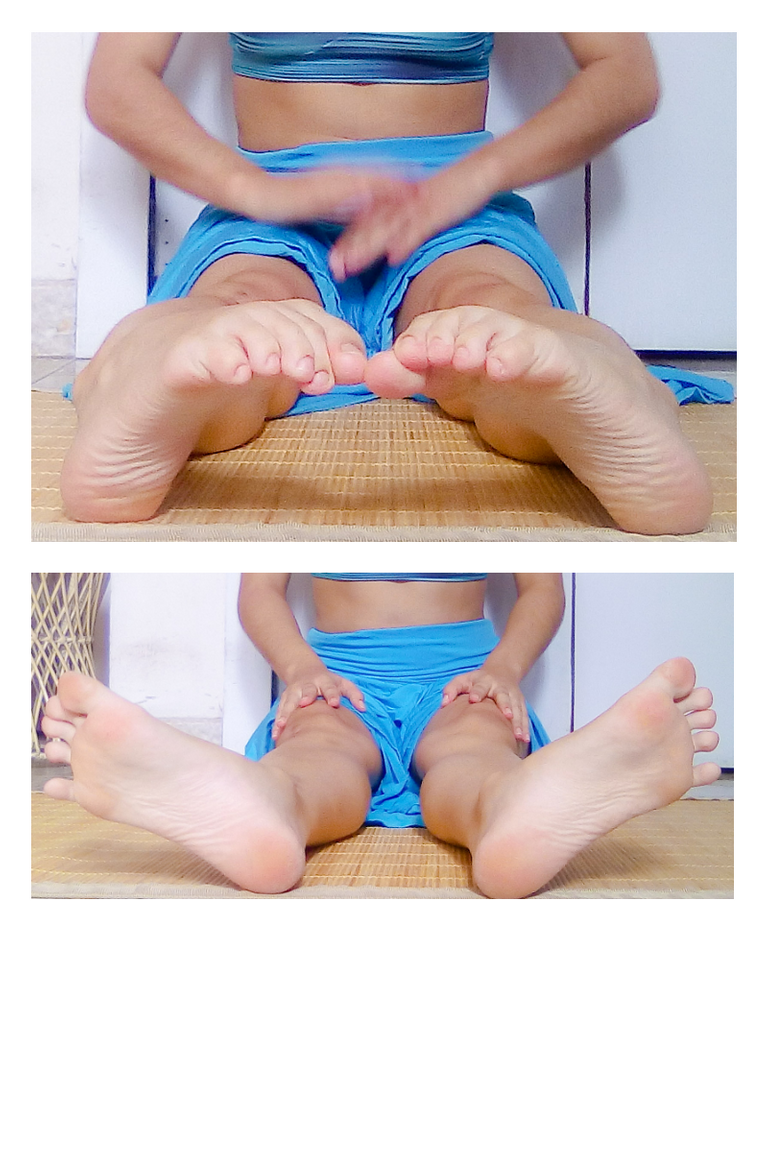
- Parabrisas: Está es una combinación de los dos ejercicios anteriores, solo que está vez lo harás con los dos pies y rotando las piernas en conjunto con los mismos. Realizar secuencias 10 veces y lentamente.
- Windscreen: This is a combination of the two previous exercises, only this time you will do it with both feet and rotating your legs together with them. Perform sequences 10 times and slowly.
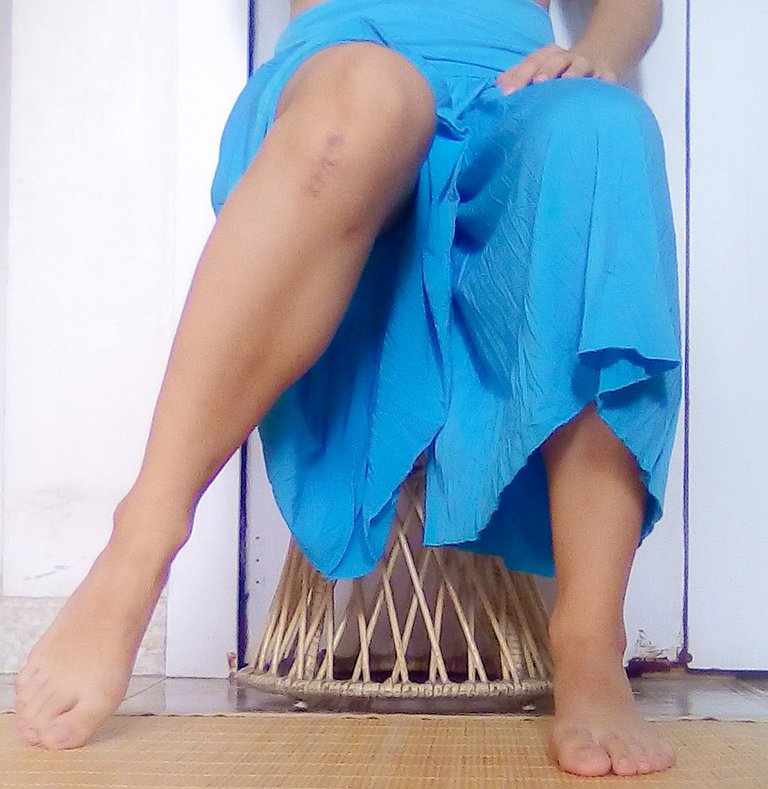
- El alfabeto: Siéntate en una silla o en el borde de la cama. Los movimientos de la pierna y el tobillo serán dibujar el alfabeto, una letra a la vez utilizando el dedo gordo del pie como si fuese la punta del lápiz. No es necesario hacer todo el abecedario, solo guíate por el nivel de dolor y cansancio. A medida de los días y las terapias podrás hacerlo con más facilidad.
- The Alphabet: Sit on a chair or on the edge of the bed. The movements of the leg and ankle will be drawing the alphabet, one letter at a time using the big toe as if it were the tip of the pencil. It is not necessary to do the whole alphabet, just be guided by the level of pain and tiredness. As the days and therapies go by you will be able to do it more easily.
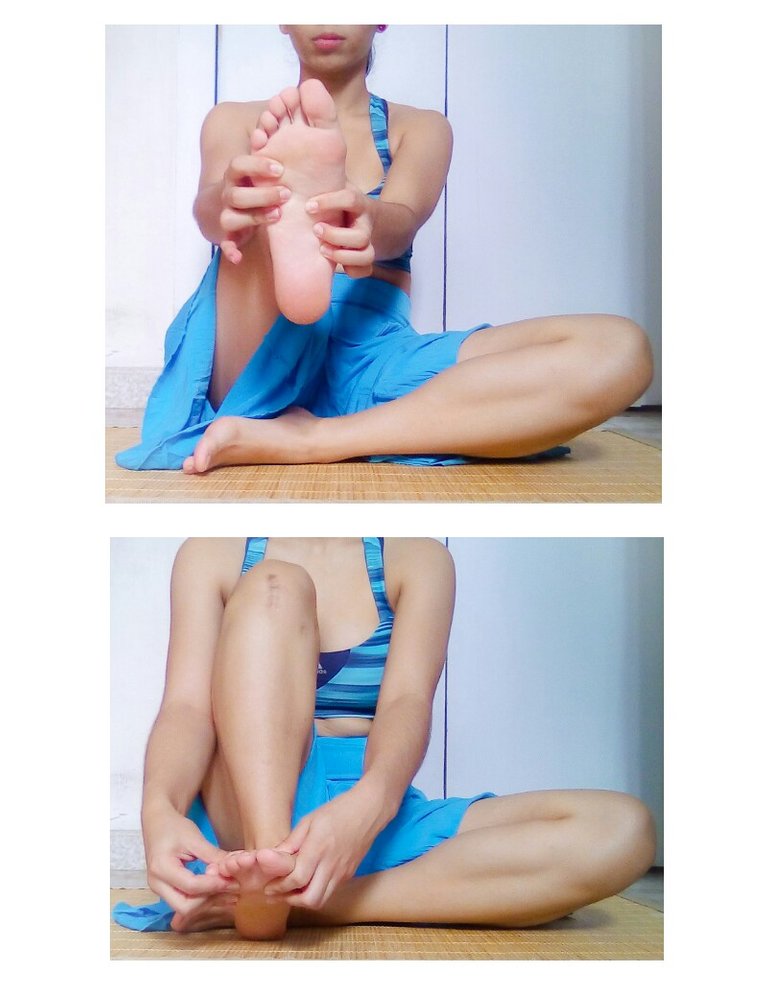
- Masajes leves: Con tus dos manos agarrar la planta de tu pie, de ahí con tus dedos hacer pequeños círculos y luego hacer toques leves. Esto es para enviar energías buenas a ese sector bloqueado e ir despertando y relajando todas las fibras (sobretodo si es un esguince).
- Light massage: With your two hands grab the sole of your foot, from there with your fingers make small circles and then make light touches. This is to send good energies to that blocked sector and to go waking up and relaxing all the fibers (especially if it is a sprain).
Segunda etapa / Second stage
Realizar cuando el tobillo esté más fuerte y desinflado. Consultar con un profesional, según la gravedad de la lesión.
Perform when the ankle is stronger and deflated. Consult a professional, depending on the severity of the injury.
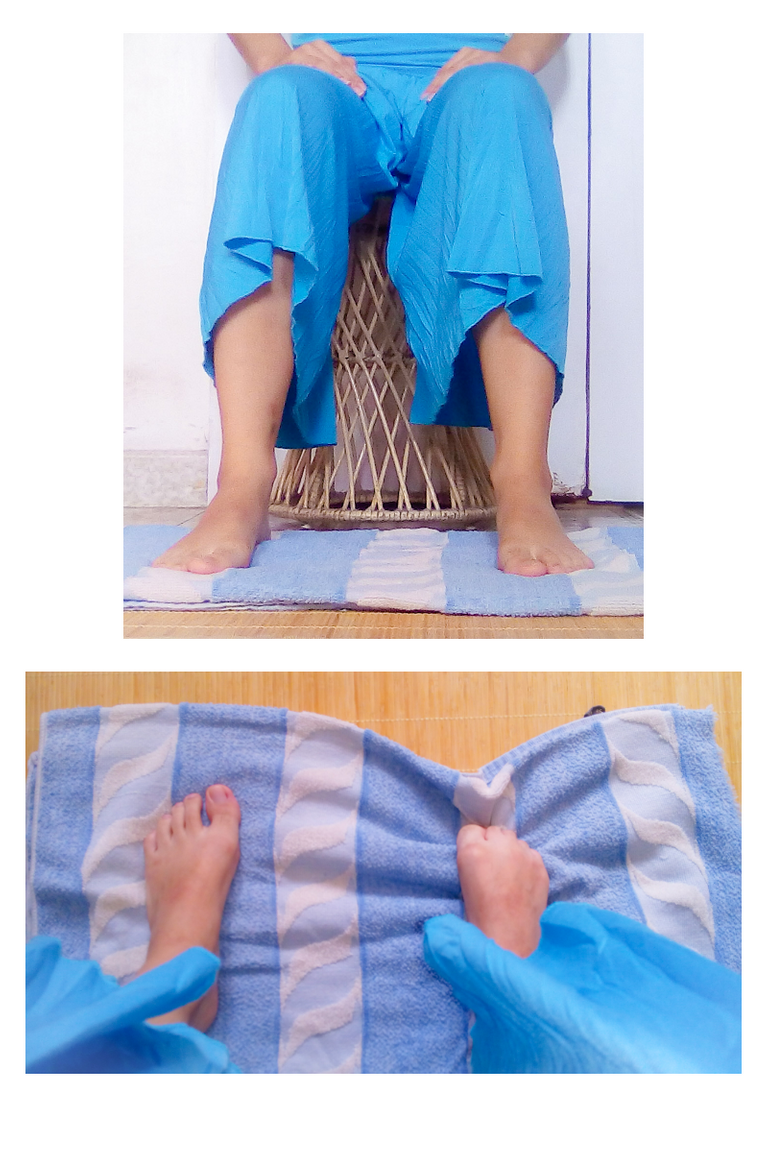
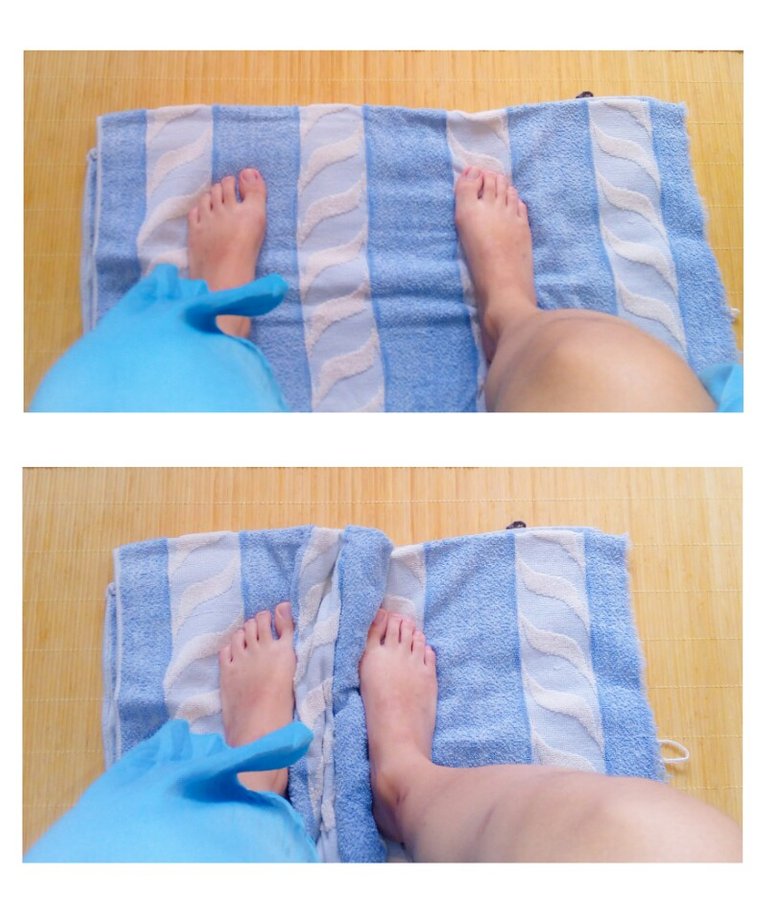
Para estos ejercicios utilizaremos una toalla; doblarla lo suficiente para que entren tus dos pies. Debes sentarte en la silla o al borde de la cama, poner la toalla debajo de tus pies.
For these exercises we will use a towel; fold it enough for your two feet to enter. You must sit on the chair or at the edge of the bed, put the towel under your feet.
- Primer ejercicio: Contraer los dedos de tu pie lesionado, mantenerlo por 10 segundos y luego relajarlos, repetir 10 a 15 veces.
- First exercise: Contract your injured toes, hold for 10 seconds and then relax them, repeat 10 to 15 times.
- Segundo ejercicio: Esta vez dejar los dedos de los pies relajados y deslizar hacia arriba y hacia abajo el pie lesionado con la toalla, haciendo presión. El pie sano se quedará haciendo fuerza en el sitio para que la toalla no se mueva con facilidad. Repetir cada direcciones 10 veces cada una.
- Second exercise: This time leave your toes relaxed and slide up and down the injured foot with the towel, making pressure. The healthy foot will stay in place by pushing up the towel so that the towel does not move easily. Repeat each direction 10 times.
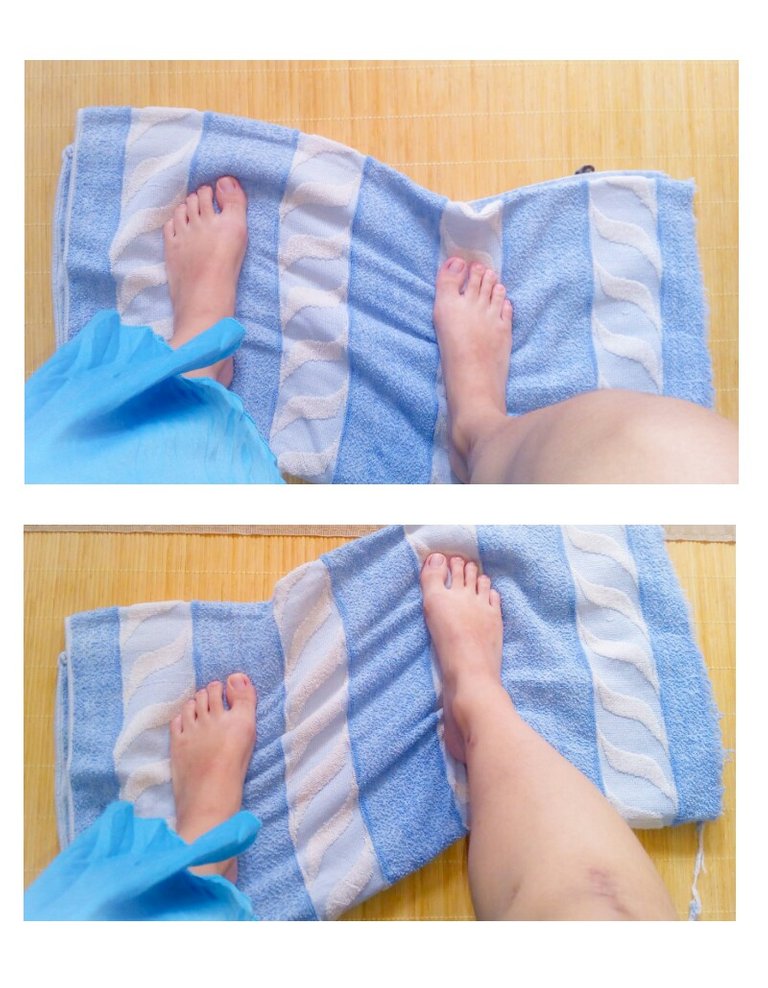
- Tercer ejercicio: Es igual que el ejercicio anterior, solo que cambia la dirección de la pierna, ahora el movimiento será de un lado para el otro, adentro y hacia fuera de tu cuerpo (derecha e izquierda).
Repetir cada dirección 10 veces.
- Third exercise: It is the same as the previous exercise, only that the direction of the leg changes; now the movement will be from one side to the other, inside and outside your body (right and left).
Repeat each direction 10 times.
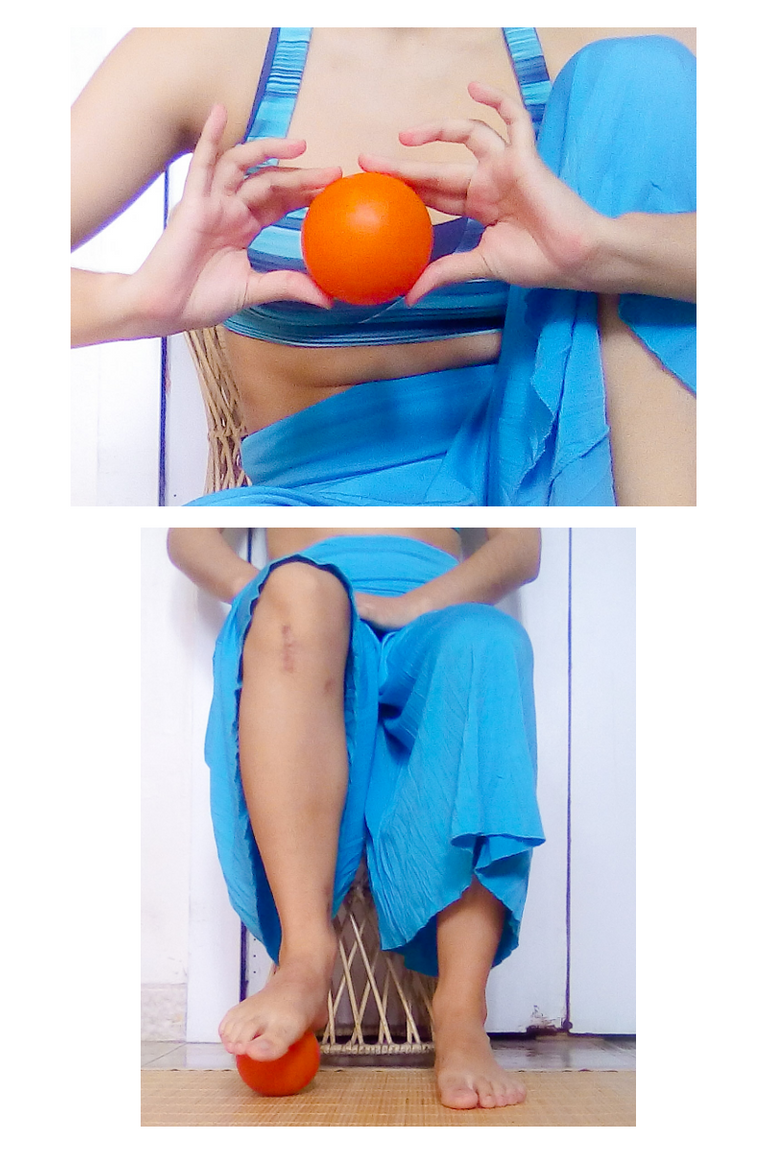
- Pelota: El último de esta etapa, es el que más me gusta, lo hago todo el tiempo por la facilidad y el bienestar que le brinda a mi pie. Utilizo una pelota pequeña, hay unas especiales para rehabilitación, pero se puede utilizar casi que cualquiera mientras sea cómoda y no se vaya a desinflar. Sentado en la silla debes poner la pelota debajo de tu pie lesionado, luego movilizarla con tu pie, eso hará que tenga mayor movilización y además te dará masajes increíbles.
- Ball: The last one of this stage, is the one I like the most, I do it all the time because of the ease and wellbeing it gives to my foot. I use a small ball, there are some special ones for rehabilitation, but you can use almost any of them as long as it is comfortable and does not deflate. Sitting on the chair you must put the ball under your injured foot, then move it with your foot, that will make it have more mobilization and also give you incredible massages.
Tercera etapa / Third stage
Isométrico: Ejercicio de tensión de un músculo y su mantenimiento en alguna posición estacionaria, al tiempo que se mantiene la tensión. Son especialmente útiles para personas que se están recuperando de lesiones que limiten el rango de movimiento.
Isometric: Exercise of tension of a muscle and its maintenance in some stationary position, while maintaining the tension. They are especially useful for people recovering from injuries that limit range of motion.
Estos ejercicios son para fortalecer los músculos cercanos a la articulación del tobillo, dándole un mayor y mejor soporte a la articulación.
These exercises are to strengthen the muscles near the ankle joint, giving the joint more and better support.
Banda elástica / Elastic band
Para todos los ejercicios a continuación la banda elástica debe quedar por la planta del pie a la altura de los dedos. Siendo sostenida por tus dos manos.
For all the exercises below, the elastic band should be placed on the sole of the foot at toe level. Being held by your two hands.
- Inversión y Versión del tobillo: Siéntate con las piernas estiradas y espalda recta. Son los mismos movimientos de los ejercicios de la primera etapa, solo que ahora se harán con una banda elástica para poner más resistencia y fuerza. Movilizar pie de adentro hacia afuera pero haciendo una media luna con el mismo movimiento. Realizar 20 veces cada lado, lentamente.
- Inversion and Ankle Version: Sit with your legs stretched out and your back straight. These are the same movements as the exercises in the first stage, except that now they will be done with an elastic band to put more resistance and strength. Move your foot from the inside to the outside but making a crescent with the same movement. Perform 20 times each side, slowly.
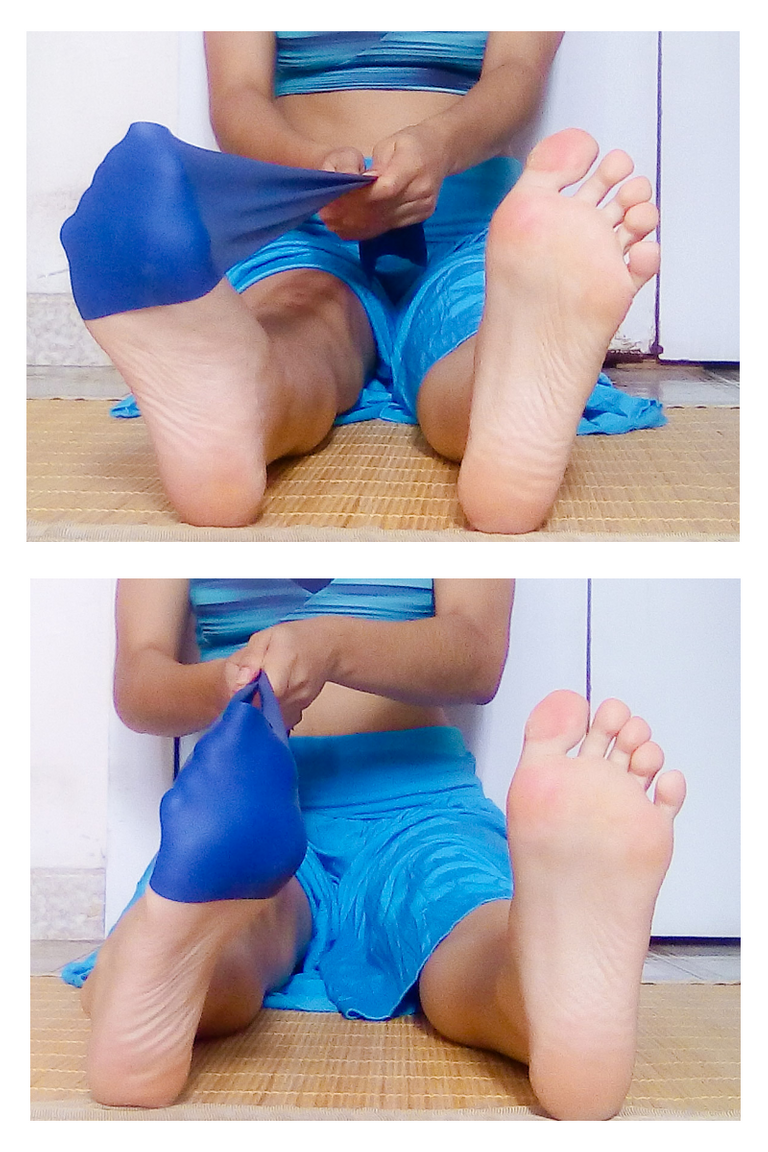
- Flexión y media punta: Seguimos en la misma posición, ahora el movimiento del pie es comenzar en flexión y llegar a extensión pero sin estirar los dedos del pie, quedando como si estuvieras parado de puntas tratando de alcanzar algo que está en un lugar alto. Mantener por 10 segundos y regresar a flexión lentamente. Realizar 20 repeticiones.
- Flexion and half point: We continue in the same position, now the movement of the foot is to start in flexion and reach extension but without stretching the toes, remaining as if you were standing on tiptoes trying to reach something that is in a high place. Hold for 10 seconds and return to flexion slowly. Perform 20 repetitions.

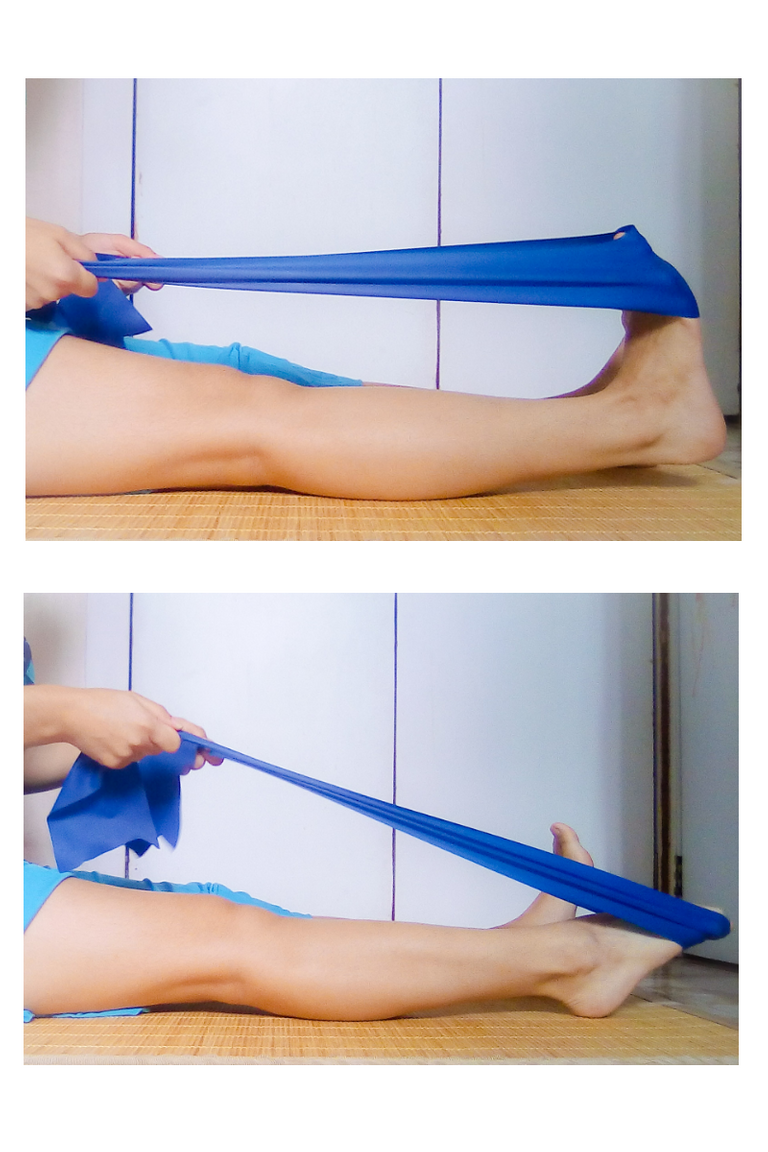
- Flexión y extensión: El mismo procedimiento del ejercicio anterior, solo que cuando llegues a extensión estiras las dedos de los pies, con la intención de ir al suelo. Recuerda mantener las rodillas estiradas en todo momento. Mantener posición 10 segundos. Realizar 20 repeticiones.
- Flexion and extension: The same procedure as the previous exercise, only when you reach extension you stretch your toes, with the intention of going to the floor. Remember to keep your knees stretched at all times. Maintain position for 10 seconds. Perform 20 repetitions.
Cuarta Etapa / Fourth Stage
Las lesiones de tobillo generalmente disminuyen el balance corporal. A medida que se vaya progresando y finalizando las sesiones físicas se deben implementar ejercicios propioceptivos. Los cuales ayudan a los mecanoreceptores del tobillo a reconocer la posición en la que se encuentran y tener mejor equilibrio en los diferentes tipos de superficies.Por eso estos ejercicios son de suma importancia para evitar futuras lesiones.
Ankle injuries generally decrease body balance. As progress is made and physical sessions are completed, proprioceptive exercises should be implemented. These exercises help ankle mechanics recognize their position and have better balance on different types of surfaces.
This is why these exercises are so important to avoid future injuries.
Volver a usar la toalla dobla pero está vez donde entre nada más el pie lesionado.
Use the towel again but this time where nothing else enters the injured foot.
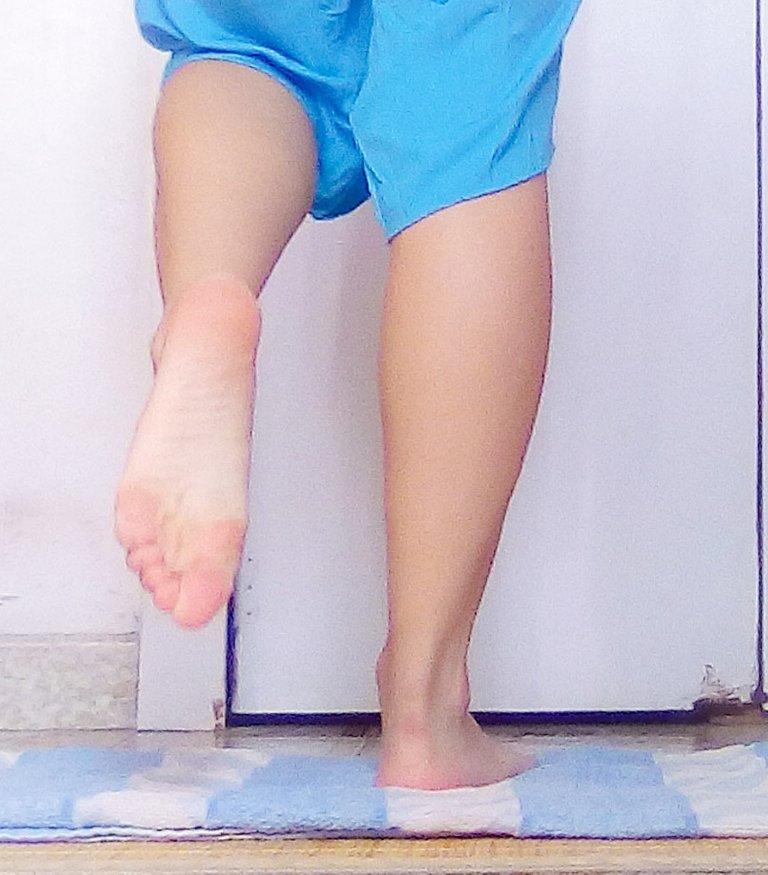
- Equilibrio fase 1: Coloca la toalla doblada como un rectángulo en el piso. Párate sobre ella solo con el pie del tobillo lesionado, luego levanta la pierna del lado sano (lentamente) y agarrate de algún soporte, a medida que avances y te sientas más confiado hazlo sin sostenerte. Mantén el equilibrio por lo menos 15 segundos sino hasta donde puedas, e ir aumentando poco a poco. Repite 10 veces.
- Balance Phase 1: Place the folded towel as a rectangle on the floor. Stand on it with only the foot of the injured ankle, then lift the leg on the sound side (slowly) and grab onto some support, as you move forward and feel more confident, do so without holding. Keep your balance for at least 15 seconds, but as far as you can, and gradually increase it. Repeat 10 times.
- Equilibrio Fase dos: Conforme avances tratar de hacerlo con los brazos abiertos hacia los lados e ir aumentando le tiempo hasta llegar a mantener el equilibrio por 60 segundos. Repetir unas 10 veces. Cuando estés más estable debes hacerlo con los brazos al frente del pecho y ojos cerrados.
- Balance Phase Two: As you advance, try to do it with your arms open to the sides and increase the time until you are balanced for 60 seconds. Repeat about 10 times. When you are more stable you should do it with your arms in front of your chest and your eyes closed.
- Equilibrio Fase tres: Con el mismo principio de los ejercicios anteriores, solo que ahora sostendrás un objeto frente a tu pecho, yo siempre recomiendo una pelota mediana. Mantener equilibrio por 60 segundos o más y repetir 6 veces.
- Balance Phase Three: With the same principle as the previous exercises, only now you will hold an object in front of your chest, I always recommend a medium ball. Maintain balance for 60 seconds or more and repeat 6 times.
Quinta y última Etapa / Fifth and final stage
Importante: Comience los ejercicios para estirar el tendón de Aquiles tan pronto como pueda hacerlo sin dolor. El tendón de Aquiles conecta los músculos posteriores de la pantorrilla, en la parte inferior de la pierna, con el hueso en la base del talón. Es fundamental dedicarle tiempo porque es lo que nos ayuda a caminar y agacharnos sin problemas, de estar tenso podría aumentar la probabilidad de lesiones.
Important: Begin exercises to stretch the Achilles tendon as soon as you can do so without pain. The Achilles tendon connects the posterior calf muscles on the lower leg to the bone at the base of the heel. It is essential to take the time to do this because it is what helps us walk and bend over smoothly, and if it is tightened, it may increase the chance of injury.
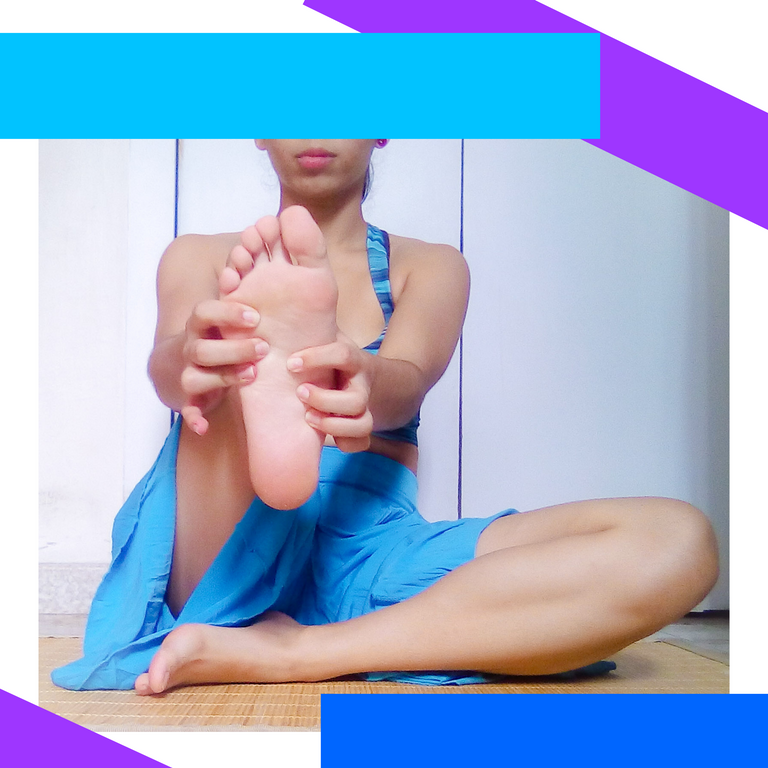
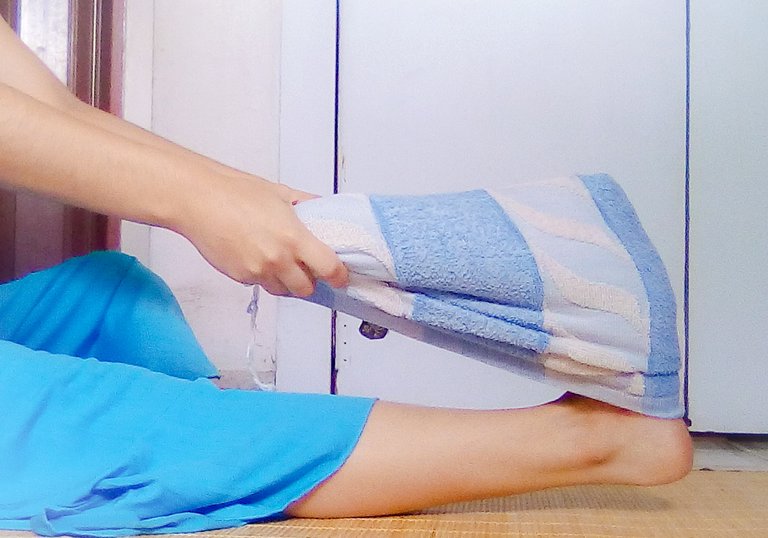
- Estiramiento con toalla: Siéntate con las piernas al frente y estiradas. Envolver la toalla y que quede larga, la pasarás por el metátarso de tu pie lesionado y agarrar cada punta de la toalla con cada mano. Jalar la toalla lo más que te permita tu pie en rehabilitación, este quedará en flexión. Mantener posición 20 segundos, repetir 5 veces.
- Towel Stretch: Sit with your legs in front of you and stretch. Wrap the towel and make it long, passing it through the metatarsal of your injured foot and grasping each tip of the towel with each hand. Pull the towel as far as your foot will go in rehab, it will stay in flexion. Hold position for 20 seconds, repeat 5 times.
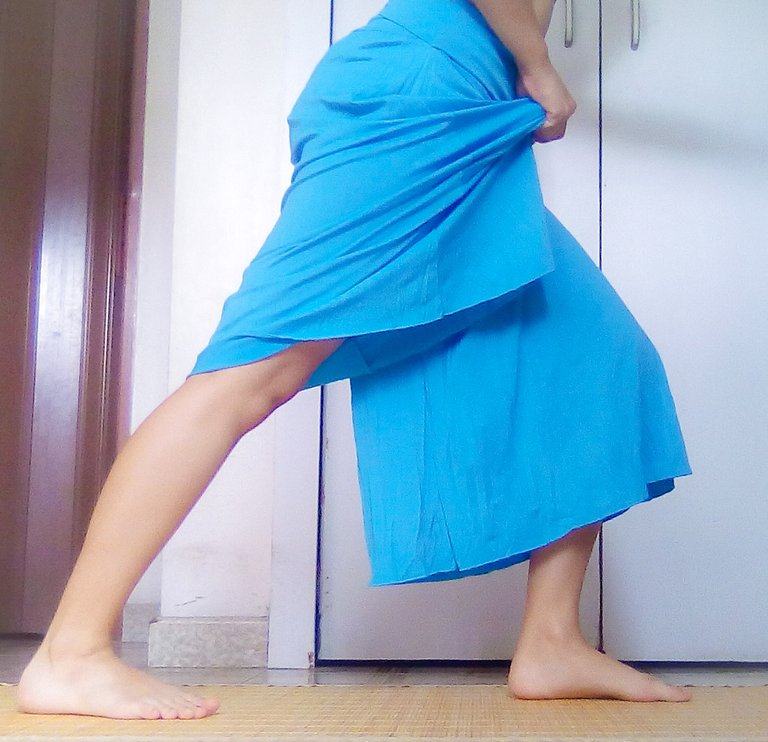
- Estiramiento de la pantorrilla y el Aquiles: Realizar cuando puedas estar de pie sin dolor. Párese frente a una pared y apoye las manos contra ella a la altura de tu pecho. Ahora ponga la pierna que vaya a estirar (lesionada) un paso atrás de la otra. Mantenga el talón de atrás en el suelo mientras flexiona la rodilla de la otra pierna hasta que sienta el estiramiento en la pierna de atrás. Mantener posición de 15 a 30 segundos. Repetir de 4 a 6 veces. También para estirar diferentes músculos de la pierna, dobla la rodilla de atrás sin levantar el talón. Mantener por 15 segundos y realizar 4 repeticiones.
- Calf and Achilles Stretch: Perform when you can stand without pain. Stand in front of a wall and rest your hands against it at chest level. Now put the leg that is going to be stretched (injured) one step behind the other. Keep your back heel on the ground while bending the knee of the other leg until you feel the stretch in your back leg. Hold position for 15 to 30 seconds. Repeat 4 to 6 times. Also to stretch different leg muscles, bend the back knee without lifting the heel. Hold for 15 seconds and perform 4 repetitions.
Tenga en cuenta que el tiempo y el tipo de ejercicios de rehabilitación recomendados para usted según las preferencias de su médico o de su fisioterapeuta. Para saber que se le puede agregar a la terapia y recuerda siempre tener paciencia.
Note that the time and type of rehabilitation exercises recommended for you according to the preferences of your doctor or physical therapist. To know what can be added to therapy and always remember to be patient.
Espero les ayude y les haya gustado, besos inmensos... / I hope it helps you and you liked it, big kisses...
Congratulations, @constgaladriel Your Post Got 50% Boost By @hiveupme Curator.
"Delegate To @hiveupme Curation Project & Earn 95% Curation Rewards"
Contact Us : CORE / VAULT Token Discord Channel or Join Us : UPMELINK Web Site
Thank you very much 🙏✨ for your support
Me encantó este post! Ganaste otra seguidora :)
Me alegra mucho ❤️ que te gustara, besos inmensos y muchisimas gracias 🙏 ✨😘
Muchisimas gracias por el apoyo, los abrazo infinito
¡Felicidades! Esta publicación obtuvo upvote y fue compartido por @la-colmena, un proyecto de Curación Manual para la comunidad hispana de Hive que cuenta con el respaldo de @curie.
Si te gusta el trabajo que hacemos, te invitamos a darle tu voto a este comentario y a votar como testigo por Curie.
Si quieres saber más sobre nuestro proyecto, acompáñanos en Discord: La Colmena.
Muchísimas gracias 🙏✨ por el apoyo! Se les abraza
Que información tan valiosa, y un post con tremenda explicación y calidad! Para las personas que practicamos cualquier tipo de actividad física realmente esto es esencial! Muchas gracias, seguiré viendo tus post!