Saludos a todos mis #hivers que conforman esta excepcional comunidad, hoy estoy cibernéticamente de nuevo con ustedes y feliz de estarlo. Les traigo un tutorial muy útil y sin duda alguna muy creativo para decoraciones de cumpleaños o fiestas. Se trata de como elaborar hermosas flores de cartulina haciendo énfasis en que la creatividad es magia.
to all my #hivers that make up this exceptional community, today I am cybernetically with you again and happy to be. I bring you a very useful and certainly very creative tutorial for birthday or party decorations. It's about how to make beautiful cardboard flowers emphasizing that creativity is magic.

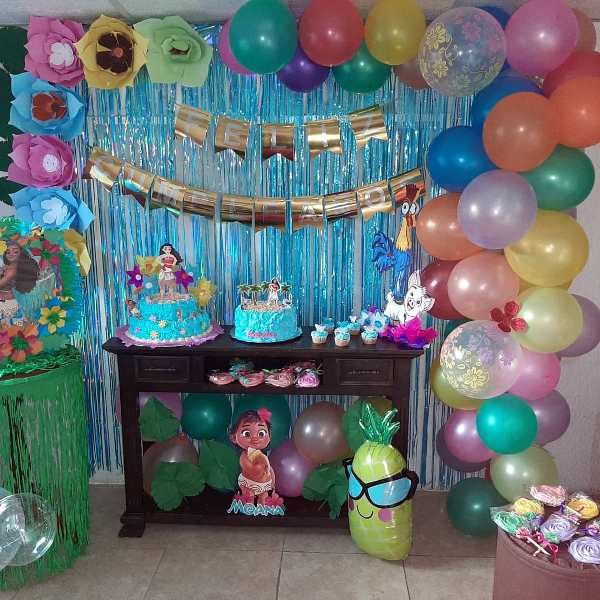
Antes de comenzar les contare como me motive a crear estas flores de cartulina. Se aproximaba el cumpleaños número 4 de mi hija Isabella ya mi pequeña y yo habíamos hablado de la temática del cual seria su cumpleaños y fue Moana. La emoción de mi hija por su fiesta era sorprendente. Y bueno cuando empecé organizar lo que seria su fiesta lo primero que se me vino a la mente fue la decoración. La temática de Moana es de mar y así tipo hawaiana. Y bueno manos a la obra desde un principio quería un espacio lleno de flores de colores aparte de que también estaban muy de moda eran tendencia en las decoración las flores le quedaban perfectas para su temática de cumpleaños.
Before I start I will tell you how I got motivated to create these cardboard flowers. My daughter Isabella's 4th birthday was coming up and my little girl and I had already talked about the theme for her birthday and it was Moana. My daughter's excitement for her party was amazing. And well when I started to organize what would be her party the first thing that came to my mind was the decoration. Moana's theme is sea and Hawaiian type. And well hands to work from the beginning I wanted a space full of colorful flowers besides they were also very fashionable were trendy in the decoration flowers were perfect for her birthday theme.
Now below is a tutorial on how to make beautiful flowers out of cardboard.
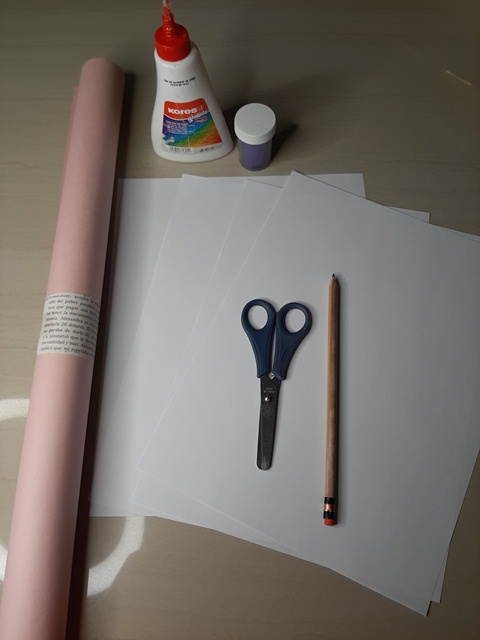
• 1 pliego de cartulina del color de su preferencia.
• 4 Hojas blancas. Tamaño carta u oficio.
• Pega escolar. (Pega blanca)
• 1 lápiz.
• Escarcha.
• Tijera.
• Regla.
Materials to Use:
- 1 sheet of card stock in the color of your choice.
- 4 white sheets of paper. Letter or legal size.
- School glue. (White glue)
- 1 pencil.
- Frosting.
- Scissors.
- Ruler.
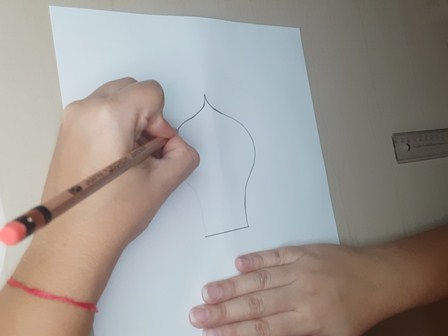
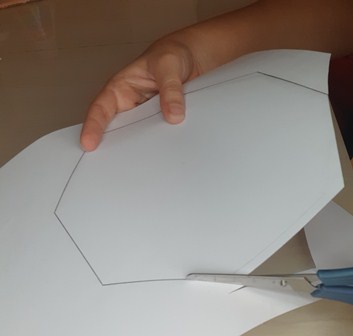
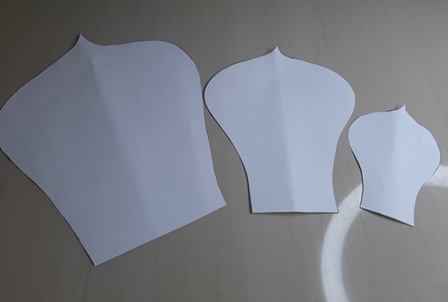
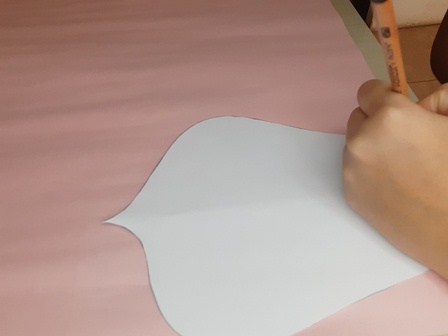
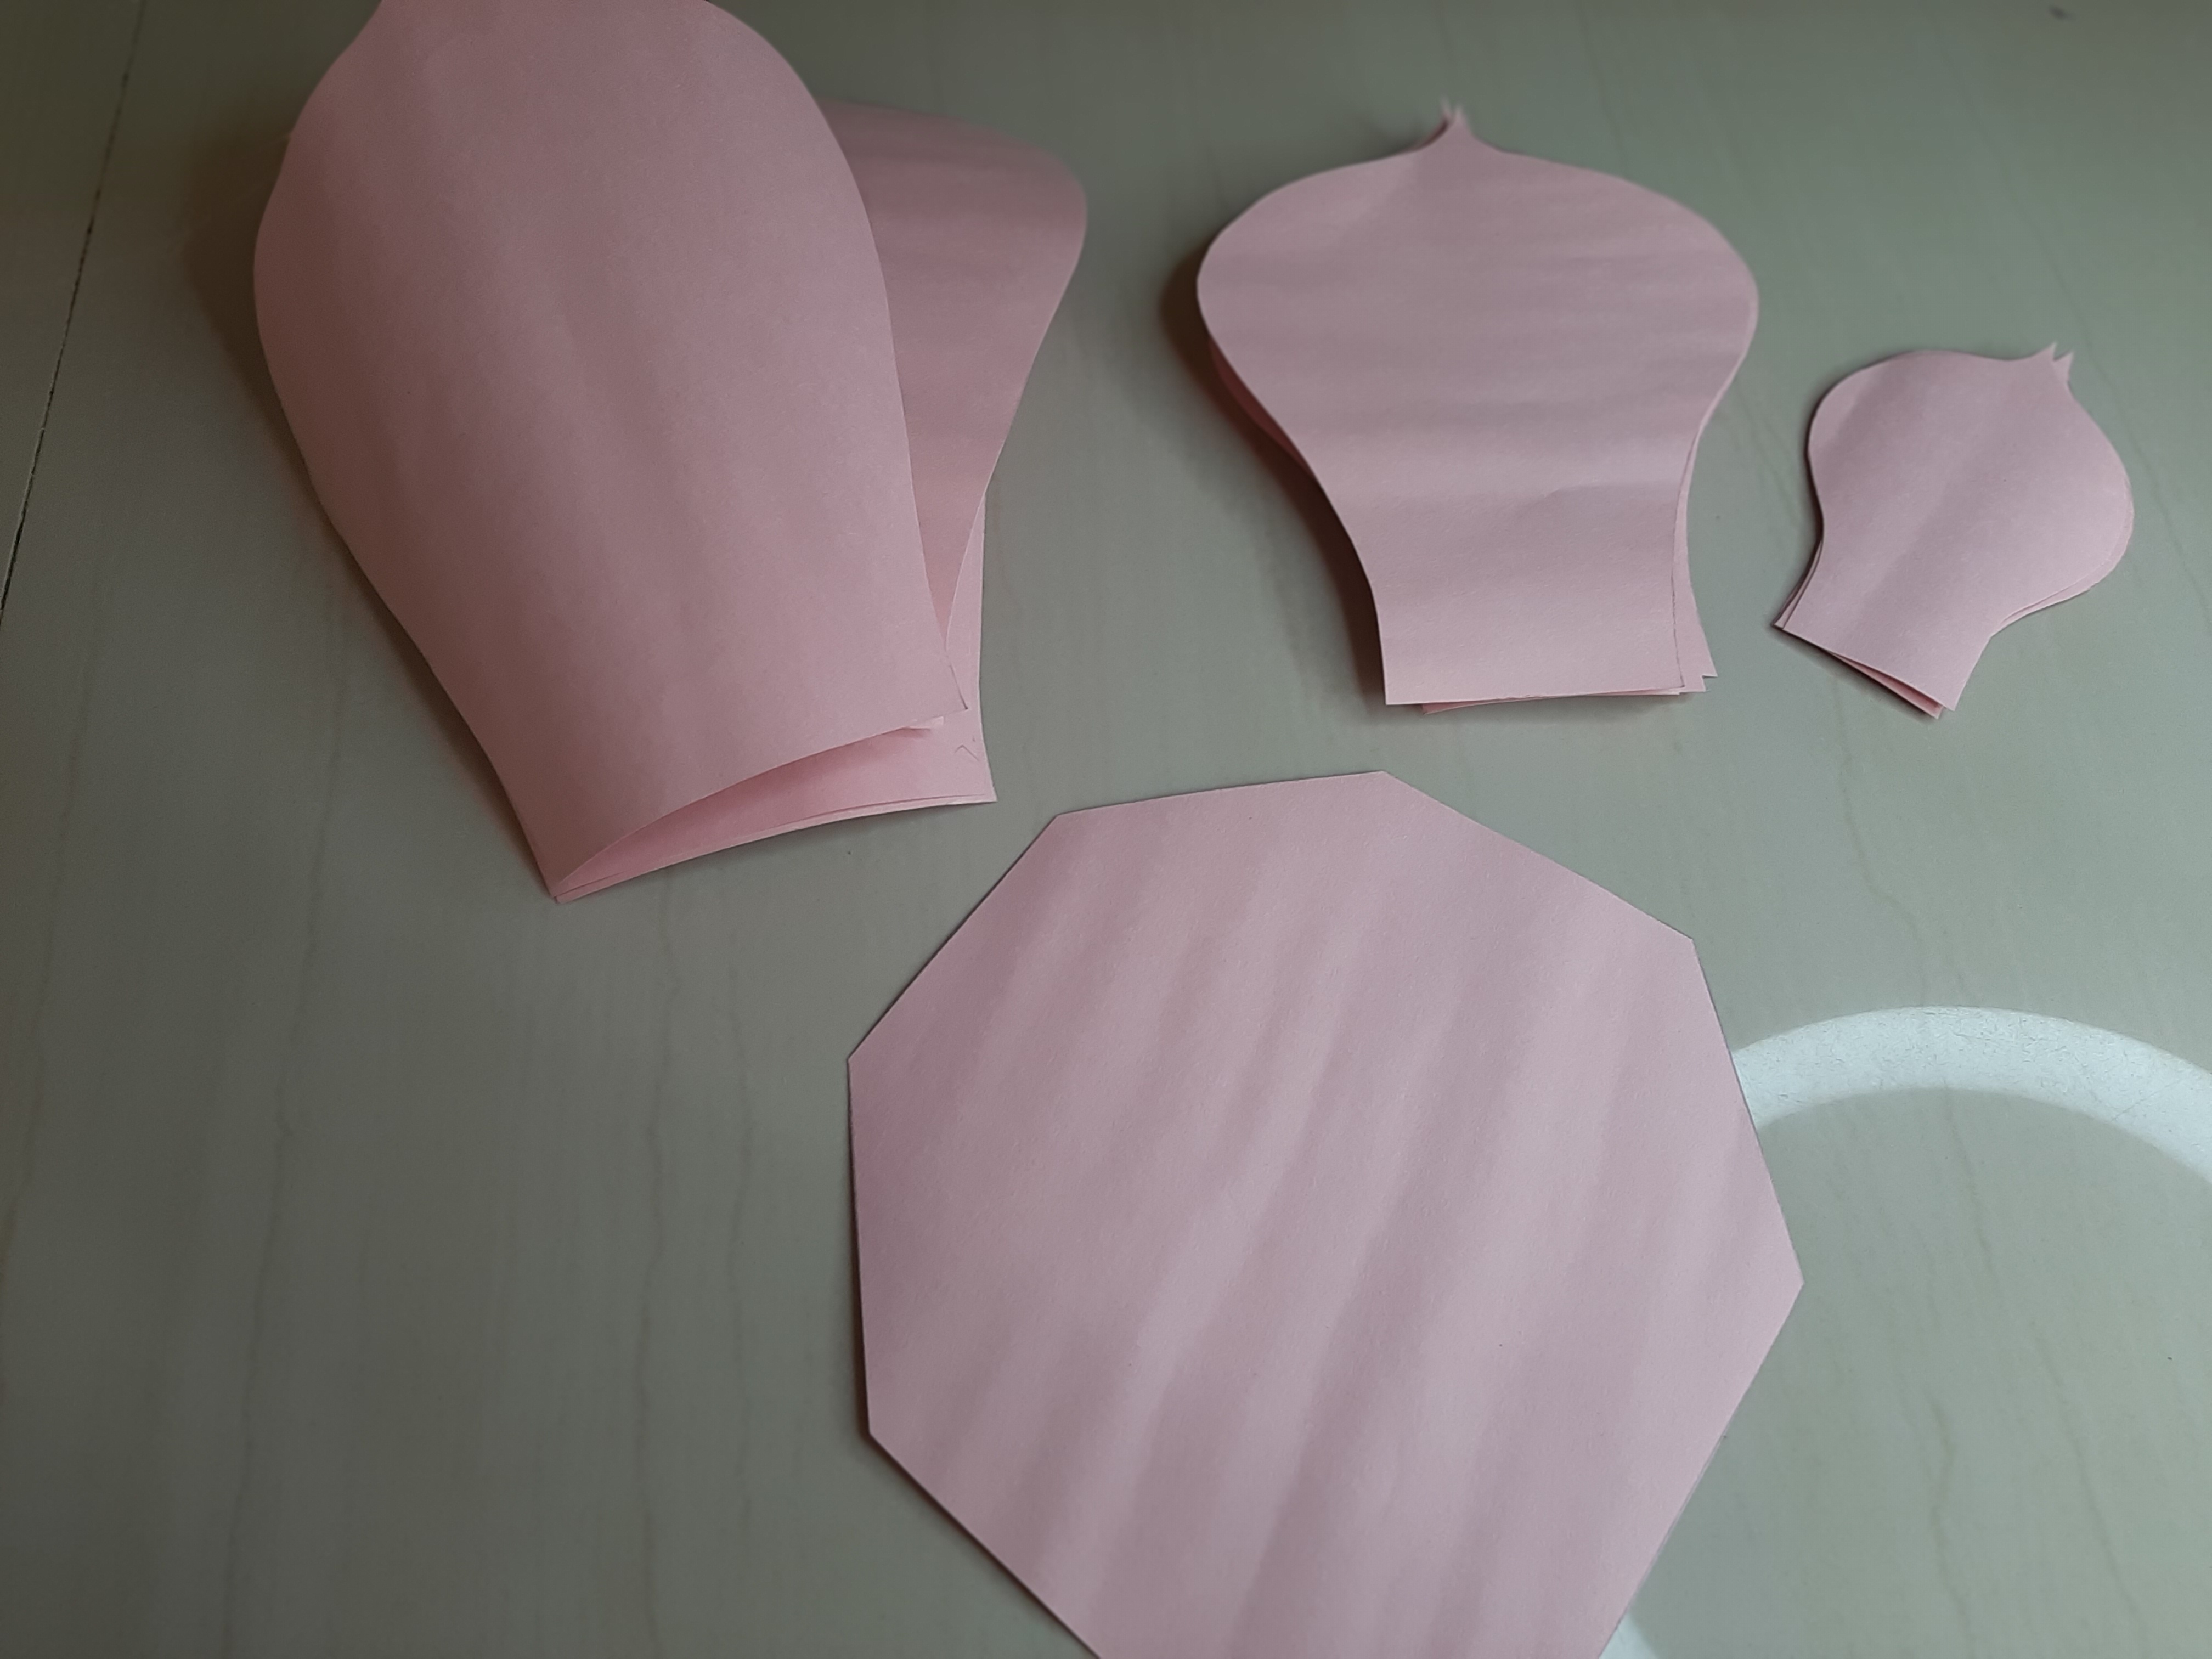
Paso 1
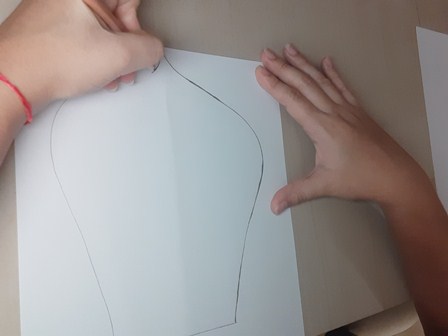
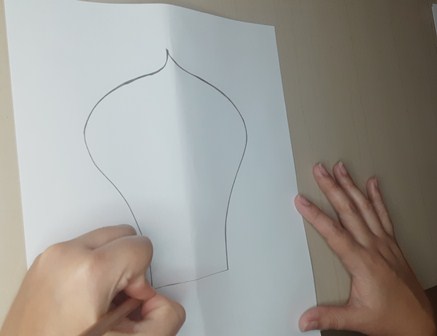
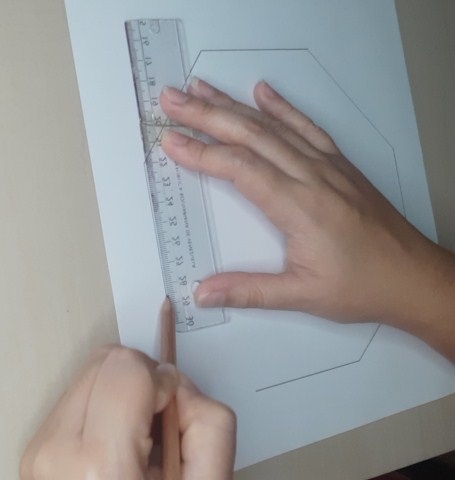
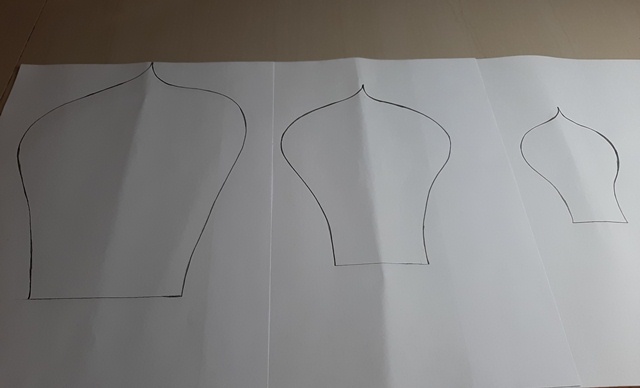
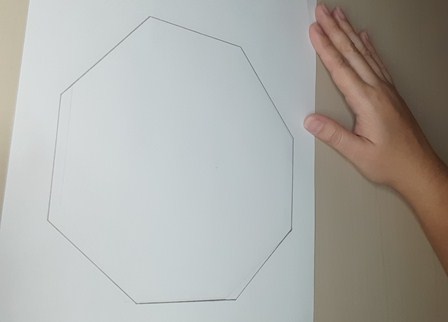
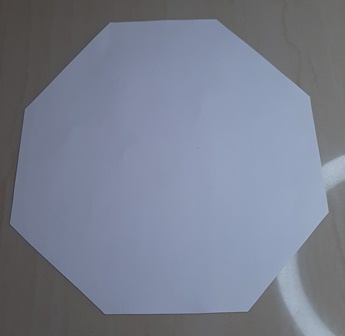
En las 3 primeras hojas blancas con el lápiz vamos a dibujar 3 pétalos, 1 grande, 1 mediano y otro pequeño y en la cuarta hoja un pentágono que será la base de nuestra flor. (Estos serian nuestros patrones)
Step 1
On the first 3 white sheets with the pencil we are going to draw 3 petals, 1 large, 1 medium and 1 small and on the fourth sheet a pentagon that will be the base of our flower. (These would be our patterns)
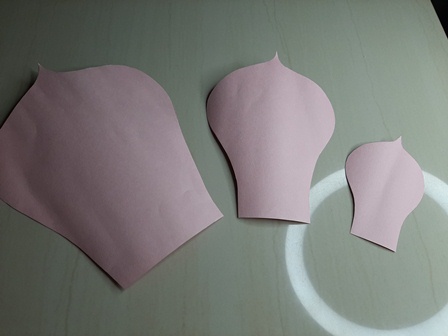
Pétalo Grande / Large Petal
Pétalo Mediano / Medium petal
Petalo Pequeño / Small Petalo
Pentágono / Pentagon
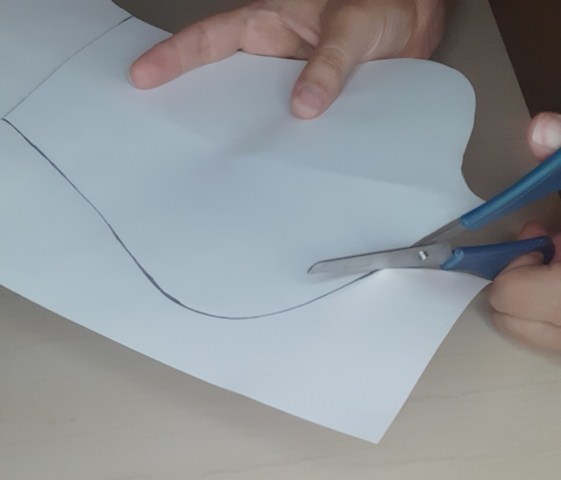
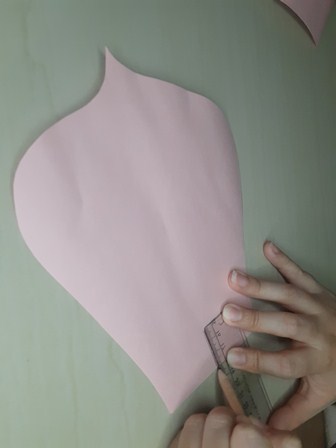
Paso 2
Con la ayuda de la tijera vamos a recortar nuestros pétalos y nuestro pentágono.
Step 2
With the help of the scissors we will cut out our petals and our pentagon.
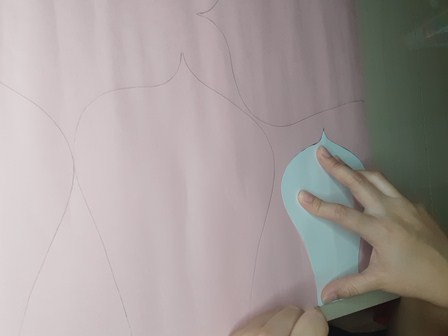
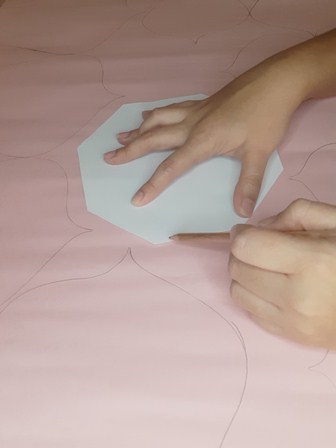
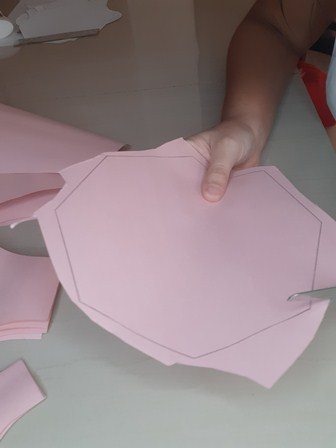
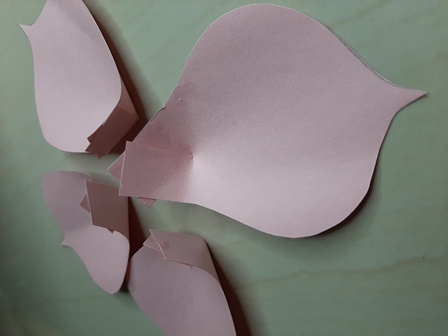
Paso 3
En la cartulina vamos a colocar nuestro pétalo más grande ya recortado y calcaremos 4 veces ya que nuestra flor tendrá 4 pétalos grandes. Y seguimos a calcar los pétalos que siguen en la cartulina (los cuatro medianos y los cuatro pequeños). Luego calcamos también nuestro pentágono. Y por último recortamos todos los pétalos y el pentagono.
Step 3
On the cardboard we are going to place our largest petal already cut out and trace 4 times since our flower will have 4 large petals. Then we trace the following petals on the cardboard (the four medium and the four small ones). Then we also trace our pentagon. And finally we cut out all the petals and the pentagon.
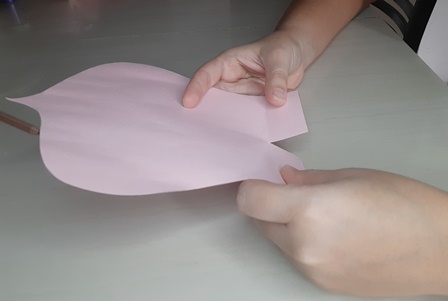
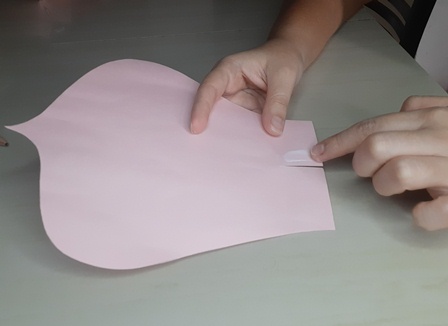
Paso 4
A cada uno de los pétalos ya recortados vamos a recortarle 2 cm por la parte inferior en el medio y luego vamos a unir de forma arruchada con pega.
Step 4
To each of the petals already cut out, we will cut 2 cm from the bottom in the middle and then we will join them in a crumpled way with glue.

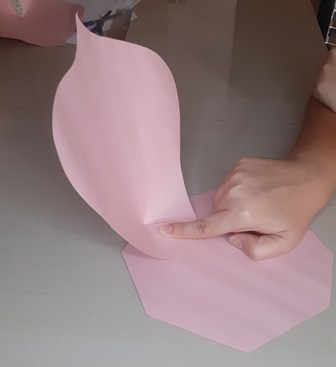
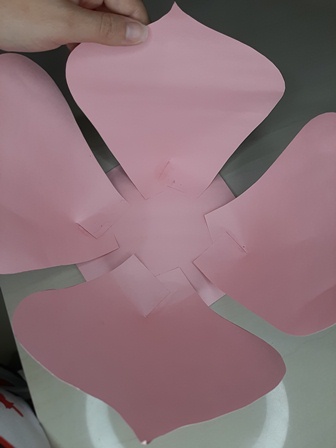
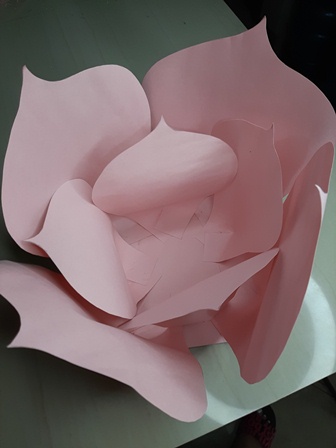
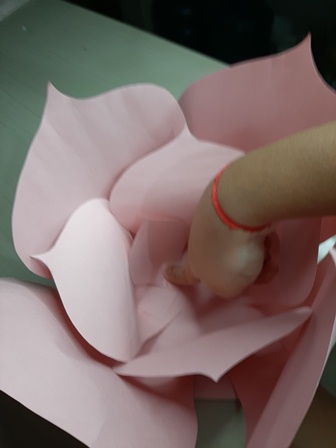
Paso 5
Luego de haber elaborados nuestros pétalos procedemos a unir las piezas y crear nuestra hermosa flor. Agarramos el pentágono (base) y comenzamos a pegar nuestros pétalos en forma giratoria en el pentágono. Primero pegamos en la base los pétalos grande, luego los medianos y e ultimo en el centro los pequeños. Tips: con una plancha de cabello a temperatura media pasamos por las puntas de los pétalos y semi ondulamos esto dará un toque real y maravilloso a la flor.
Step 5
After we have made our petals we proceed to put the pieces together and create our beautiful flower. We take the pentagon (base) and start gluing our petals in a rotating way on the pentagon. First we glue the big petals on the base, then the medium ones and finally the small ones in the center. Tips: with a hair iron at medium temperature we pass through the tips of the petals and semi-wave this will give a real and wonderful touch to the flower.

.jpeg)
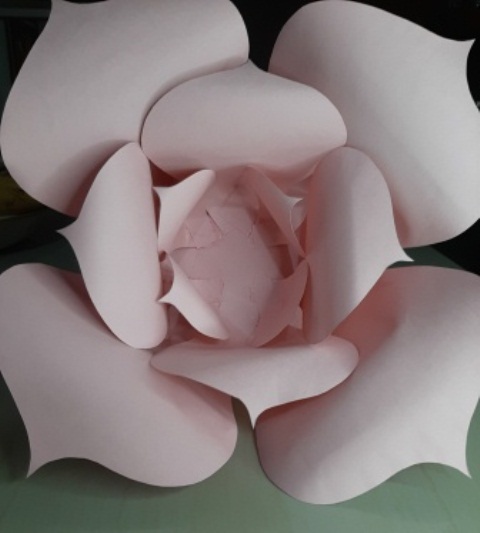
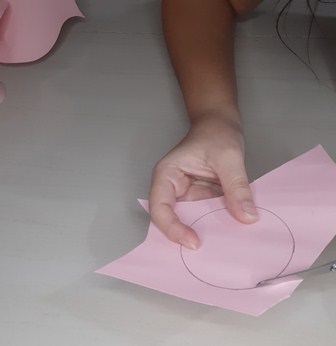
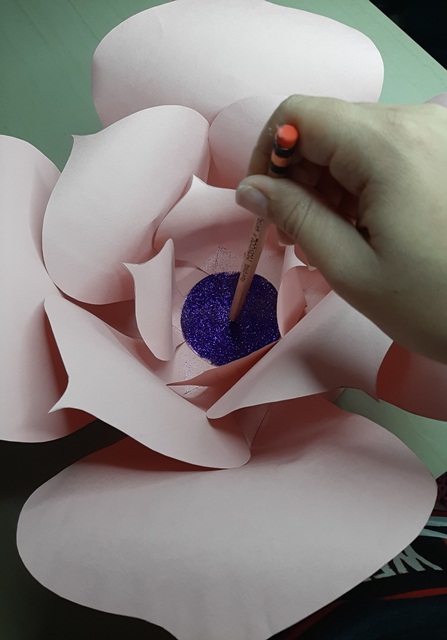
Paso 6
Una vez que estén todos nuestros pétalos pegados en la base (pentágono) y con la ayuda de la plancha de cabello sus puntas onduladas procedemos a colocar escarcha en el medio de la flor en una forma redonda. En particular use un redondo que dibuje en la misma cartulina le coloque pega y aplique escarcha quedando esta hermoso resultado que verán a continuación. Tips: Pueden decorar el centro a su preferencia pueden usar foami, cartón o papel.
Step 6
Once all our petals are glued on the base (pentagon) and with the help of the hair iron their wavy tips we proceed to place frosting in the middle of the flower in a round shape. In particular, I used a round shape that I drew on the same cardboard, put glue on it and apply frosting, leaving this beautiful result that you will see below. Tips: You can decorate the center to your preference you can use foami, cardboard or paper.

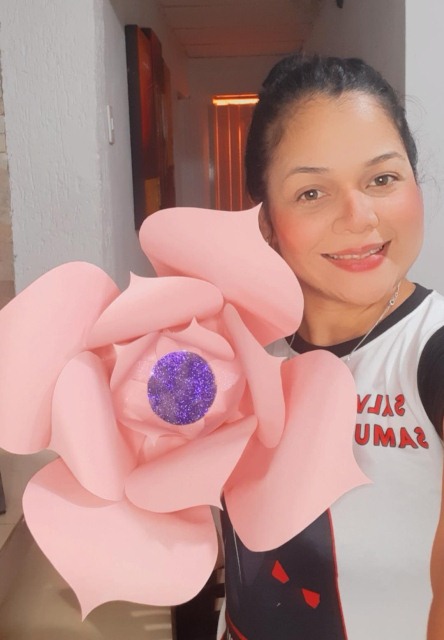
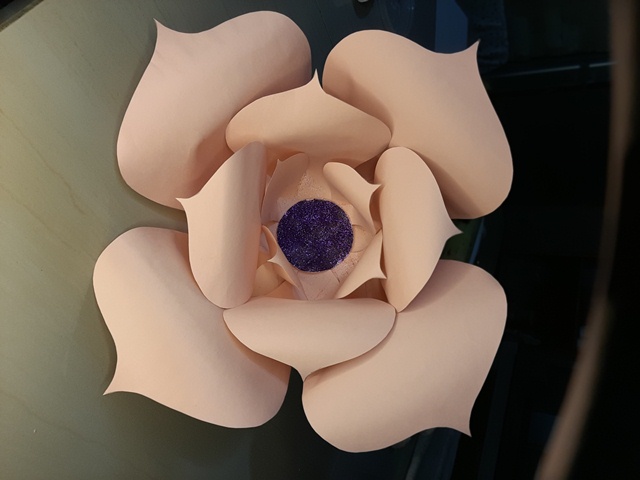
And this is how our beautiful Cardboard Flower looks like .
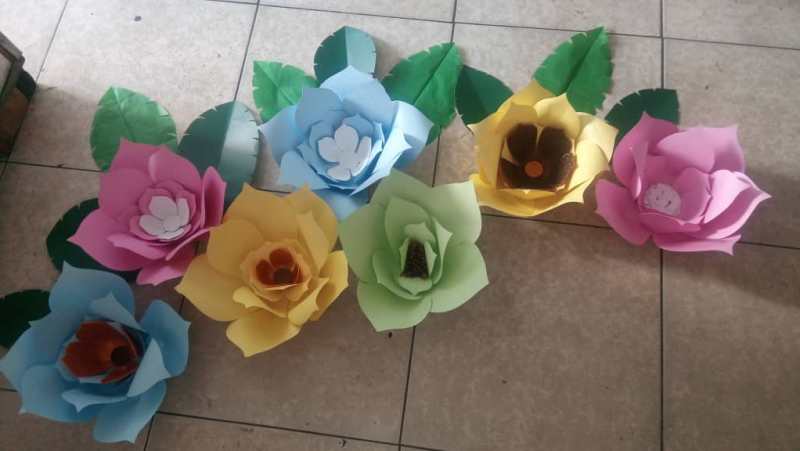
Pictures of my Isabella's birthday decoration with colorful flowers made in cardboard by me. In the center on each flower I made a different design. Creating is an art.
.jpeg)
.jpeg)
I hope you liked my tutorial and you are motivated to do it for some decoration, it looks great.
Pictures are of my authorship taken with my cell phone.

Nice work, beautiful 🤩
Thank you very much :)
Gracias por el apoyo @rutablockchain :)
Congratulations @danaeliz29! You have completed the following achievement on the Hive blockchain and have been rewarded with new badge(s) :
Your next target is to reach 3000 upvotes.
You can view your badges on your board and compare yourself to others in the Ranking
If you no longer want to receive notifications, reply to this comment with the word
STOPSupport the HiveBuzz project. Vote for our proposal!
Amigaaa, que belleza. Me encanto como hiciste esas flores. Dios te guarde a esa hermoso princesa, por cierto. <3
Gracias amigaaaaa 😊😘 amen amiga. Te mando muchas bendiciones y buena vibra. Eres un sol 🌞