¡Hola amigos de colmena!
Deseo que estén muy bien.
Hello hive friends!
I wish you are very well.
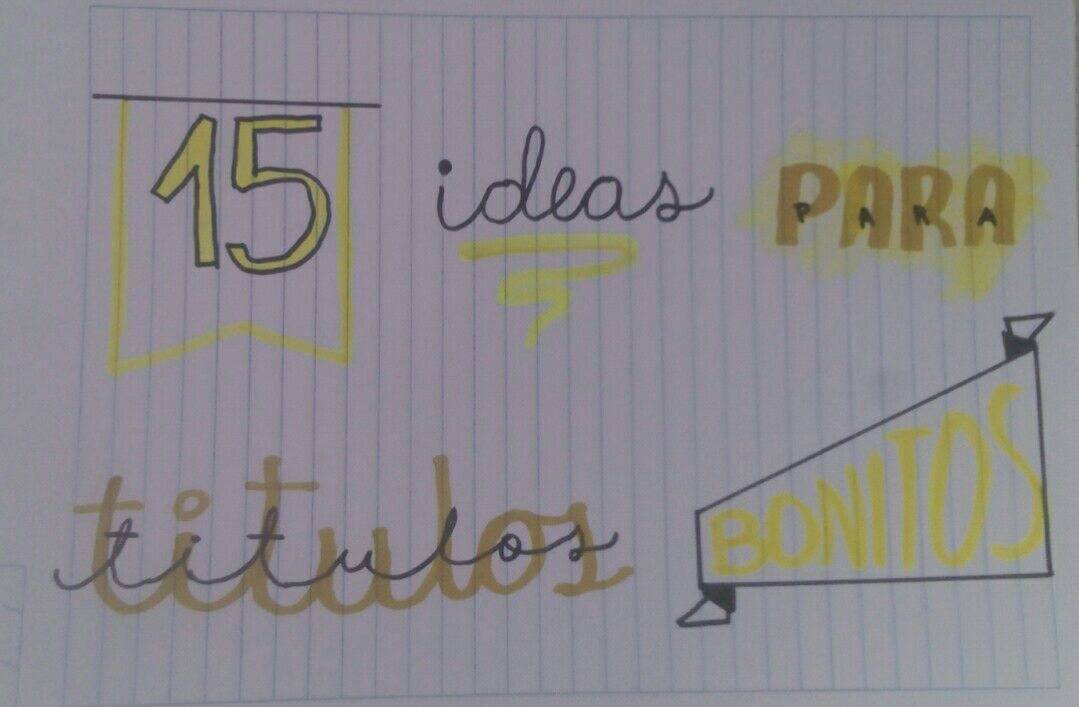
Para este post quise mostrar el paso a paso de como hacer banners o como también le decimos "títulos bonitos"
For this post I wanted to show the step by step of how to make banners or how we also say "beautiful titles"
¿Qué es el banners? Es el arte de dibujar letras bonitas mediante diferentes técnicas, según el método de escritura que utilicemos. Estamos hablando de dibujar y no de escribir, cuando escribimos lo hacemos de forma mecánica y cuando dibujamos lo hacemos letra a letra, pensado el resultado y estilo que le queremos dar. Eso es Lettering Banners
What is banners? It is the art of drawing beautiful letters using different techniques, depending on the writing method we use. We are talking about drawing and not writing, when we write we do it mechanically and when we draw we do it letter by letter, thinking about the result and style that we want to give it. That's Lettering Banners
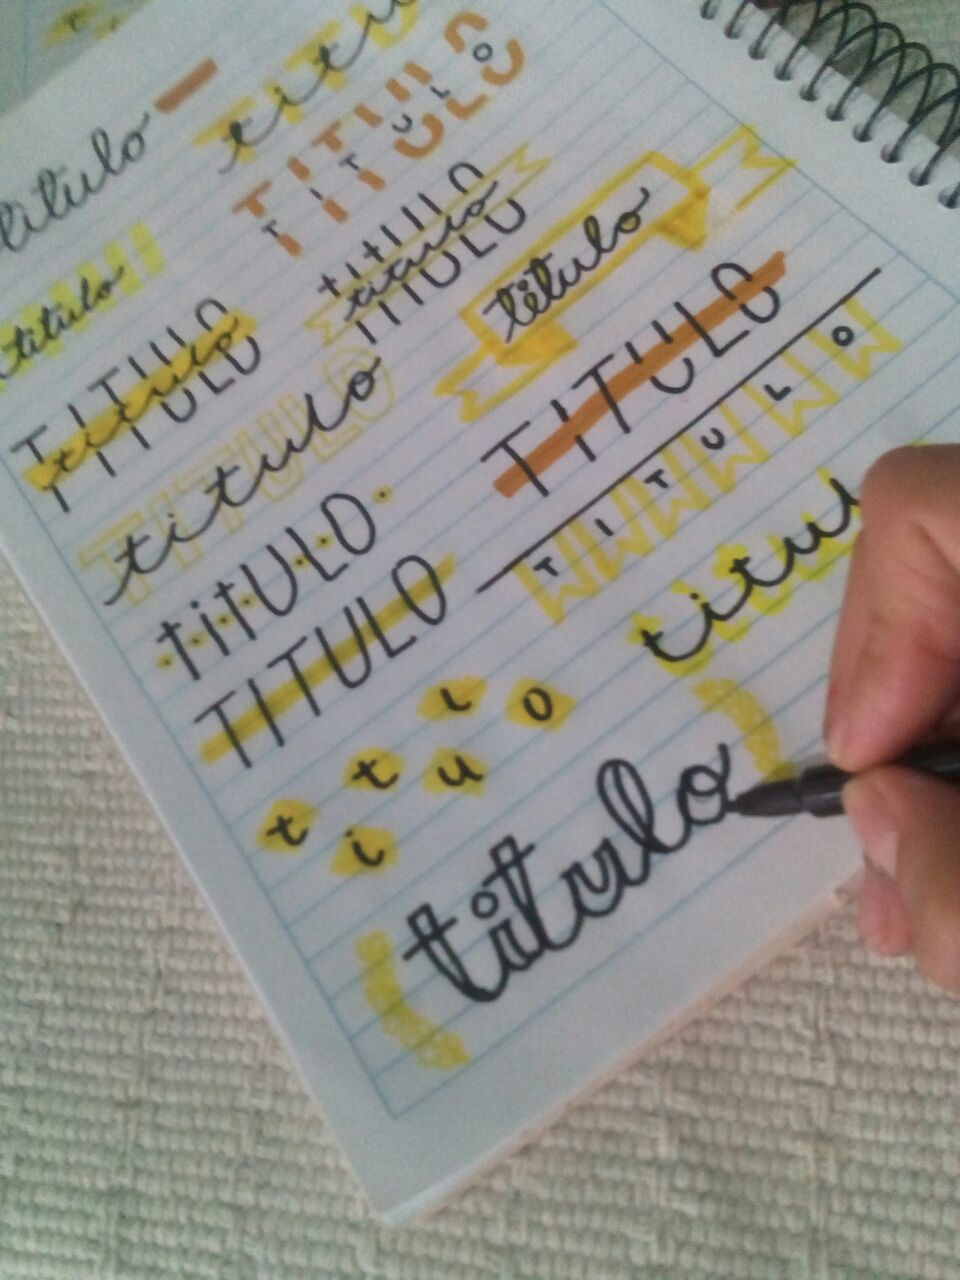
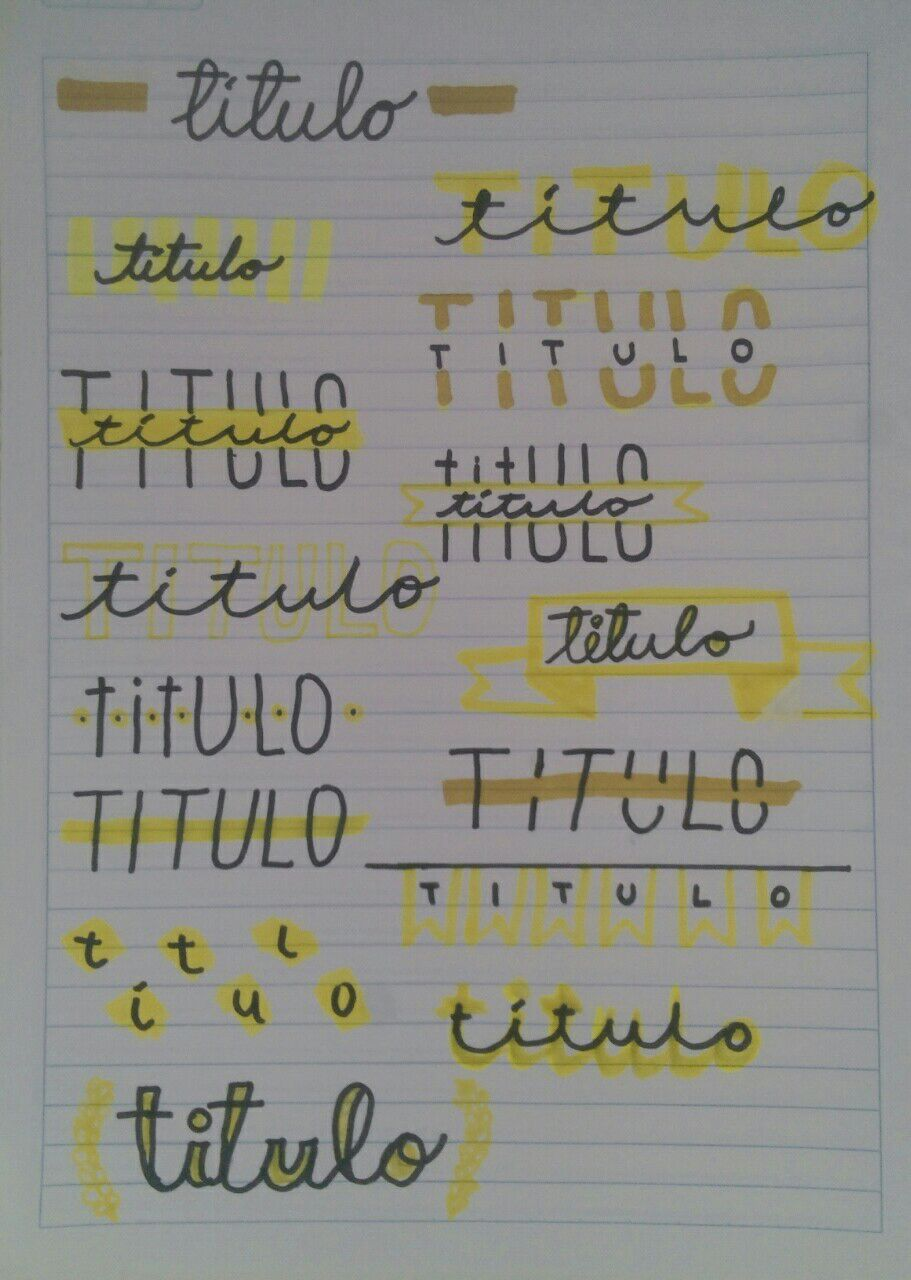
Si quieres que tus apuntes sean muy bonitos y con un estilo único, sigue leyendo que te mostrare como hacer 15 diferentes Banners paso a paso.
If you want your notes to be very beautiful and with a unique style, keep reading as I will show you how to make 15 different Banners step by step.
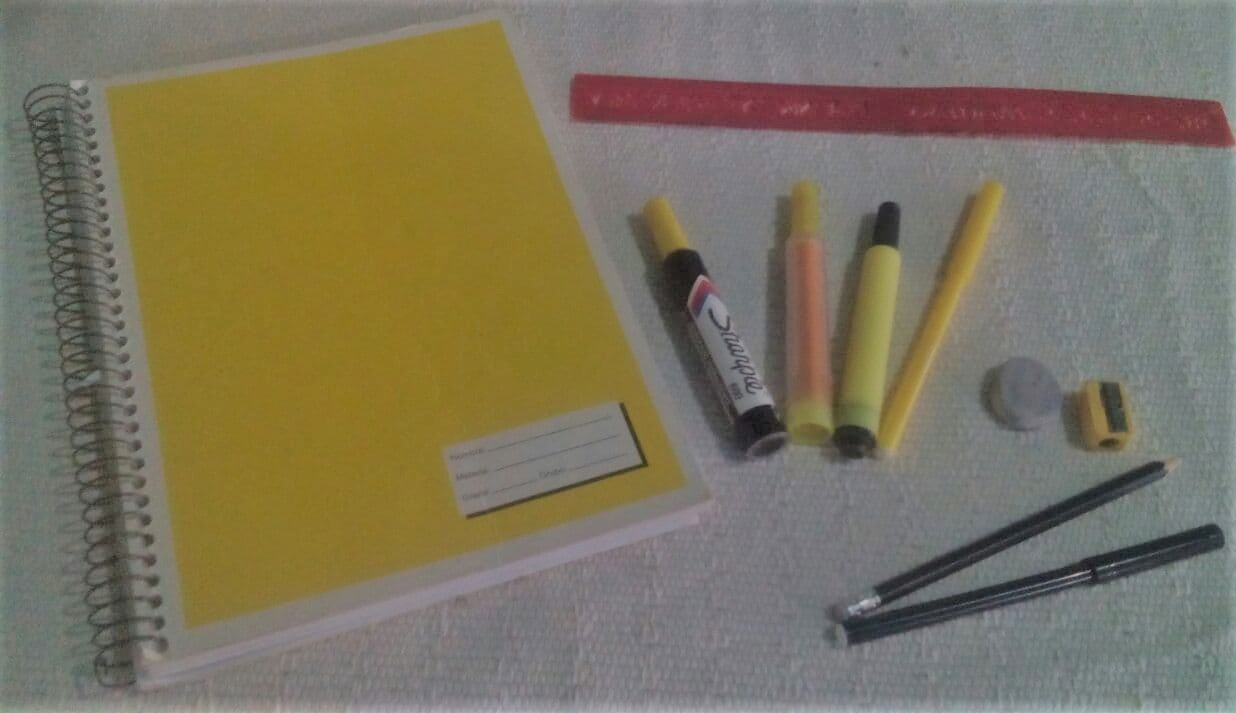
Veamos que necesitamos para realizarlo (claro puedes utilizar lo que tengas a mano)
Let's see what we need to do it (of course you can use what you have on hand)
Muy bien, conociendo los materiales empecemos con las ideas:
Very well, knowing the materials, let's start with the ideas:
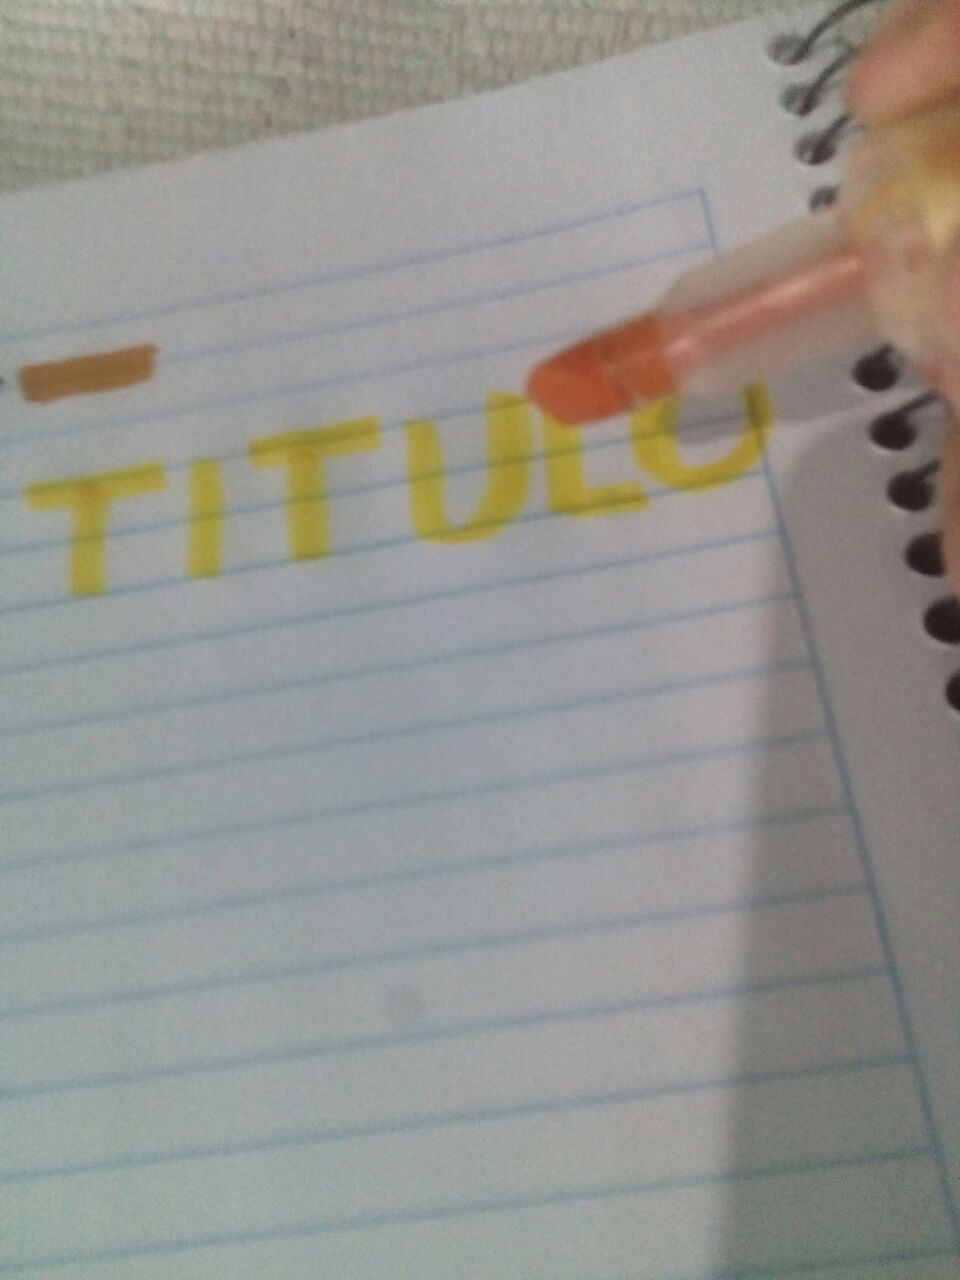
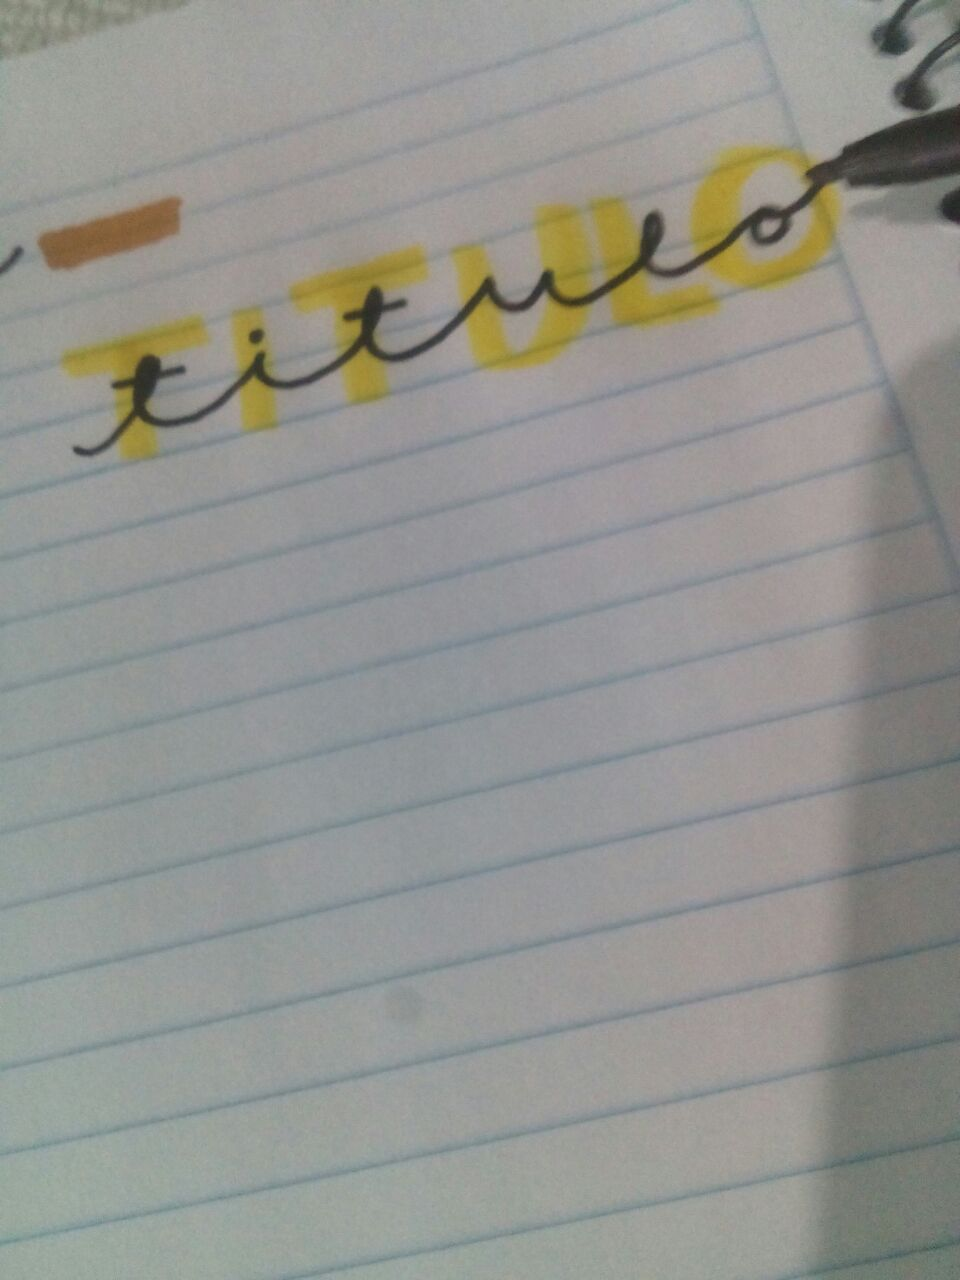
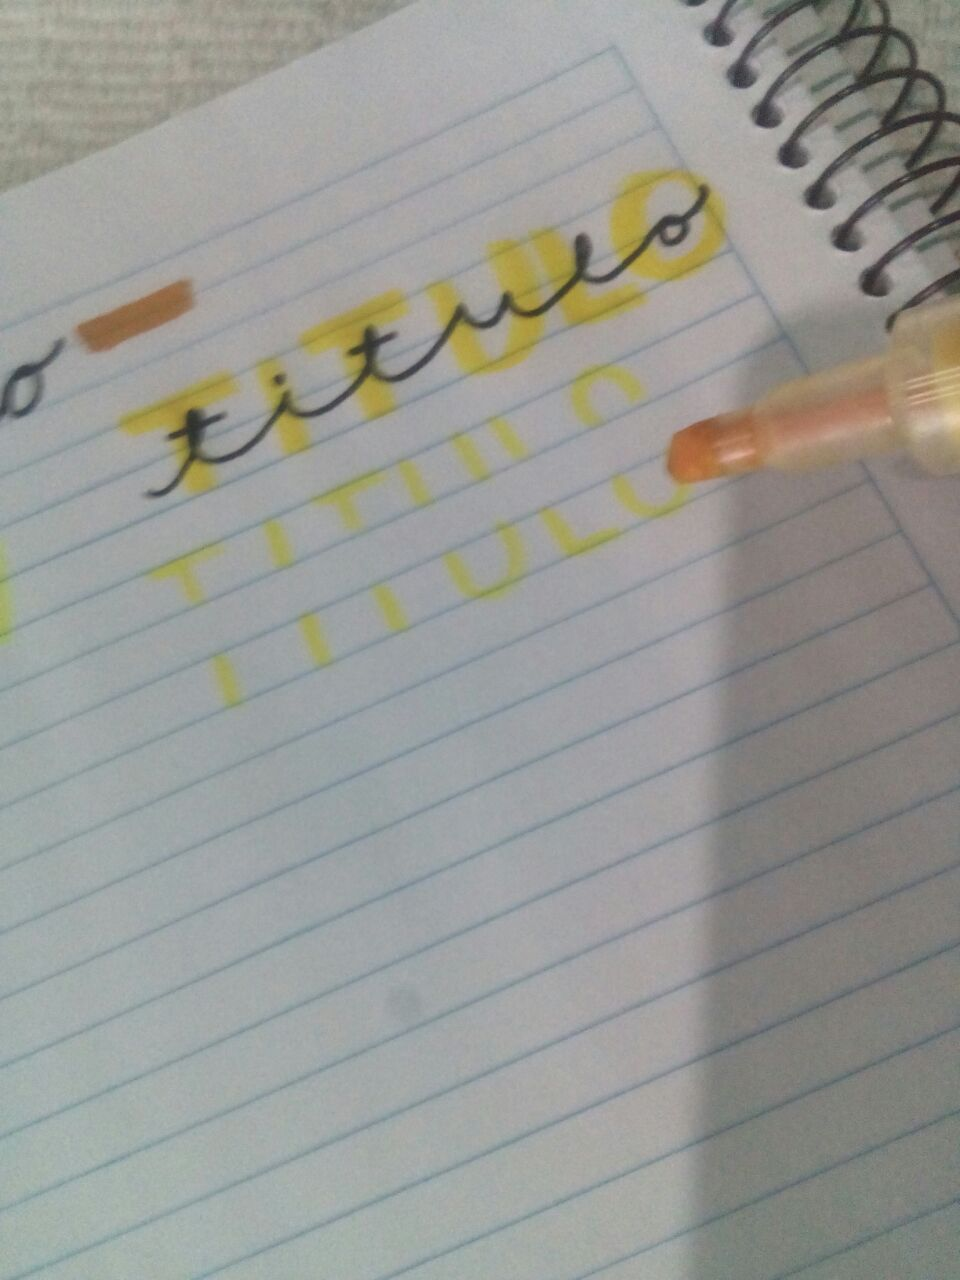
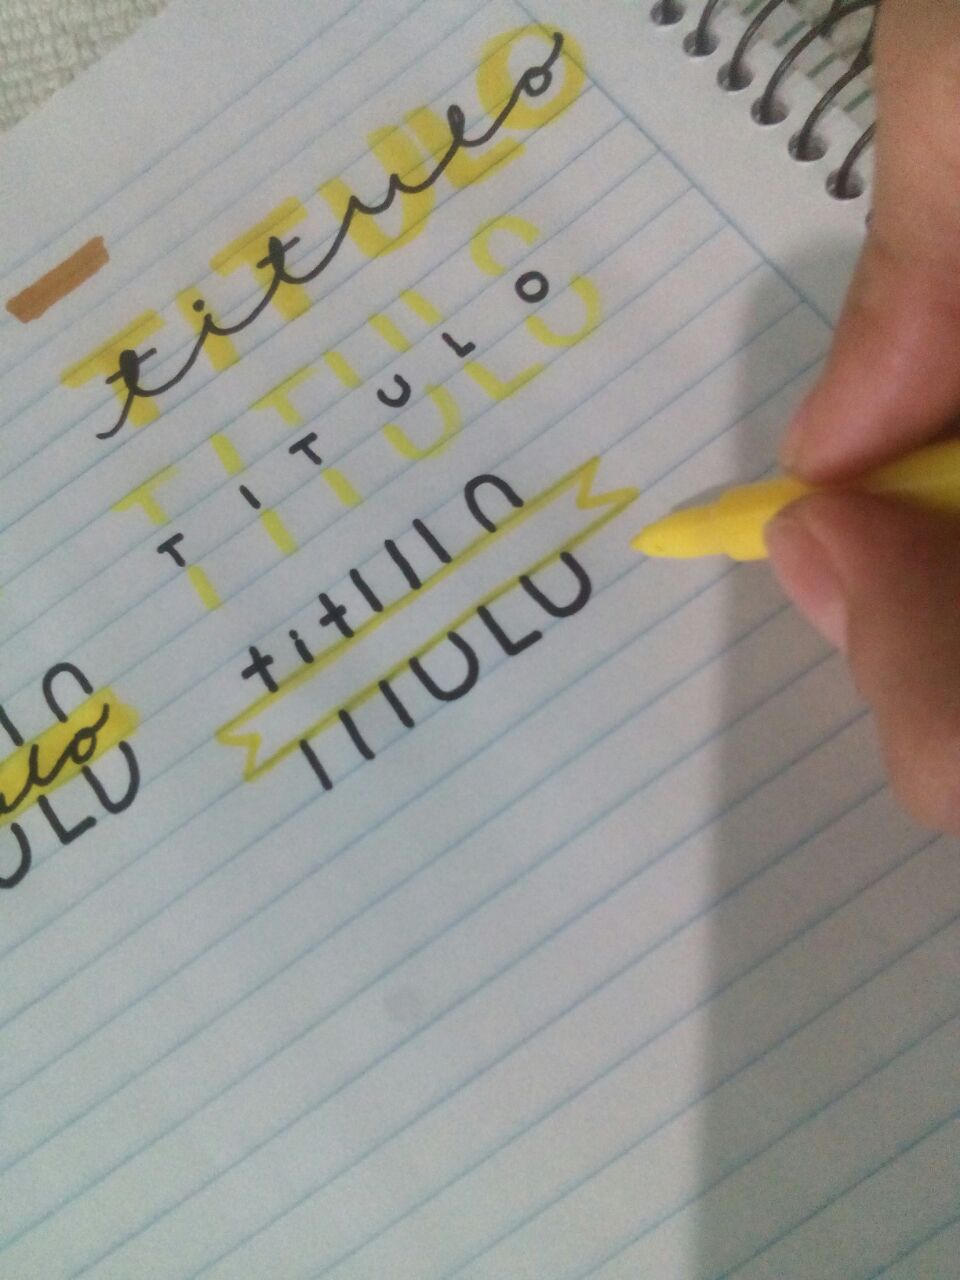
1 Primero:
Hacemos una línea del color que elegimos, y luego con plumón negro escribimos la palabra en letra cursiva y al final hacemos una línea de color, como se ve en las imágenes.
1 First:
We make a line of the color we choose, and then with black marker we write the word in italics and at the end we make a color line, as seen in the images.
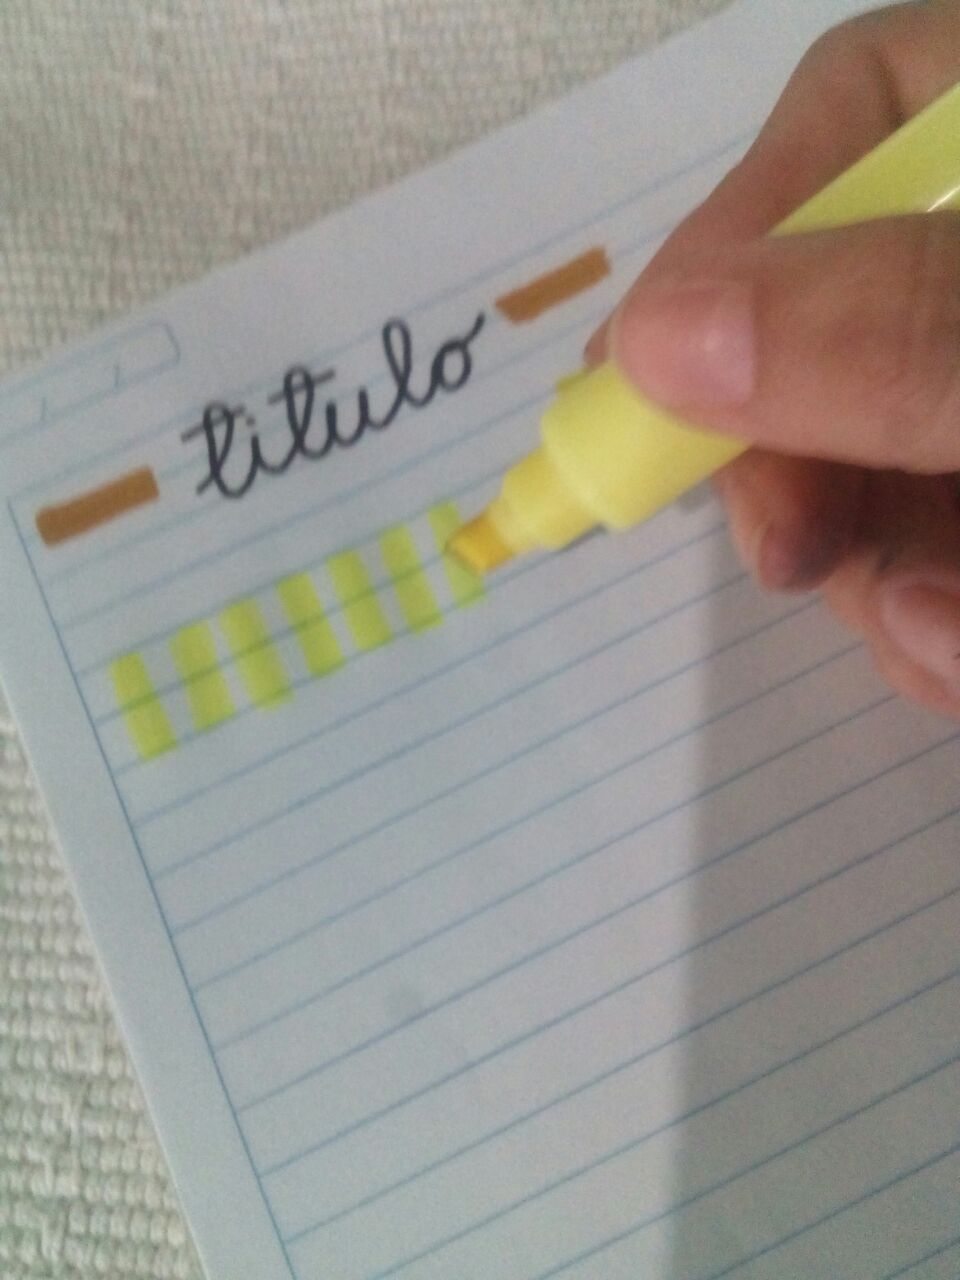
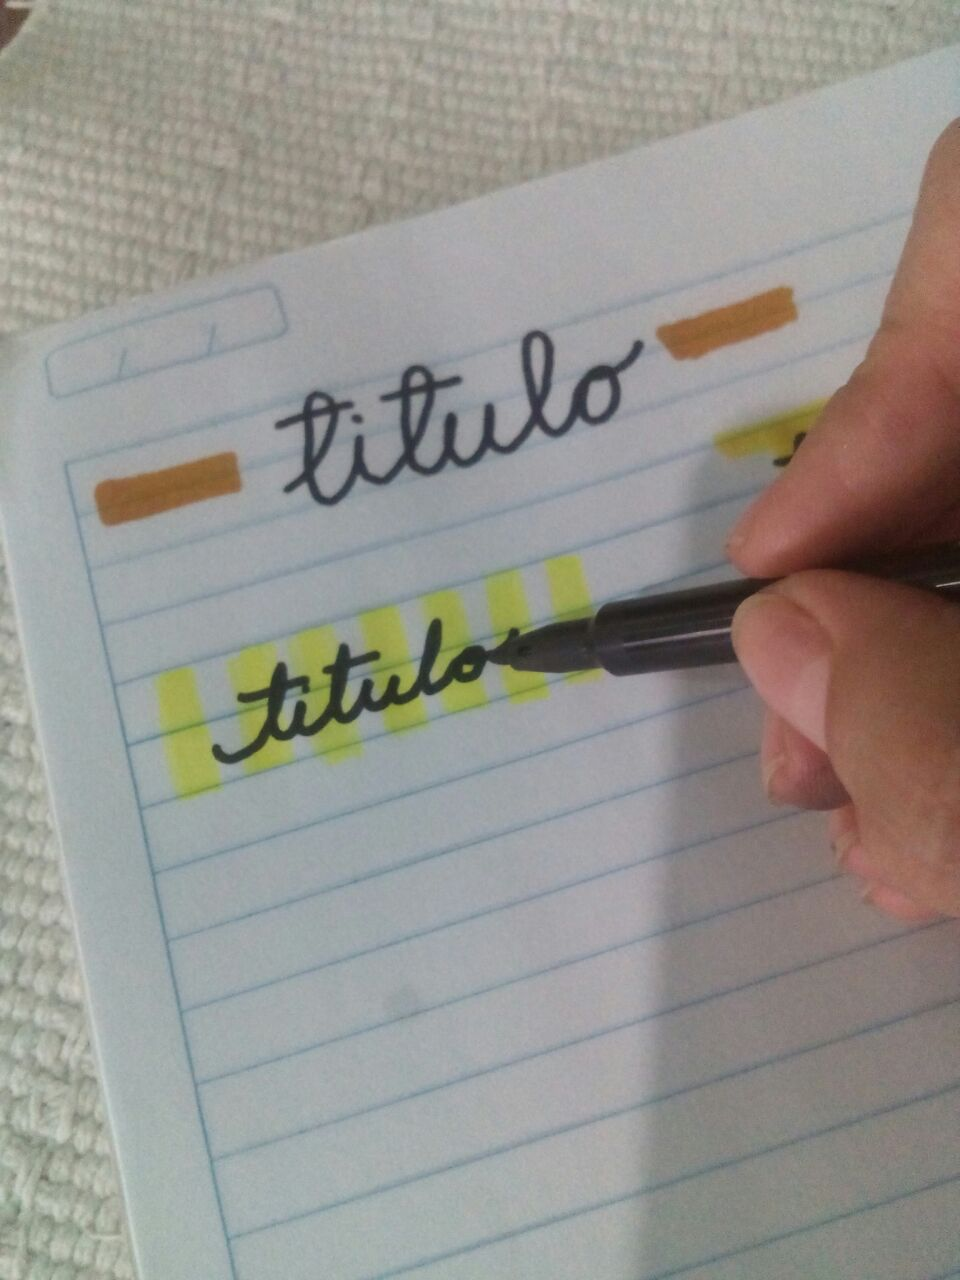
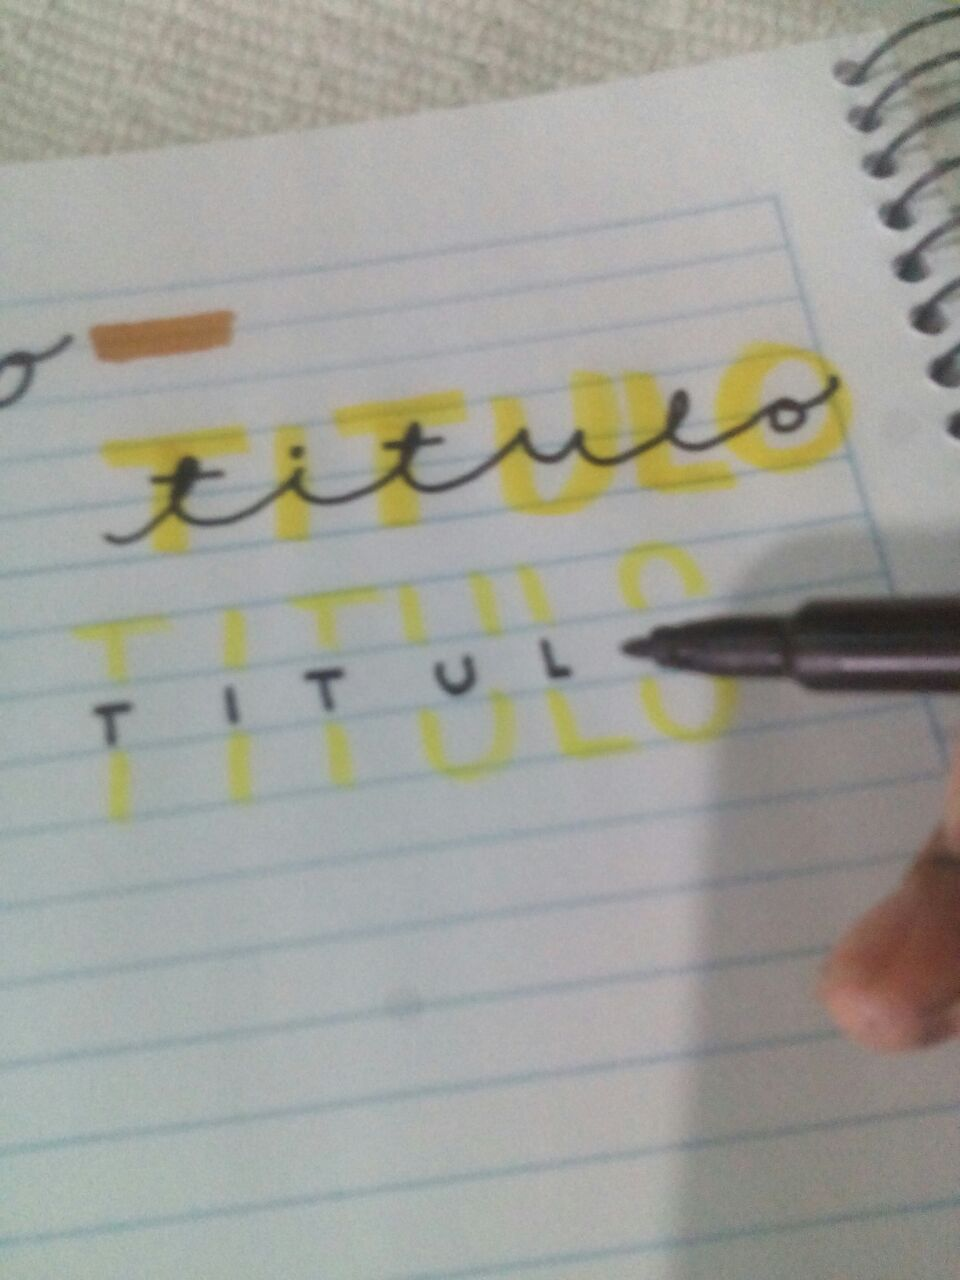
2 Segundo:
Con marcador escribimos la palabra, utilizando siempre la parte gruesa y en letra de molde y luego con plumón negro escribimos por el medio la palabra en cursiva, como se ve en las imágenes
2 seconds:
With a marker we write the word, always using the thick part and in block letters and then with black marker we write the word in italics in the middle, as seen in the images
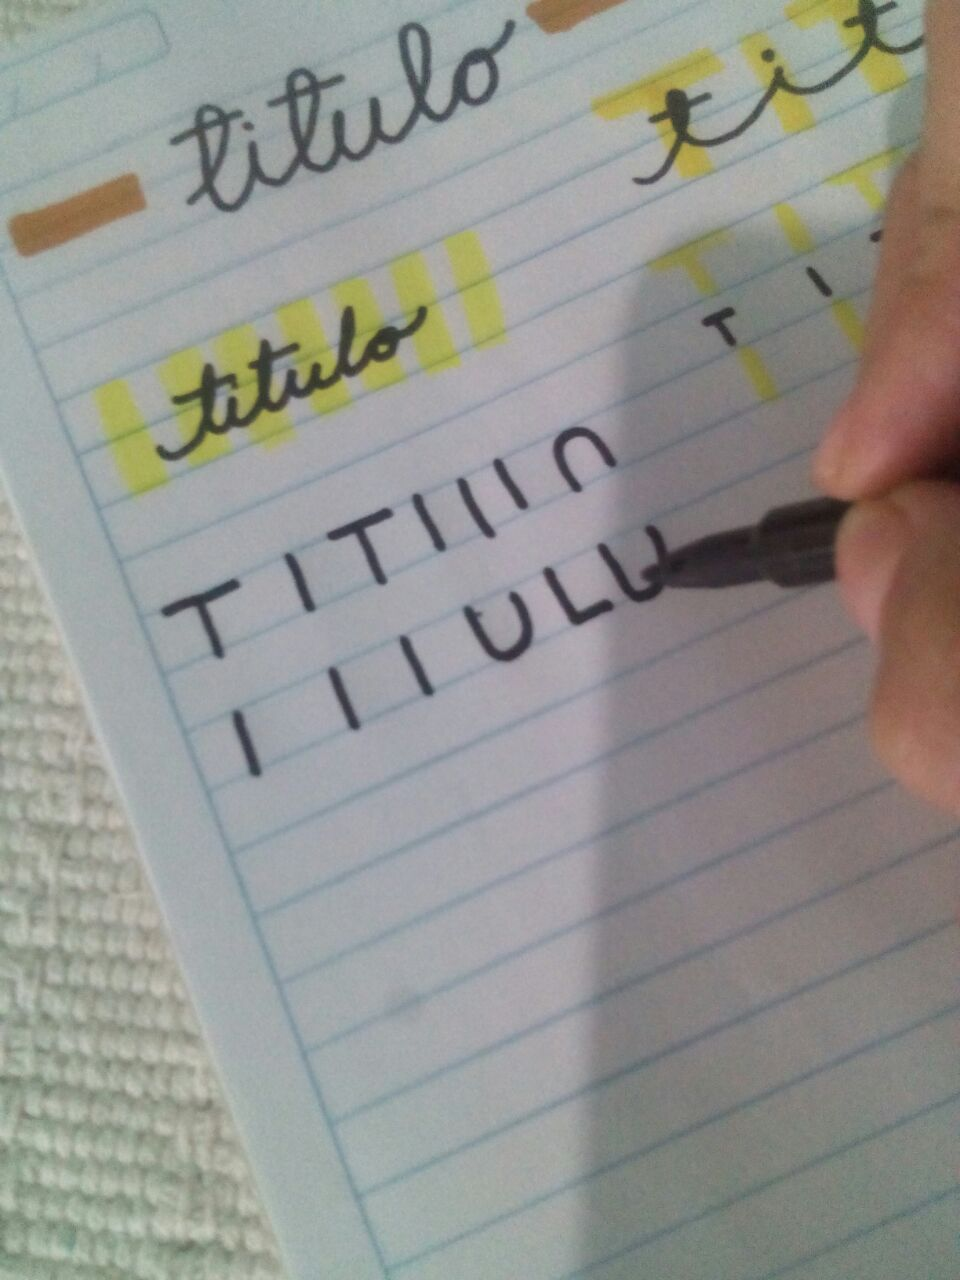
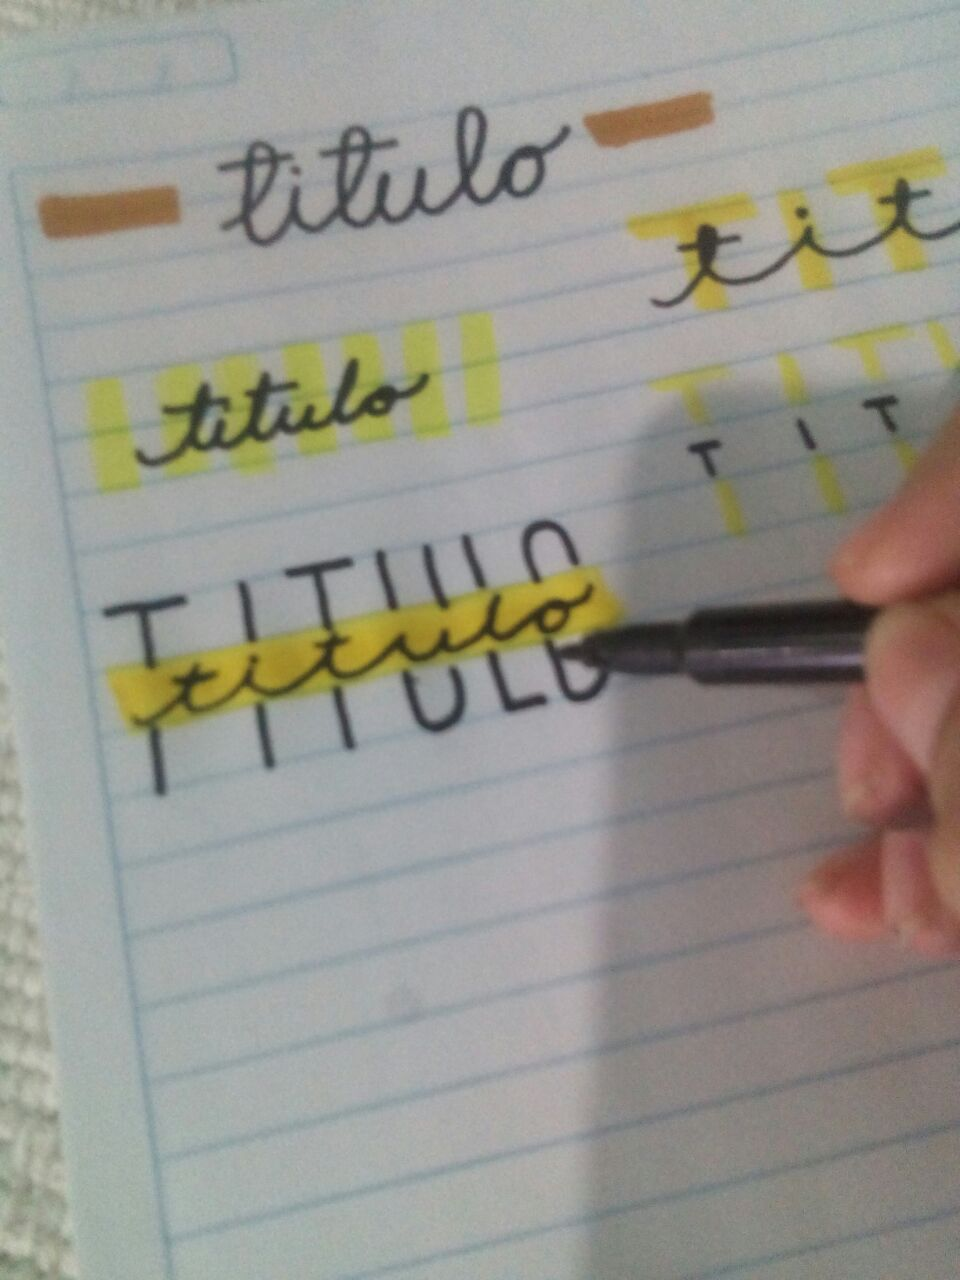
3 Tercero:
Haremos líneas en vertical con marcador donde arriba de ellas escribiremos con plumón negro la palabra en letra cursiva, vea la imagen
3 Third:
We will make vertical lines with a marker where above them we will write the word in italics with black marker, see the image
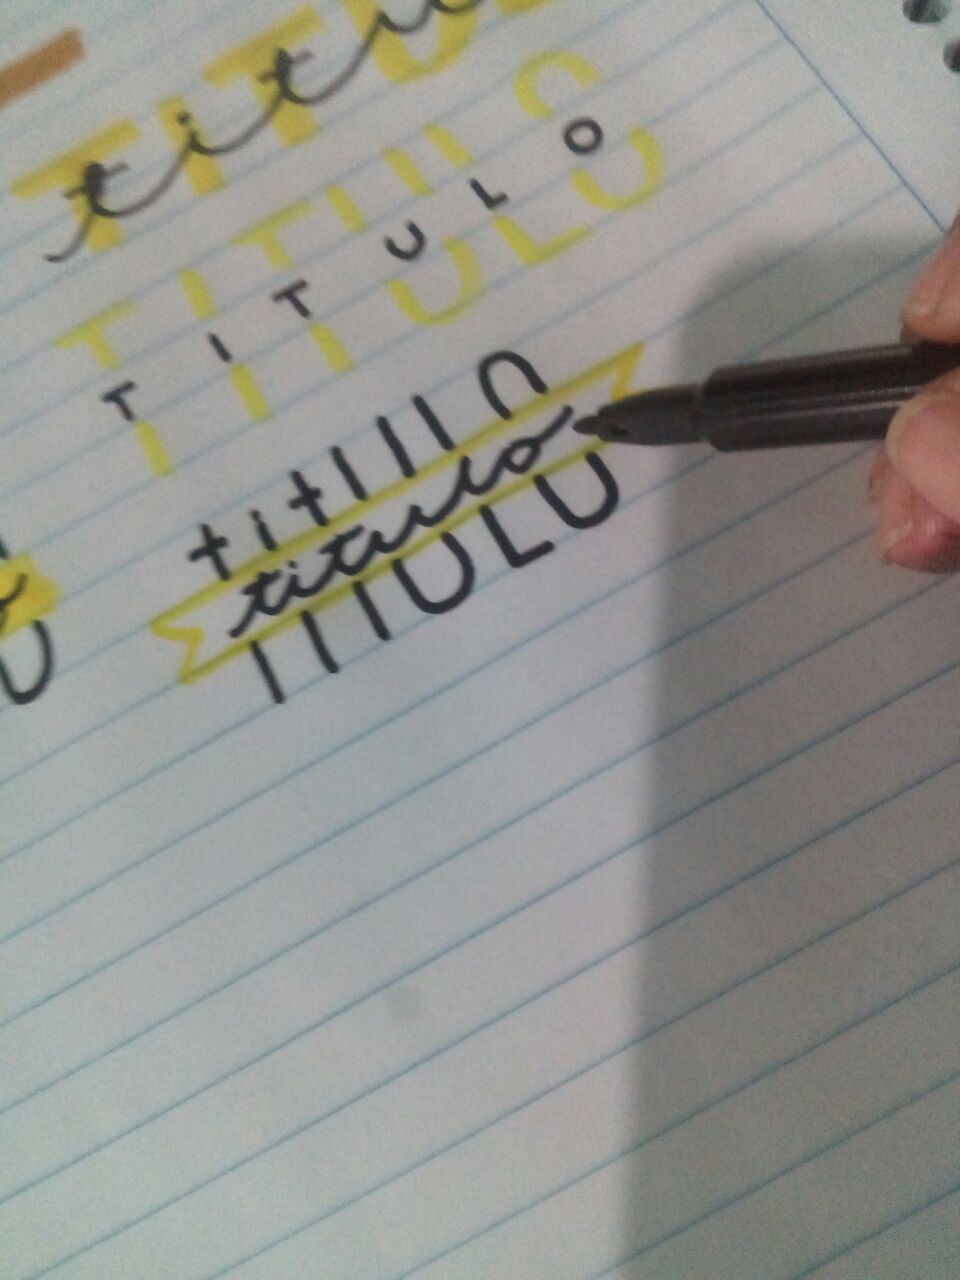
4 Cuarto:
Escribiremos letras de molde a medias con marcador (observe la imagen), dejando un espacio en medio de cada una para luego escribir allí la palabra con plumón, como se observa
4 Fourth:
We will write block letters in half with a marker (see the image), leaving a space in the middle of each one and then write the word there with marker, as seen in the image
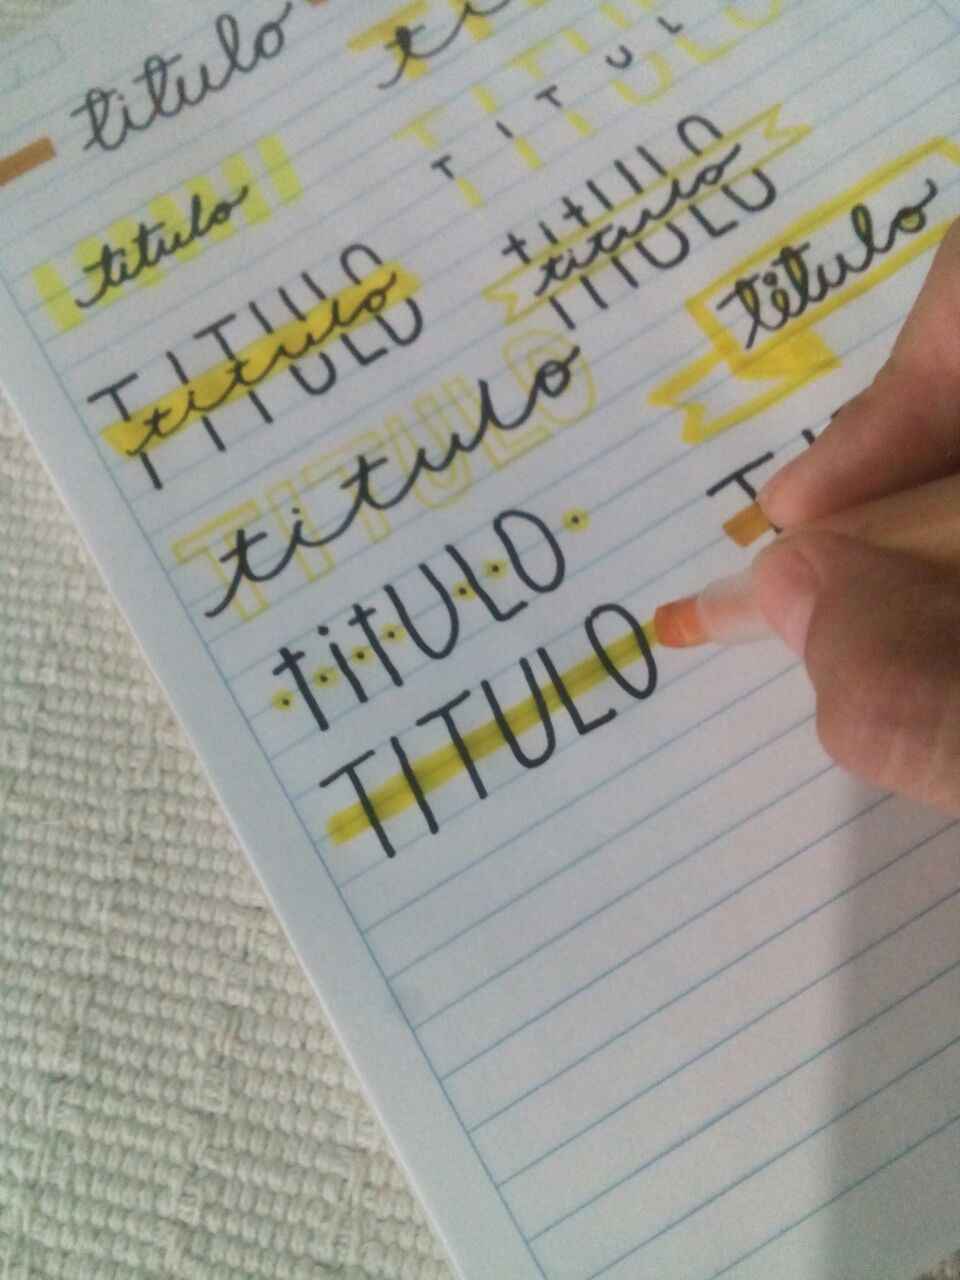
5 Quinto:
Es similar a la anterior, solo que utilizaremos el plumón para hacer las letras grandes a medias y con el marcador pasaremos una línea por allí, arriba de esa línea escribiremos la palabra en cursivas, veamos
5 Fifth:
It is similar to the previous one, only that we will use the marker to make the large letters in the middle and with the marker we will pass a line there, above that line we will write the word in italics, let's see

6 Sexto:
Repetiremos el proceso de hacer las letras a medias, pero lo haremos con plumón y en minúsculas, luego con un plumón de color y punta fina, haremos como si fuera un lazo, (vea la imagen), y dentro escribiremos en cursiva la palabra
6 Sixth:
We will repeat the process of making the letters half, but we will do it with pen and in lowercase, then with a colored pen and a fine point, we will do as if it were a bow, (see the image), and inside we will write the word in italics
7 Séptimo:
Para esta utilizaremos el estilo grafiti donde con un plumón punta fina y de color haremos las letras y arriba escribimos en cursivas con negro la palabra, como se ve en la imagen
7 Seventh:
For this we will use the graffiti style where with a fine point and colored marker we will make the letters and above we write the word in italics with black, as seen in the image
8 Octavo:
Haremos la figura que aparece en la imagen con plumón de color, adentro haremos las letras tienen que dejar un espacio para rellenarlas con color, veamos
8 Eighth:
We will make the figure that appears in the image with colored marker, inside we will make the letters they have to leave a space to fill them with color, let's see
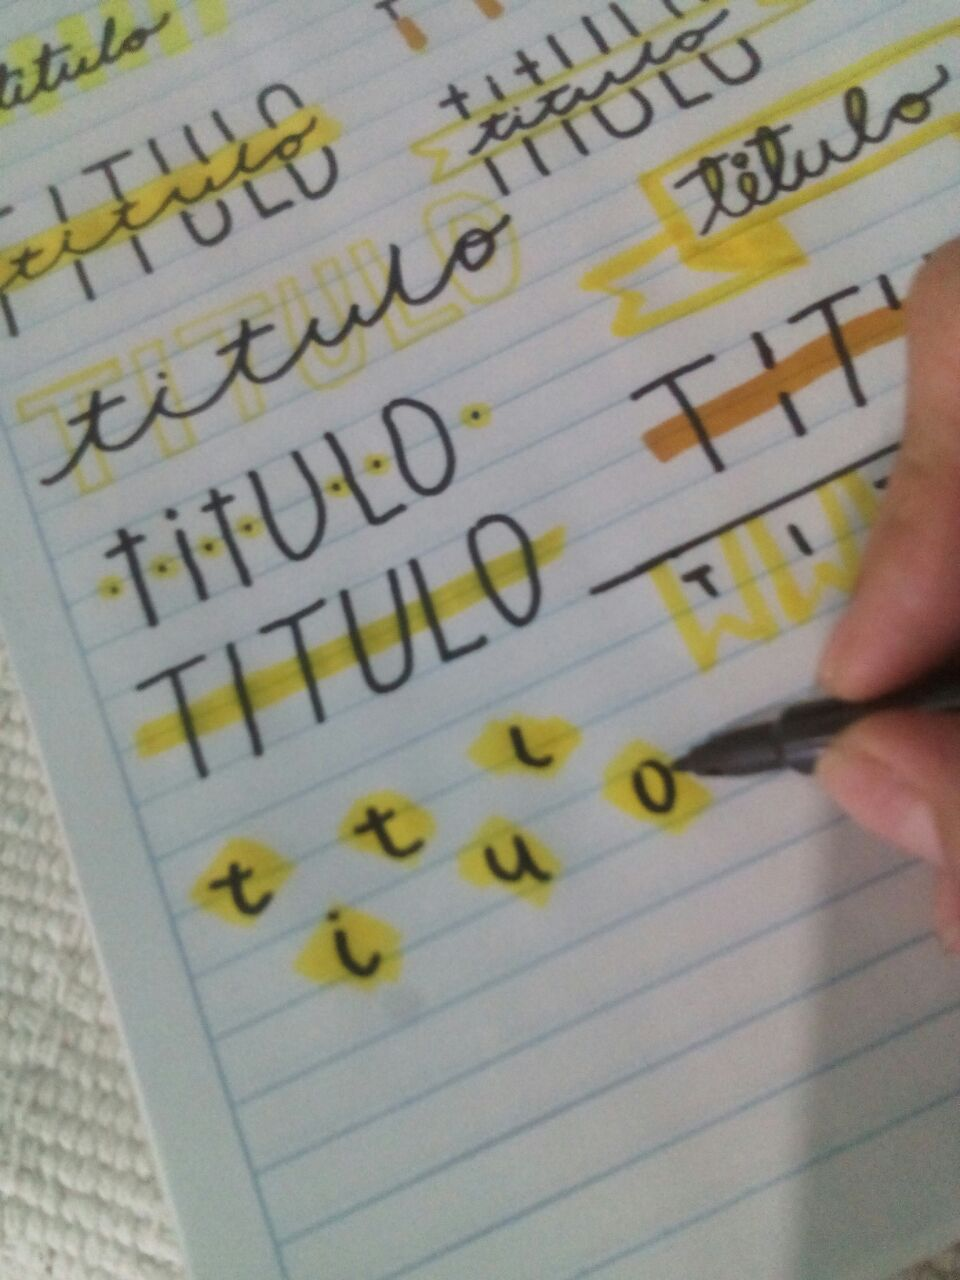
9 Noveno:
Con plumón negro escribimos la palabra en letras de molde y minúscula entre letra haremos un circulo de color y en el centro un punto negro, como aparece en la imagen
9 Ninth:
With black marker we write the word in block letters and lowercase between letters we will make a colored circle and in the center a black point, as it appears in the image

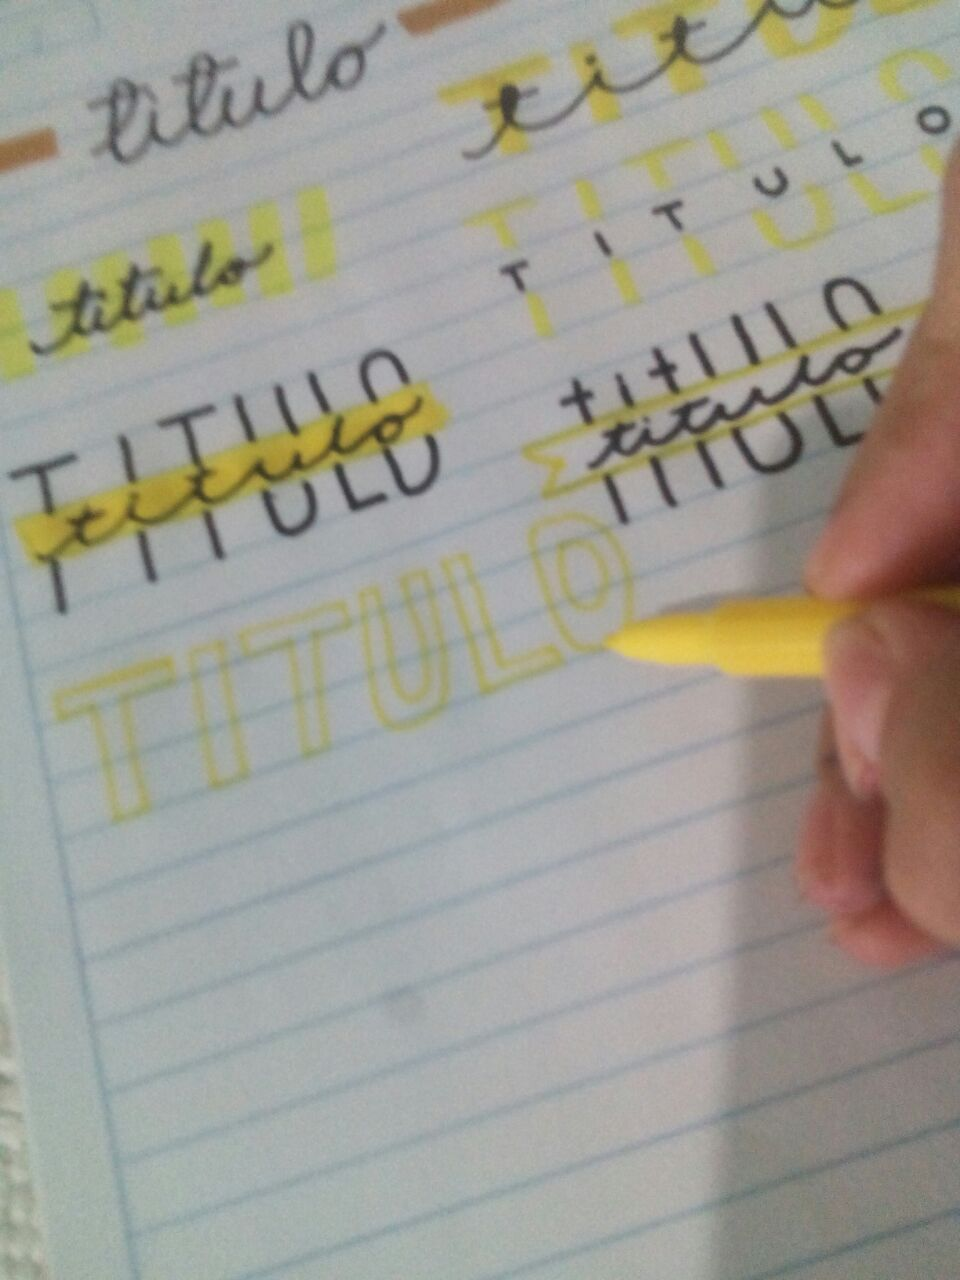
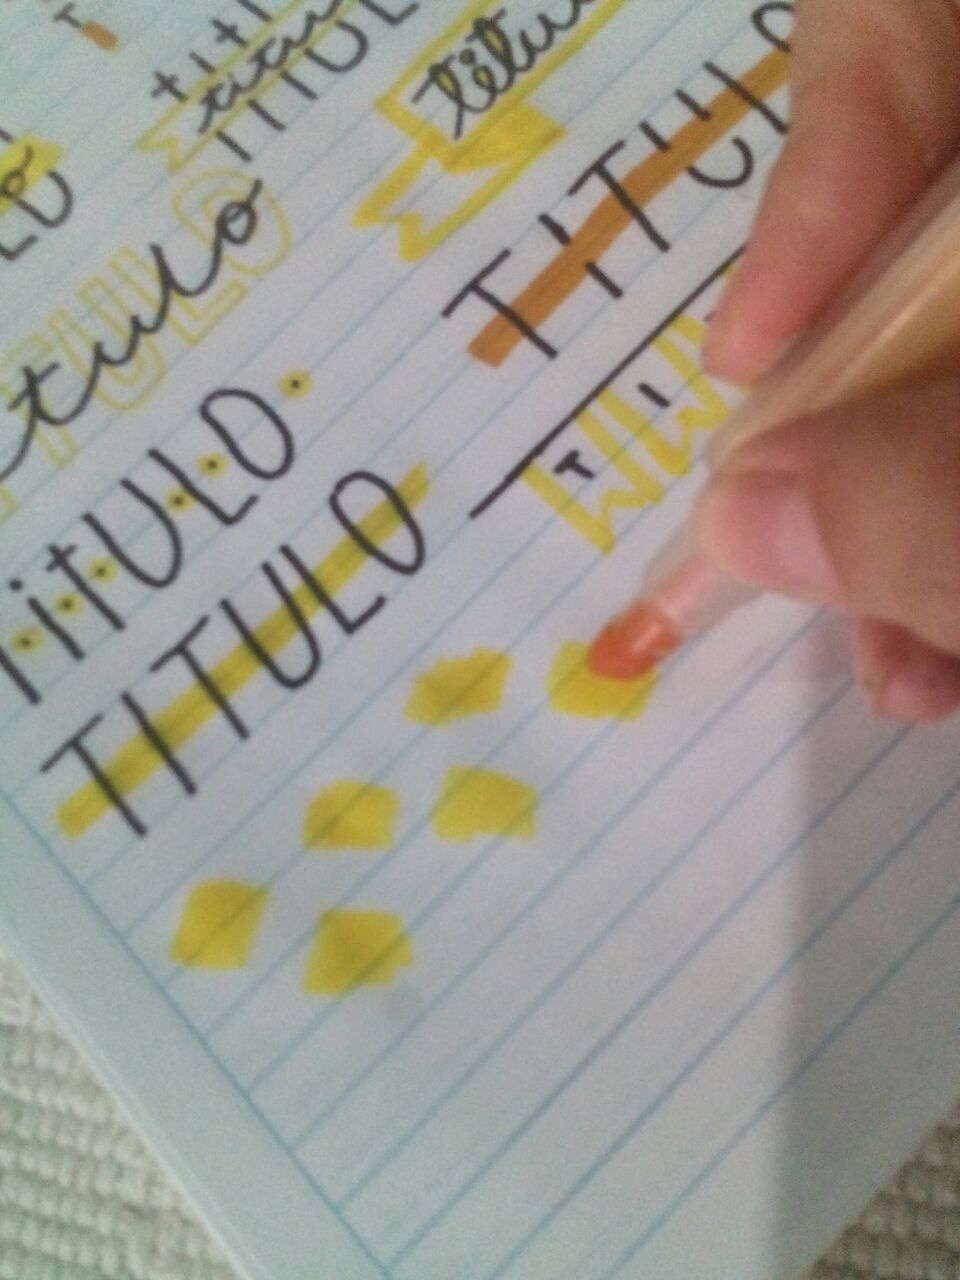
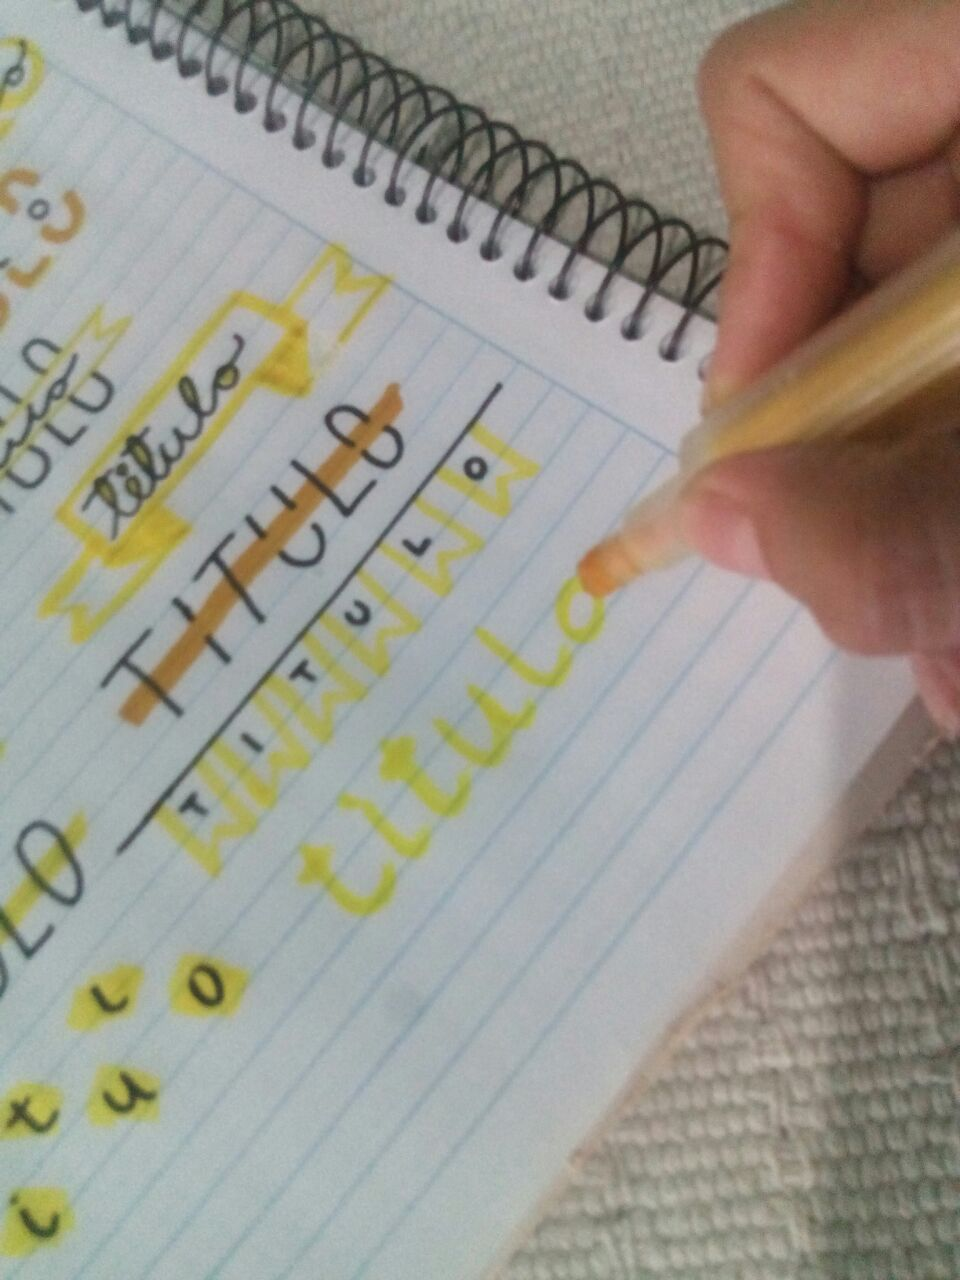
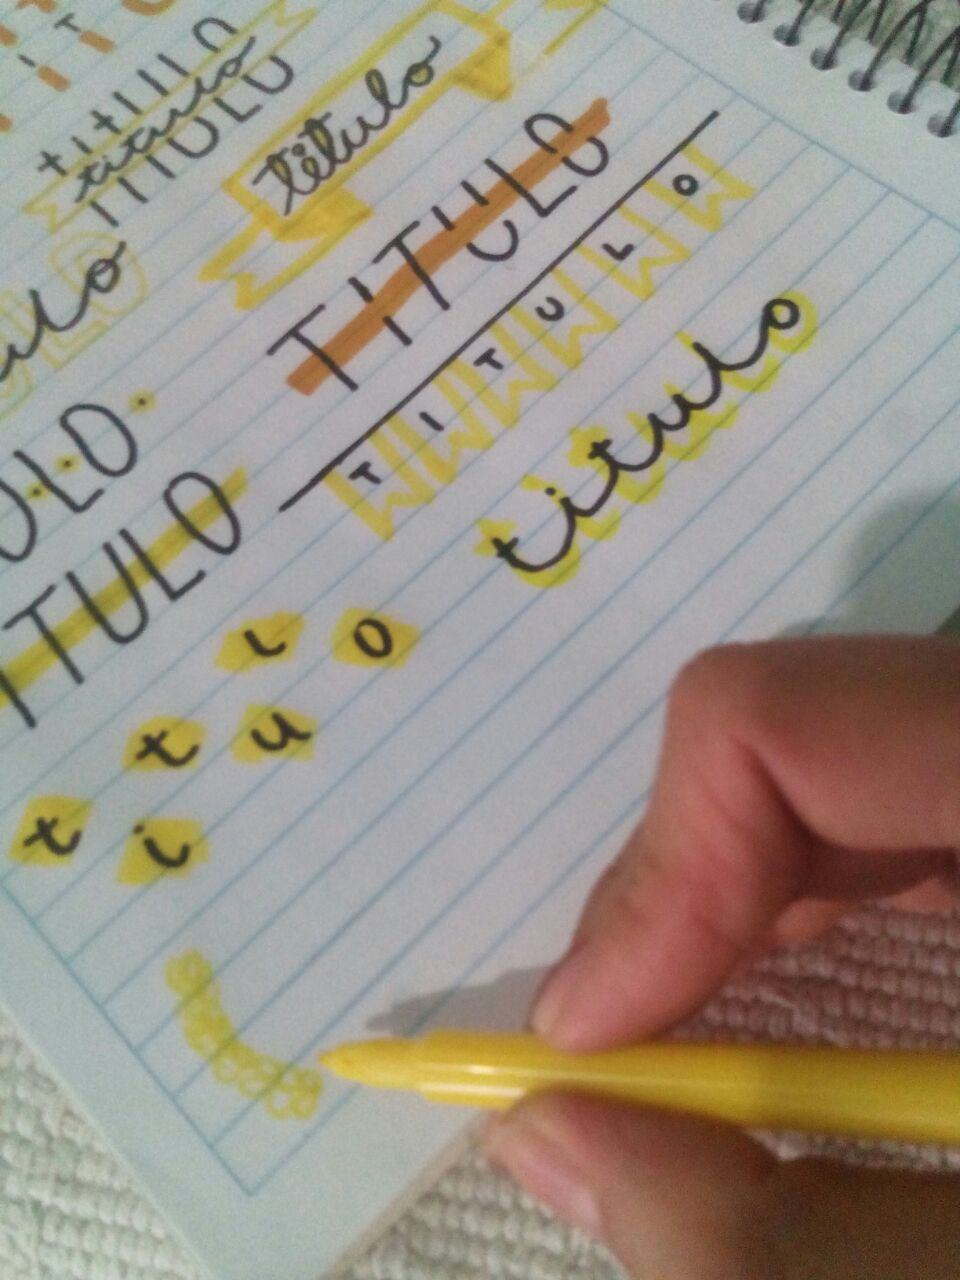
10 Décimo:
Para esta haremos con plumón negro una letra normal y una a medias, para luego pasar una línea de color por el medio, dando la ilusión que la línea va por delante y por atrás de la letra, mire la imagen
10 Tenth:
For this we will make a normal letter and a half letter with black marker, and then pass a colored line through the middle, giving the illusion that the line goes in front of and behind the letter, look at the image
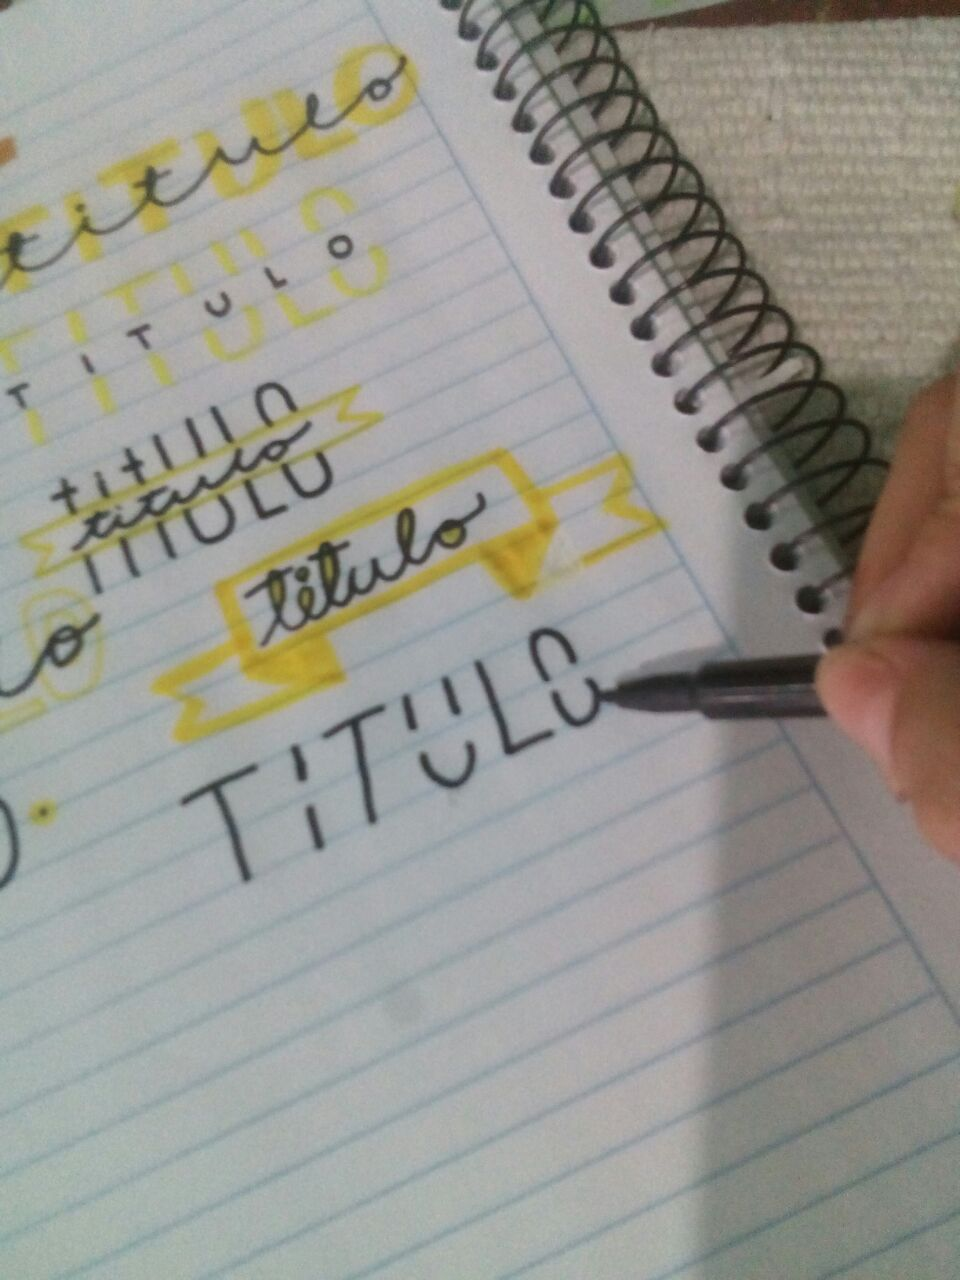
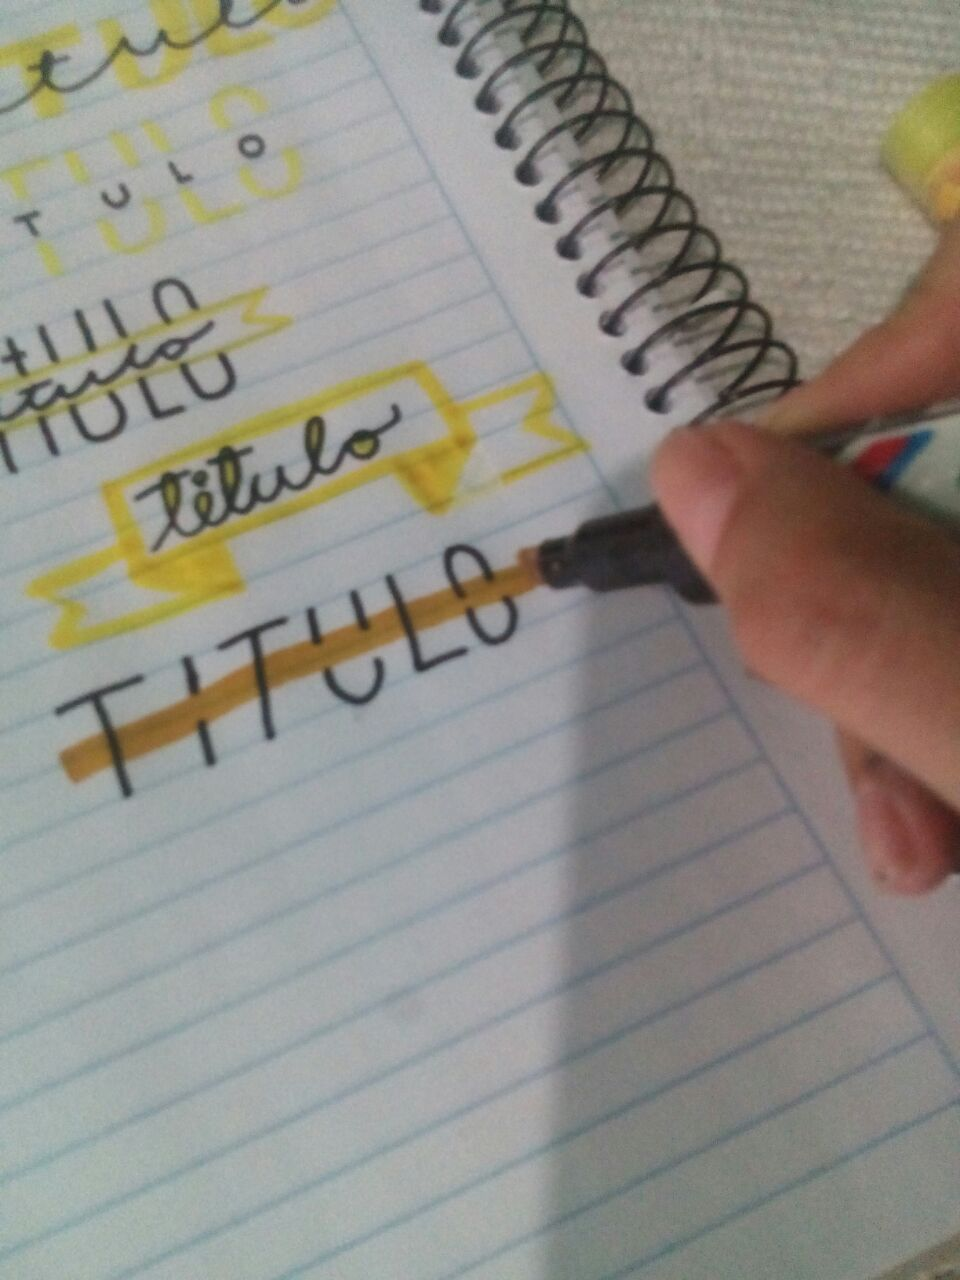
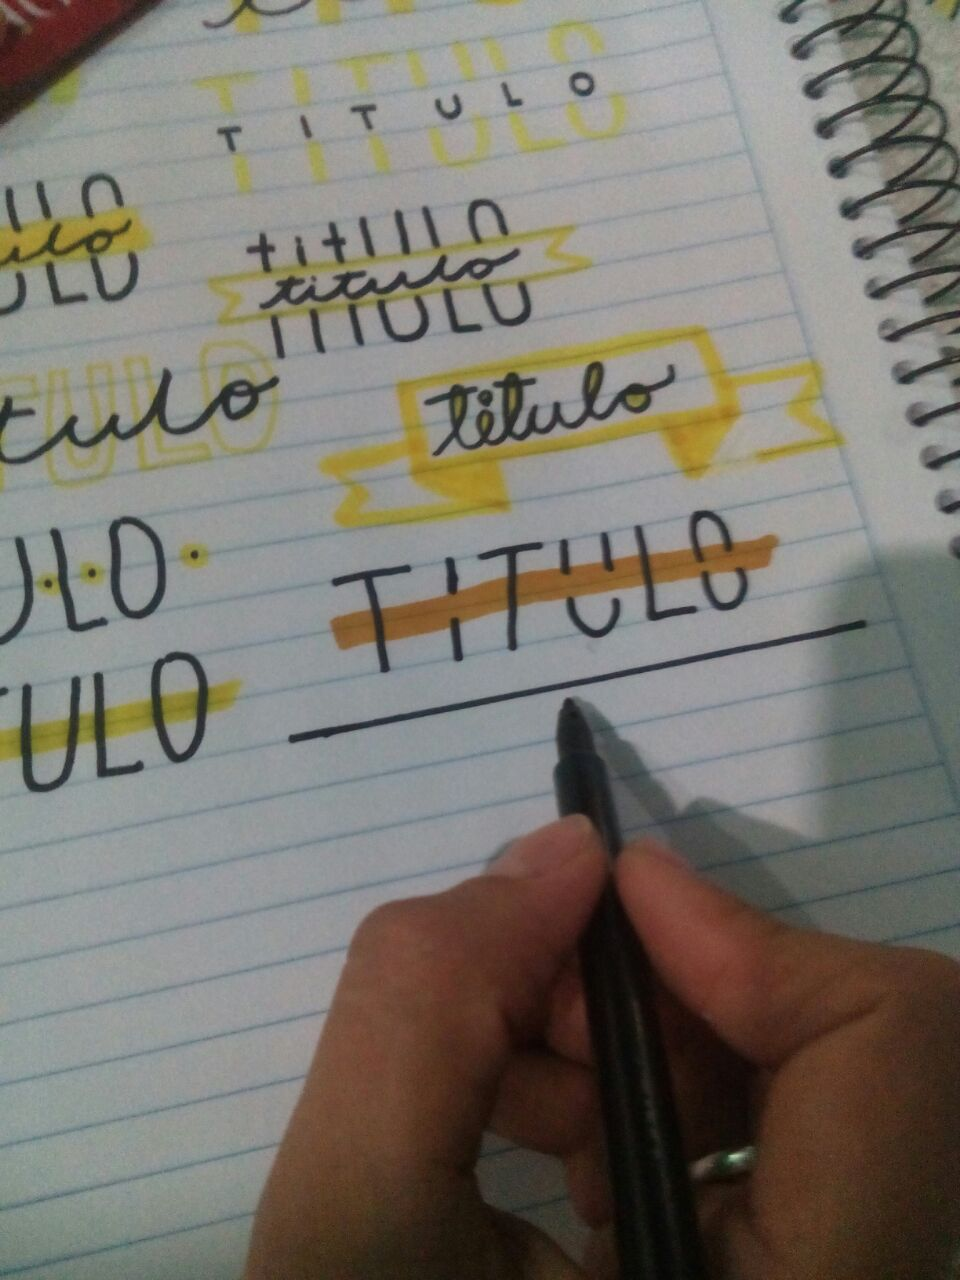
11 Undécimo:
Escribimos la palabra en mayúscula y con letra de molde para luego pasar una línea por el medio de la palabra
11 Eleventh:
We write the word in capital letters and with block letters and then pass a line through the middle of the word
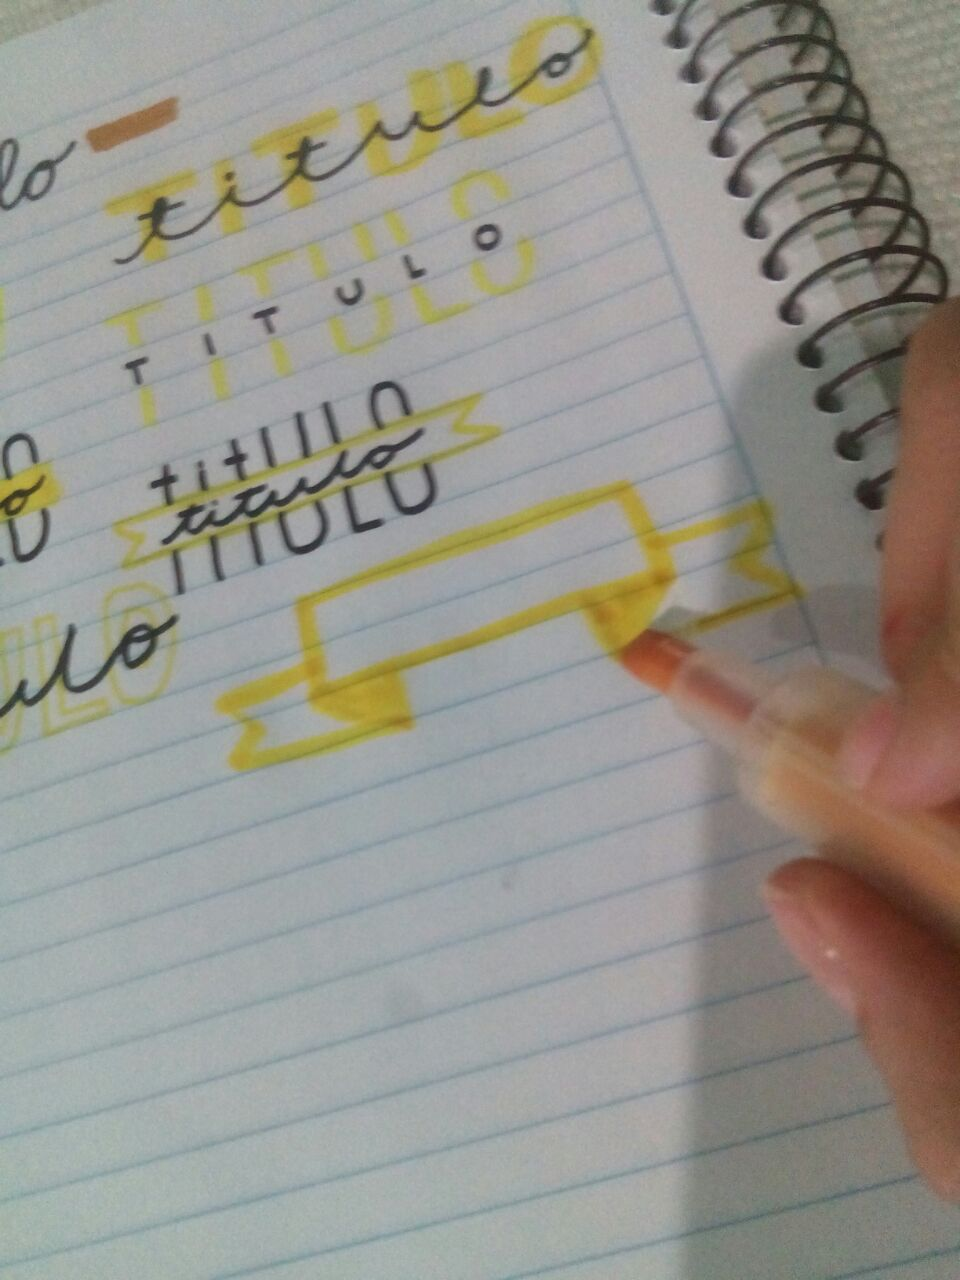
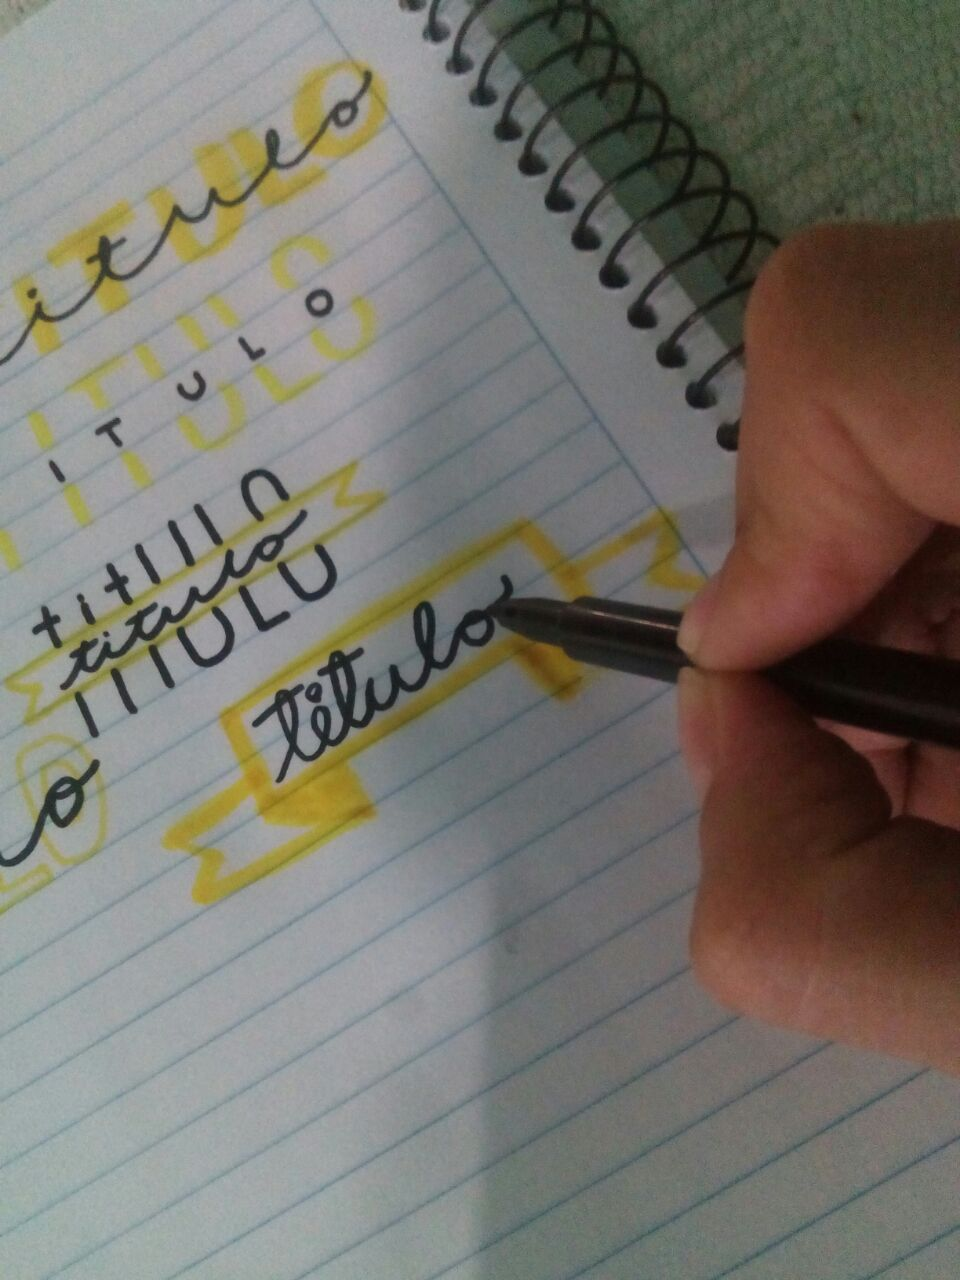
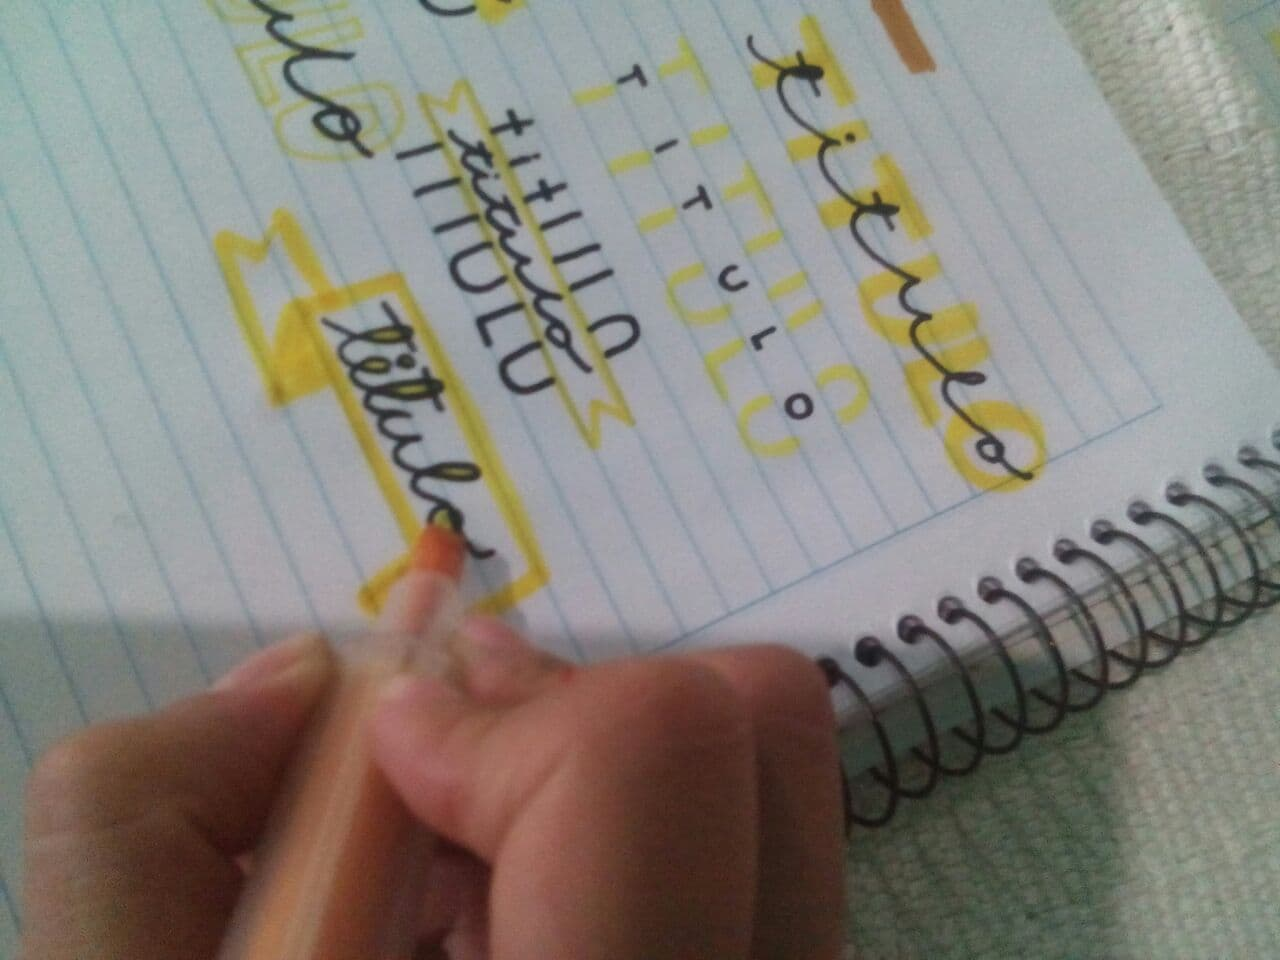
12 Duodécimo:
Utilizaremos la regla y el plumón negro para trazar una línea, luego haremos banderines con marcador de color donde irán las letras, veamos
12 Twelfth:
We will use the ruler and the black marker to draw a line, then we will make pennants with a colored marker where the letters will go, let's see

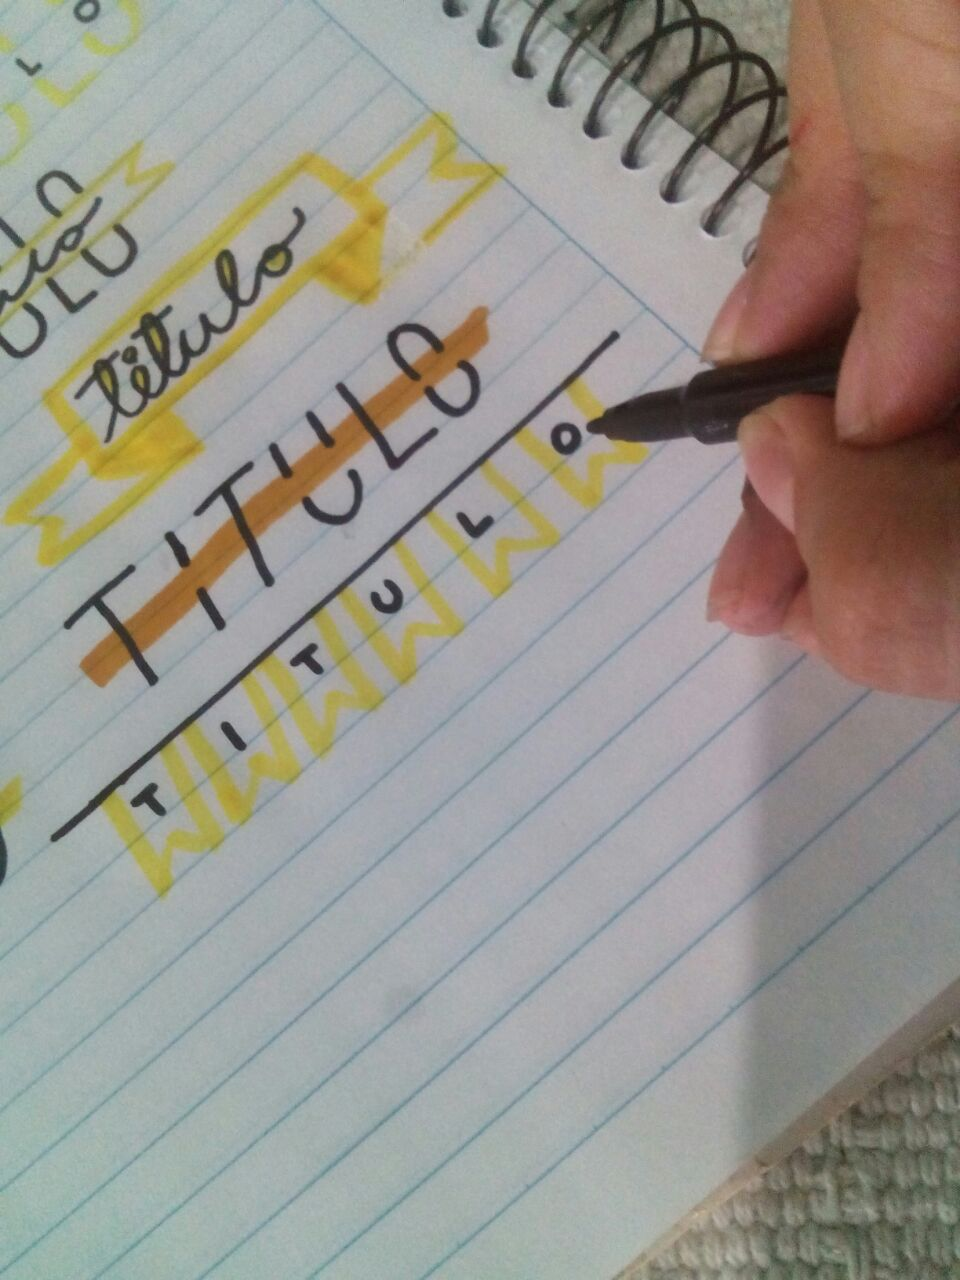
13 Decimotercer:
Haremos manchitas de colores con marcador, correspondientes a las letras de la palabra y con el plumón escribiremos las letras
13 Thirteenth:
We will make colored spots with a marker, corresponding to the letters of the word and with the marker we will write the letters
14 Decimocuarto:
Con marcadores escribiremos letras de molde estilo minúsculas, en medio con plumón negro haremos las letras en cursiva tratando que tengan relación con las de abajo
14 Fourteenth:
With markers we will write lowercase style block letters, in the middle with black marker we will make the letters in italics trying to be related to the ones below
15 Decimoquinto diseño:
Empezaremos haciendo un ramo de hojas con el plumón de color, luego con el plumón negro escribiremos las letras, cerramos con el ramo de hojas y rellenamos las letras, como se muestra en las imágenes
15 Fifteenth design:
We will start by making a bouquet of leaves with the colored feather, then with the black feather we will write the letters, close with the bouquet of leaves and fill in the letters, as shown in the images

Miren que lindo se ven todos, estoy encantada con el resultado, sin duda será algo que ponga en practica.
Look how cute they all look, I am delighted with the result, without a doubt it will be something that I put into practice.
Si te gusto no olvides seguirme para más contenido de calidad.
If you liked it, don't forget to follow me for more quality content.
.jpg)
Nos leemos pronto. 💫
We read soon.