¡¡¡Bienvenido a mi Tutorial!!!❤️
Welcome to my Tutorial!!!❤️
Organizador
Organizer
Hola bella comunidad #hive. Hoy me siento mejor de salud y bueno no quería pasar por alto la invitación de mi amiga @jennyzer porque me gusta el reciclaje.
Hoy quiero compartir con ustedes un hermoso organizador que las ideas me iban surgiendo a medida que lo iba haciendo porque de verdad no sabía qué hacer y empecé a recoger todos los materiales y retazos que tenía. Fue un reto para mi hacer esto pero poco a poco me fueron surgiendo las ideas y bueno espero les guste. Este organizador fue elaborado con materiales de reciclaje que puedes conseguirlo en casa y para las decoraciones puedes conseguirlo también en casa o comprar dependiendo de tu idea en mercerías. El tiempo de duración depende de ti. Este organizador es ideal para organizar tus cosas en mi caso en mi mesa donde trabajo con manualidades y otros tipos de arte para #hive y también lo puedes utilizar como obsequio para tus amigos o familiares. Lo bueno también de este tutorial es que lo puedes hacer junto con tus niños para que ellos vayan aprendiendo desde pequeño a reciclar ya que el reciclaje es importante para le mejora de nuestro planeta.
Antes de comenzar lavarse las manos y tomar medidas preventivas en la actividad.
Hello beautiful #hive community. Today I feel better in health and well I did not want to ignore the invitation of my friend @jennyzer because I like recycling.
Today I want to share with you a beautiful organizer that ideas came to me as I was doing it because I really did not know what to do and I began to collect all the materials and scraps that I had. It was a challenge for me to do this but little by little ideas came to me and well, I hope you like it. This organizer was made with recycling materials that you can get at home and for decorations you can also get it at home or buy depending on your idea in haberdashery. The duration time is up to you. This organizer is ideal to organize your things in my case on my table where I work with crafts and other types of art for #hive and you can also use it as a gift for your friends or family. The good thing about this tutorial is that you can do it together with your children so that they can learn from childhood to recycle since recycling is important for the improvement of our planet.
Before starting wash your hands and take preventive measures in the activity.
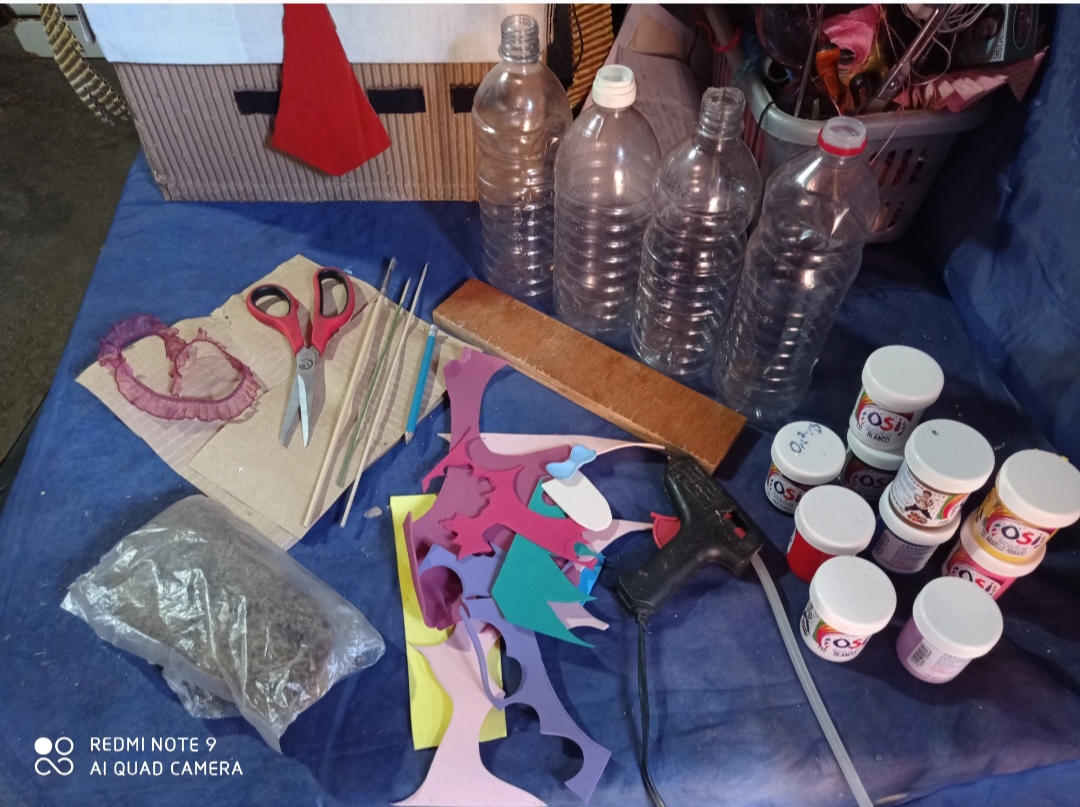
¿Que se necesita para la creación de este hermoso organizador?
What is needed to create this beautiful organizer?
Materiales:
4 Potes plásticos
Pintura a tú gusto (en mi caso utilice morado, rosado, amarillo y azul).
1 Tijera
Foami de colores (utilice algunos pequeños retazos que tenía guardados).
1 Palillo de altura
Cartón
Musgo
1 Tablita de base
Silicon
Plancha
1 Exacta
1 Pincel
Molde para las letras
Materials:
4 plastic pots
Paint to your liking (in my case I used purple, pink, yellow and blue).
1 scissors
Colored foams (use some small scraps you had saved).
1 Height stick
Paperboard
Moss
1 base board
Silicon
Iron
1 Exact
1 Brush
Letter mold
Procedimiento:
Process:
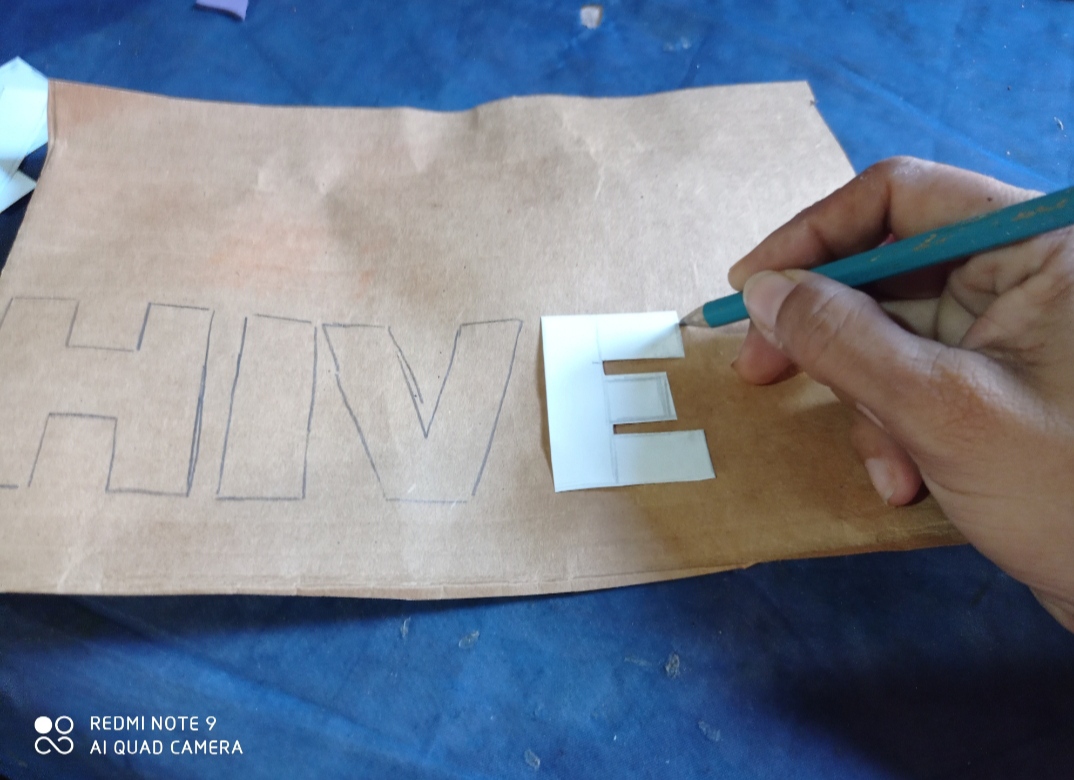
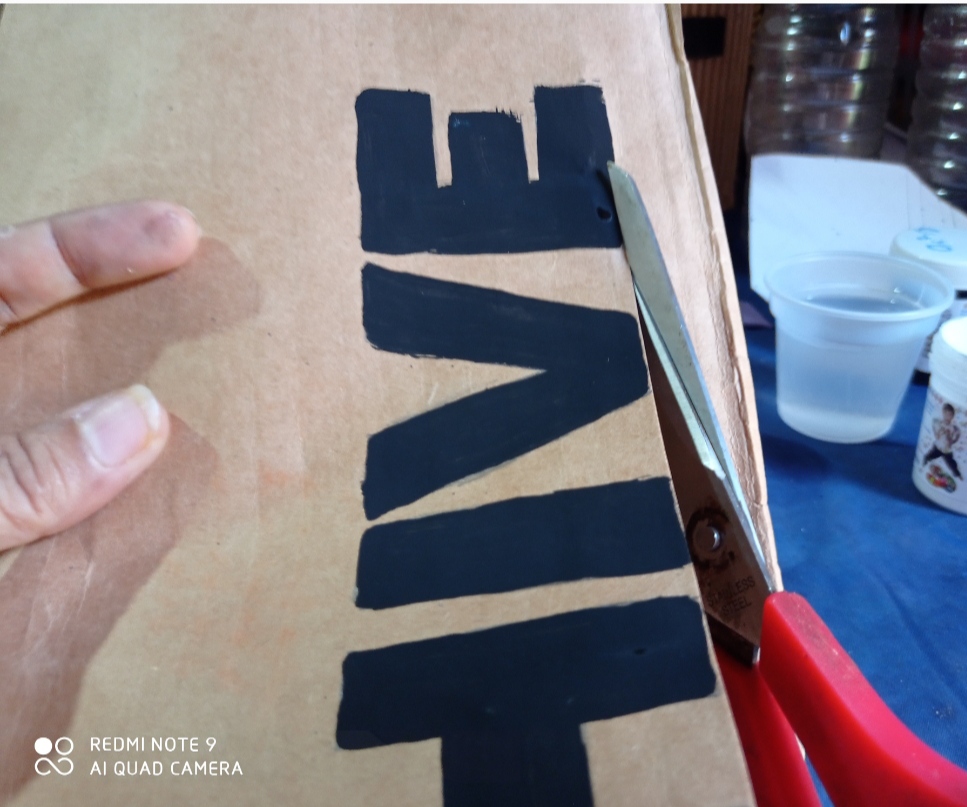
Marcamos con el lápiz en el cartón las letras de la palabra que se me vino a la mente en ese momento "hive".
We marked with the pencil on the cardboard the letters of the word that came to mind at that moment "hive".
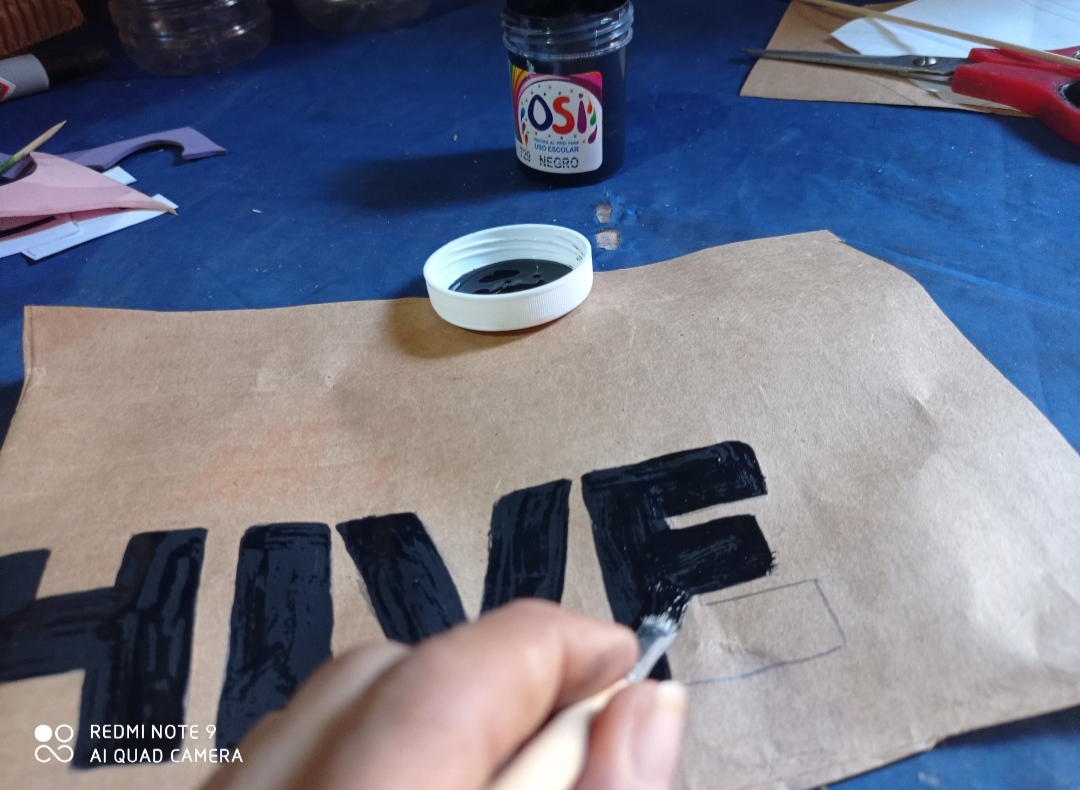
Una vez marcadas se pintan. Yo en mi caso utilice el color negro. Dejar secar.
Once marked, they are painted. In my case, I used the color black. Let dry.
Luego se recorta cada letra.
Then each letter is cut out.
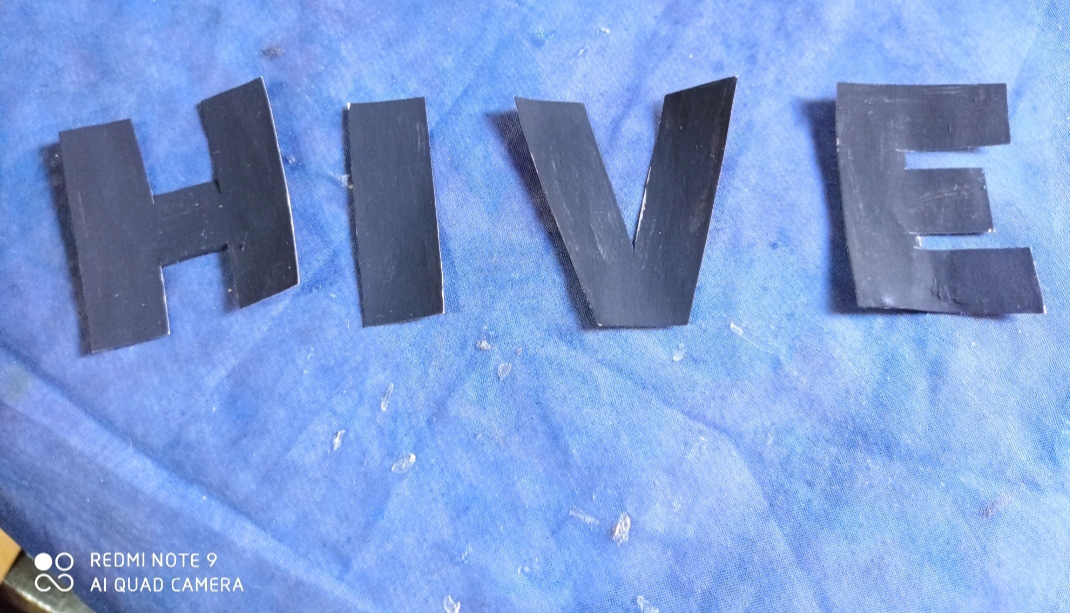
Aquí las pueden observar cada una recortadas y listo ya tenemos la palabra lista.
Here you can see each cut out and ready we have the word ready.
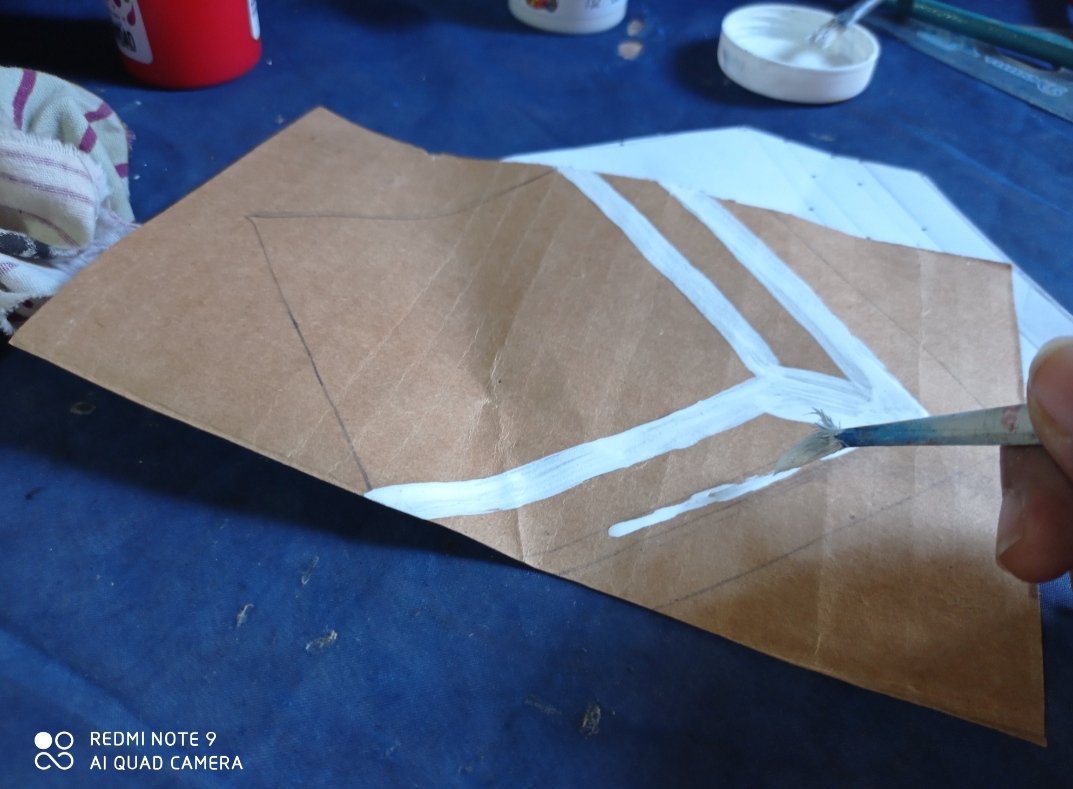
Ahora pintamos el logo que se me ocurrió en ese momento ponerlo. Una vez marcado en el cartón se pinta la parte que va en blanco. Dejar secar.
Now we paint the logo that occurred to me at that time to put it. Once marked on the cardboard, the part that is blank is painted. Let dry.
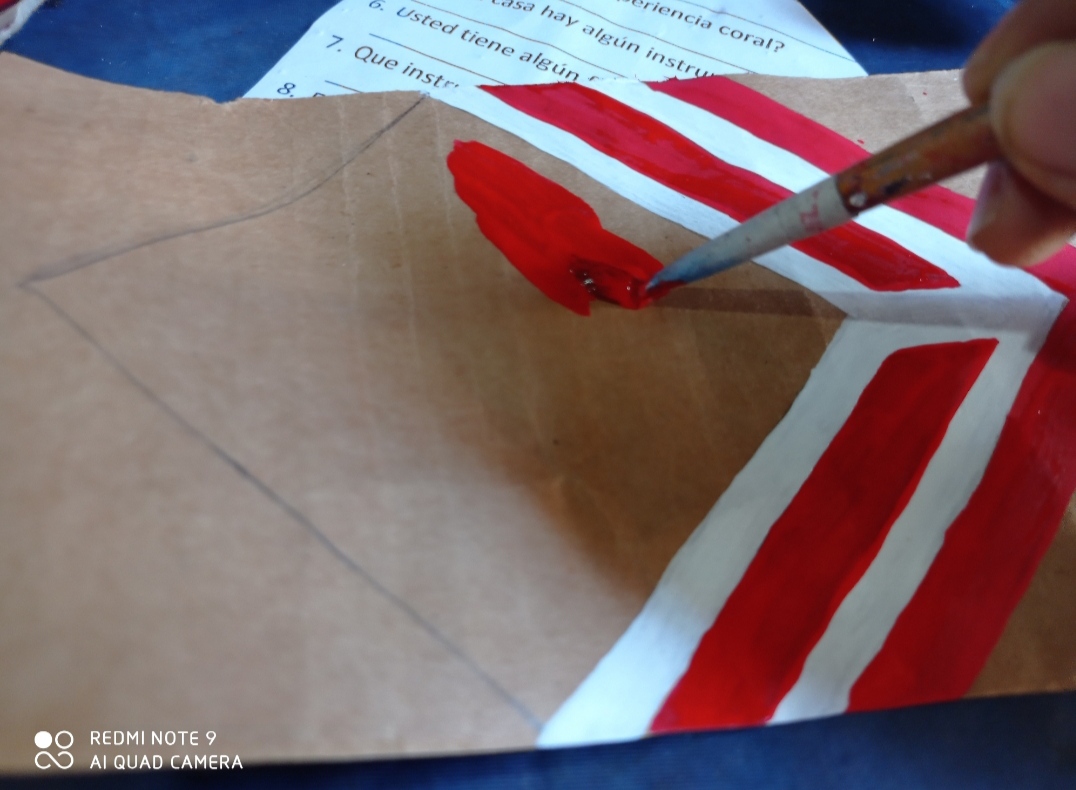
Se pinta ahora la parte roja y dejar secar.
Now paint the red part and let it dry.
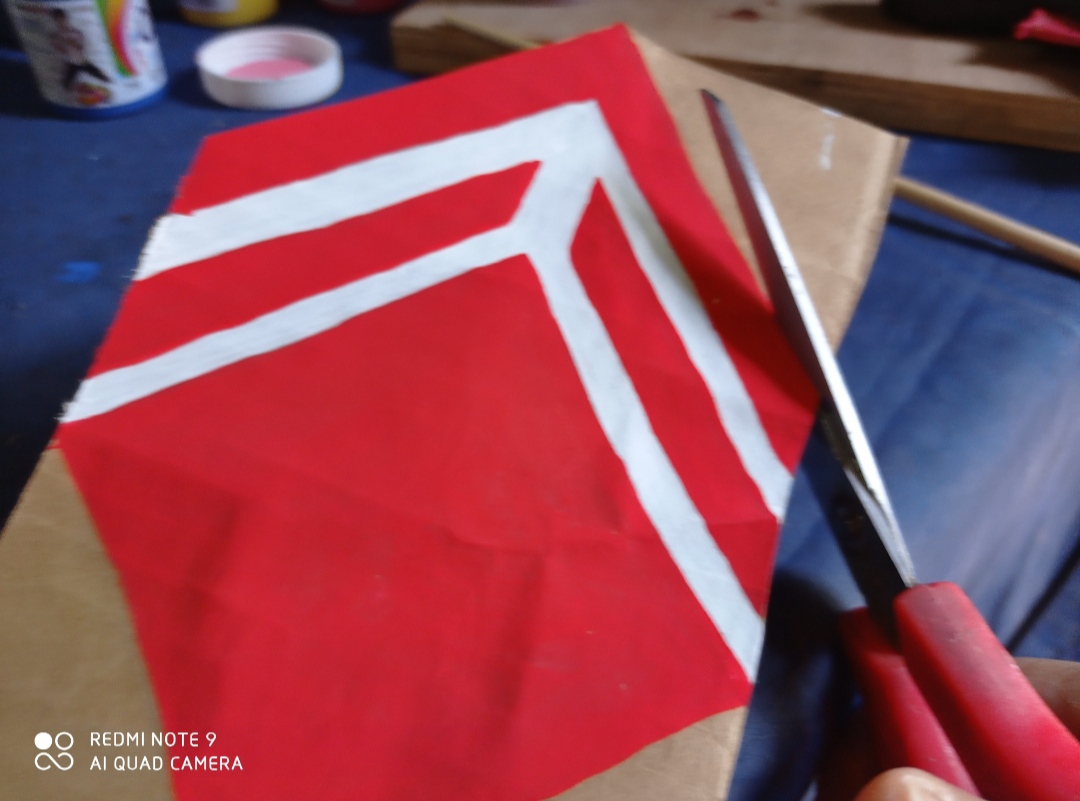
Ahora se recorta.
Now it is trimmed.
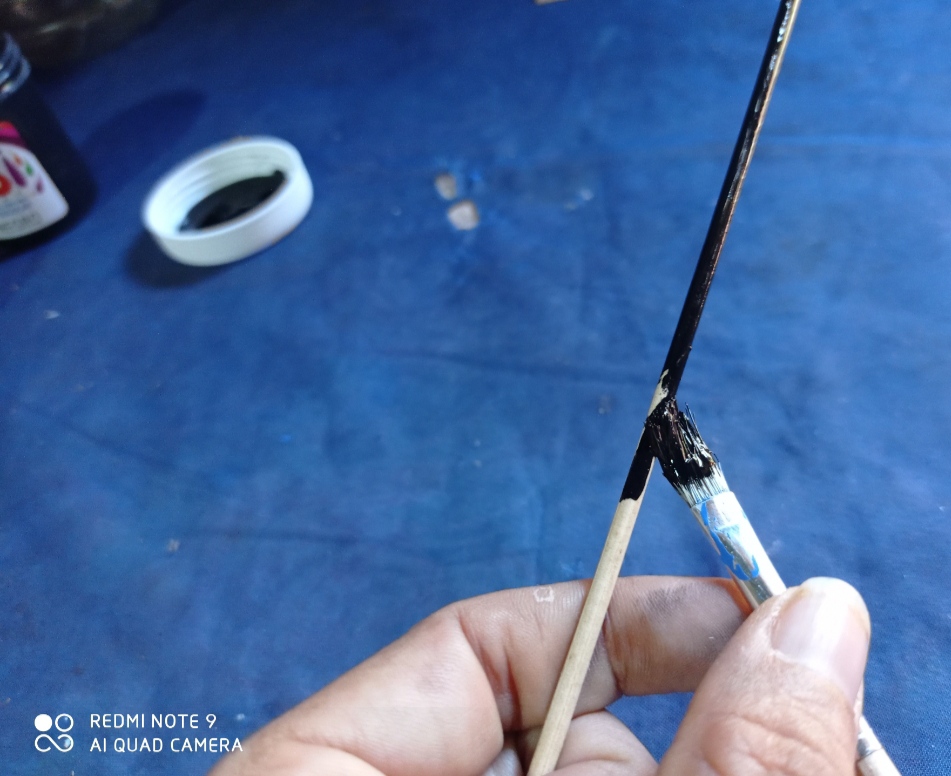
Se pinta de negro el palillo de altura. Dejar secar.
The tall stick is painted black. Let dry.
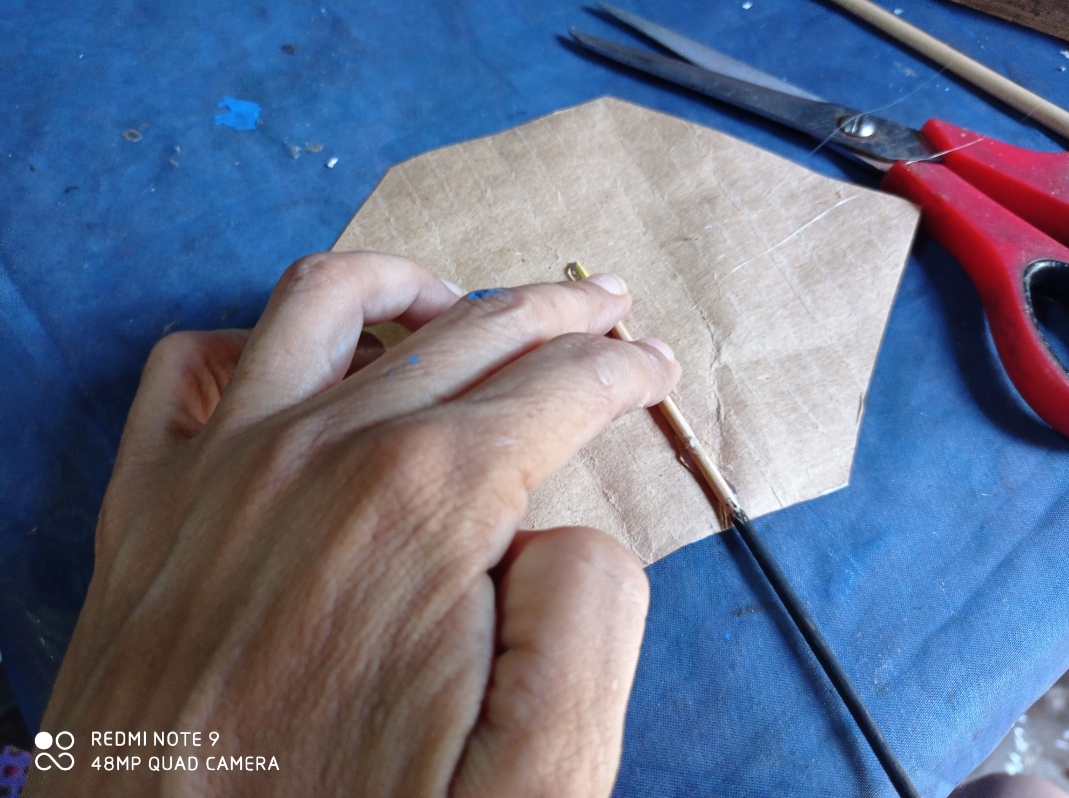
Después se pega el palillo con Silicon por la parte de atrás del logo.
Then stick the toothpick with Silicon on the back of the logo.
Finalizamos tapándo el palillo para mejor estética.
We finish by covering the toothpick for better aesthetics.

Y aquí tenemos el logo ya listo.
And here we have the logo ready.

Decoramos la base con una elástica o cinta decorativa pegándola con Silicon.
We decorate the base with an elastic or decorative tape, gluing it with Silicon.
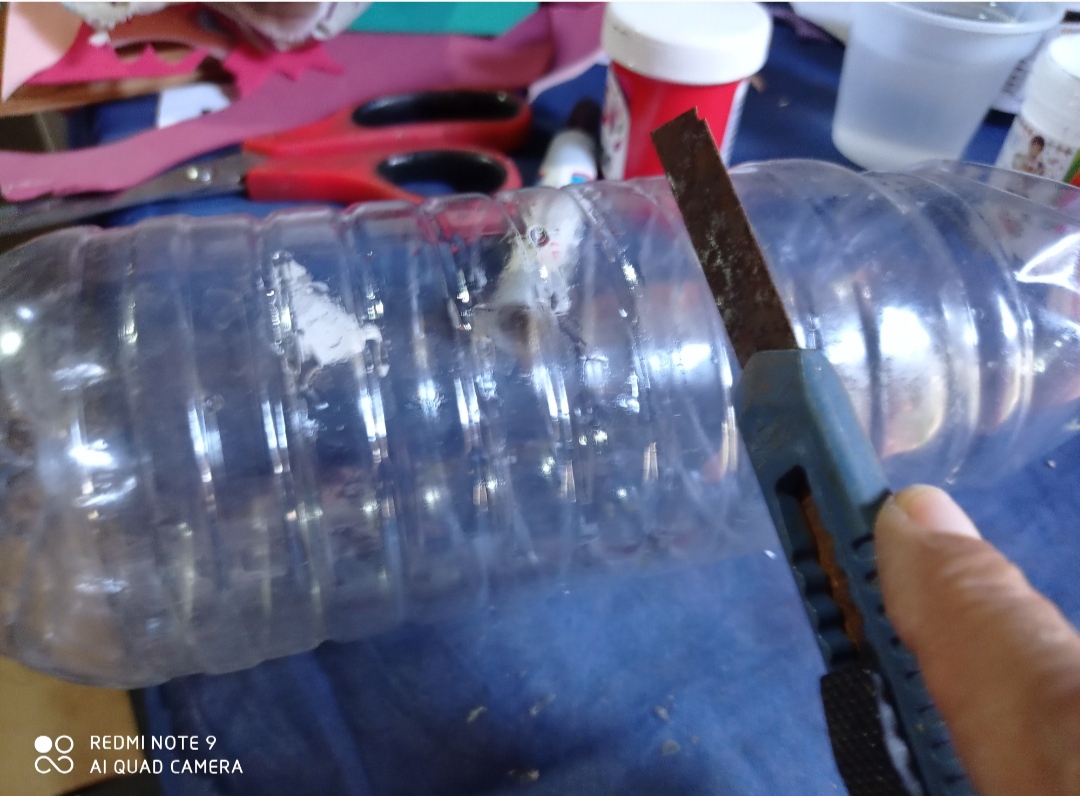
Comenzamos ahora haciendo los envases organizadoras. Se pica primero con la exacta para facilitar el corte.
We start now by making the organizing packages. It is minced first with the exact one to facilitate the cut.
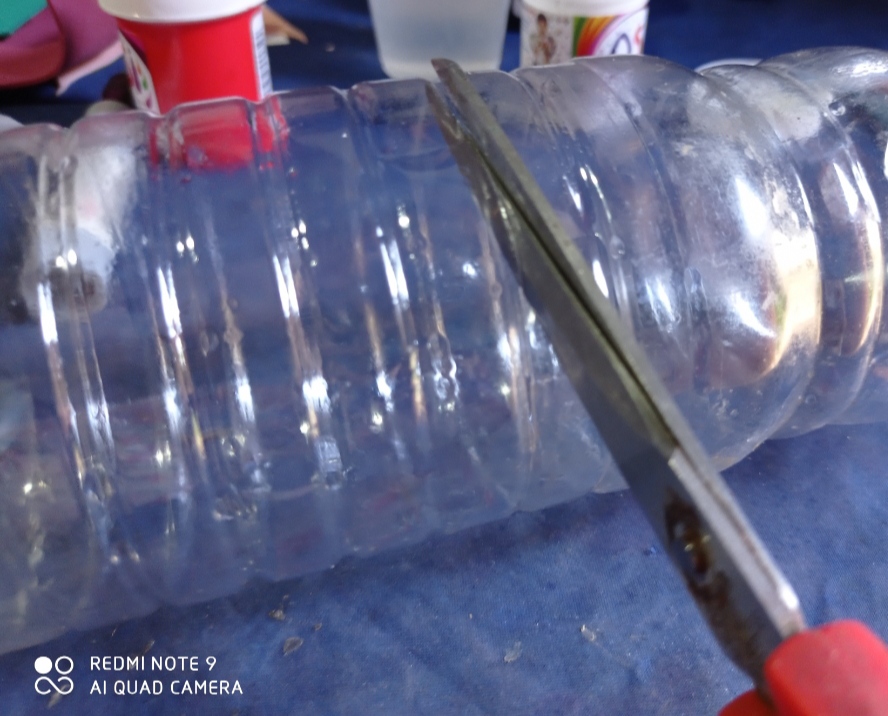
Luego se recorta con la tijera que quede al nivel.
Then it is trimmed with the scissors that is level.
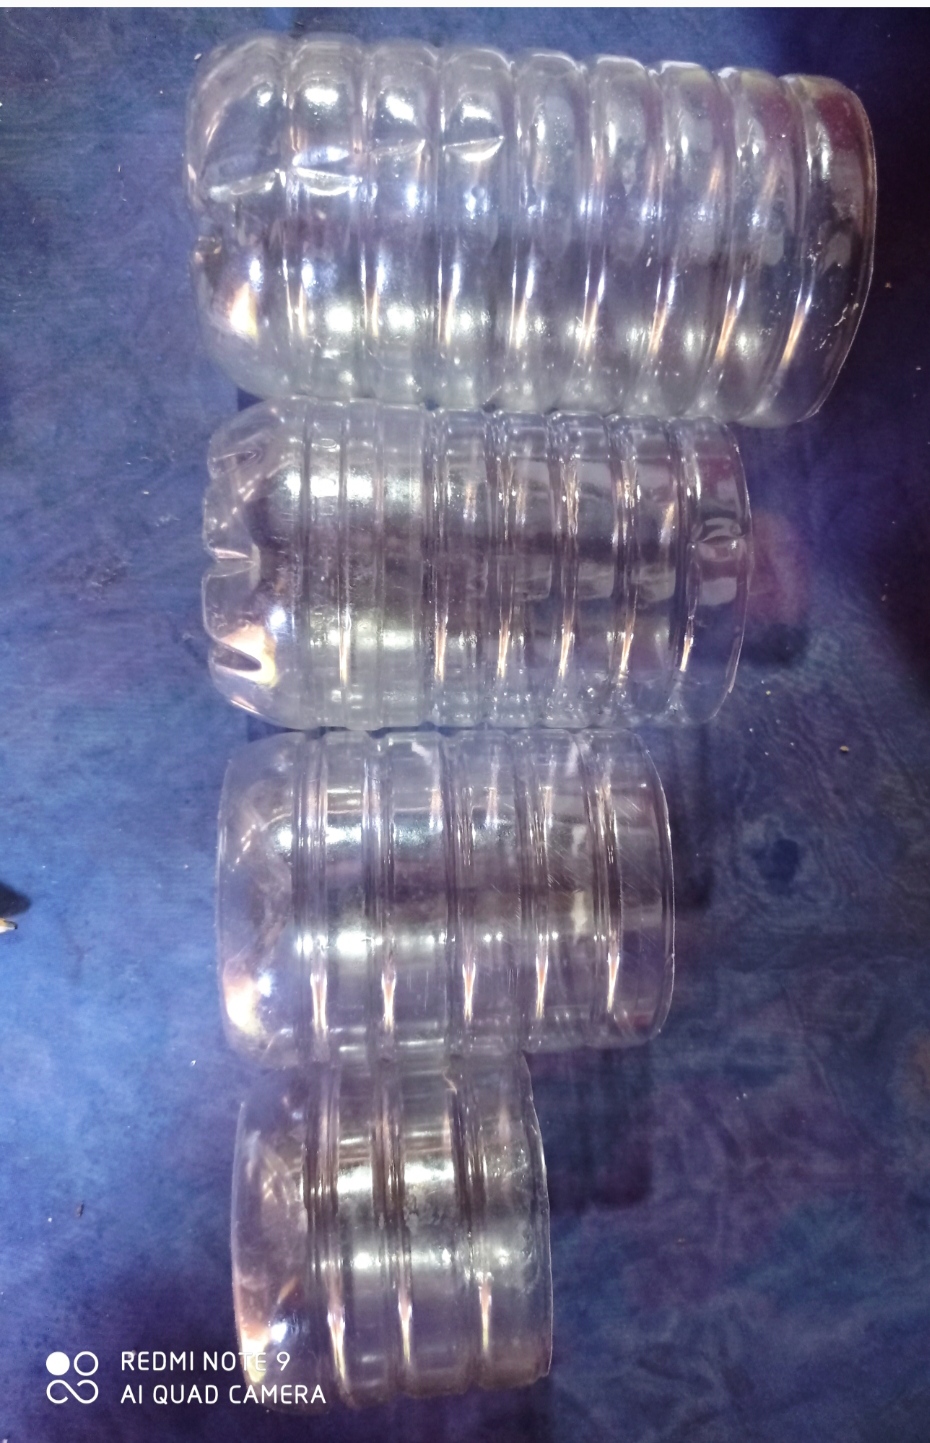
Yo los corte de diferentes tamaños para variar.
I cut them to different sizes for variety.
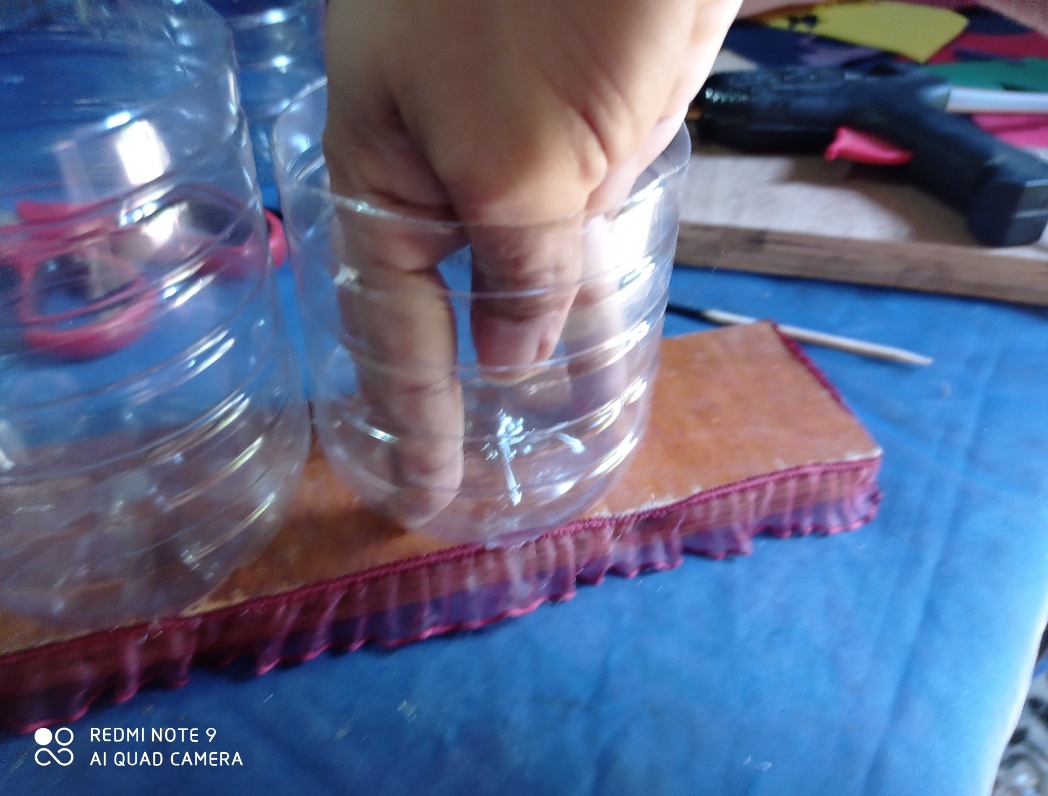
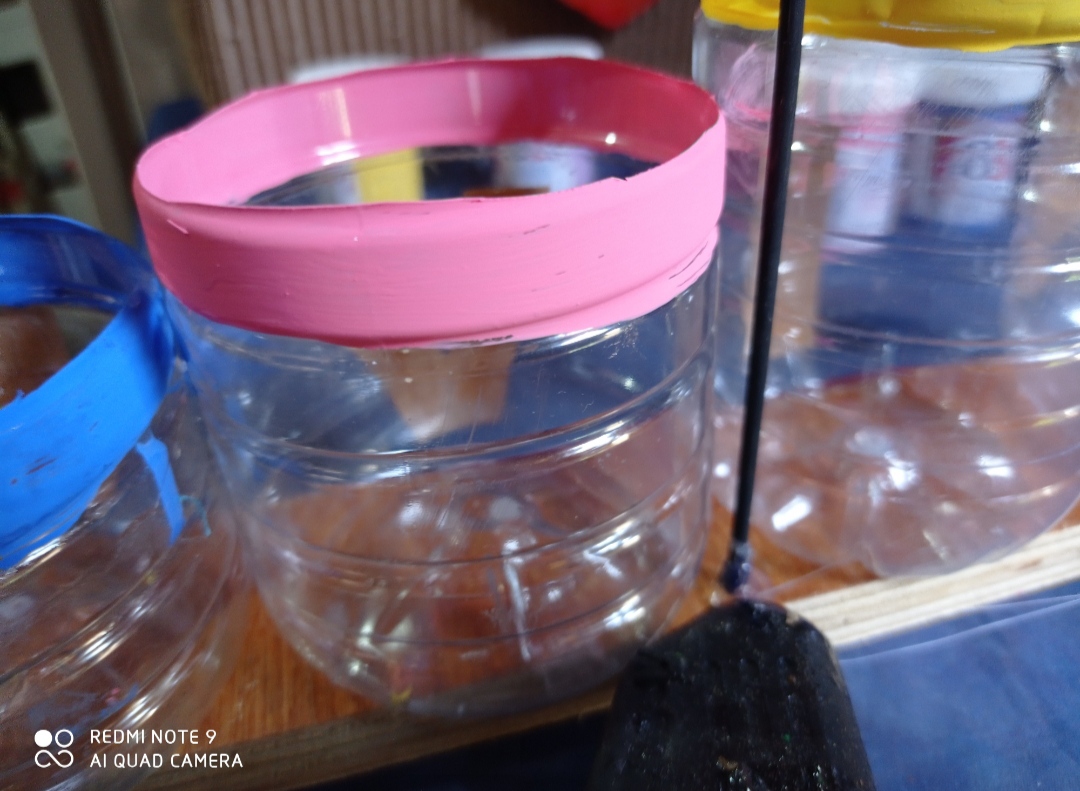
Una vez cortados se pegaron en la base con silicon haciendo presión.
Once cut, they were glued to the base with silicone pressing.
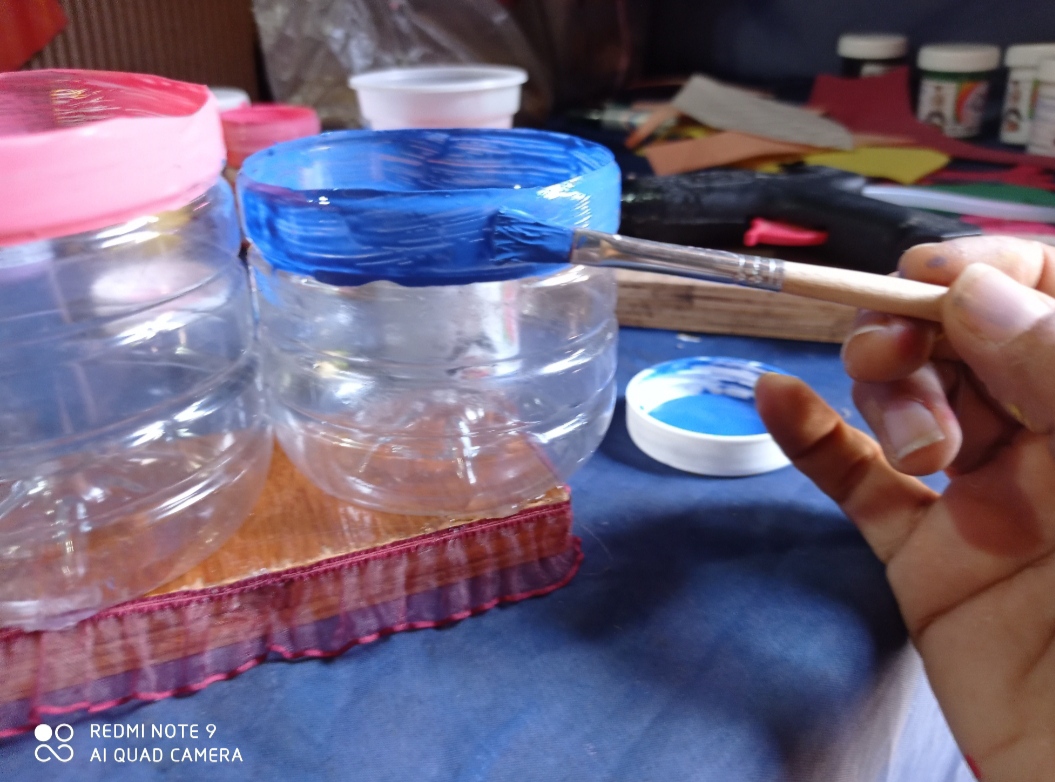
Luego se pintaron las orillas de la parte superior en los colores ya descrito en los materiales. Dejar secar.
Then the edges of the upper part were painted in the colors already described in the materials. Let dry.
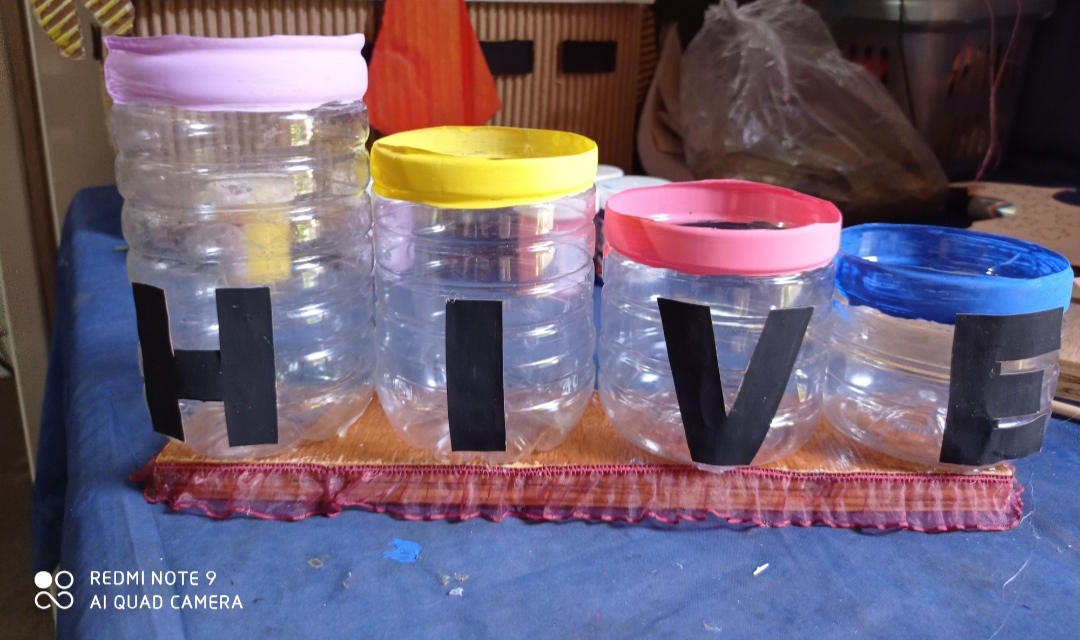
Se pegan las letras con Silicon quedando de esta manera.
The letters are glued with Silicon remaining in this way.
Se pega con Silicon el logo ya hecho.
The letters are glued with Silicon remaining in this way.
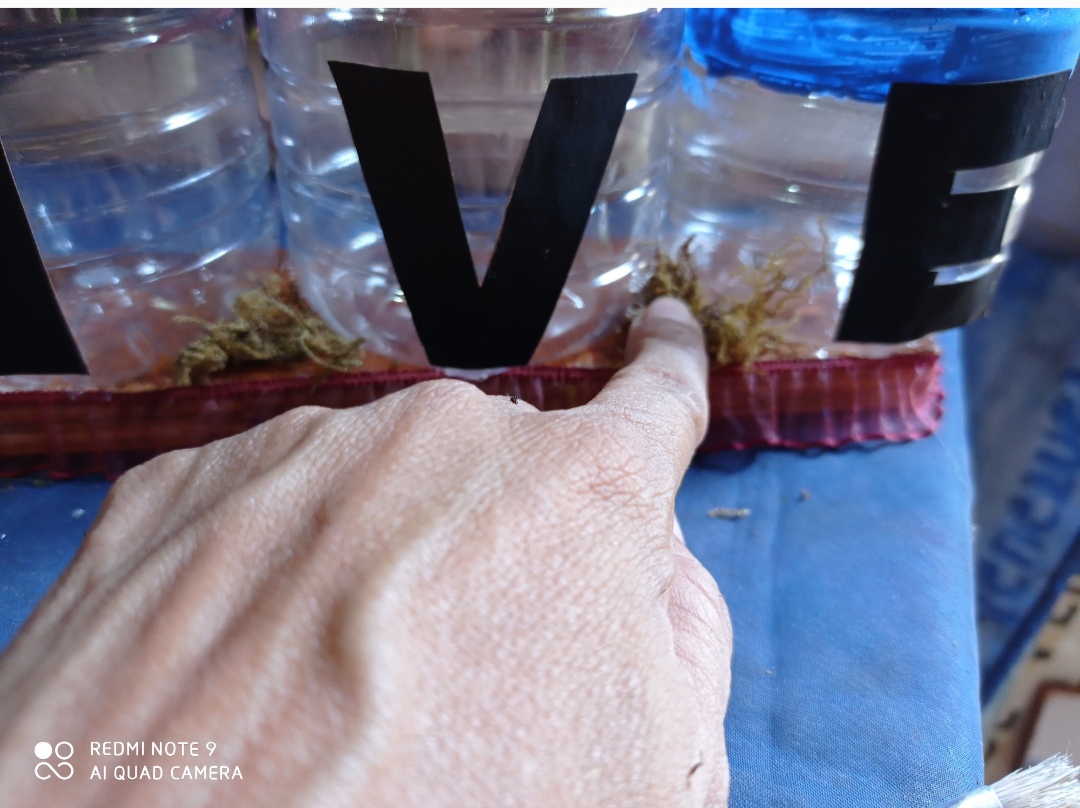
Decoramos con musgo la base dando apariencia natural.
We decorate the base with moss giving a natural appearance.
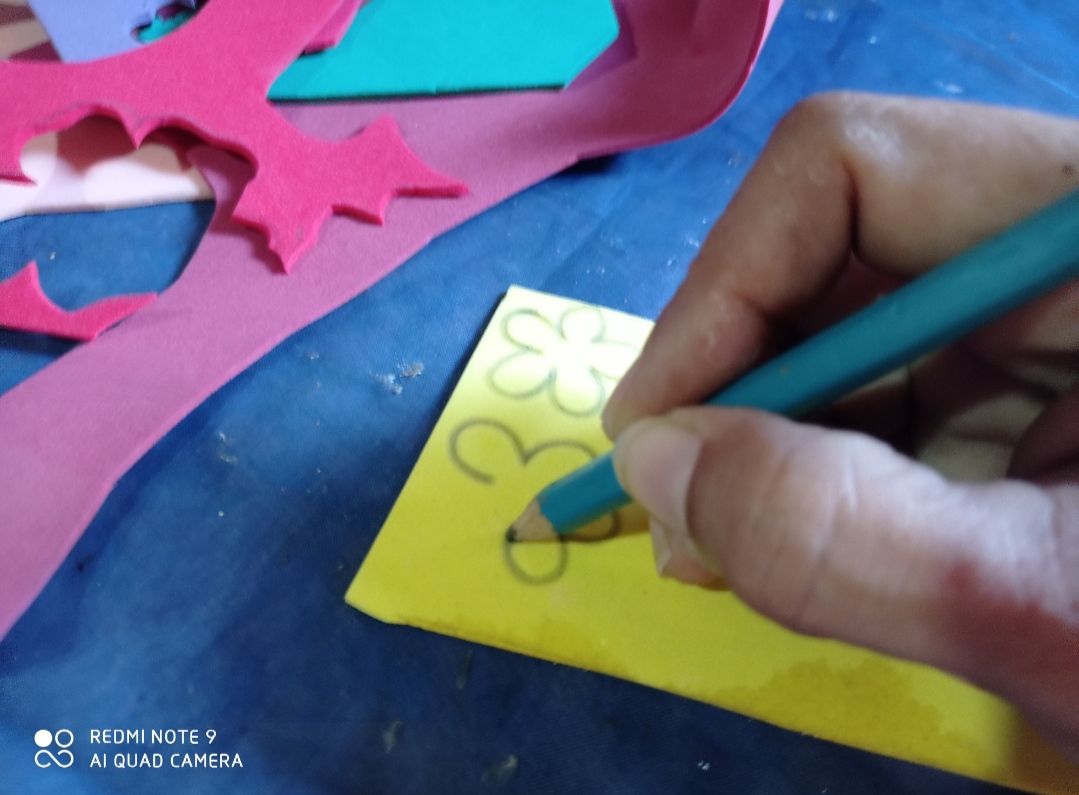
Ahora empezamos con la decoración de las flores. Marcamos las florecitas en el foami. Yo utilice varios colores de foami.
Now we start with the decoration of the flowers. We mark the little flowers in the foami. I used several colors of foami.
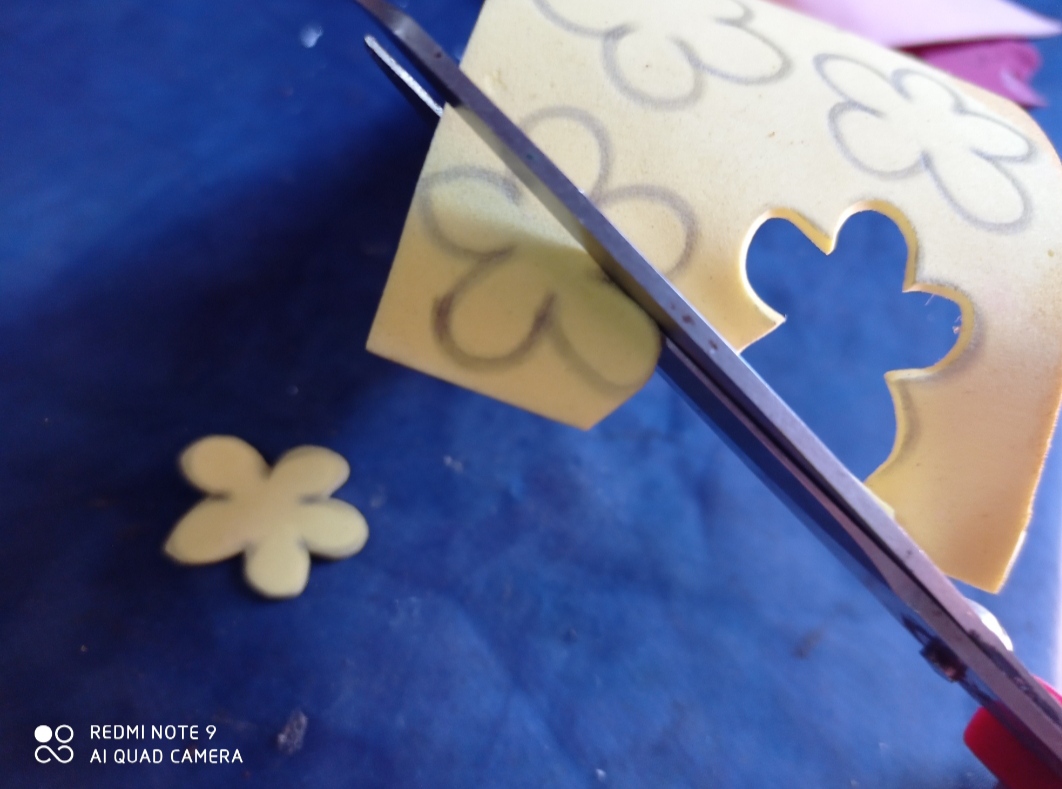
Y luego se recortan cada una.
And then each one is clipped.
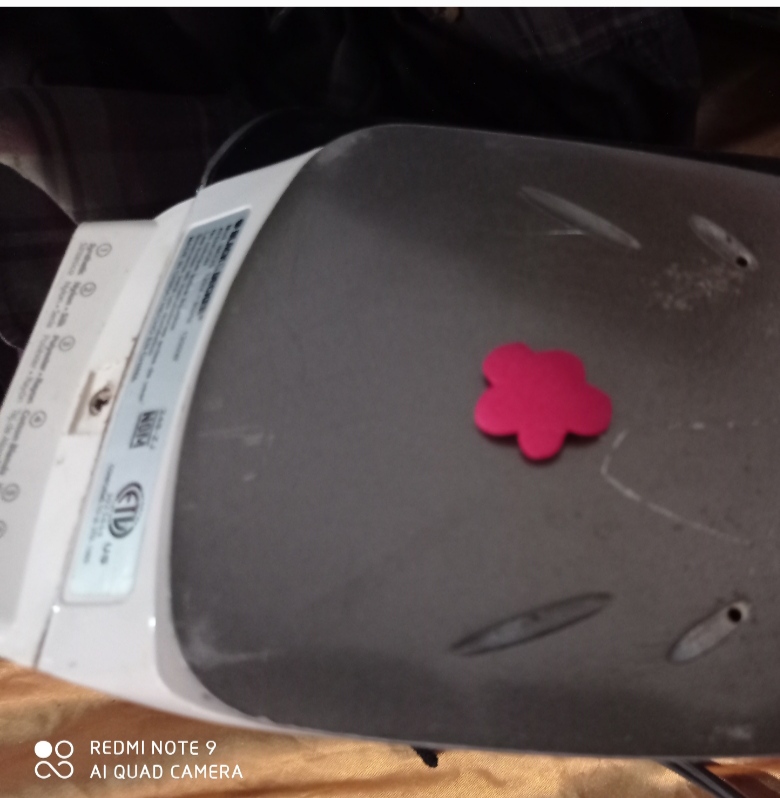
Nota: El procedimiento de cocar las flores debe hacerlo un adulto.
Se colocan las florecitas en la plancha para cocarlas.
Note: The process of cooking the flowers must be done by an adult.
The little flowers are placed on the plate to cook them.
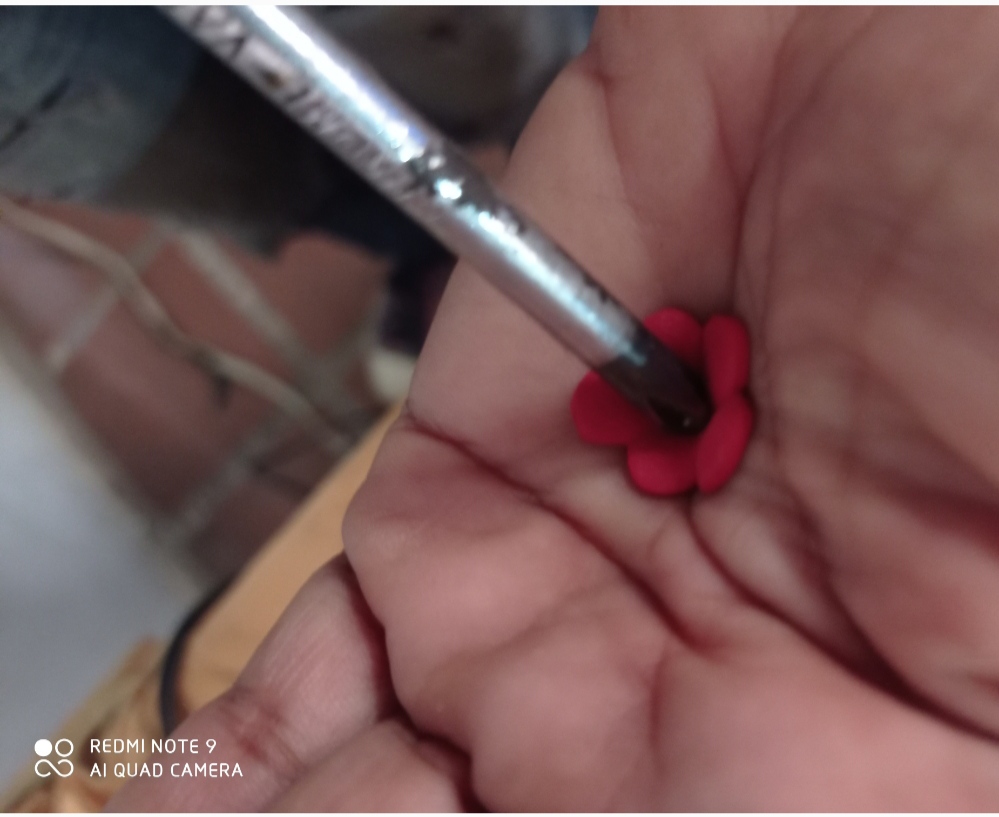
Y con un palillo de altura o algo que tengas disponible le das forma en tus manos como se indica en la foto.
And with a tall toothpick or something you have available, you shape it in your hands as indicated in the photo.
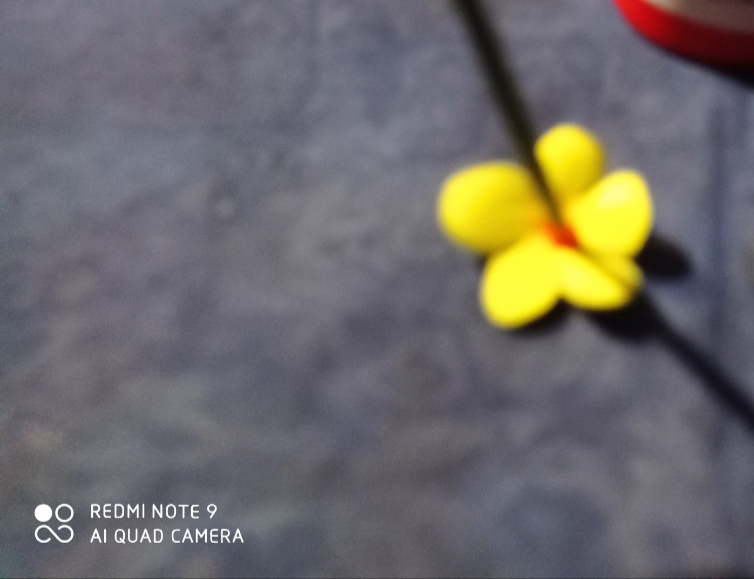
Luego se pinta el centro de las flores. Les pueden pegar perlitas también.
Then the center of the flowers is painted. They can also stick pearls.
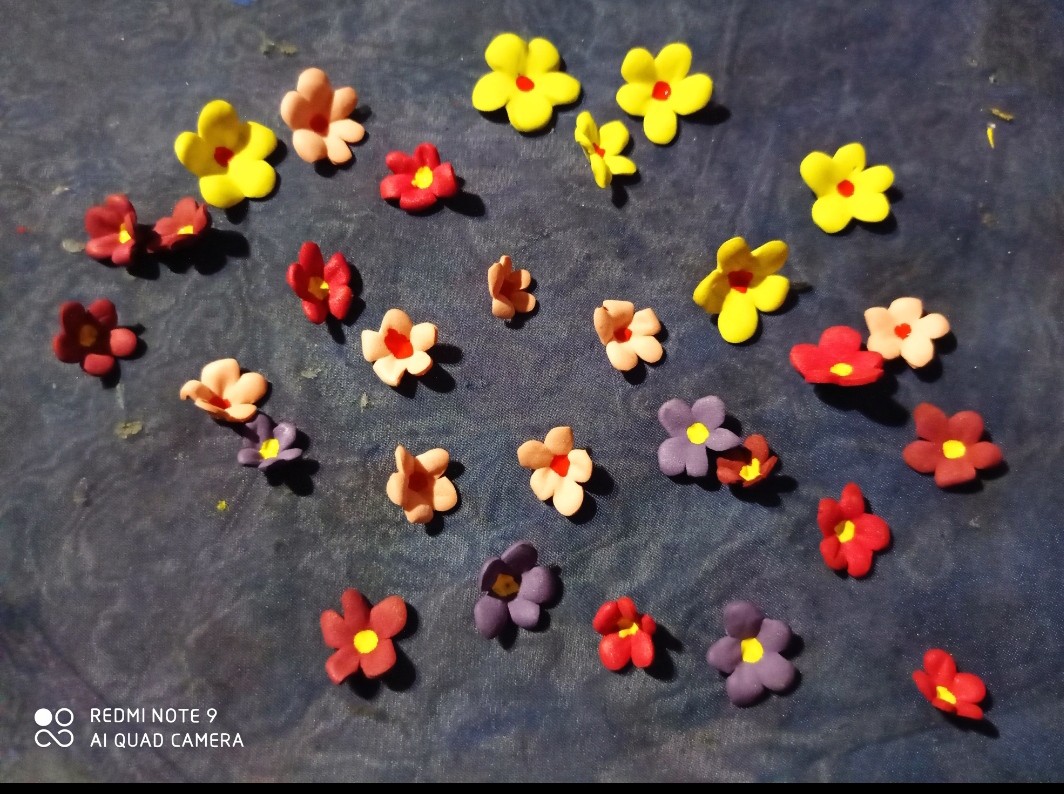
Y obtenemos la cantidad necesaria para decorar de varios colores o lo puedes hacer de un solo color, como guste.
And we obtain the necessary amount to decorate in various colors or you can do it in a single color, as you like.
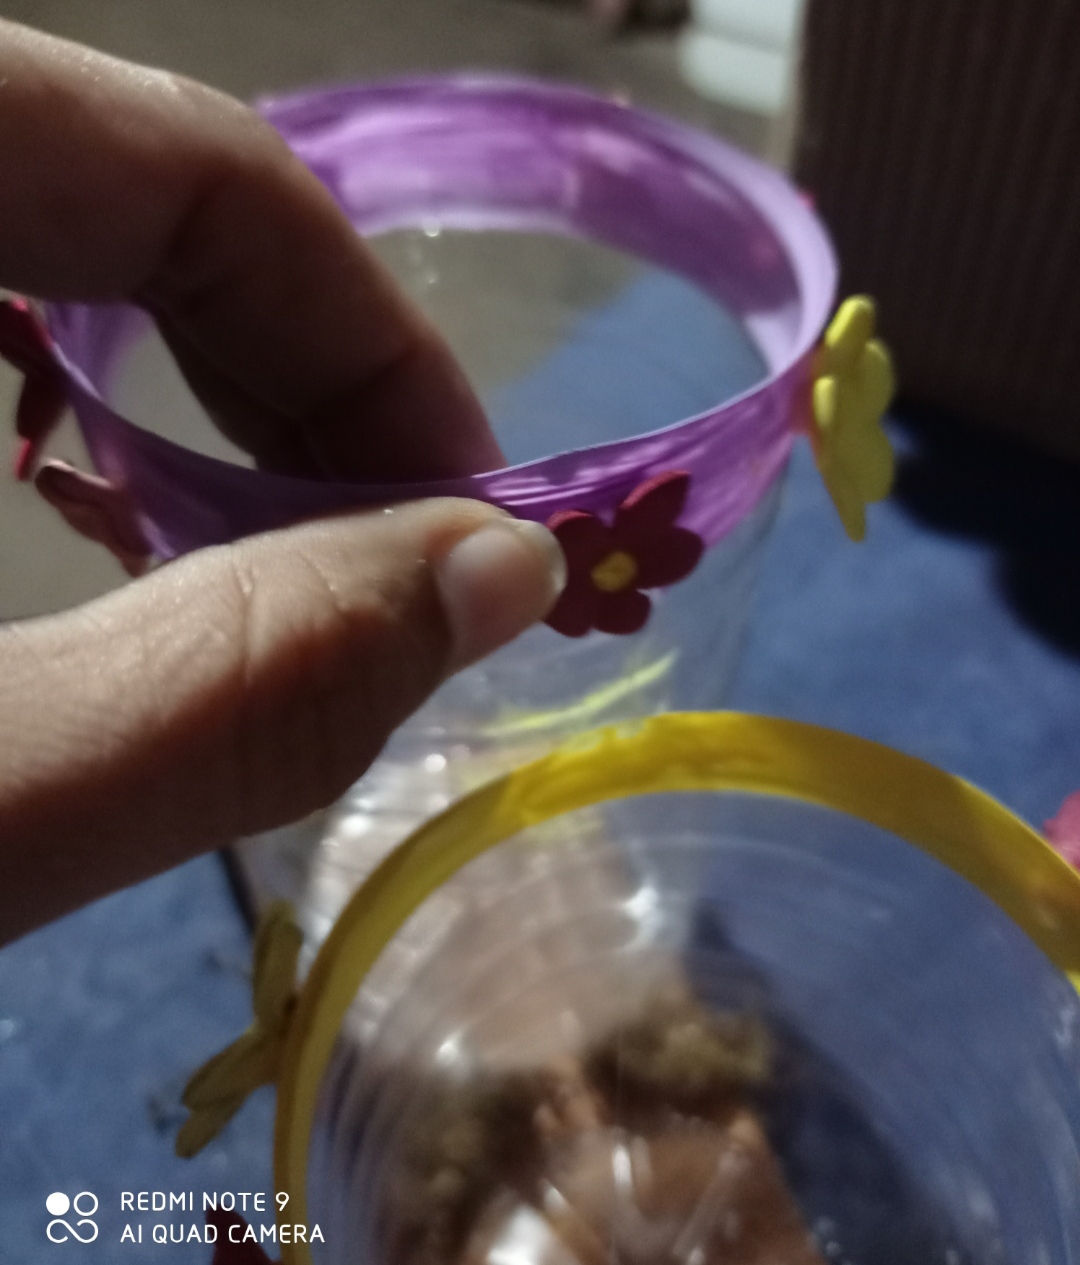
Una vez lista las flores las pegamos en las combinaciones que nos guste.
Once the flowers are ready, we paste them in the combinations that we like.
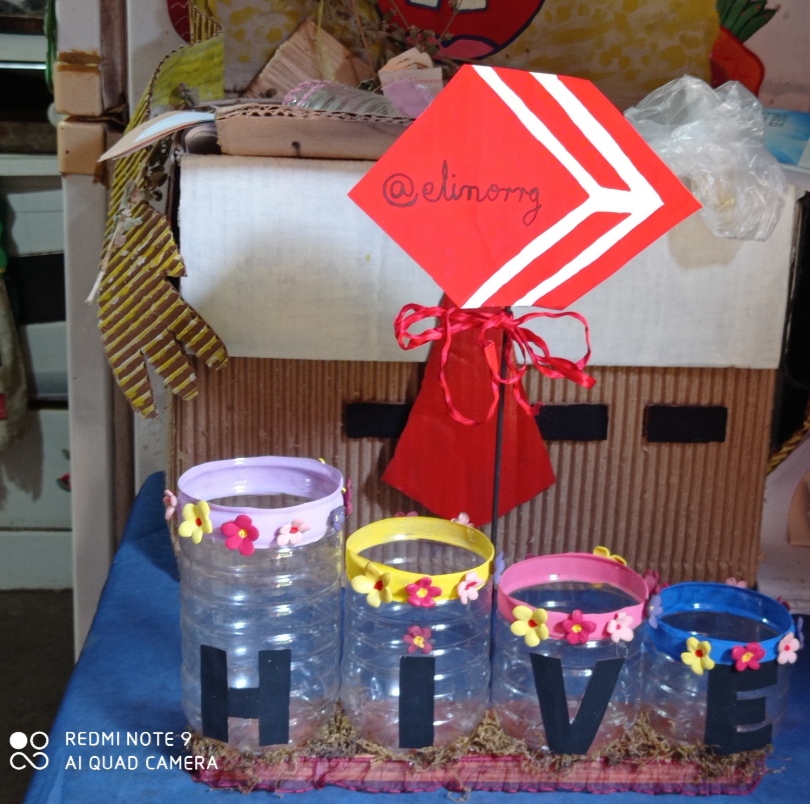
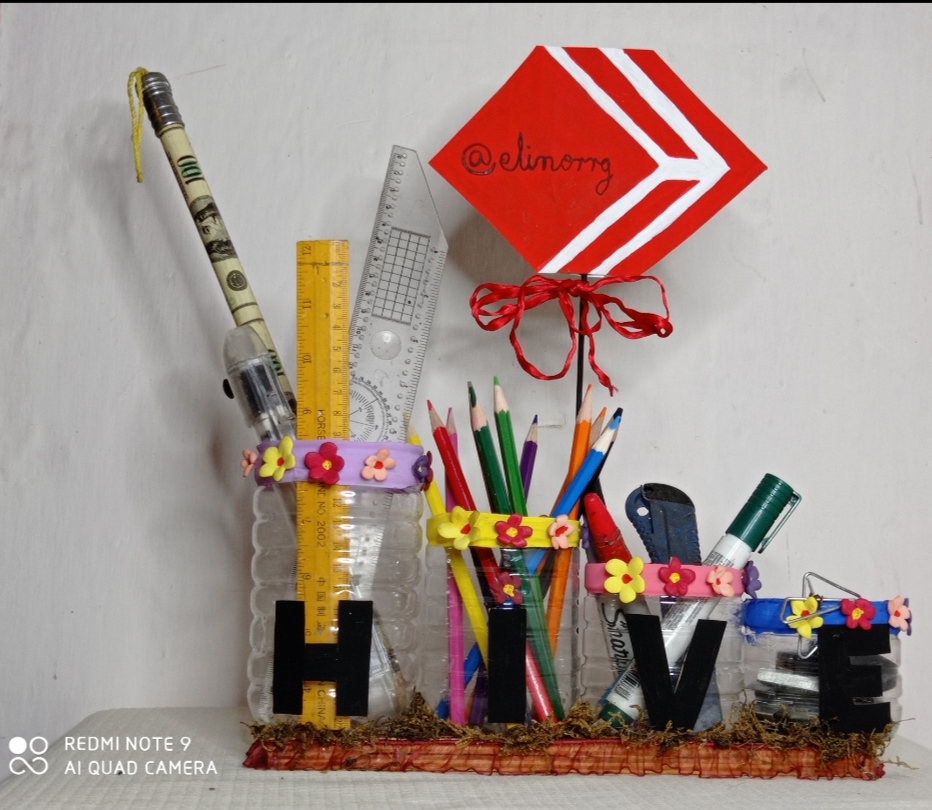
Aquí pueden observarlo ya listo. Adicionalmente le pueden poner un lazo de cualquier color, igual se va ver de bello. Claro no pudo faltar el nombre de mi usuario jejejeje...
Here you can see it ready. Additionally you can put a bow of any color, it will still look beautiful. Of course, the name of my user could not be missing hehehehe ...
Mira que hermoso organizador hive. Lo cree para mi mesa de trabajo para hive identificando mi área de trabajo para tener todo organizado.
Look at what a beautiful hive organizer. I create it for my workbench to hive identifying my work area to have everything organized.
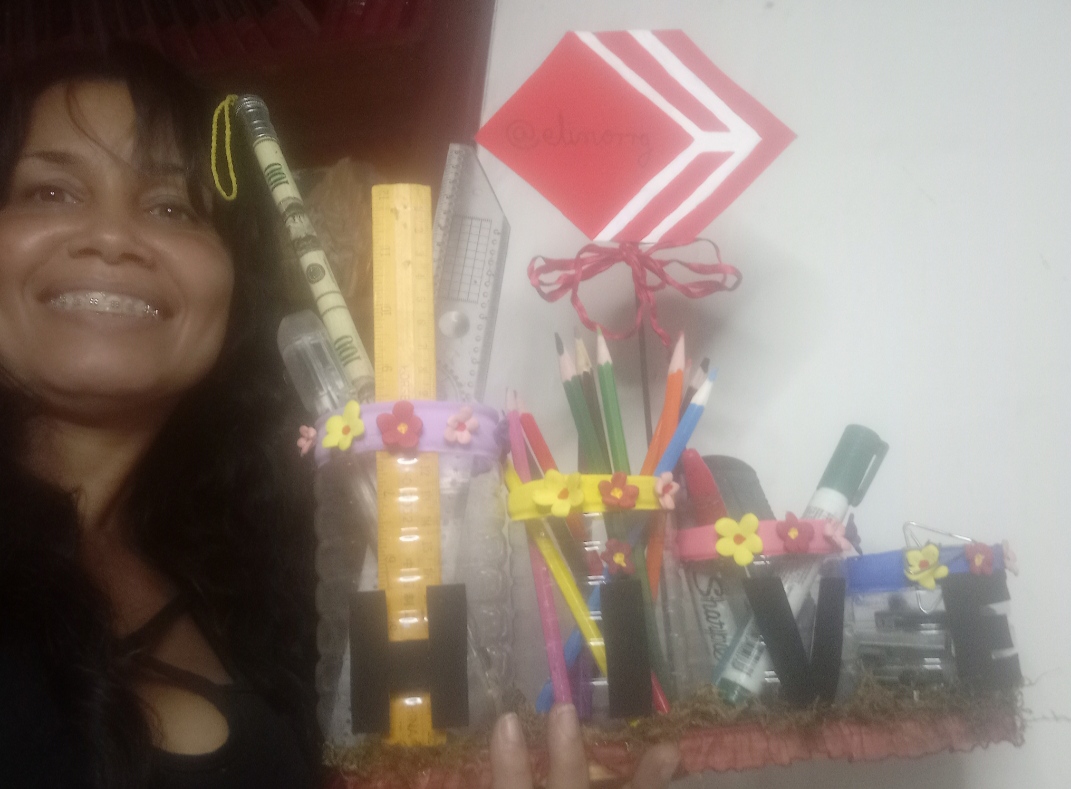
Aquí yo y mi hermoso organizador.
Here me and my beautiful organizer.
¿Que les pareció mi idea?
** What did you think of my idea? **
¿Les gustó?
They like me?
Los invito a que con familia aprovechando de esta cuarentena se propongan a crear reciclando objetos de gran utilidad para limpiar nuestra tierra 🌐. Se que ustedes tienen muchas brillantes ideas así que los invito y sigamos trabajando en hive para el crecimiento de ella y de nosotros.😉🙂
I invite you with your family, taking advantage of this quarantine, to propose to create by recycling very useful objects to clean our land 🌐. I know that you have many brilliant ideas so I invite you and let's continue working on hive for her and us growth.😉🙂
Feliz día. Abrazo fraternal para todos.🤗❤️
**Happy day. Brotherly hug for all **. 🤗❤️
Las fotos fueron tomadas con cámara Redmi note 9
The photos were taken with a Redmi note 9 camera
Me alegra que hayan disfrutado de mi Tutorial👏😘
I'm glad you enjoyed my Tutorial👏😘
¡Gracias por estar aquí!💞
Thanks for being here! 💞
Gracias por el apoyo. Saludos.
Felicitaciones por tu post, esta muy interesante sobre todo para el mes que viene, que es el día de las madres, algo sencillo, practico y de utilidad. Bendiciones.
Gracias me alegro que te haya gustado. Saludos.
Hola que bien te quedo el organizador, y con materiales reusables. Excelente.
Gracias me alegro que te haya gustado. Saludos
Valoro el esfuerzo que has hecho en participar, la manualidad reciclada esta muy hermosa, reciclaje al estilo #hive estupenda participación.
Mucha gracias @jennyzer fue un placer para mí participar y me agrada que haya disfrutado de mi Tutorial. Que bueno que le gustó. Saludos amiga. Abrazo fraterno para ti. Yo mejorando de salud con mi tratamiento. Seguimos con lo hermoso que es esta plataforma con las grandes ideas que se presenta. Nuestro Dios Jehová nos dio muchas capacidades para crear. Que bueno!!
Espero que mejores para seguir viendo tus participaciones en las futuras ediciones, felicidades por recibir el tercer lugar en el concurso, gracias por formar parte de la #9 edición de Creative Recycling Challenge!
Gracias amiga..estaré pendiente.. hay muchas cosas hermosas por hacer.. saludos.