Saludos cordiales!
En esta ocasion comparto esta hermosa manualidad de flores hechas con bolsas plasticas, Esta manualidad hace una linda decoración como centro de mesa o complemento en lugares como nuestros comedores. ¡Comencemos!
Warm greetings!
This time I share this beautiful craft of flowers made with plastic bags, This craft makes a nice decoration as a centerpiece or complement in places like our dining rooms. **Let's get started!
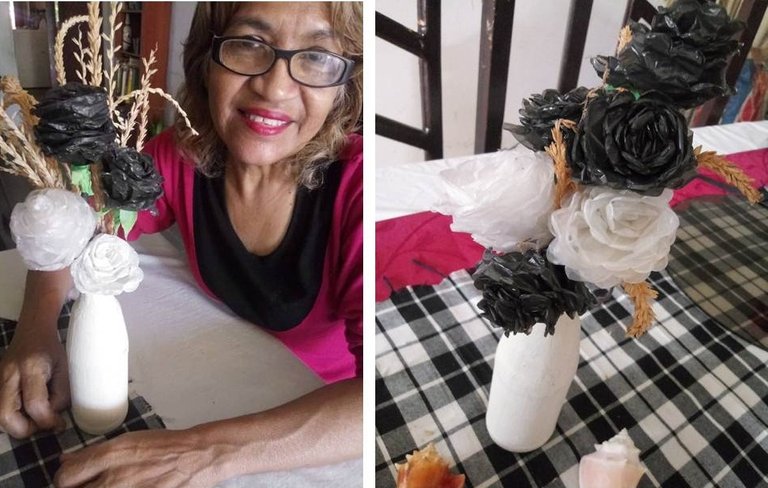
Un lindo centro de mesa con bolsas de plastico
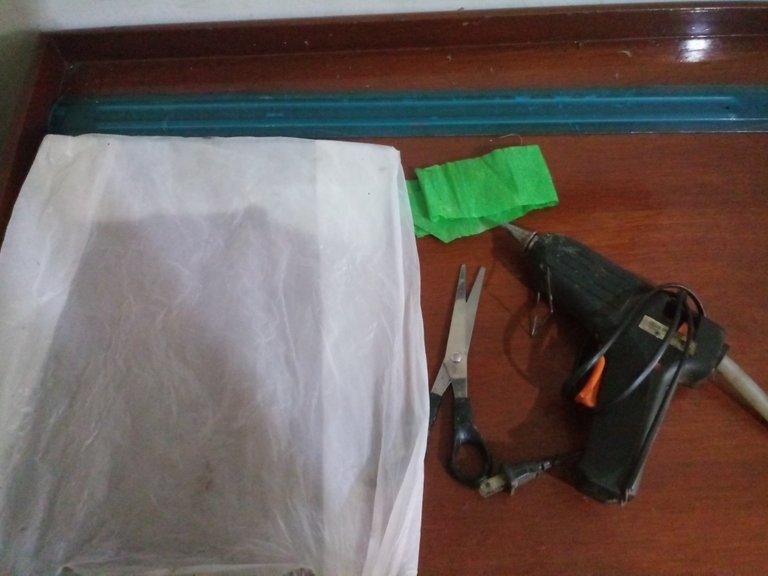
MATERIALES:
- Bolsa plástica
- Bolígrafo
- Tijeras
- Regla
- Palillos de altura o donde la vayas a colocar
- Papel crepé (un retazo)
- Silicón caliente o al frío
MATERIALS:
- Plastic bag
- Ballpoint pen
- Scissors
- Ruler
- Sticks of height or where you are going to place it
Crepe paper (one piece) - Hot or cold glue

Como fueron hechas las flores (PASO A PASO):
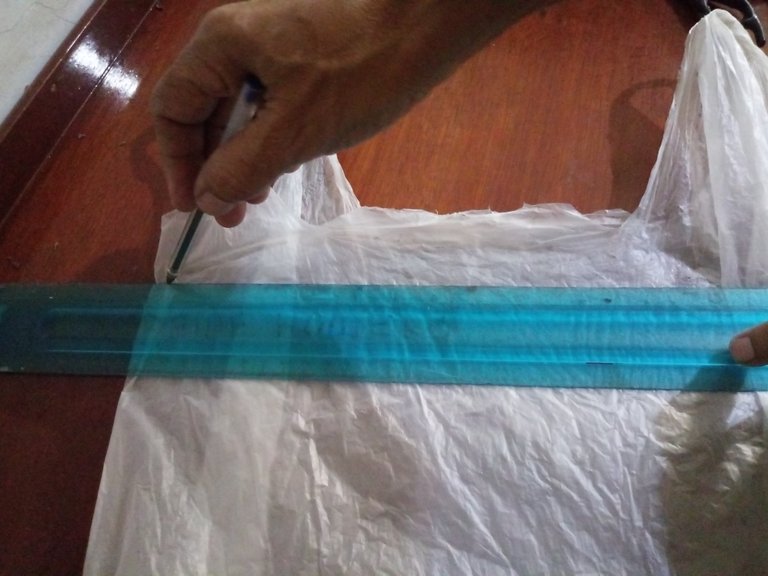
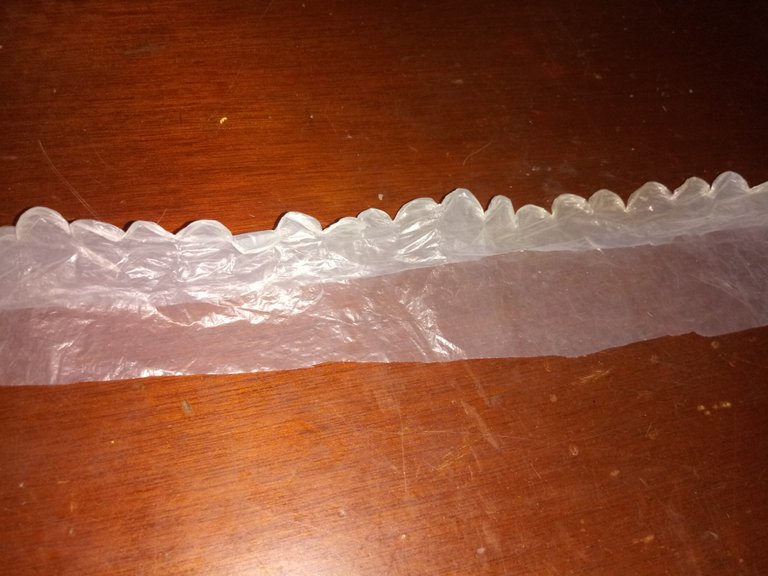
Paso n°1: Trazar con un bolígrafo y una regla encima de la bolsa 5cm de ancho y de largo dependerá que tan grande quieras la flor.
How was this made (STEP BY STEP):
Step n°1: Trace with a pen and a ruler on top of the bag 5cm width and length will depend on how big you want the flower.
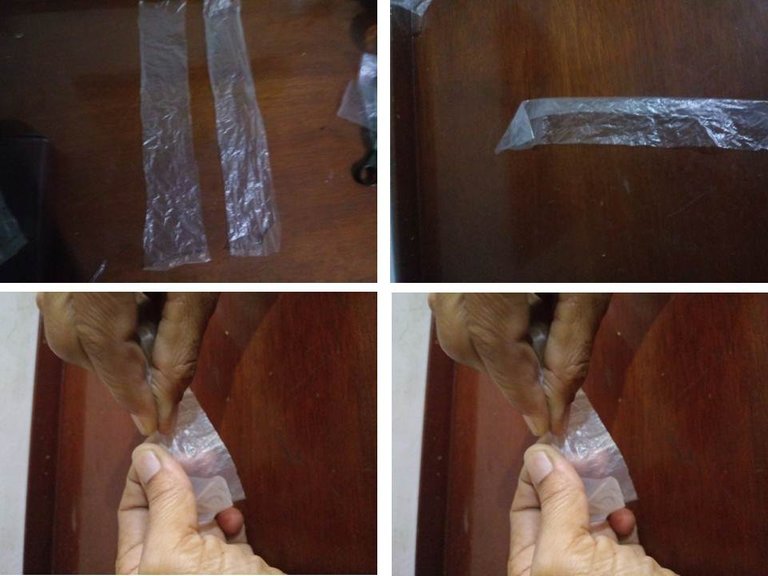
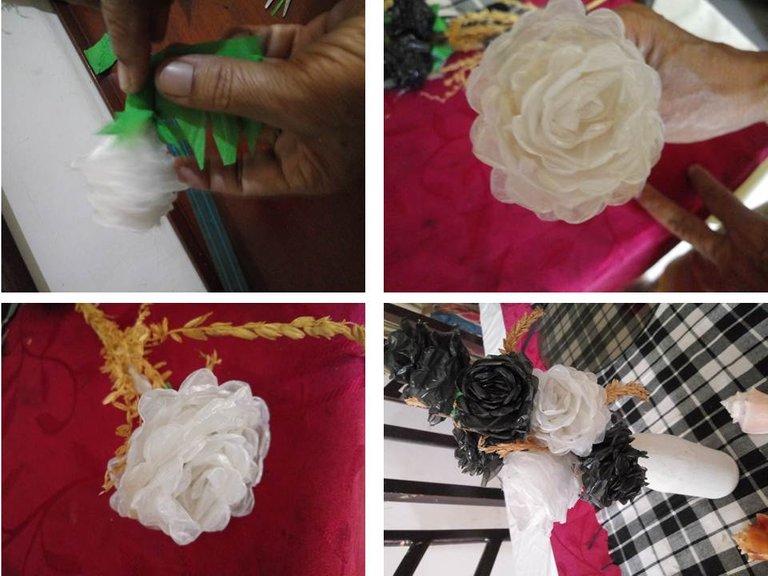
Paso n°2: Recortar arriba de las líneas marcadas. Te saldrá una tira larga. Posteriormente se debe doblar una esquina de la tira y colocar el dedo pulgar encima de la esquina doblada y con la ayuda del otro dedo pulgar se debe de tirar hacia el cuerpo haciendo un poco de fuerza para estirar bien, luego se hace lo mismo un poco al lado y así sucesivamente hasta dejar la tira con formas circulares de un lado.
Step 2: Cut out above the marked lines. You will get a long strip. Then fold one corner of the strip and place your thumb on top of the folded corner and with the help of the other thumb pull it towards the body with a little force to stretch it well, then do the same a little to the side and so on until you leave the strip with circular shapes on one side.
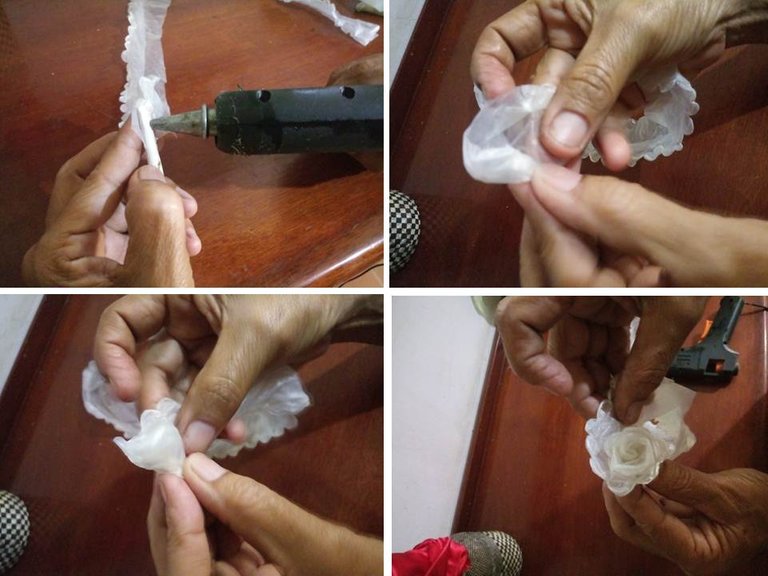
Paso n°3: Colocar un poco de silicón en el palillo y pegar la punta doblada allí, luego se comienza a enrollar al rededor del palillo y verás como poco a poco se convierte en una hermosa flor y por último, colocar un poco de silicón para sujetar y pegar bien la punta final.
Step 3: Put some silicone on the toothpick and glue the bent tip there, then start wrapping it around the toothpick and you will see how it gradually becomes a beautiful flower and finally, put some silicone to hold and glue the final tip well.
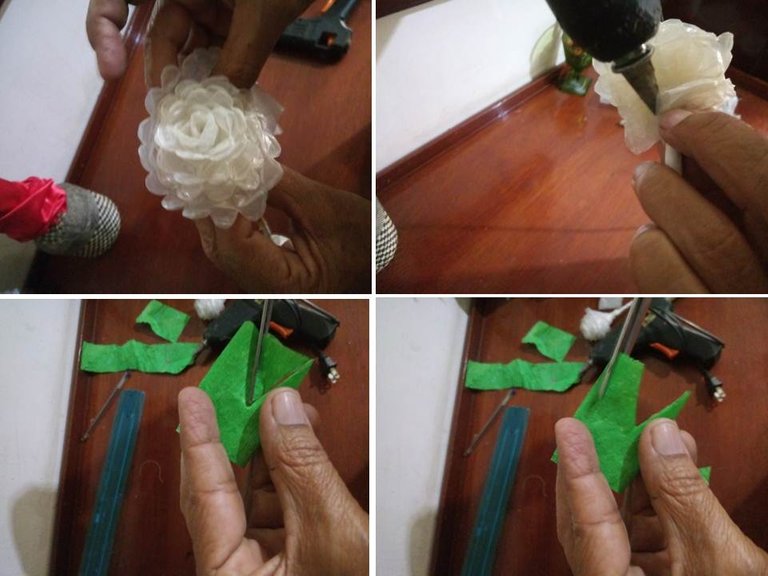
Paso n°4: Una vez que la flor esté lista, debemos hacerle las hojas, recortamos un retazo de papel crepé del ancho que queramos y lo doblamos en dos. Luego cortamos un solo lado en forma de zic zac.
Step n°4: Once the flower is ready, we must make the leaves, we cut a piece of crepe paper of the width we want and fold it in two. Then cut only one side in the shape of a zic zac.
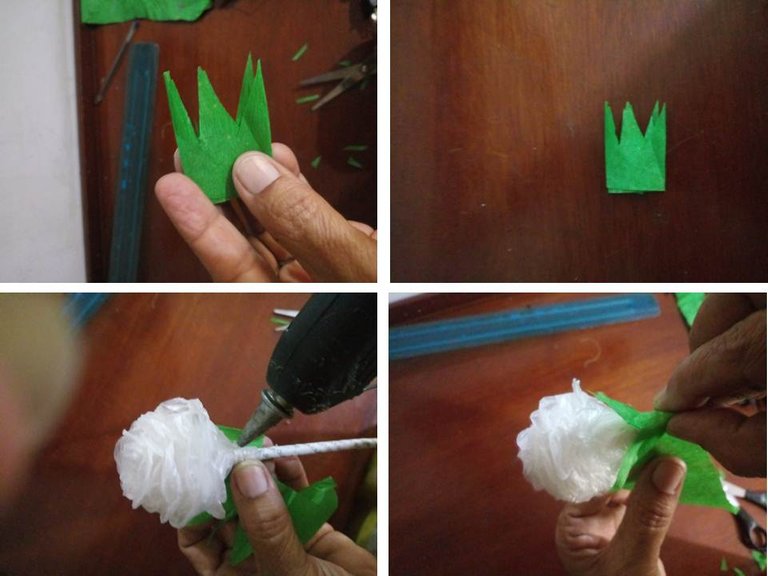
Paso n°5: Por último, pegamos una punta de nuestra tira de papel crepé por debajo de la flor, luego enrollamos alrededor y pegamos la punta final. Verás lo hermosa que queda nuestra flor de cosas recicladas, una hermosa decoración para cualquier parte de la casa e incluso un buen regalo.
Step 5: Finally, we glue one end of our strip of crepe paper underneath the flower, then we roll it around and glue the final end. You will see how beautiful our recycled flower looks, a beautiful decoration for any part of the house and even a nice gift.
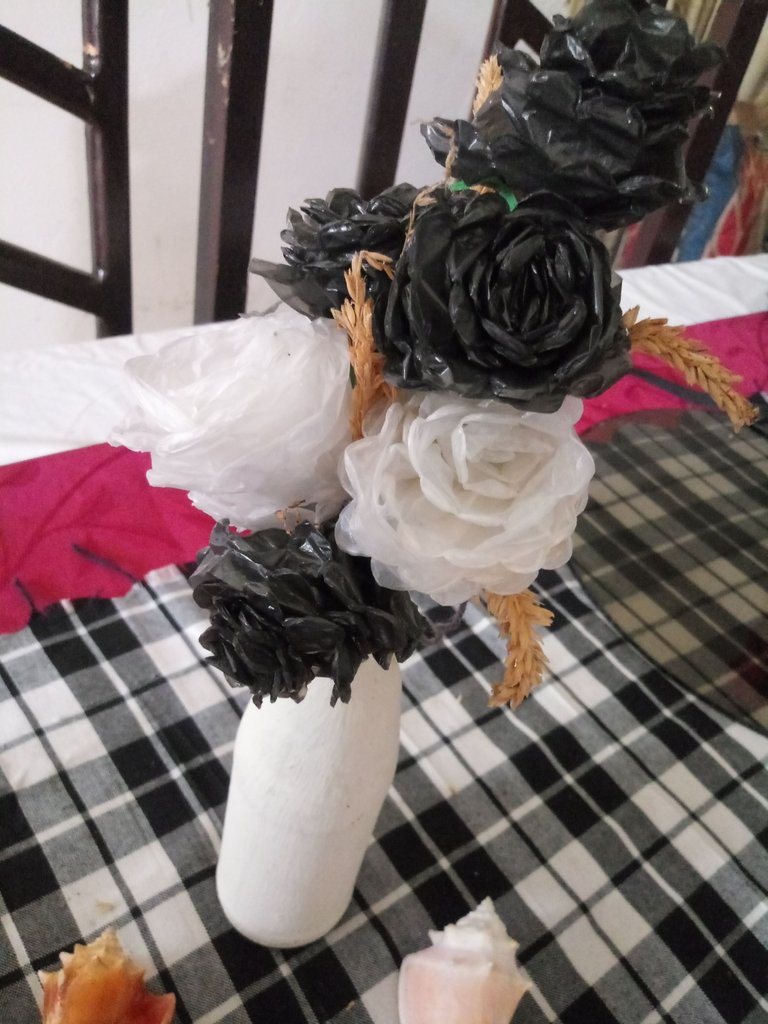
Espero que les haya gustado. Como ven, es algo que con un poco de esfuerzo puede quedar muy atractivo. Recuerda que no necesitas tener materiales costosos para lograr grandes cosas. ¡Bendiciones!
I hope you liked it. As you can see, it is something that with a little effort can be very attractive. Remember that you don't need to have expensive materials to achieve great things. Blessings!
Congratulations @elsismmillano! You have completed the following achievement on the Hive blockchain and have been rewarded with new badge(s) :
Your next target is to reach 50 comments.
You can view your badges on your board and compare yourself to others in the Ranking
If you no longer want to receive notifications, reply to this comment with the word
STOPSupport the HiveBuzz project. Vote for our proposal!