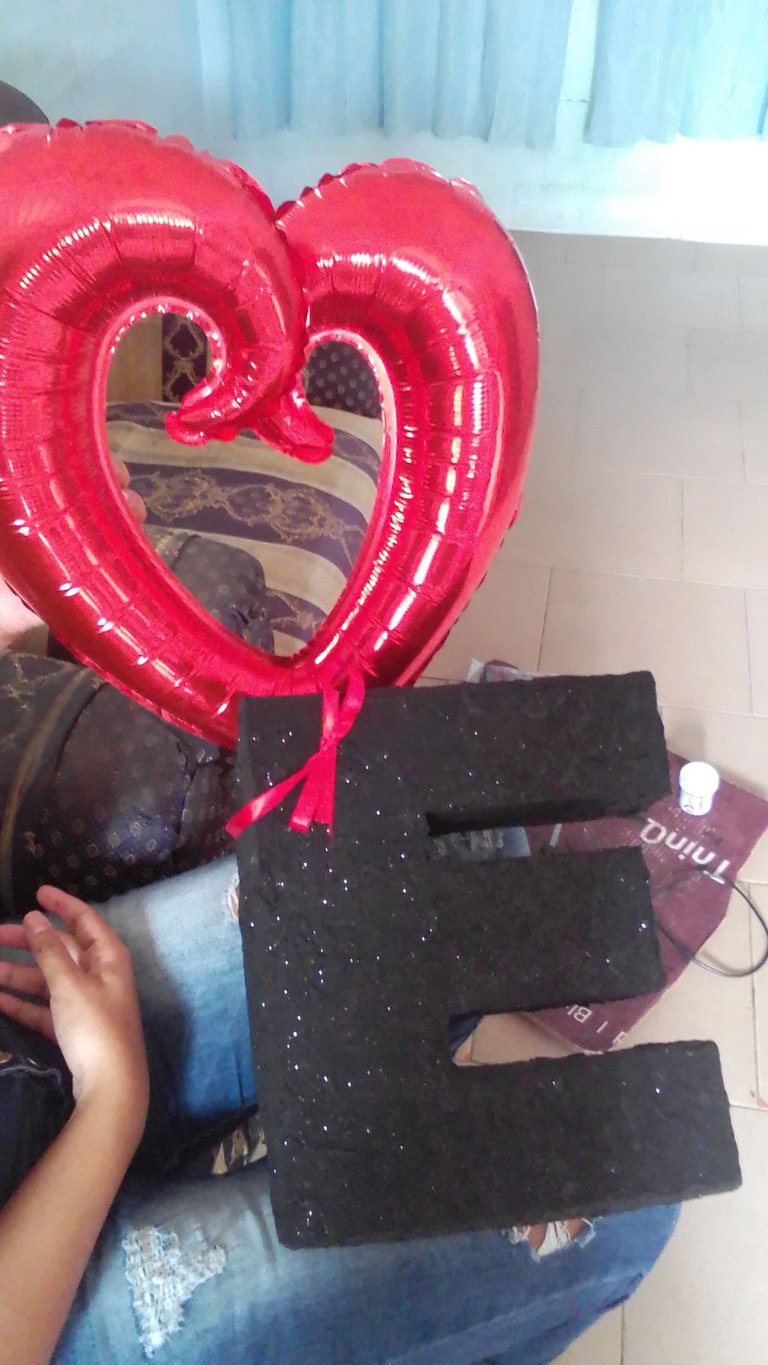
Buenas noches amigos de la colmena, espero que estén bien, hoy les voy a presentar mi primer tutorial. Se trata de un cotillón en forma de "E". Es muy sencillo de realizar; Yo particularmente elegí esta letra ya que e la inicial de mi nombre, pero pueden elegir la que ustedes deseen.
Good evening friends of the hive, I hope you are well, today I am going to present you my first tutorial. It is a cotillion in the shape of "E". It is very simple to make; I particularly chose this letter because it is the initial of my name, but you can choose the one you want.
Procedemos a realizarlo.
Let us proceed to do so.
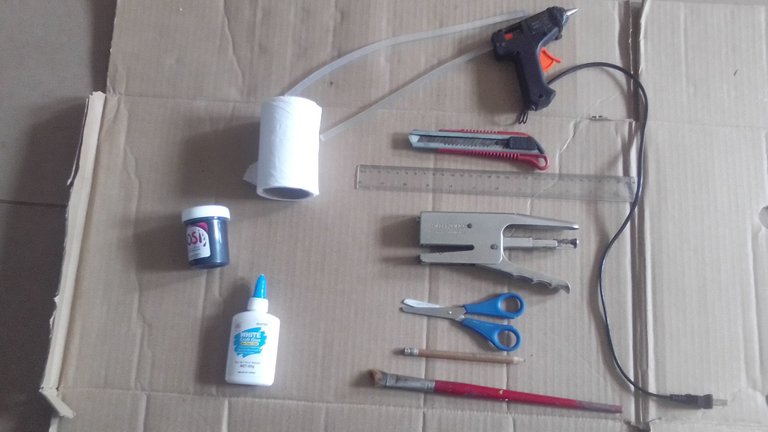
Para ello vamos a necesitar los siguientes materiales y herramientas:
For this we will need the following materials and tools:
- Cartón
- tijera
- Exacto o Cuter
- Pintura negra (Puedes utilizar cualquier otro color)
- Pega blanca
- Silicon en barra
- Pistola para silicón.
- Escarcha
- Papel Higienizo.
- Cinta roja
- Grapadora
- Lápiz y Regla
- Cardboard
- scissors
- exacto or cutter
- Black paint (You can use any other color)
- White glue
- Silicone stick
- Silicone gun.
- Frosting
- Toilet paper.
- Red tape
- Stapler
- Pencil and ruler
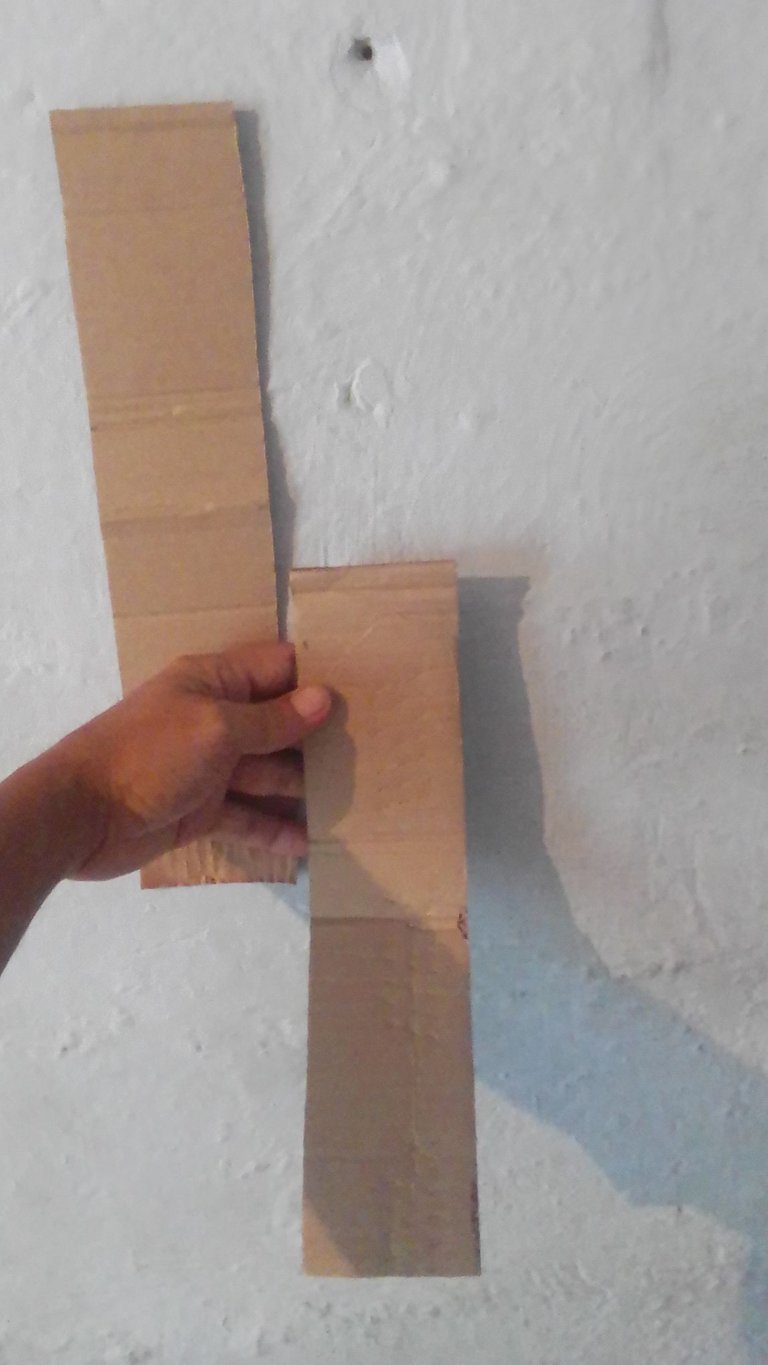
Paso 1
Para crear la base del cotillón marcamos la forma de la letra "E" en el cartón.
Step 1
To create the base of the cotillion we mark the shape of the letter "E" on the cardboard.
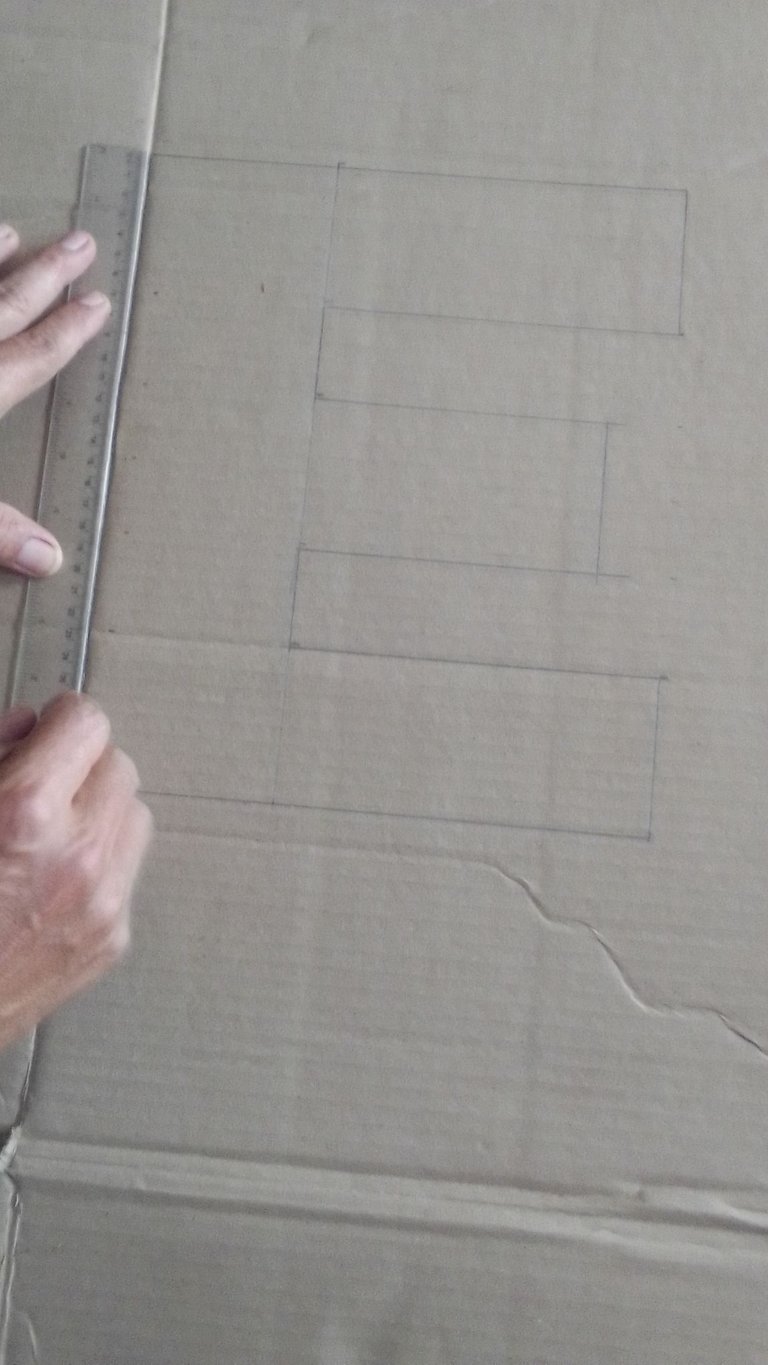
Paso 2
Marcaremos con el lápiz en el mismo cartón los bordes al que posteriormente le haremos el doblez para ir dando forma al cotillón.
Step 2
We will mark with the pencil on the same cardboard the edges to which we will later make the fold to give shape to the cotillion.
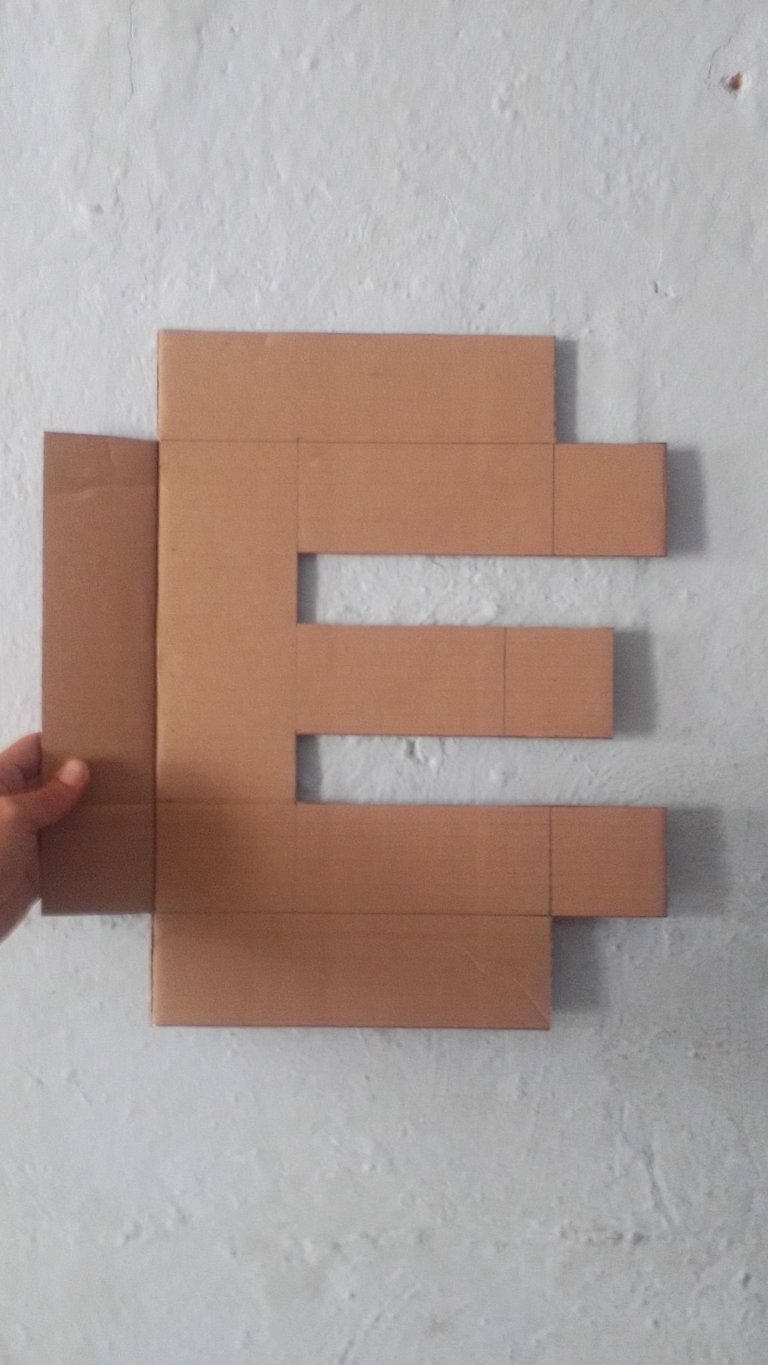
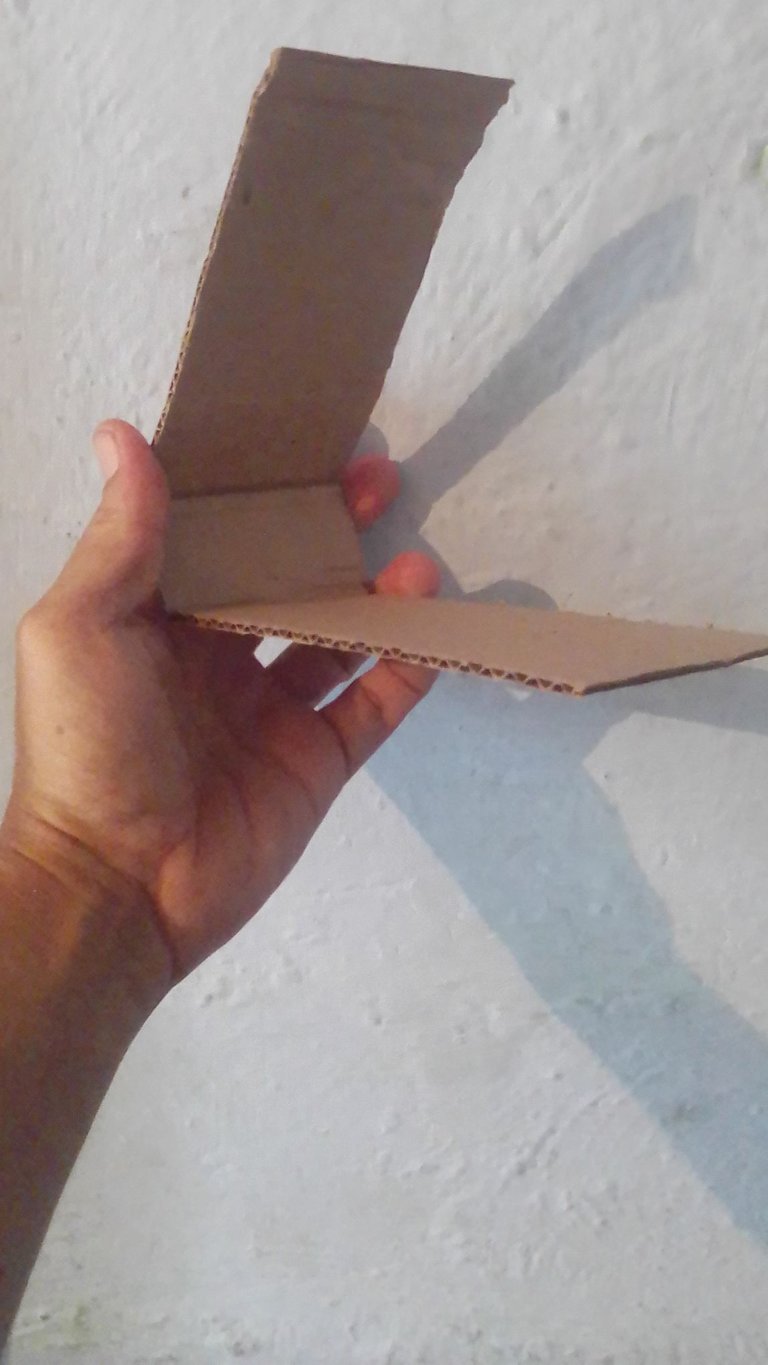
Paso 3
Recortamos dos listones de cartón de 7x25 cm. que luego pegaremos en los bordes de la "E" para ir dándole el efecto 3D al cotillón.
Step 3
Cut out two 7x25 cm. cardboard strips that we will glue on the edges of the "E" to give the 3D effect to the cotillion.
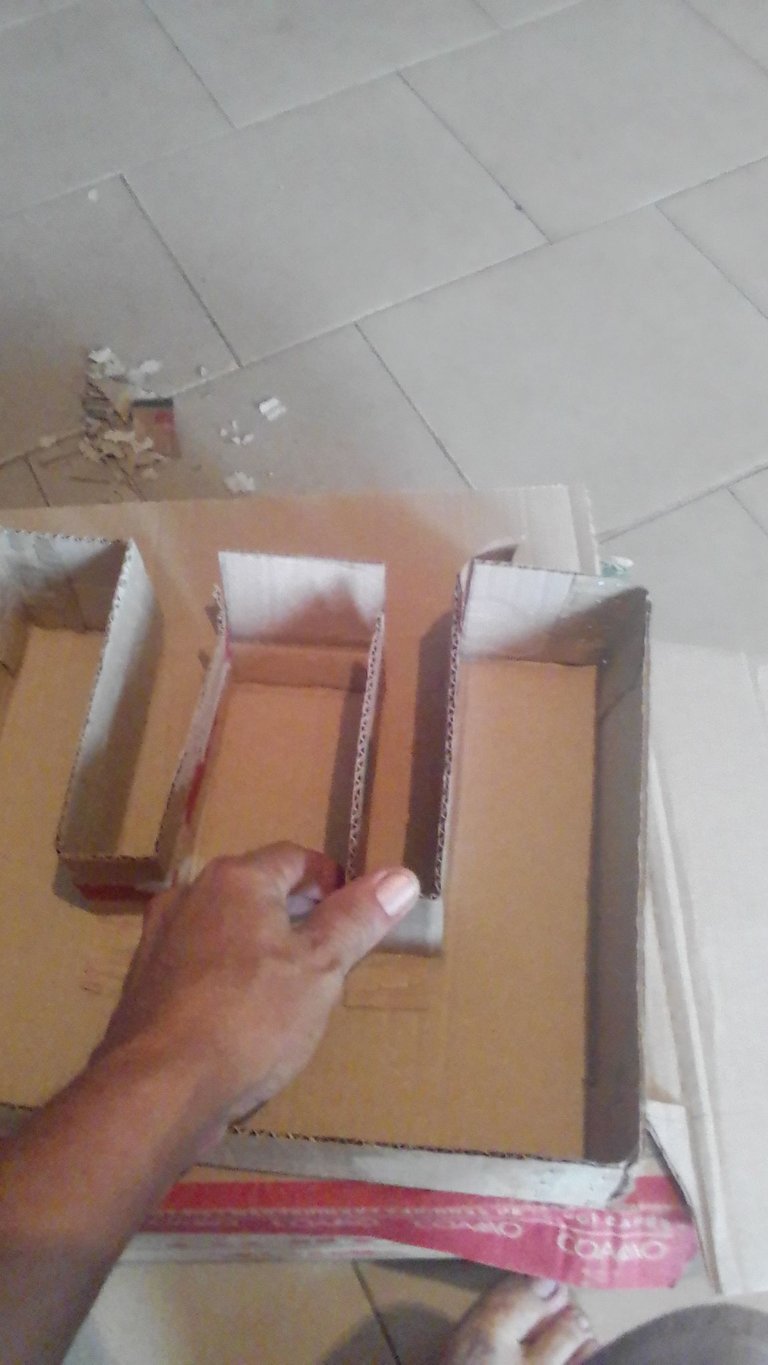
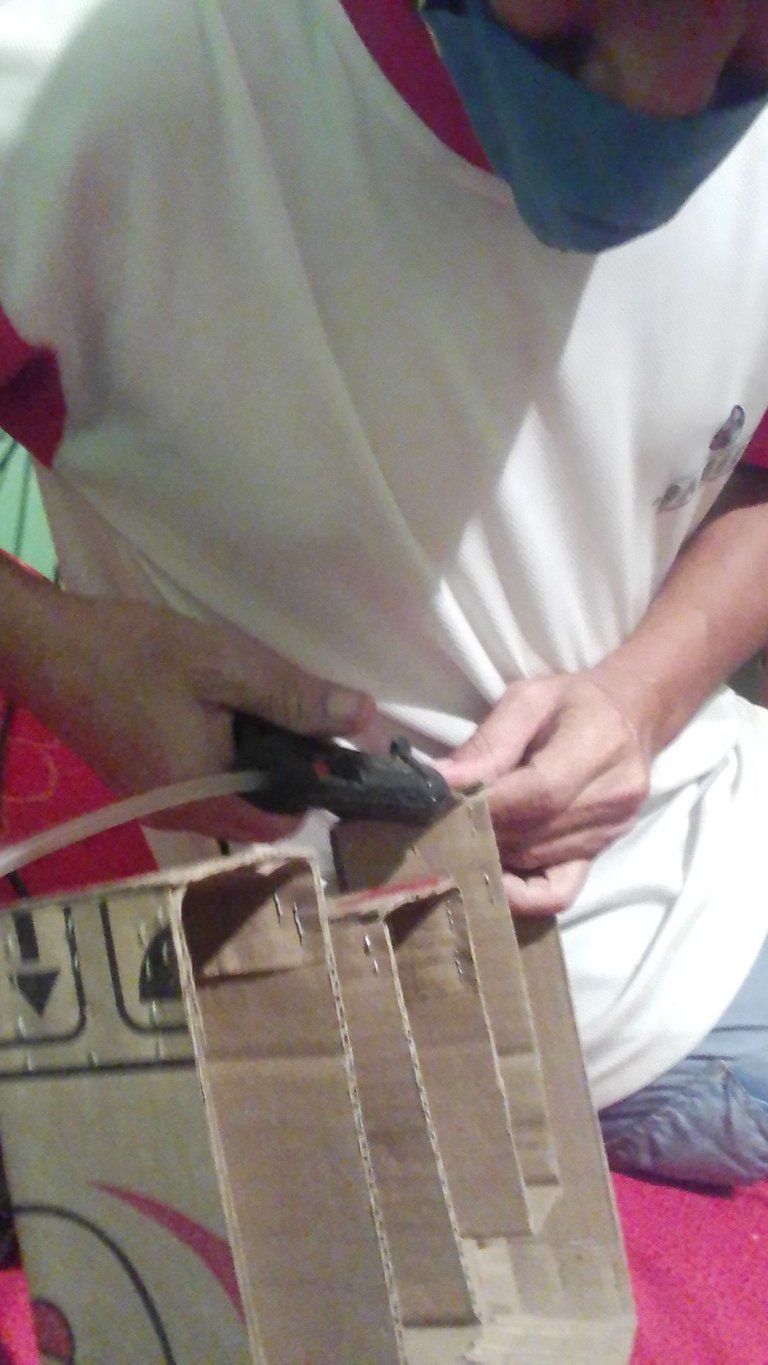
Paso 4
Engrapamos las esquinas y pegamos con silicon.
Step 4
Staple the corners and glue with silicone.
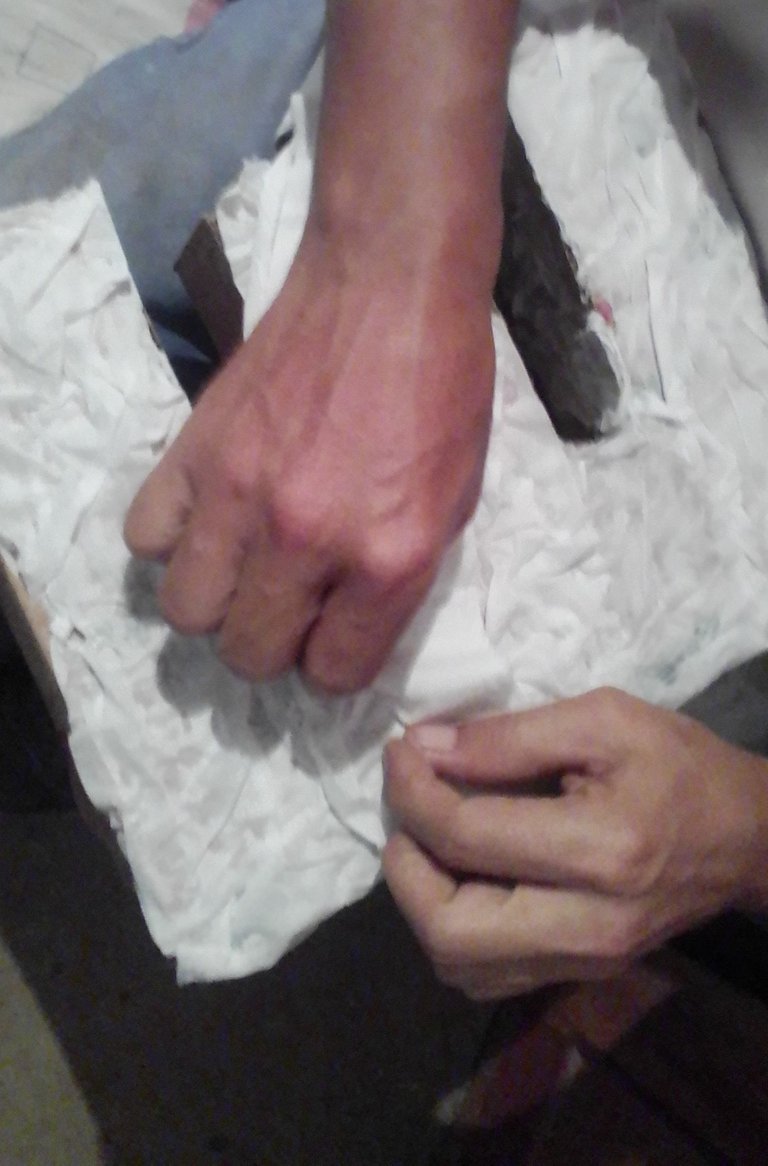
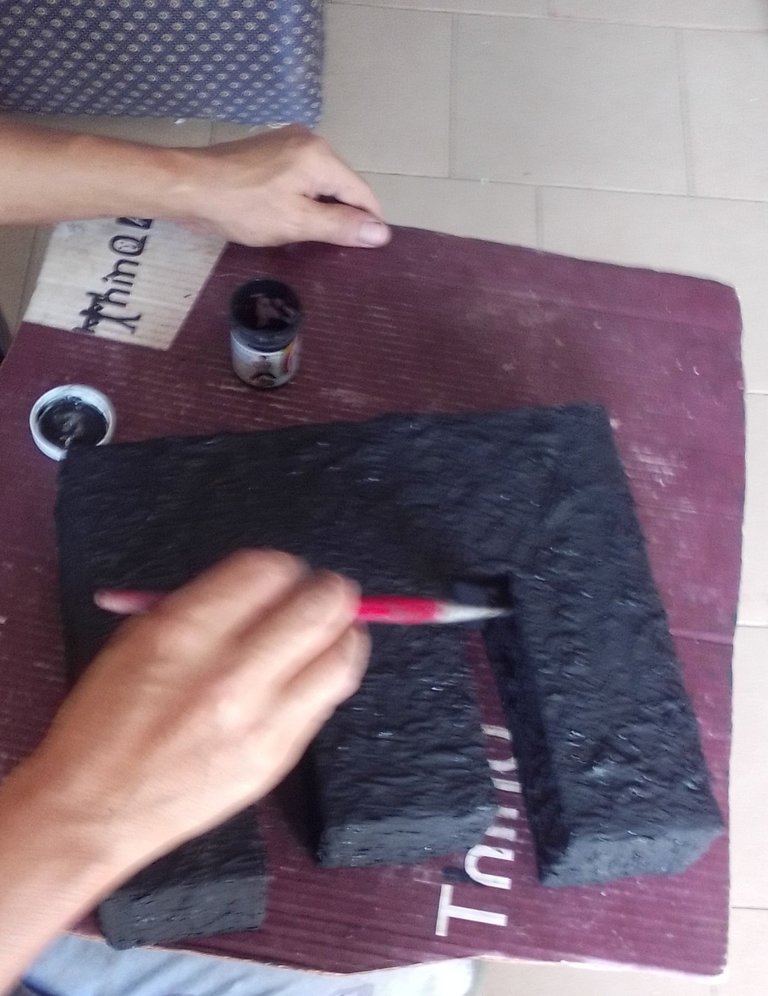
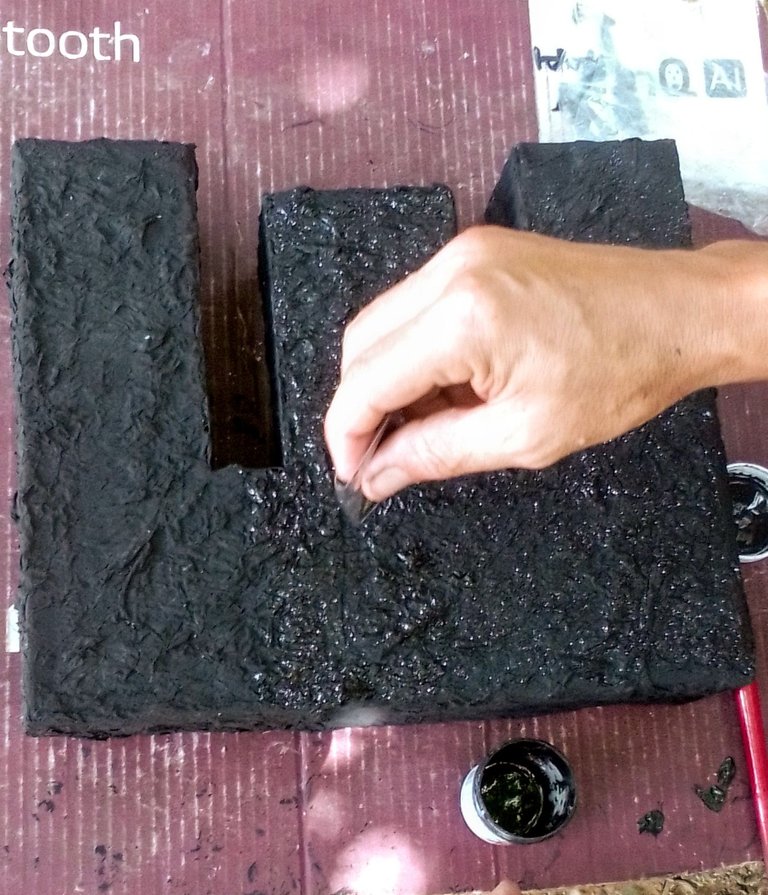
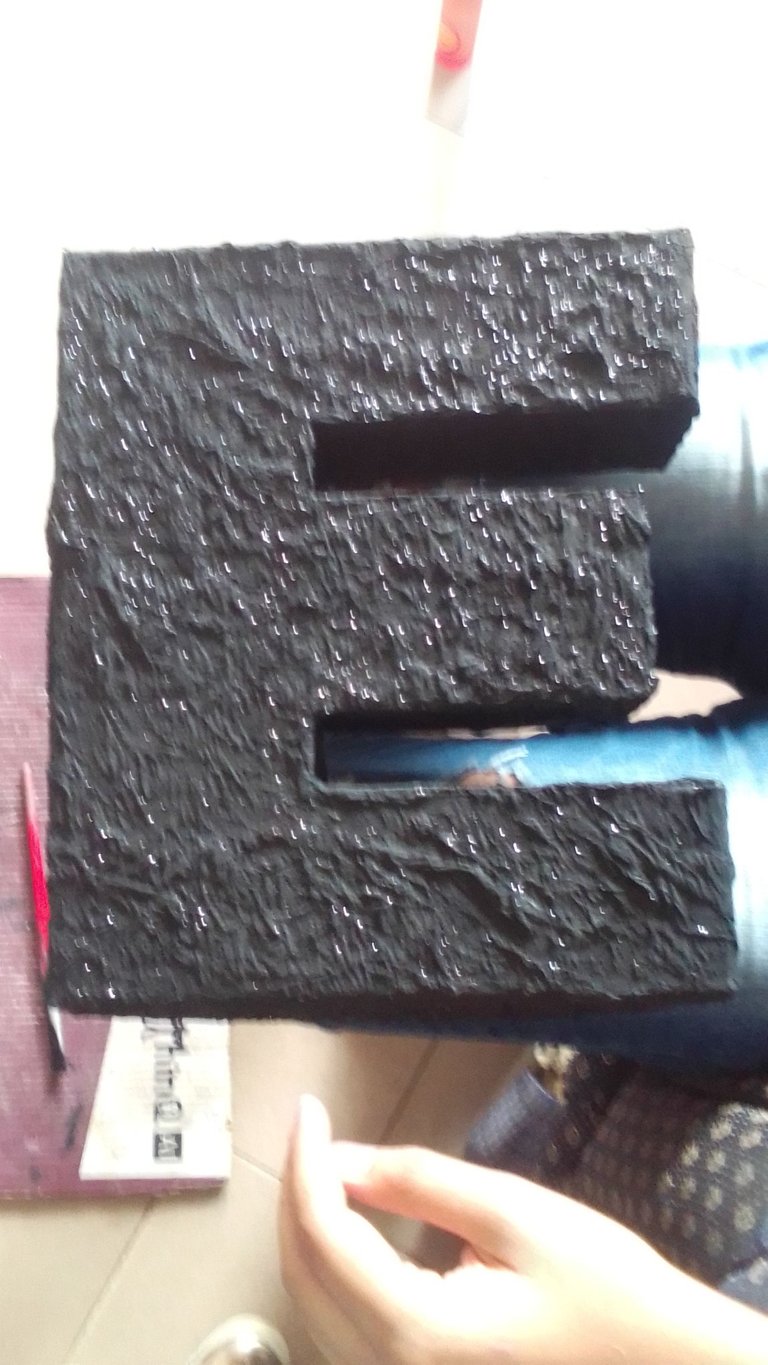
Paso 5
Pegamos el papel y procedemos a pintarlo para luego agregarle las escarchas.
Step 5
Glue the paper and proceed to paint it and then add the frosting.
Paso 6
Se debe realizar los mismos pasos nuevamente para crear la tapa de nuestro cotillón, al que luego le colocaremos un lazo previamente realizado con la cinta roja.
Para lo que será la tapa del cotillón se debe utilizar una medida mas o menos de 1 centímetro mas grande que la base.
Step 6
Follow the same steps again to create the top of our cotillion, to which we will then place a bow previously made with the red ribbon.
For what will be the top of the cotillion, you should use a measure more or less than 1 centimeter larger than the base.
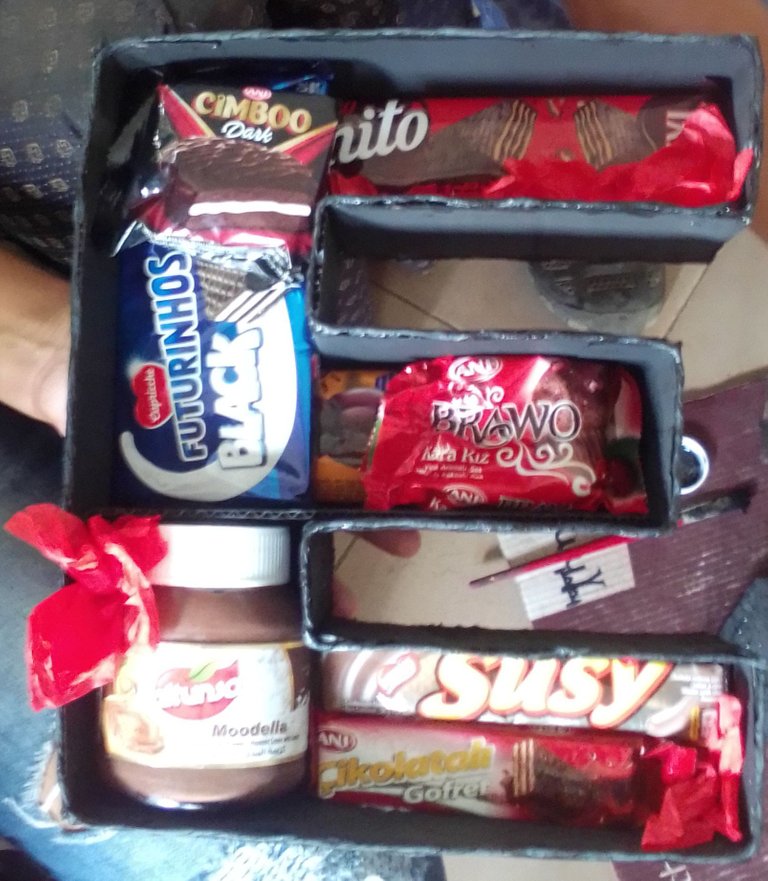
Ya listo nuestro trabajo el cotillón nos quedará de la siguiente manera y lo puedes rellenar con dulces y golosinas de su preferencia.
Once our work is ready, the cotillion will look like this and you can fill it with candies and sweets of your choice.
Congratulations @emilzap! You have completed the following achievement on the Hive blockchain and have been rewarded with new badge(s) :
Your next payout target is 50 HP.
The unit is Hive Power equivalent because your rewards can be split into HP and HBD
You can view your badges on your board and compare yourself to others in the Ranking
If you no longer want to receive notifications, reply to this comment with the word
STOPCheck out the last post from @hivebuzz: