

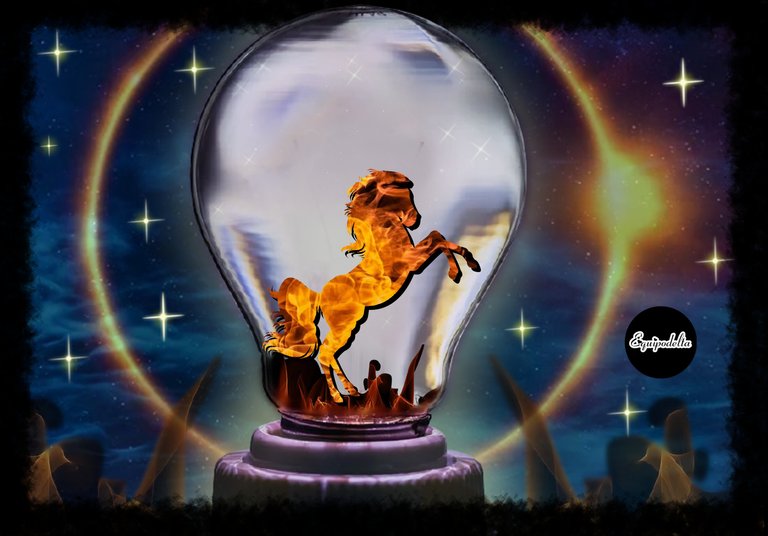
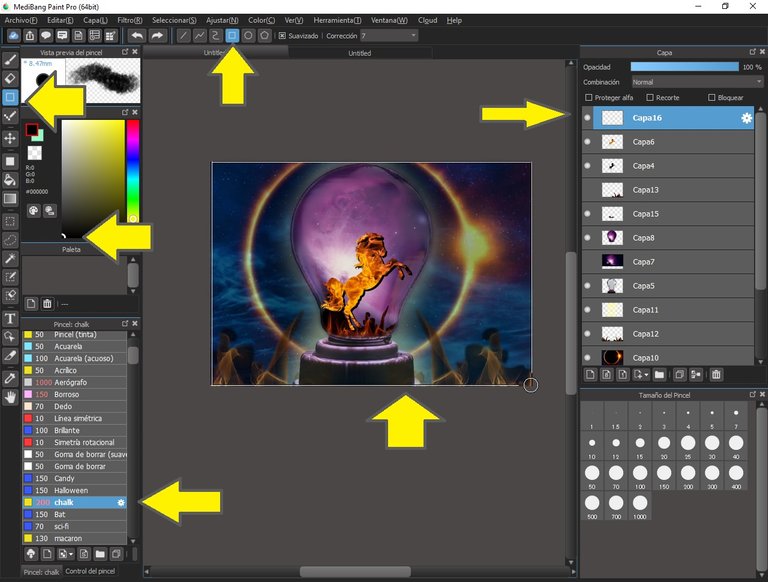
Greetings dear friends, today I was inventing and challenging the program I use for design to create editions in photographs, images and make new things from a collage you could say. I needed many different images to create both the GIF and to present my design today.
I have also used Medibang brushes to give more life, for example in the stars, lighting, frame and details in the Gif, which took ten different images to create movement.
It occurred to me to put a kite on it. This post is for informational purposes, to give knowledge of everything you can achieve with Medibang Paint Pro, they are ideas that you can improve, I hope anyway, you like my creativity and the design that I present today, very curious indeed.
Join me and I will explain my step by step. You may find it useful.

Saludos queridos amigos, hoy estuve inventando y retando el programa que uso de diseño para crear ediciones en fotografías, imágenes y hacer cosas nuevas a partir de un collage se puede decir. Pues necesité muchas imágenes diferentes para crear tanto el GIF como para presentar mi diseño de hoy.
He utilizado además pinceles de Medibang para dar más vida, por ejemplo en las estrellas, iluminación, marco y detalles en el Gif, el cual llevó diez imágenes diferentes para crear movimiento.
Se me ocurrió colocarle una cometa. Este post es a modo informativo, para dar conocimiento de todo lo que puedes lograr con Medibang Paint Pro, son ideas que puedes mejorar, espero de todas maneras, te guste mi creatividad y el diseño que te presento hoy, muy curioso de verdad.
Acompáñame y te explico mi paso a paso. Te puede ser de utilidad.


Paso a paso. / Step by Step
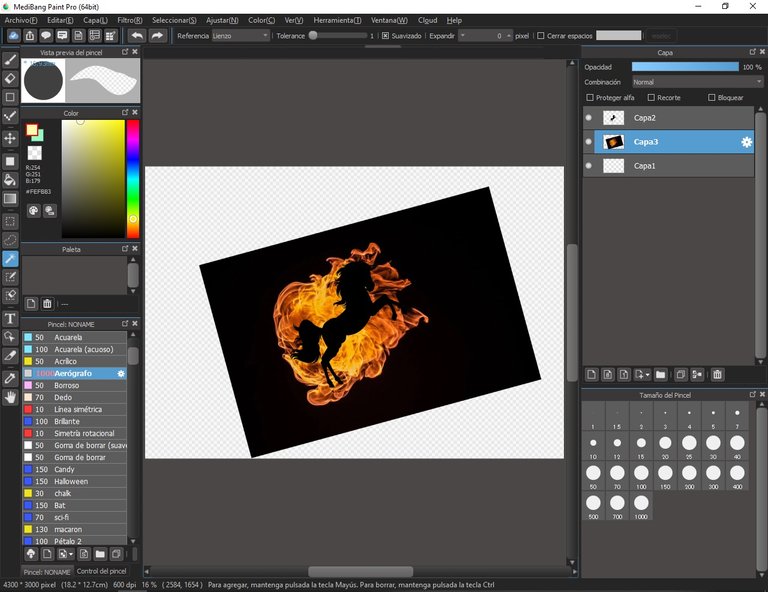
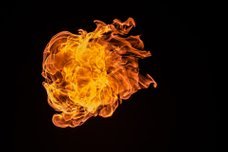
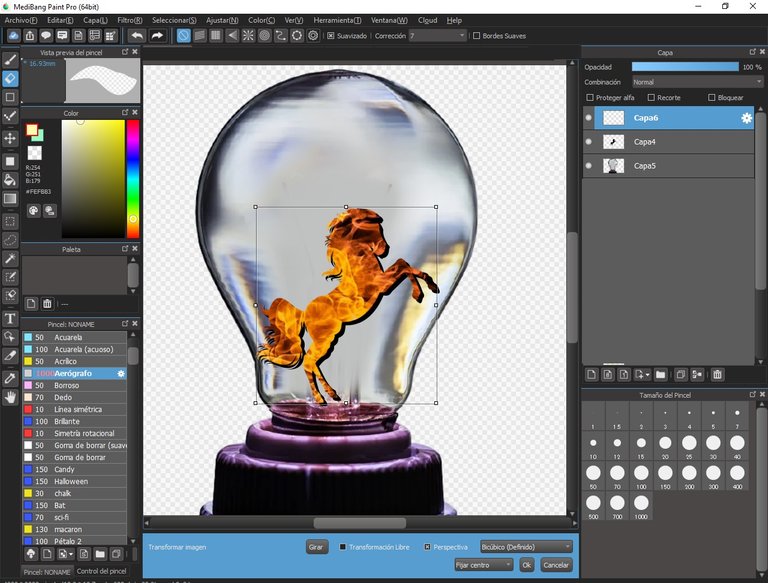
Step 1: I placed my fire background and in a new layer I added the horse, then with the magic wand I clicked on the image of the horse but in the fire layer and cut the image (Ctrl+X).
Paso 1: Coloqué mi fondo de fuego y en una capa nueva agregué el caballo, luego con la varita mágica hice clic en la imagen del caballo pero en la capa de fuego y corté la imagen (Ctrl+X).
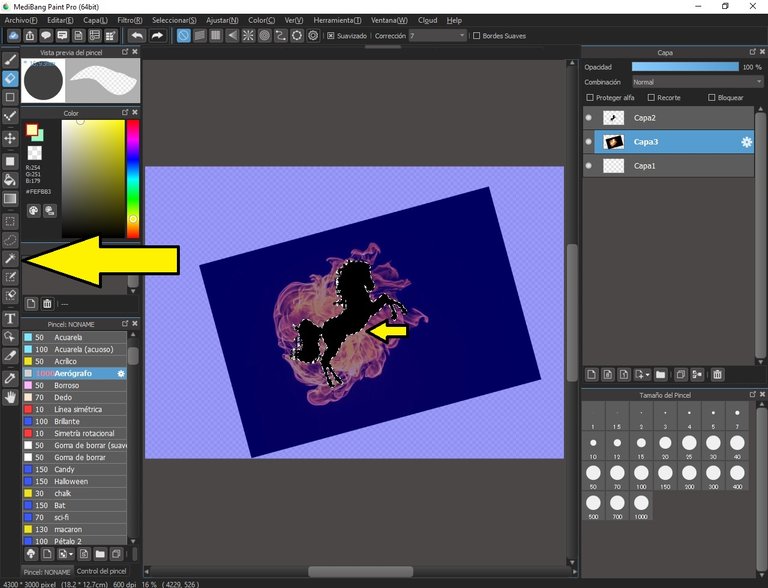
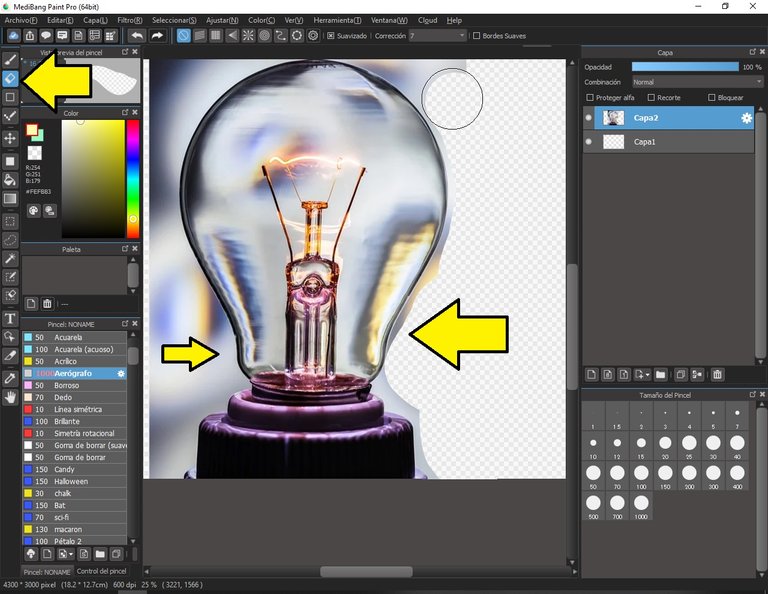
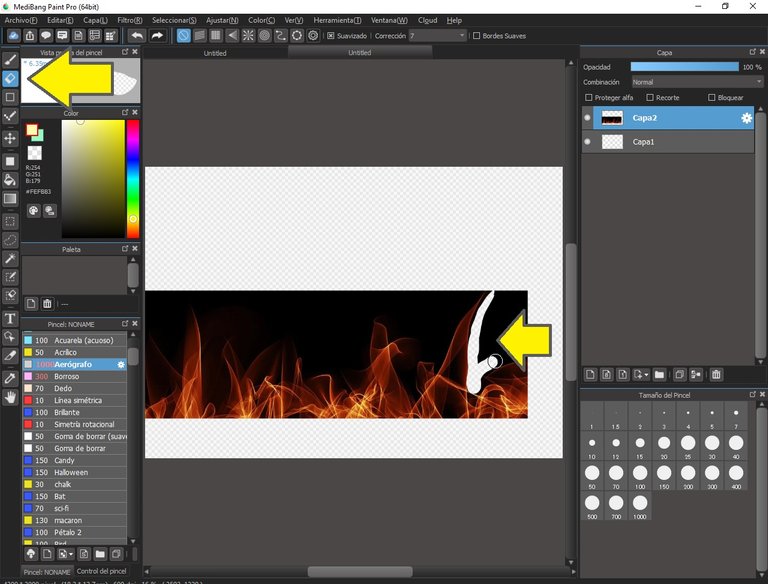
Step 2: In a new canvas I work the separate images to edit, in this case I placed the image of the bulb and proceeded to erase the edges carefully with the eraser tool. Next, with the airbrush I erased the tips of the bulb.
Step 3: I copied the horse that came out of the fire cutout and on the back I pasted the black horse. To give it depth.
Paso 2: En un nuevo lienzo trabajo las imágenes separadas a editar, en este caso coloqué la imagen del bombillo y procedí a borra los bordes cuidadosamente con la herramienta borrador. Seguidamente, con el pincel aerógrafo borré las puntas del bulbo.
Paso 3: He copiado el caballo que salió del recorte del fuego y en la parte de atrás pegué el caballo negro. Para darle profundidad.
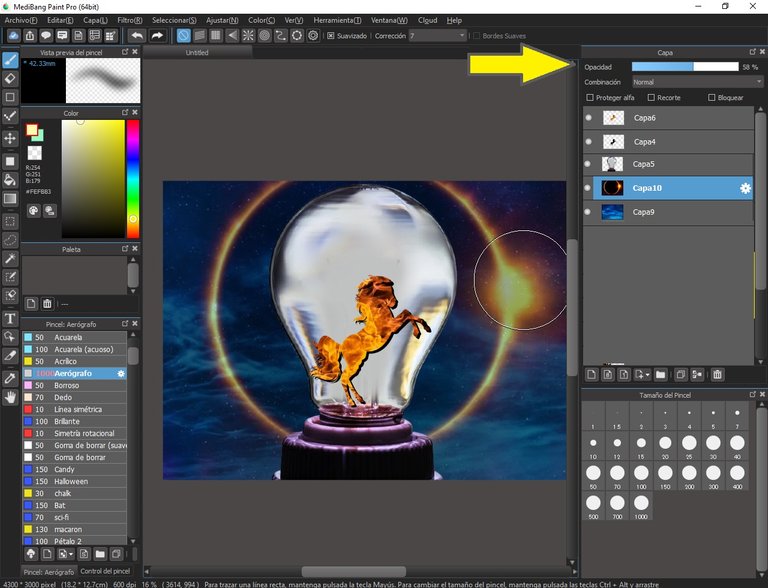

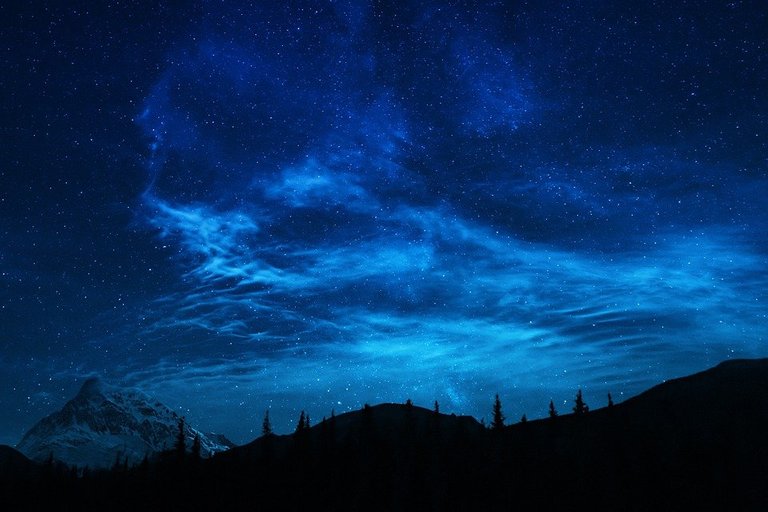
Step 4: In this section I pasted my first background (background 1), then in front of it I placed the second background (eclipse) and to this last one I adjusted the opacity, because I was only interested in the fire ring.
Paso 4: En esta sección he pegado mi primer fondo (fondo 1), luego delante de este coloqué el segundo fondo (eclipse) y a este último ajusté la opacidad, pues solo me interesaba el aro de fuego.
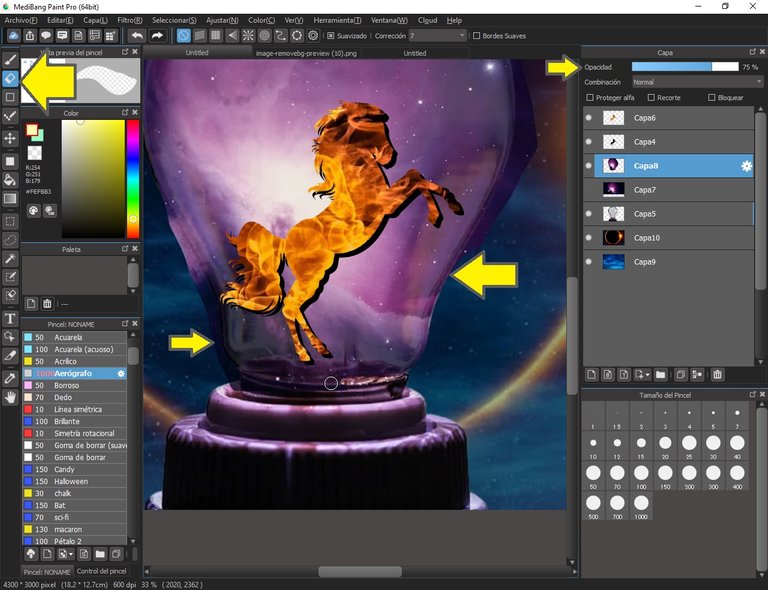
Paso 5: En una capa superior al bombillo, coloco mi fondo de nebulosa, ajusto la opacidad de la capa y con la herramienta borrador, procedo a borrar por todo el contorno del bombillo, luego difumino las orillas con el pincel borroso.
Step 5: On a layer above the bulb, I place my nebula background, adjust the opacity of the layer and with the eraser tool, I proceed to erase all around the bulb, then blur the edges with the blur brush.
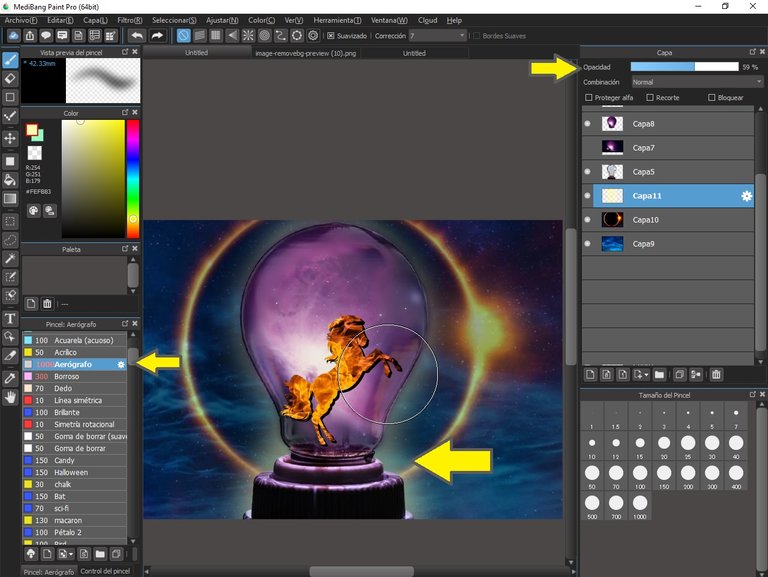
Paso 6: Abro una capa nueva anterior al bombillo, con el pincel aerógrafo y en un tono amarillo pálido, bordeo la imagen para dar luz, luego ajusto la opacidad de esa capa.
Paso 7: En un nuevo lienzo abro la imagen de fuego lineal, procedo a borrar los bordes de la imagen.
Step 6: I open a new layer before the light bulb, with the airbrush and in a pale yellow tone, I border the image to give light, then I adjust the opacity of that layer.
Step 7: In a new canvas I open the image of linear fire, I proceed to erase the edges of the image.
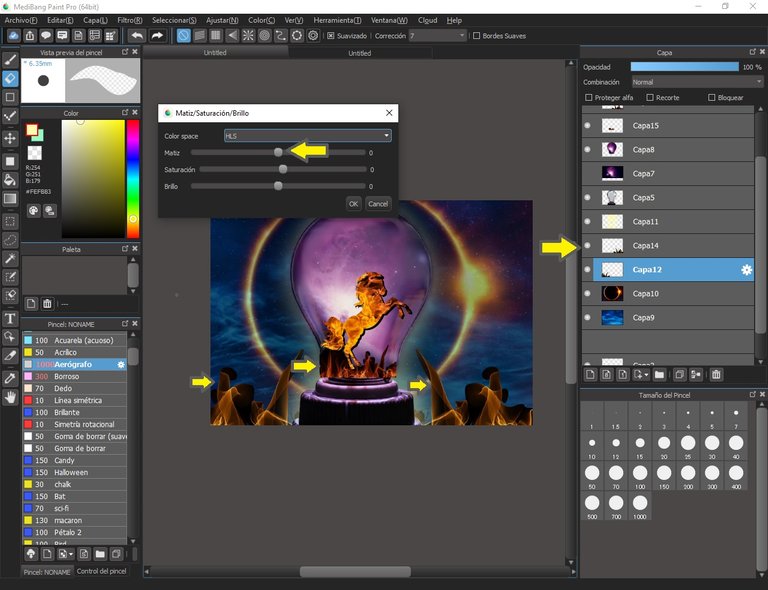
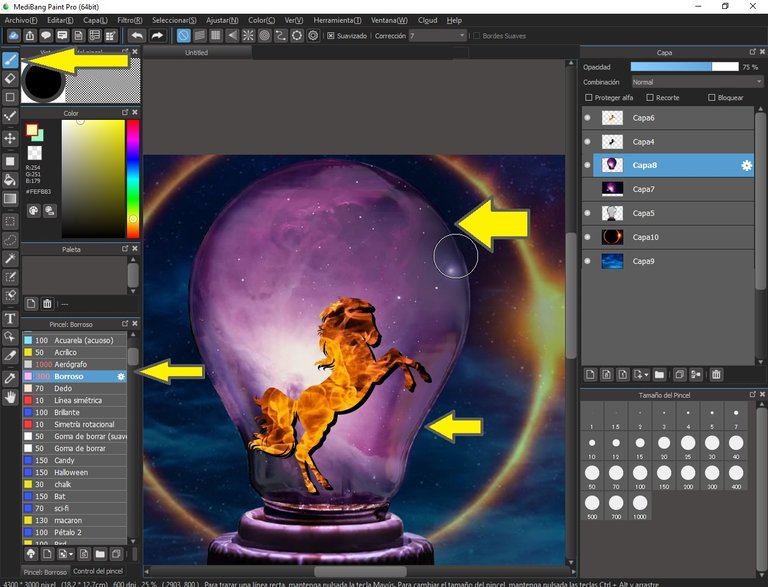
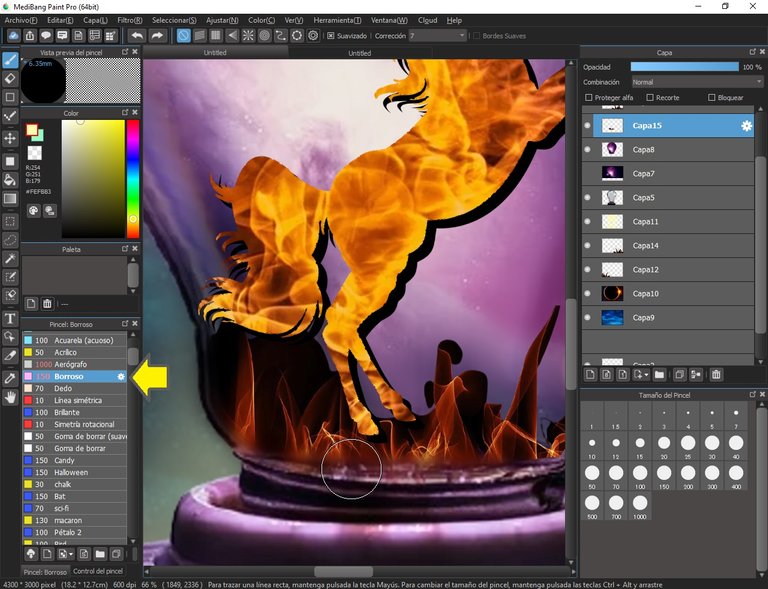
Paso 8: Reproduzco varias veces el fuego, uno lo coloco a la izquierda el otro lo invierto y lo coloco a la derecha, el tercero manipulo su tamaño y lo coloco en el bombillo, luego a cada uno con el pincel borroso, ajusto un poco los bordes.
Step 8: I reproduce several times the fire, one I place on the left, the other I invert it and place it on the right, the third I manipulate its size and place it on the bulb, then each one with the blurred brush, I adjust the edges a little.
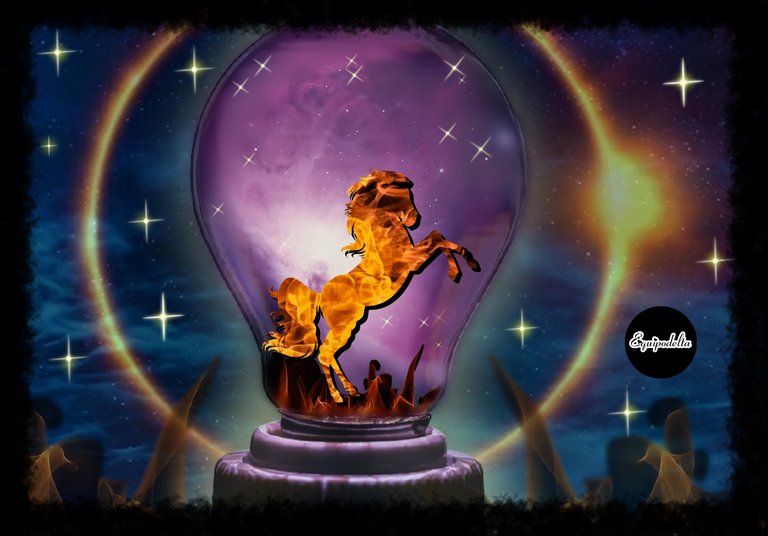
Mis últimos pasos constaron de la aplicación del marco, eso lo hice con la herramienta figuras geométricas - rectángulo, con un color negro y el pincel Chalk.
Luego con el pincel aerógrafo en una nueva capa, coloqué unos puntos amarillos y en capa nueva y el pincel Brillante 2 realicé unas estrellas brillantes.
El cometa lo realicé con la misma capa del eclipse, recorté la pieza y fui haciendo la cola arrastrando con el pincel dedo.
Es todo por hoy amigos, nos vemos en el siguiente post. Que tengan un grandioso fin de semana.
My last steps consisted of applying the frame, which I did with the geometric shapes tool - rectangle, with a black color and the Chalk brush.
Then with the airbrush in a new layer, I placed some yellow dots and in a new layer and the brush Shiny 2 I made some shiny stars.
I made the comet with the same layer of the eclipse, I cut the piece and I was making the tail dragging with the finger brush.
That's all for today friends, see you in the next post. Have a great weekend.
Detalles Técnicos / Technical Details
Program: MediBang Paint Pro.
Graphics tablet: Huion (Usb Pen Tablet). Model 420.
Used Medibang brushes:
- Chalk.
- Aerógrafo.
- Brillante 2.
Used Medibang tools:
- Borrador.
- Figuras geométricas (rectángulo)
- Varita mágica.
Corrector de idioma / traductor
SRC1
SRC2
SRC3
SRC4
SRC5
SRC6
SRC7
Mi canal Youtube, tiene un montón de tutoriales muy útiles para ti.
My Youtube channel, has a lot of very useful tutorials for you.
![]() 👉
👉 ![]() 👉
👉 ![]() 👉
👉  👉
👉 ![]() 👉
👉 
Your post has been voted as a part of Encouragement program. Keep up the good work!
Try https://ecency.com and Earn Points in every action (being online, posting, commenting, reblog, vote and more).
Boost your earnings, double reward, double fun! 😉
Support Ecency, in our mission:
Ecency: https://ecency.com/proposals/141
Hivesigner: Vote for Proposal
Thanks for you support.
Gracias por apoyar mi contenido linduras.
A ti por deleitarnos con ese gran talento!
Congratulations, your post has been upvoted by @dsc-r2cornell, which is the curating account for @R2cornell's Discord Community.
Enhorabuena, su "post" ha sido "up-voted" por @dsc-r2cornell, que es la "cuenta curating" de la Comunidad de la Discordia de @R2cornell.
Hola, querida amiga @equipodelta
Muy buen tutorial sobre Medibang. Tengo el programa, pero no lo he abierto jeje
Mucho trabajo y poco tiempo.
Gracias por compartir tus conocimientos sobre el tema.
Un abrazote
Hola querida, se que trabajas con photoshop, a tu nivel puedo recomendarte emplees ilustrator que es mas o menos lo mismo, tú te defiendes excelentemente con photoshop, Medibang puede ser un atraso para ti, te explico: Medibang todo lo que hagas alli se pixela, pues es un programa a base de pixeles, en cambio Ilustrator o Photoshop no, por eso las paginas para vender tu arte como: Stock, istock, getty entre otras exigen que trabajes en esos programas, ademas que necesitas guardarlo en formato PSD, que Medibang no tiene. Sin embargo para divertirte y hacer cosas sencillas, te funciona bien.
Gracias por la información. Es muy relevante para mí.
Además, de que quiero vender mi arte y no he encontrado la manera jeje
Un gran abrazote
Congratulations @equipodelta! You have completed the following achievement on the Hive blockchain and have been rewarded with new badge(s) :
You can view your badges on your board and compare yourself to others in the Ranking
If you no longer want to receive notifications, reply to this comment with the word
STOP