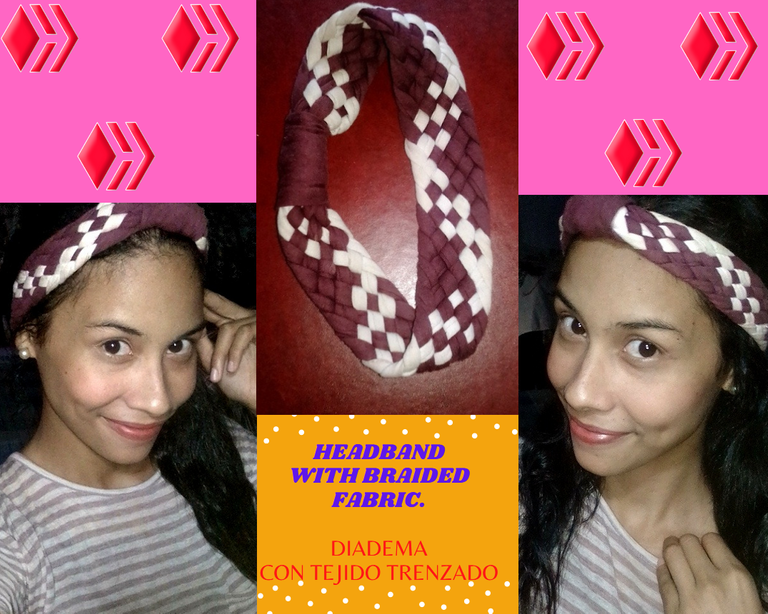
Hi Hivers, how are you guys? I hope very well in your homes. I have been doing something different to show you and that is why I made a headband with elastic fabric strips, ideal to wear casually at any time, it is beautiful and simple to do.
Everything is made with fabric and consists of making braids until obtaining the headband. I invite you to see its realization step by step so that you can do it at home for you girls or give it away.
CINTA CON TEJIDO TRENZADO
Hola Hivers, ¿cómo están chicos? Espero muy bien en sus hogares. He estado haciendo algo diferente para mostrarles y por eso hice una diadema con tiras de tela elásticas, ideal para llevar de manera casual en cualquier momento, es bonita y sencilla de hacer.
Todo está elaborado con tela y consiste en hacer trenzas hasta obtener la diadema. Les invito a ver paso a paso su realización para que pudas hacerlo en casa para ustedes mismas , chicas o regalarlo.

FIRST OF ALL, THE ONLY MATERIALS TO USE ARE:
Scissors and stretch fabric
EN PRIMER LUGAR, LOS ÚNICOS MATERIALES A UTILIZAR SON:
Tijera y tela elástica
HOW TO DO IT ?
1 We must obtain long strips of fabrics, cut from any elastic fabric. A blouse, tablecloth, sheets. You can recycle any fabric.
¿CÓMO HACERLO ?
1 . Debemos obtener tiras largas de tejidos, cortadas de cualquier tejido elástico. Una blusa, mantel, sábanas. Puedes reciclar cualquier tejido.
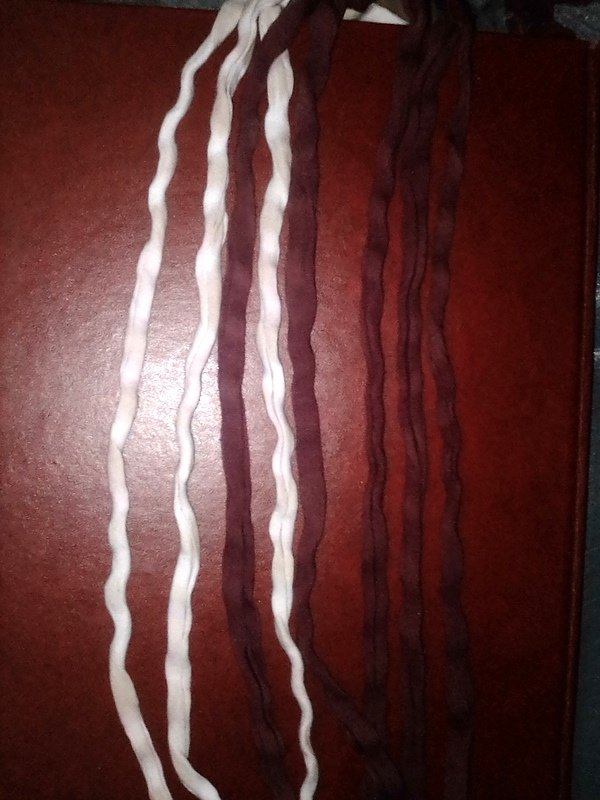
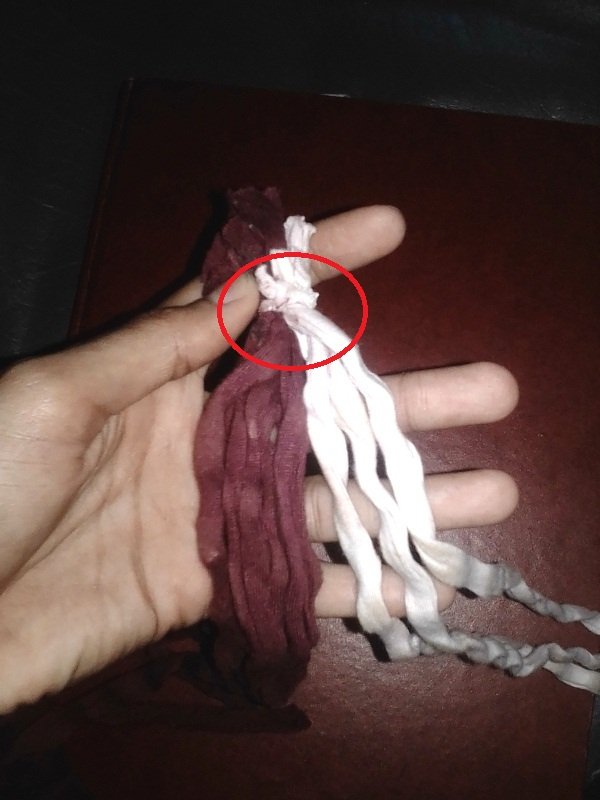
2. We take 8 long strips, 5 of one color and 3 of another color. We fasten all the strips with a piece of cloth at the beginning.
2. Tomamos 8 tiras largas, 5 de un color y 3 de otro color. Sujetamos todas las tiras con un trozo de tela al principio.
3. Here I start the braiding, crossing each strap with the row that corresponds to it. 1, then 2 and so on.
3. Aquí comienzo el trenzado, cruzando cada tira con la fila que le corresponde. 1, luego 2 y así sucesivamente.
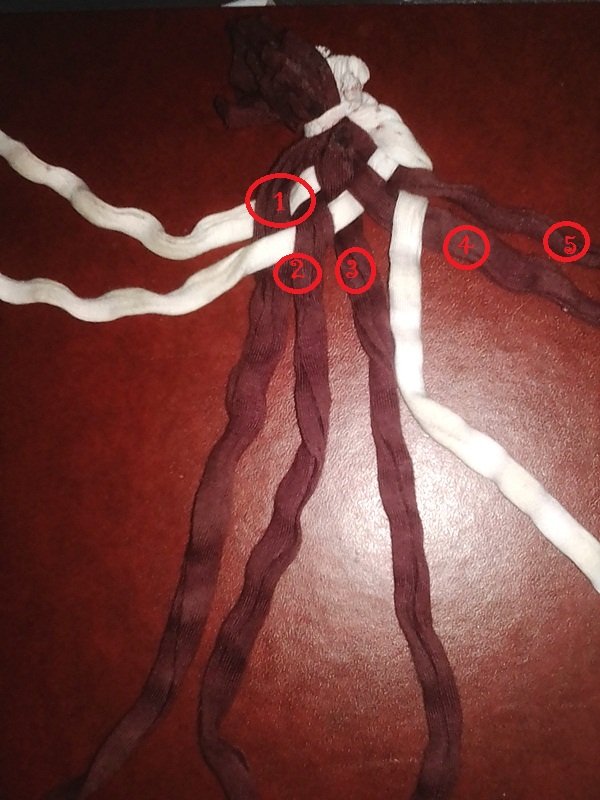
4. I'm making a mesh where the first strip (yellow numbers) meets the last strip of this mesh (red numbers).
4. Estoy haciendo una malla donde la primera franja (números amarillos) se encuentra con la última franja de esta malla (números rojos).
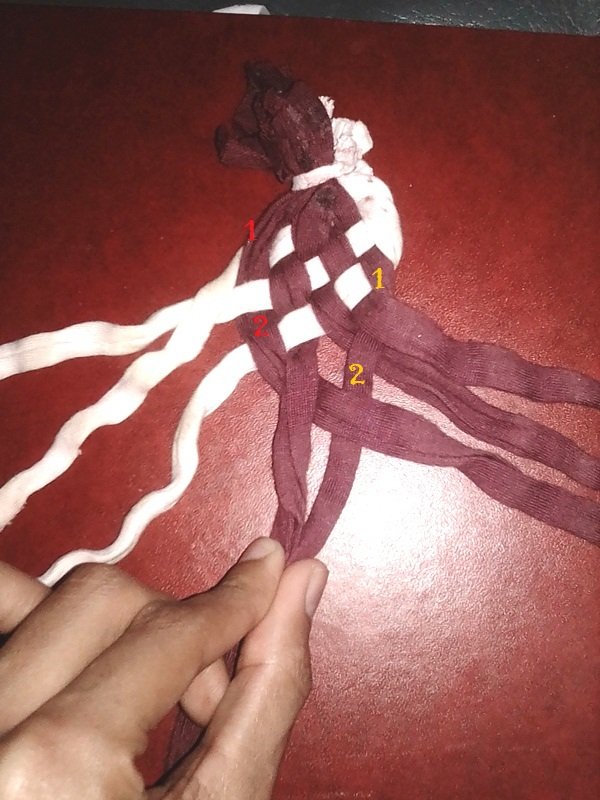
5.Then I proceed with the last two strips at the ends and do the same procedure above. As the image shows.
5.Luego procedo con las dos últimas tiras en los extremos y hago el mismo procedimiento anterior. Como muestra la imagen.
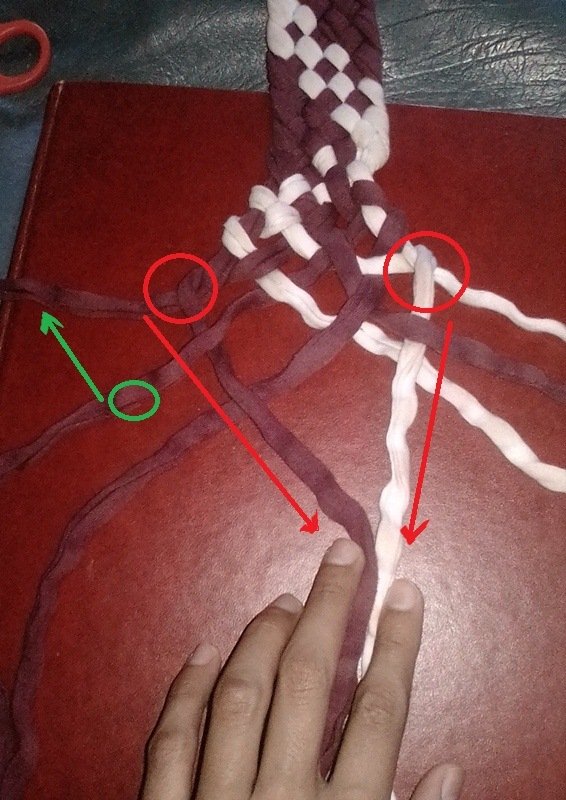
6 . And so we stay, the advance.
6 . Y así nos quedamos, el avance.
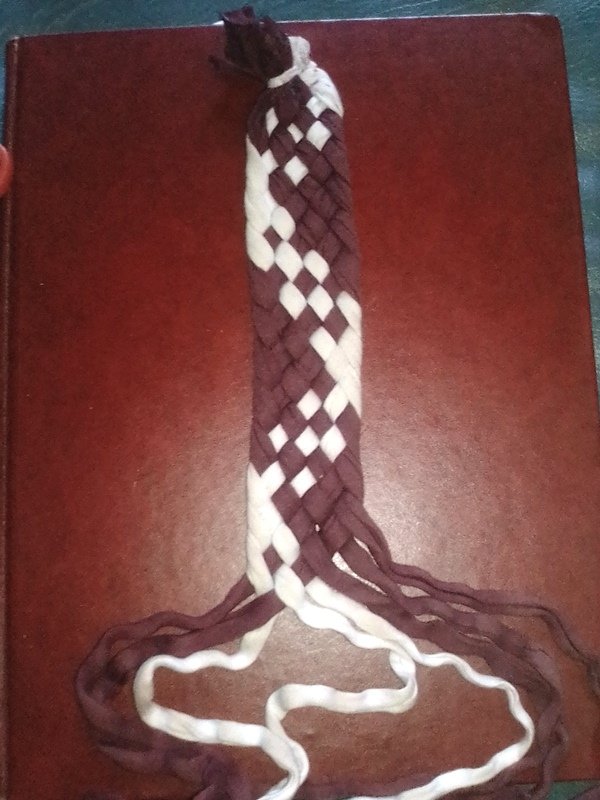
7. Now I take a wide piece of fabric and glue both ends of the headband to join them.
7. Ahora tomo un pedazo ancho de tela y pego ambos extremos de la diadema para unirlos.
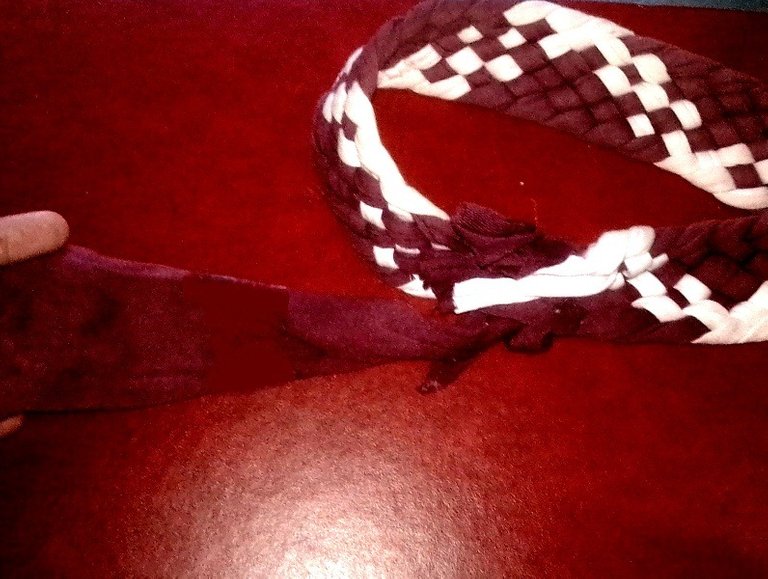
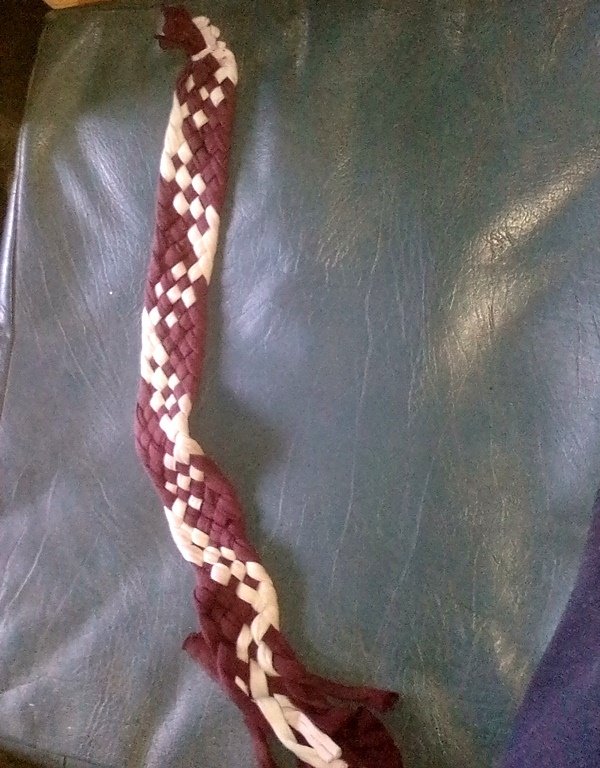
8. With the job done, that's how it looks.
8. Con el trabajo hecho, así es como se ve.
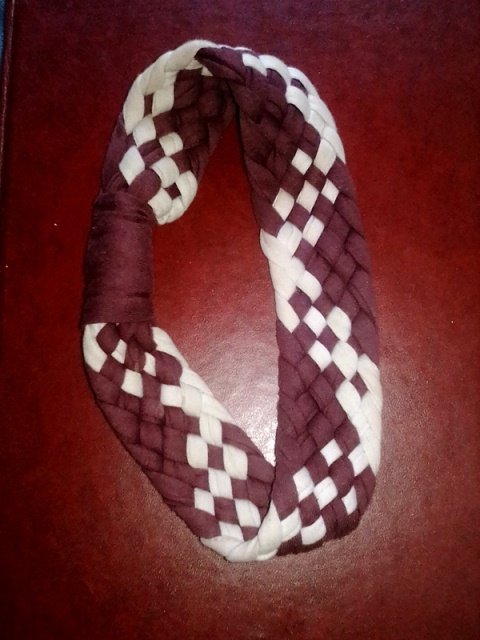
It is a headband that with practice becomes simple to make and you can use several colored strips if you are looking for something more personalized. Well friends, so far this post, I hope you liked it, I receive opinions and suggestions, I am delighted to read and respond to them. Have a good afternoon, kisses.
Es una diadema que con la práctica se vuelve sencilla de hacer y puedes utilizar varias tiras de colores si buscas algo más personalizado. Bueno amigos, hasta aquí este post, espero que les haya gustado, recibo opiniones y sugerencias, estoy encantada de leerlas y responderlas. Que tengas una buena tarde, besos
Friends here i leave my social networks/Amigos aquí dejo mis redes sociales

Copyright @eulymer - All rights reserved