Hello friends of Hive, God bless you greatly on this day, today I want to share with you the elaboration of this beautiful ornament of a little house in the snow, it is easy to do and with materials that you can have in your house, so let's start
Hola amigos de Hive, Dios los bendiga grandemente en este dia, hoy quiero compartir con ustedes la elaboración de este hermoso adorno de una casita en la nieve, es fácil de hacer y con materiales que puedes tener en tu casa, así que empecemos
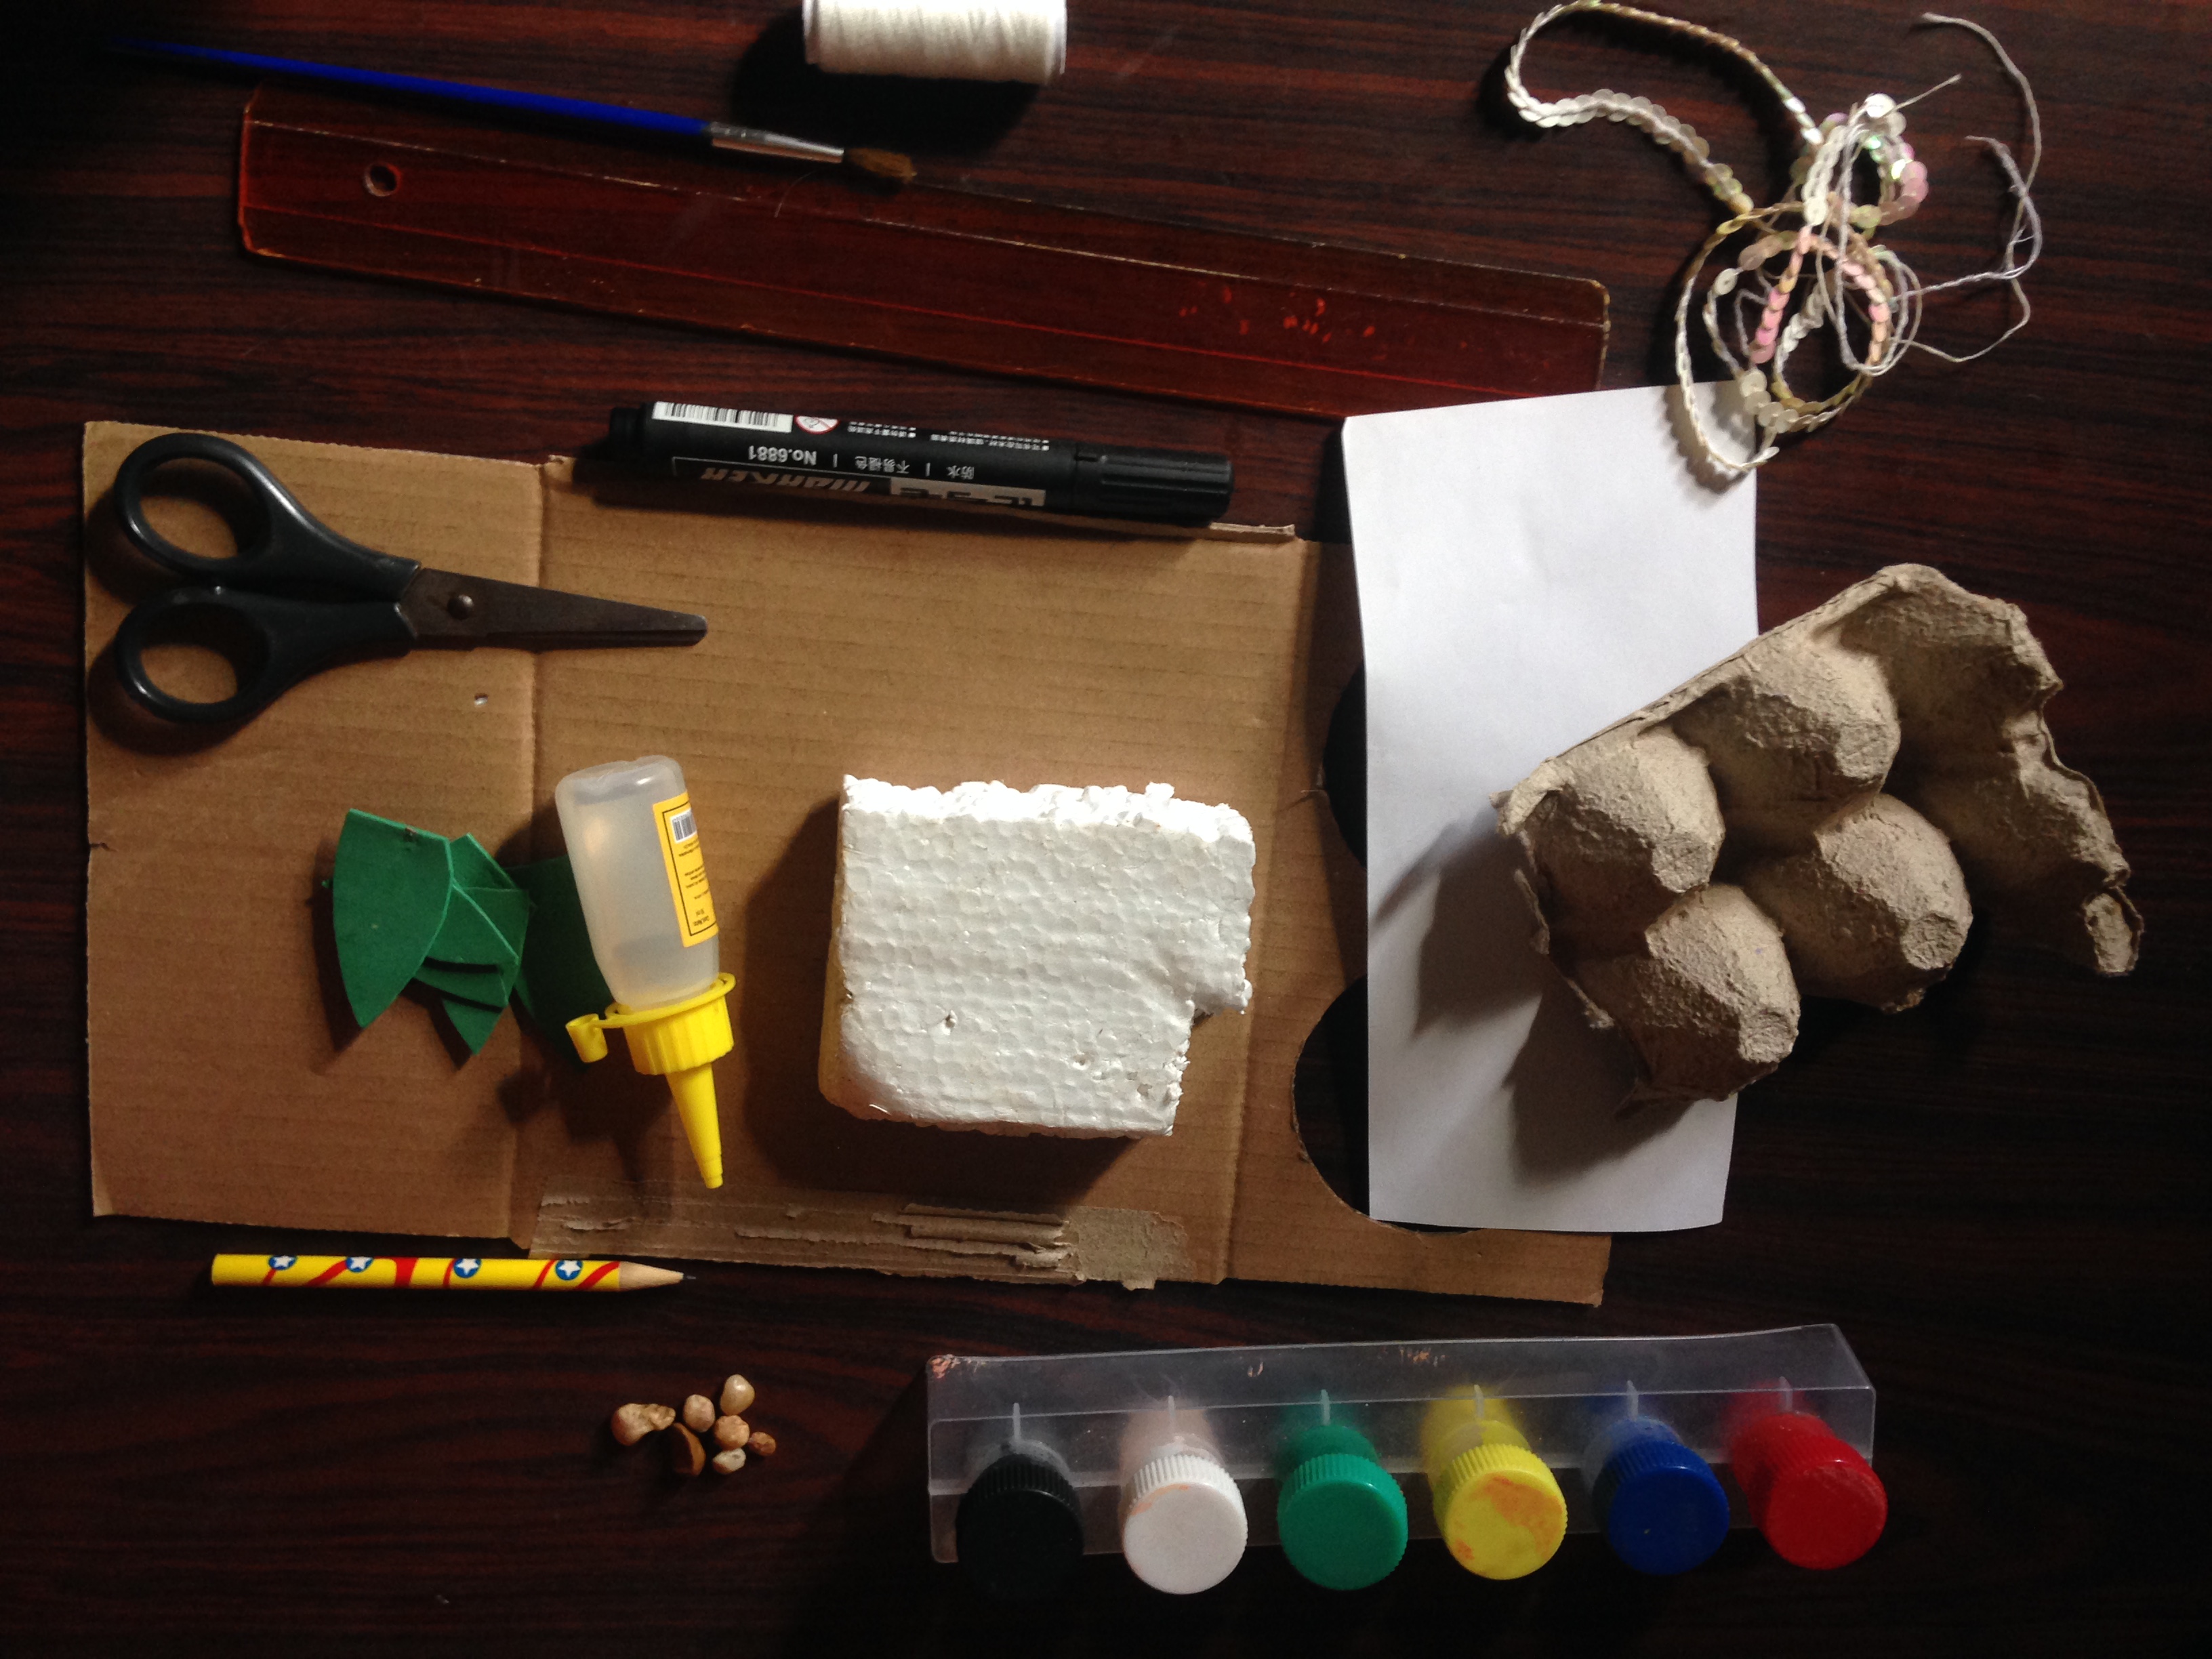
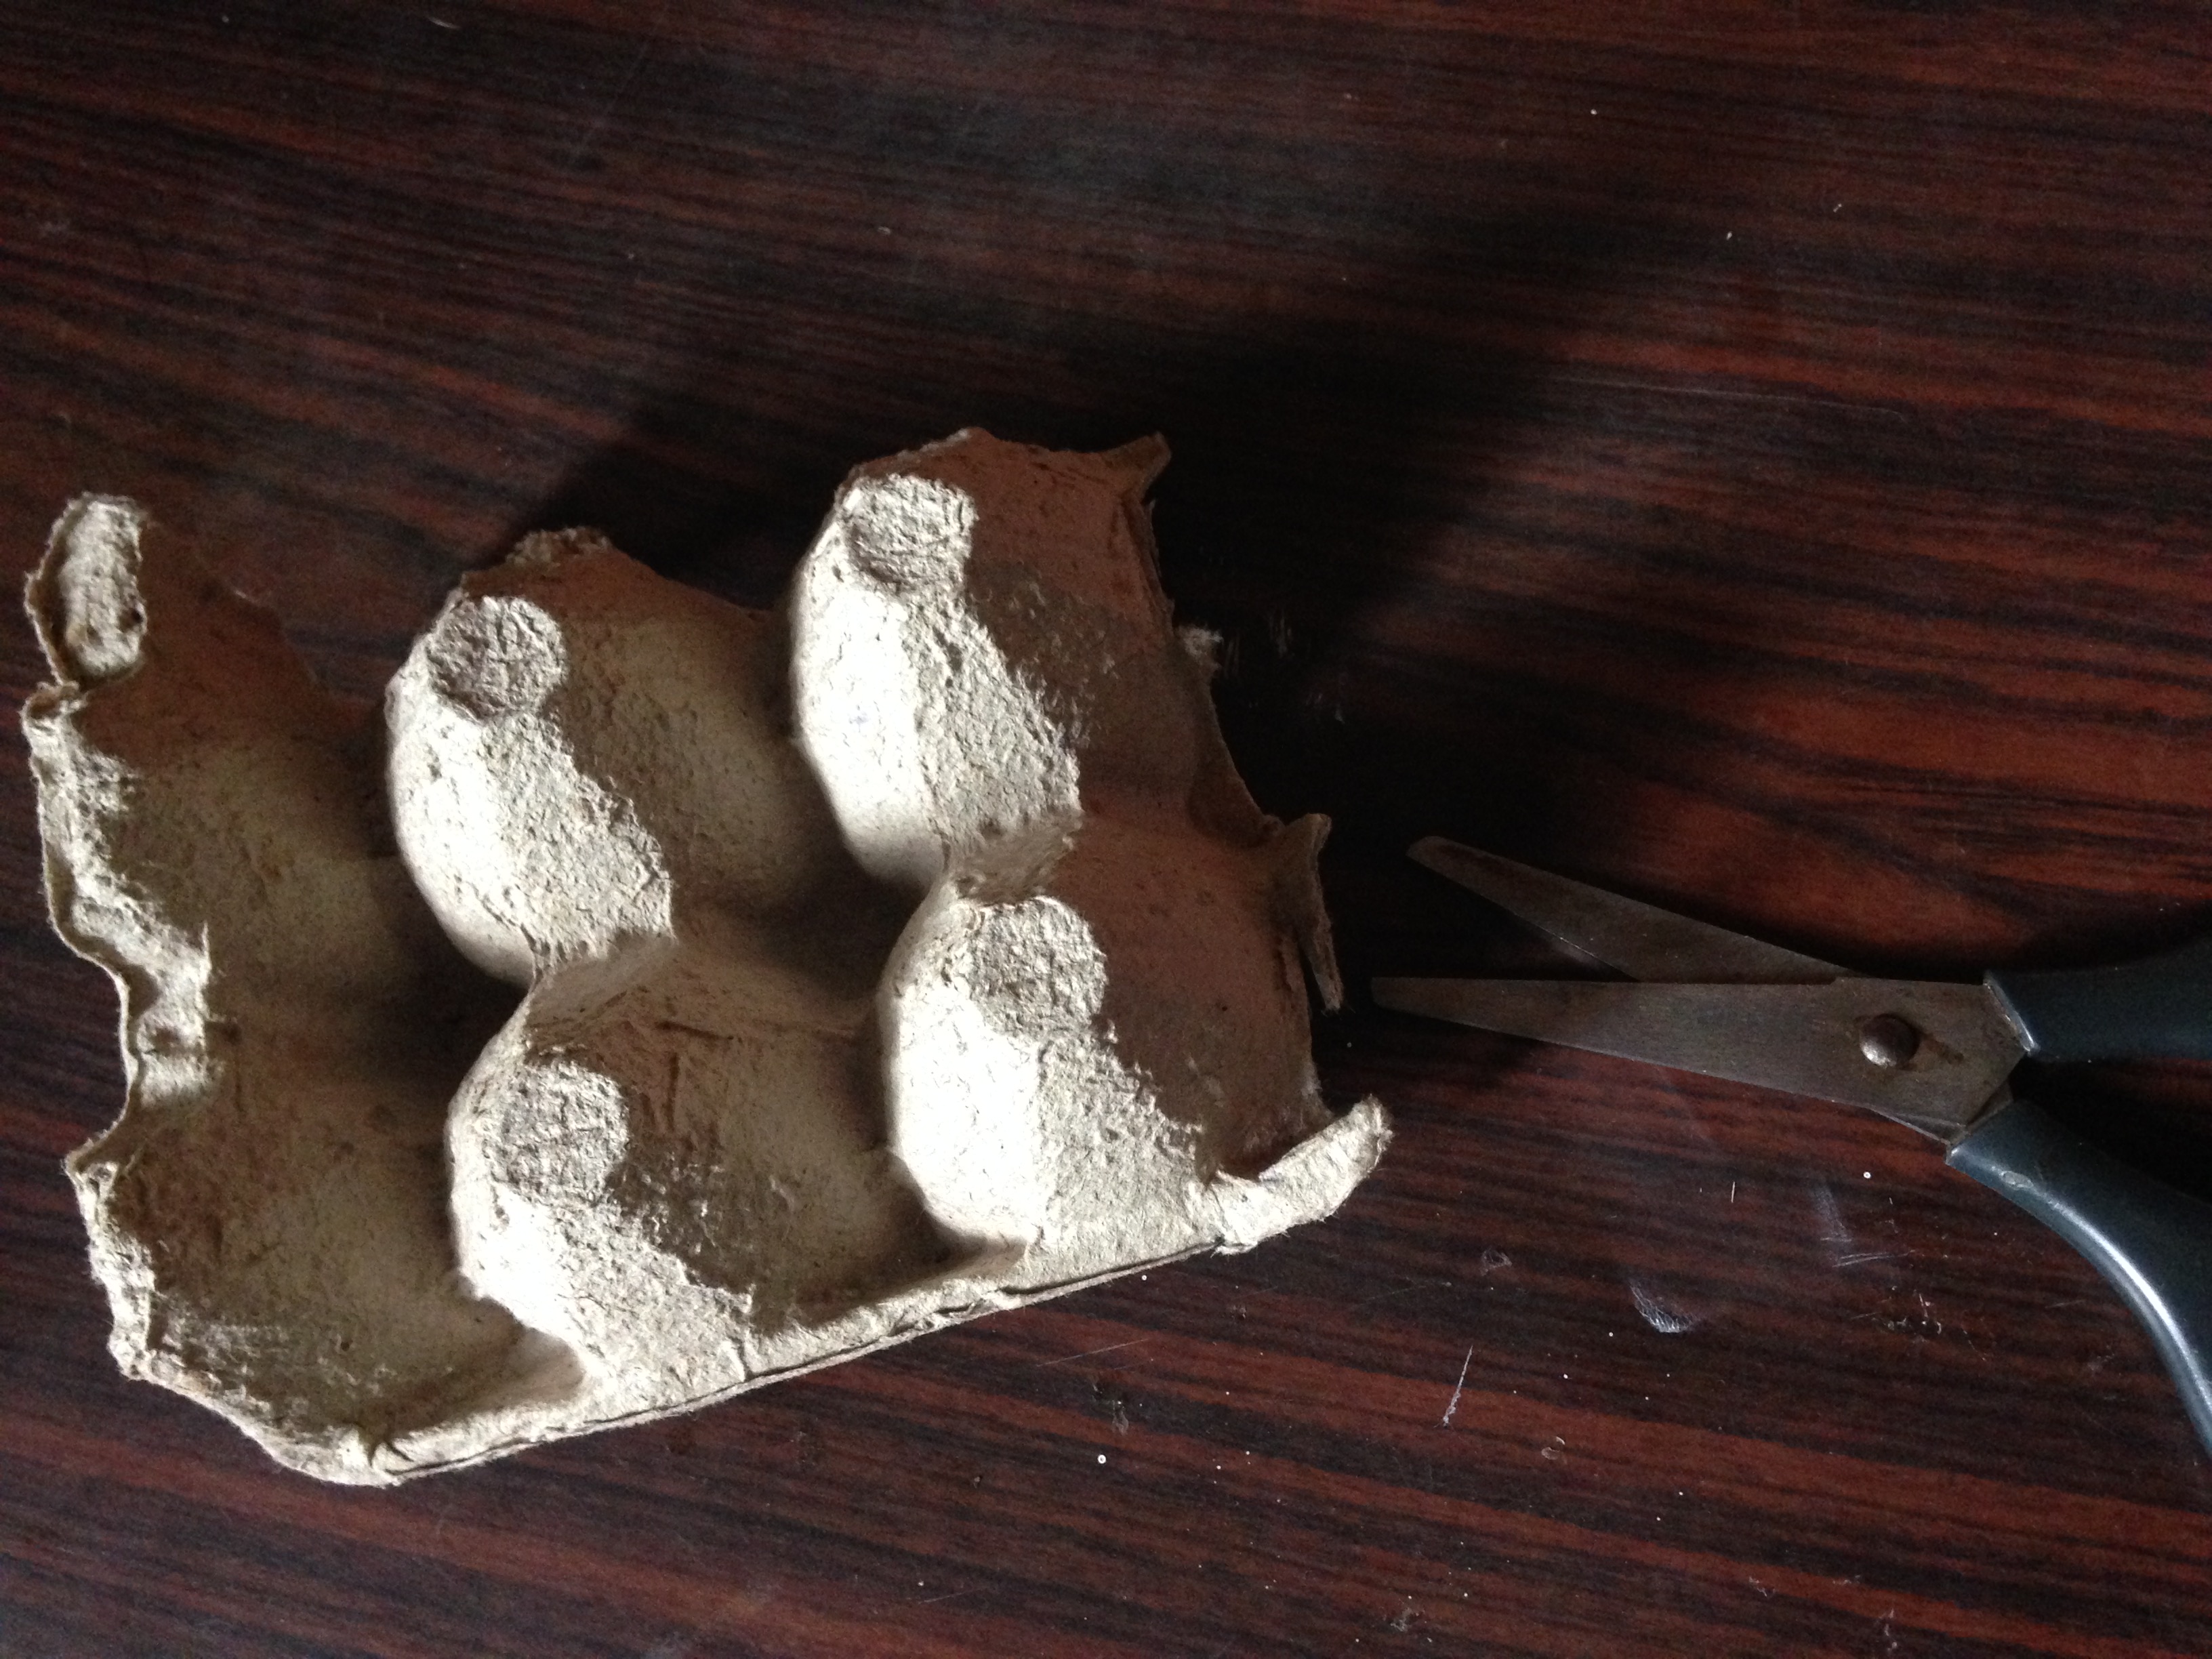
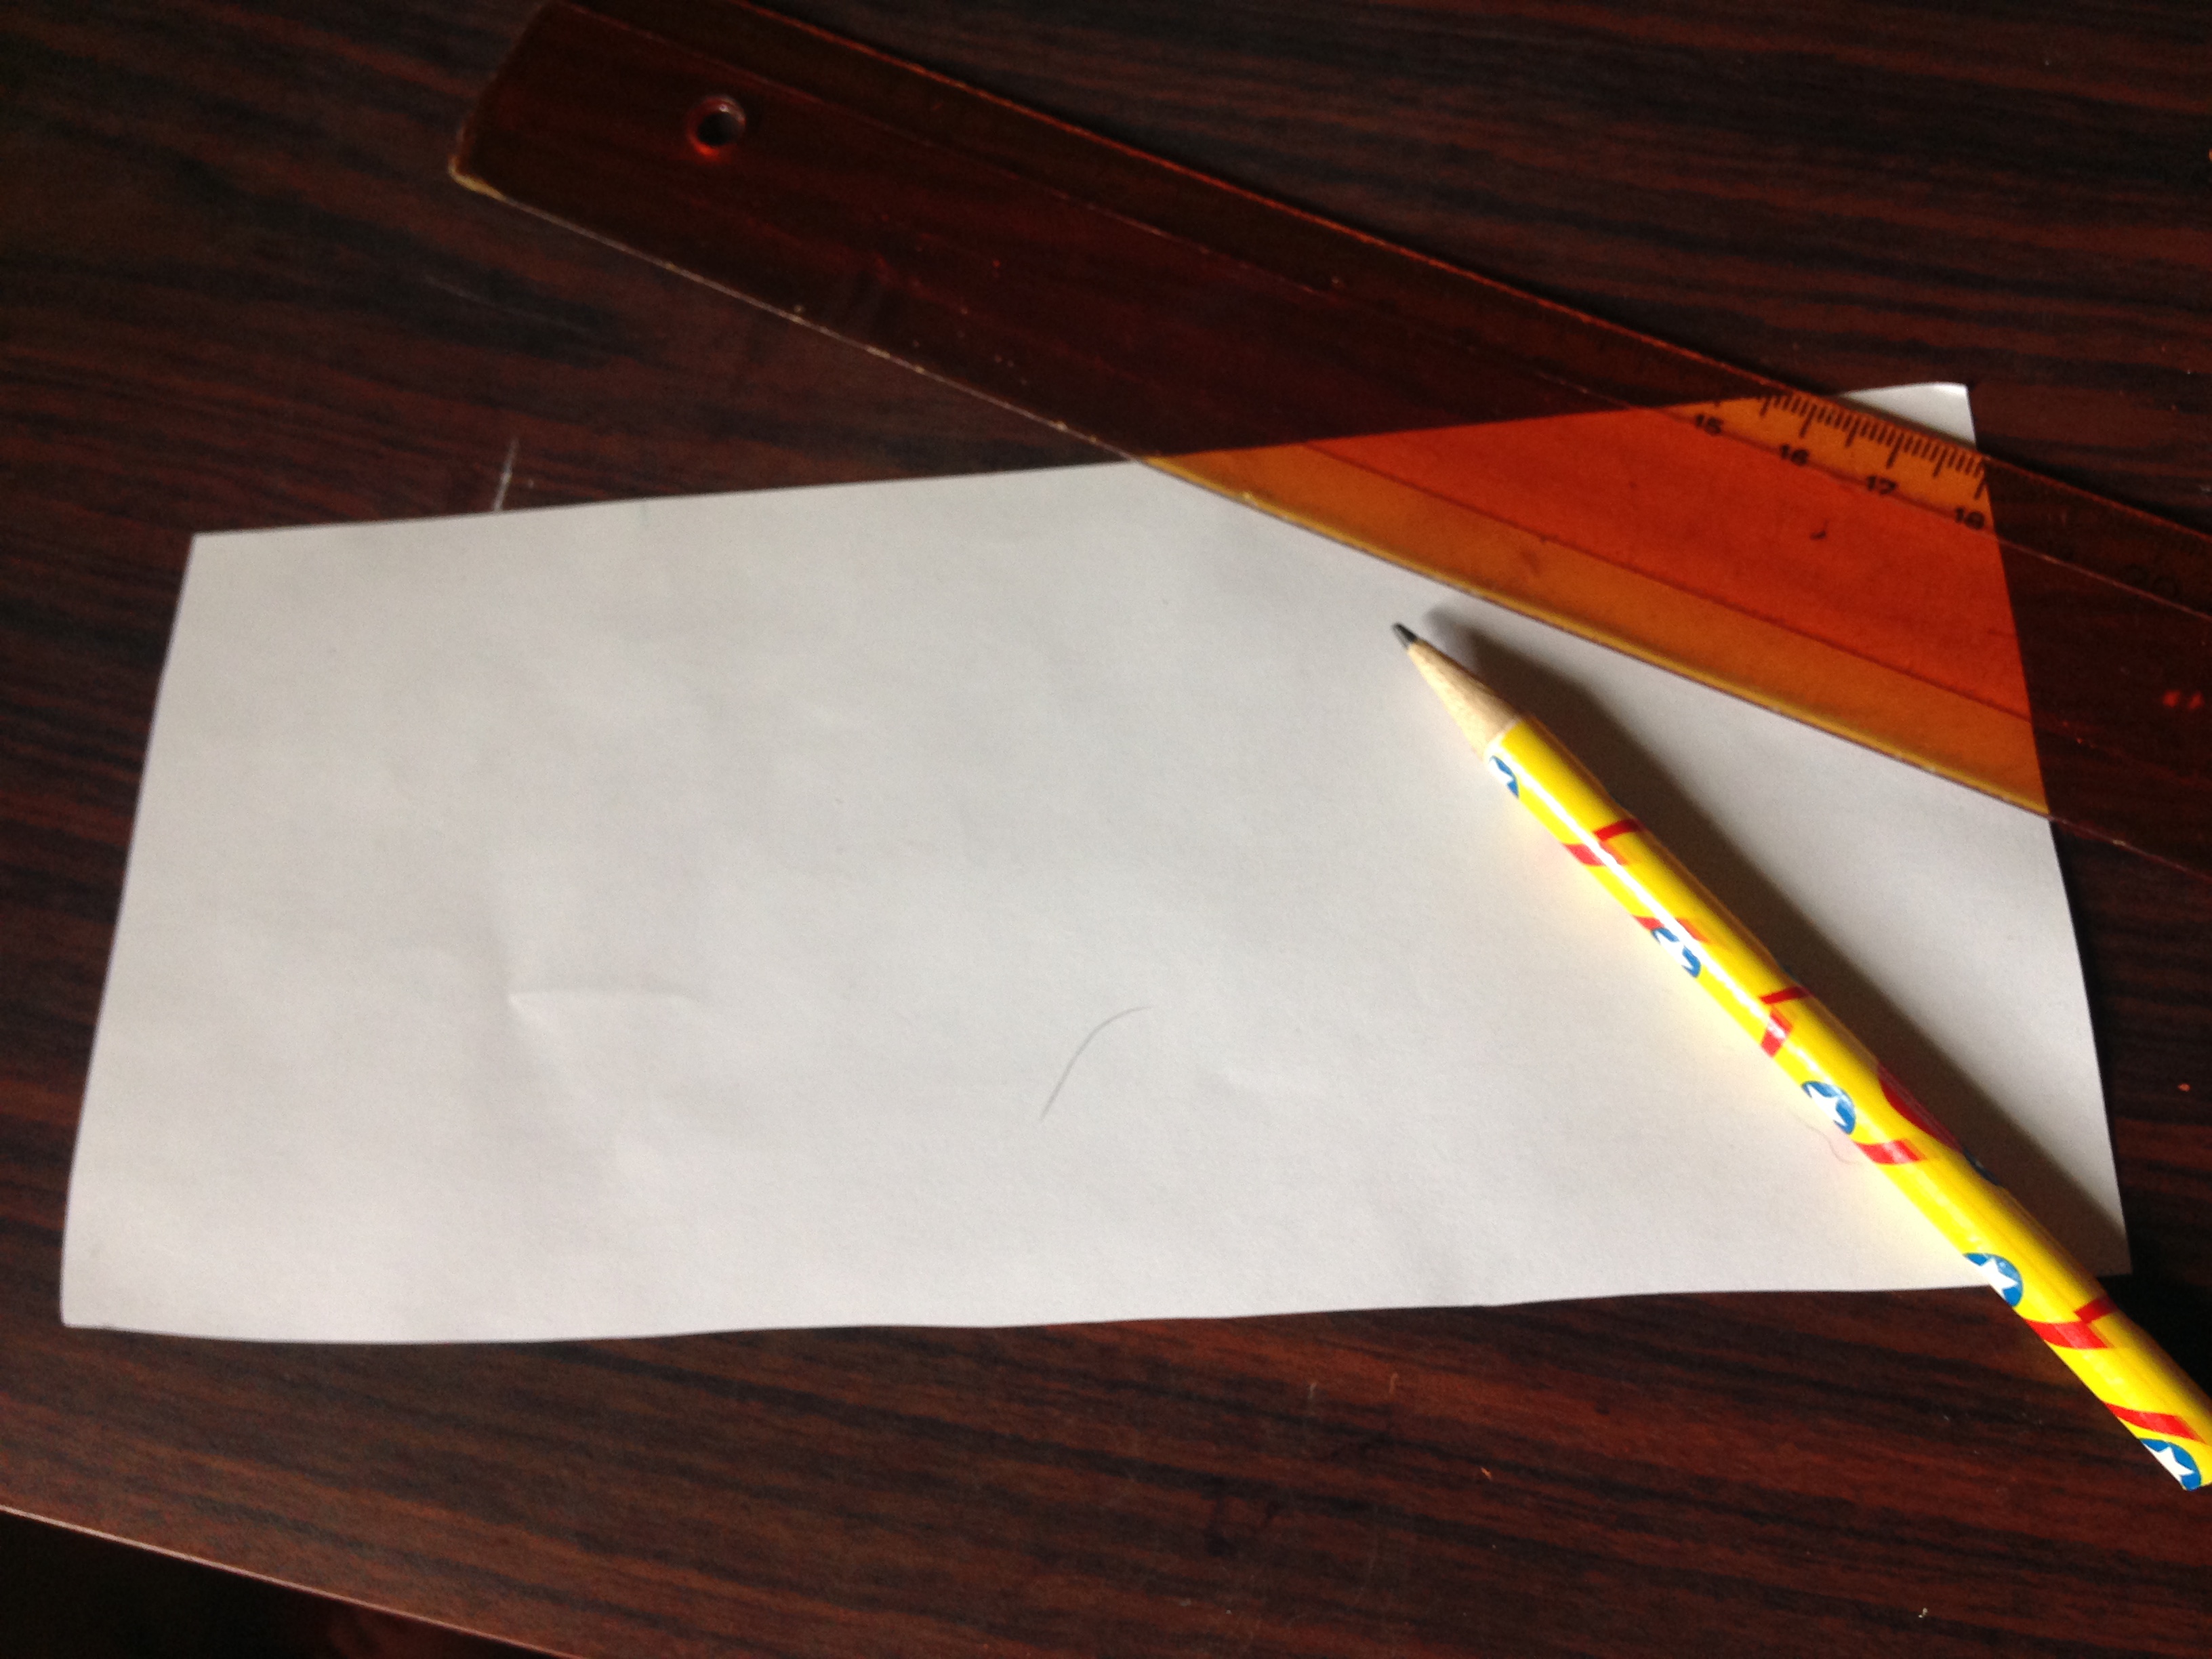
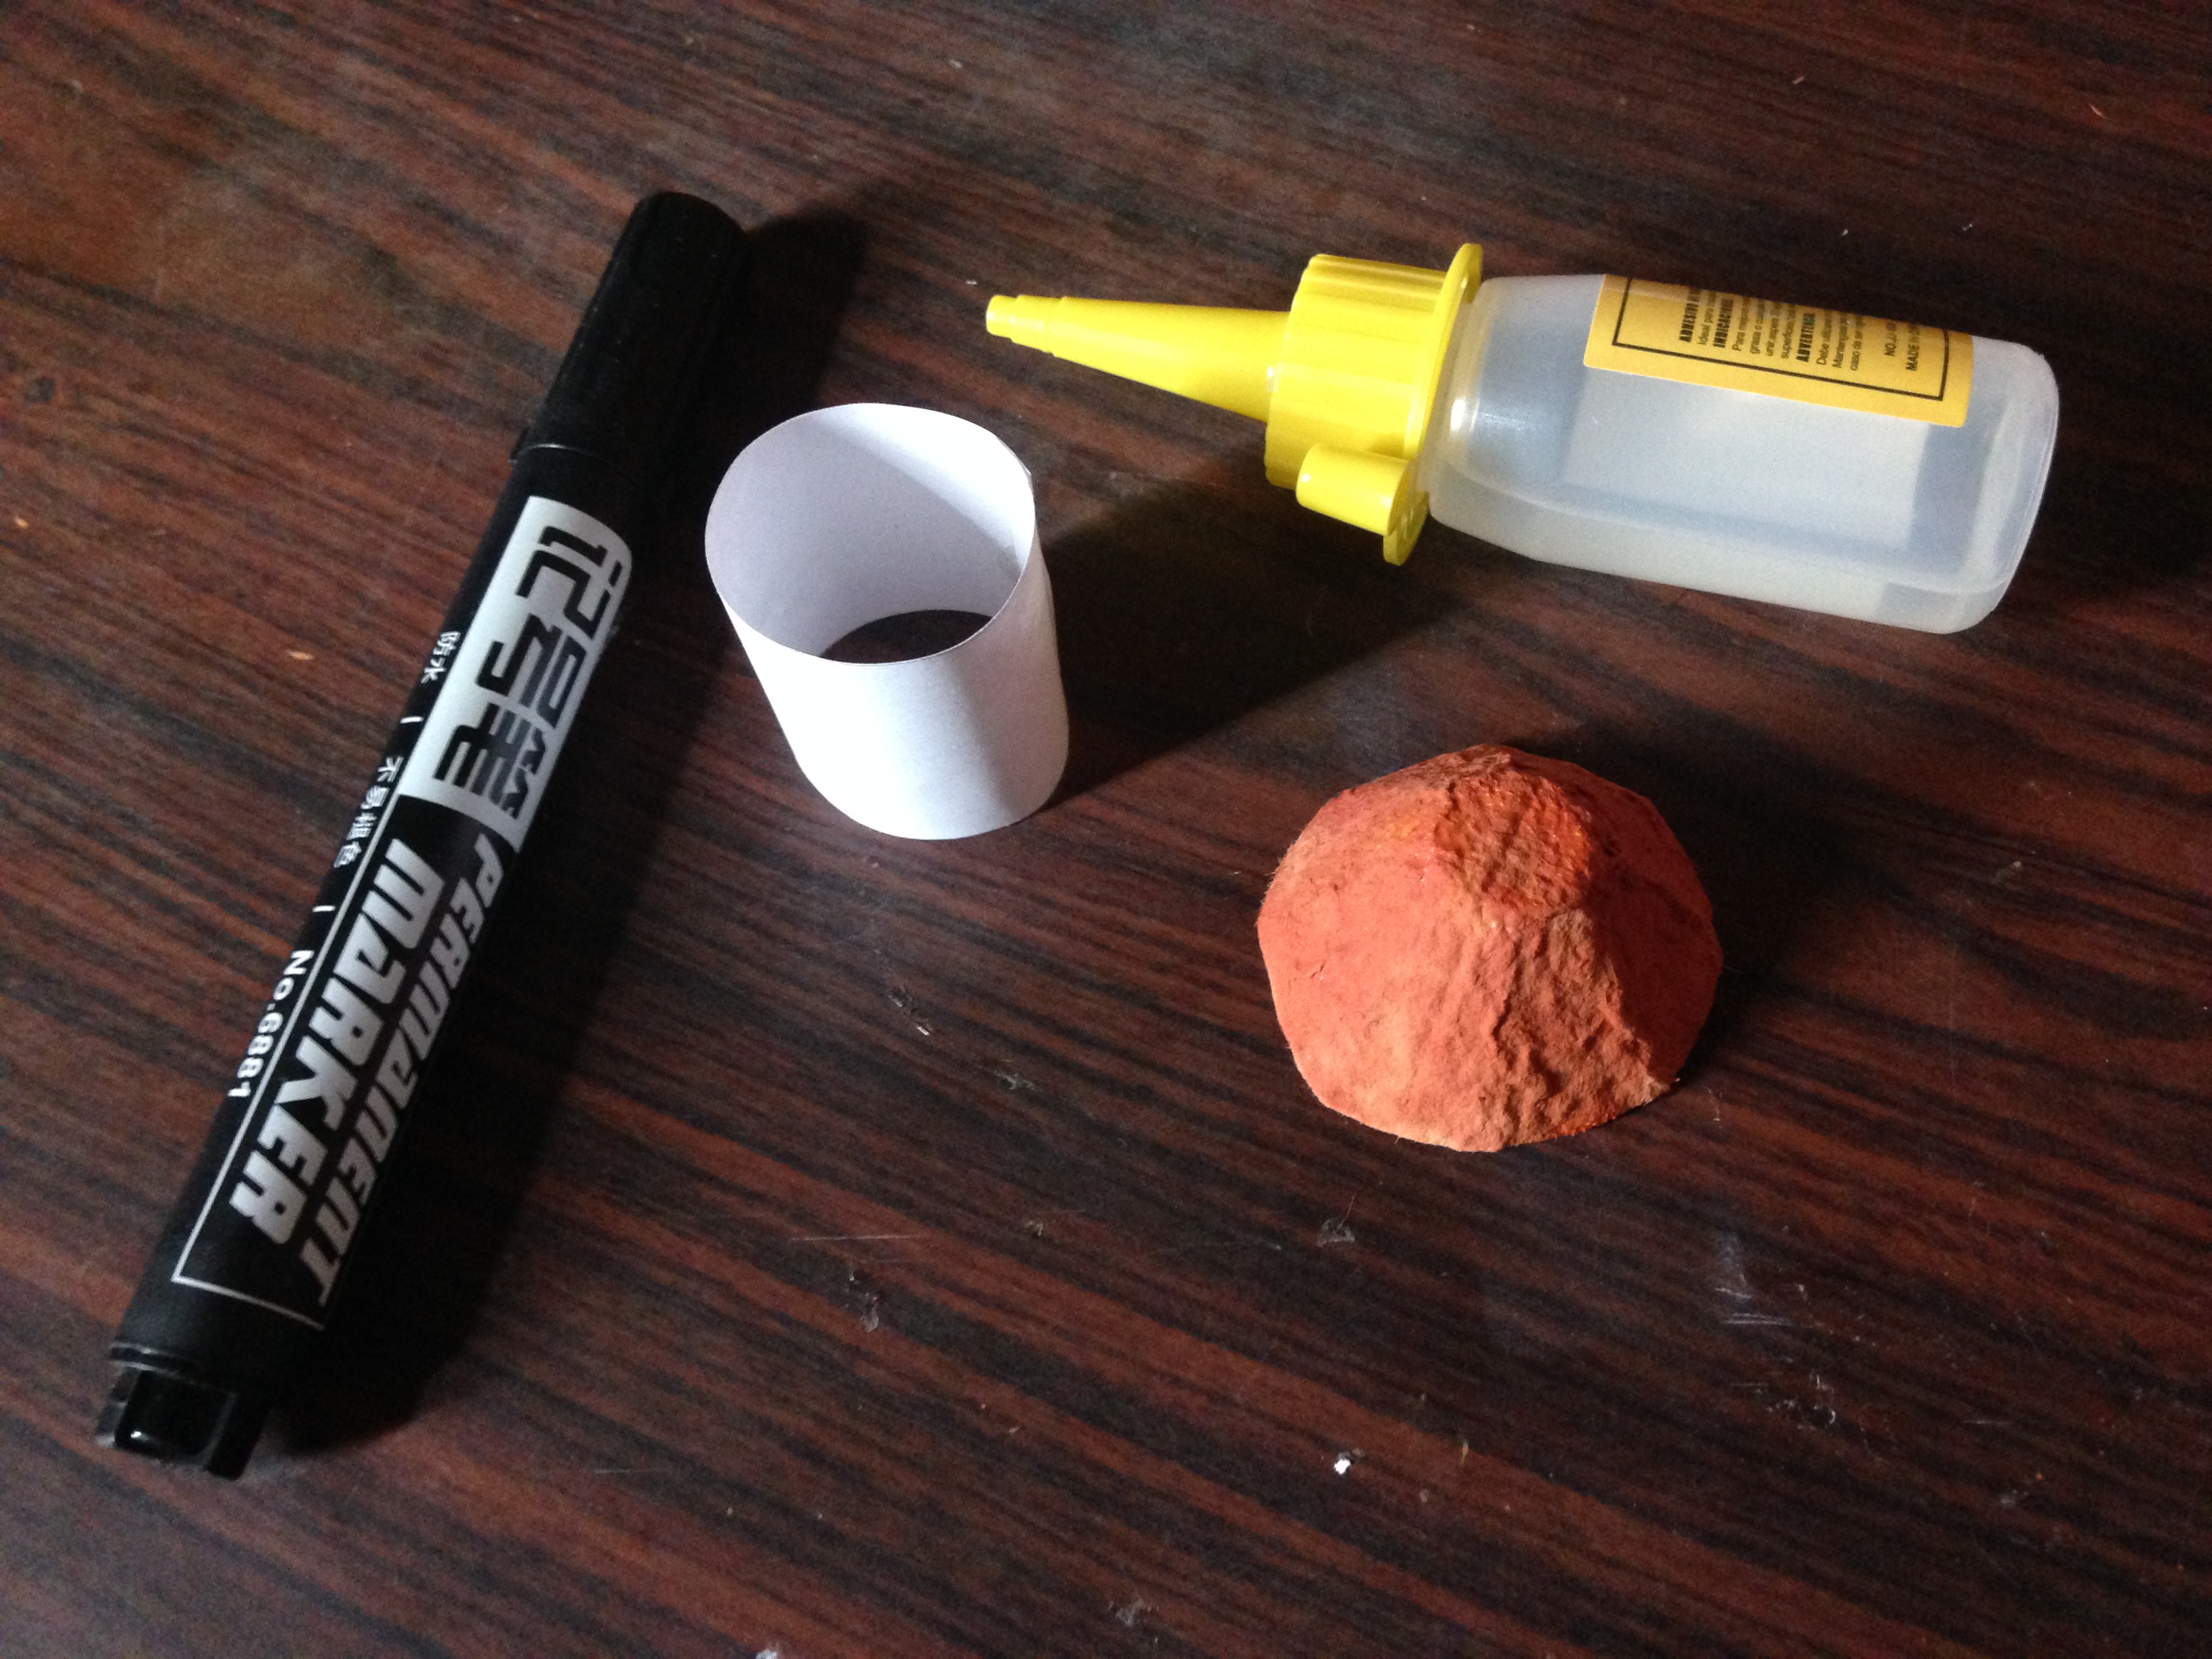
Materiales:
- carton
- cartón de huevos
- pintura blanca y naranja
- retazos de foamy verde oscuro
- 6 piedras pequeñas o la cantidad de tu preferencia
- marcador
- regla
- cartulina blanca
- silicon
- tijeras
- lápiz
- lentejuelas blancas
- un pedazo pequeño de anime
- pincel
Materials:
- cardboard
- egg carton
- white and orange paint
- pieces of dark green foamy
- 6 small stones or the quantity of your preference
- marker
- rule
- White cardboard
- silicon
- pair of scissors
- pencil
- white sequins
- a small piece of anime
- Brush
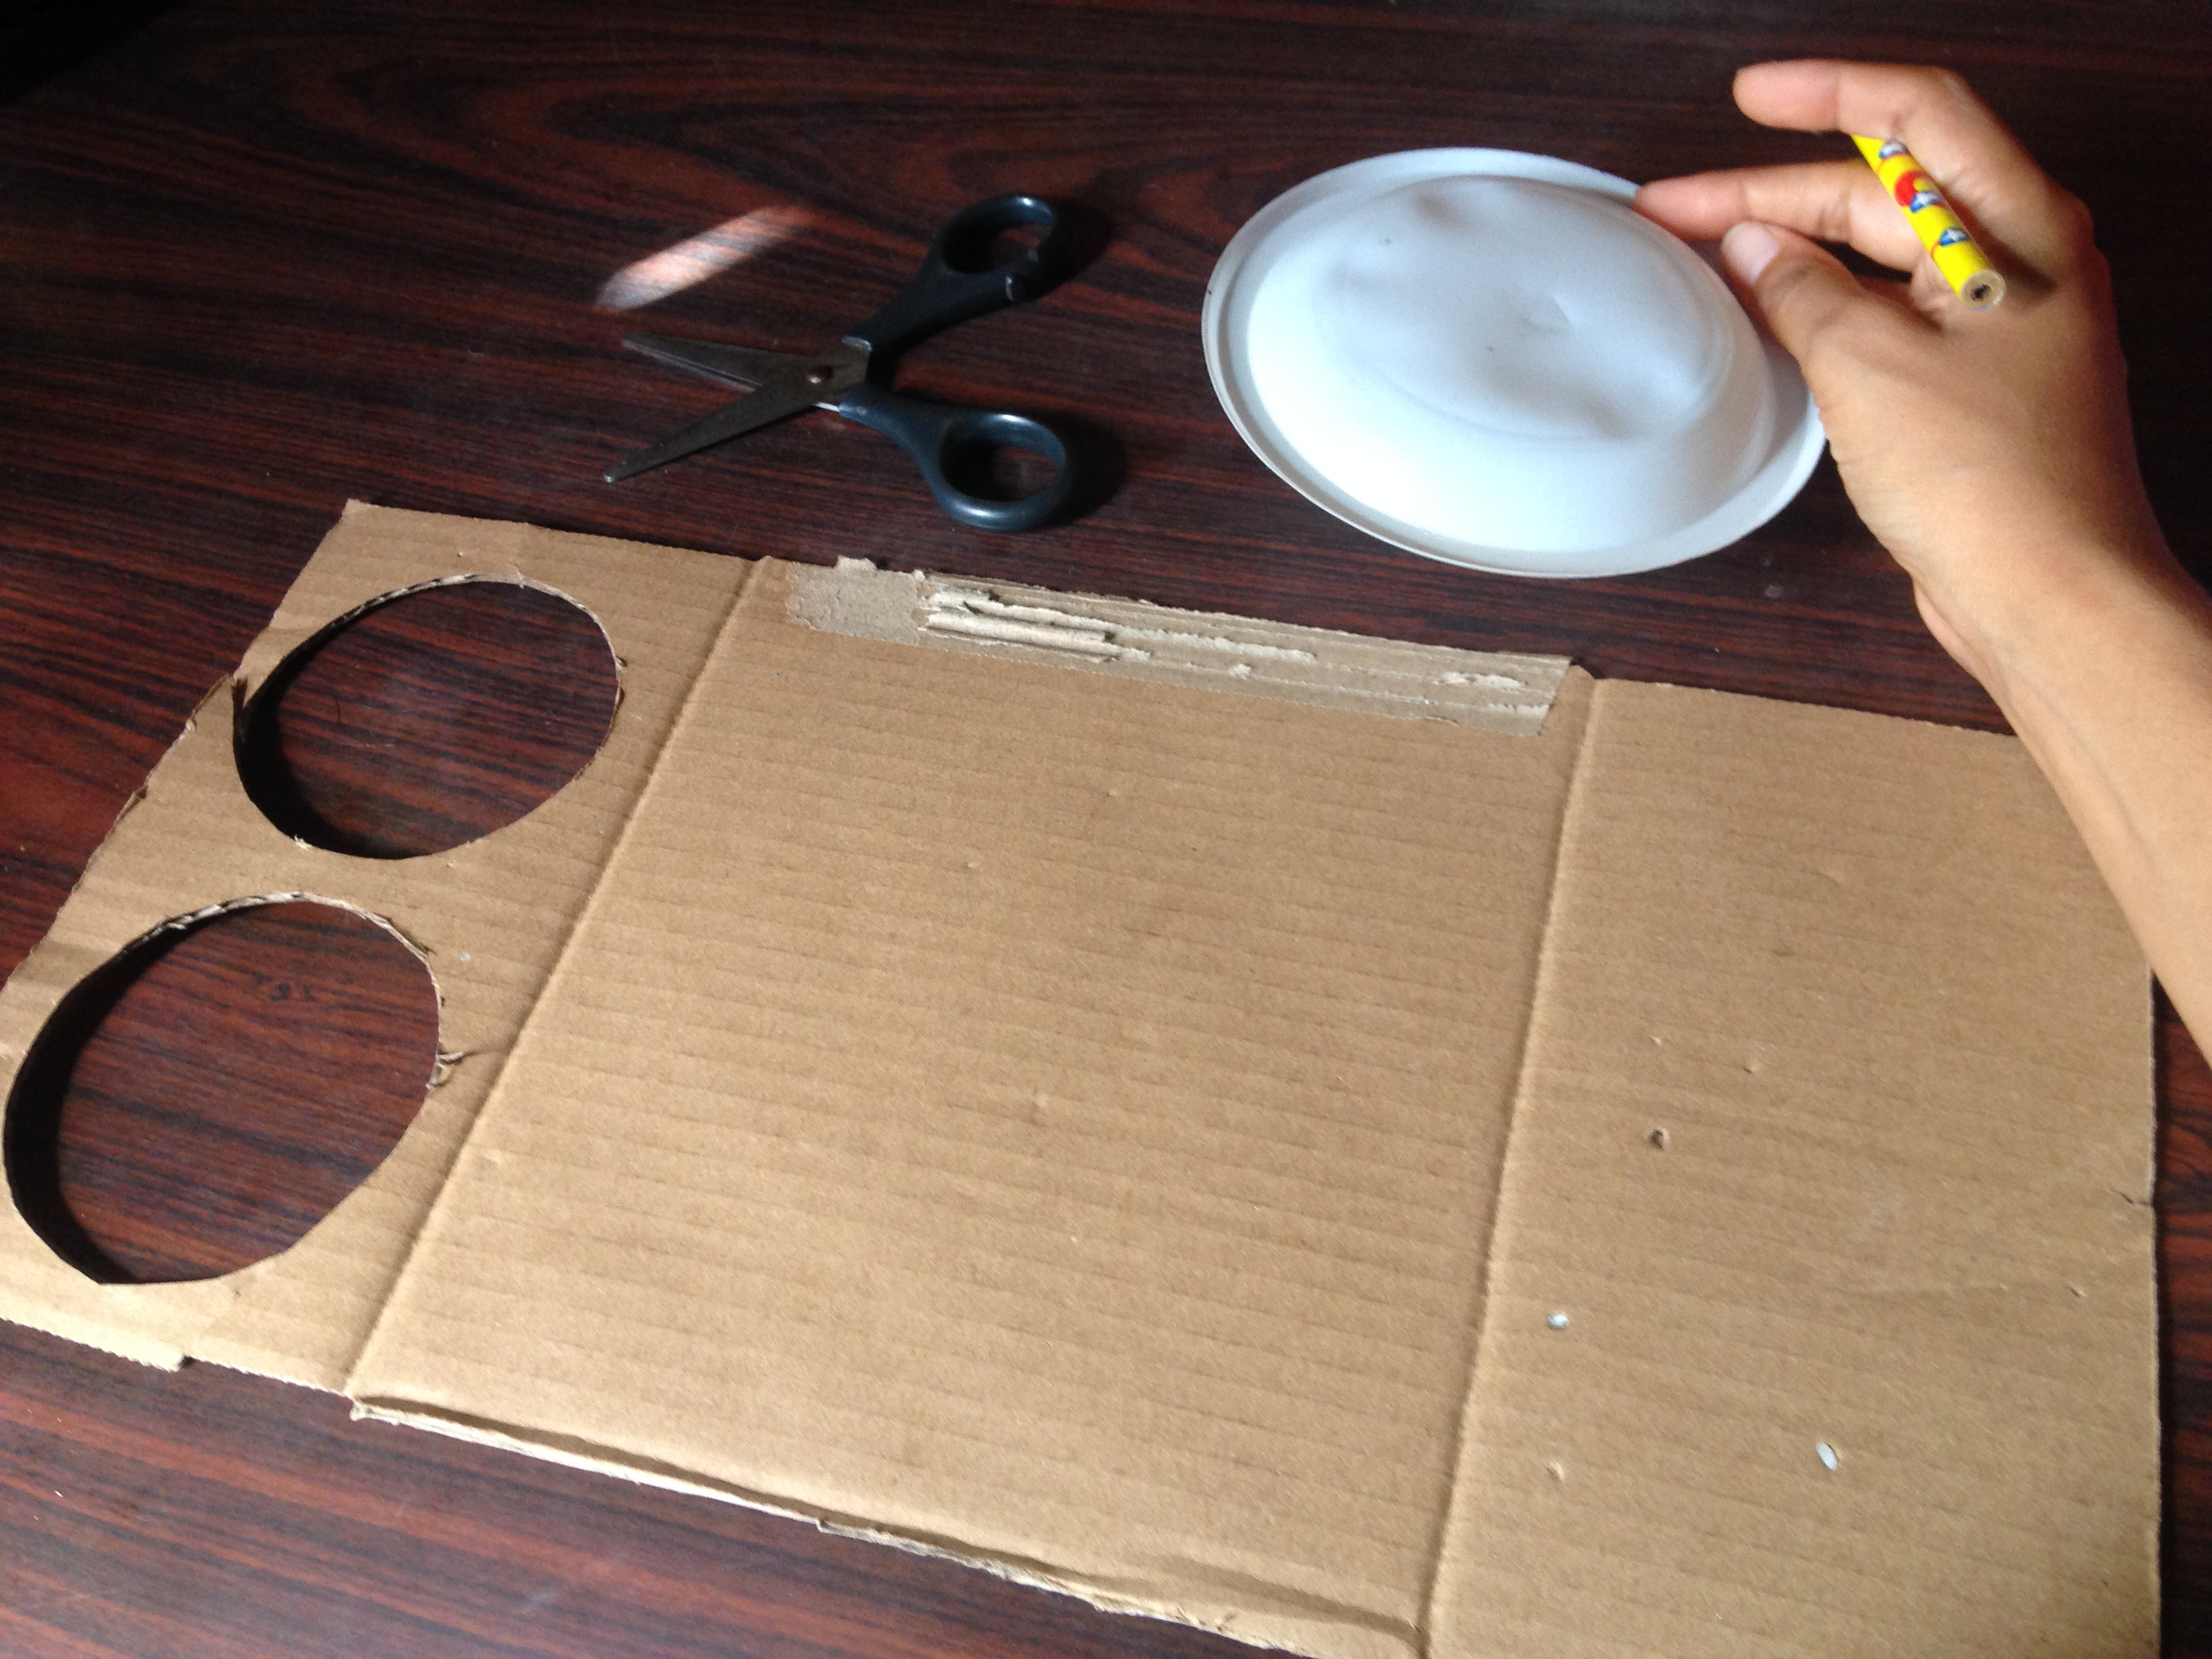
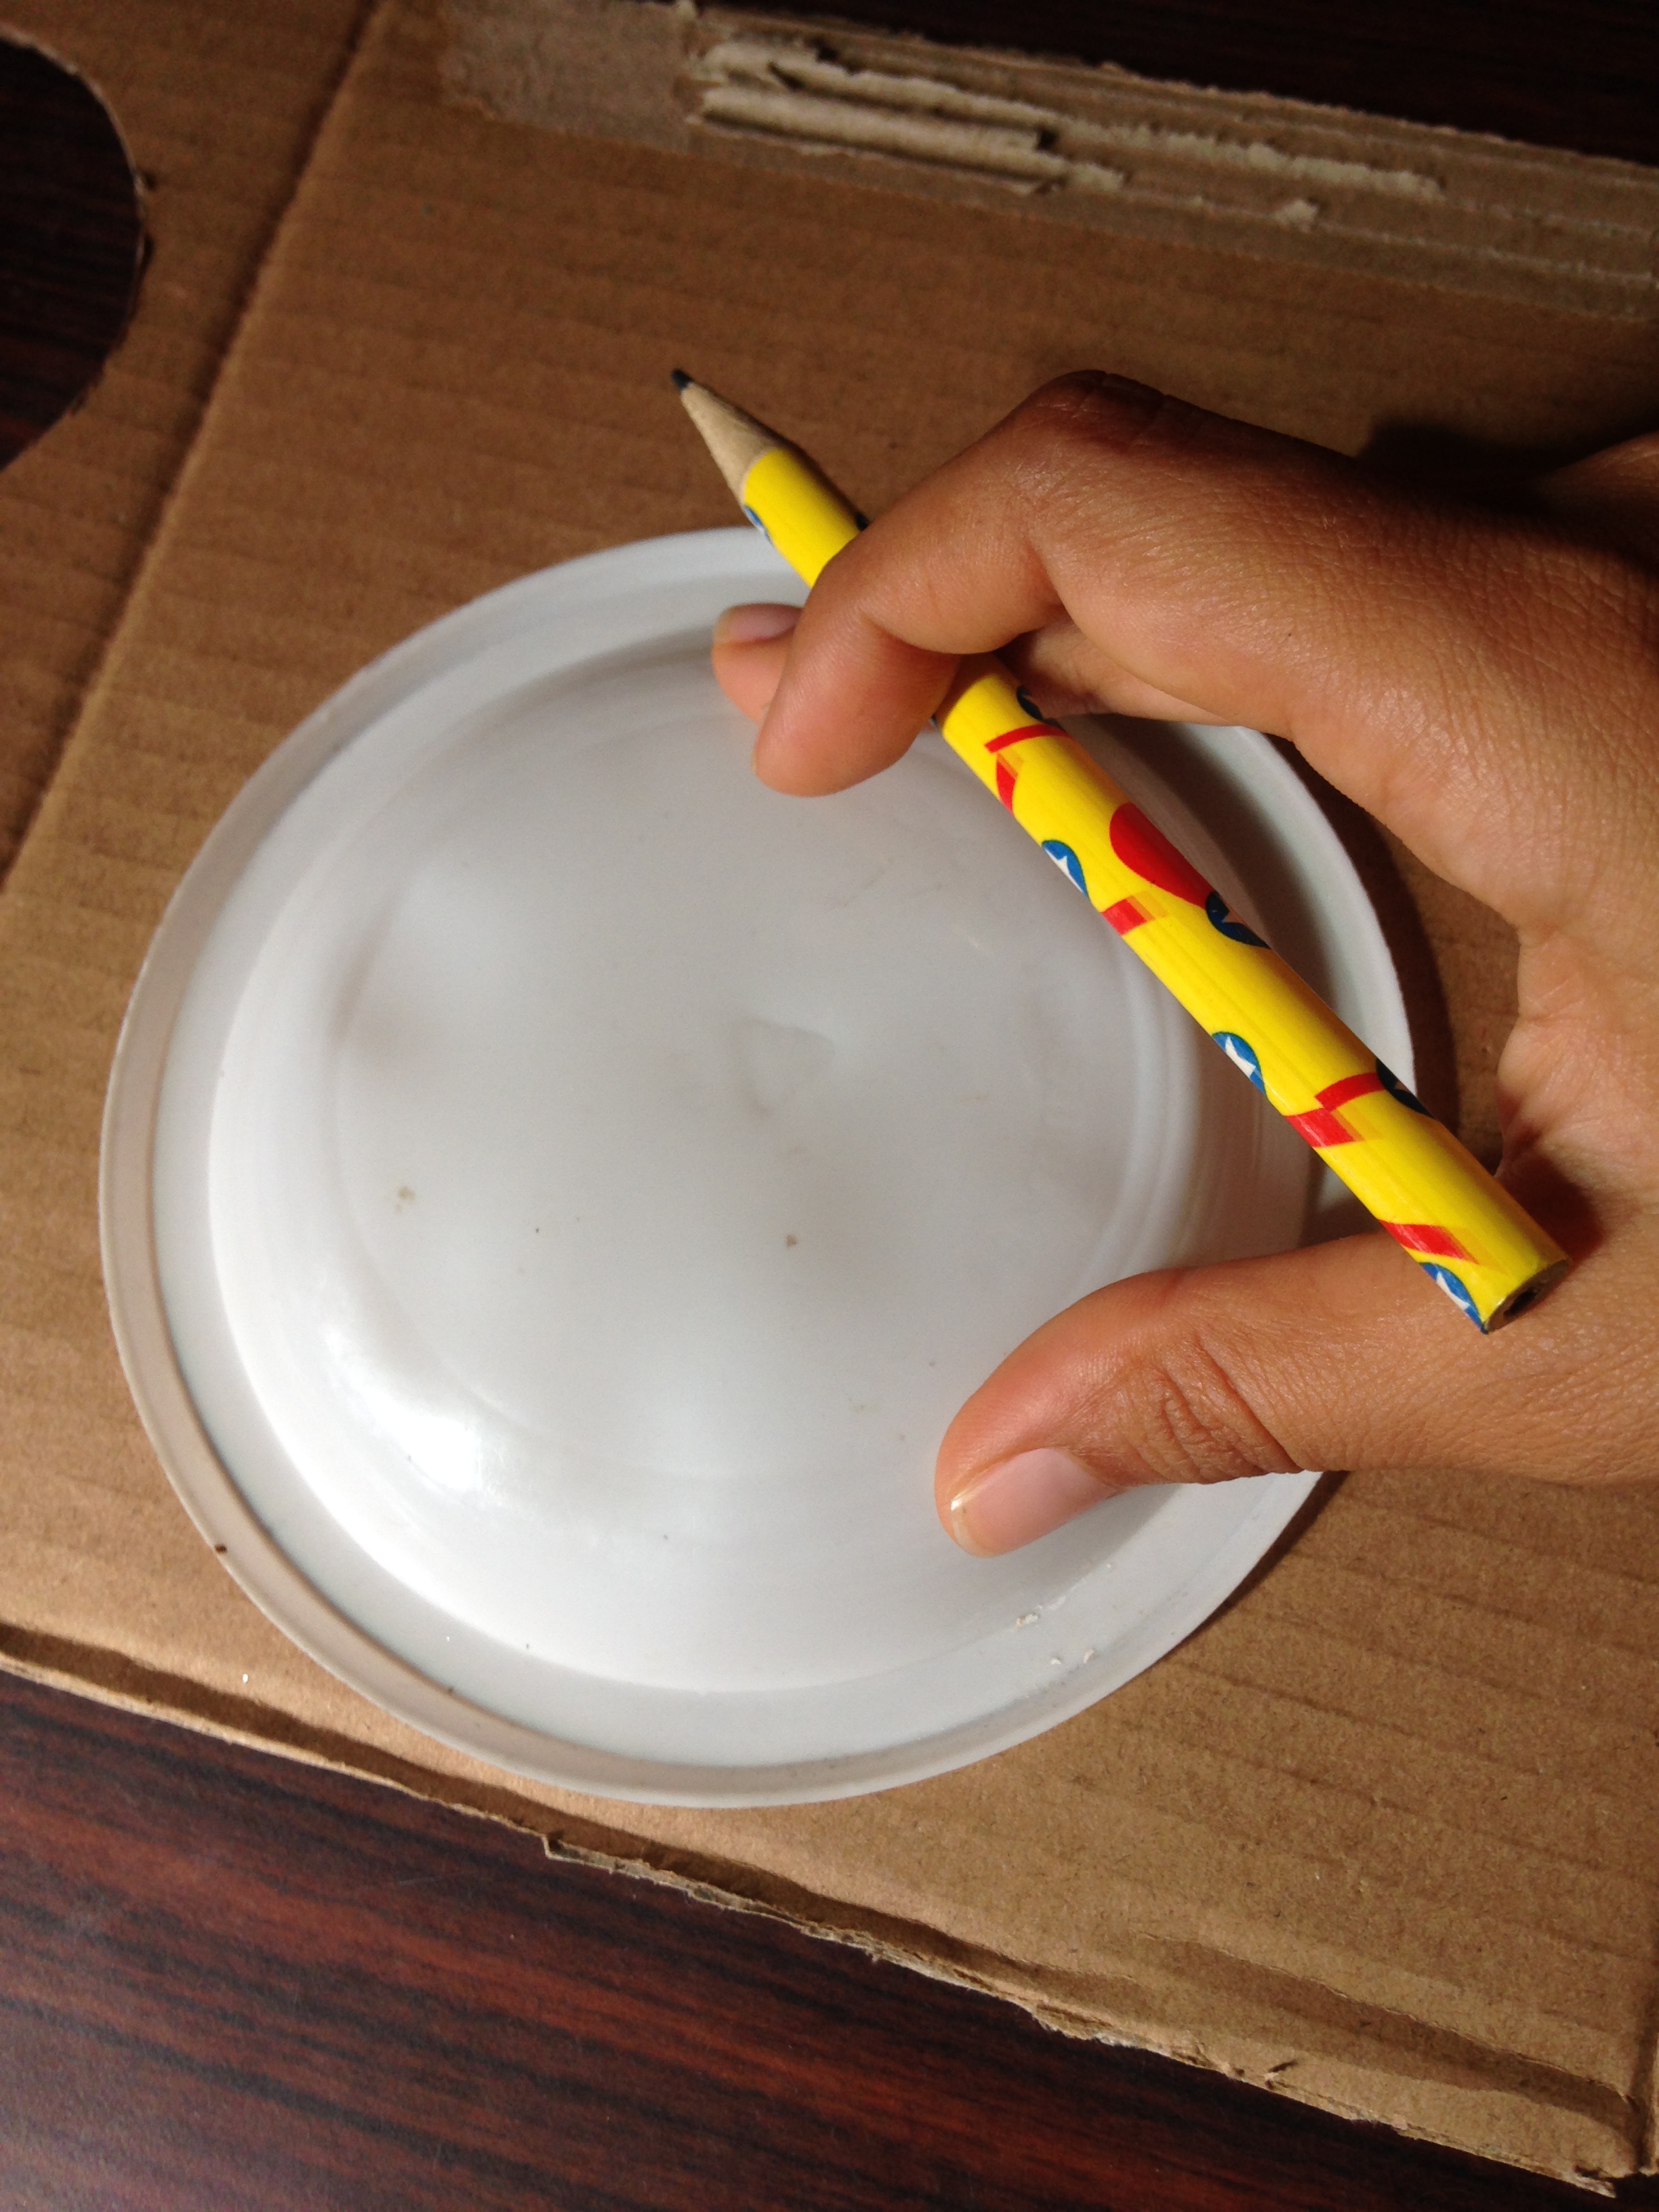
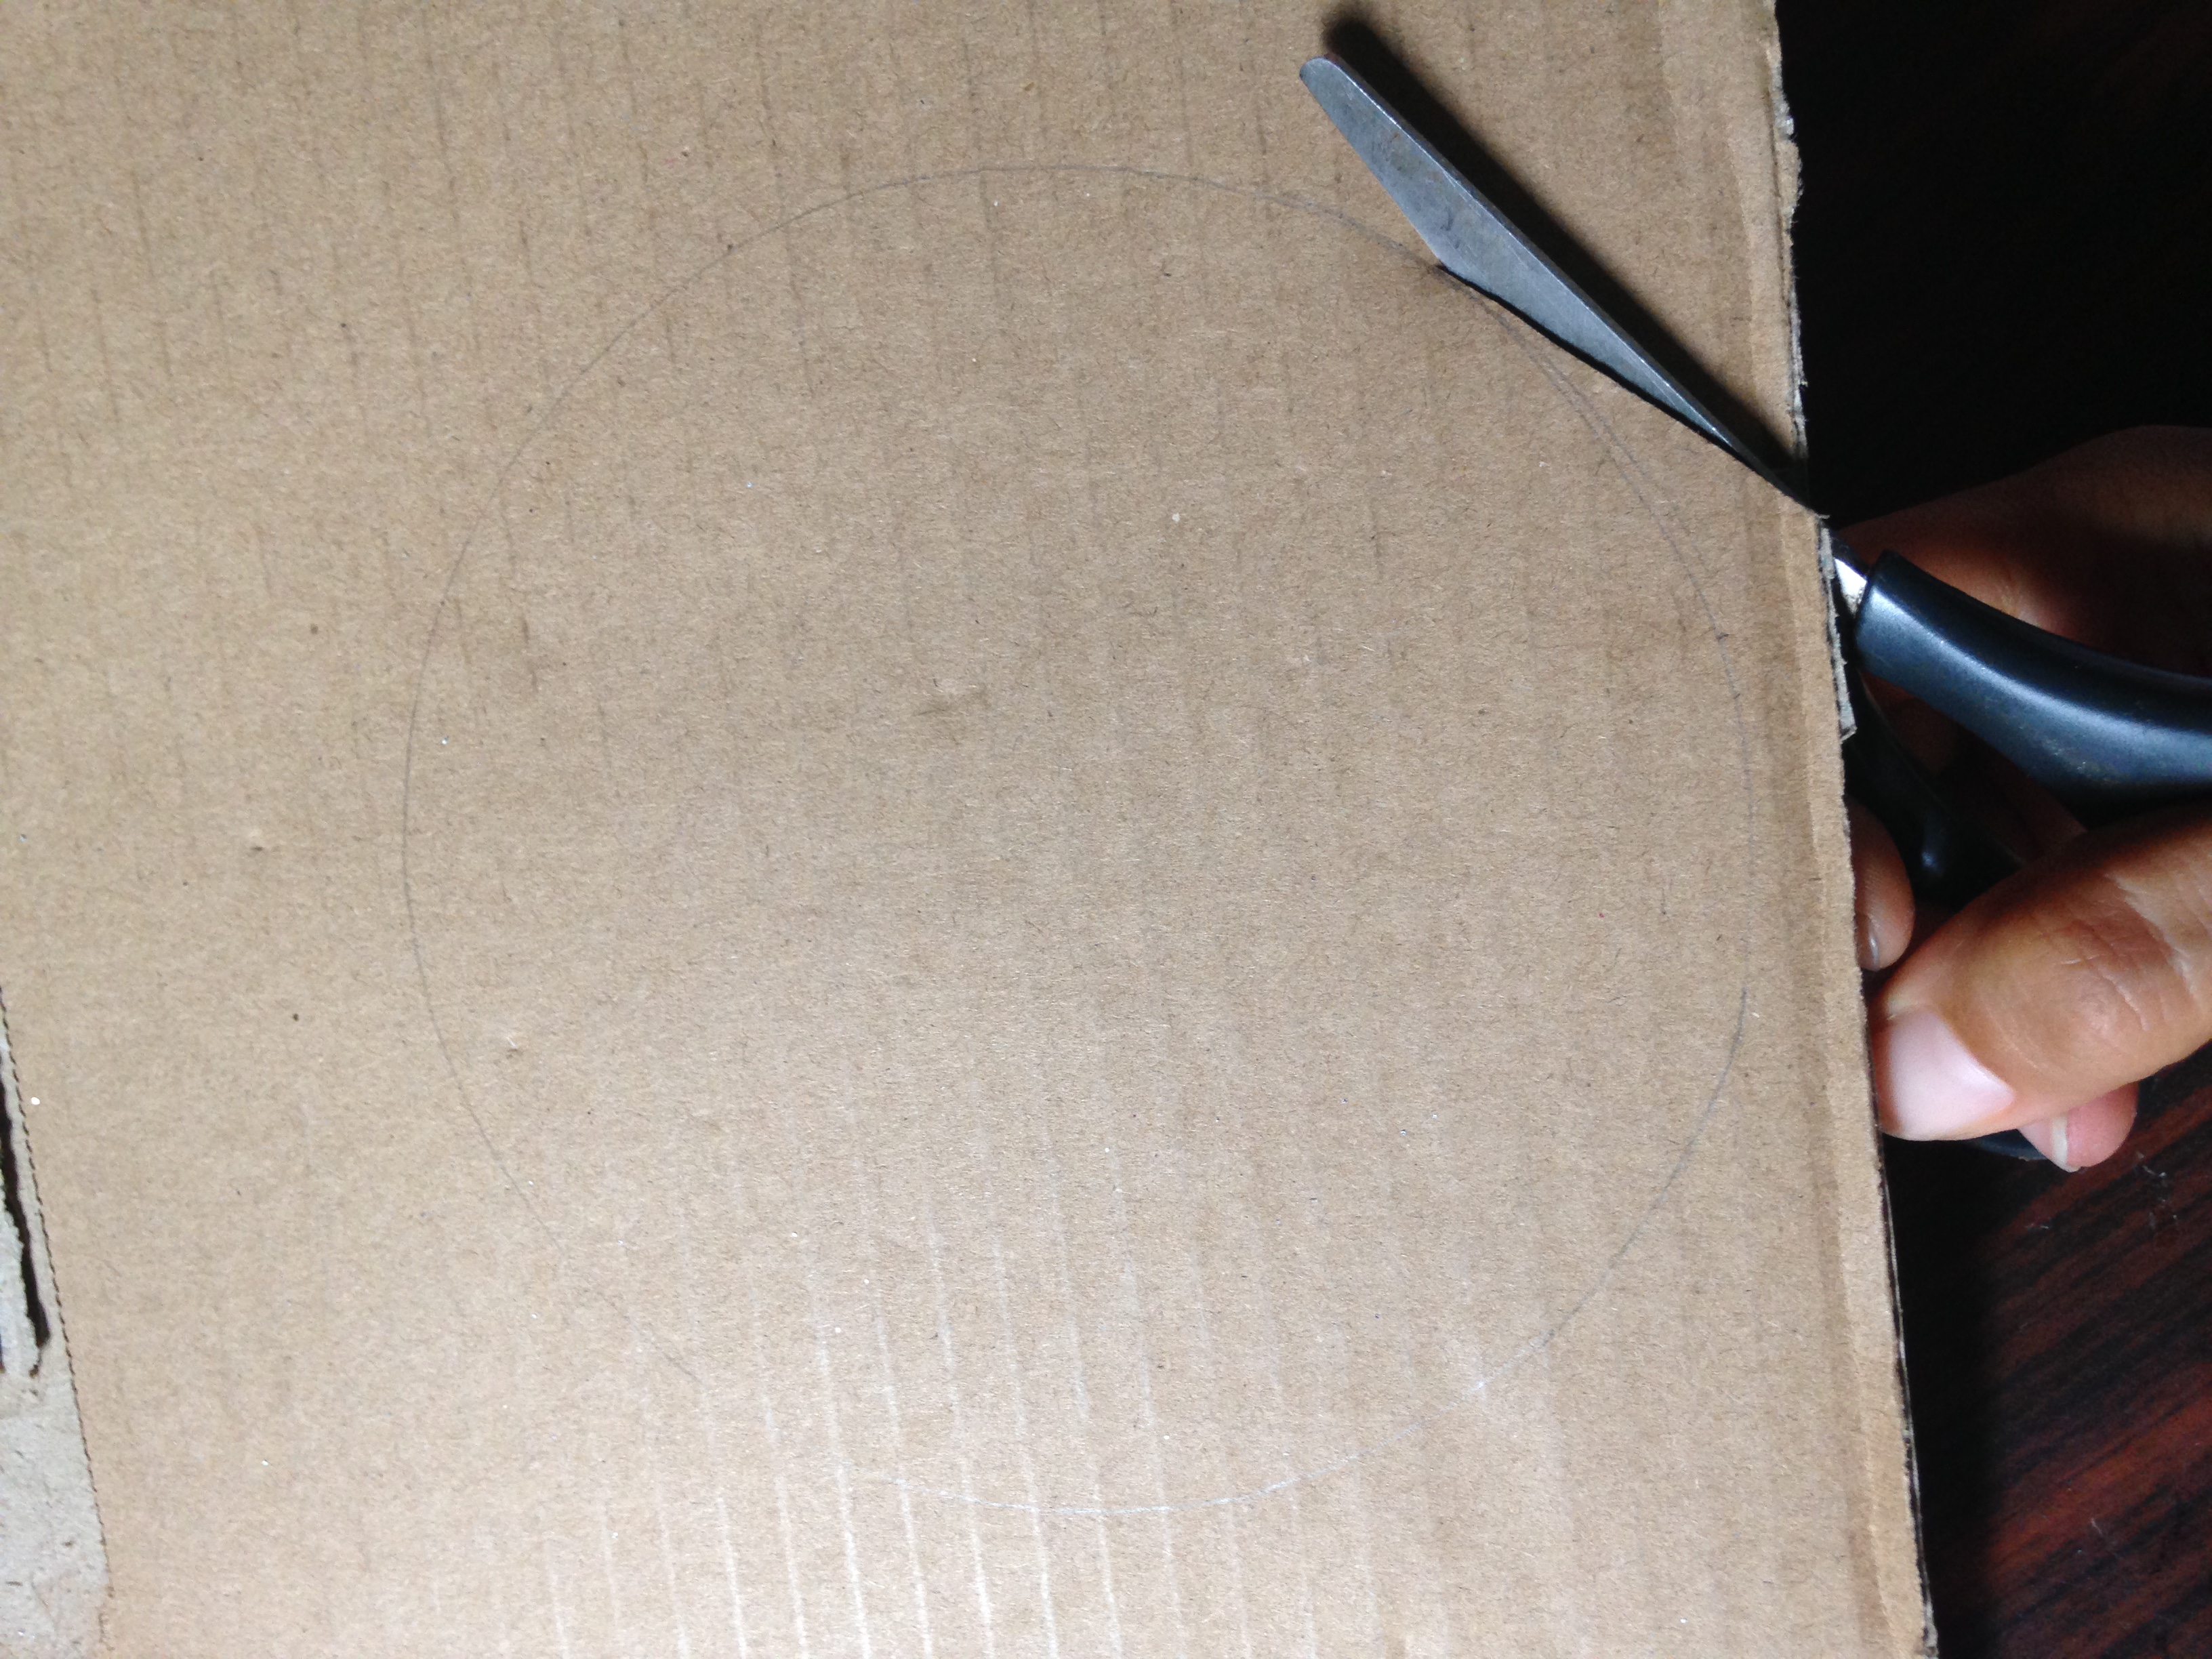
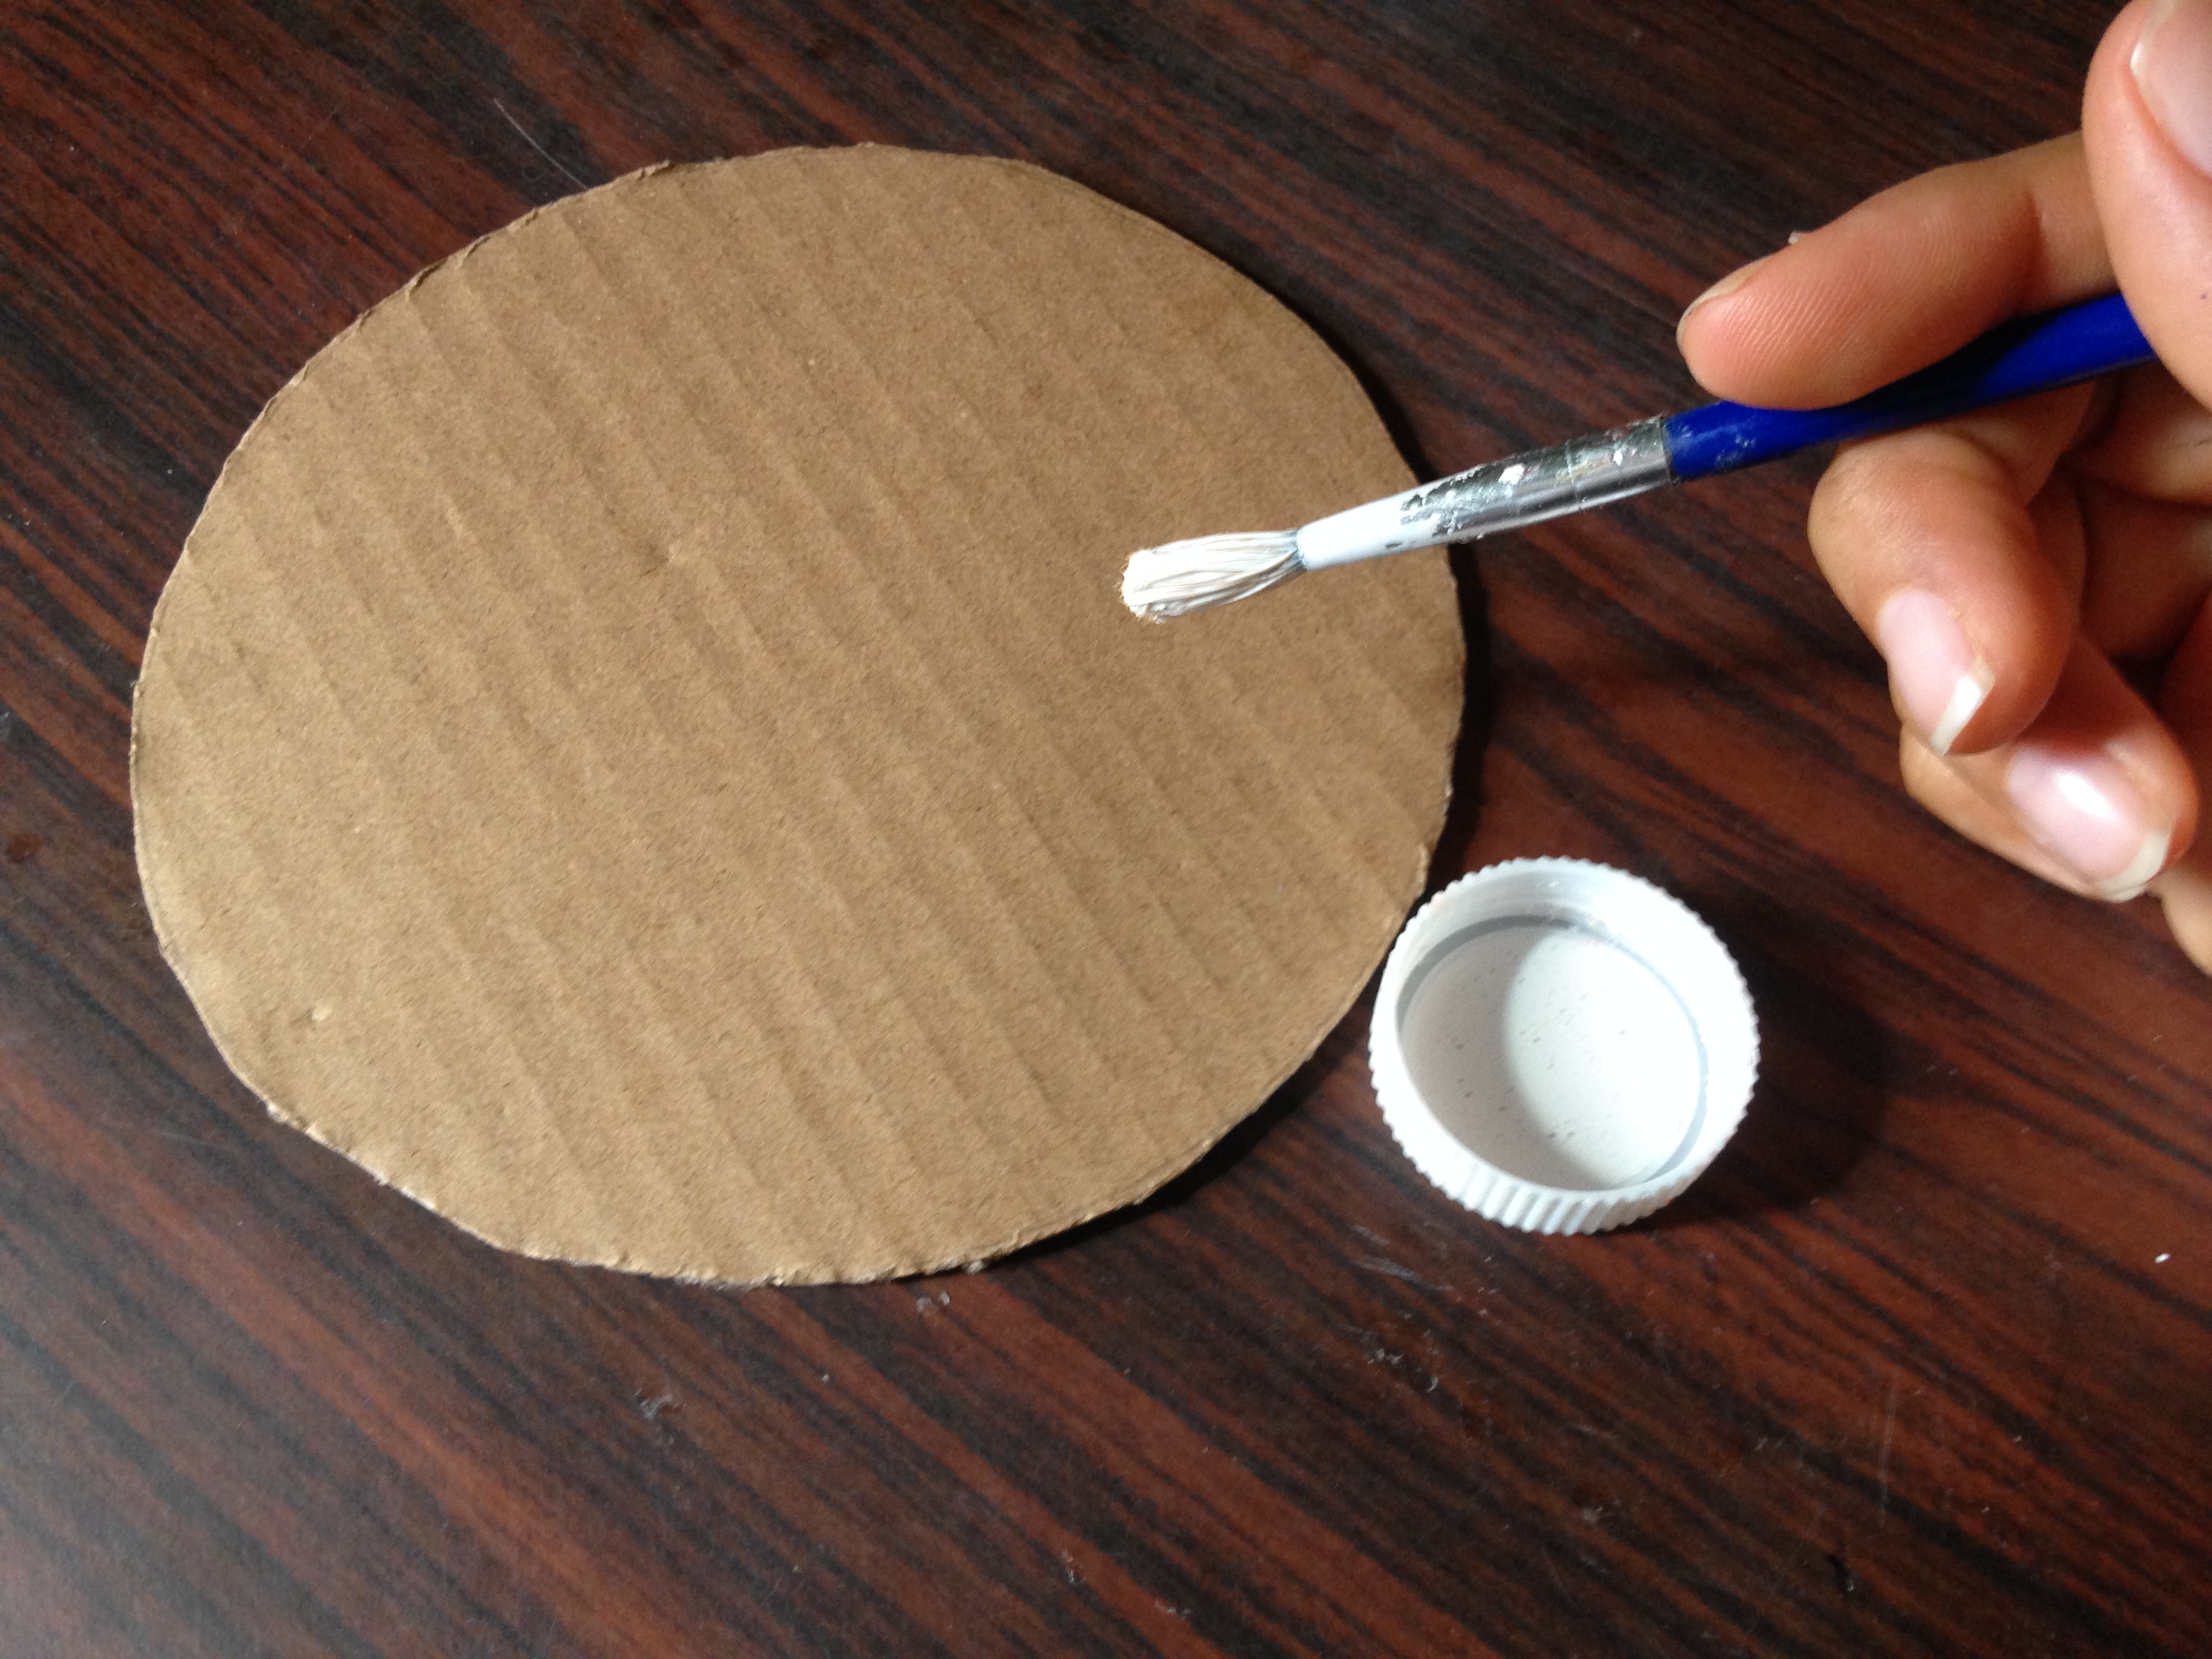
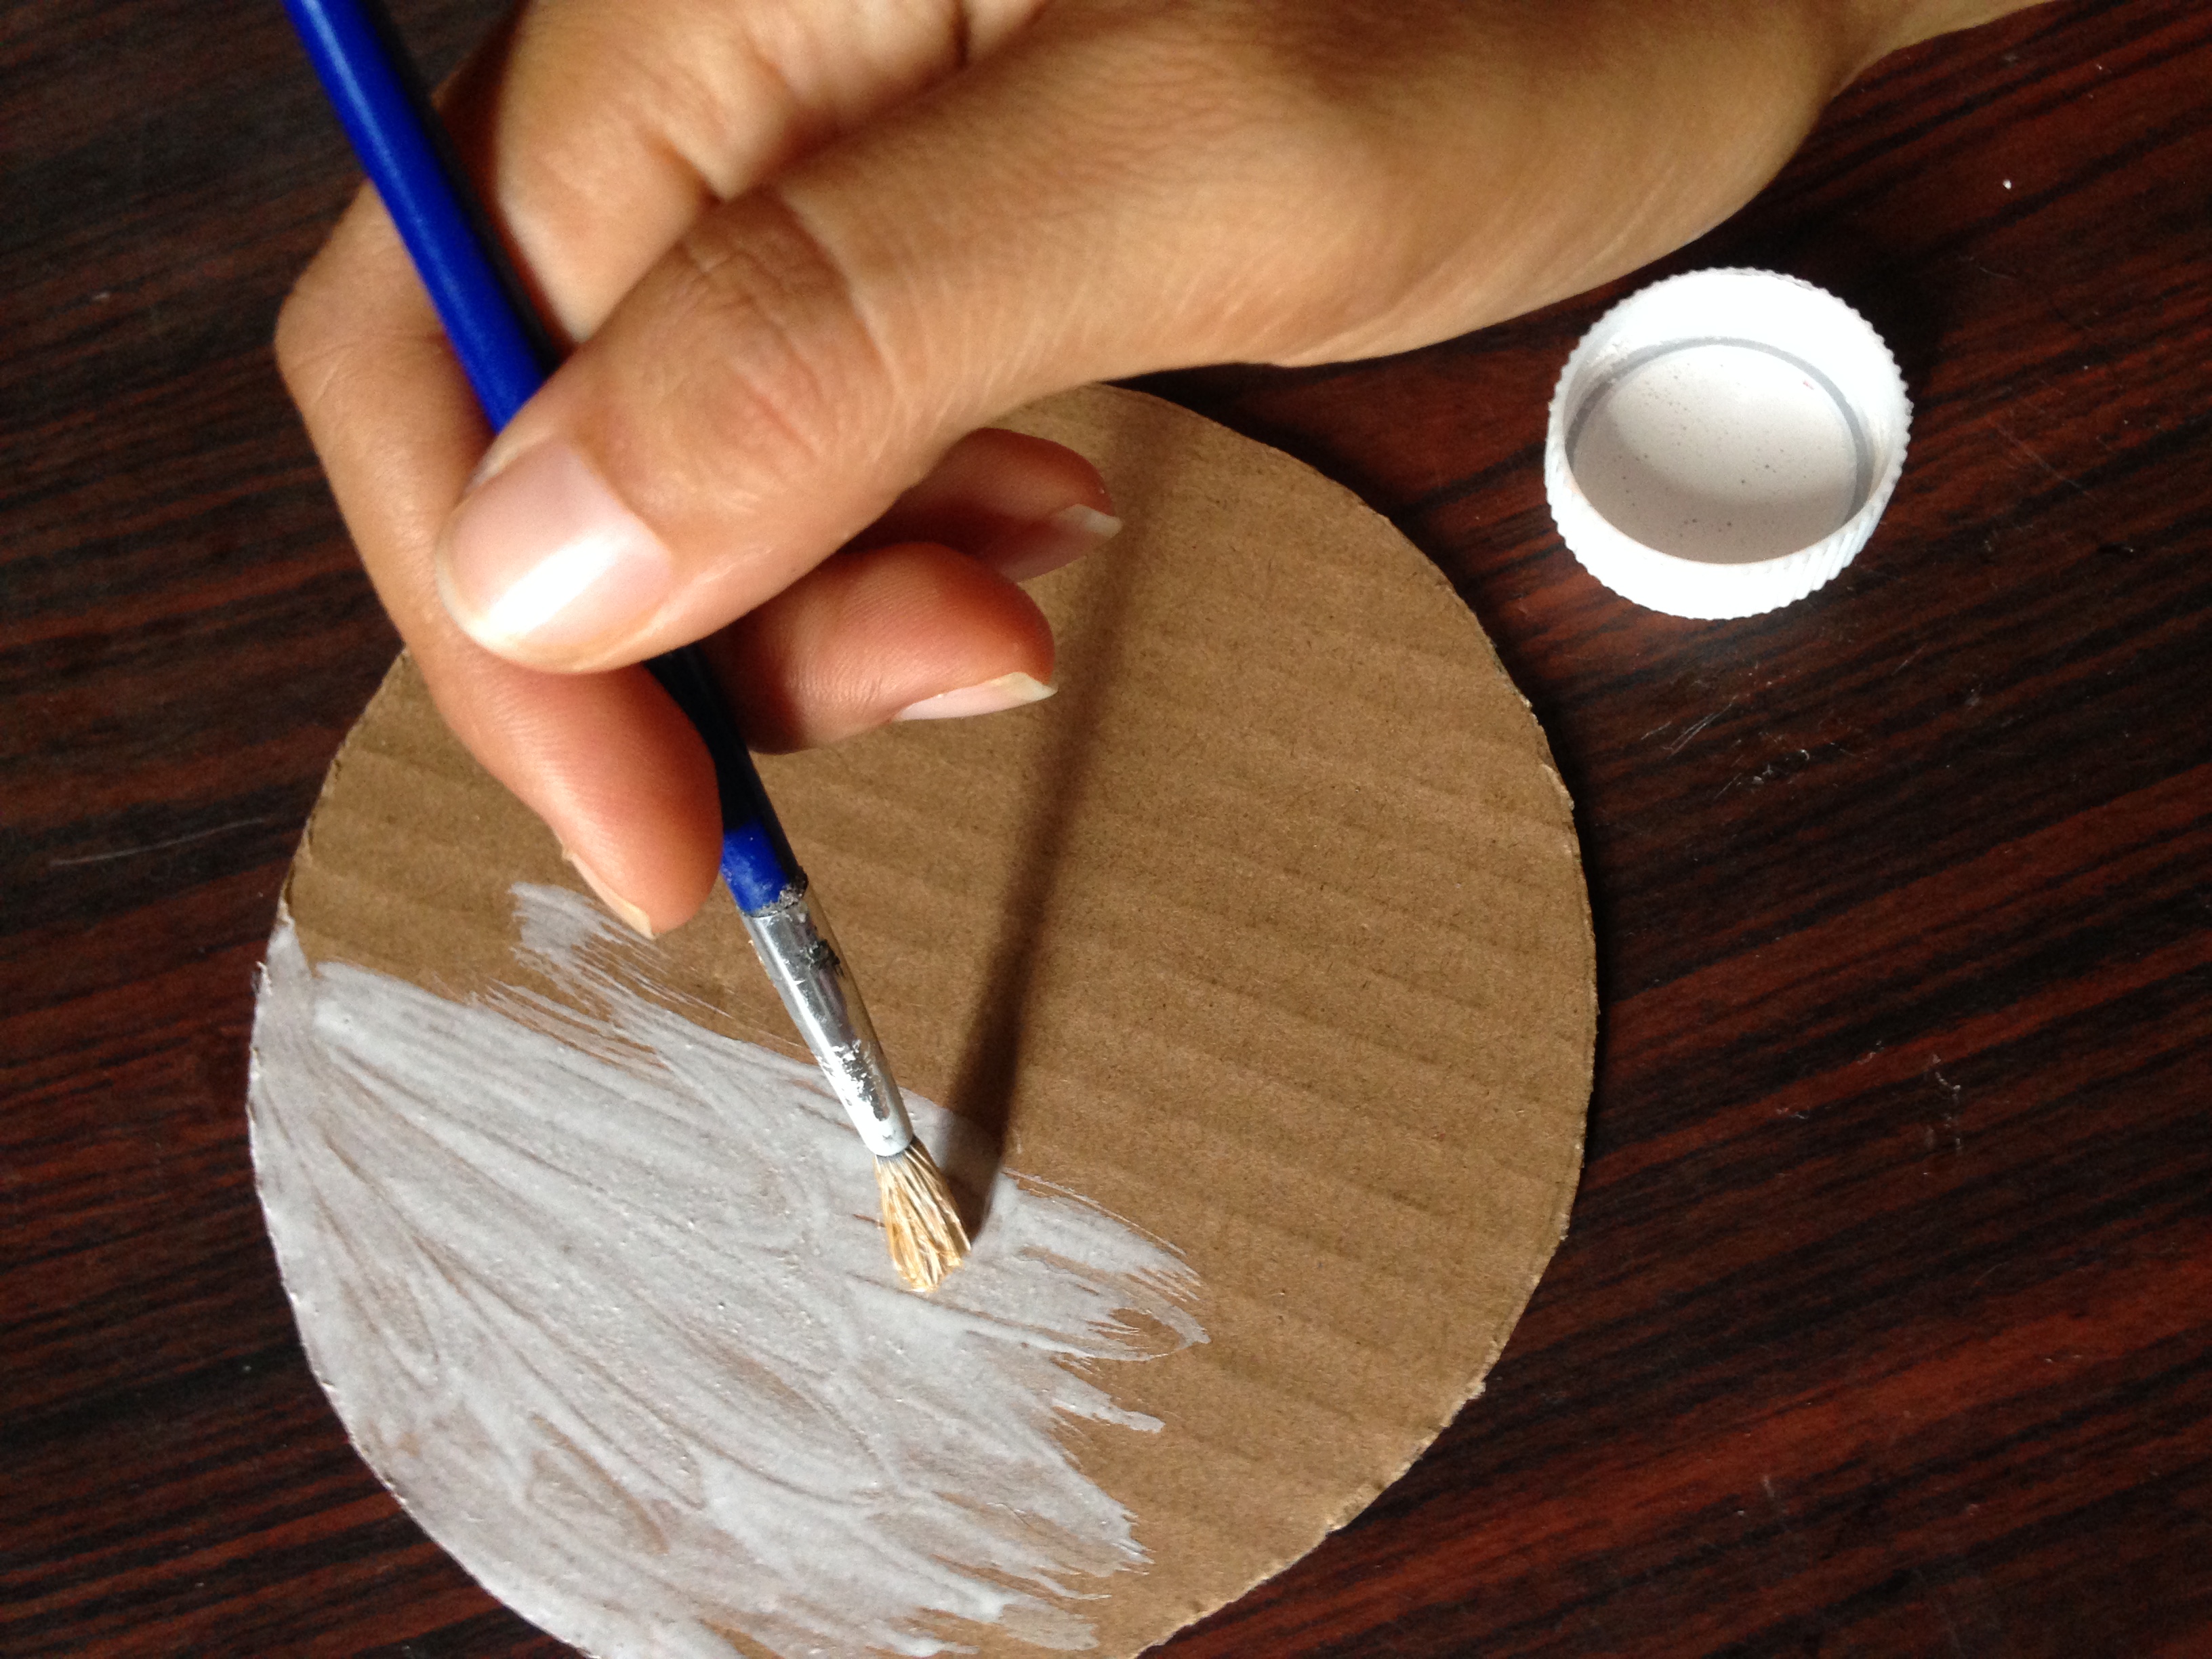
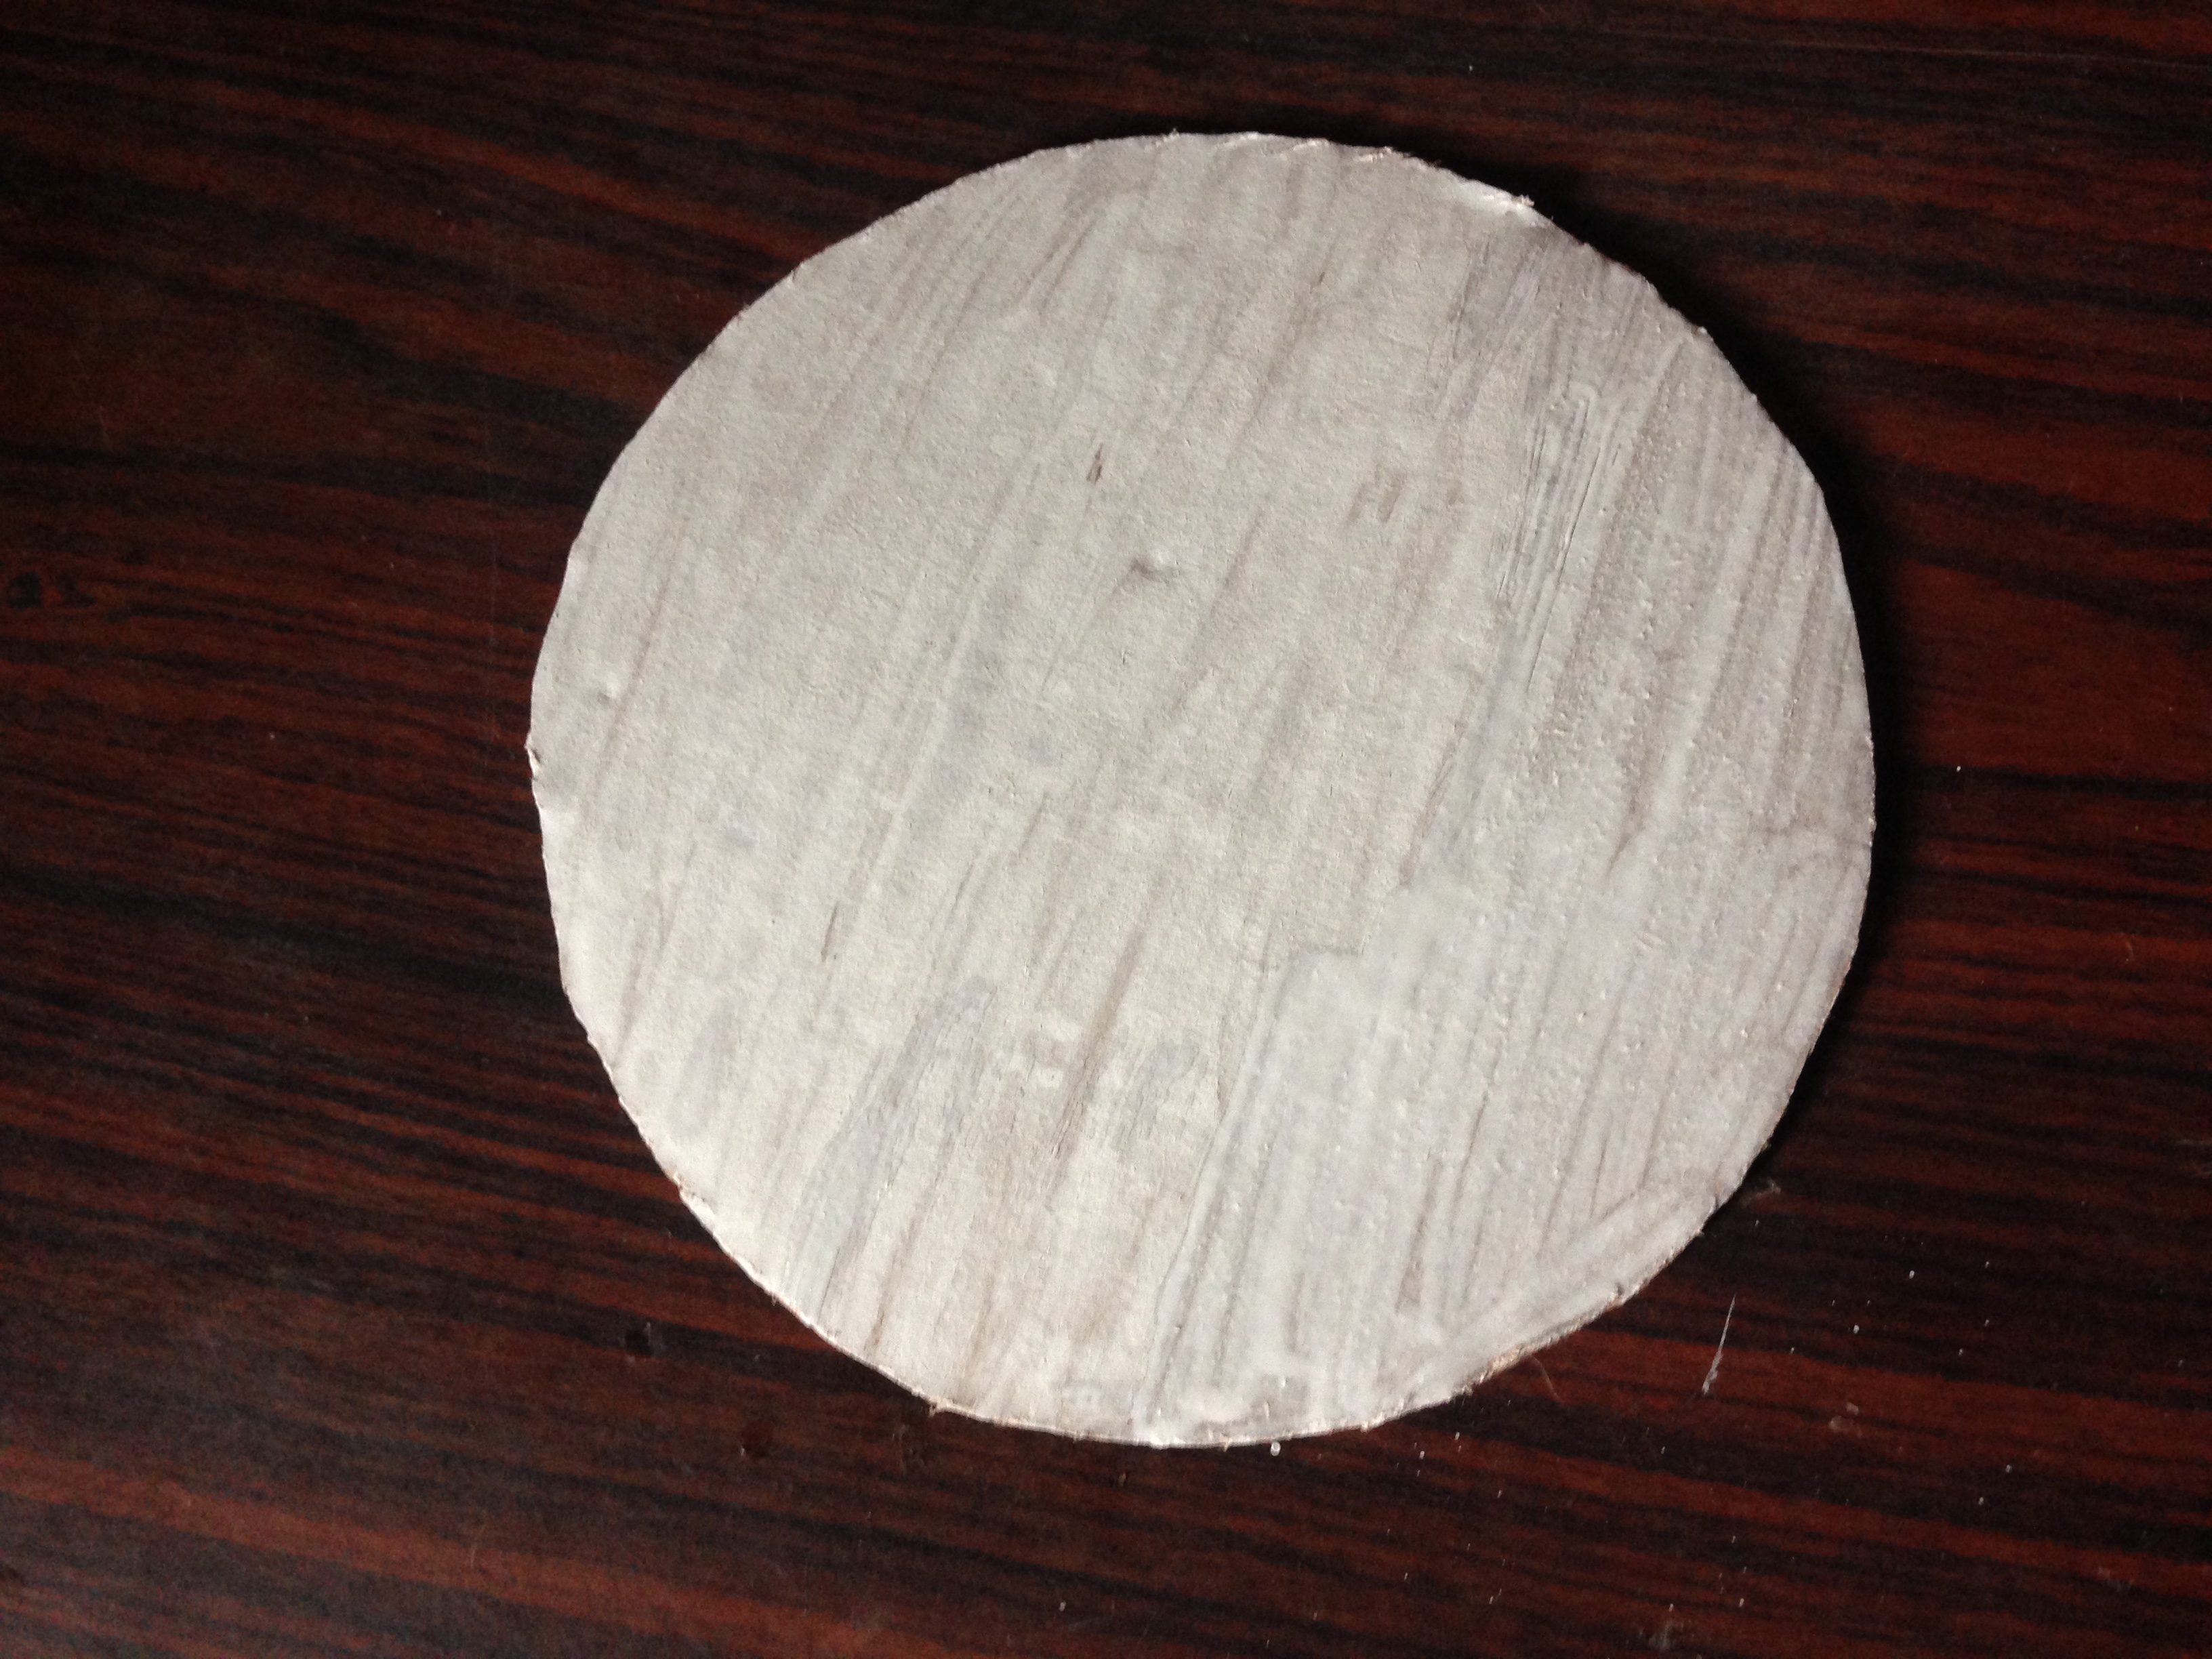
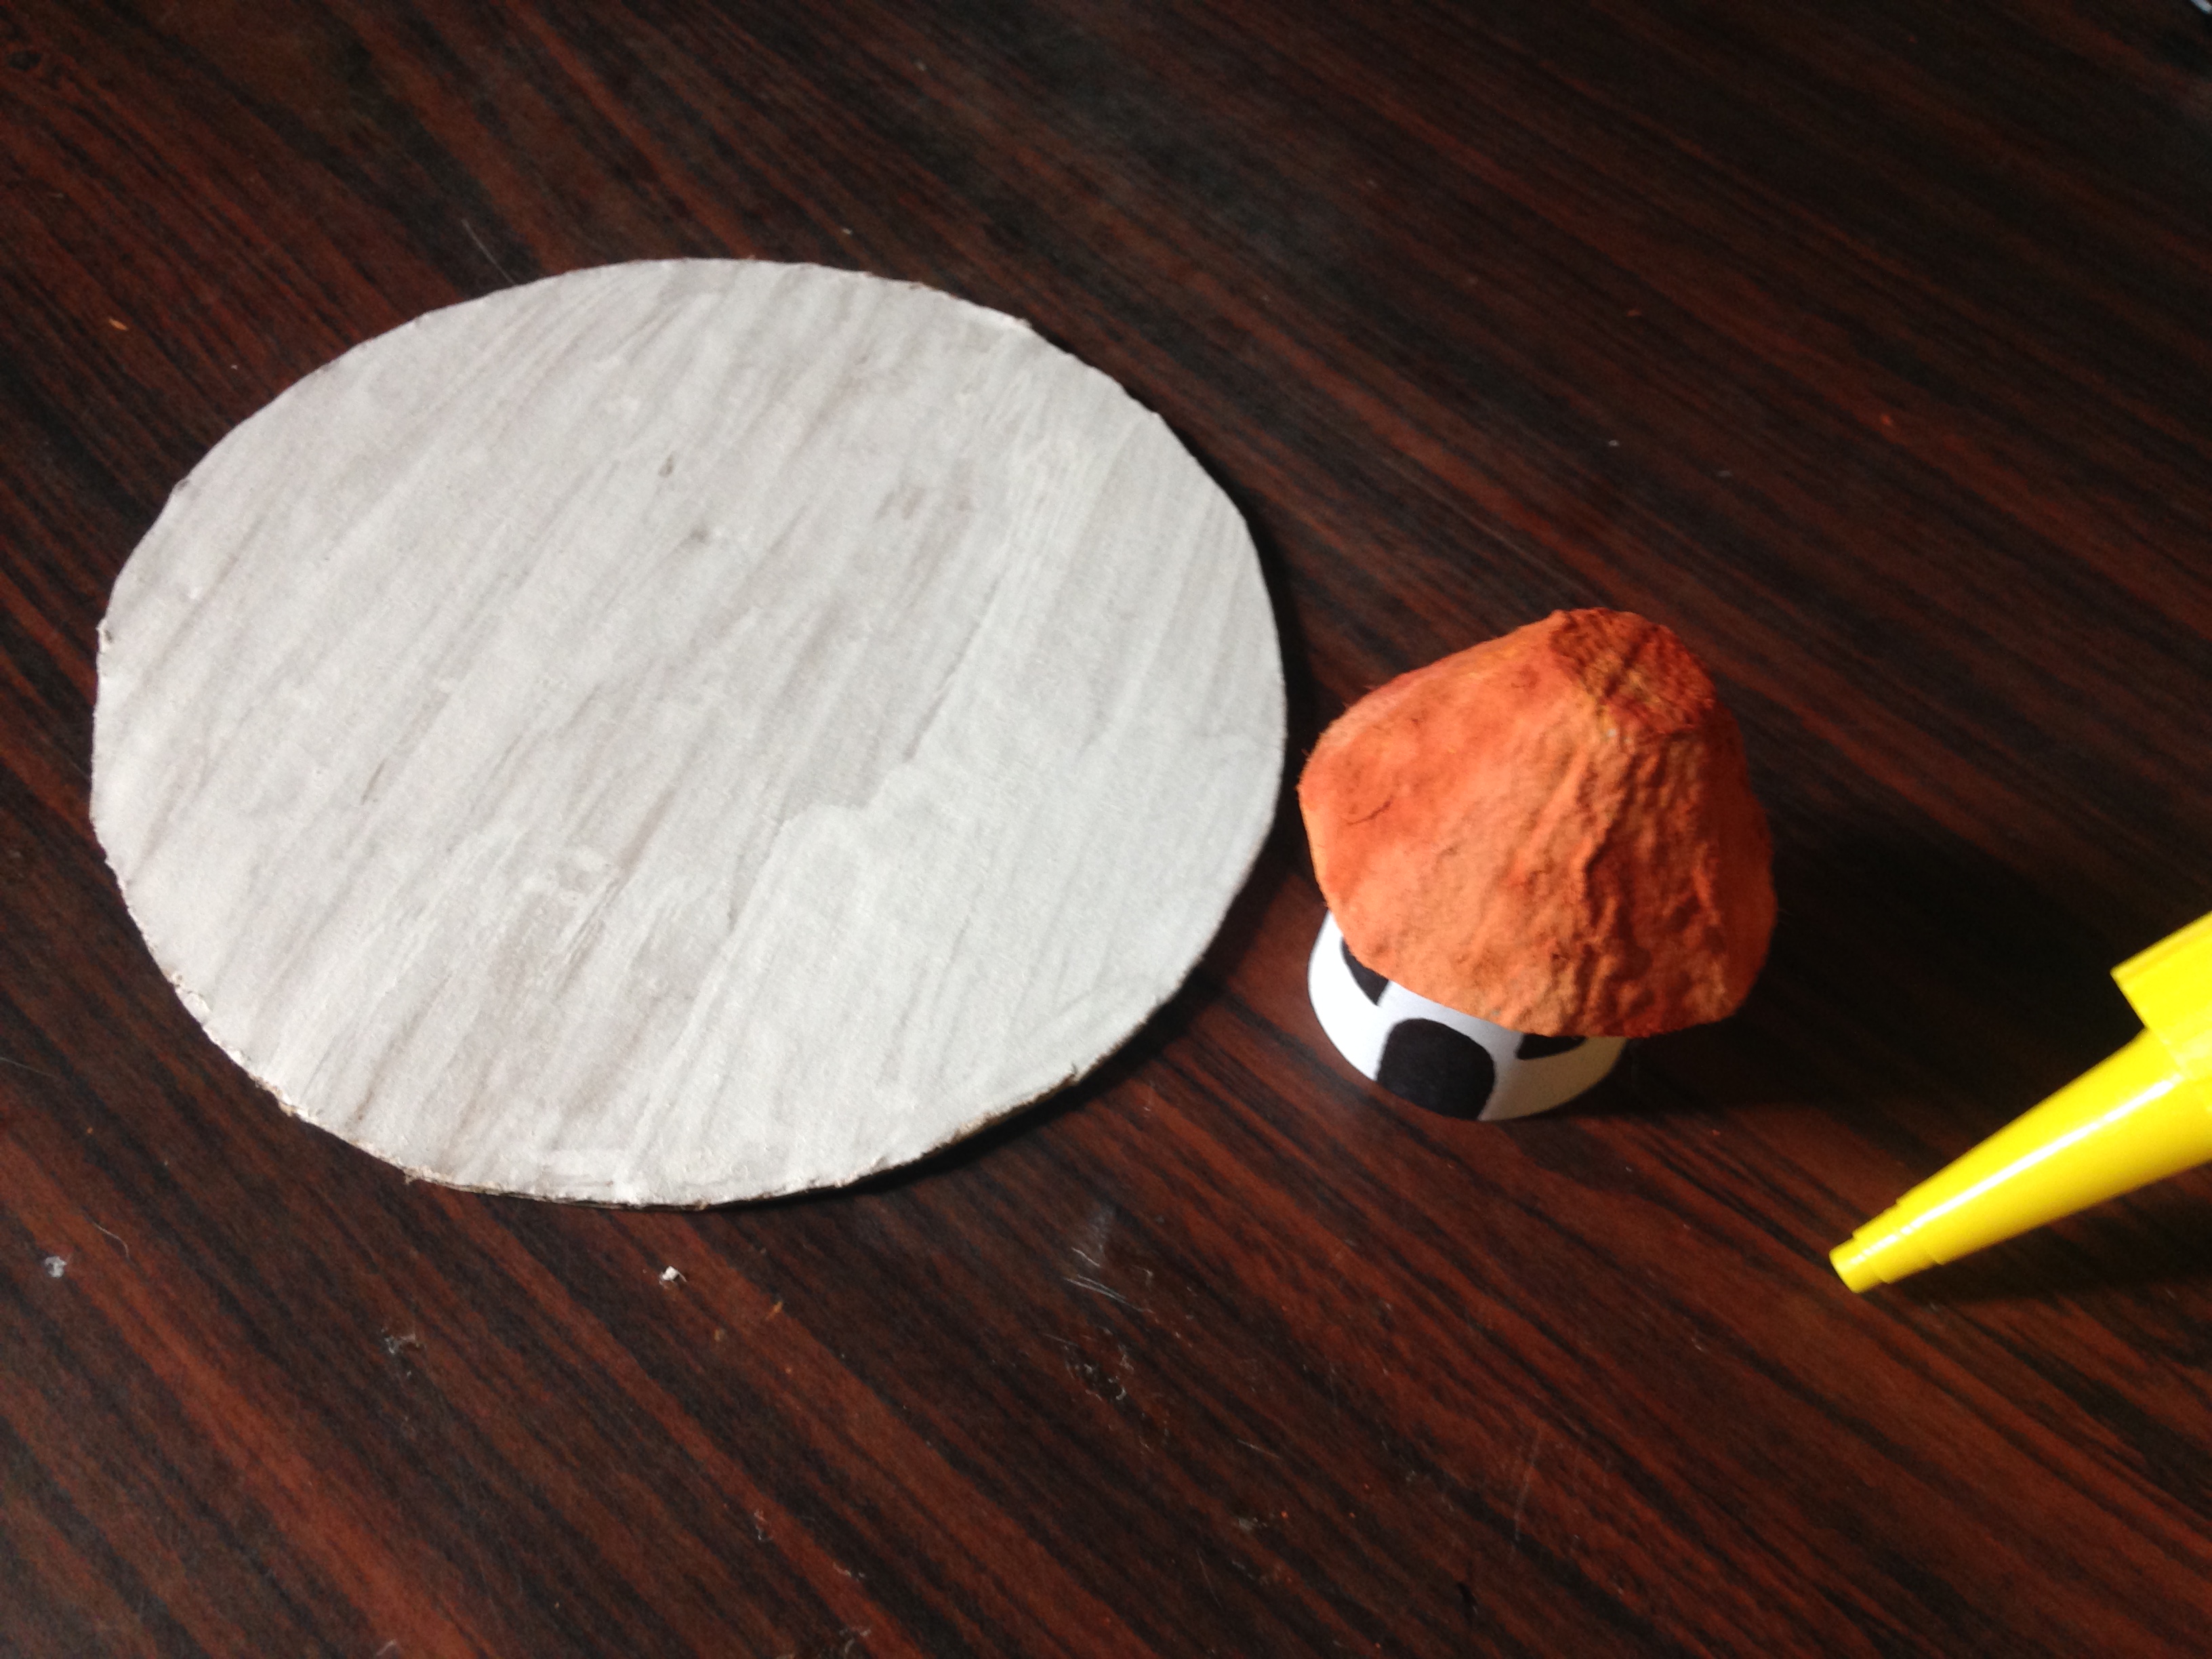
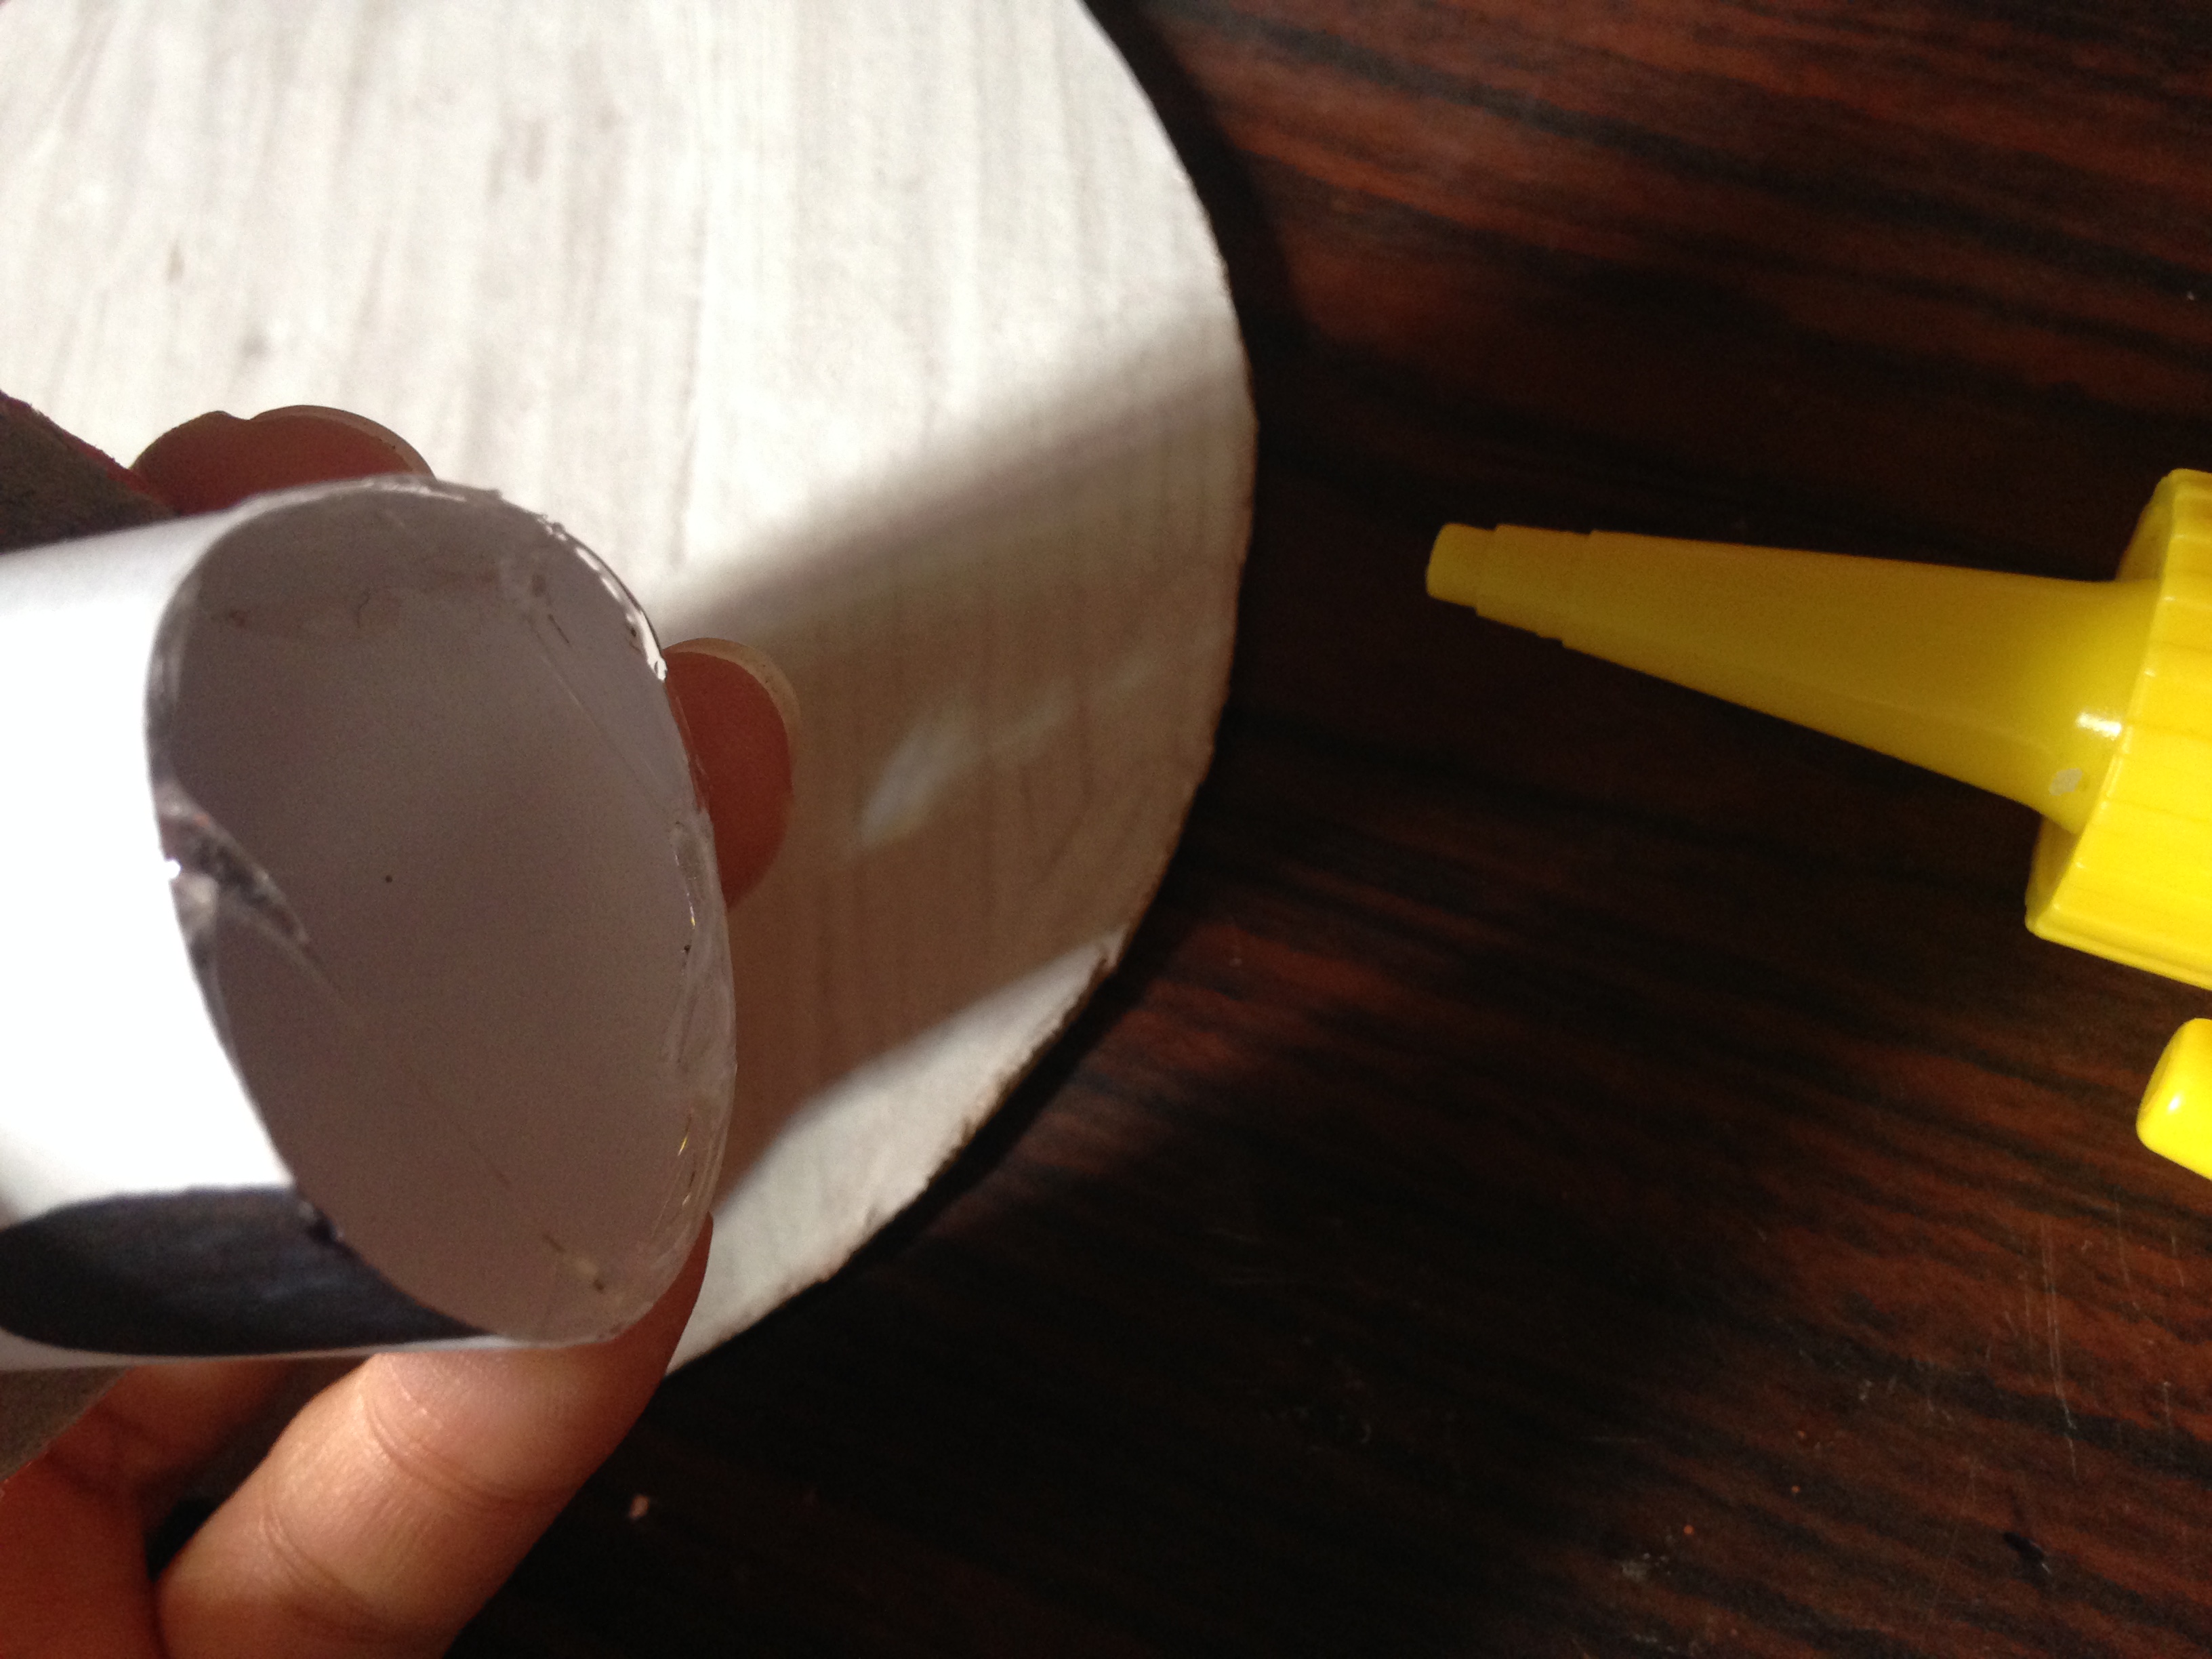
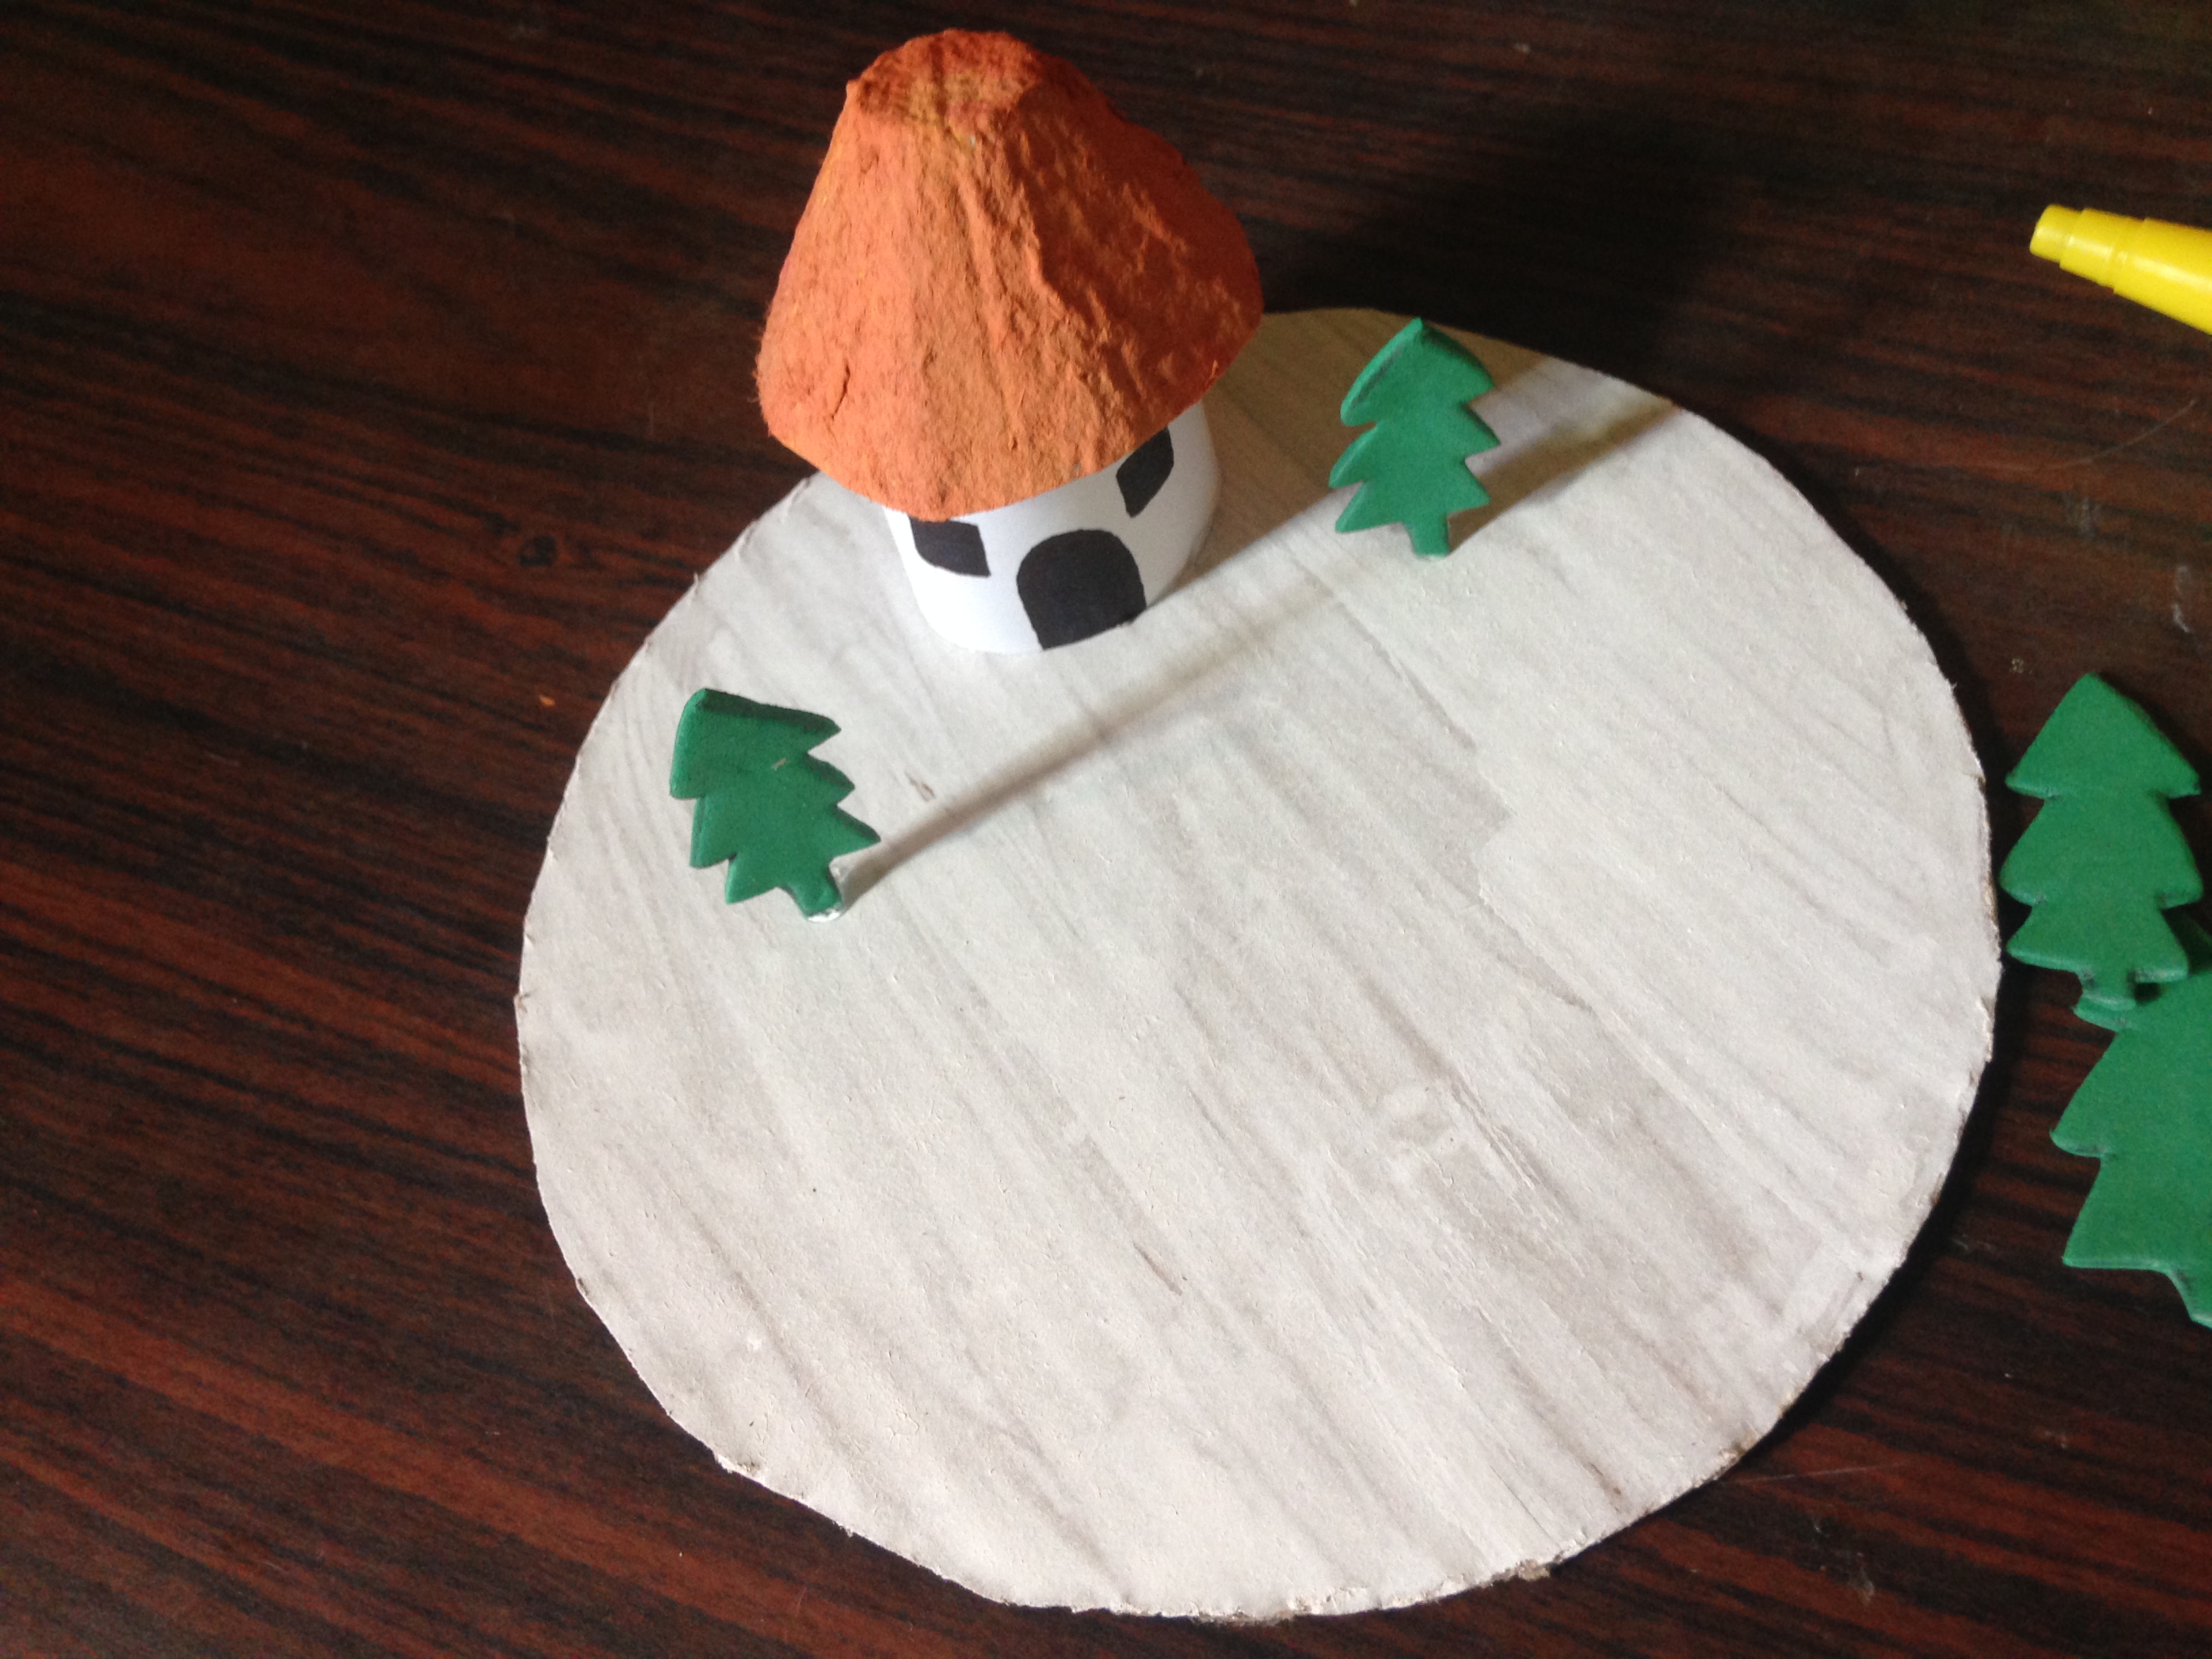
Paso 1
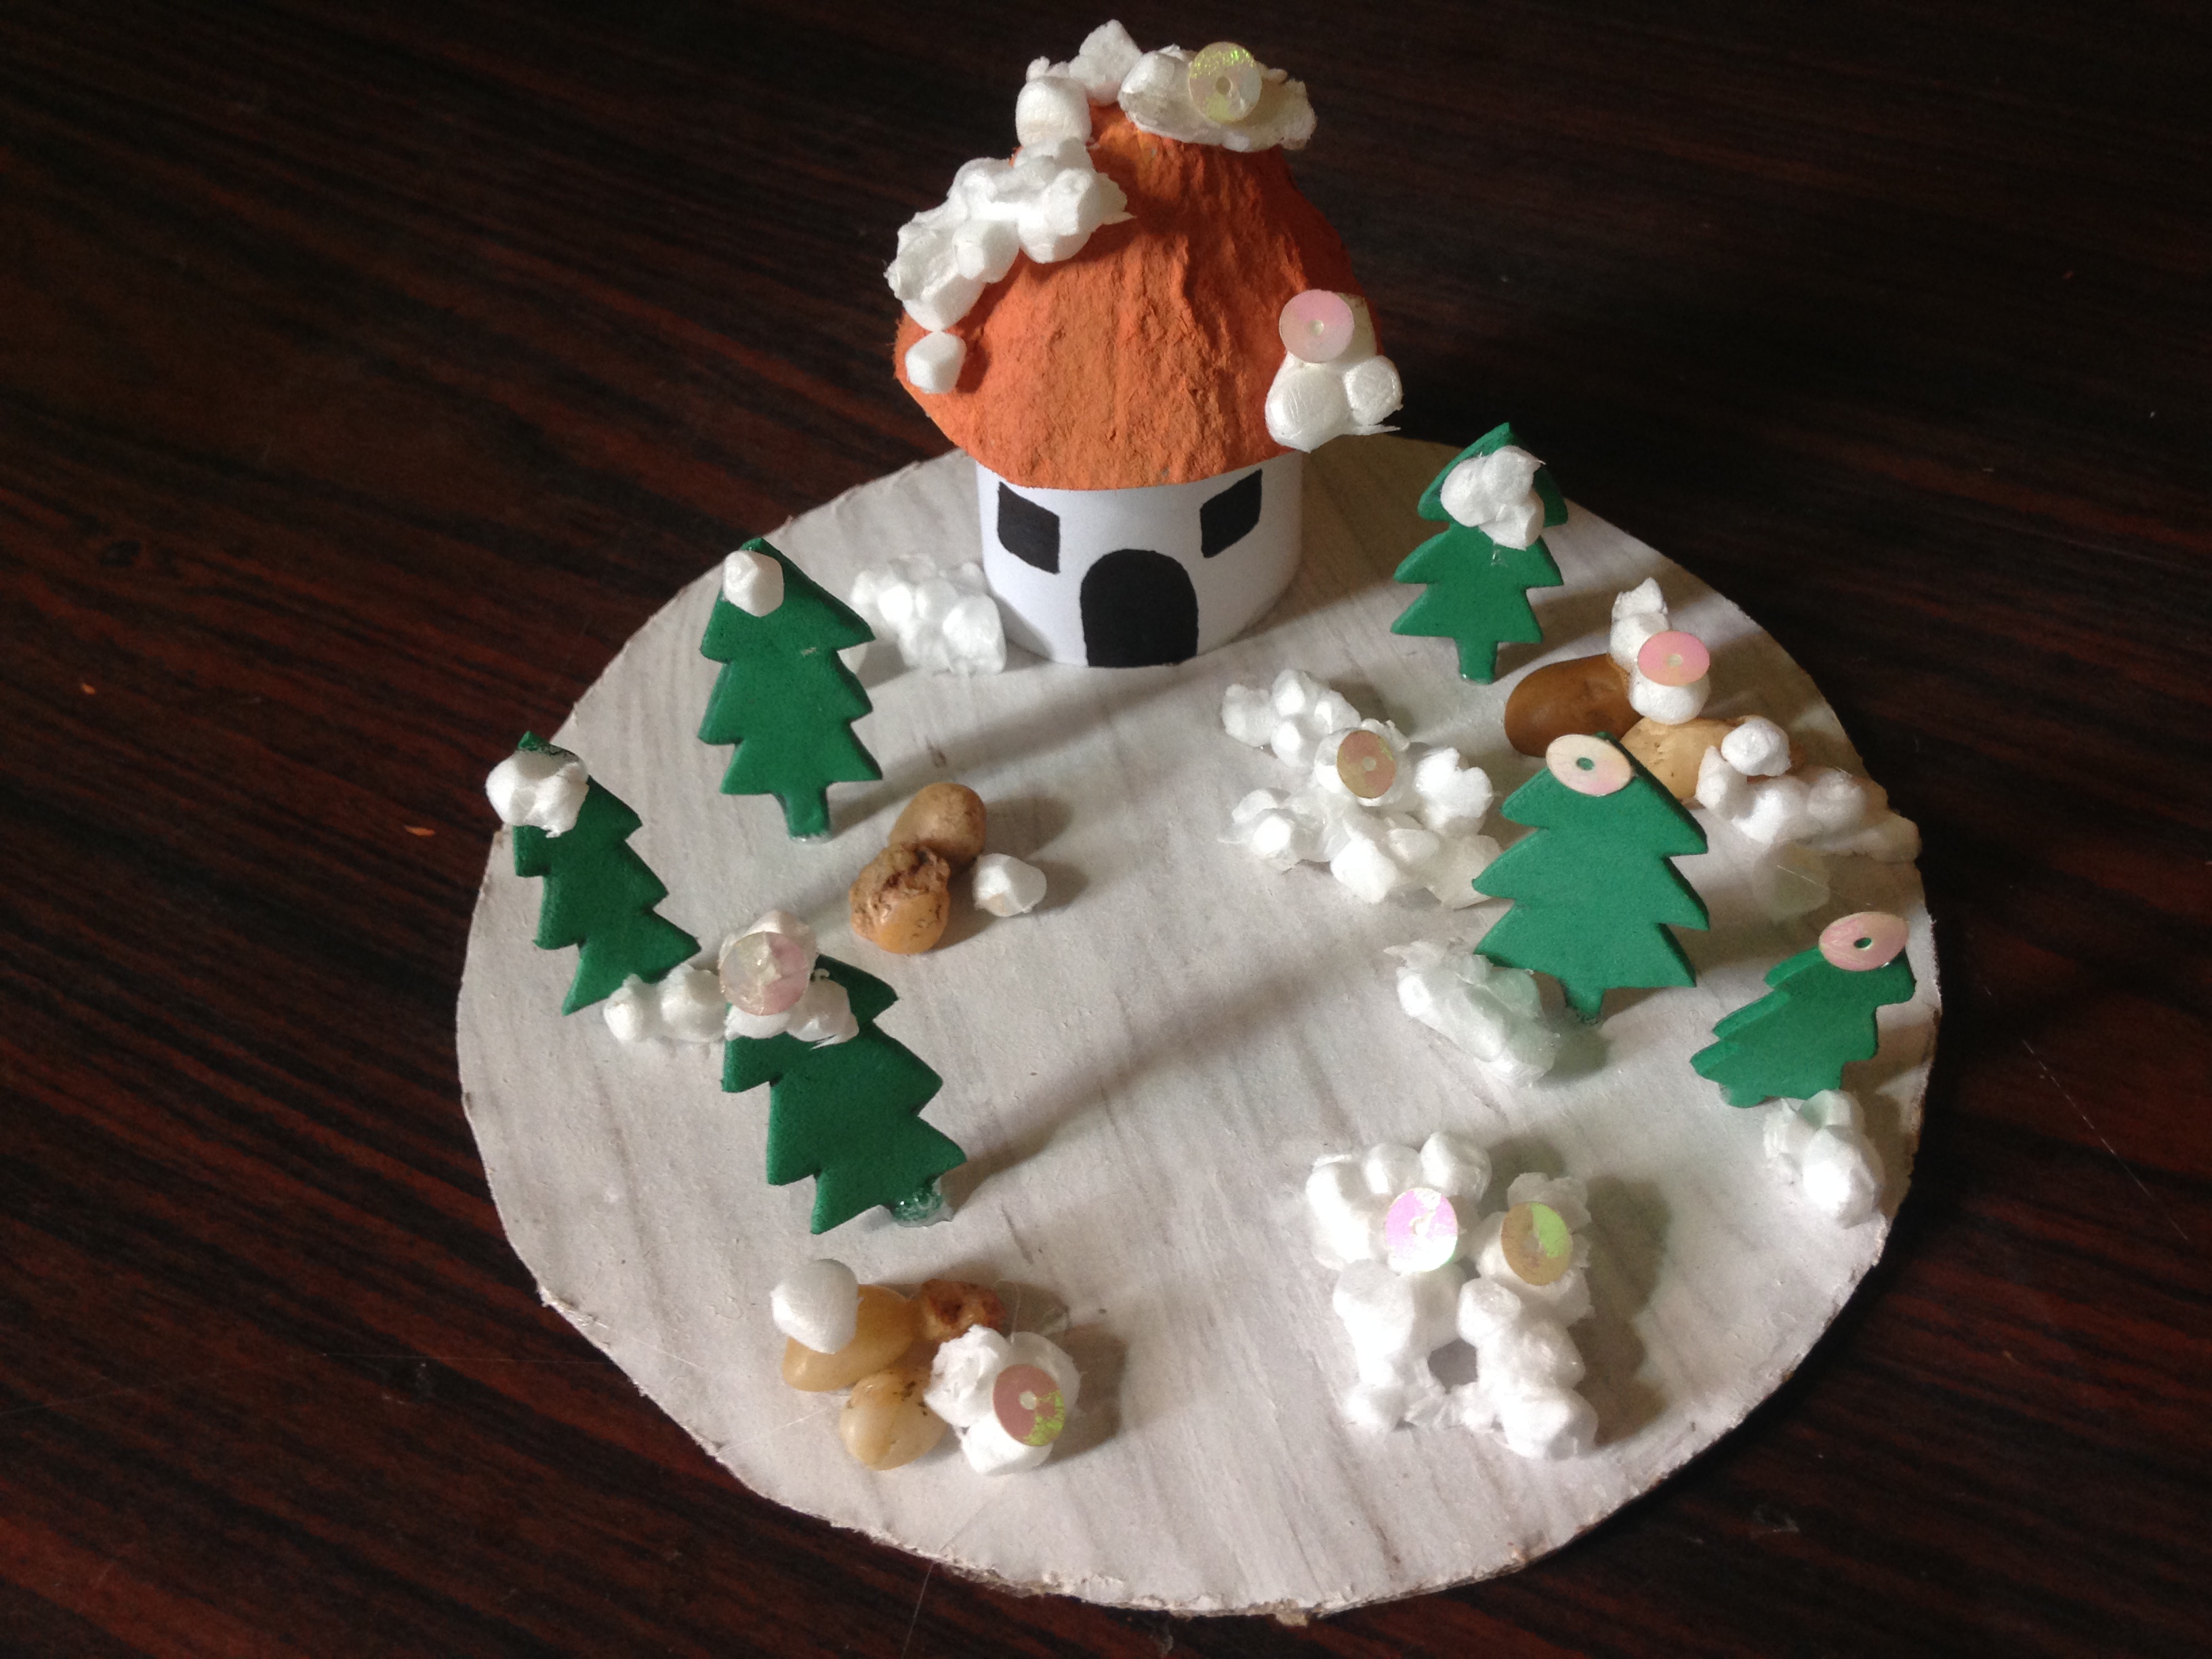
Lo primero que haremos es marcar un círculo mediano que será la base por donde irá nuestra casa, luego de marcarlo lo recortamos y procedemos a pintarlo de blanco
Step 1
The first thing we will do is mark a medium circle that will be the base where our house will go, after marking it we cut it out and proceed to paint it white

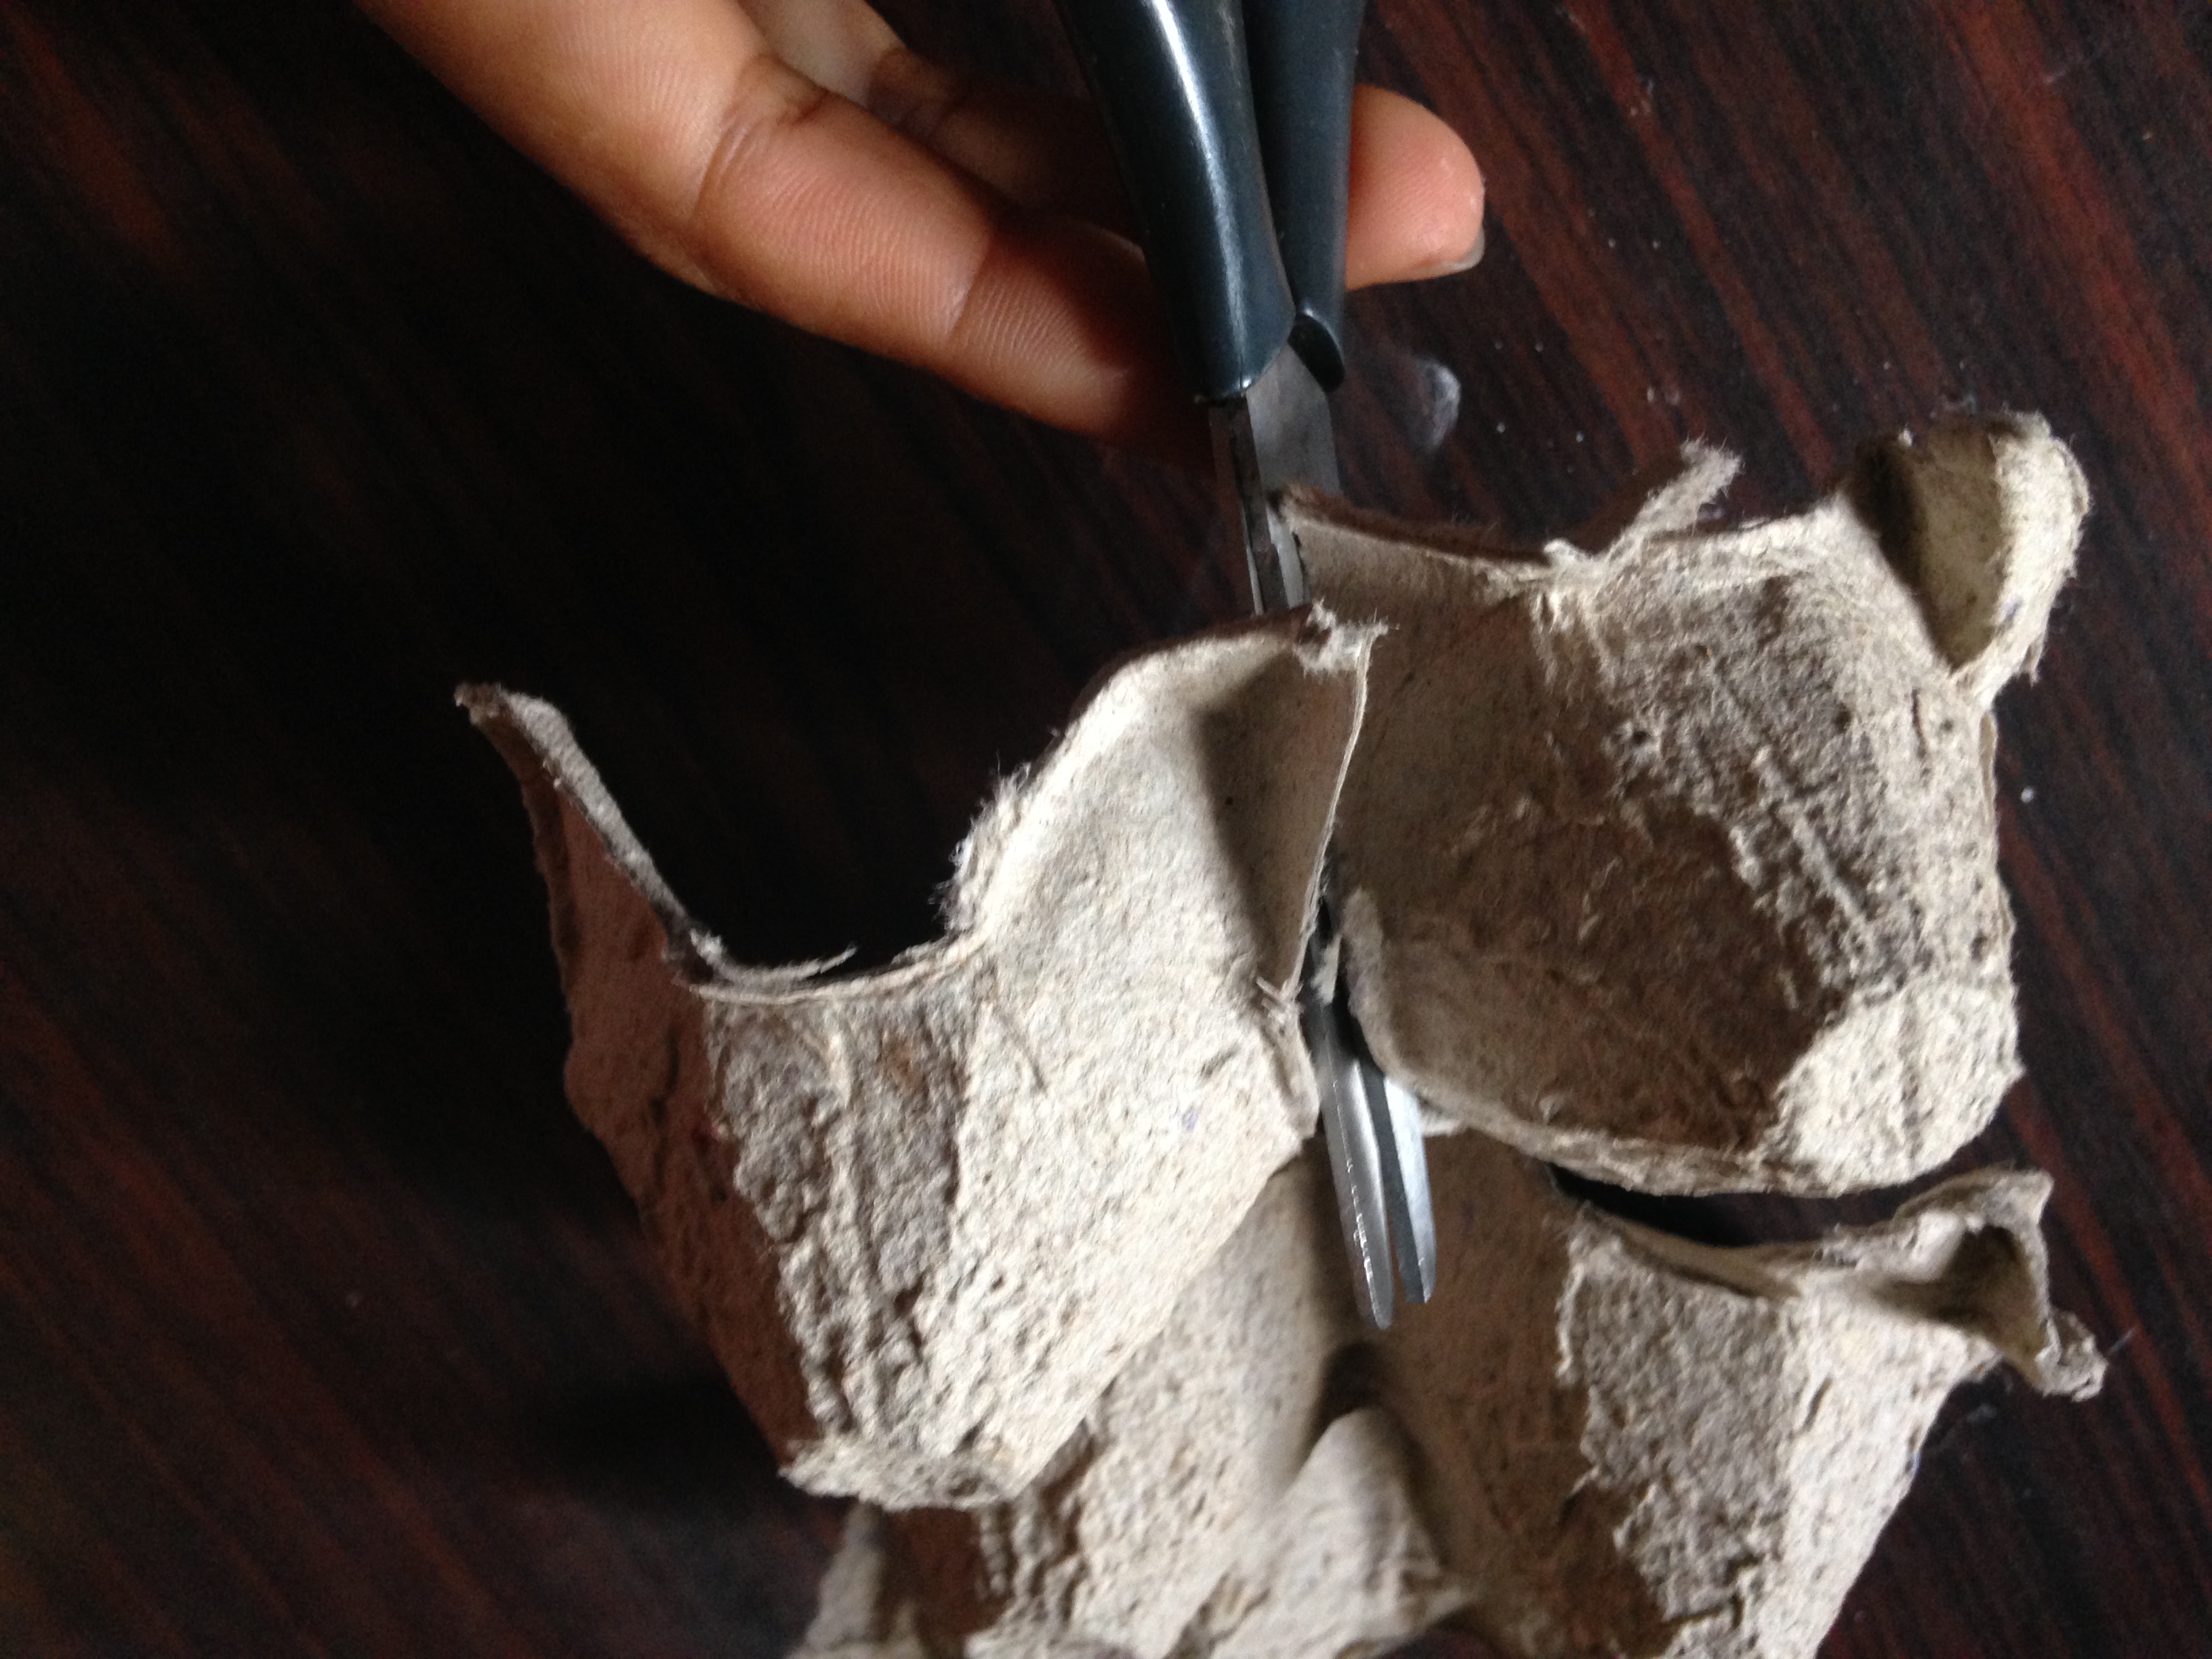
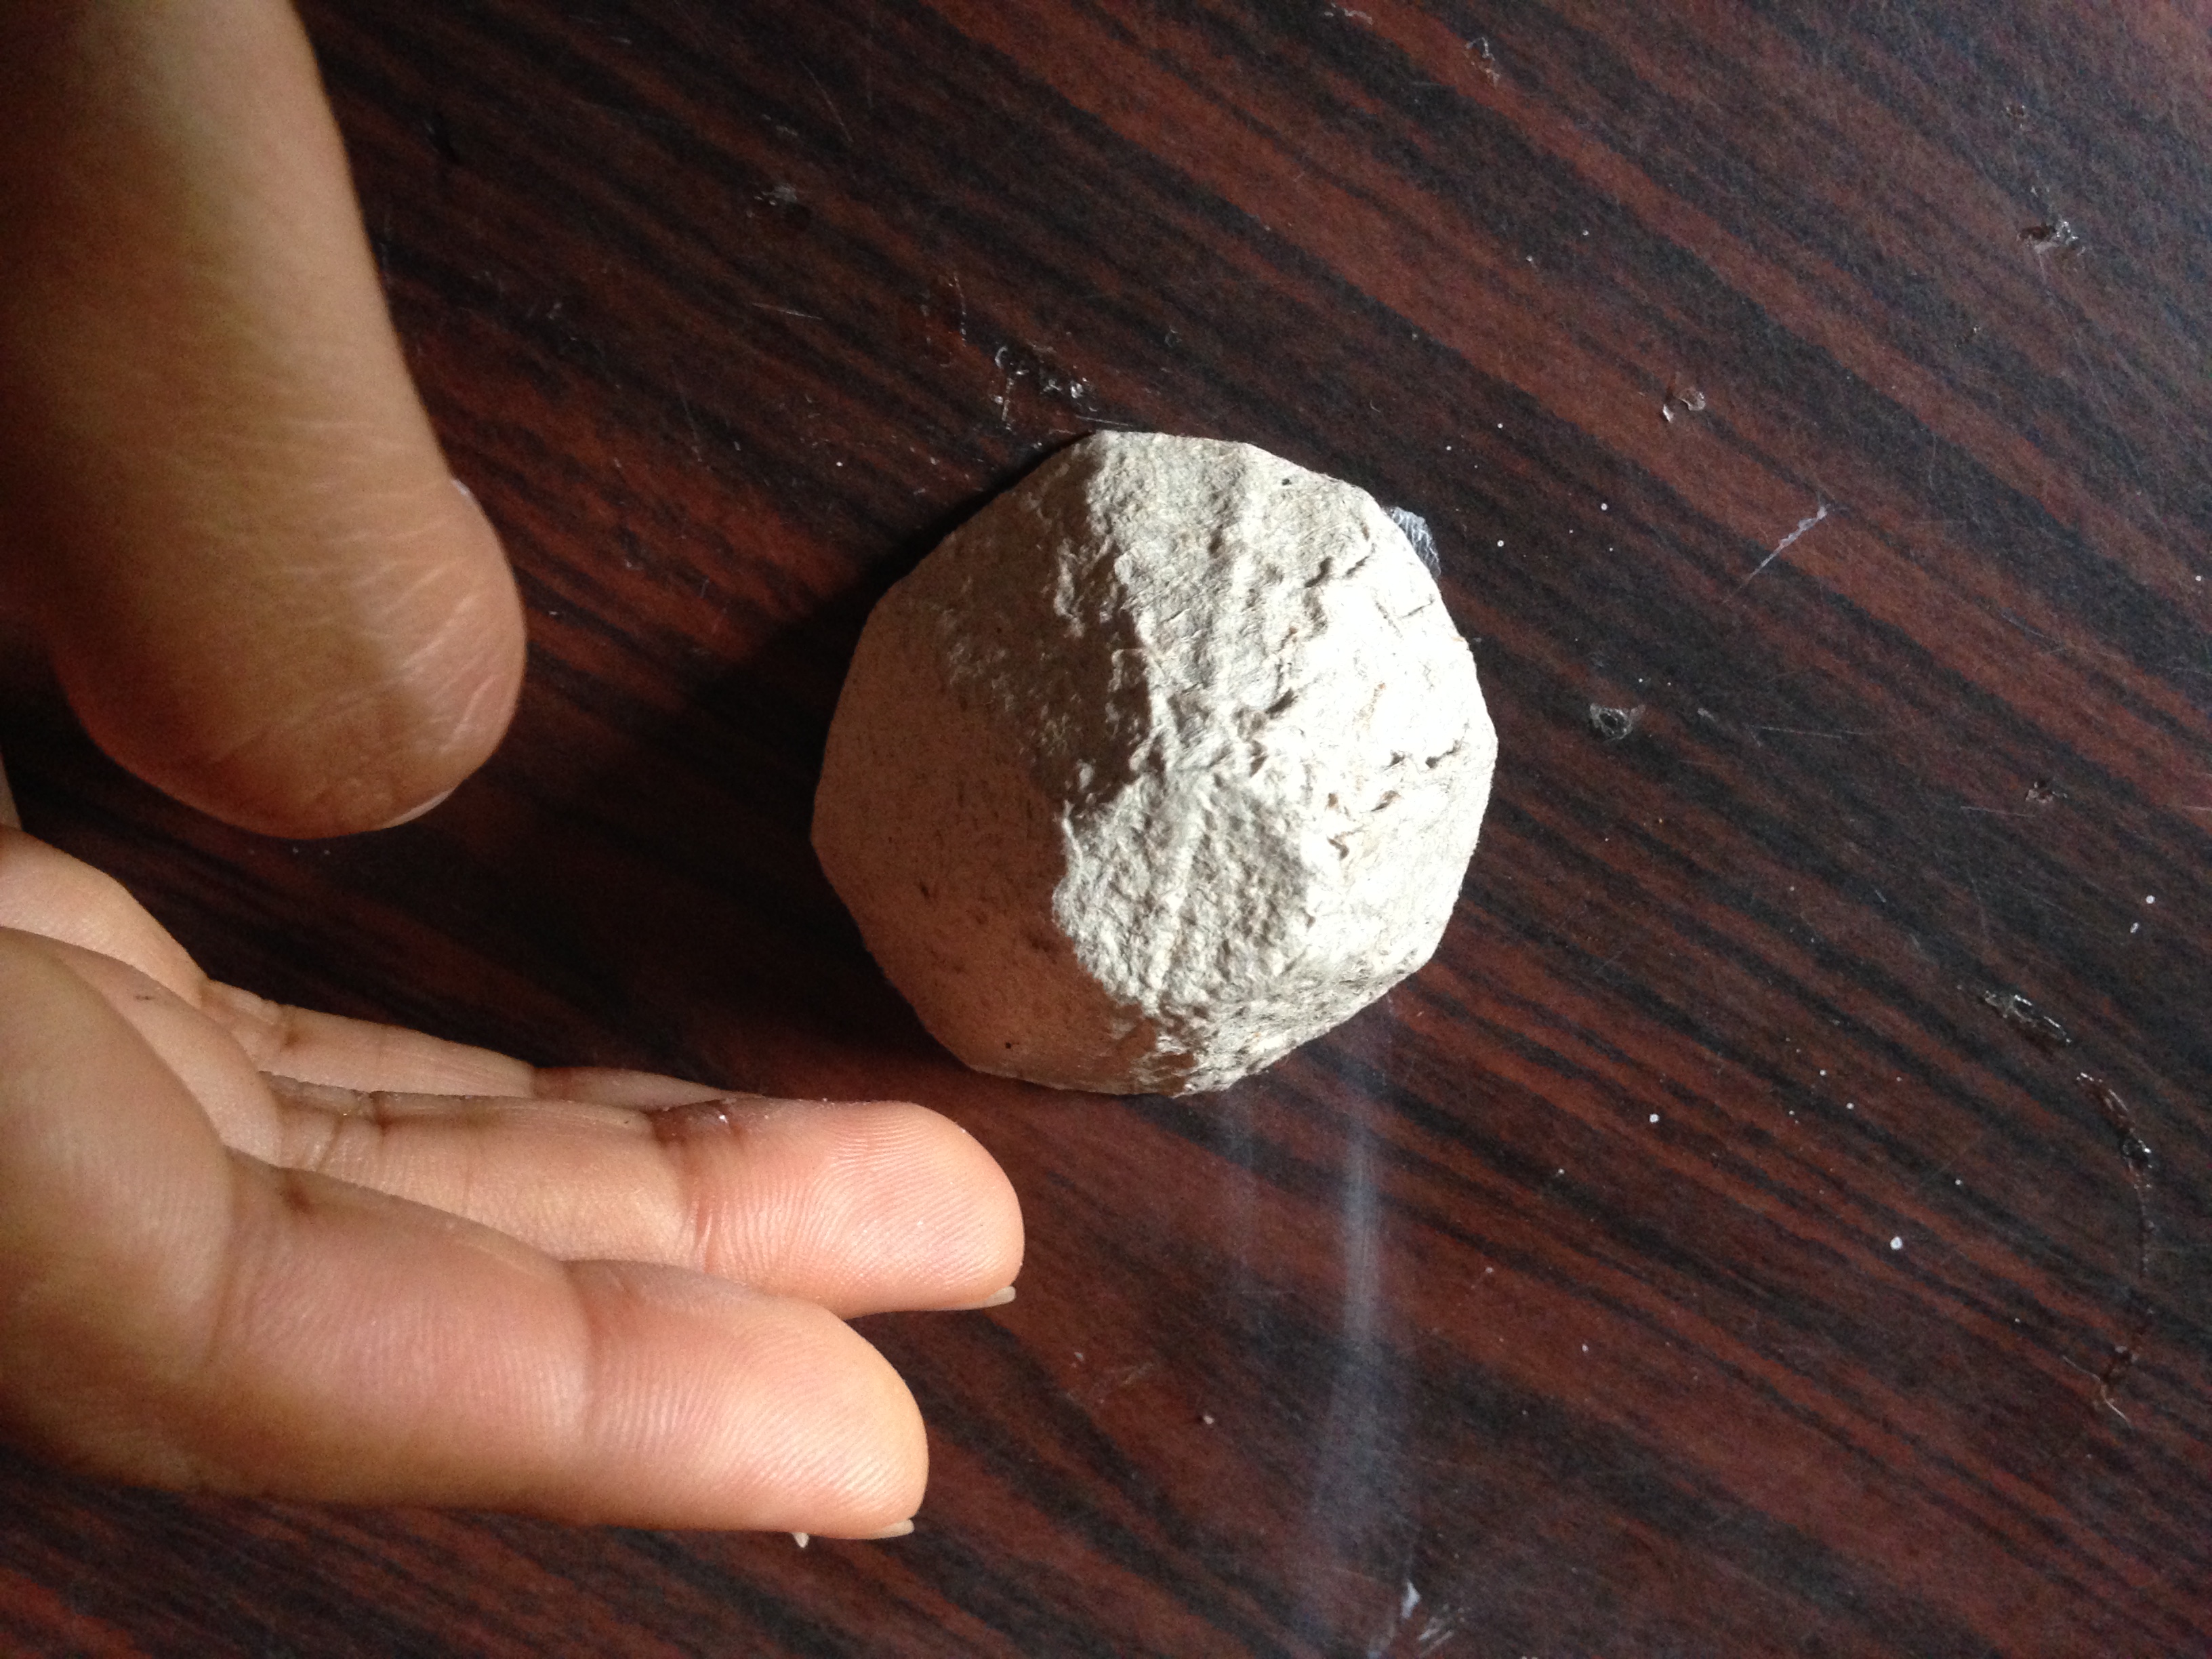
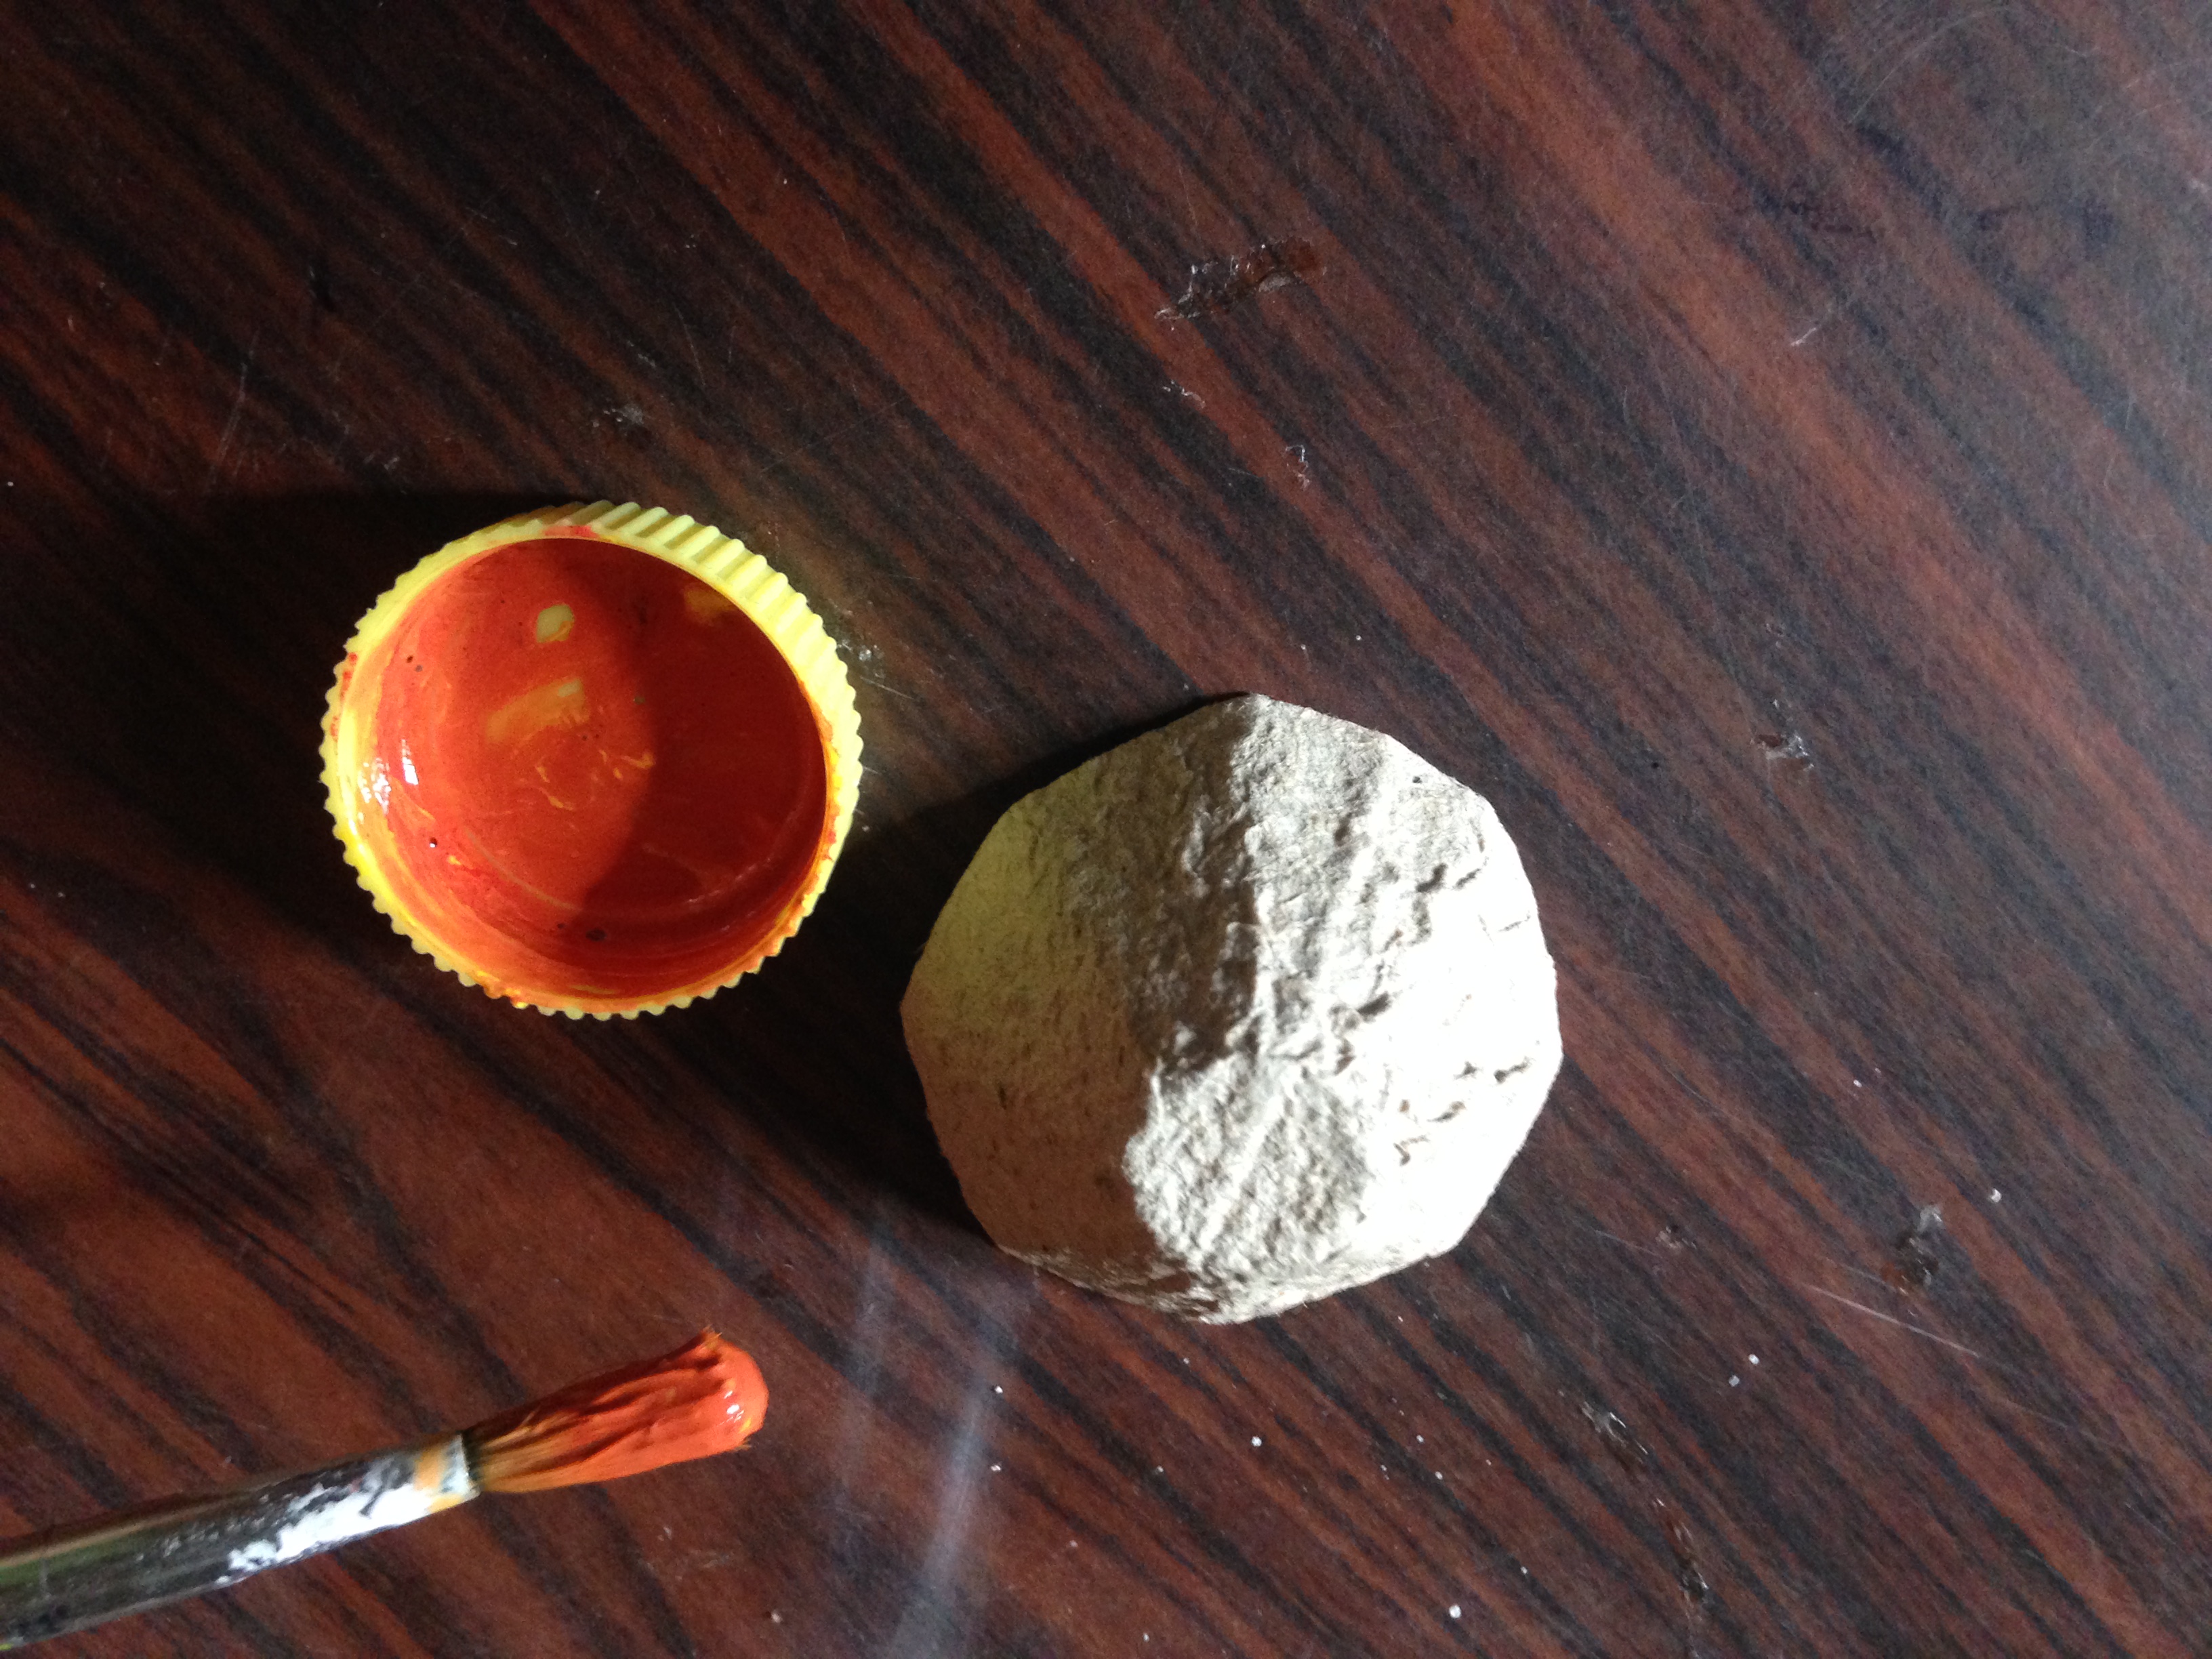
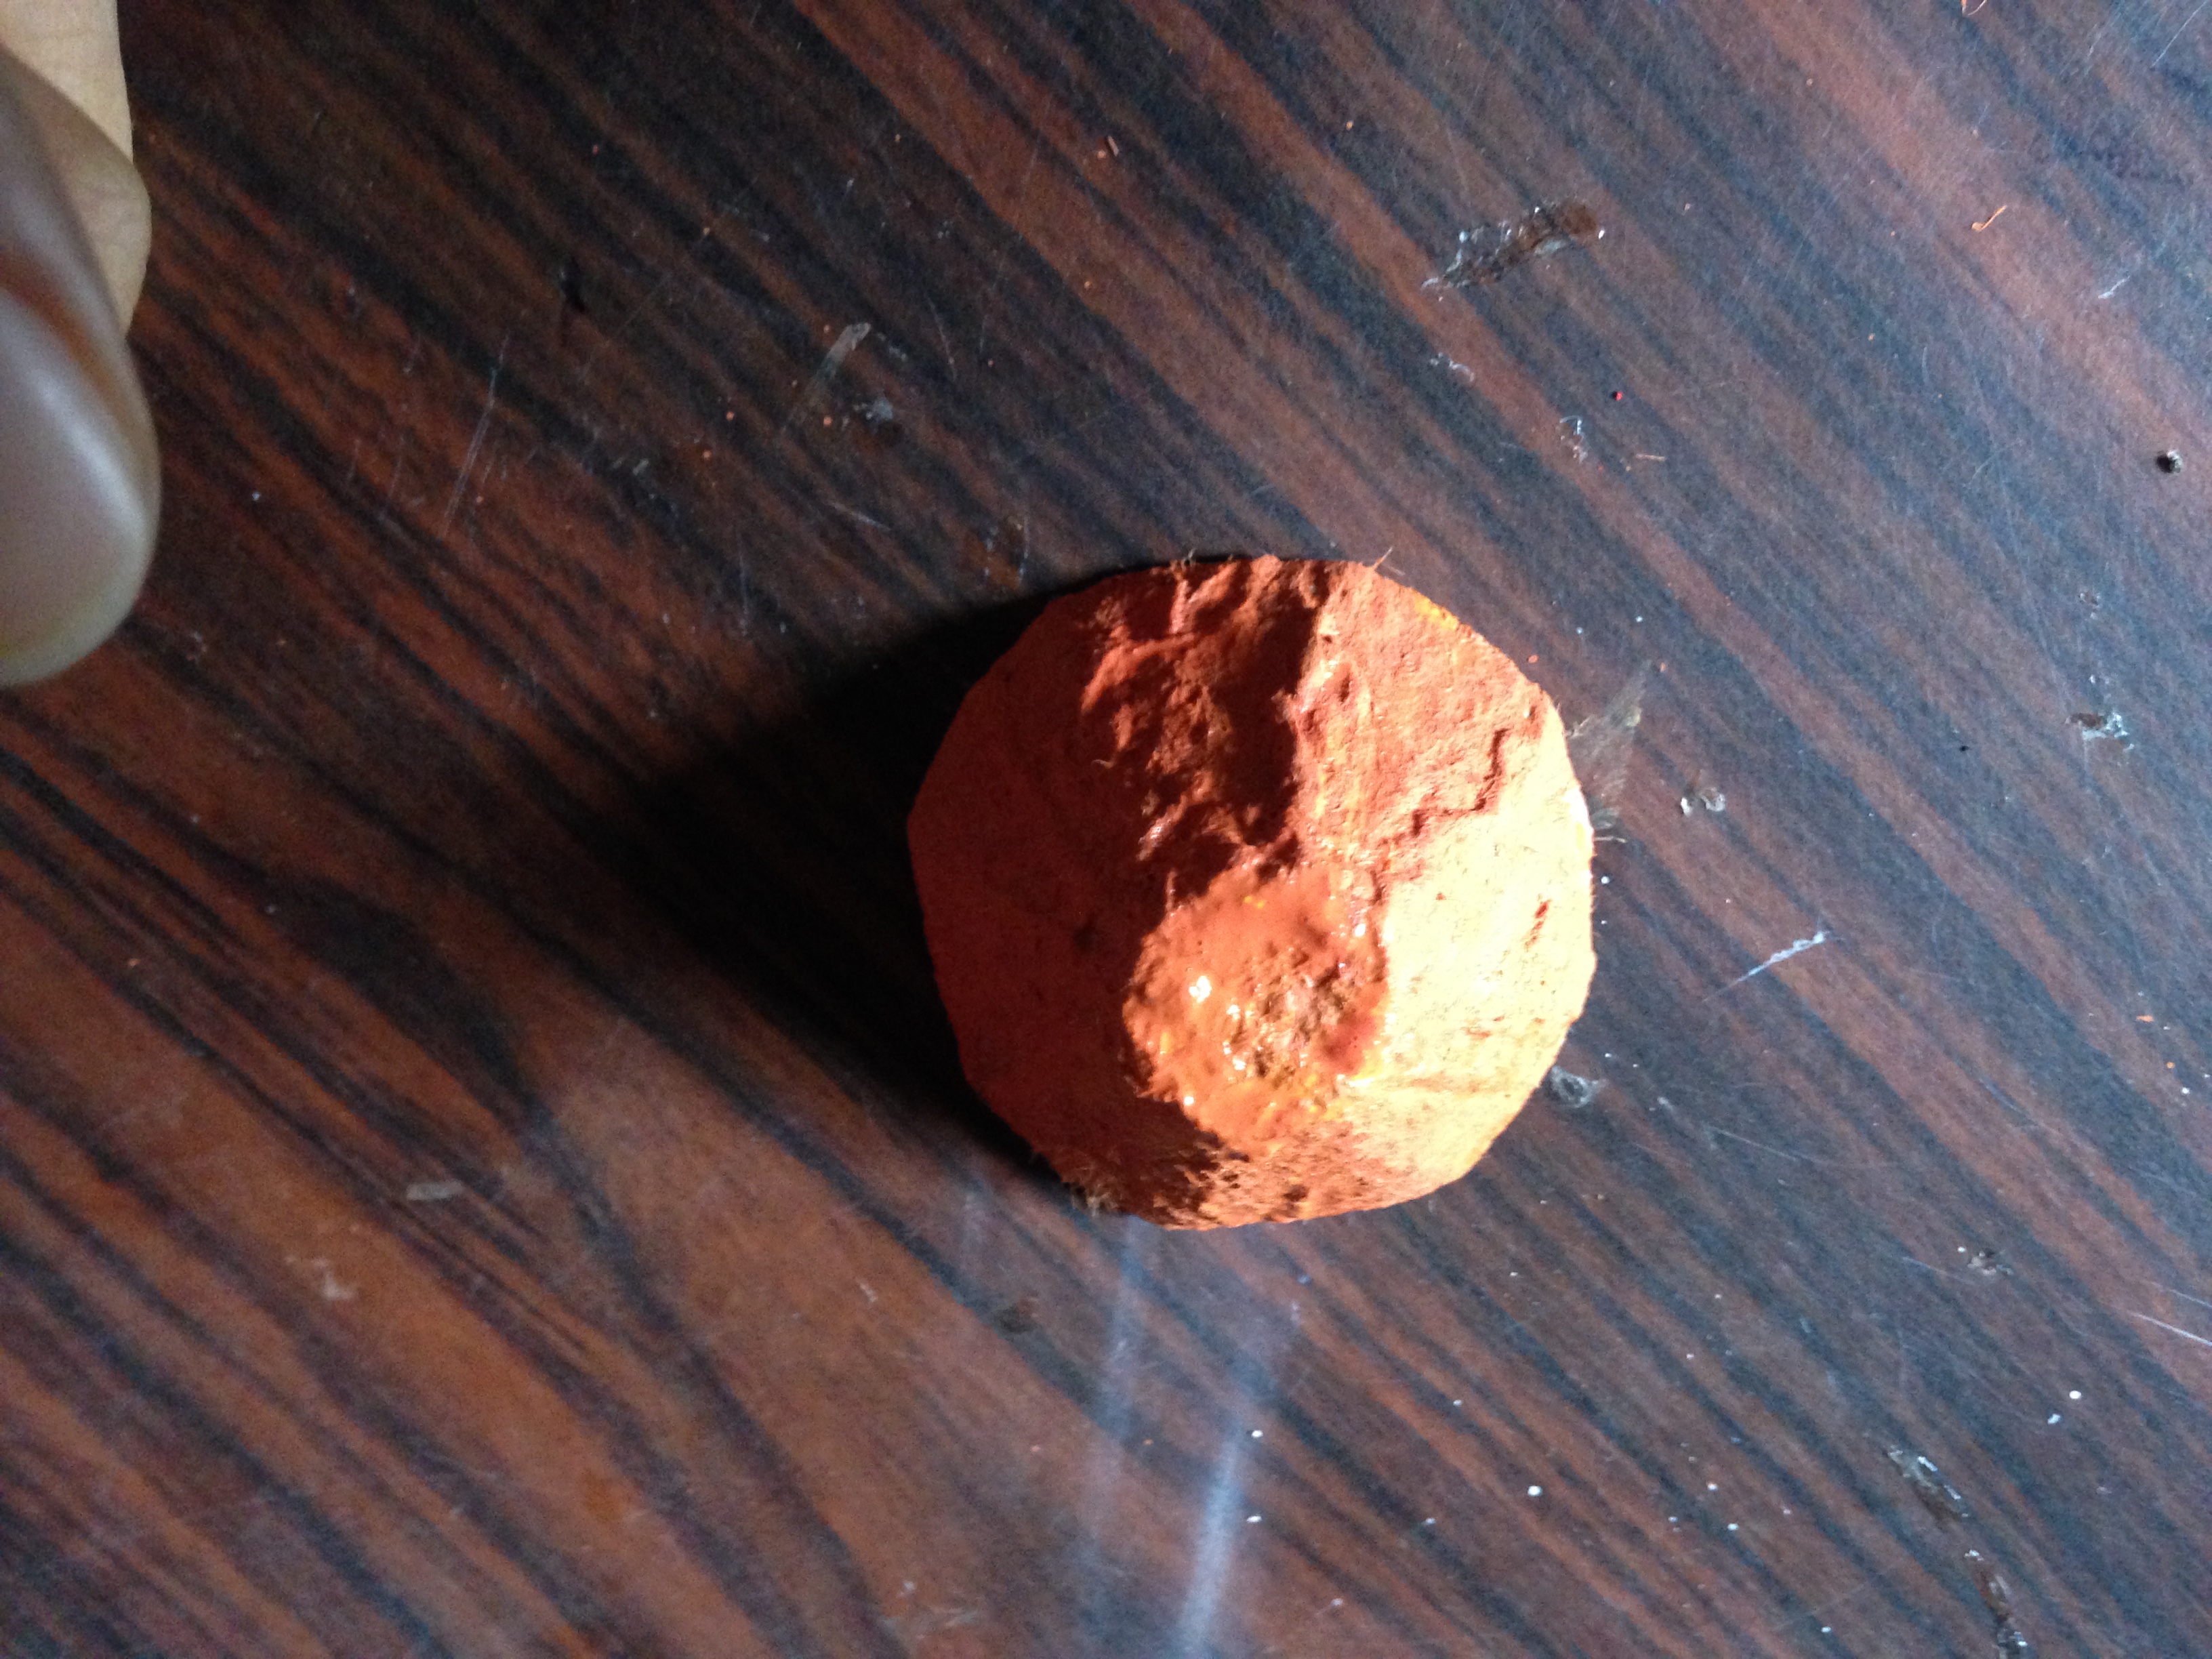
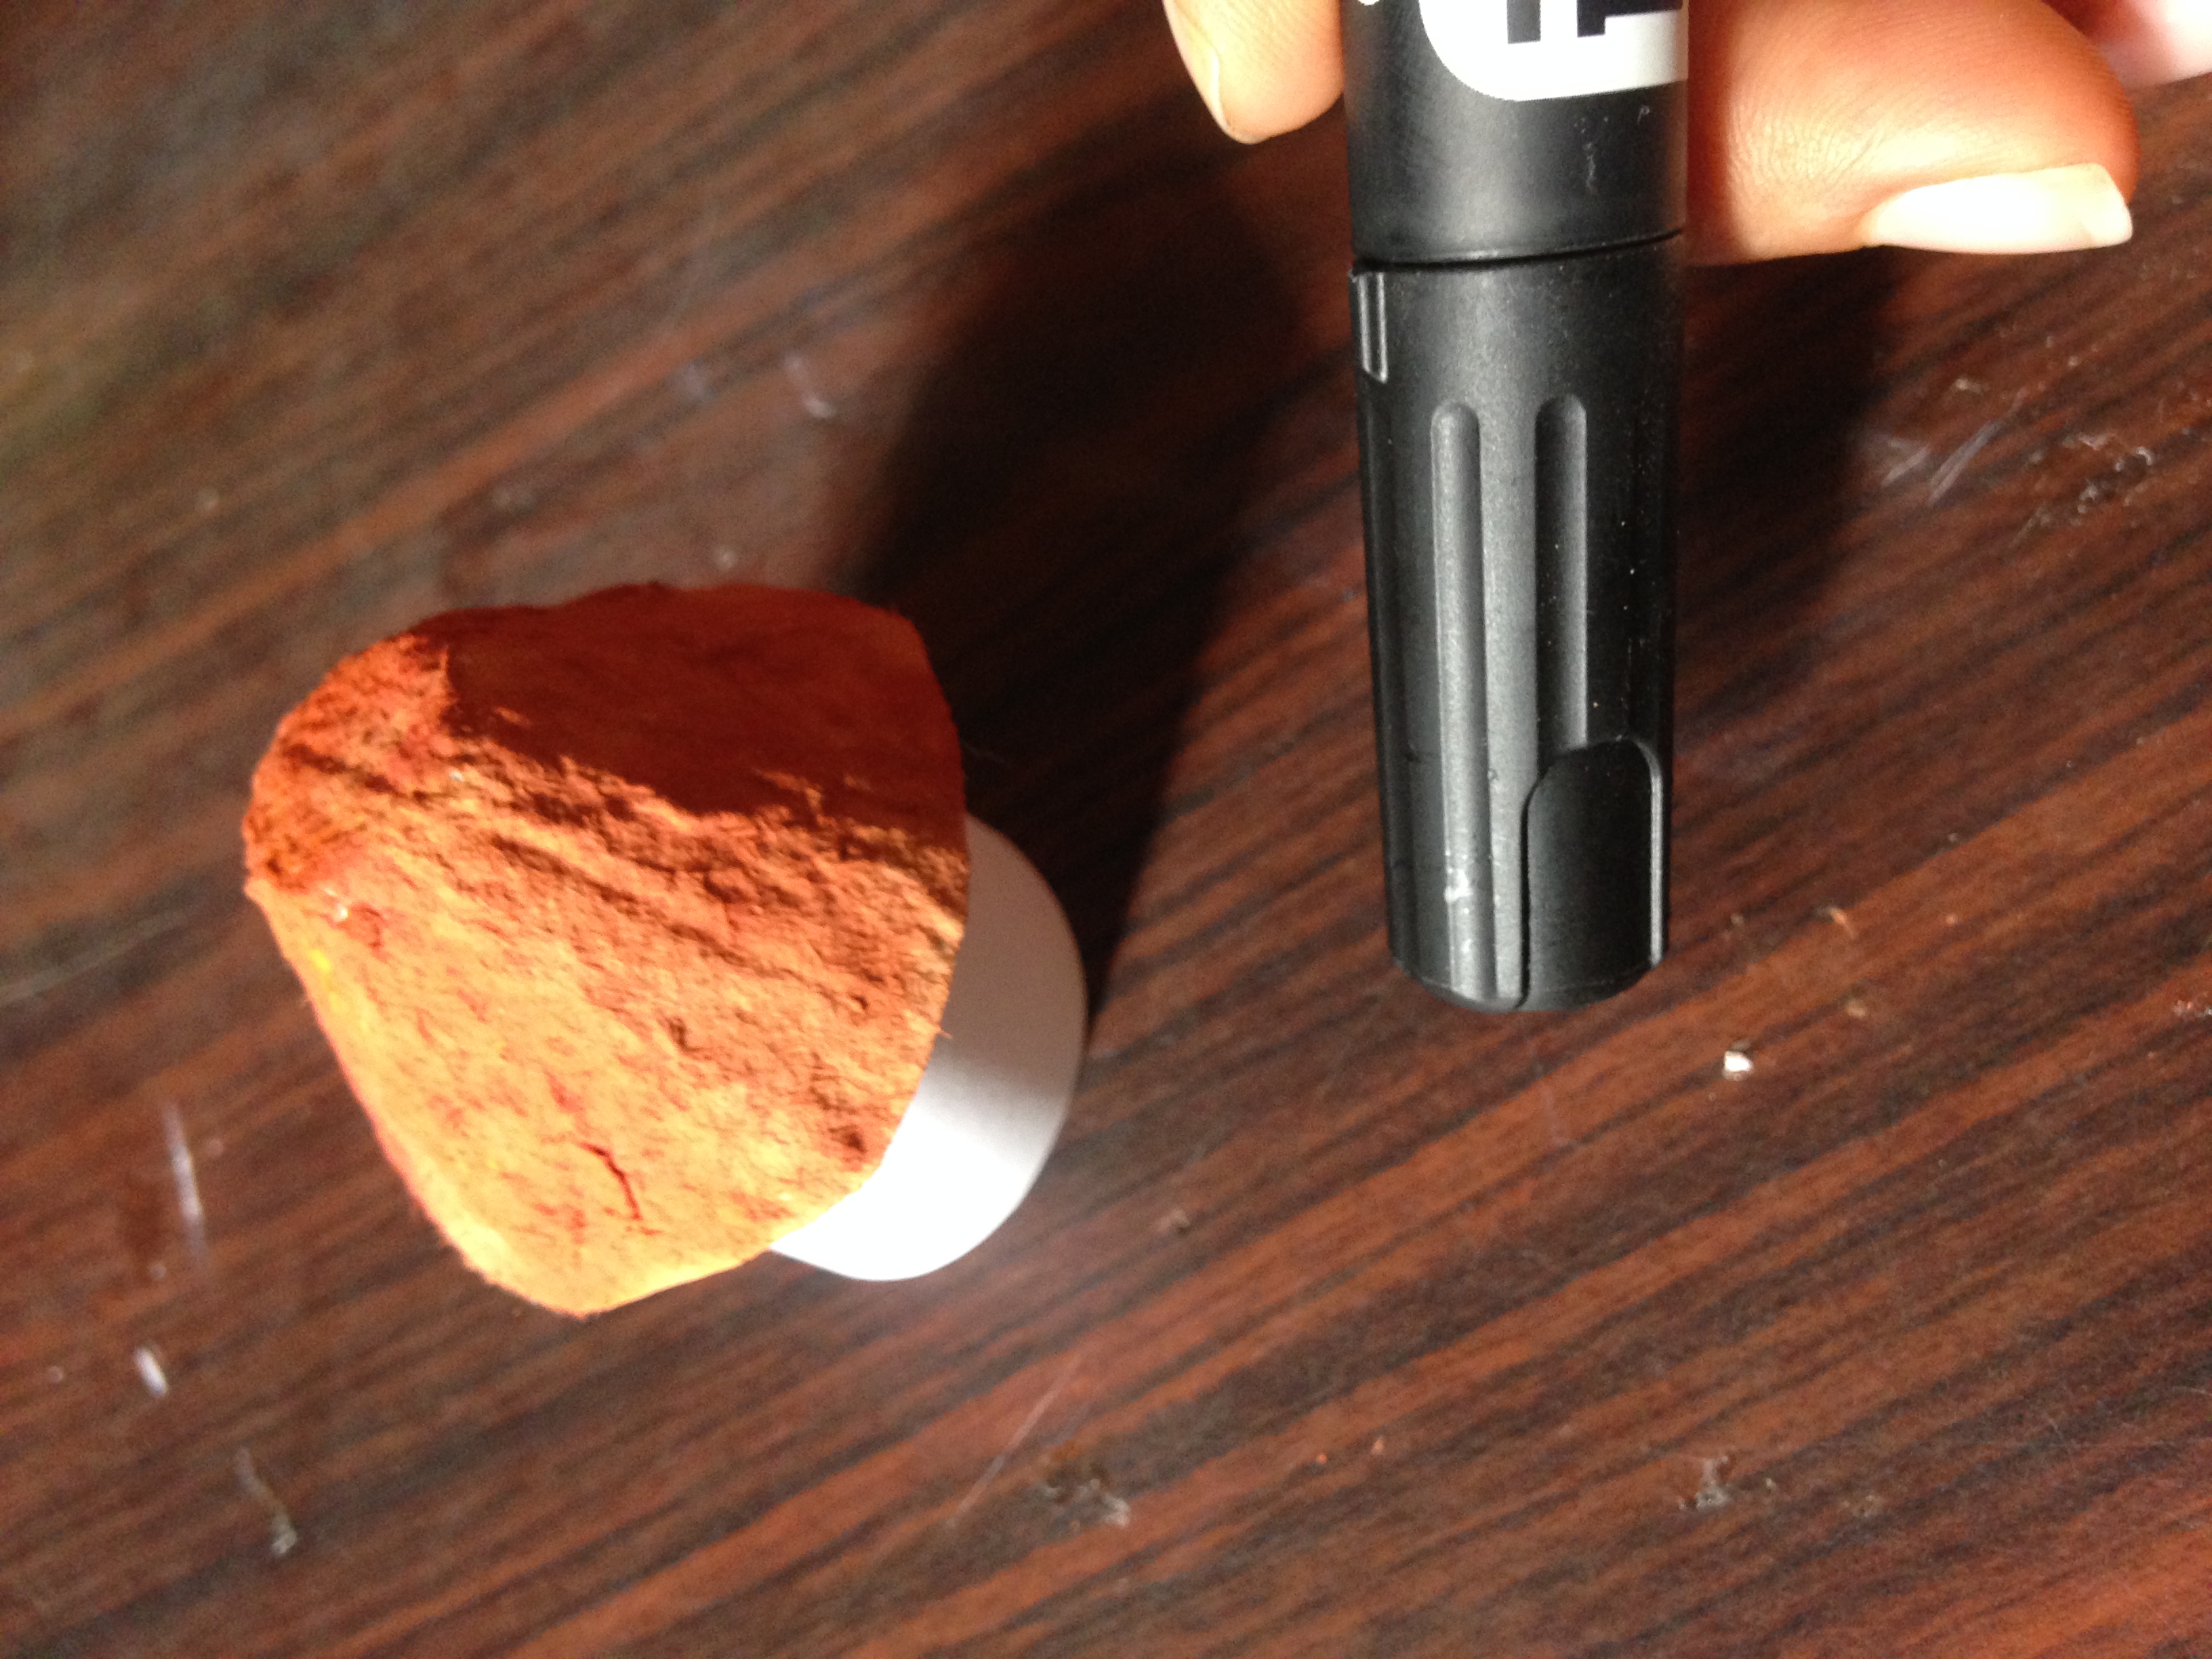
Paso 2
Ahora recortaremos una tapa de cartón de huevos y la pintaremos de color naranja, sino tienes pintura color naranja mezcla rojo y amarillo para que obtengas ese color asi como hice yo
Step 2
Now we will cut out an egg carton cover and paint it orange, otherwise you have orange paint, mix red and yellow so you can get that color just like I did.

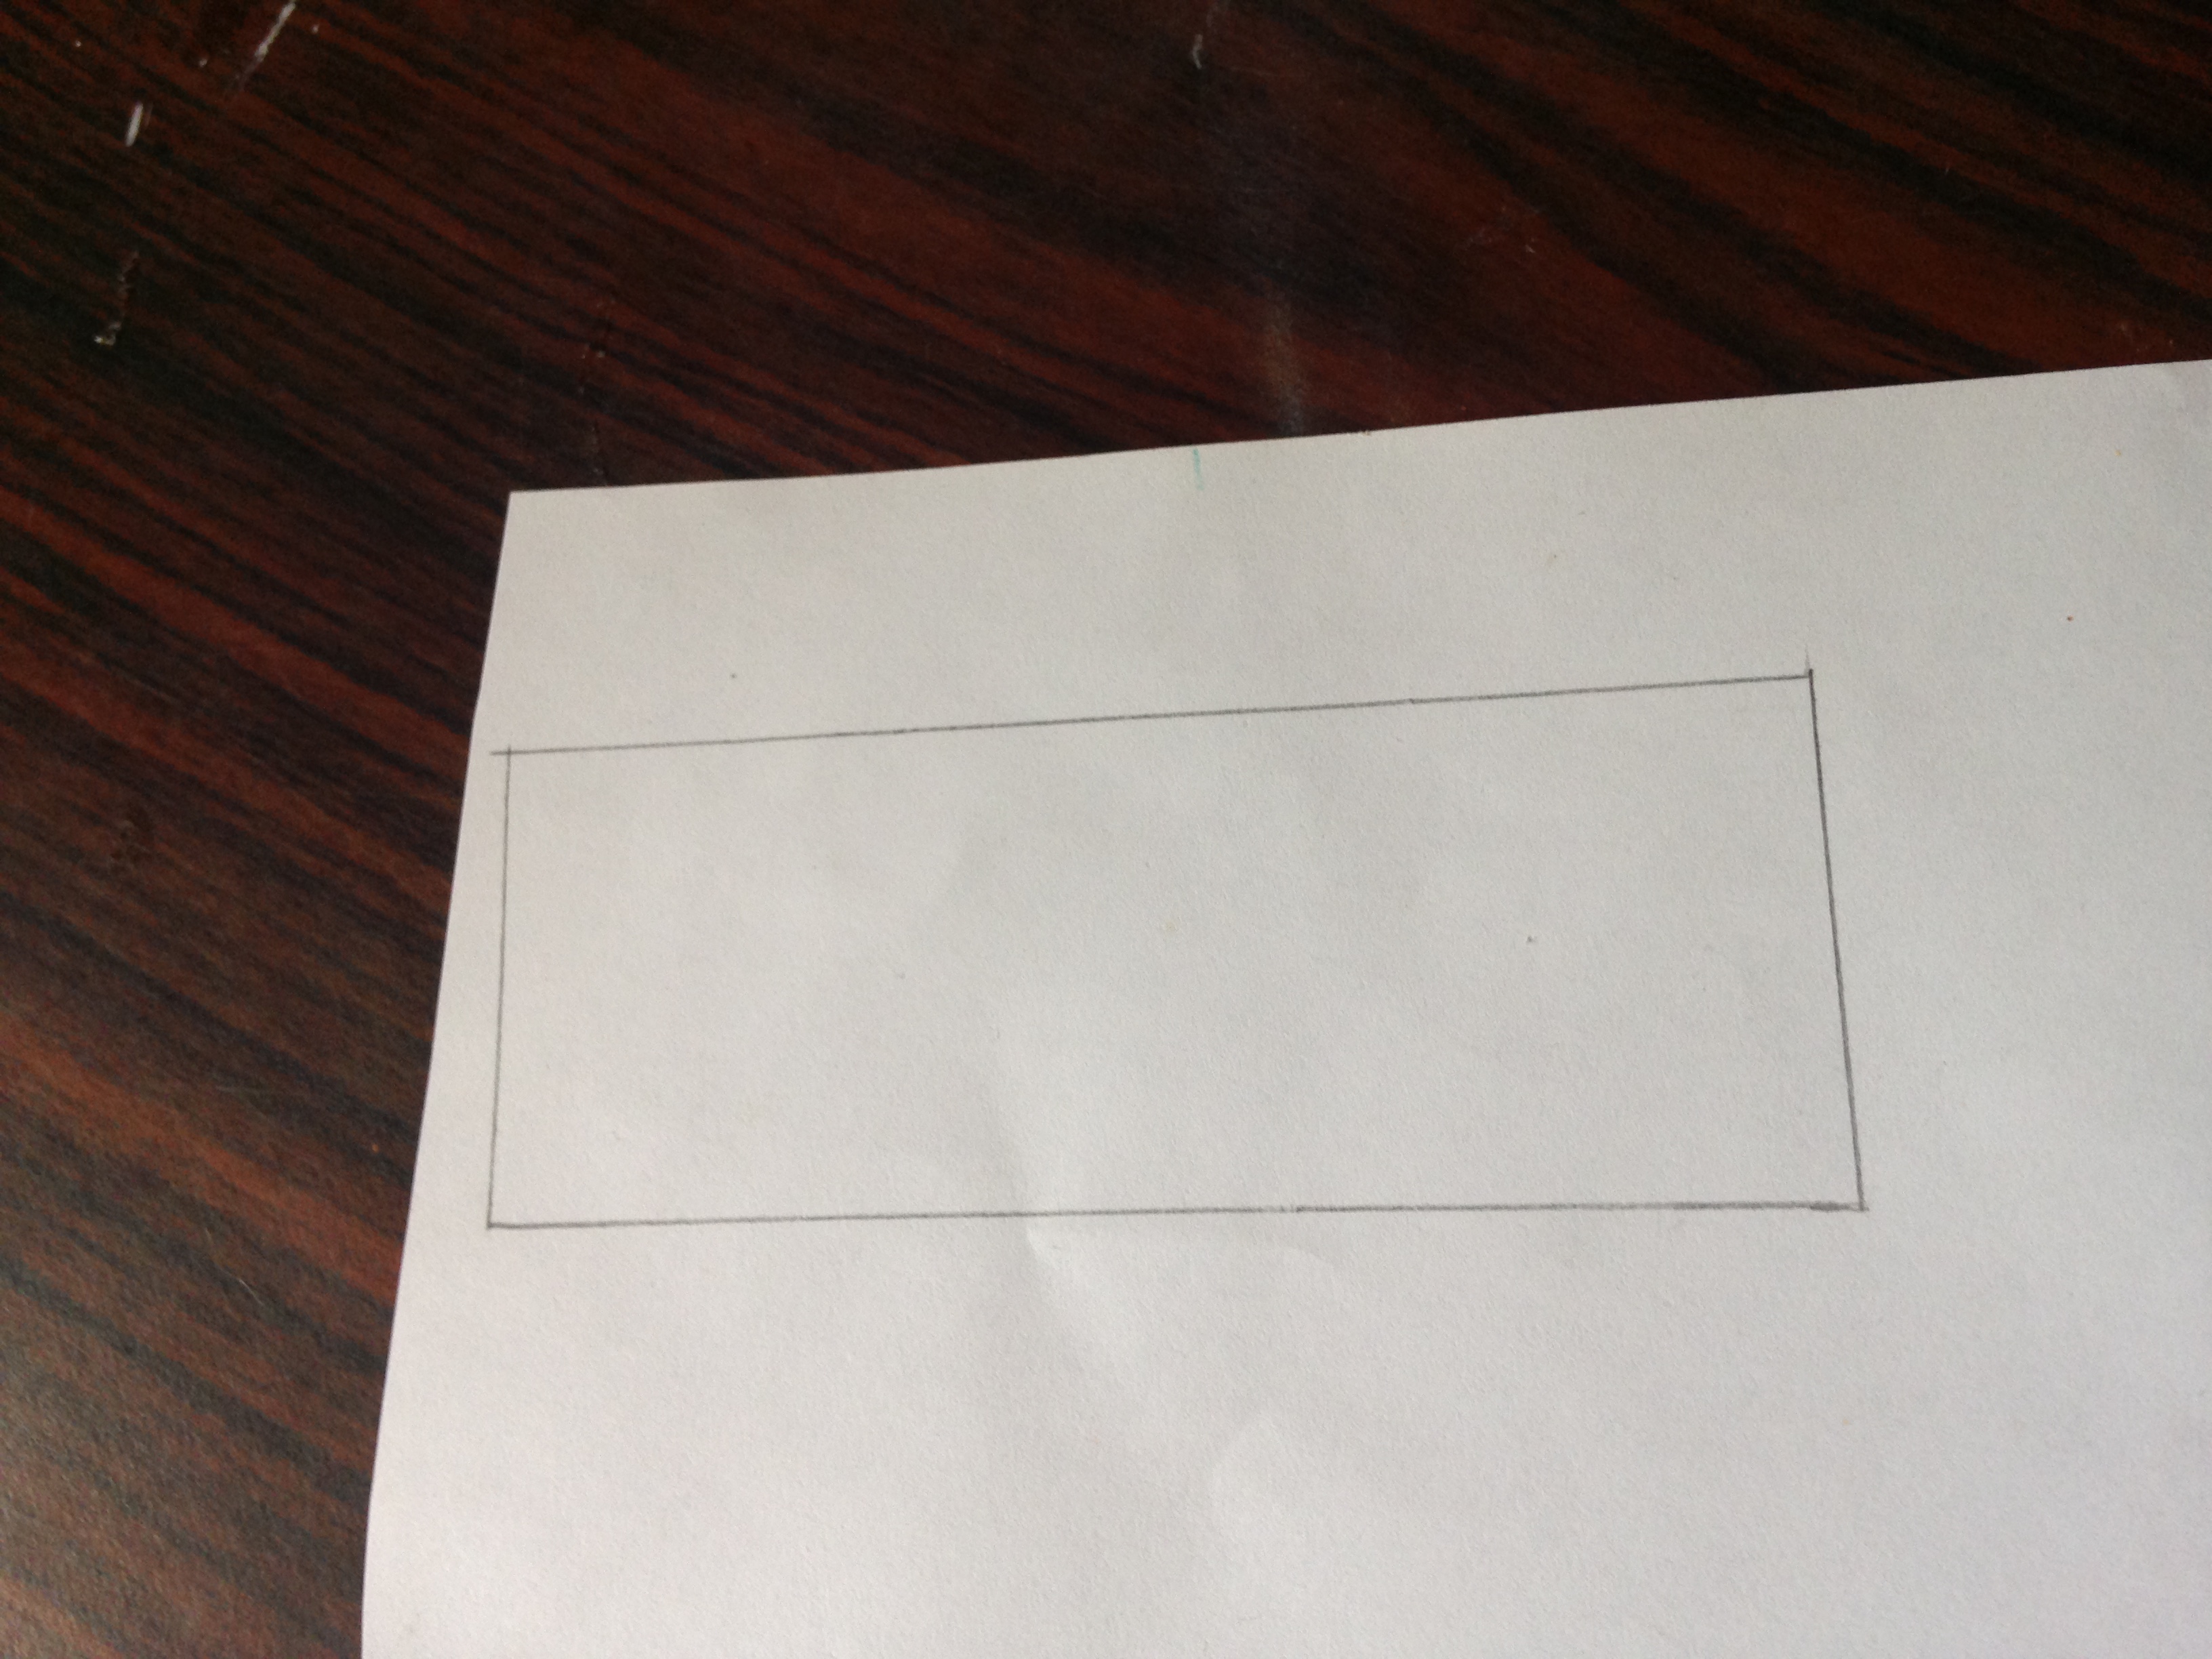
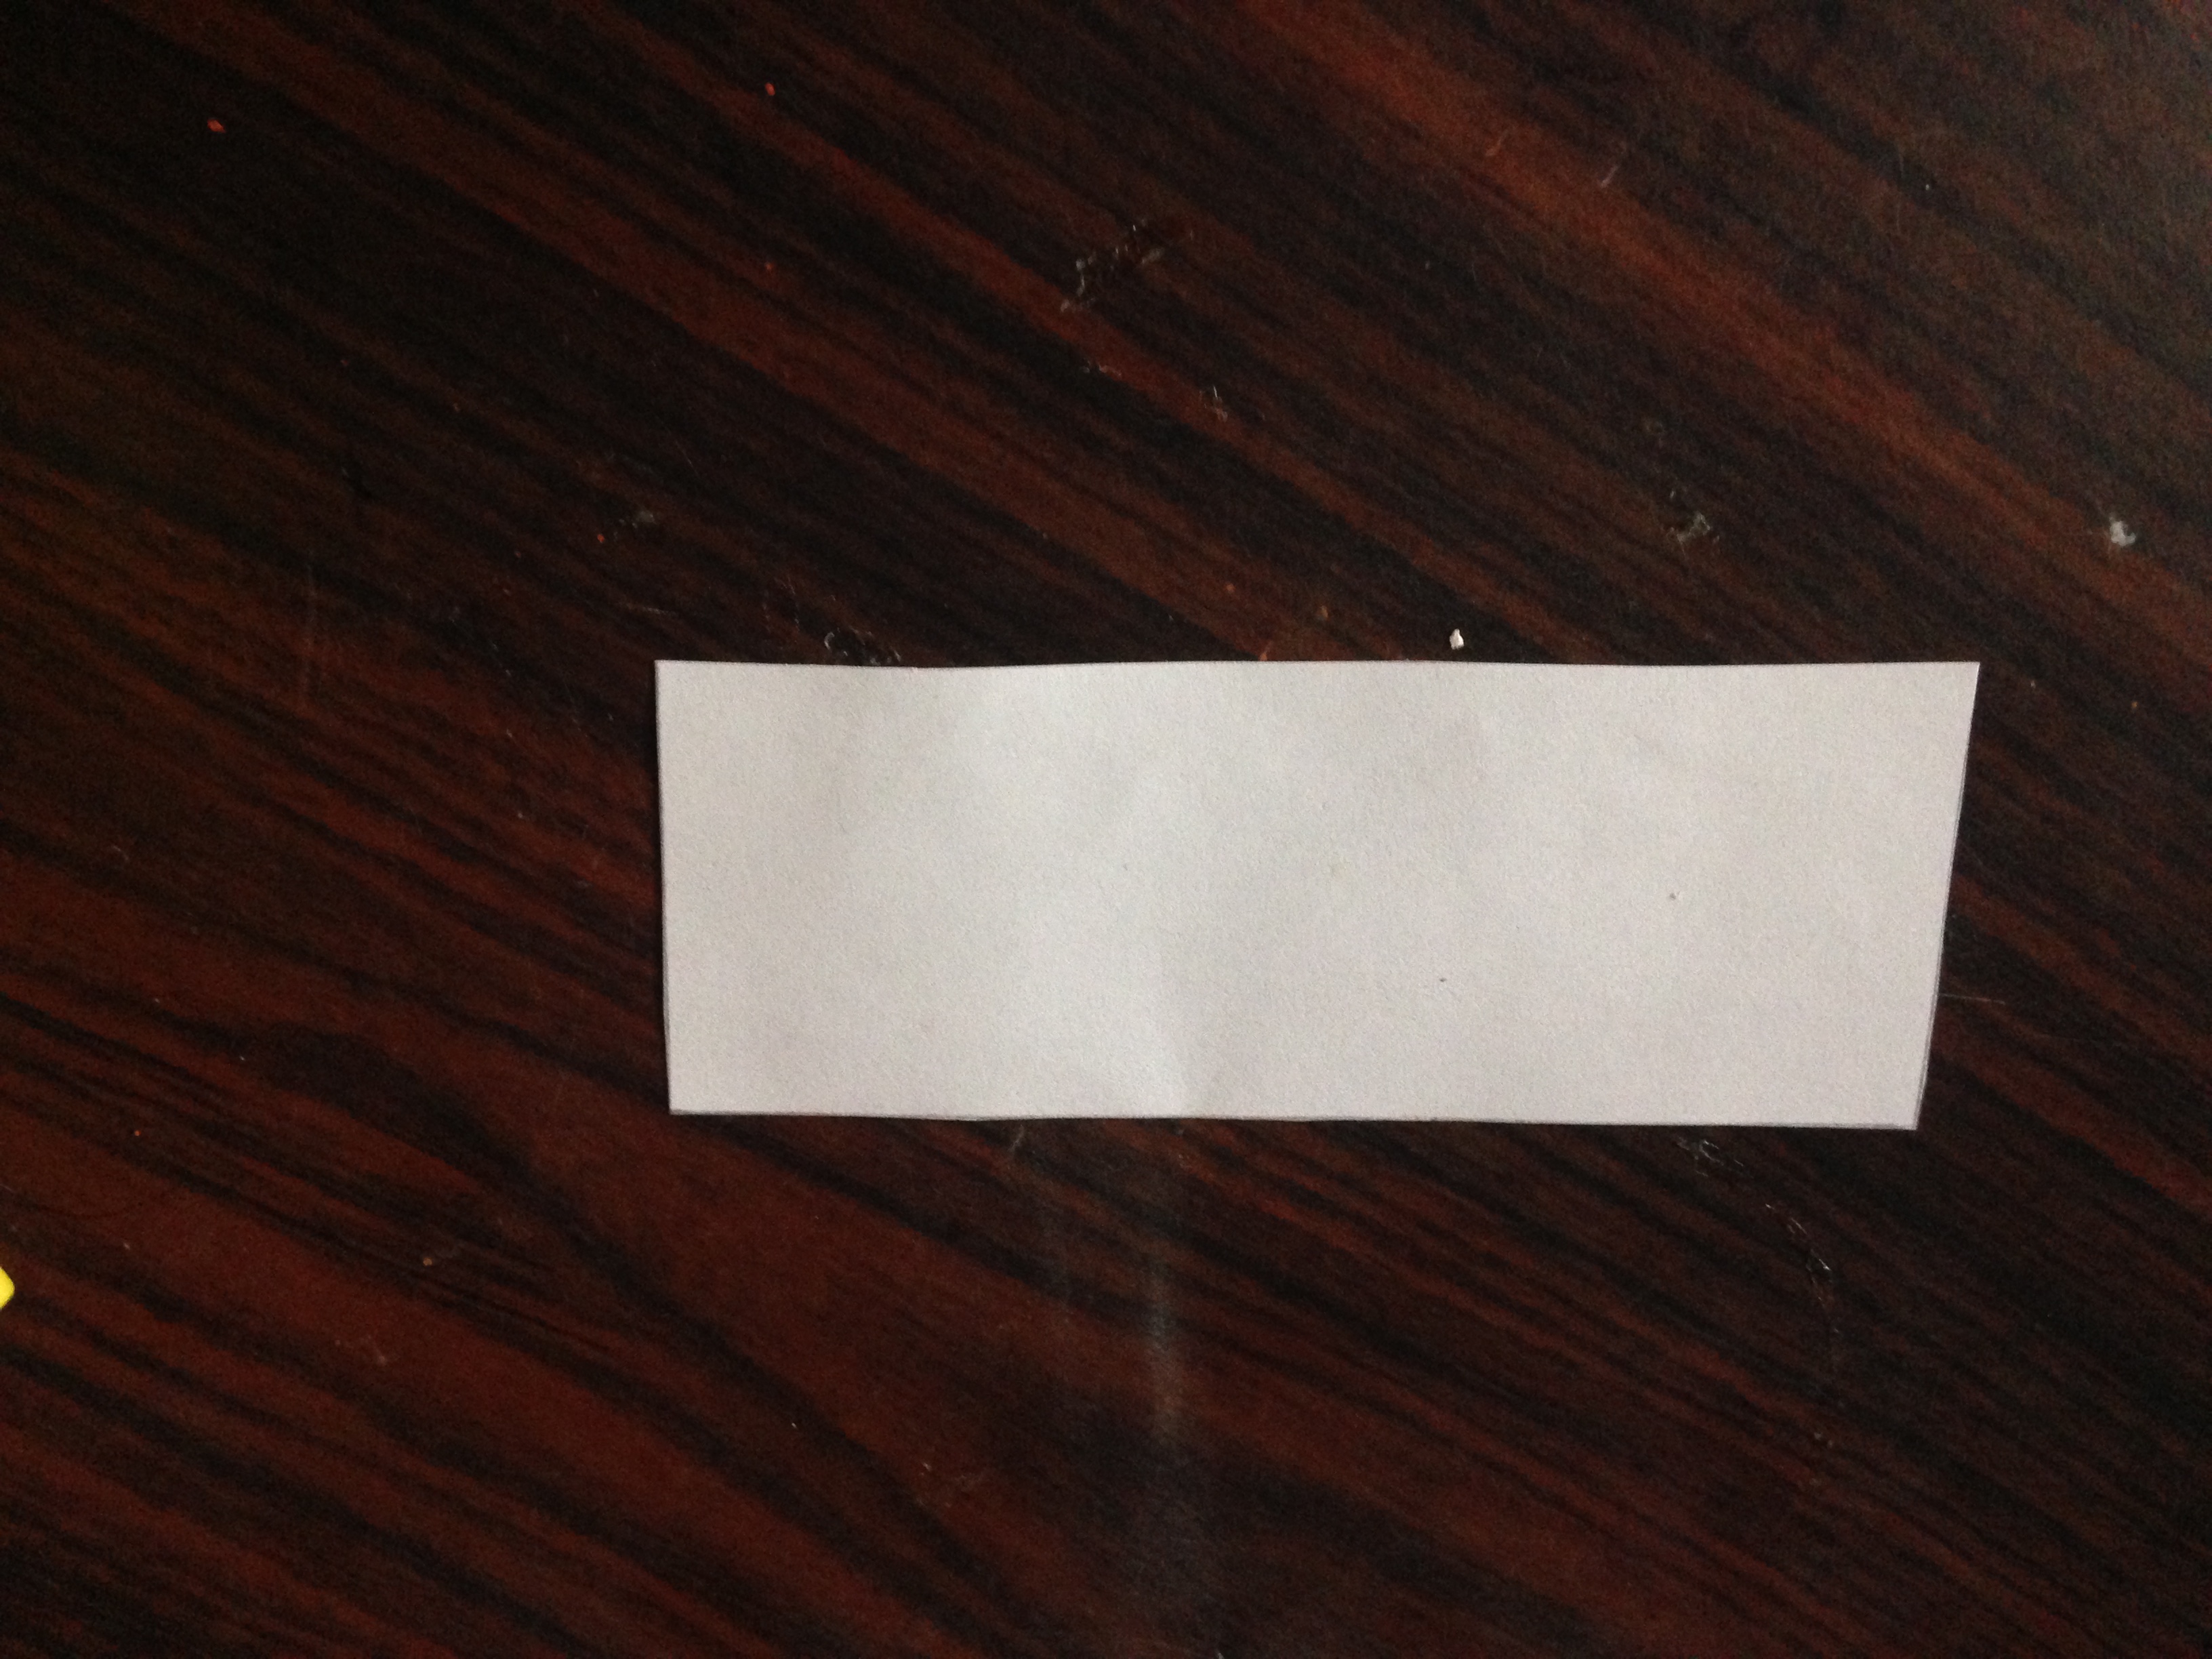
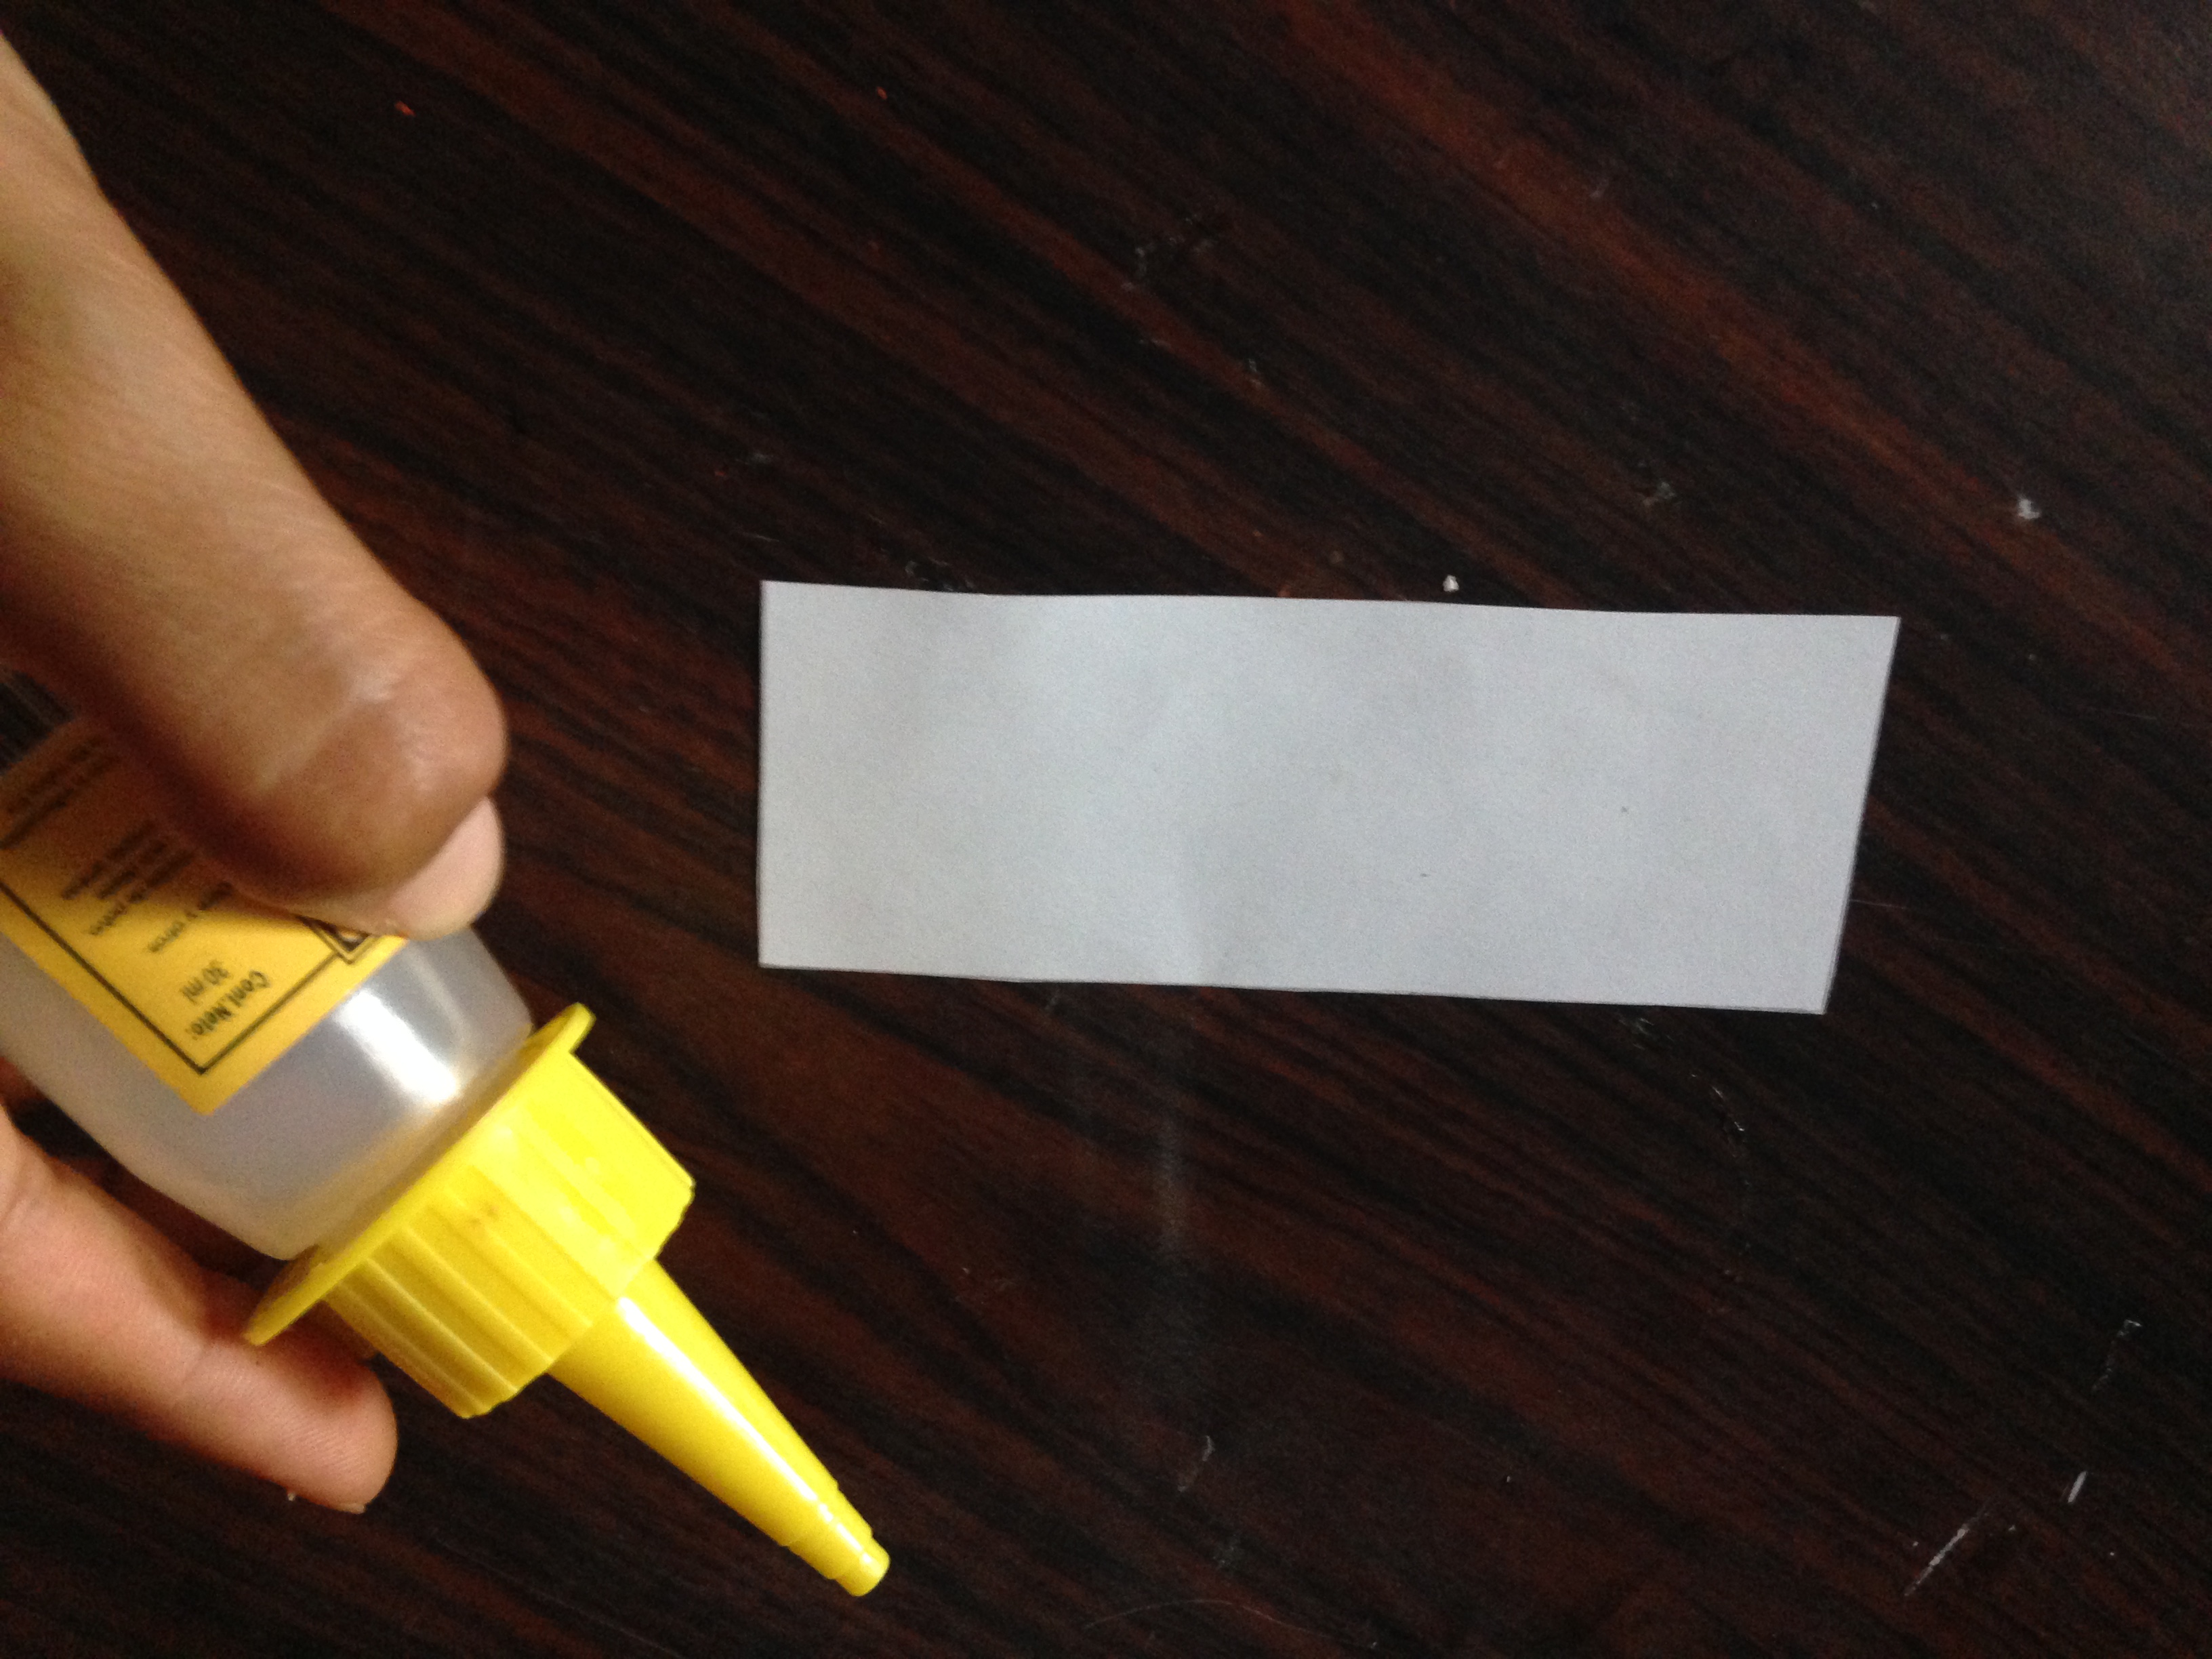
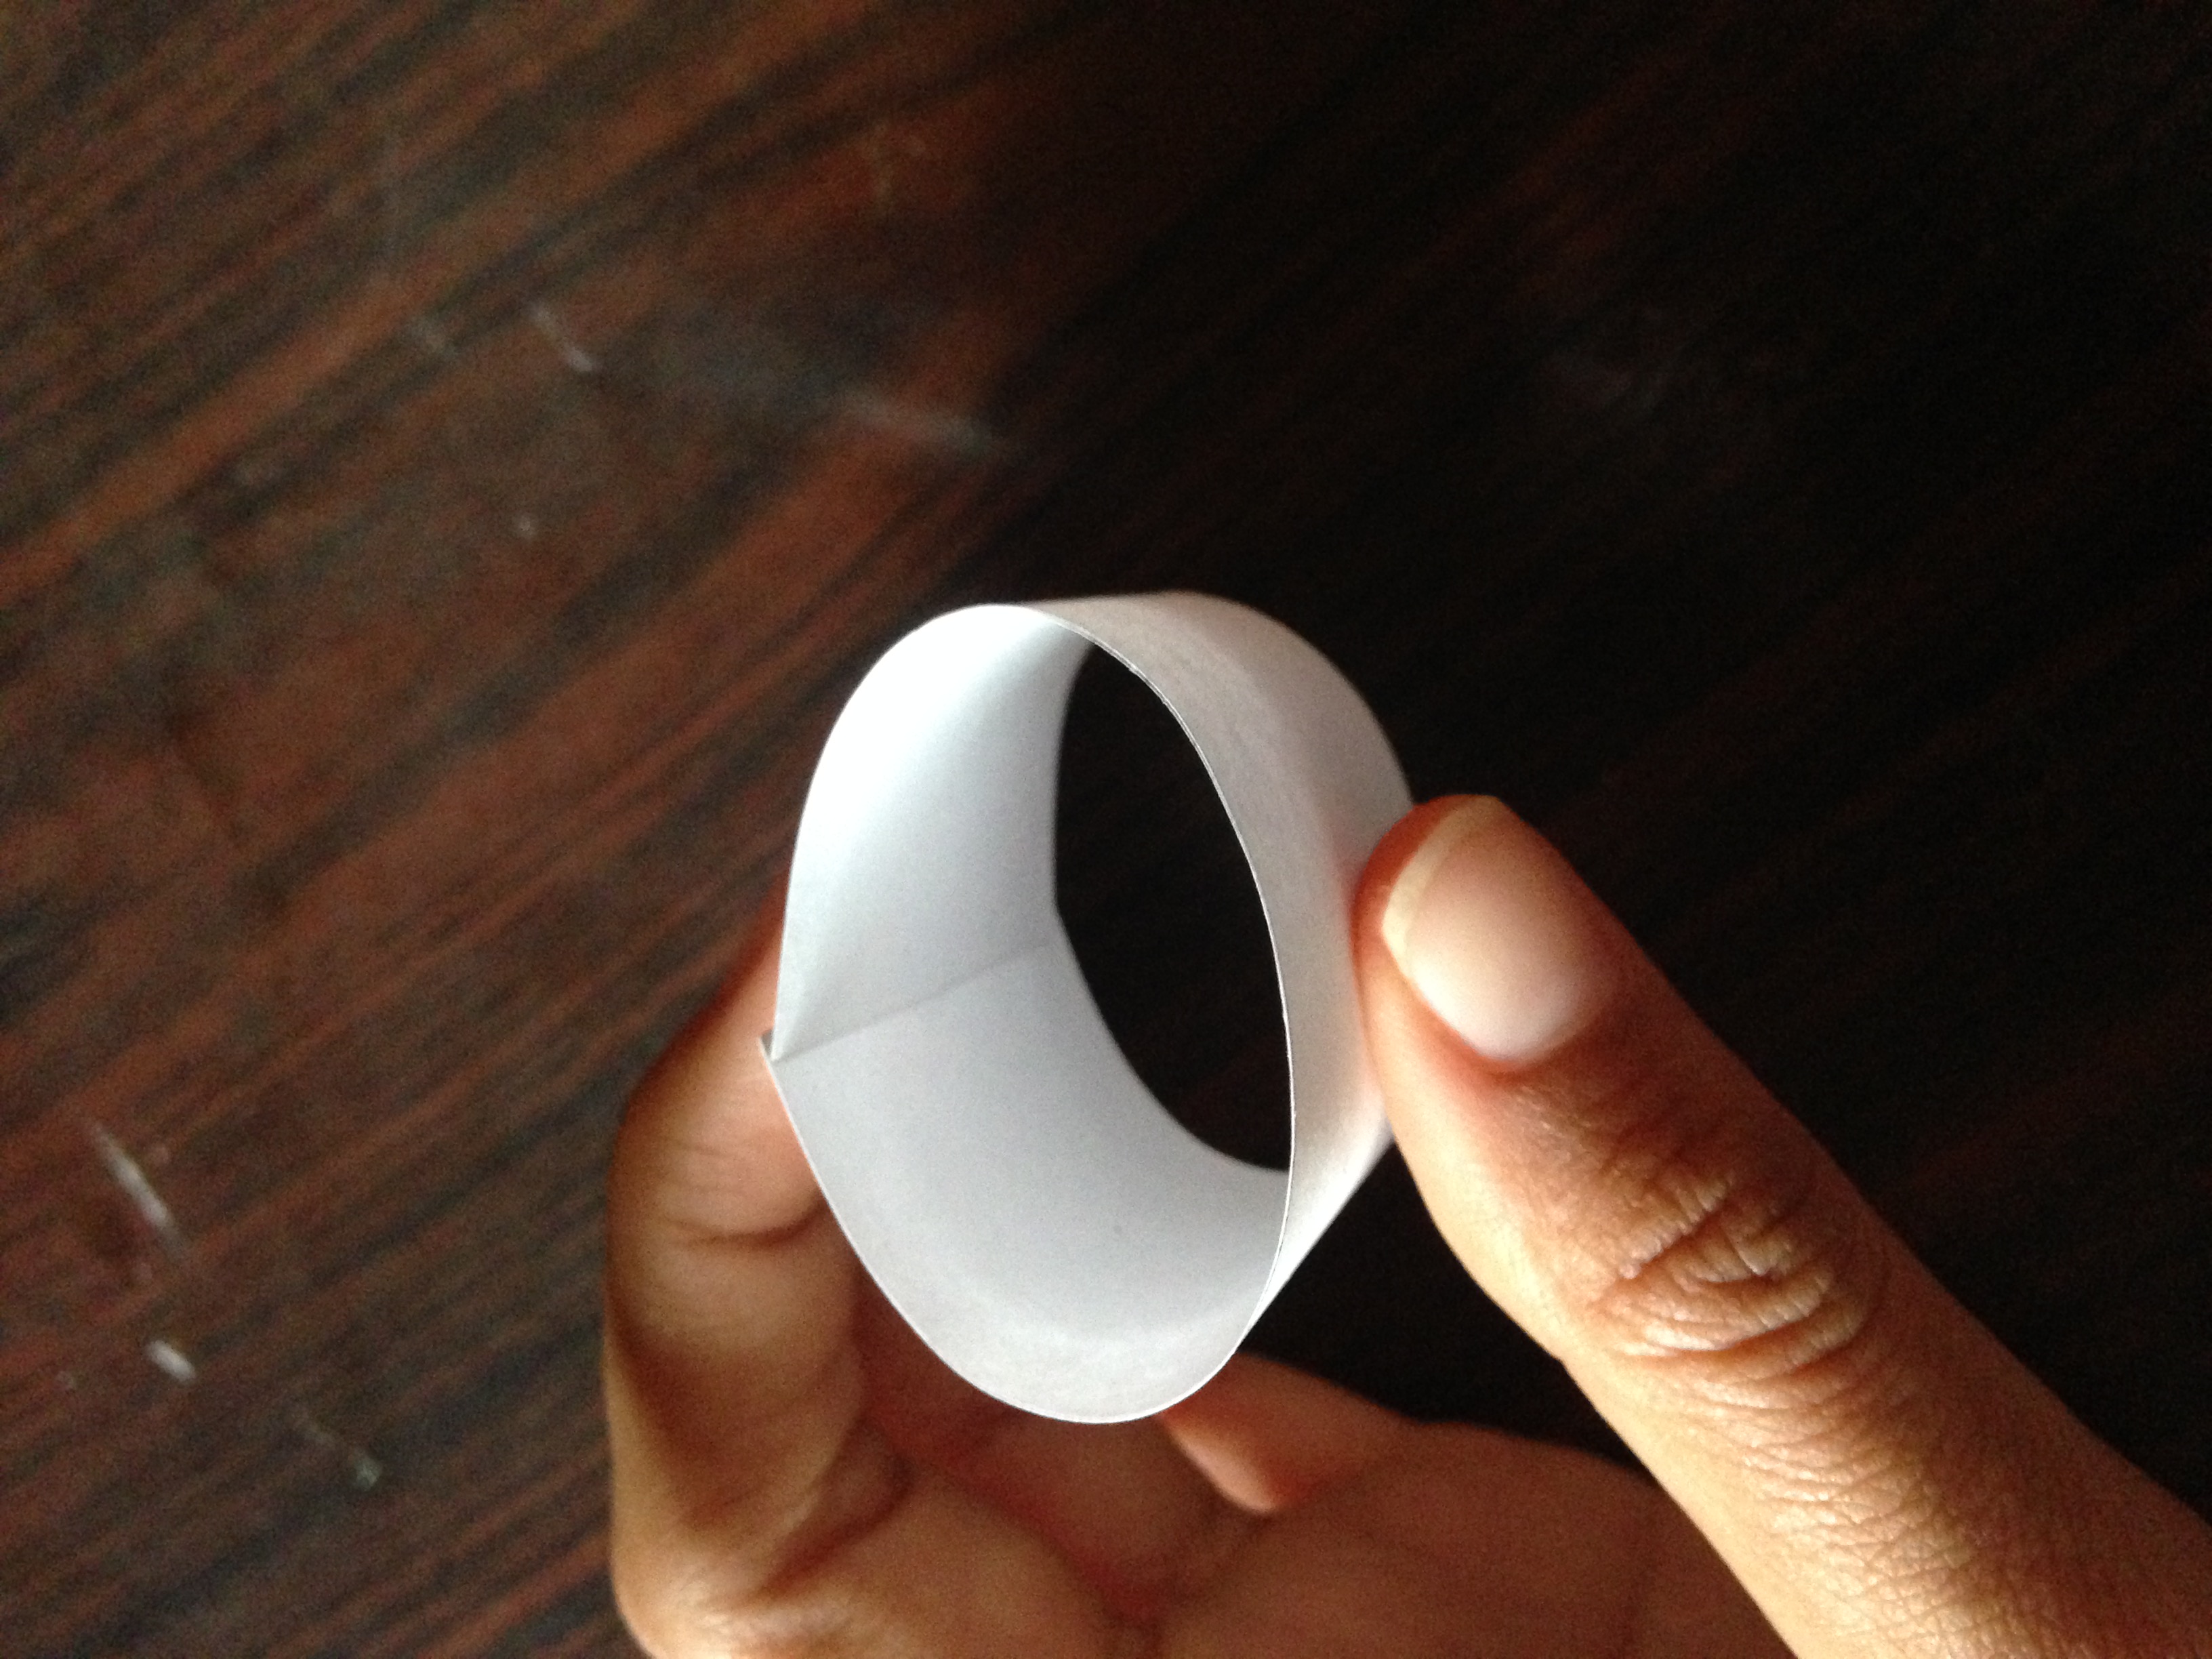
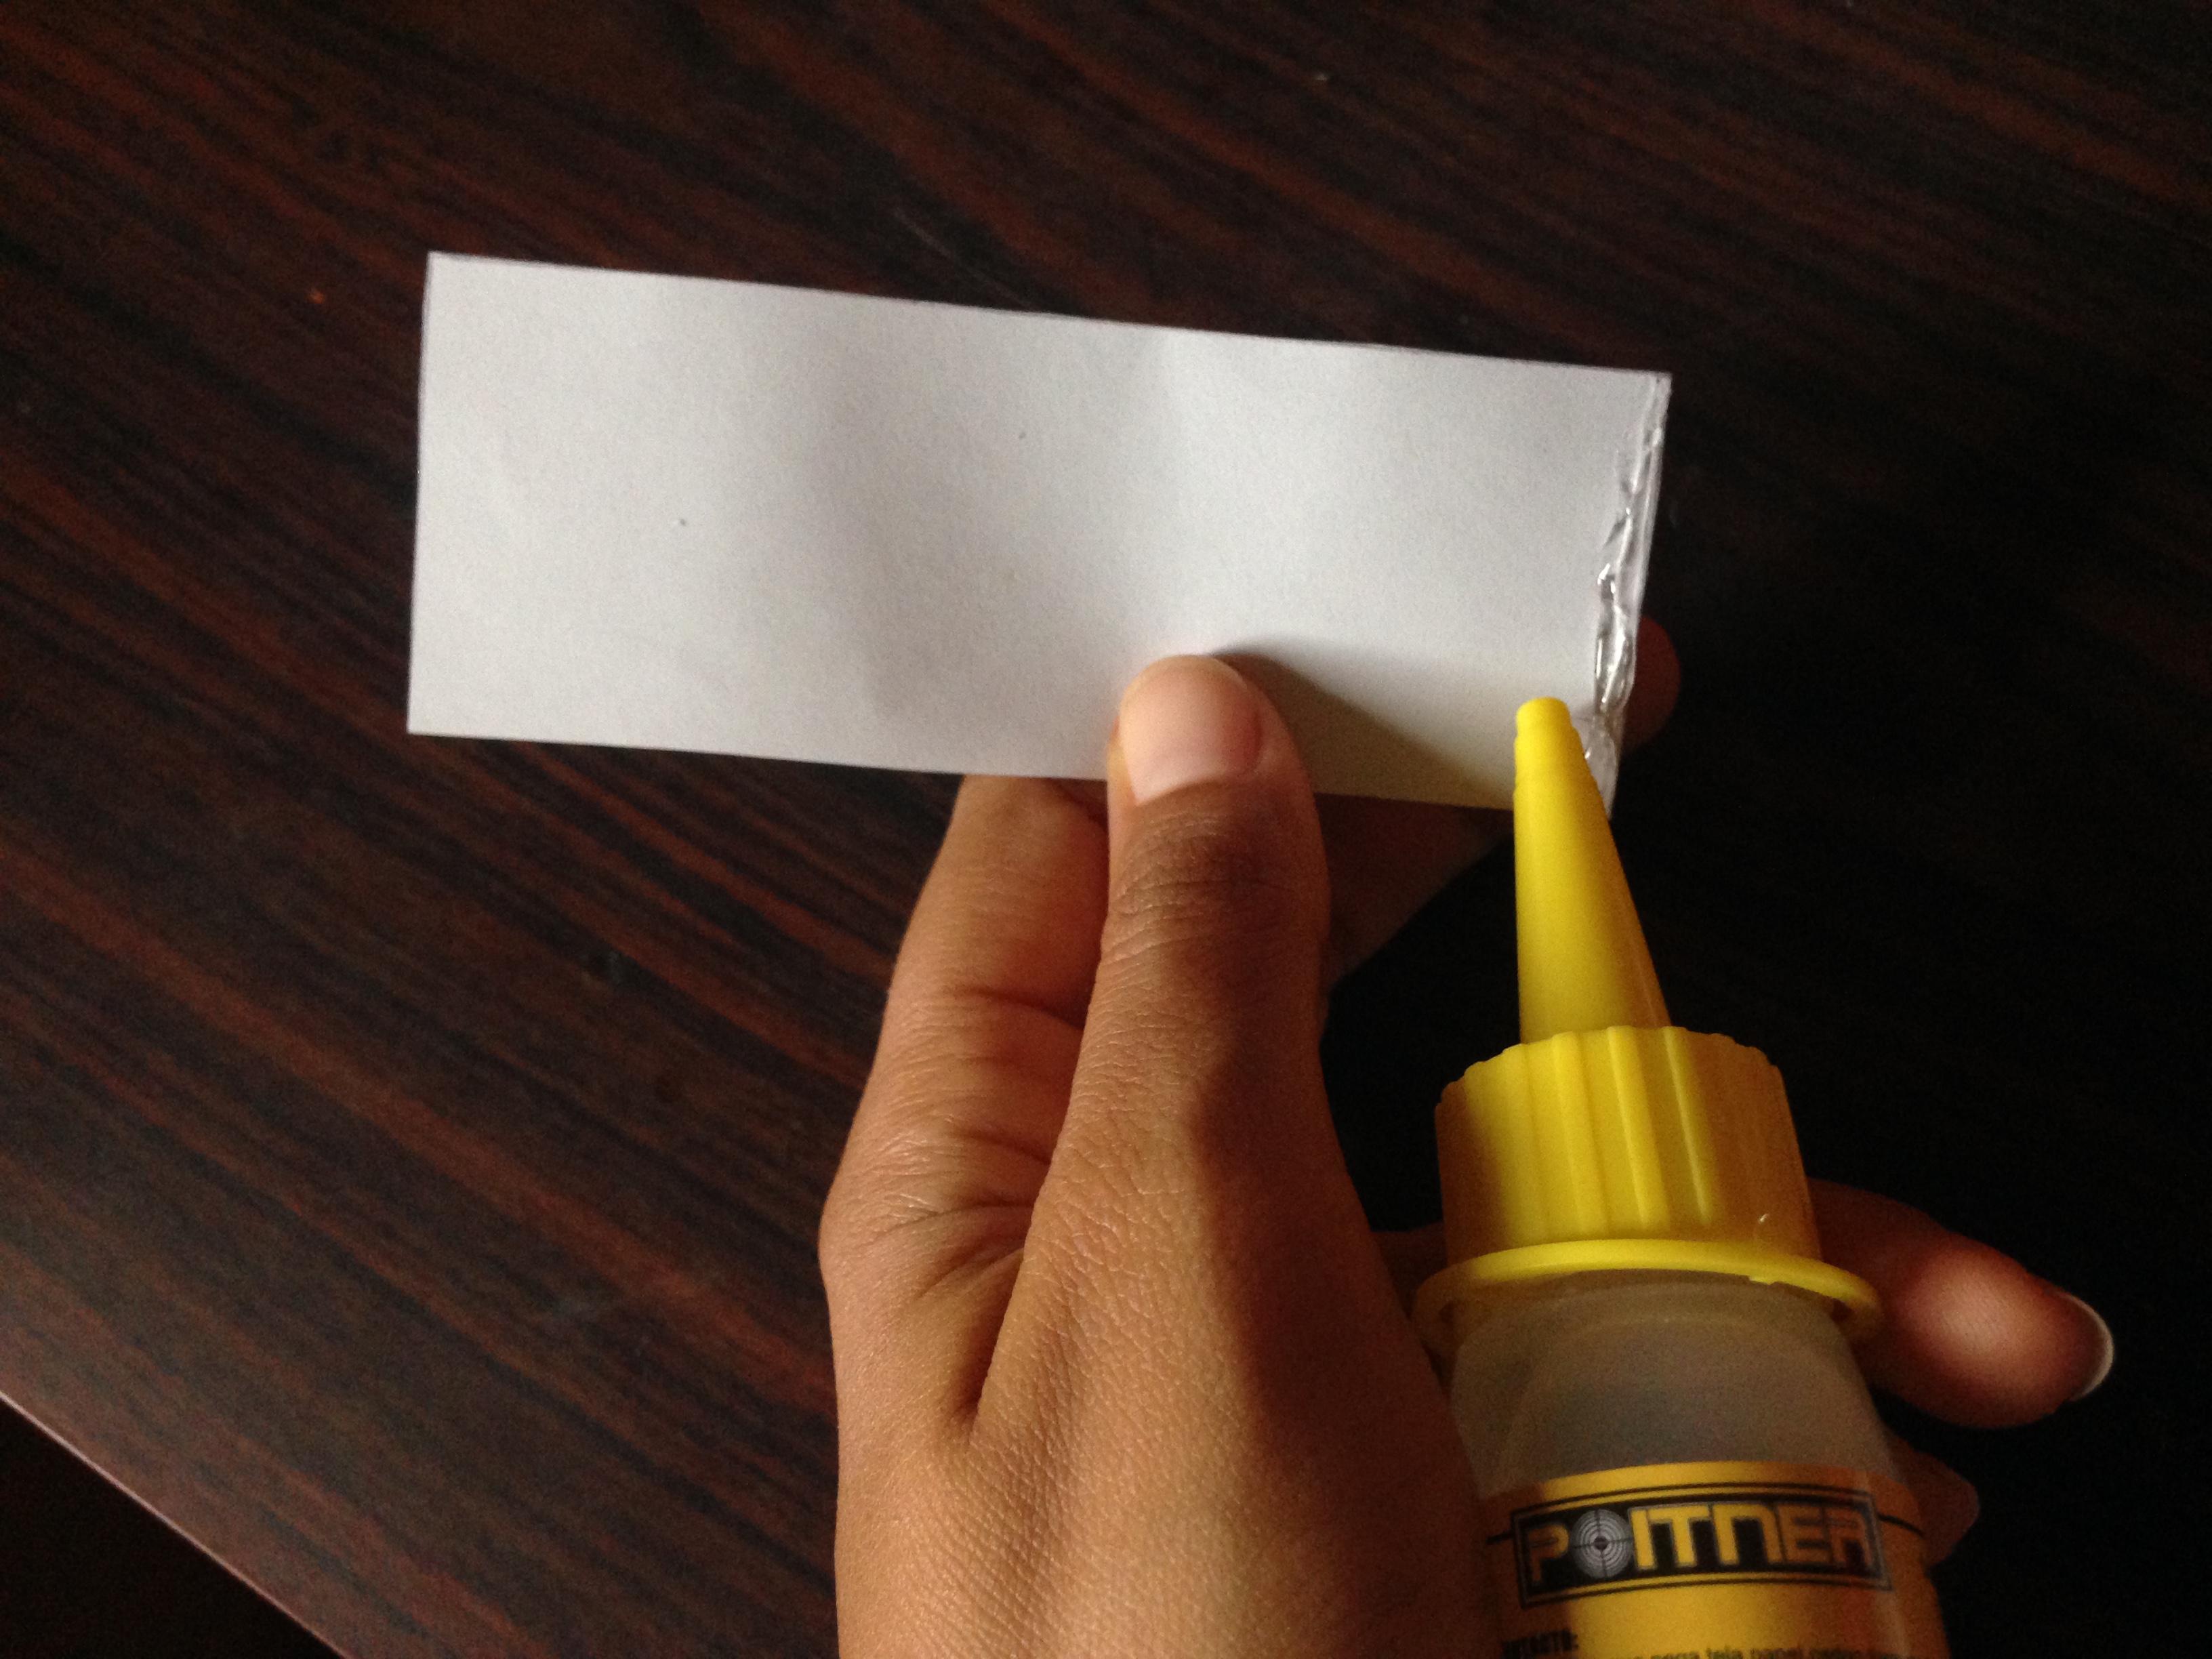
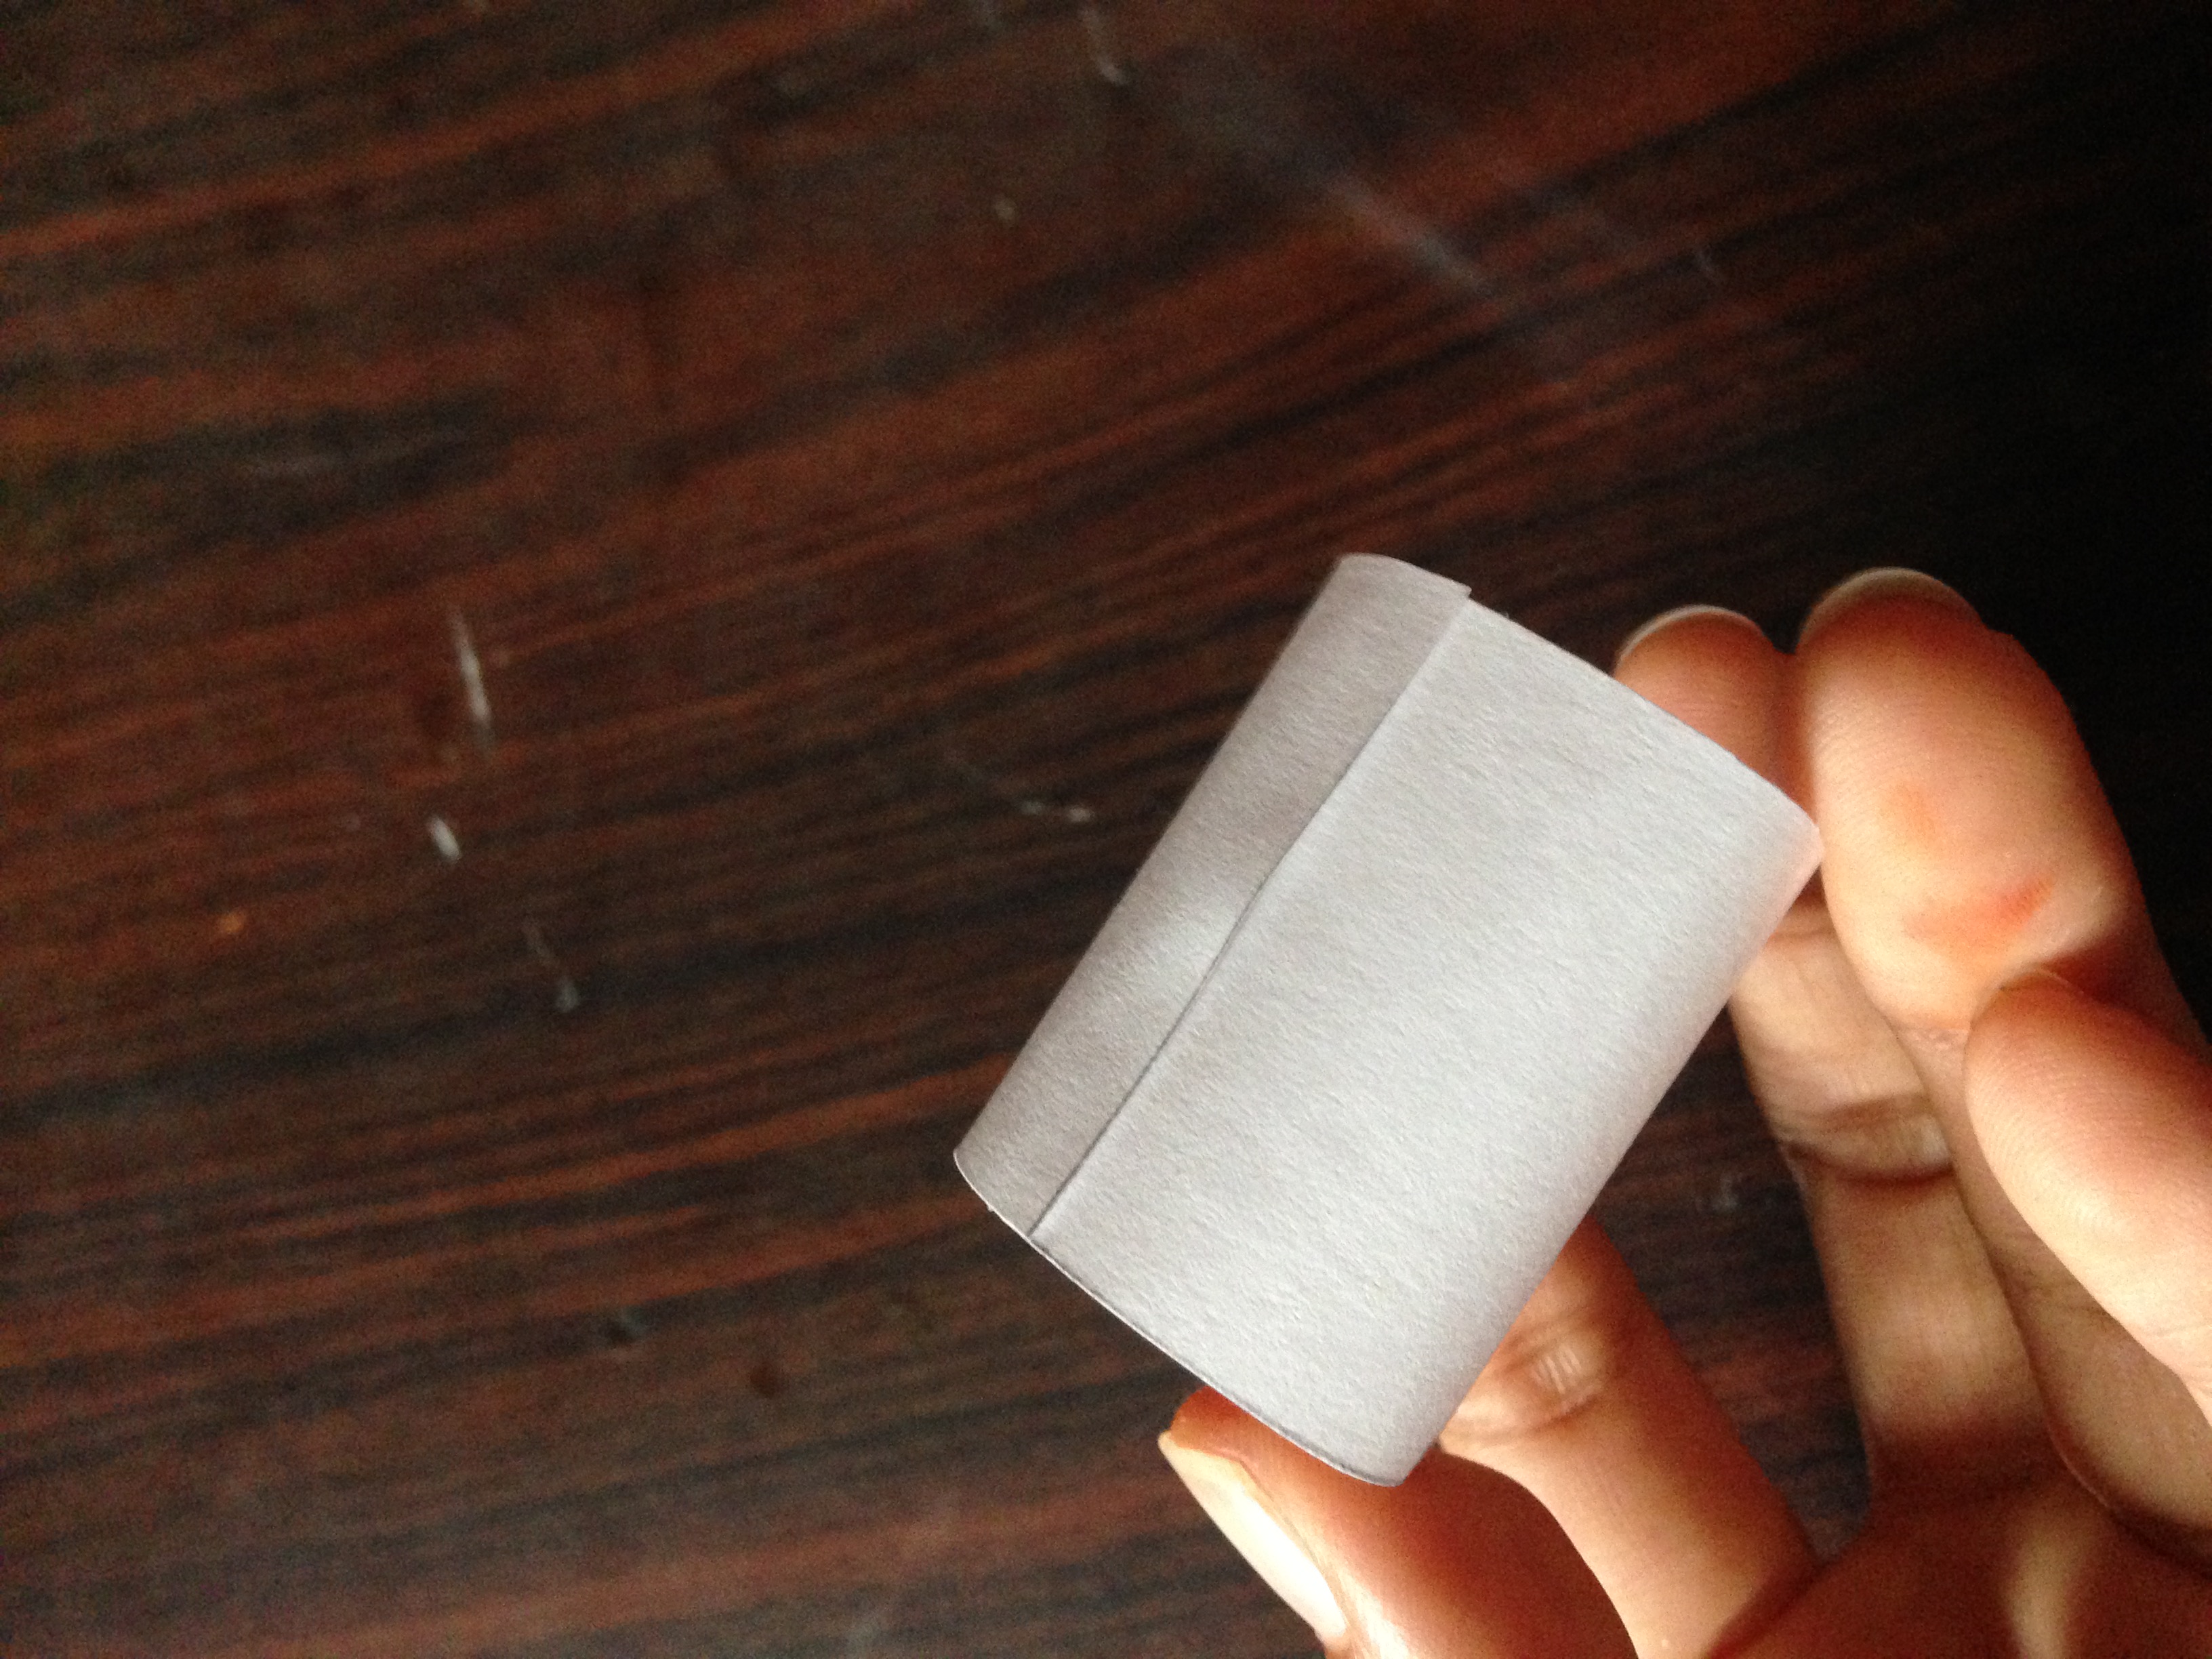
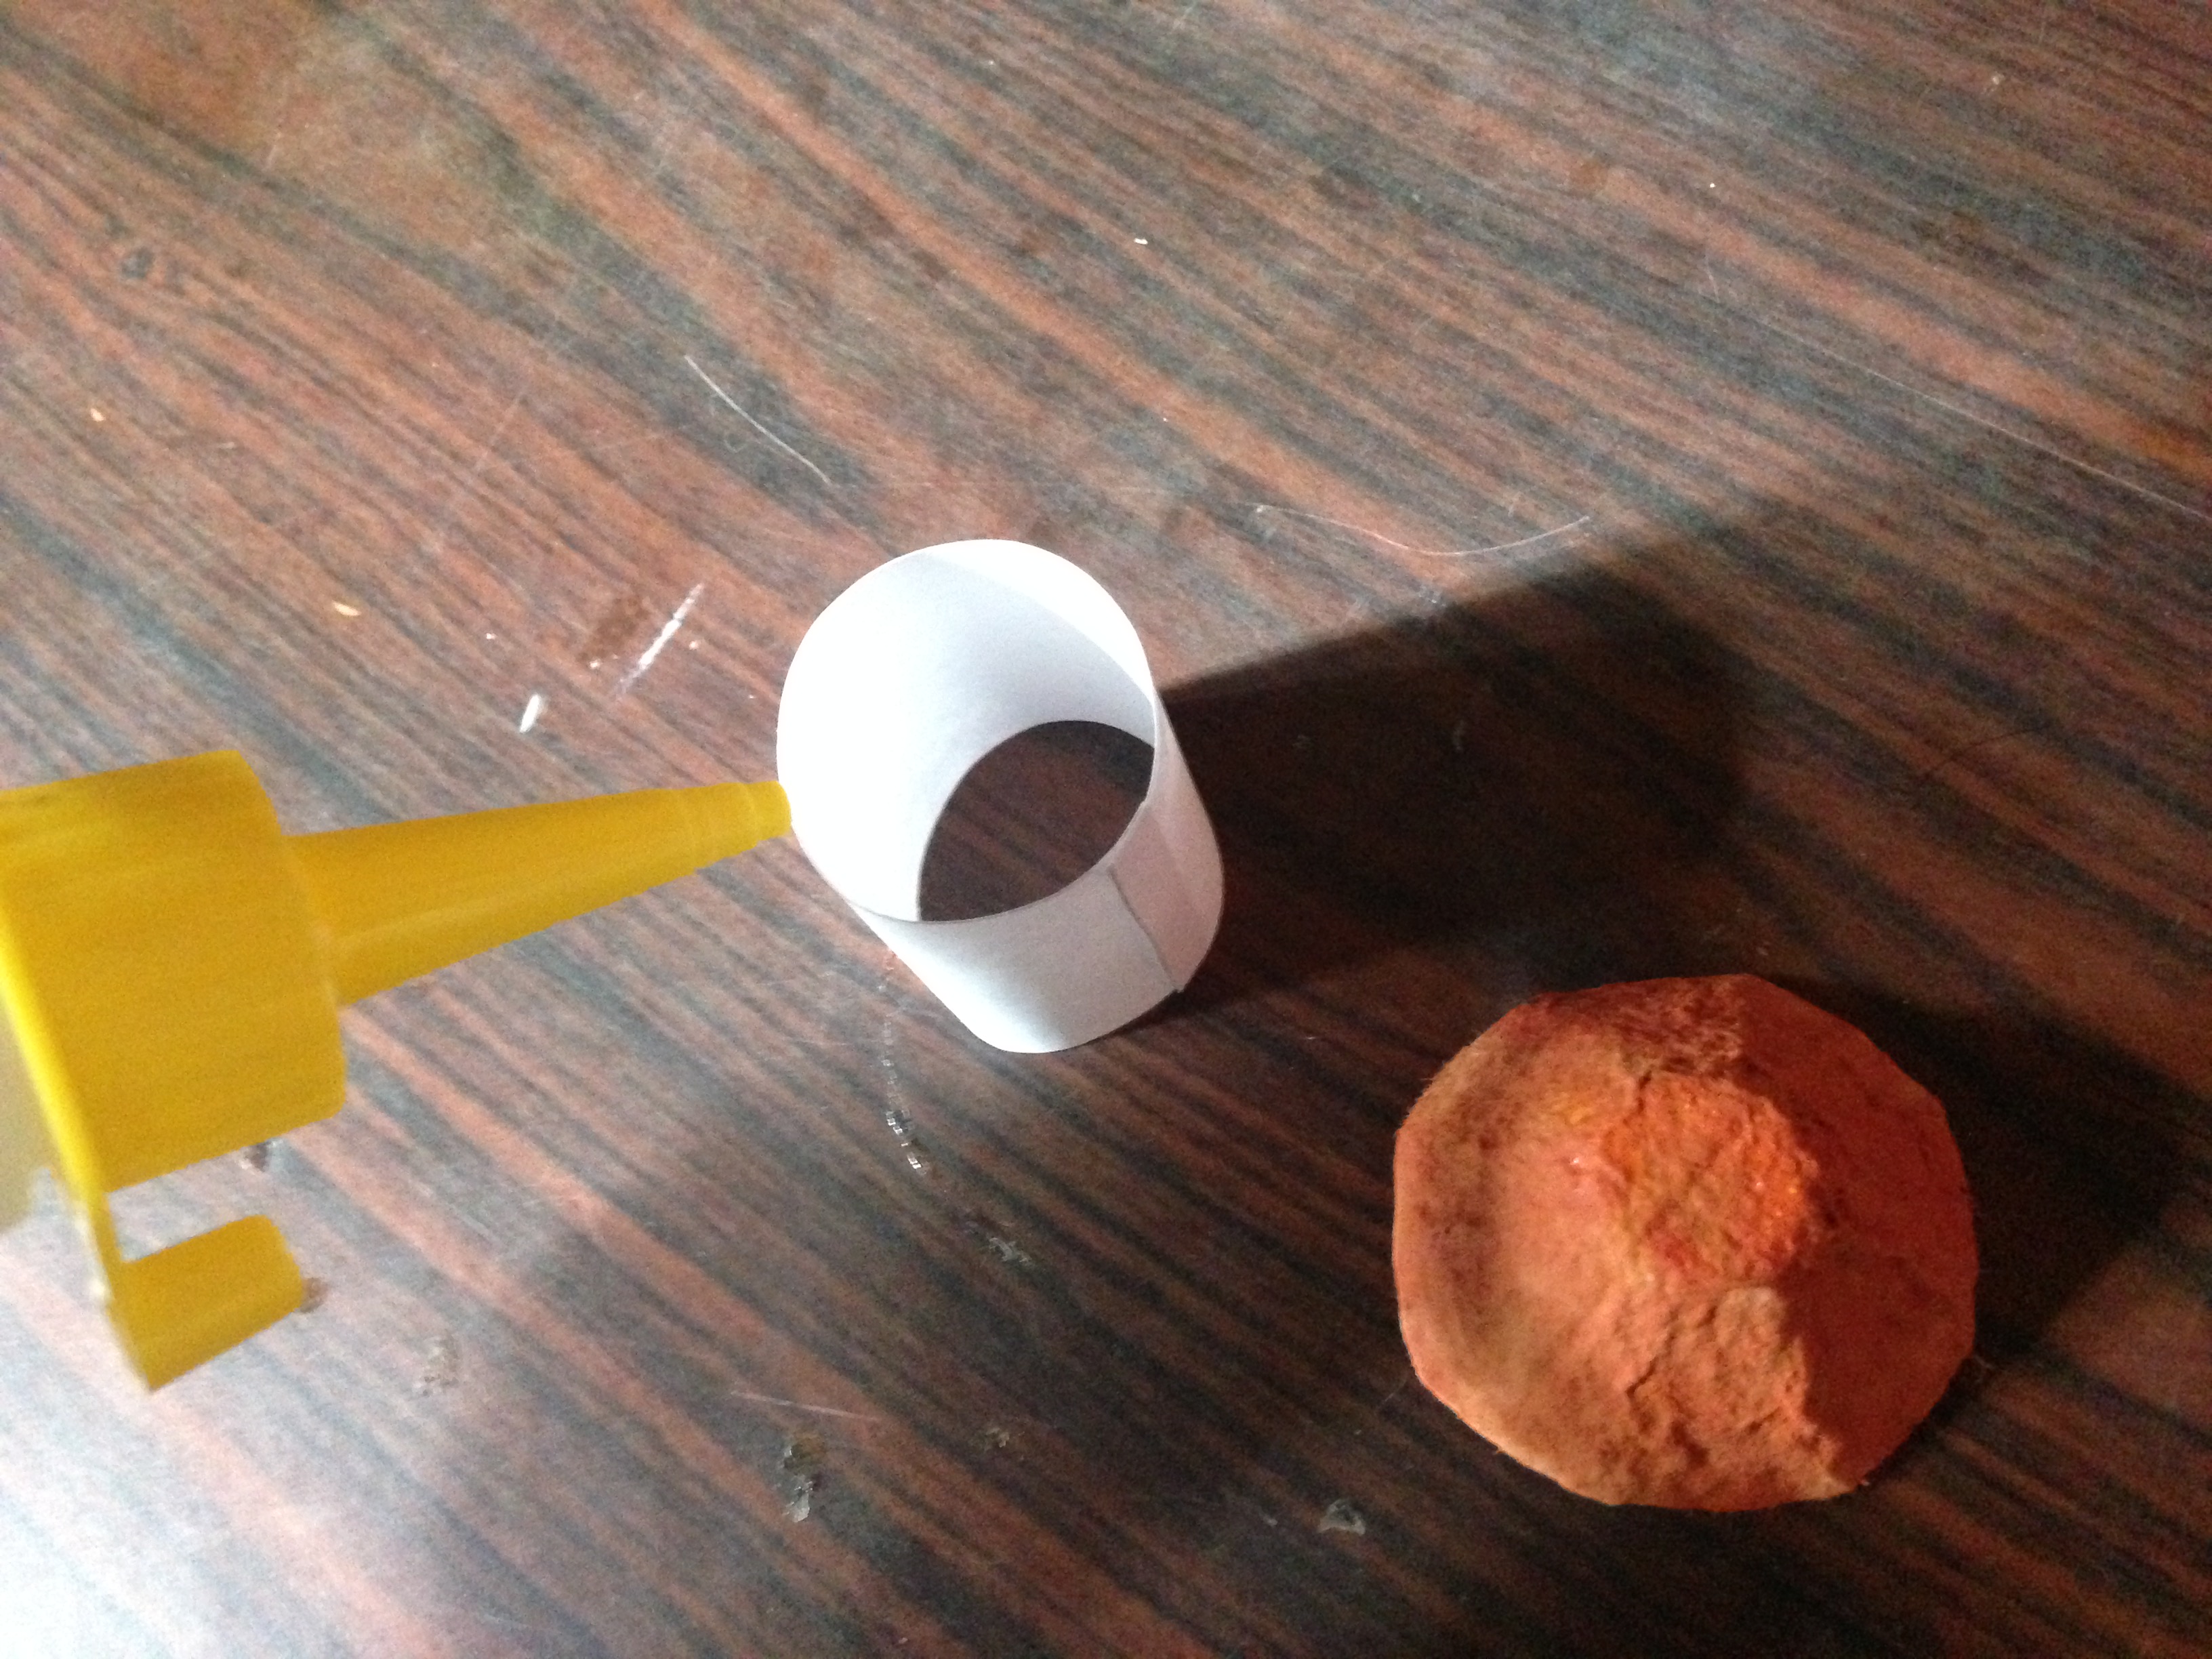
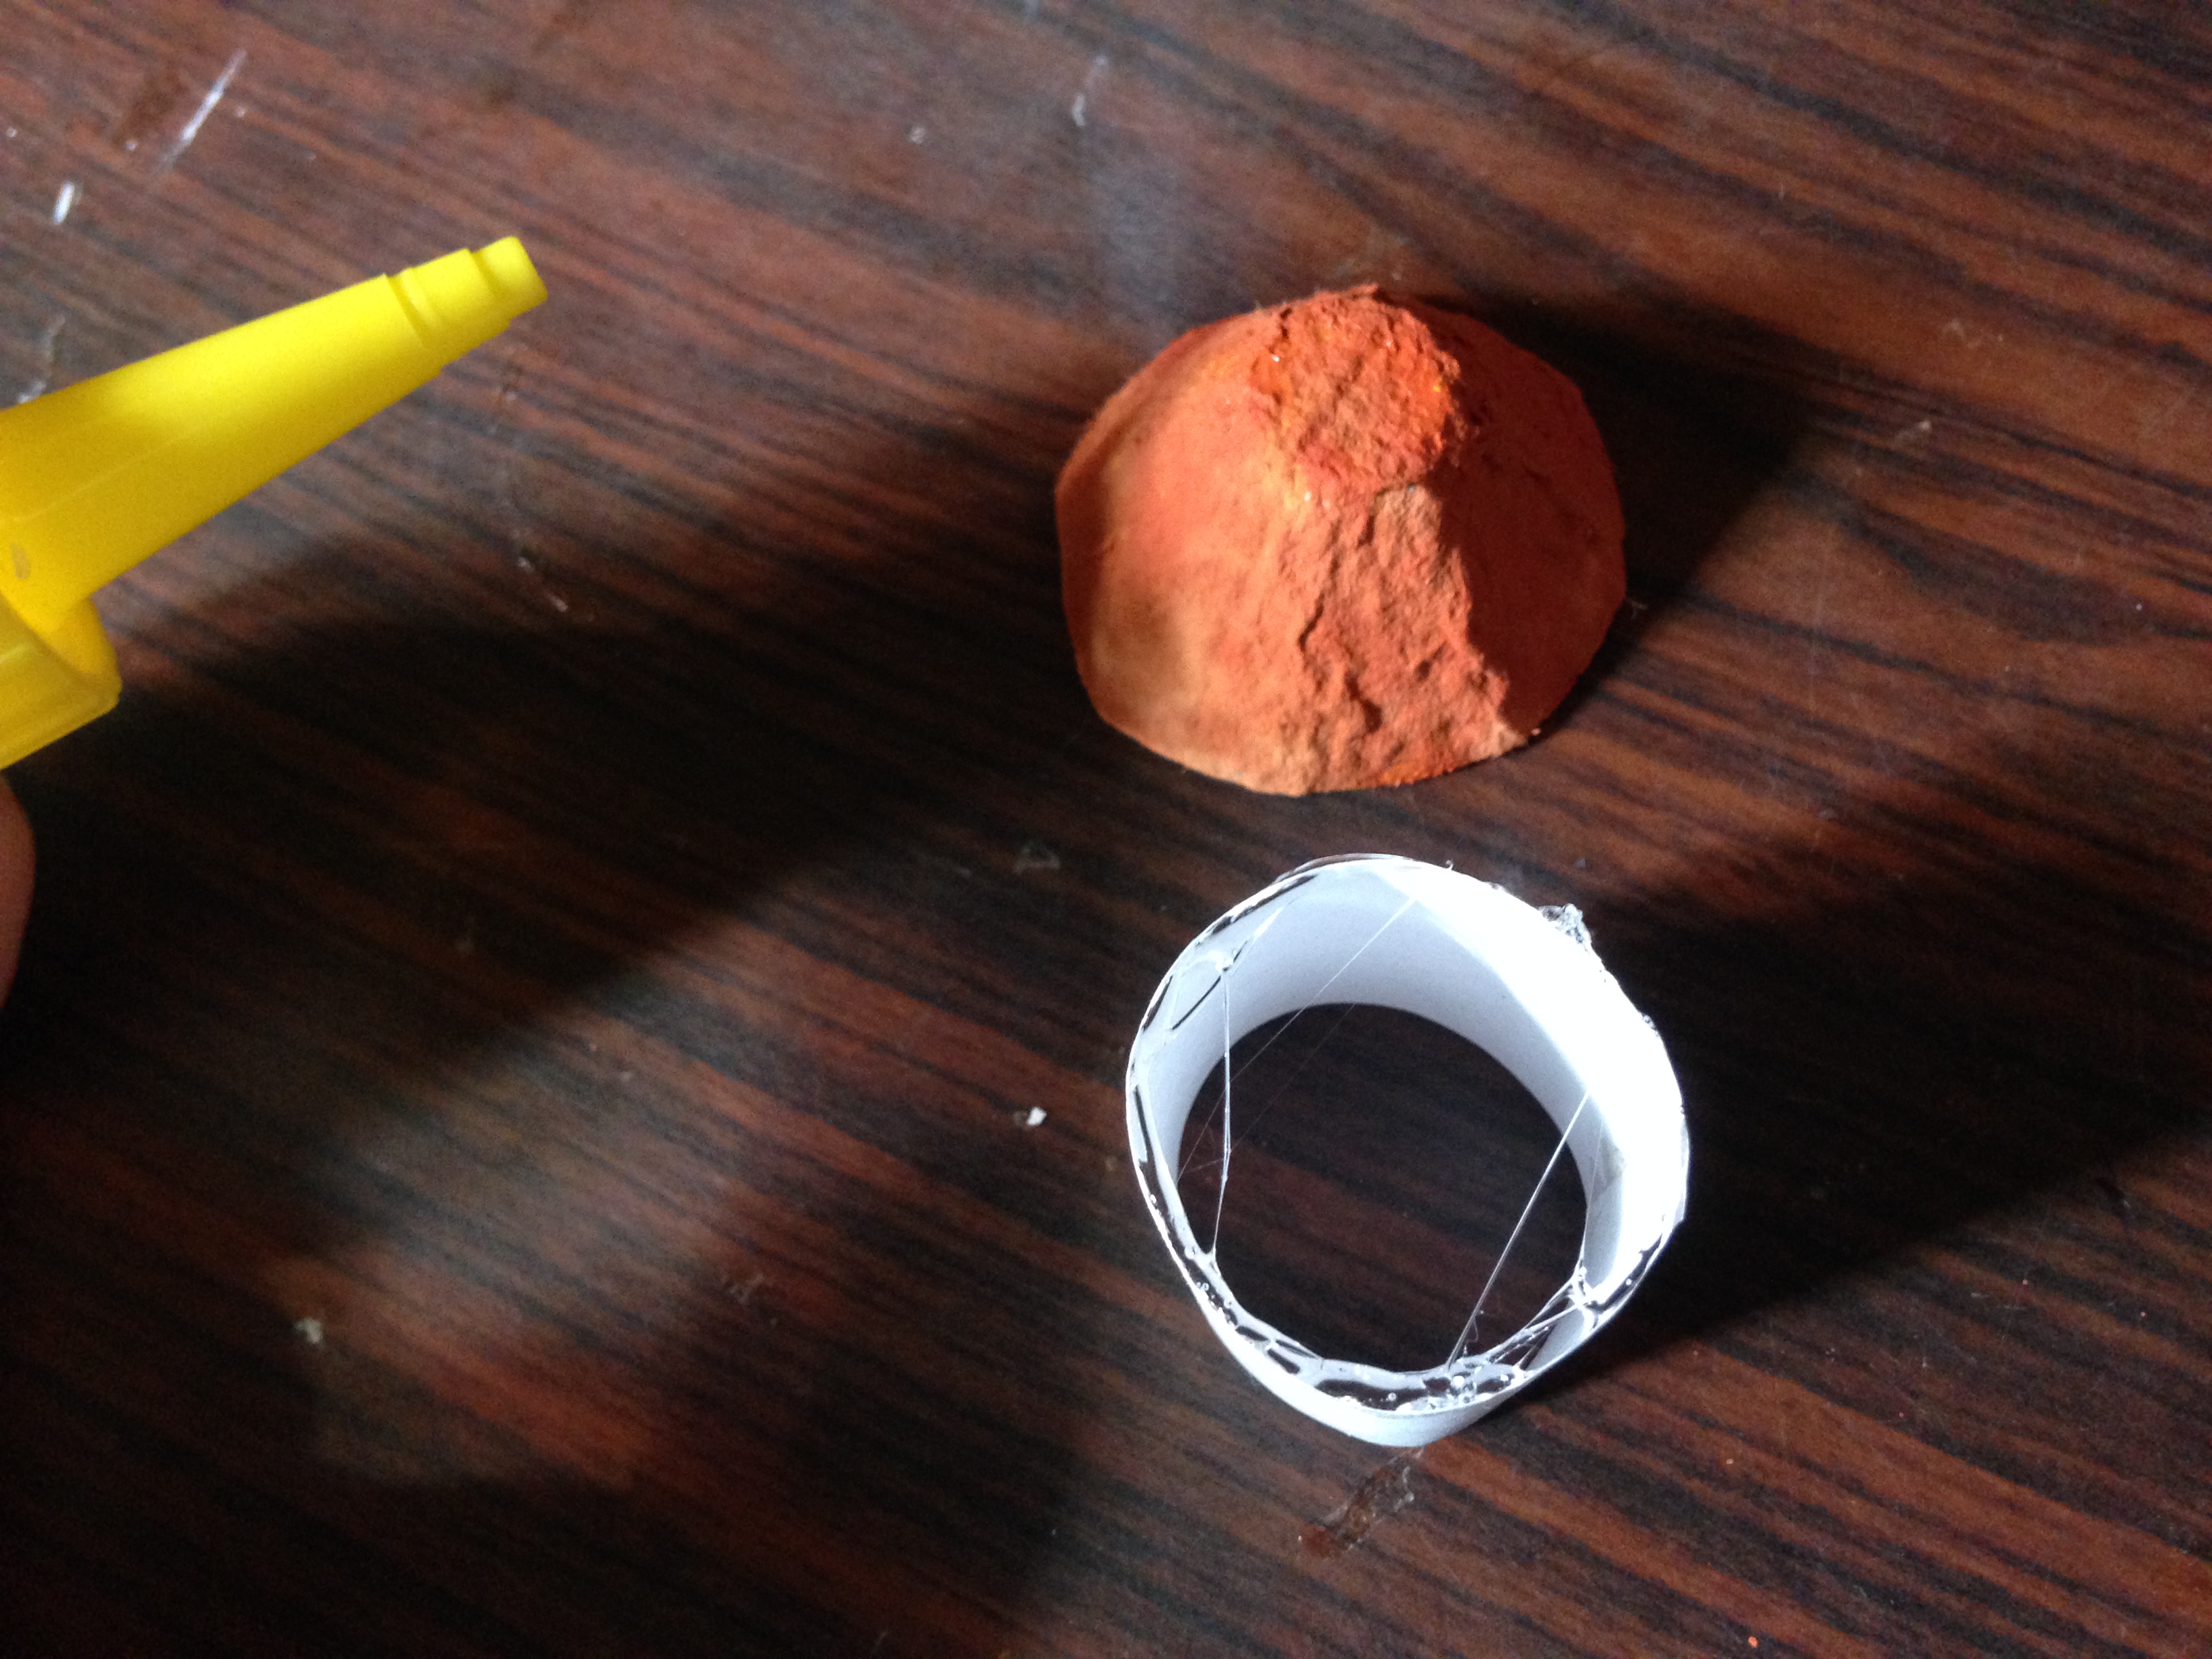
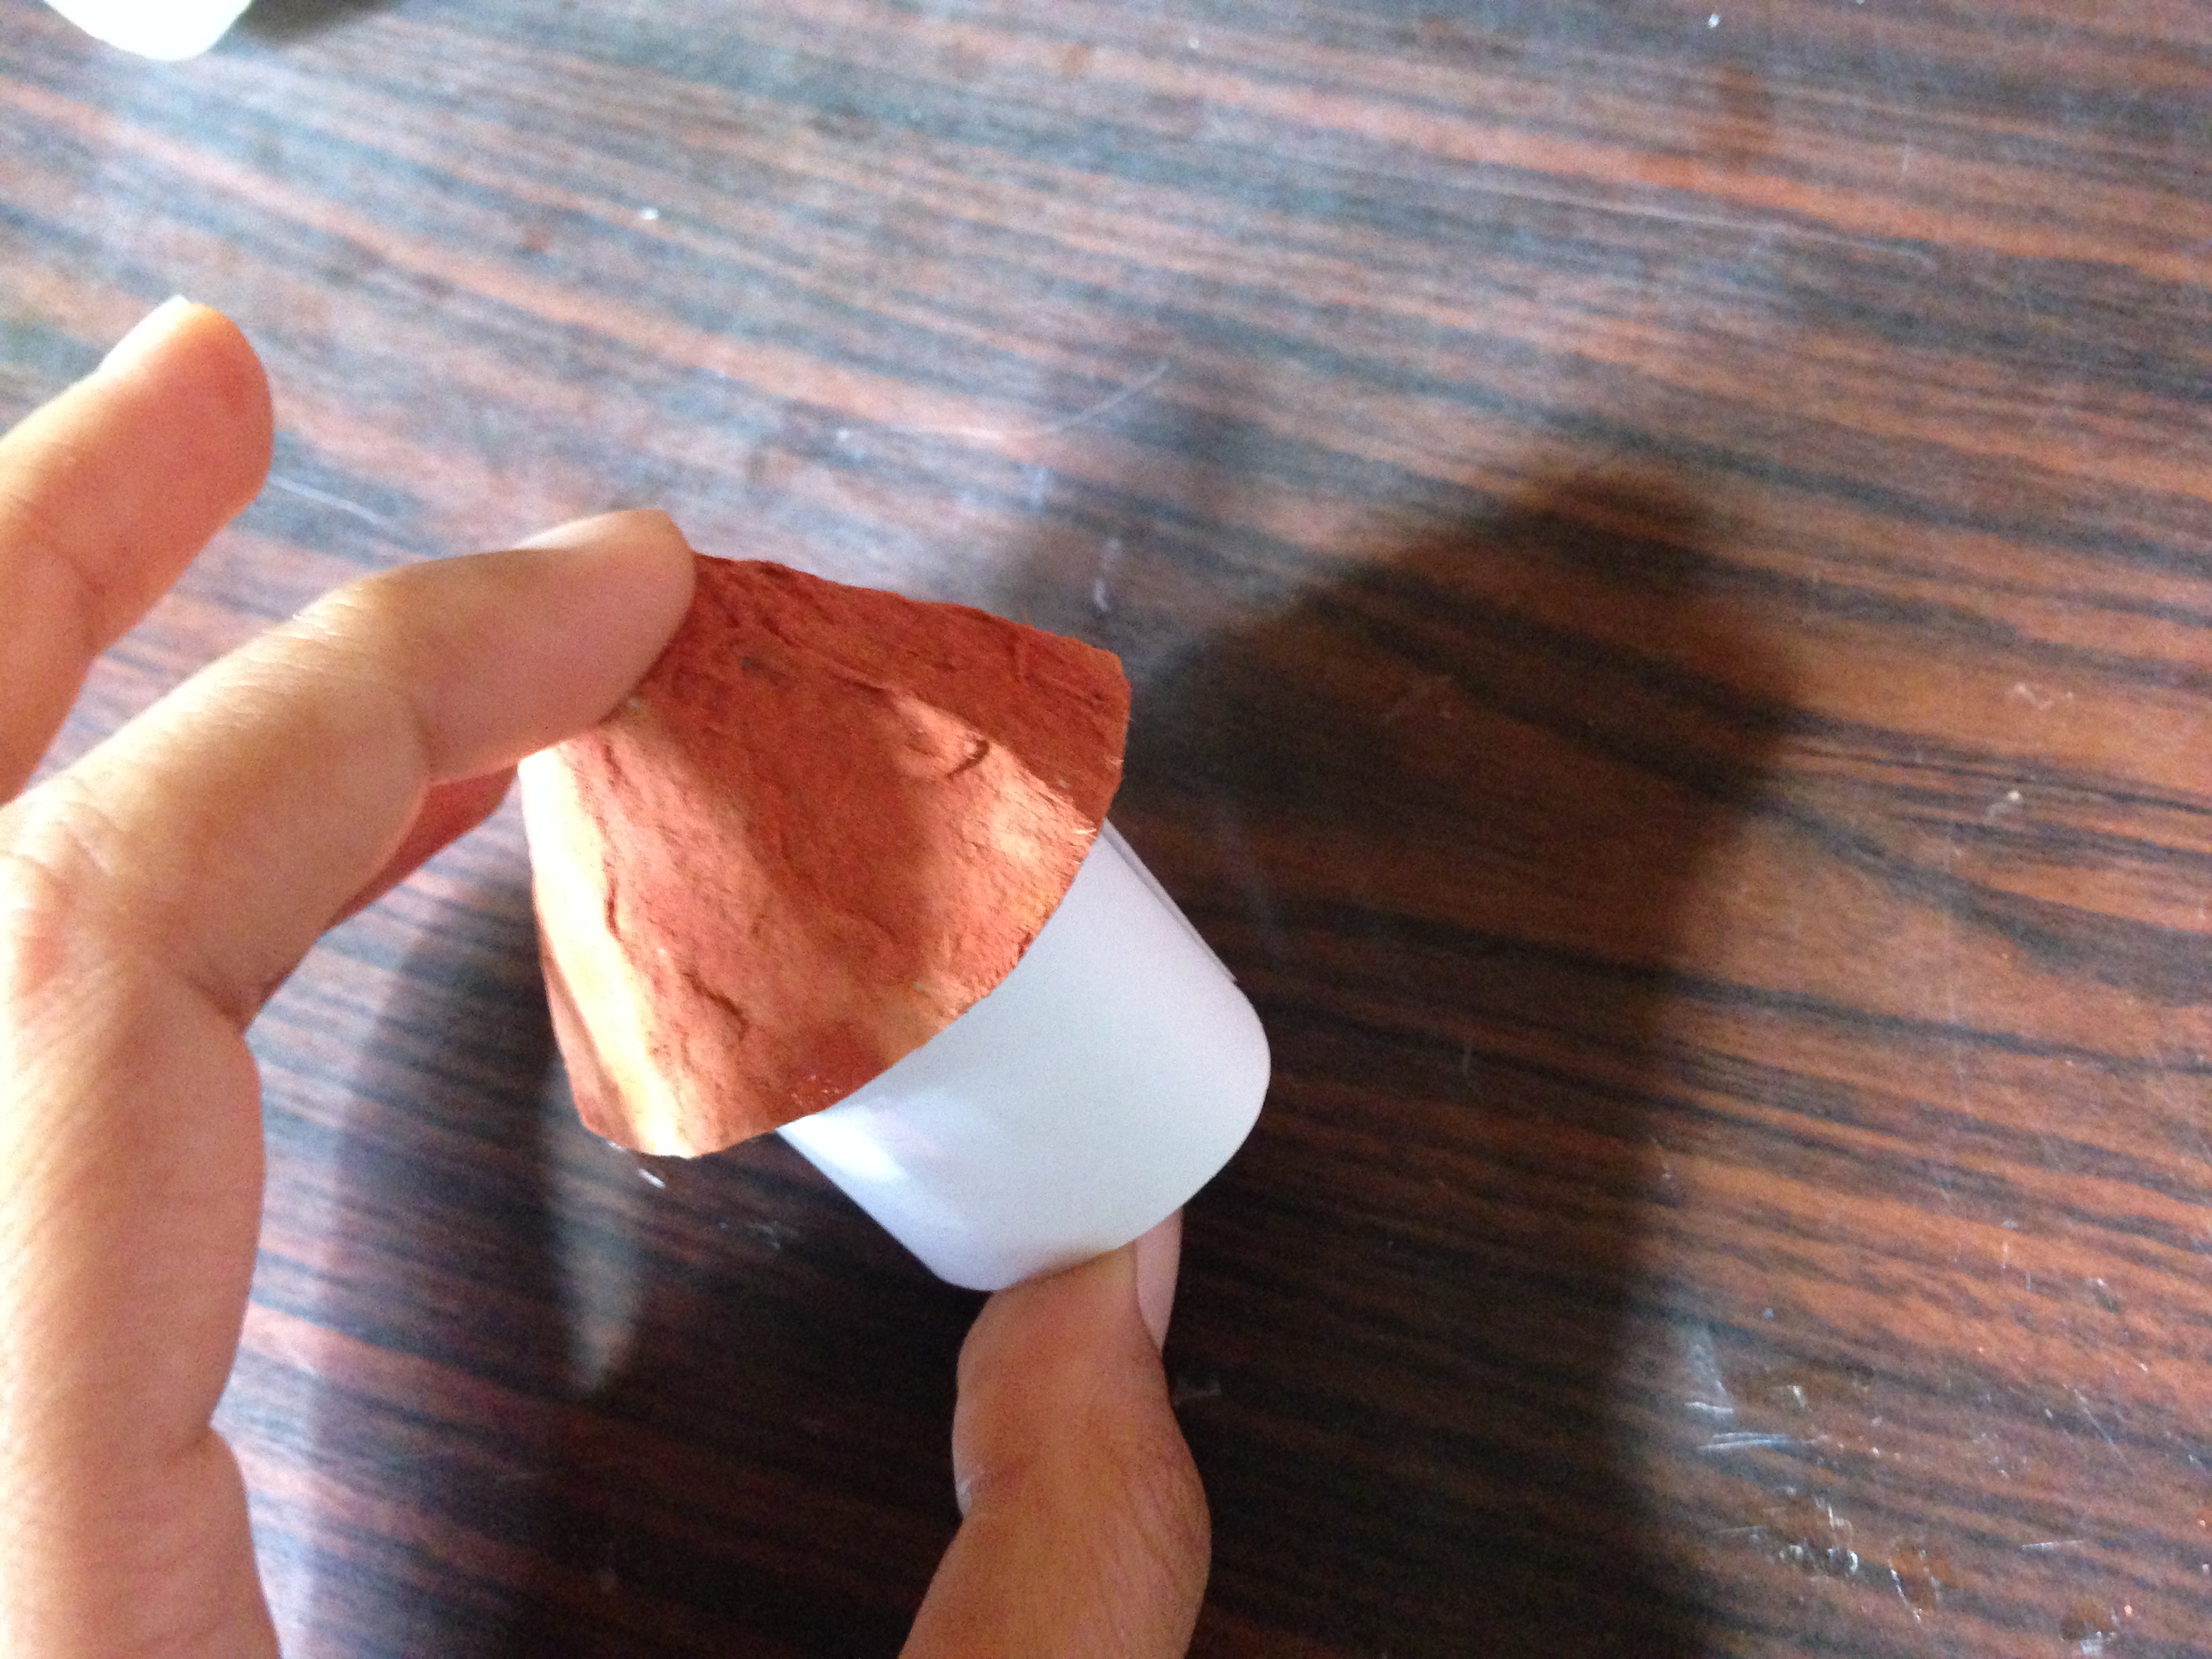
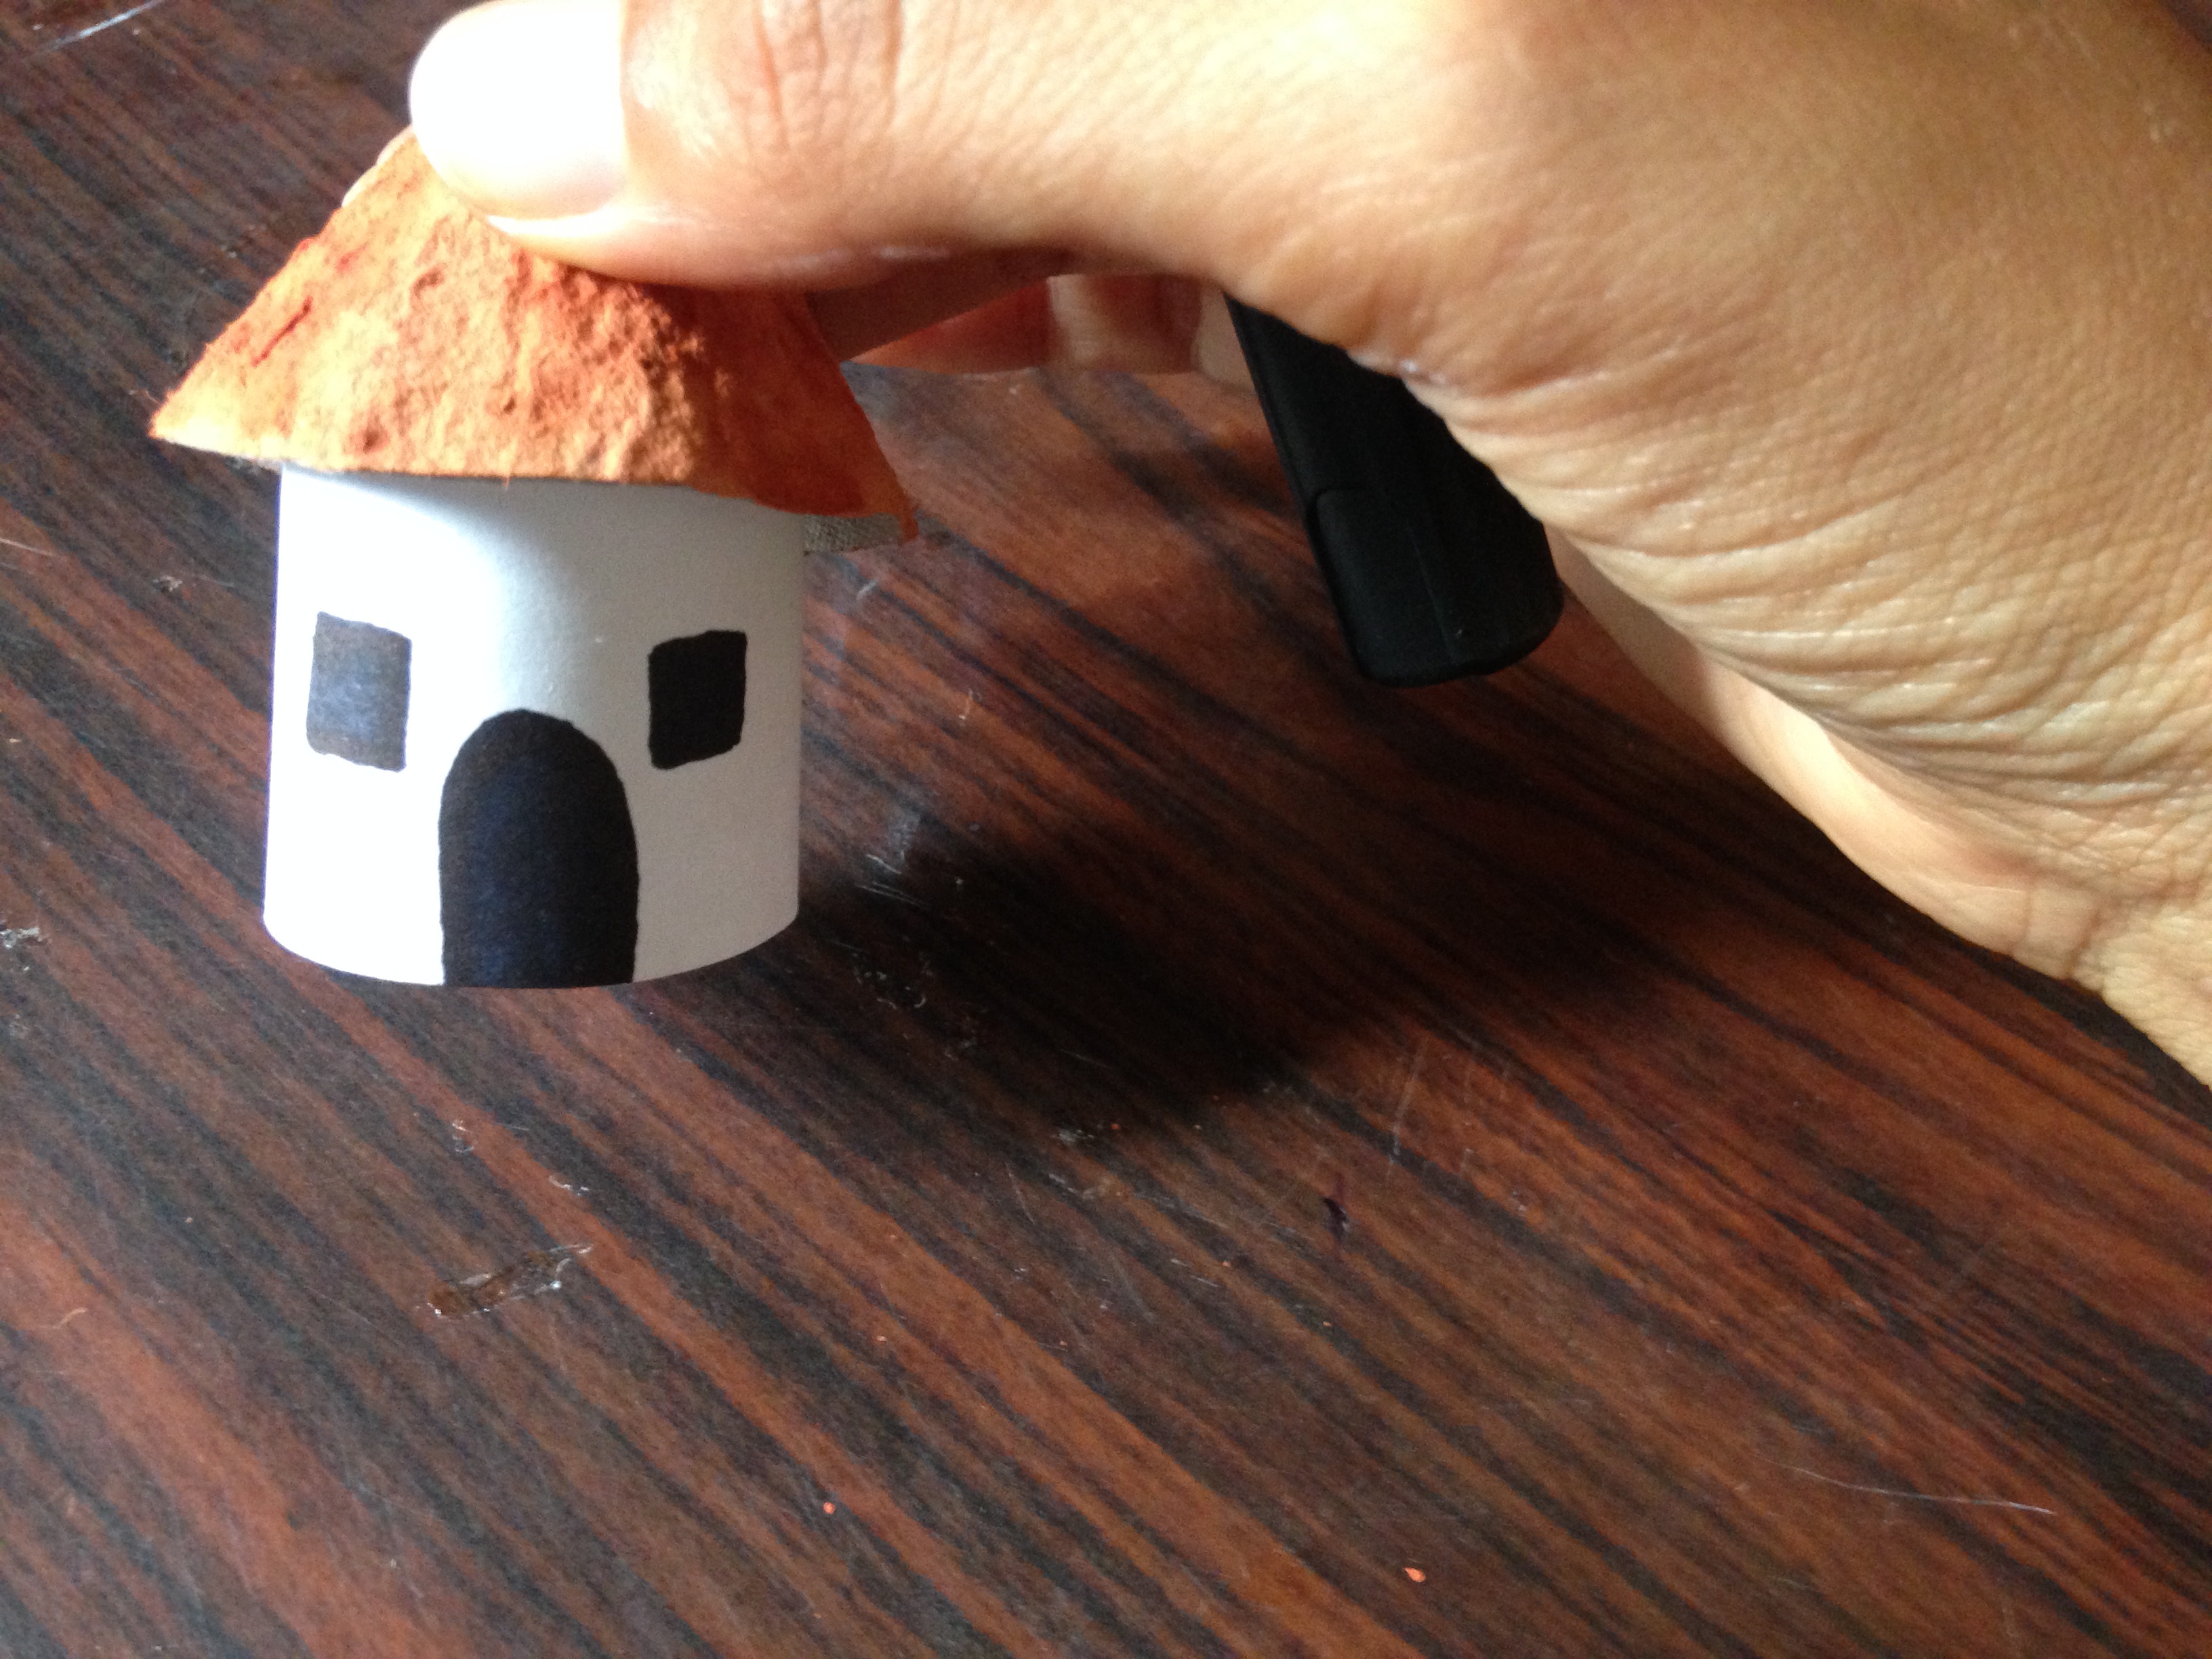
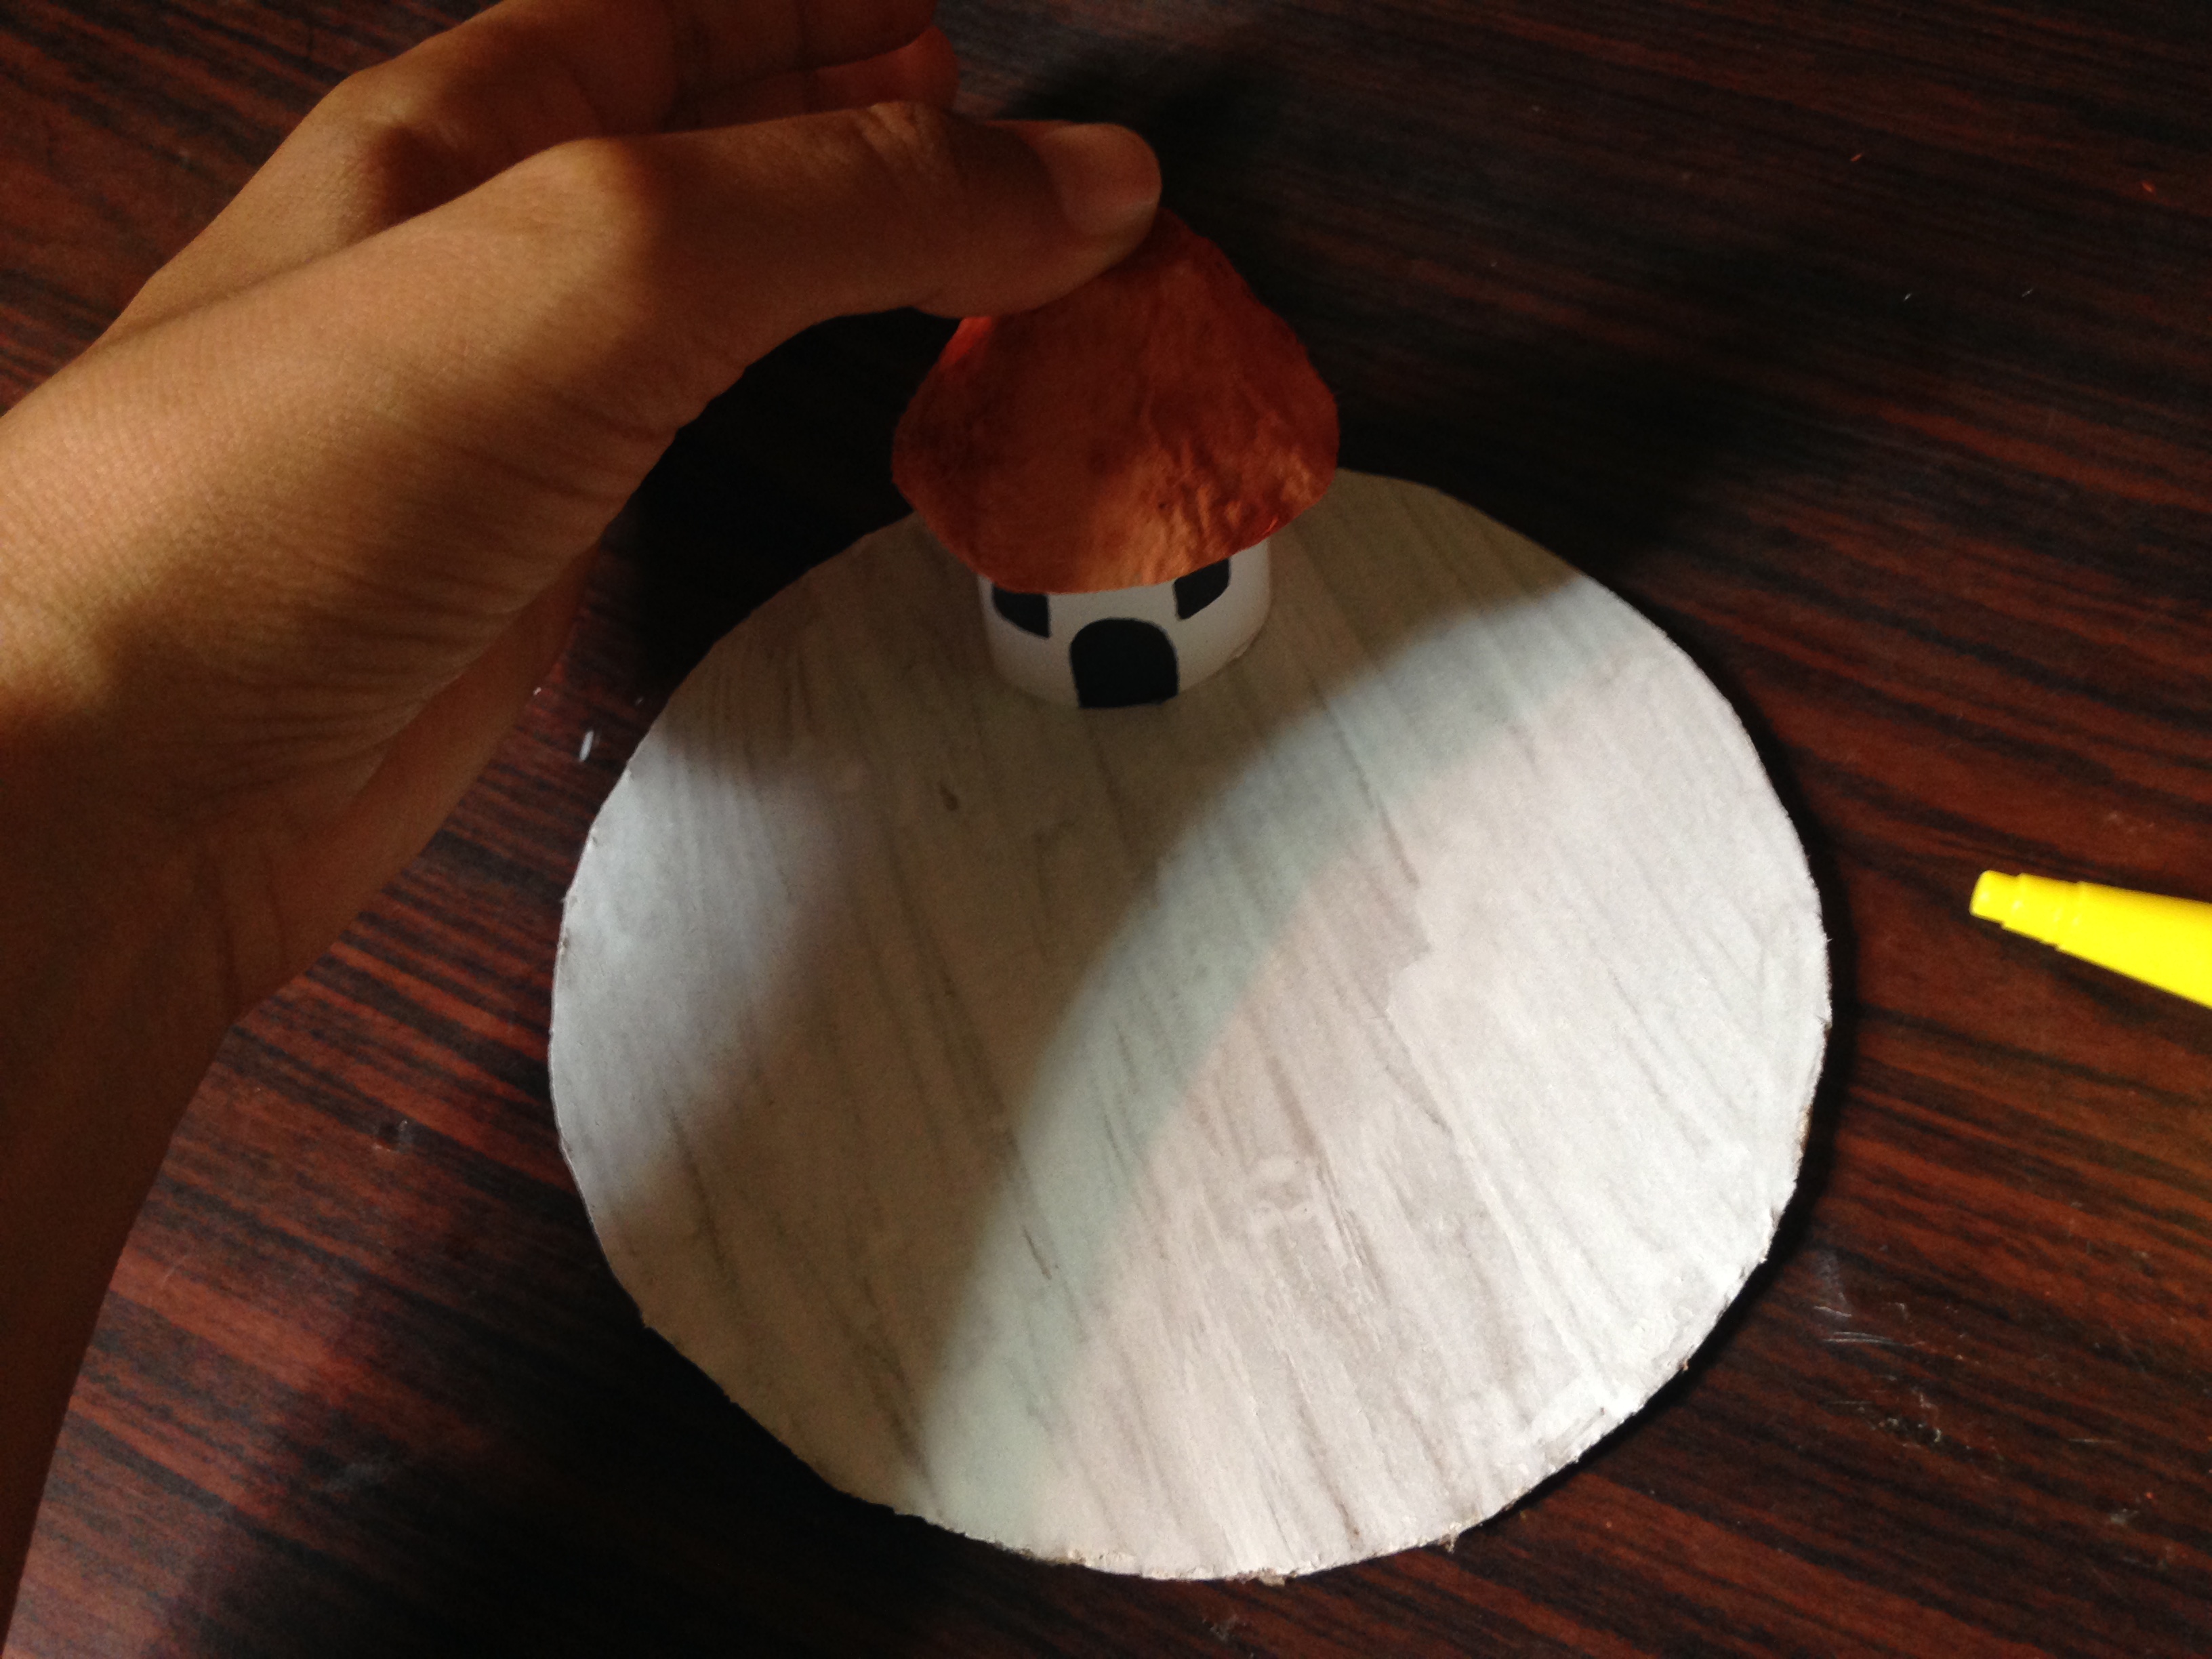
Paso 3
Vamos a hacer un rectángulo en la cartulina blanca de aproximadamente 3,5 centímetros de ancho y 12 centímetros de largo, luego de recortarla, la vamos a enrollar y la pegaremos, tomamos nuestra tapa de cartón de huevos y la pegamos para formar nuestra casa, con el marcador dibujamos la puerta y las ventanas de la casa, y luego procederemos a pegar nuestra casa a la base redonda
Step 3
We are going to make a rectangle in the white cardboard approximately 3.5 centimeters wide and 12 centimeters long, after cutting it, we are going to roll it up and glue it, we take our egg carton cover and glue it to form our house, With the marker we draw the door and the windows of the house, and then we will proceed to glue our house to the round base


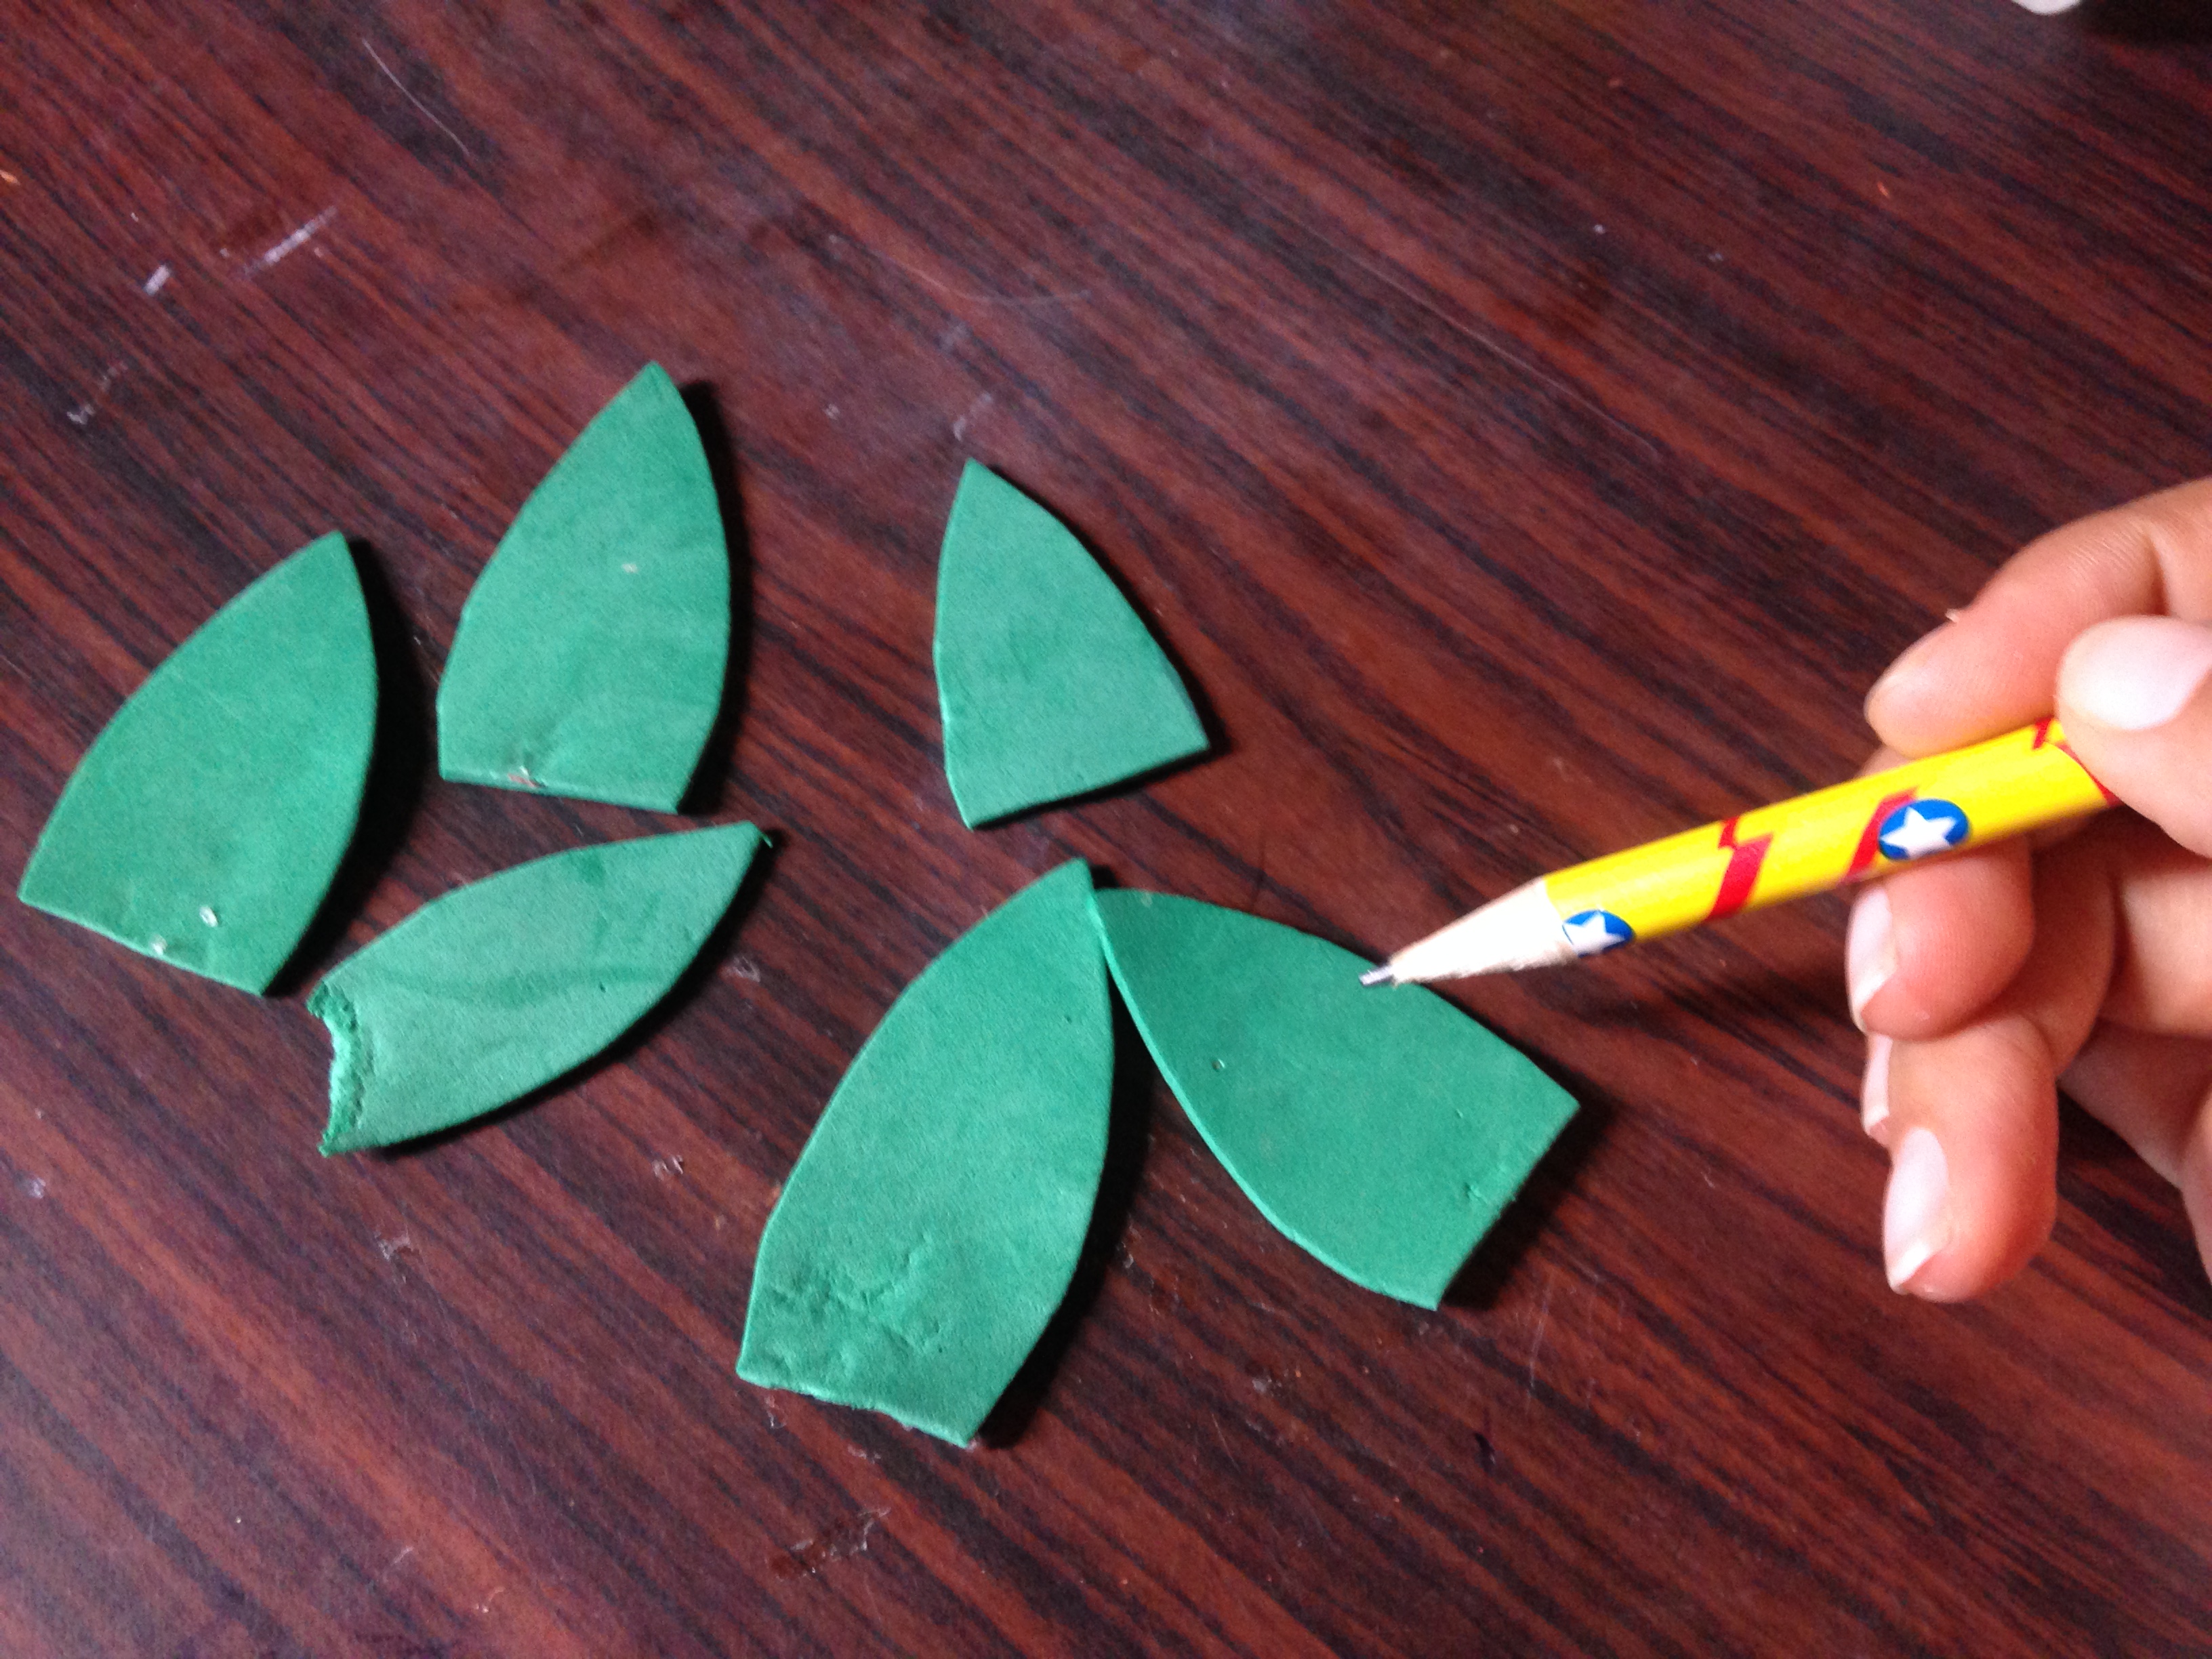
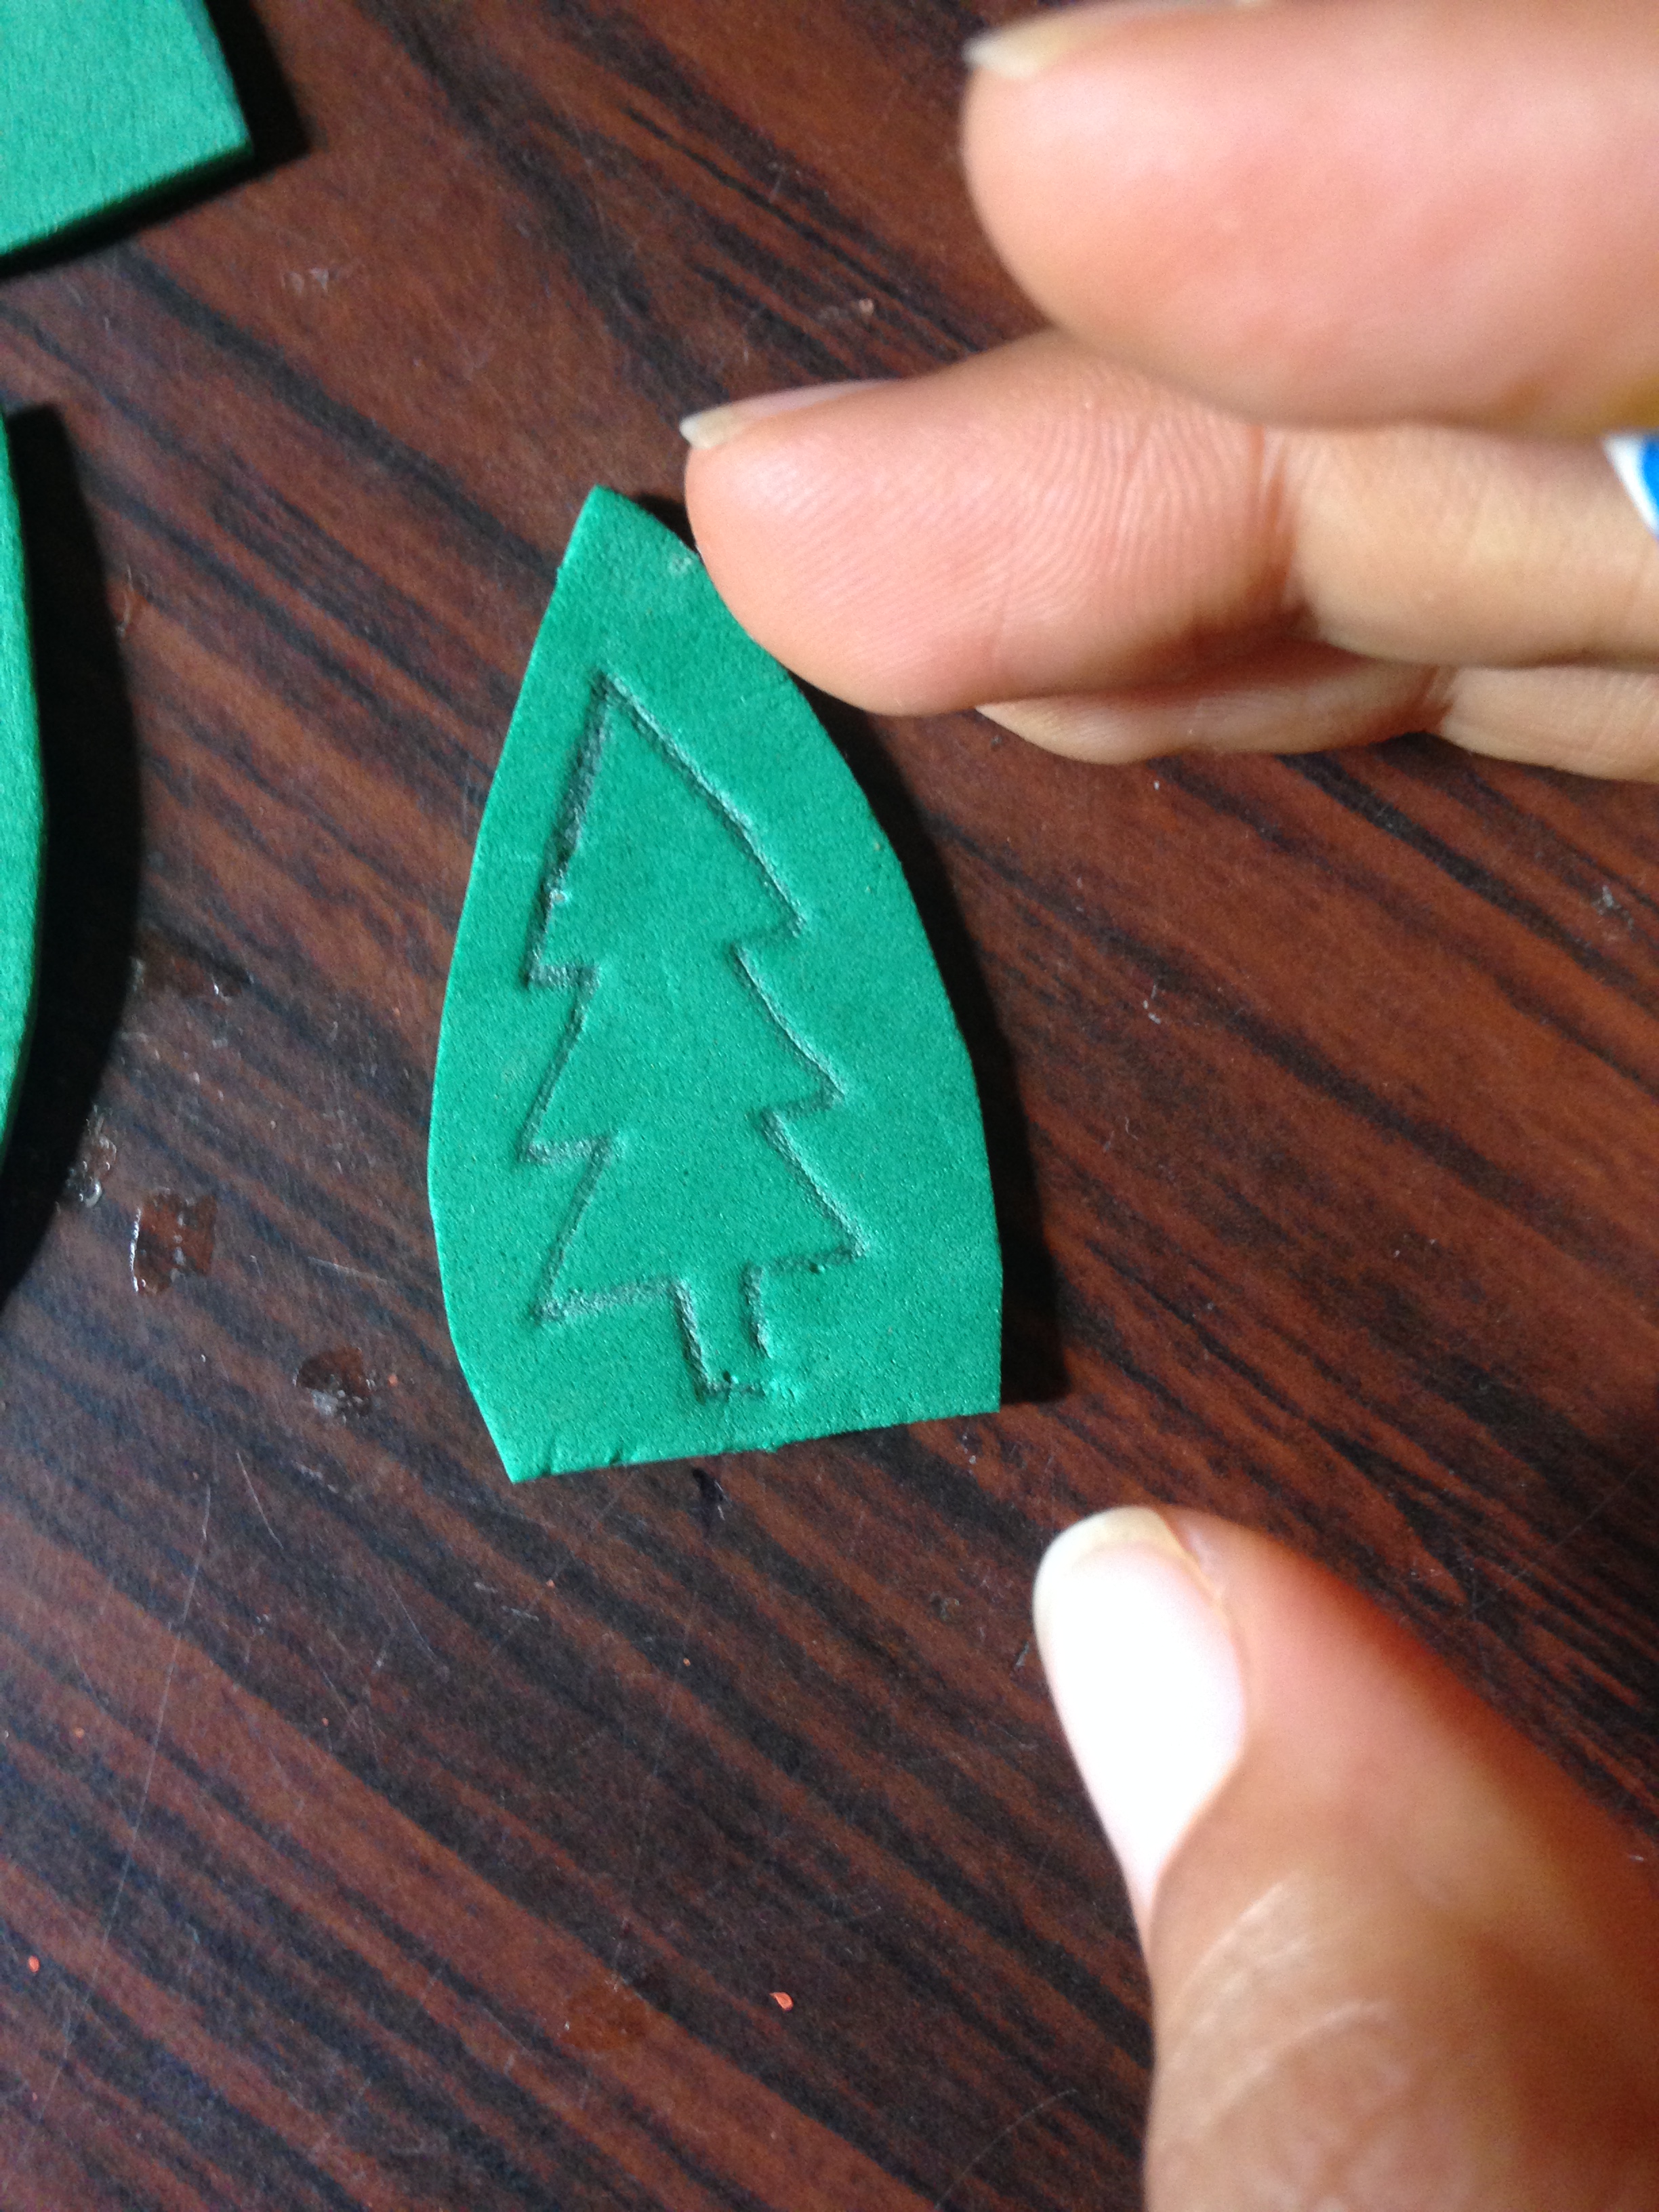
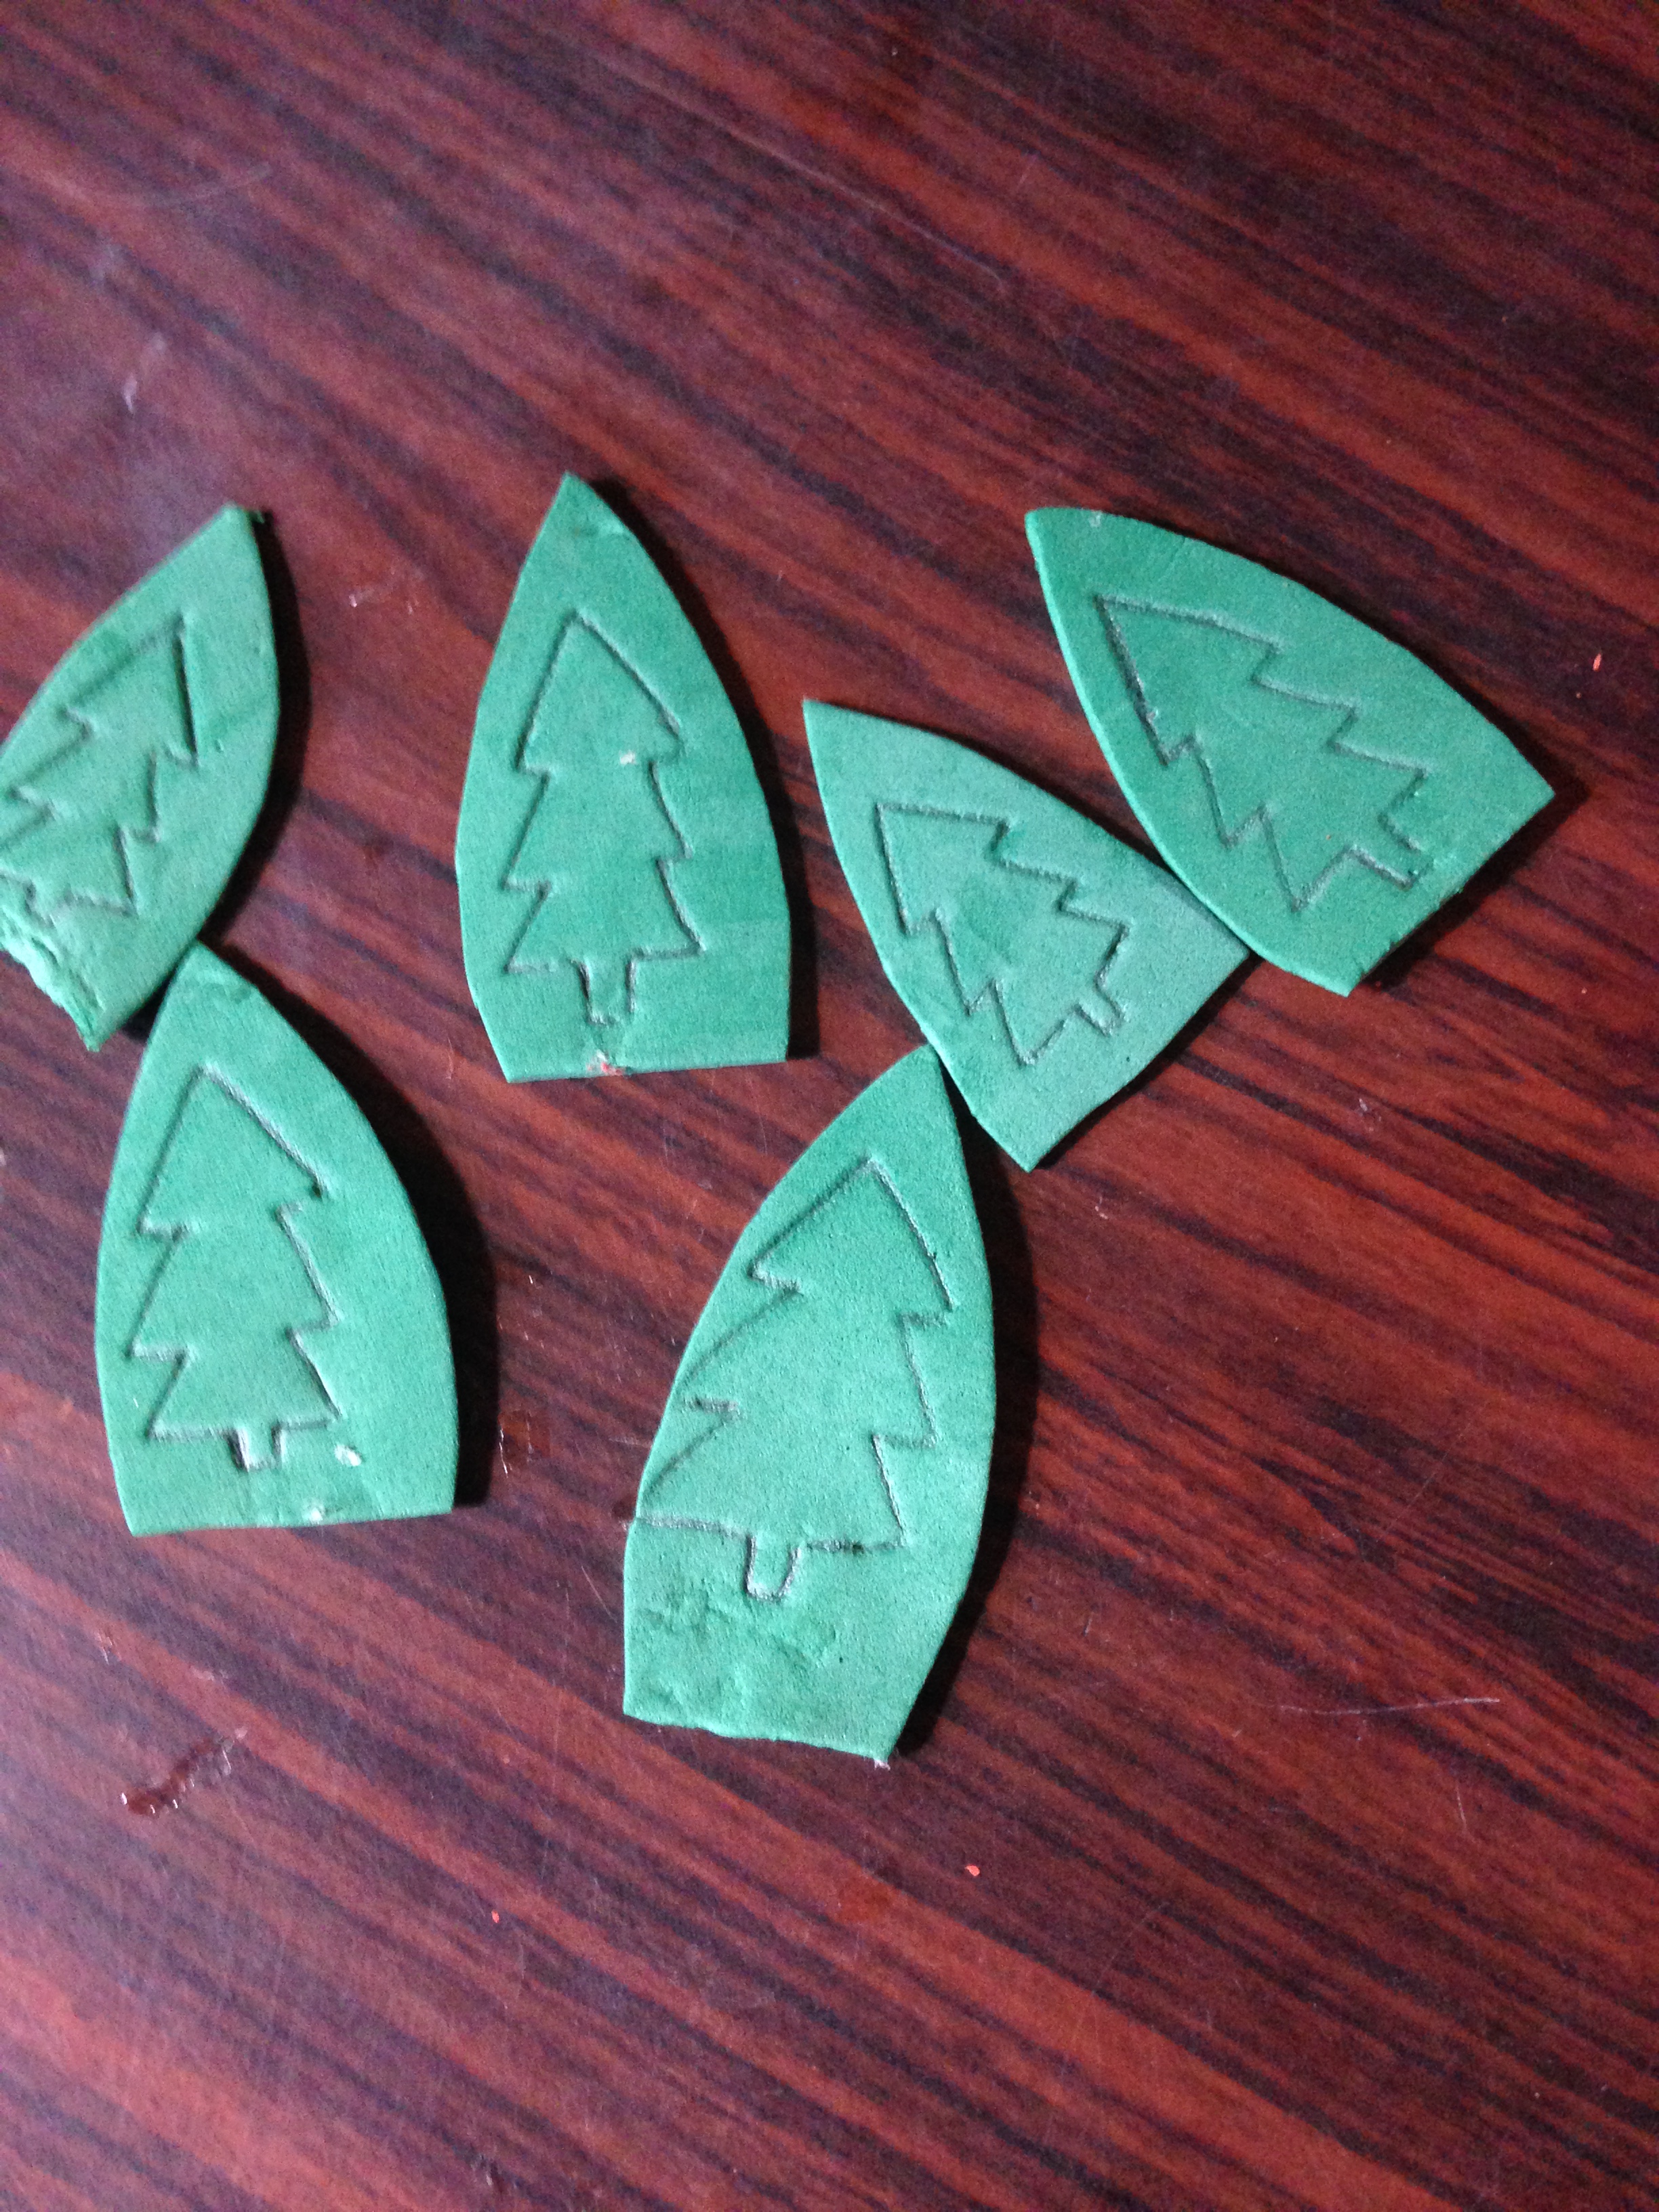
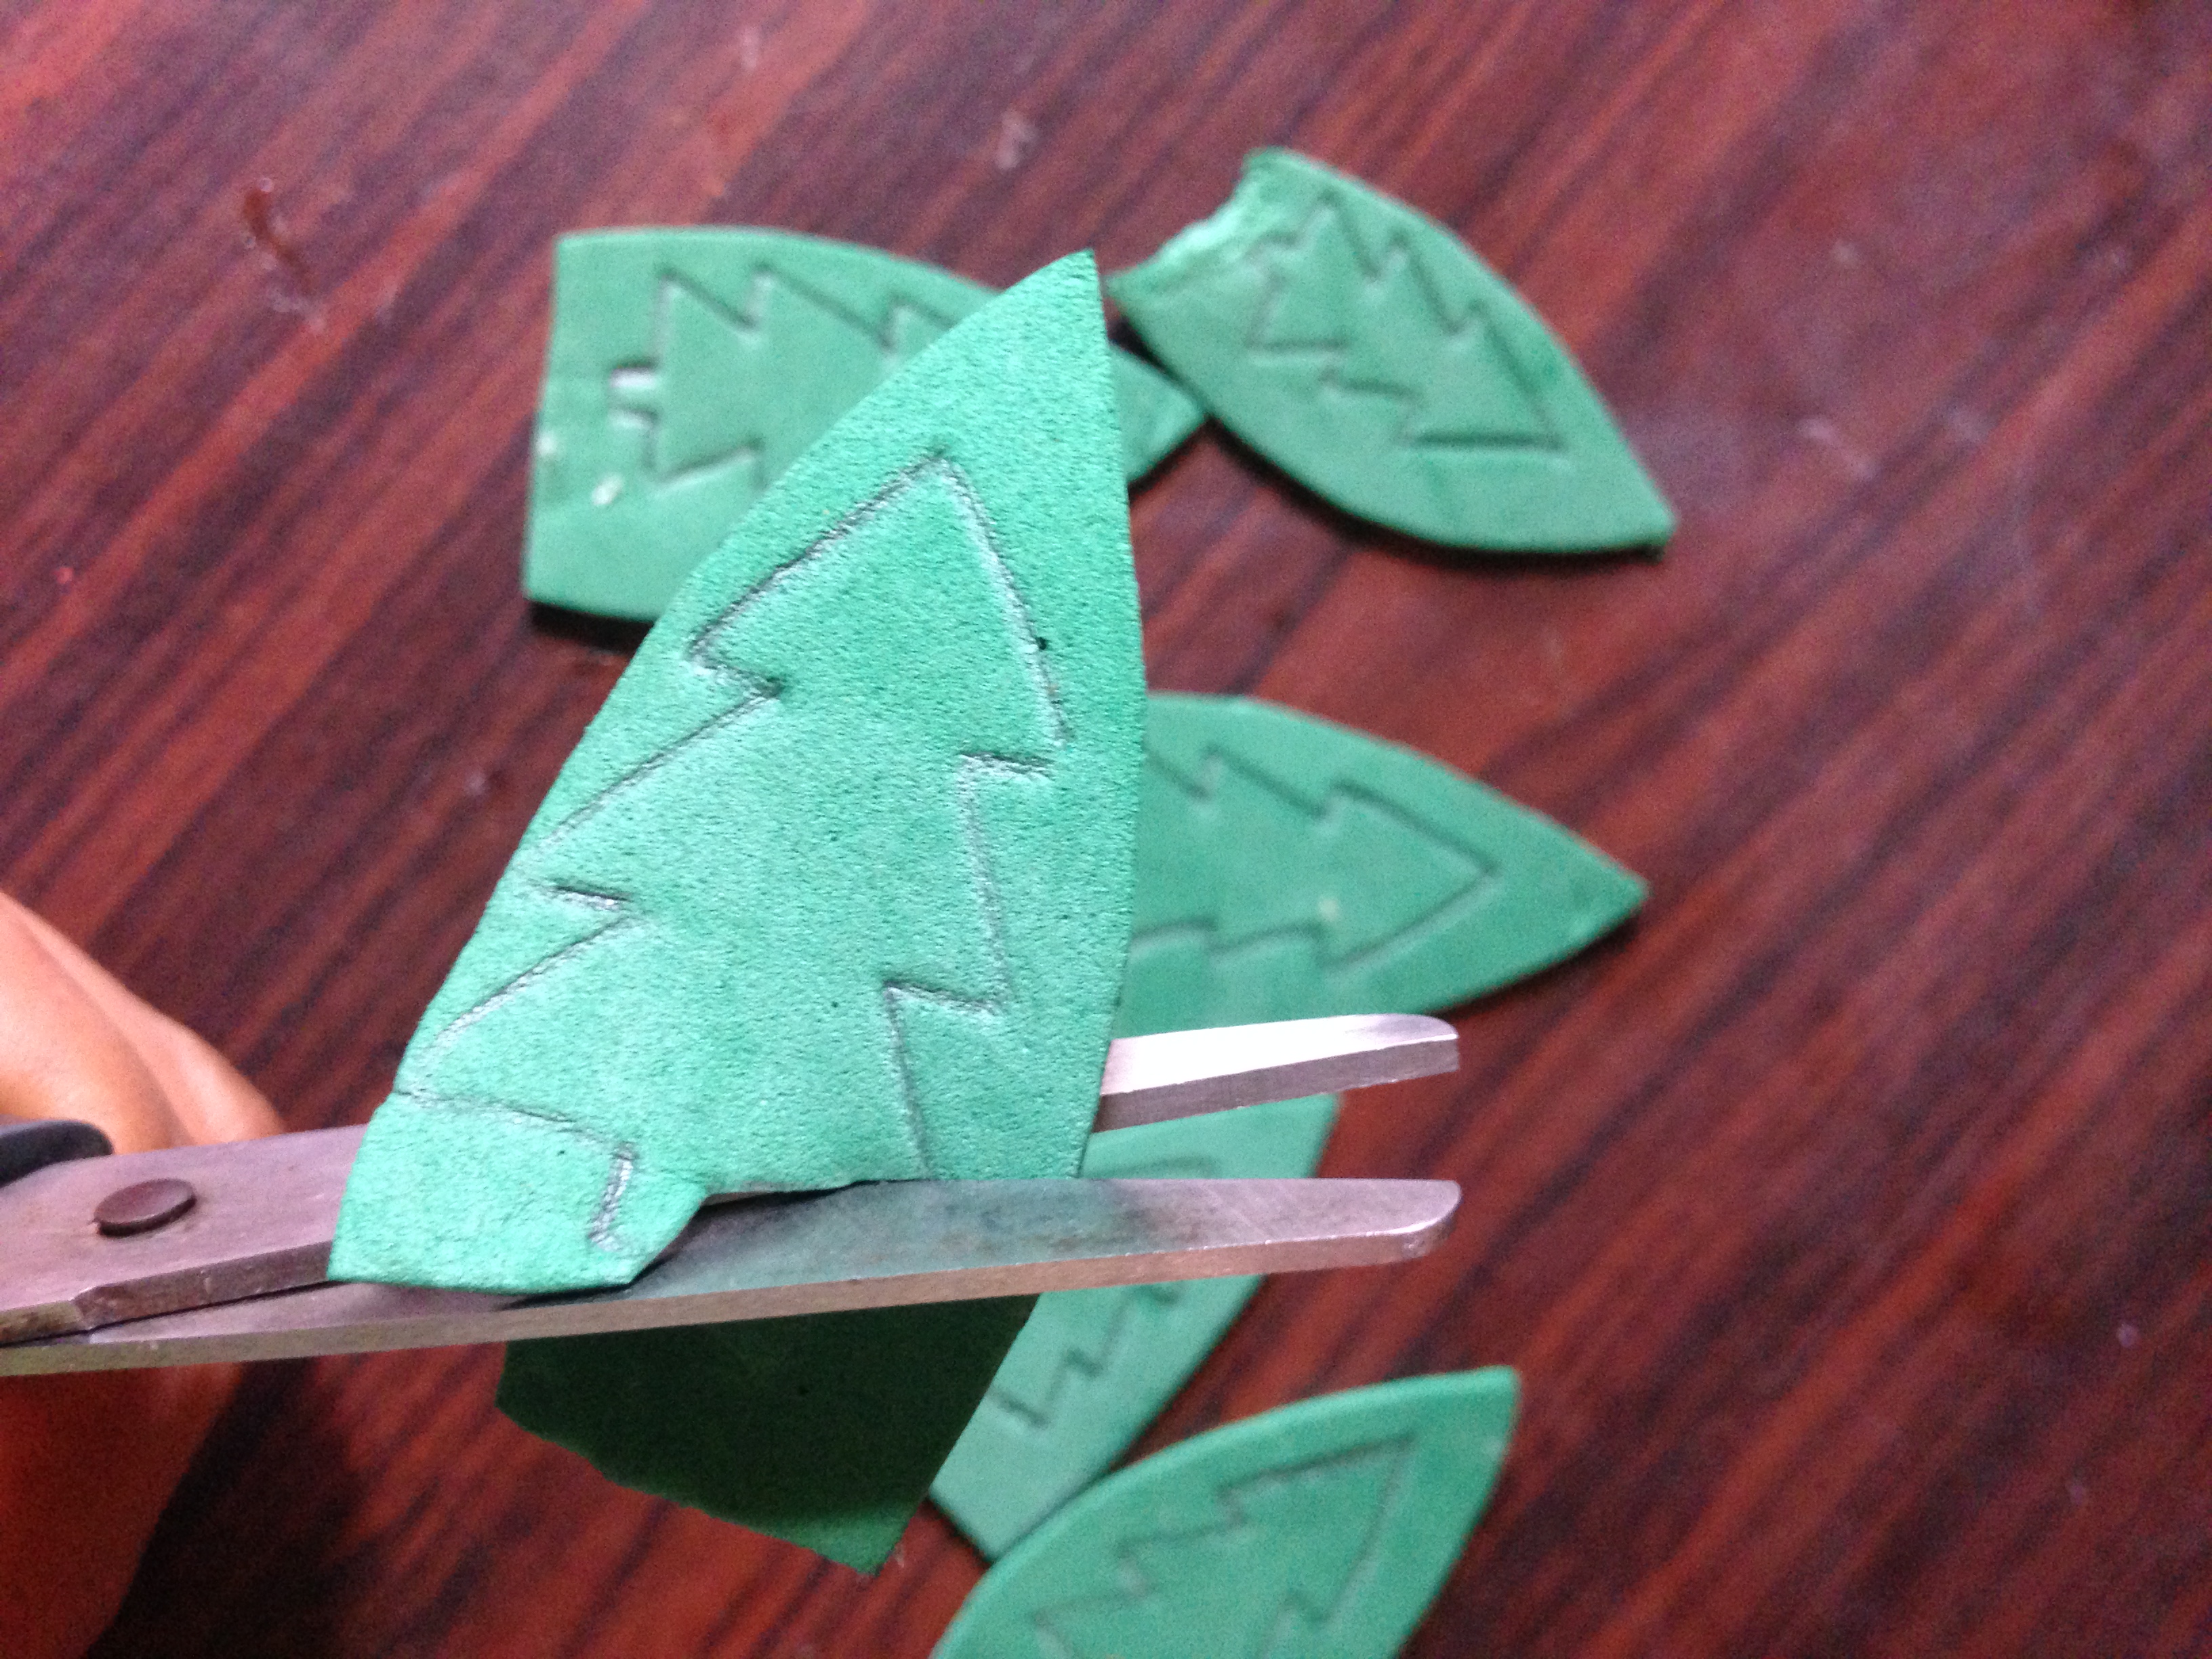
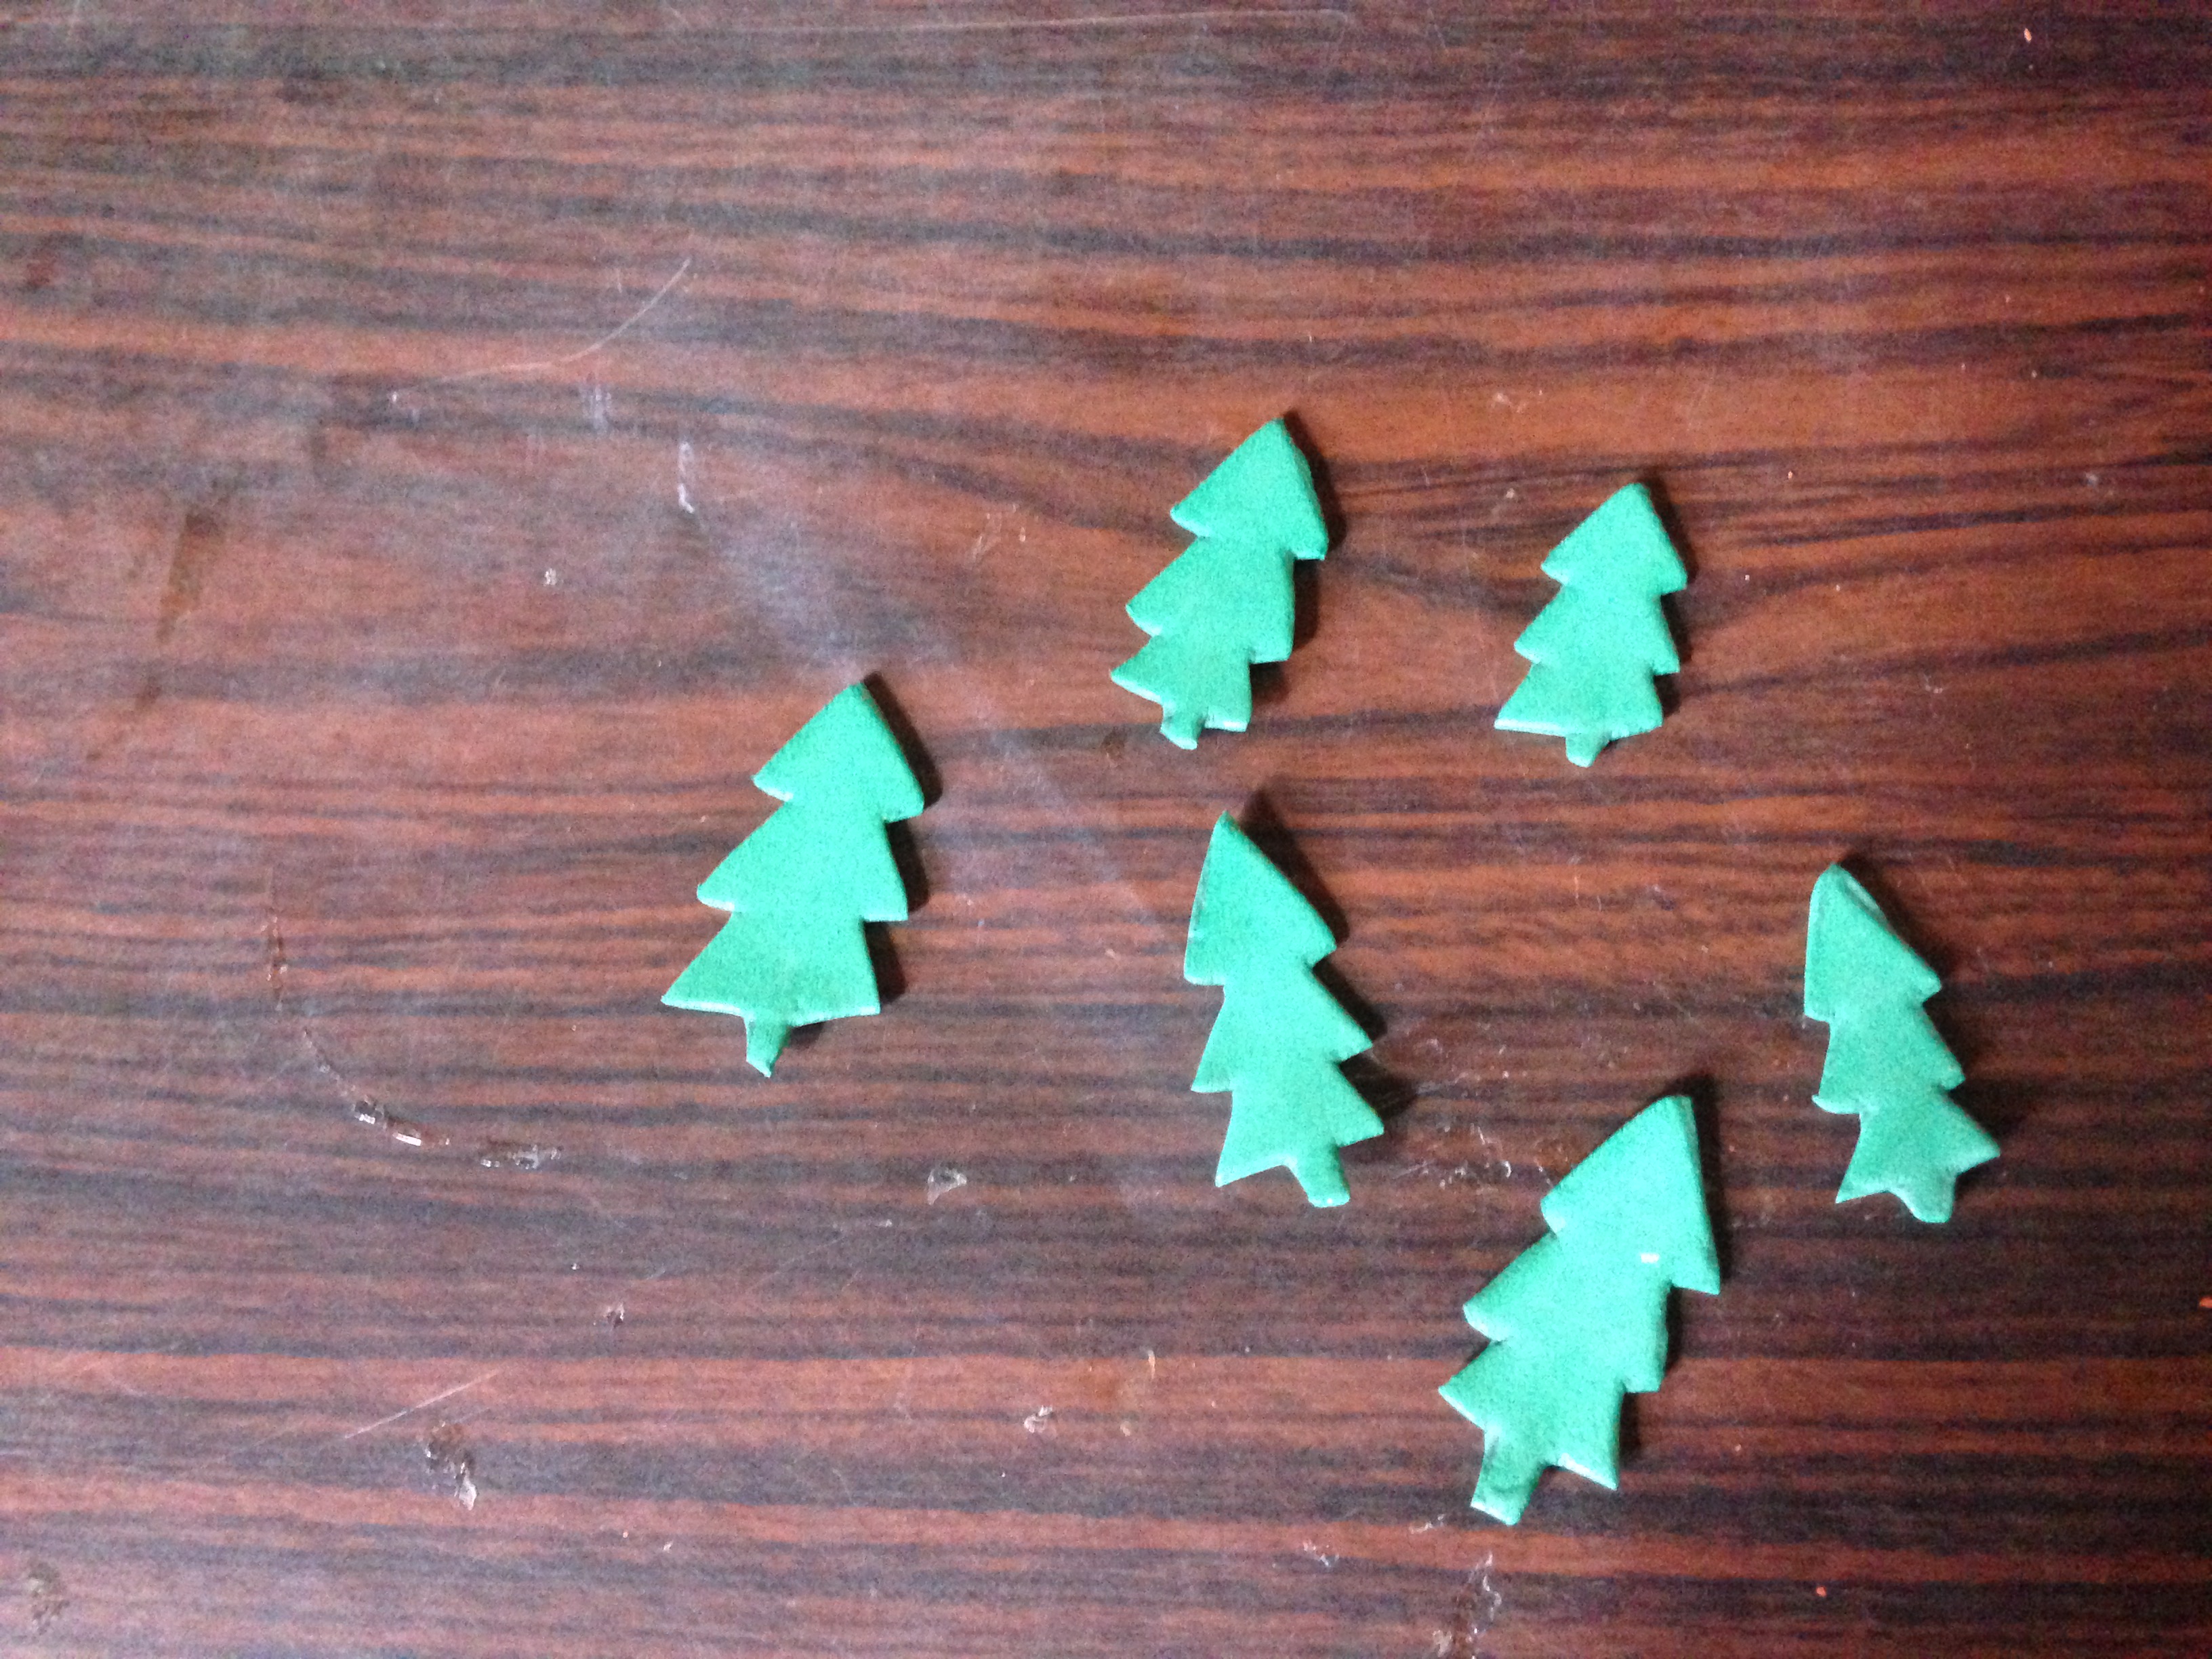
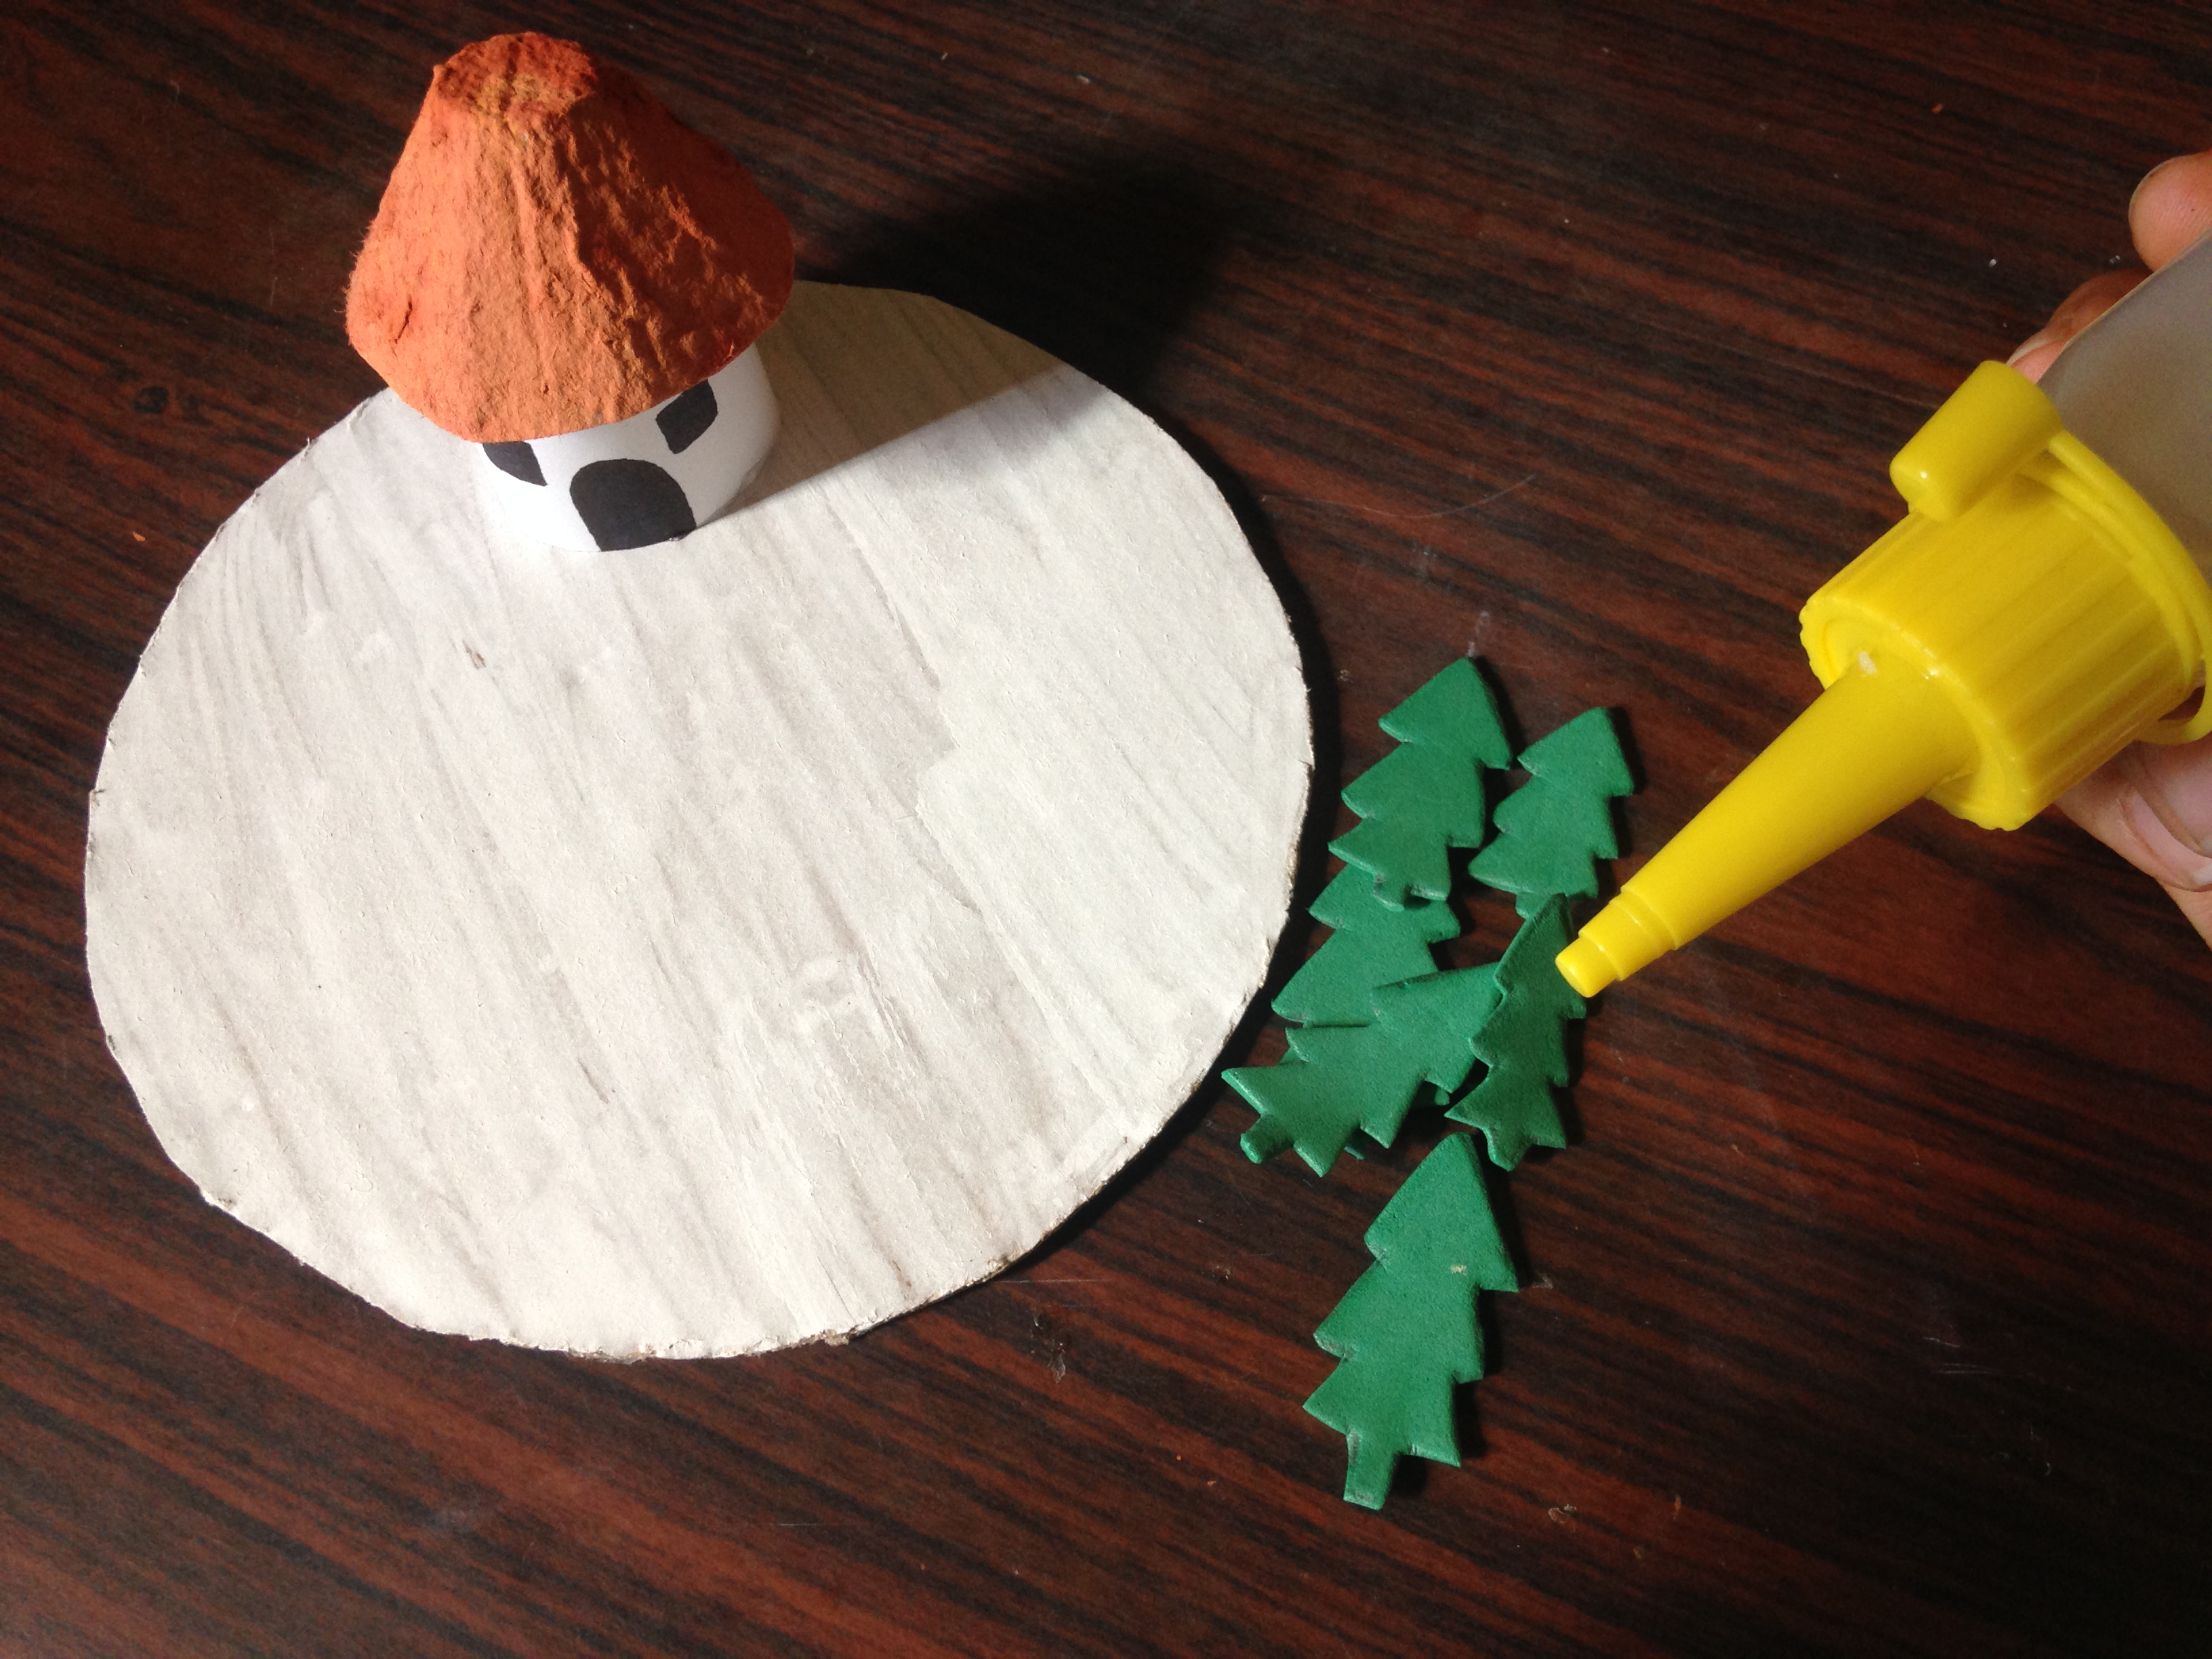
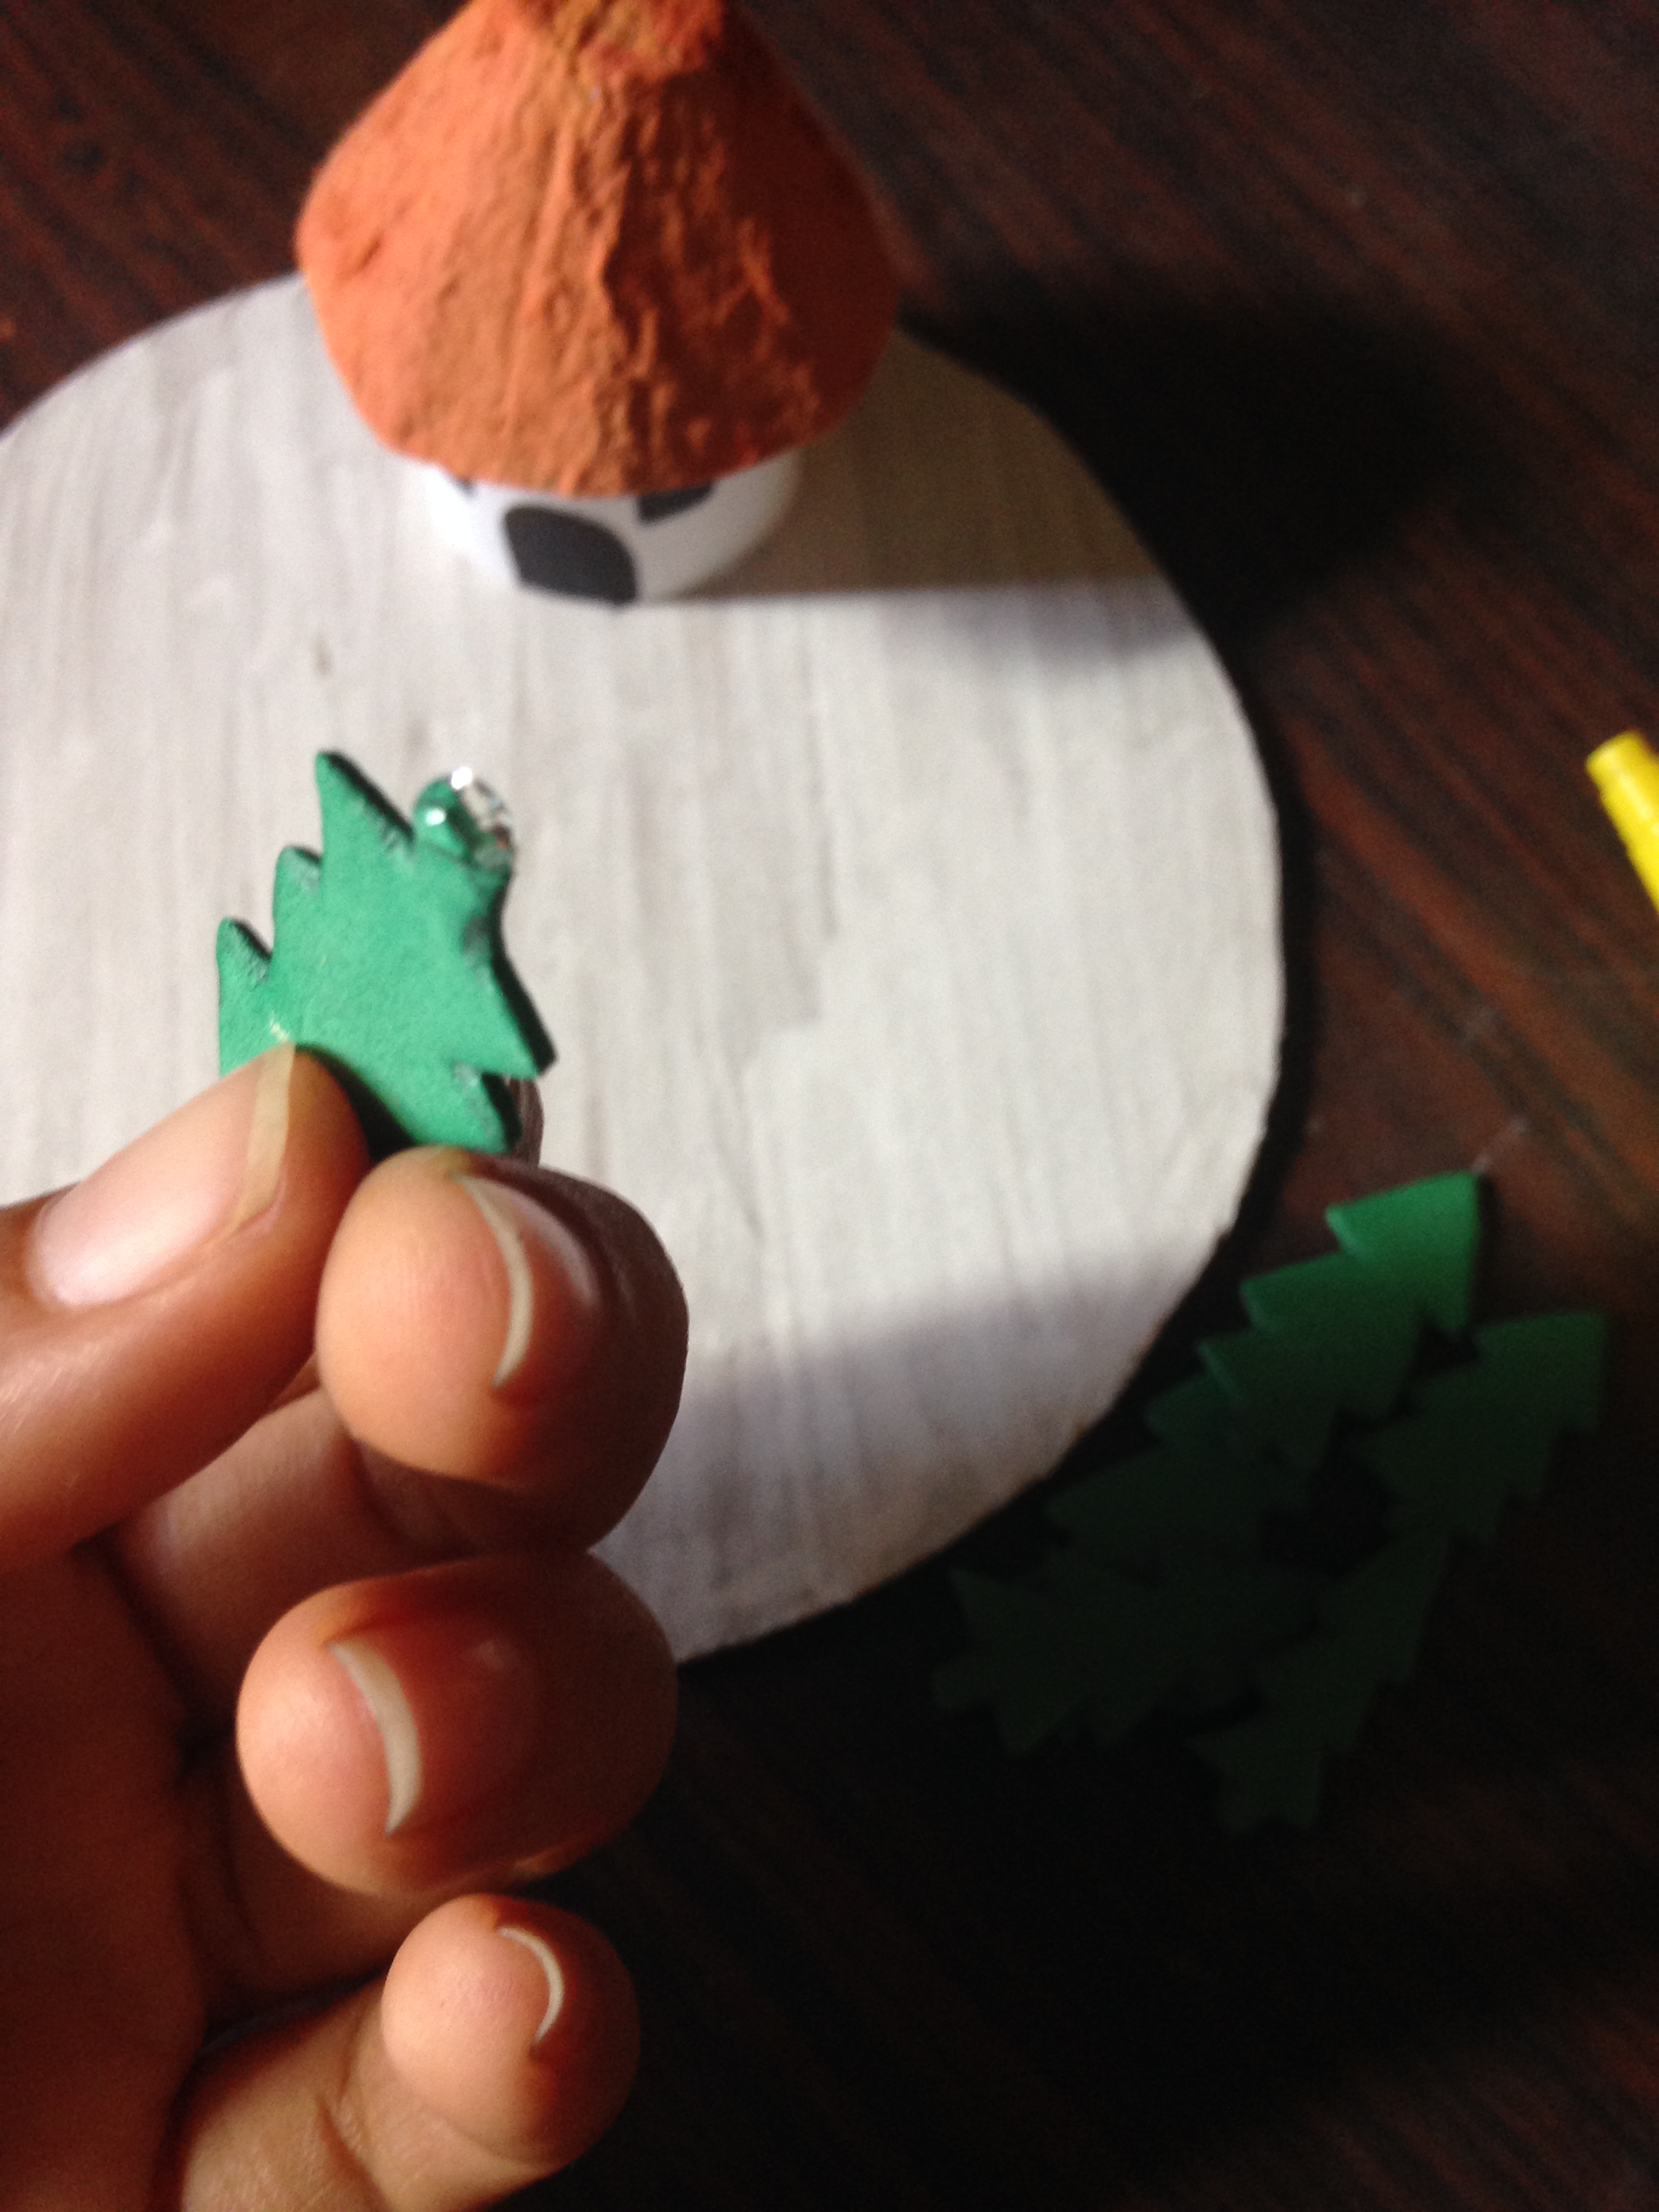
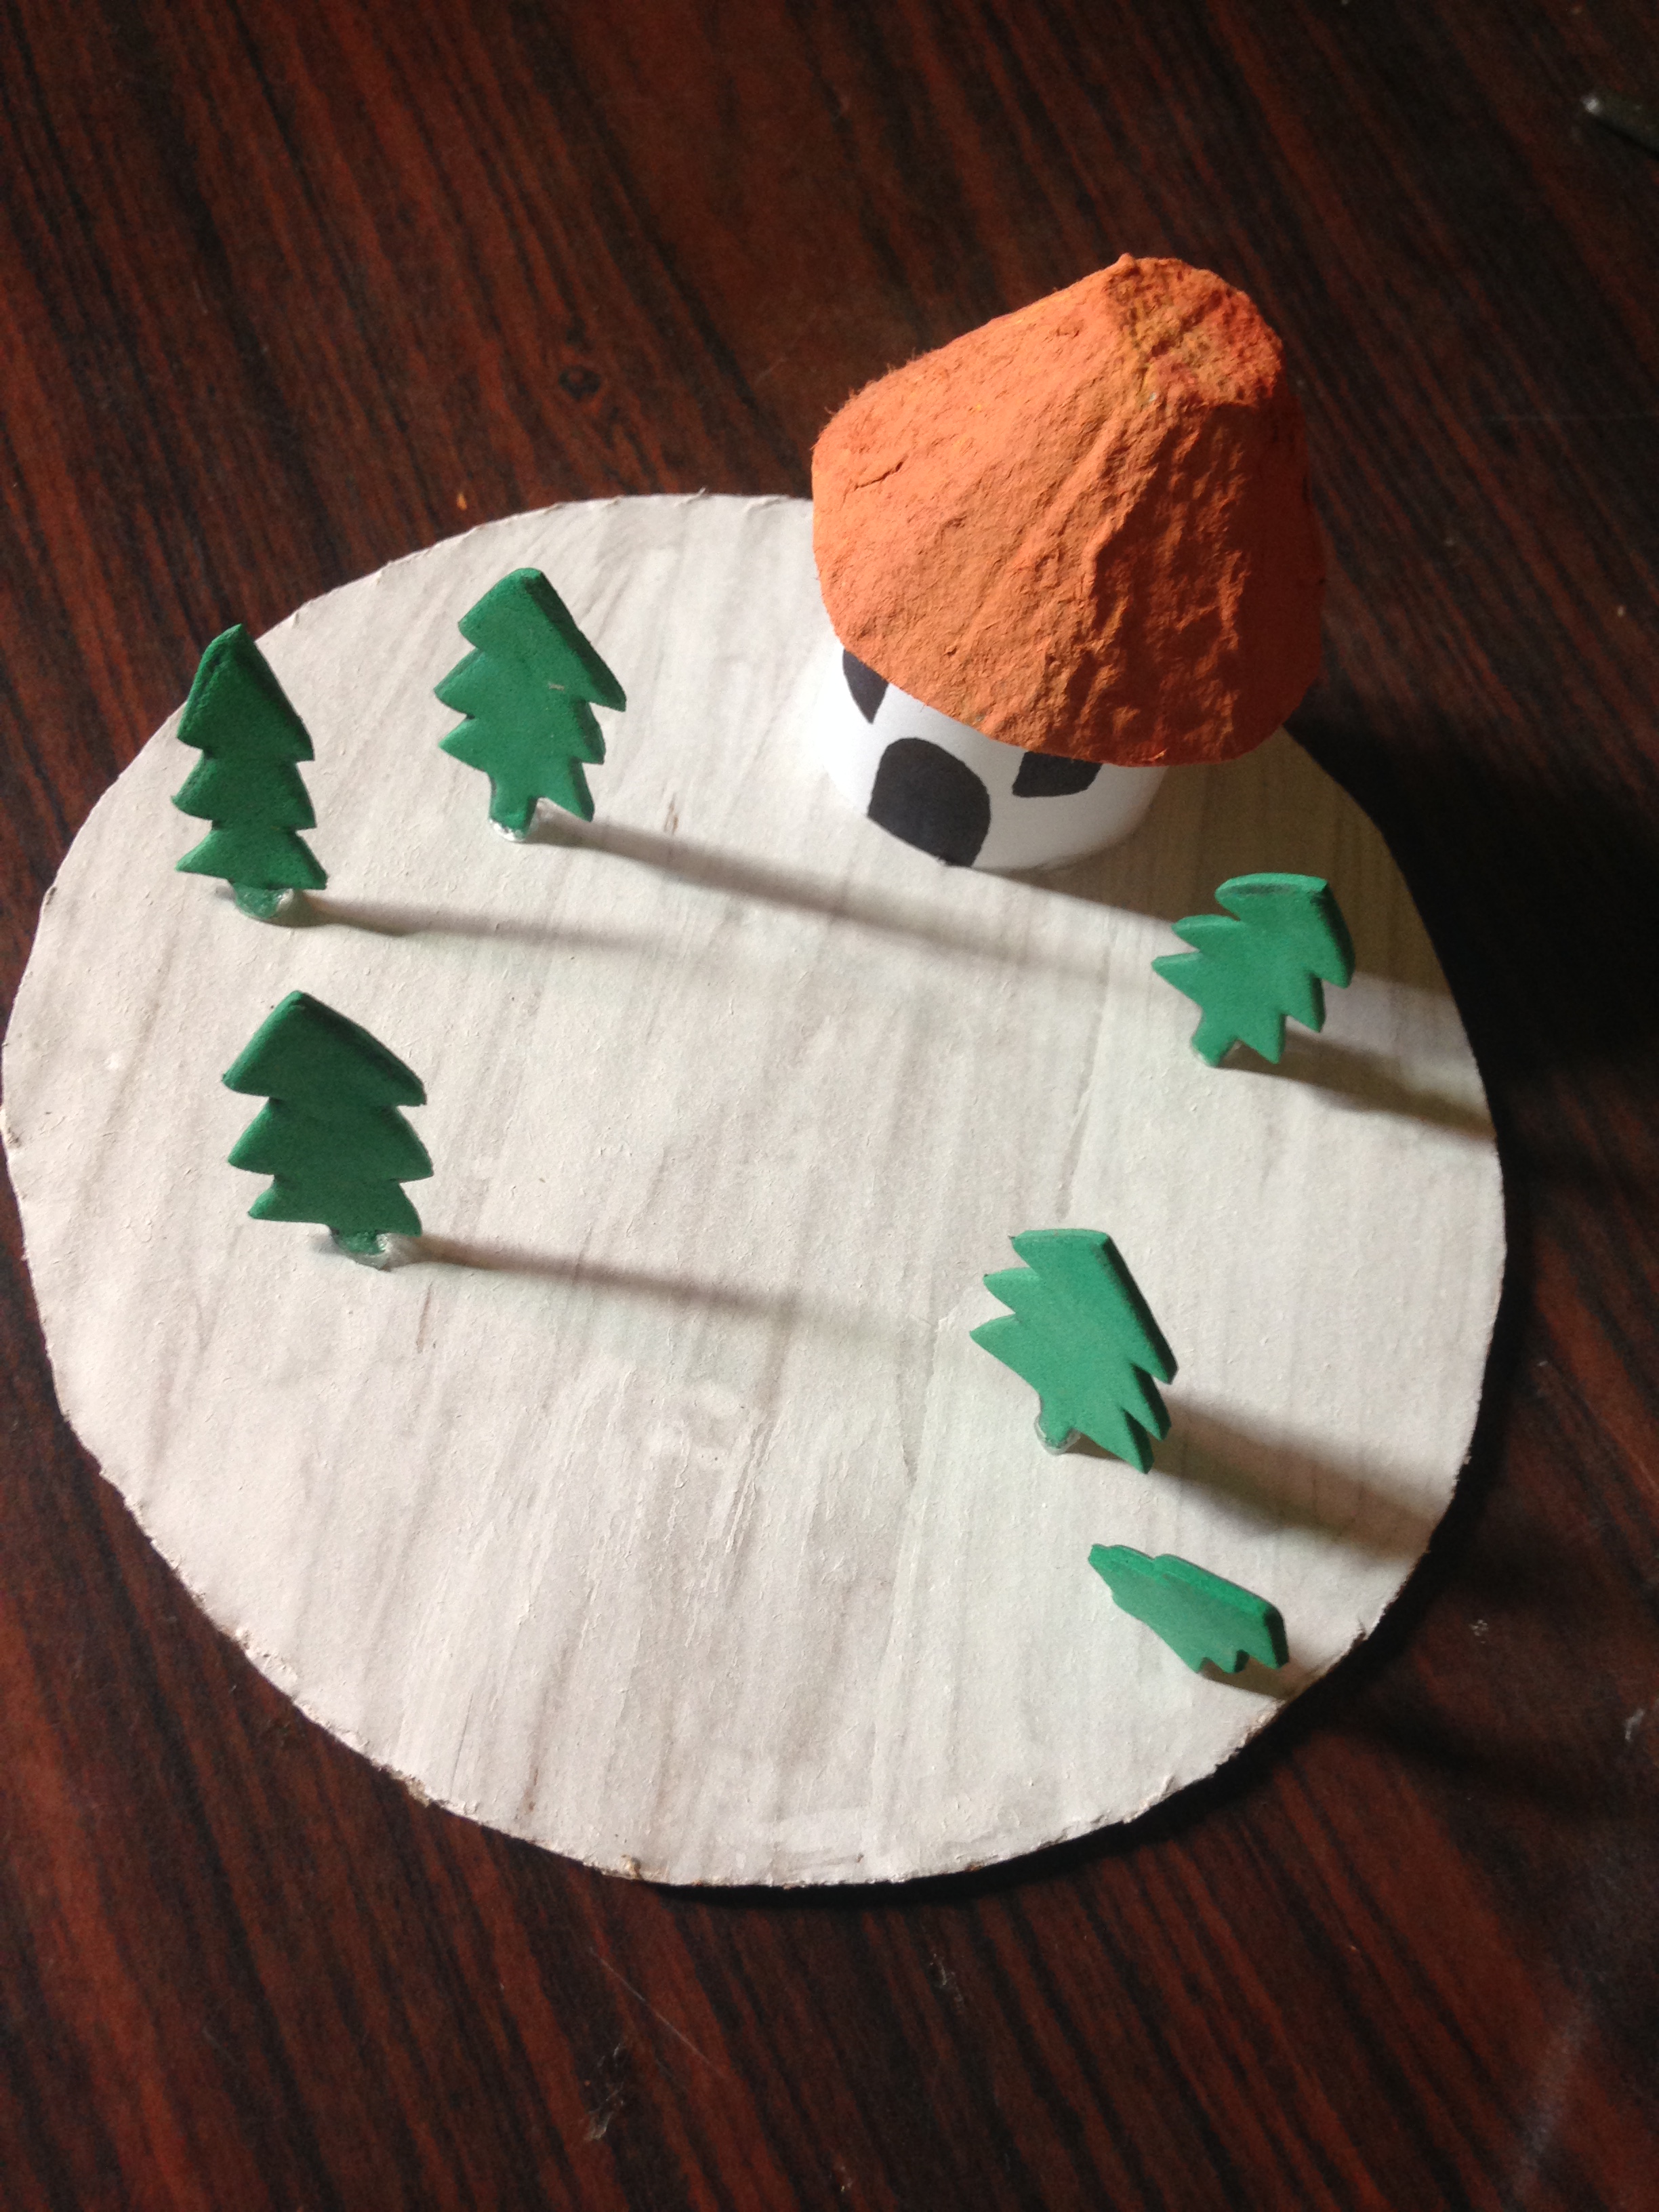
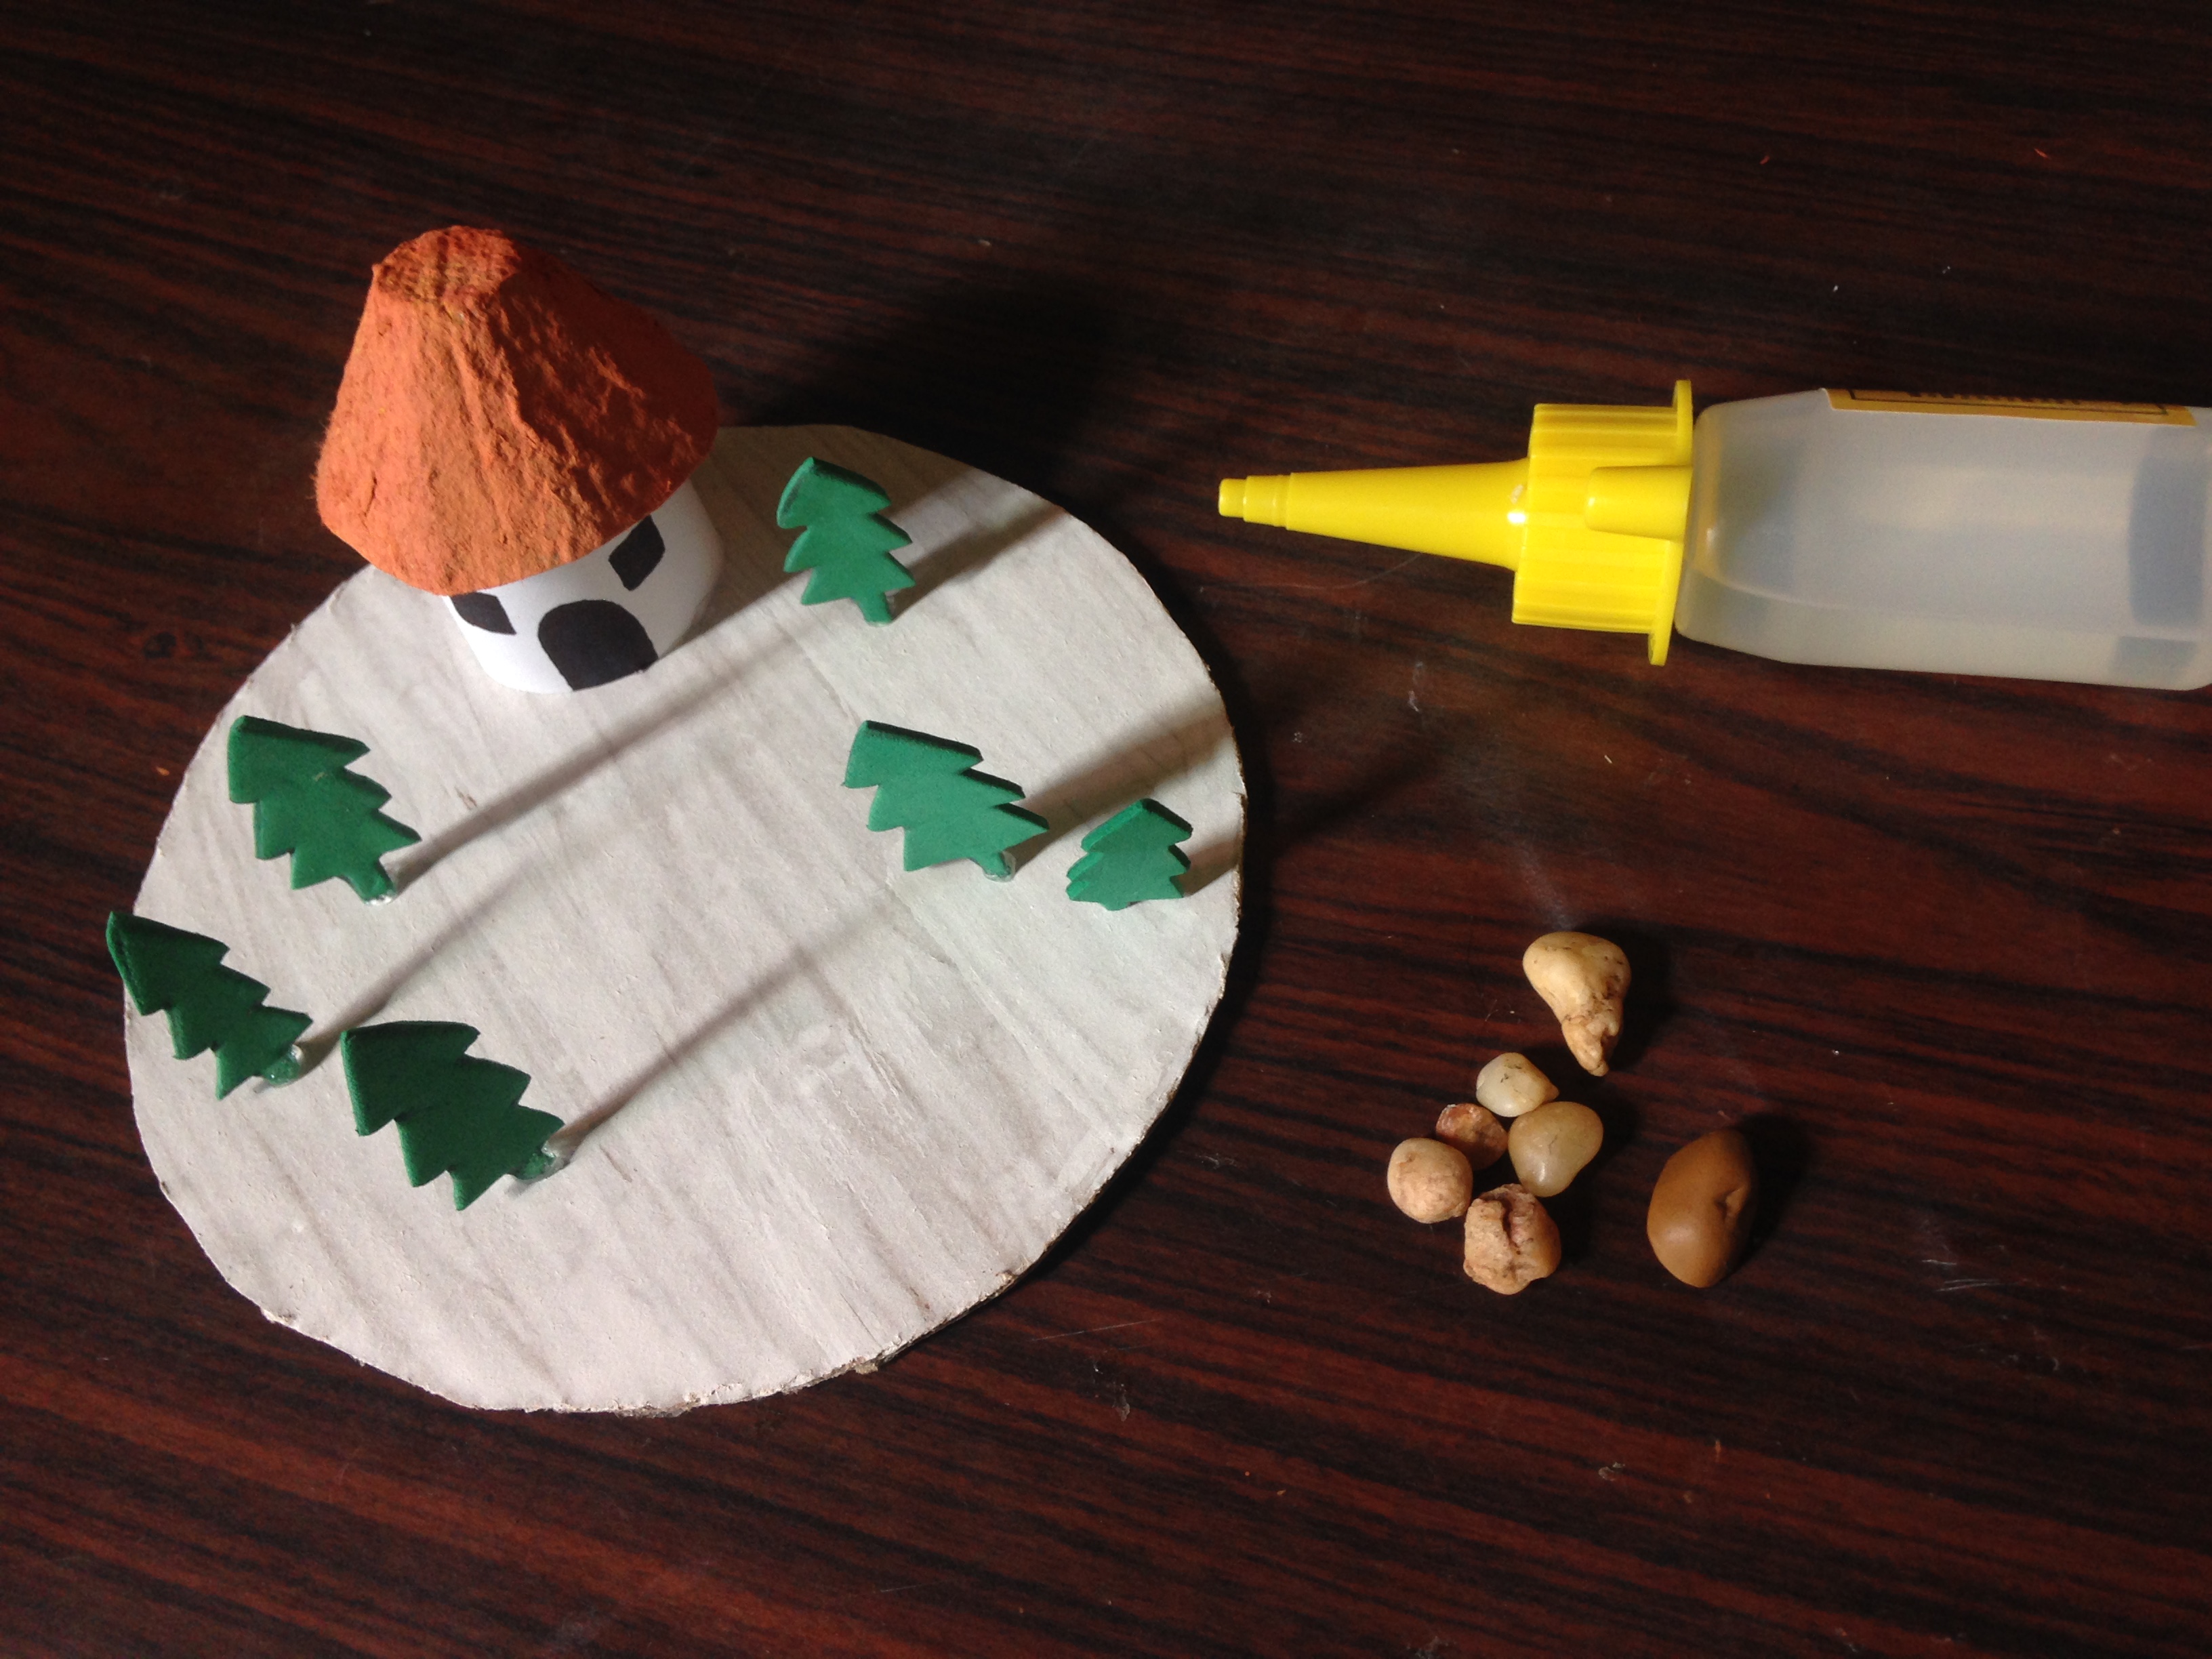
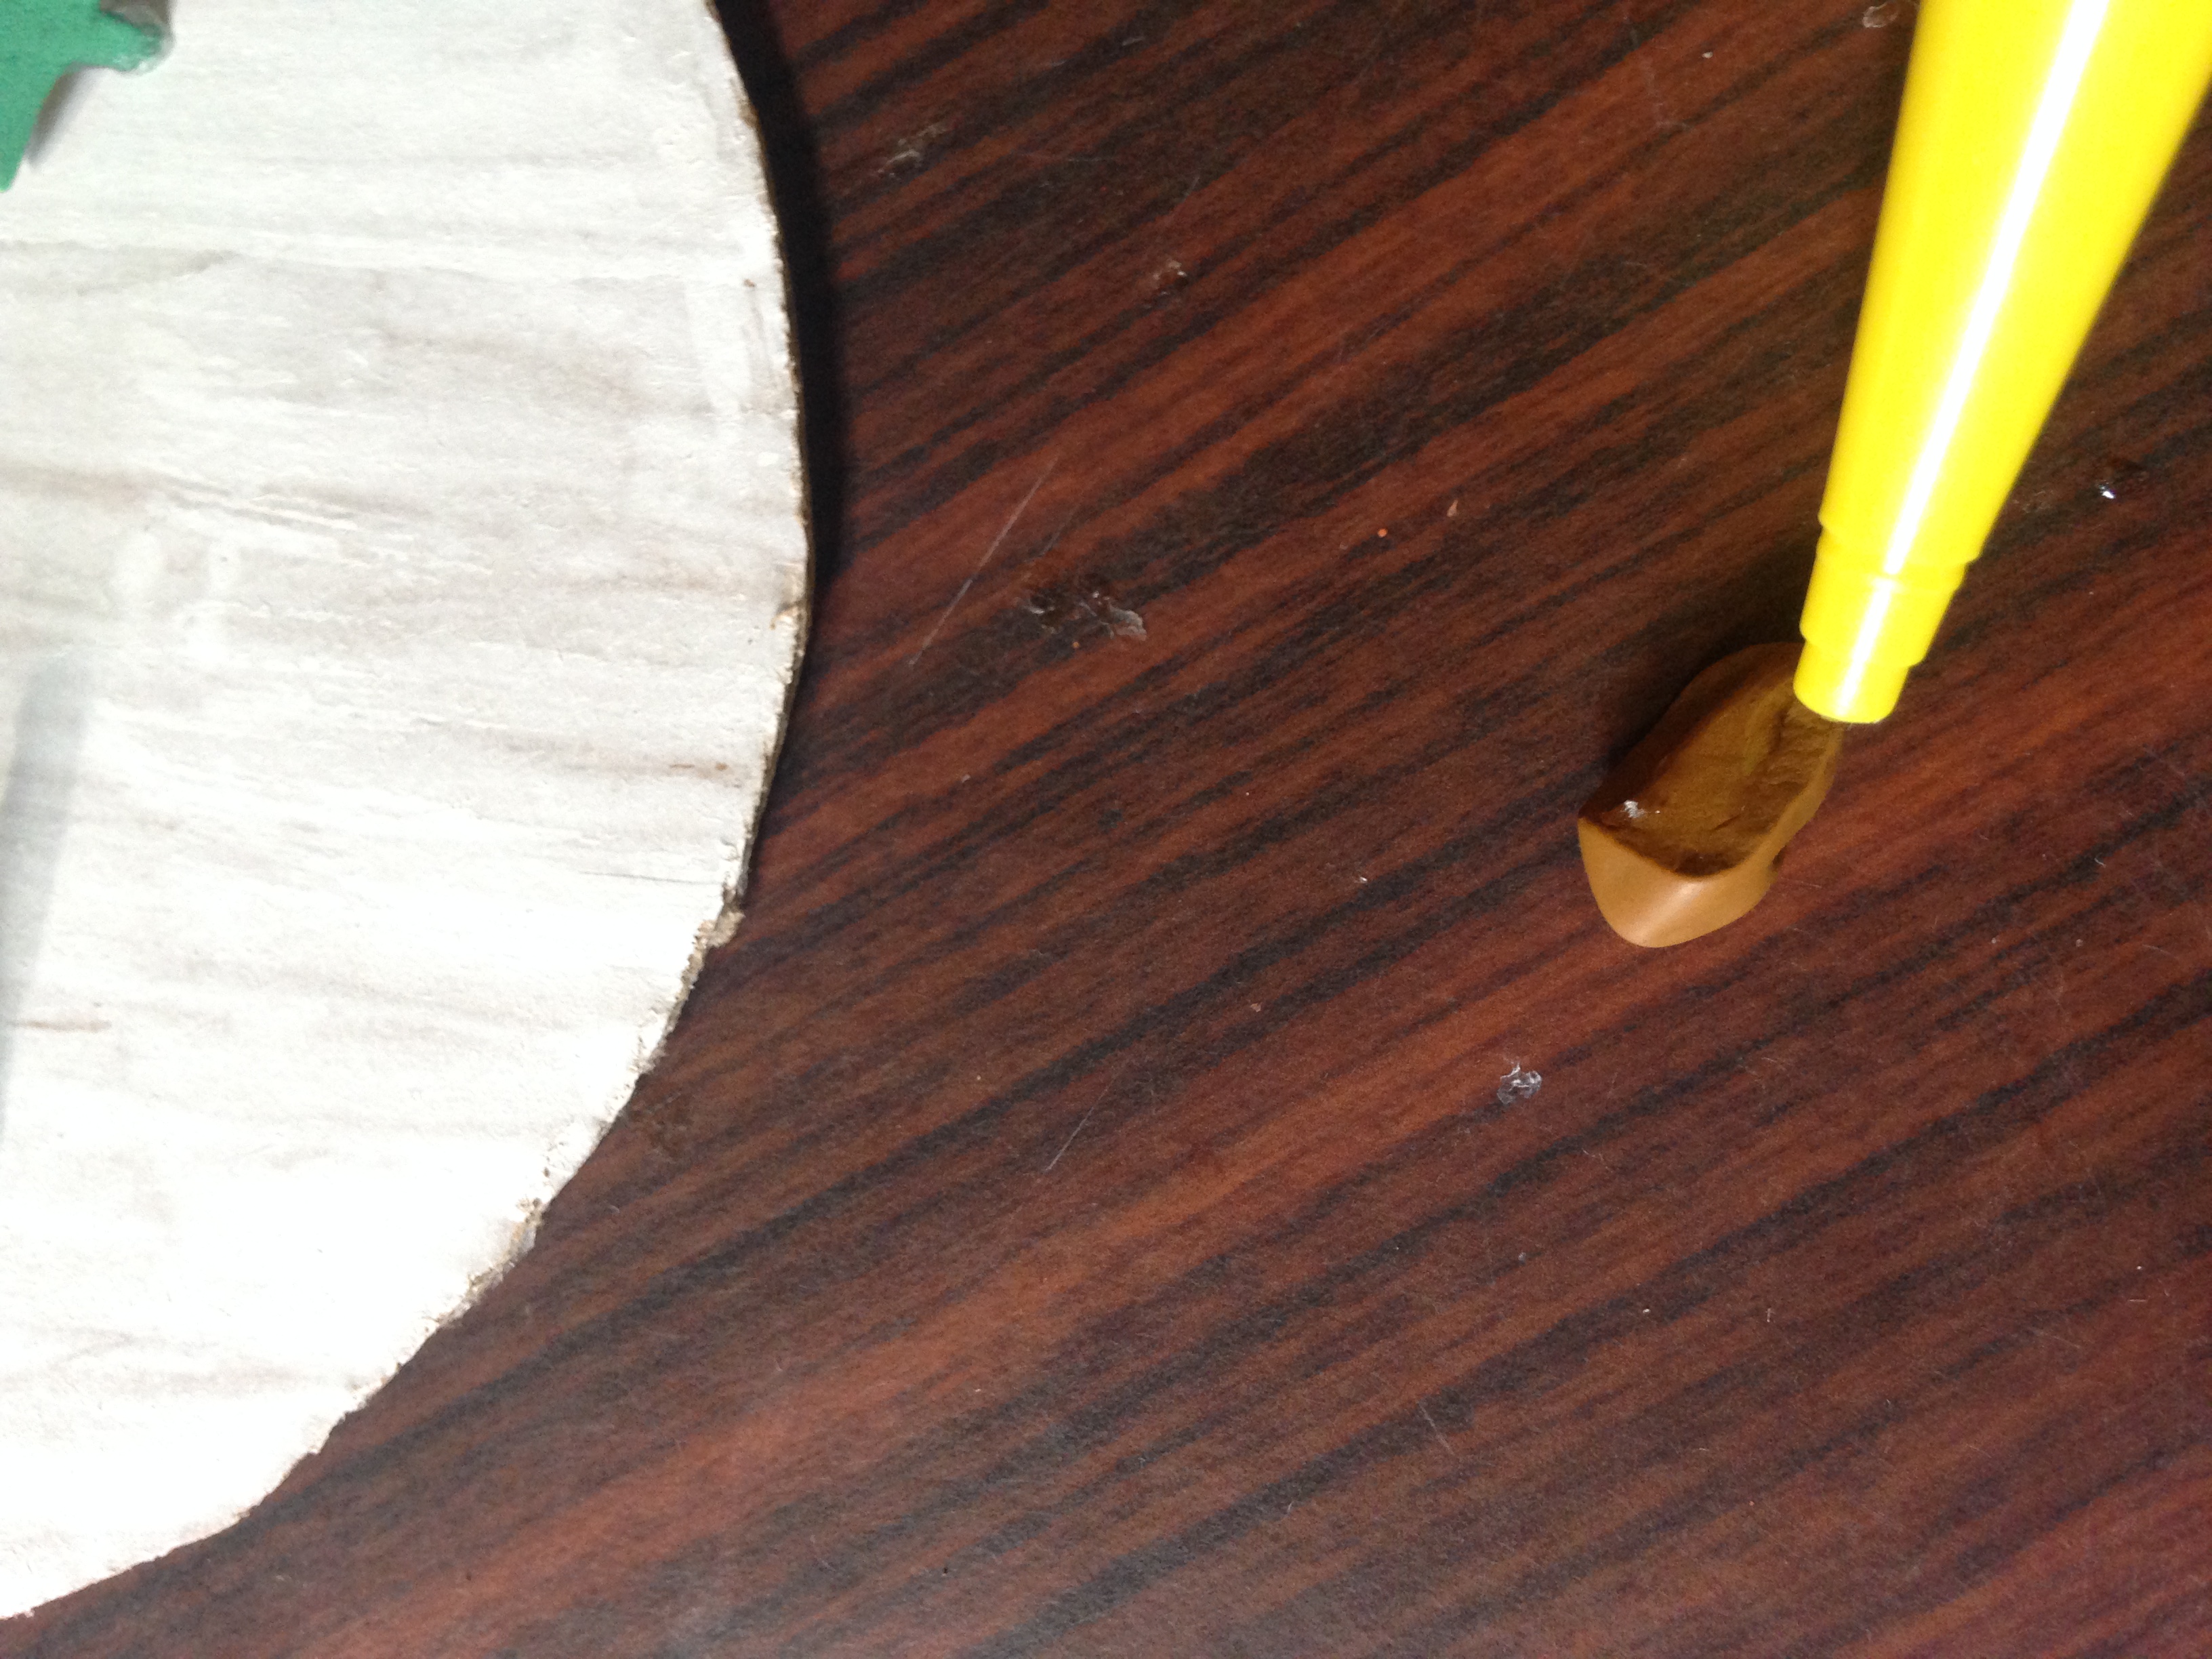
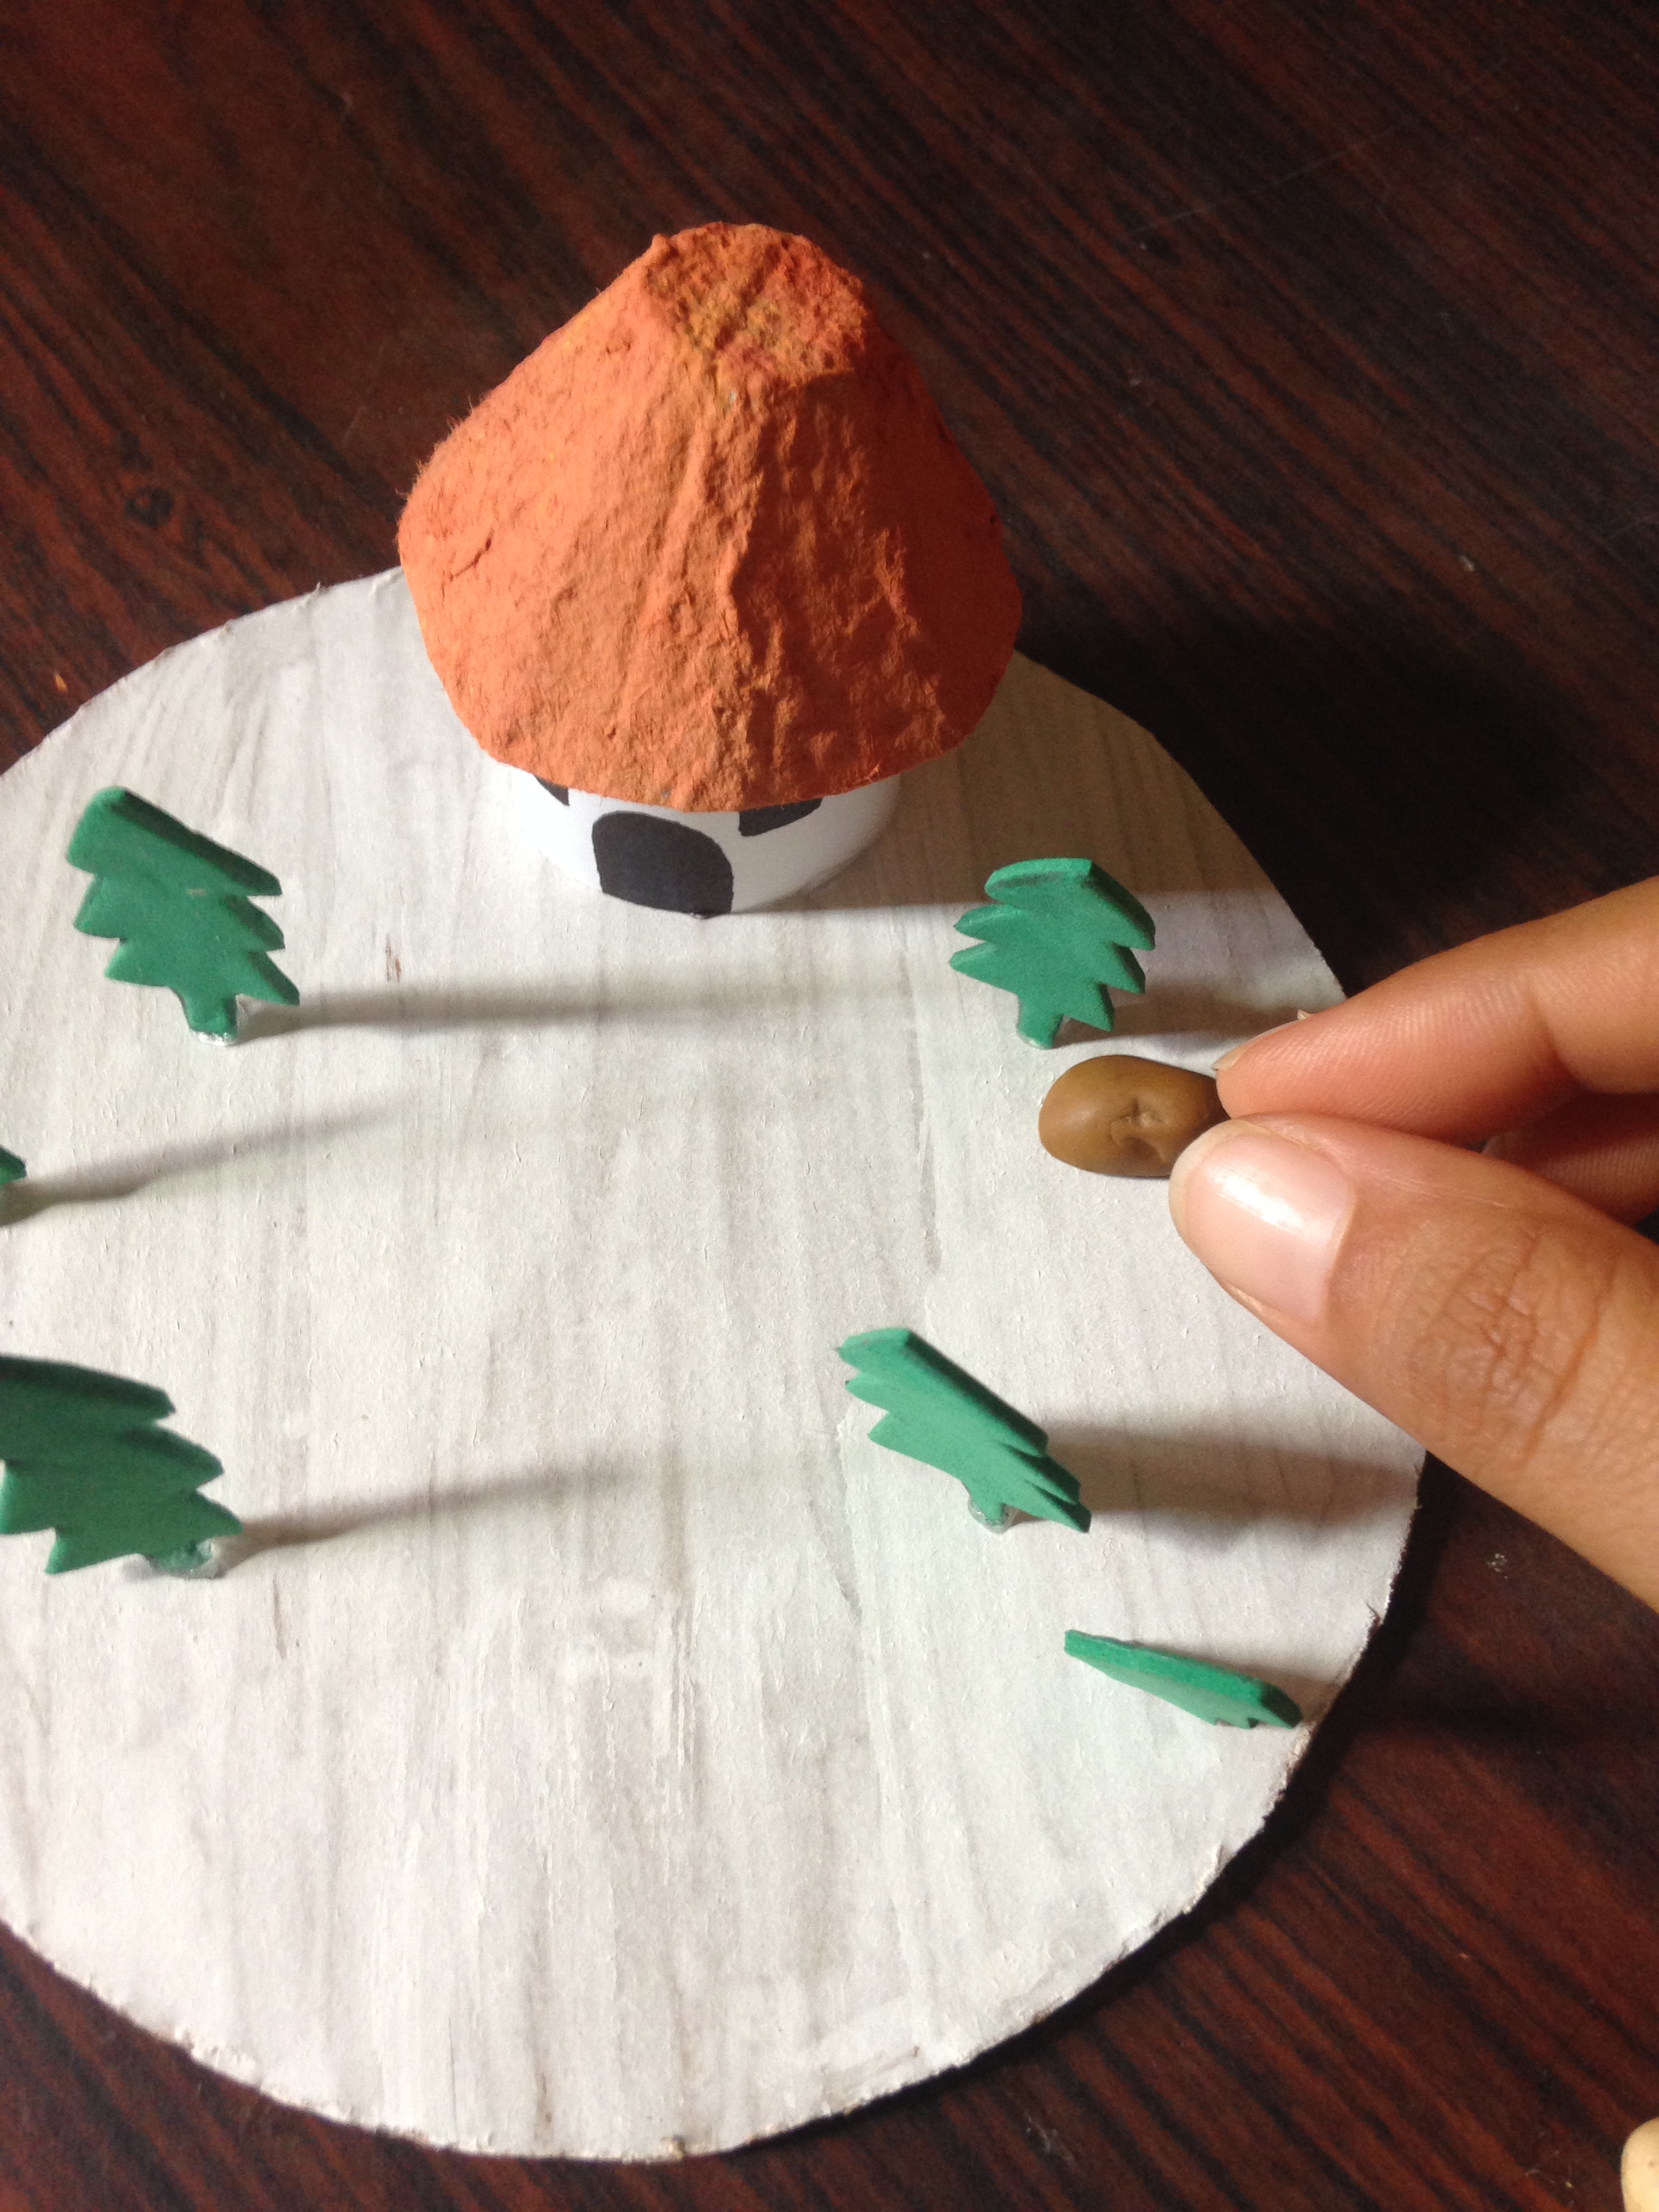
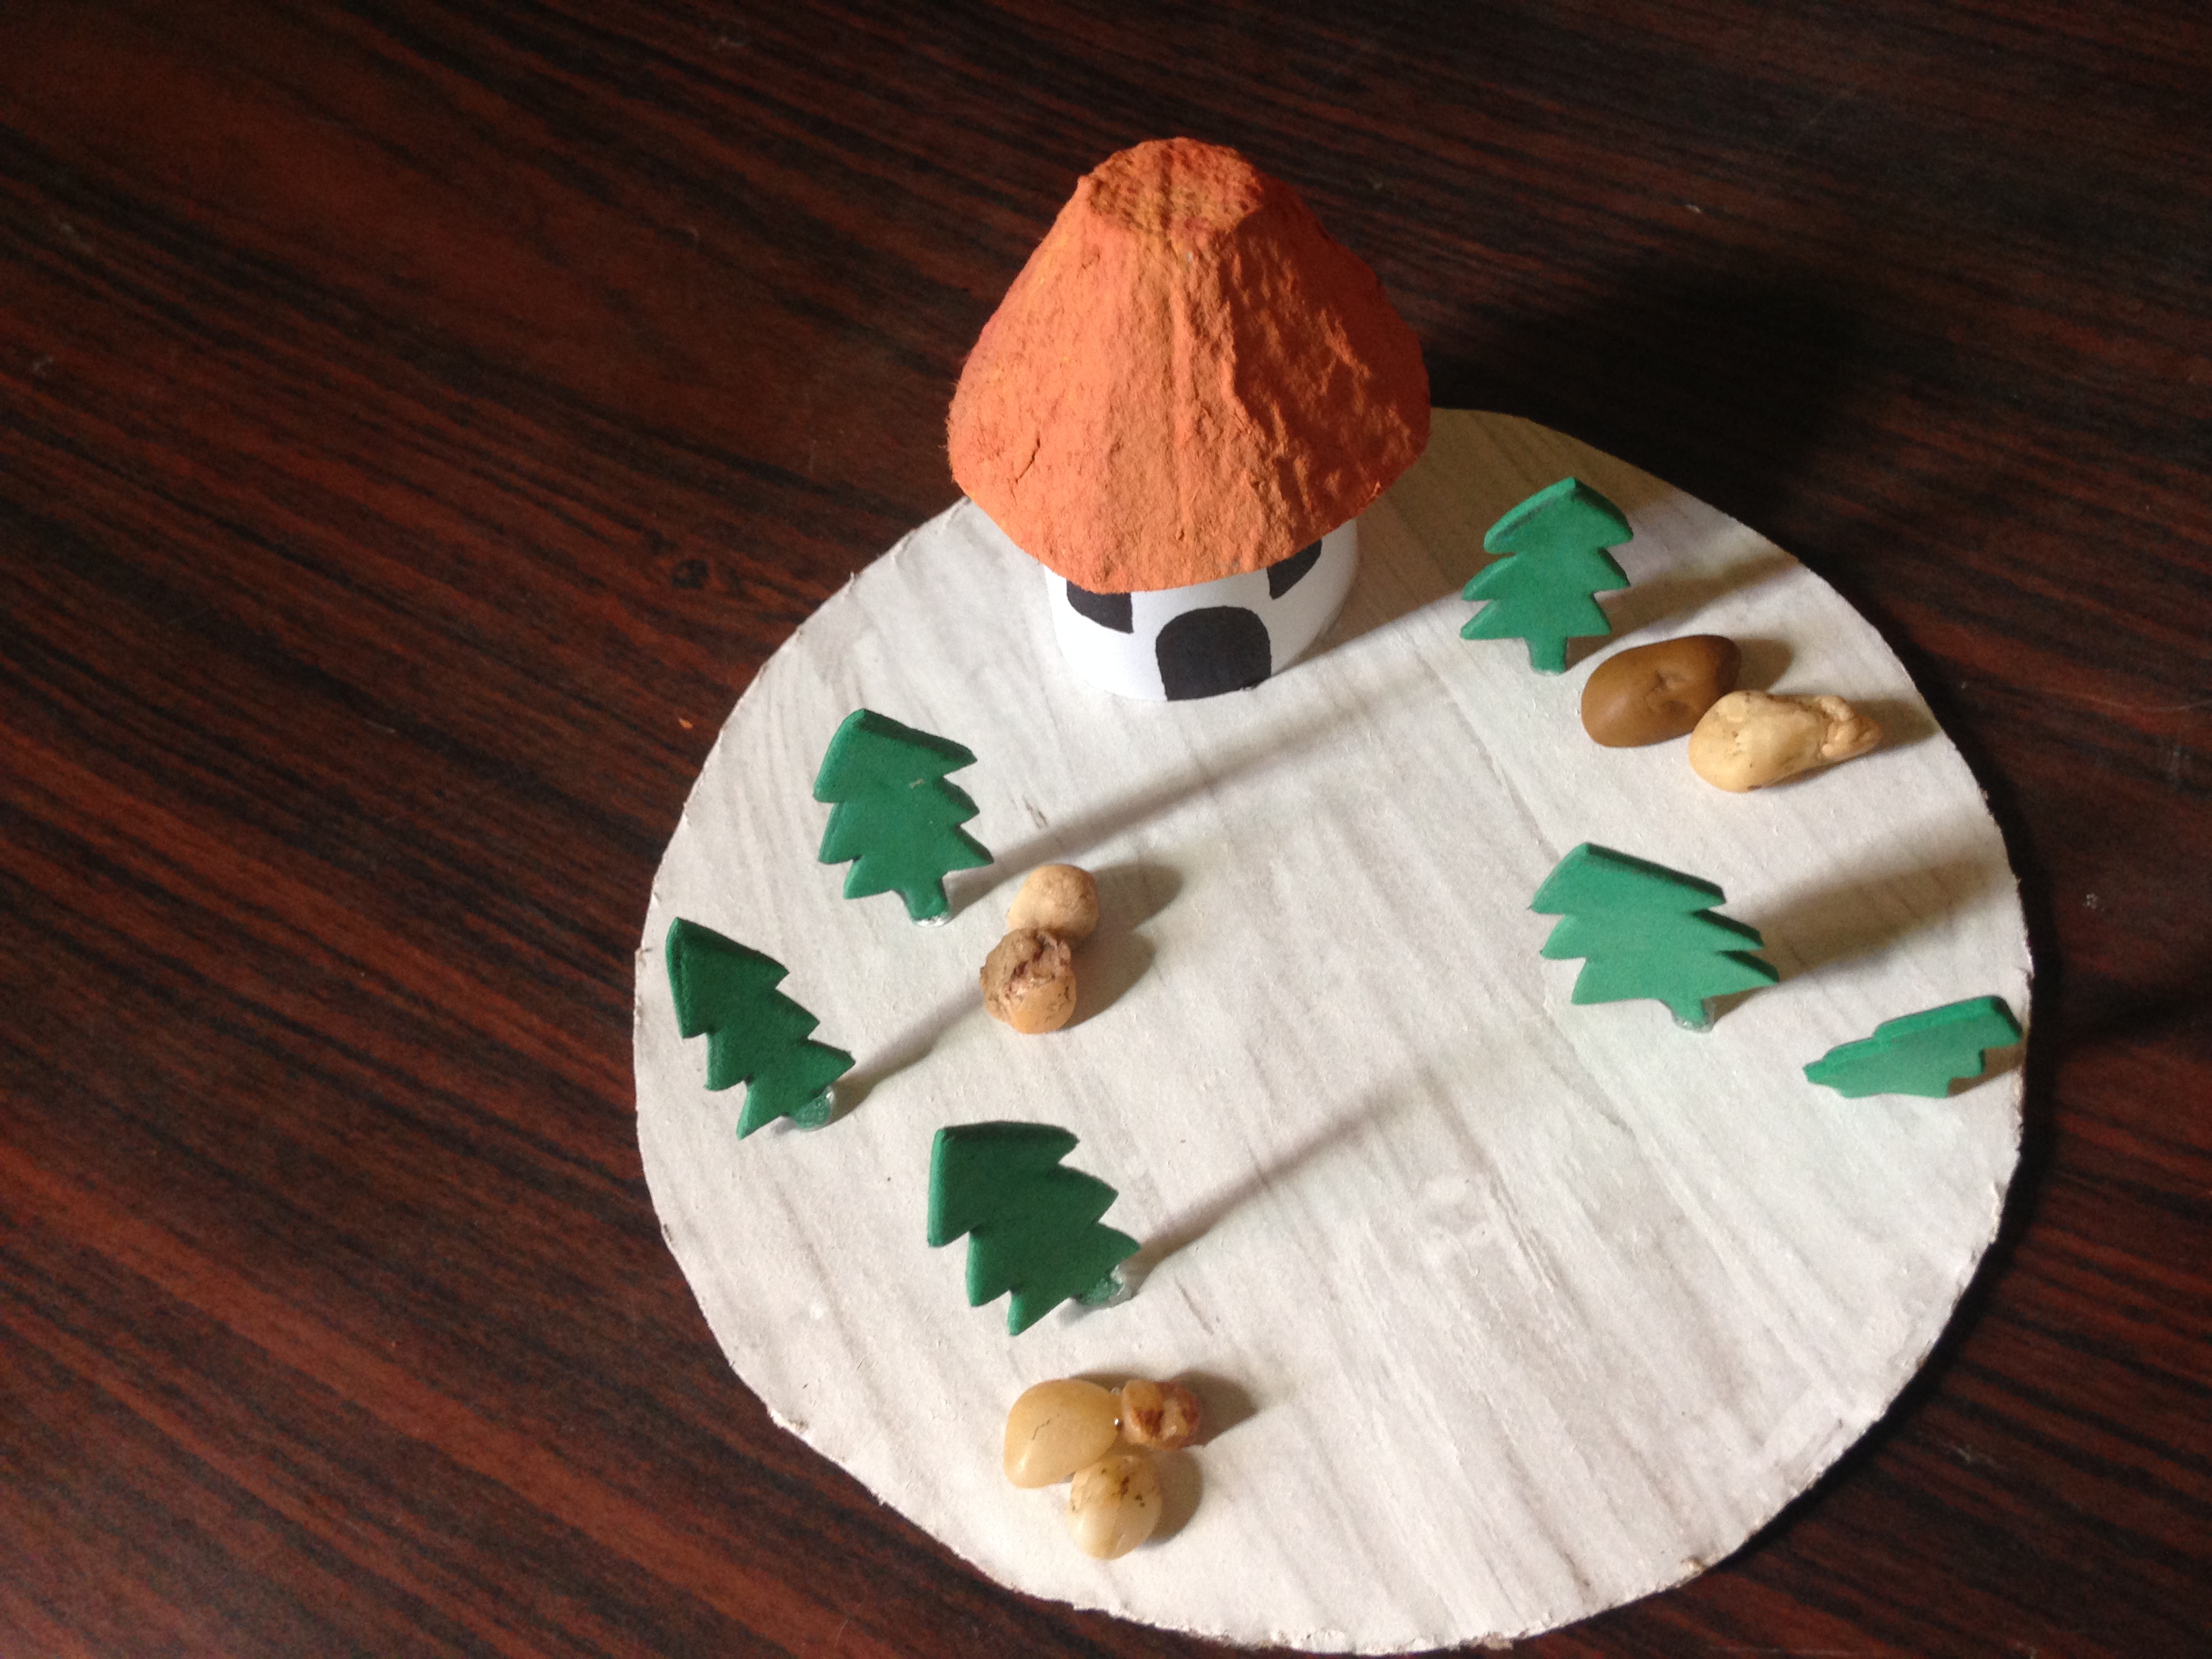
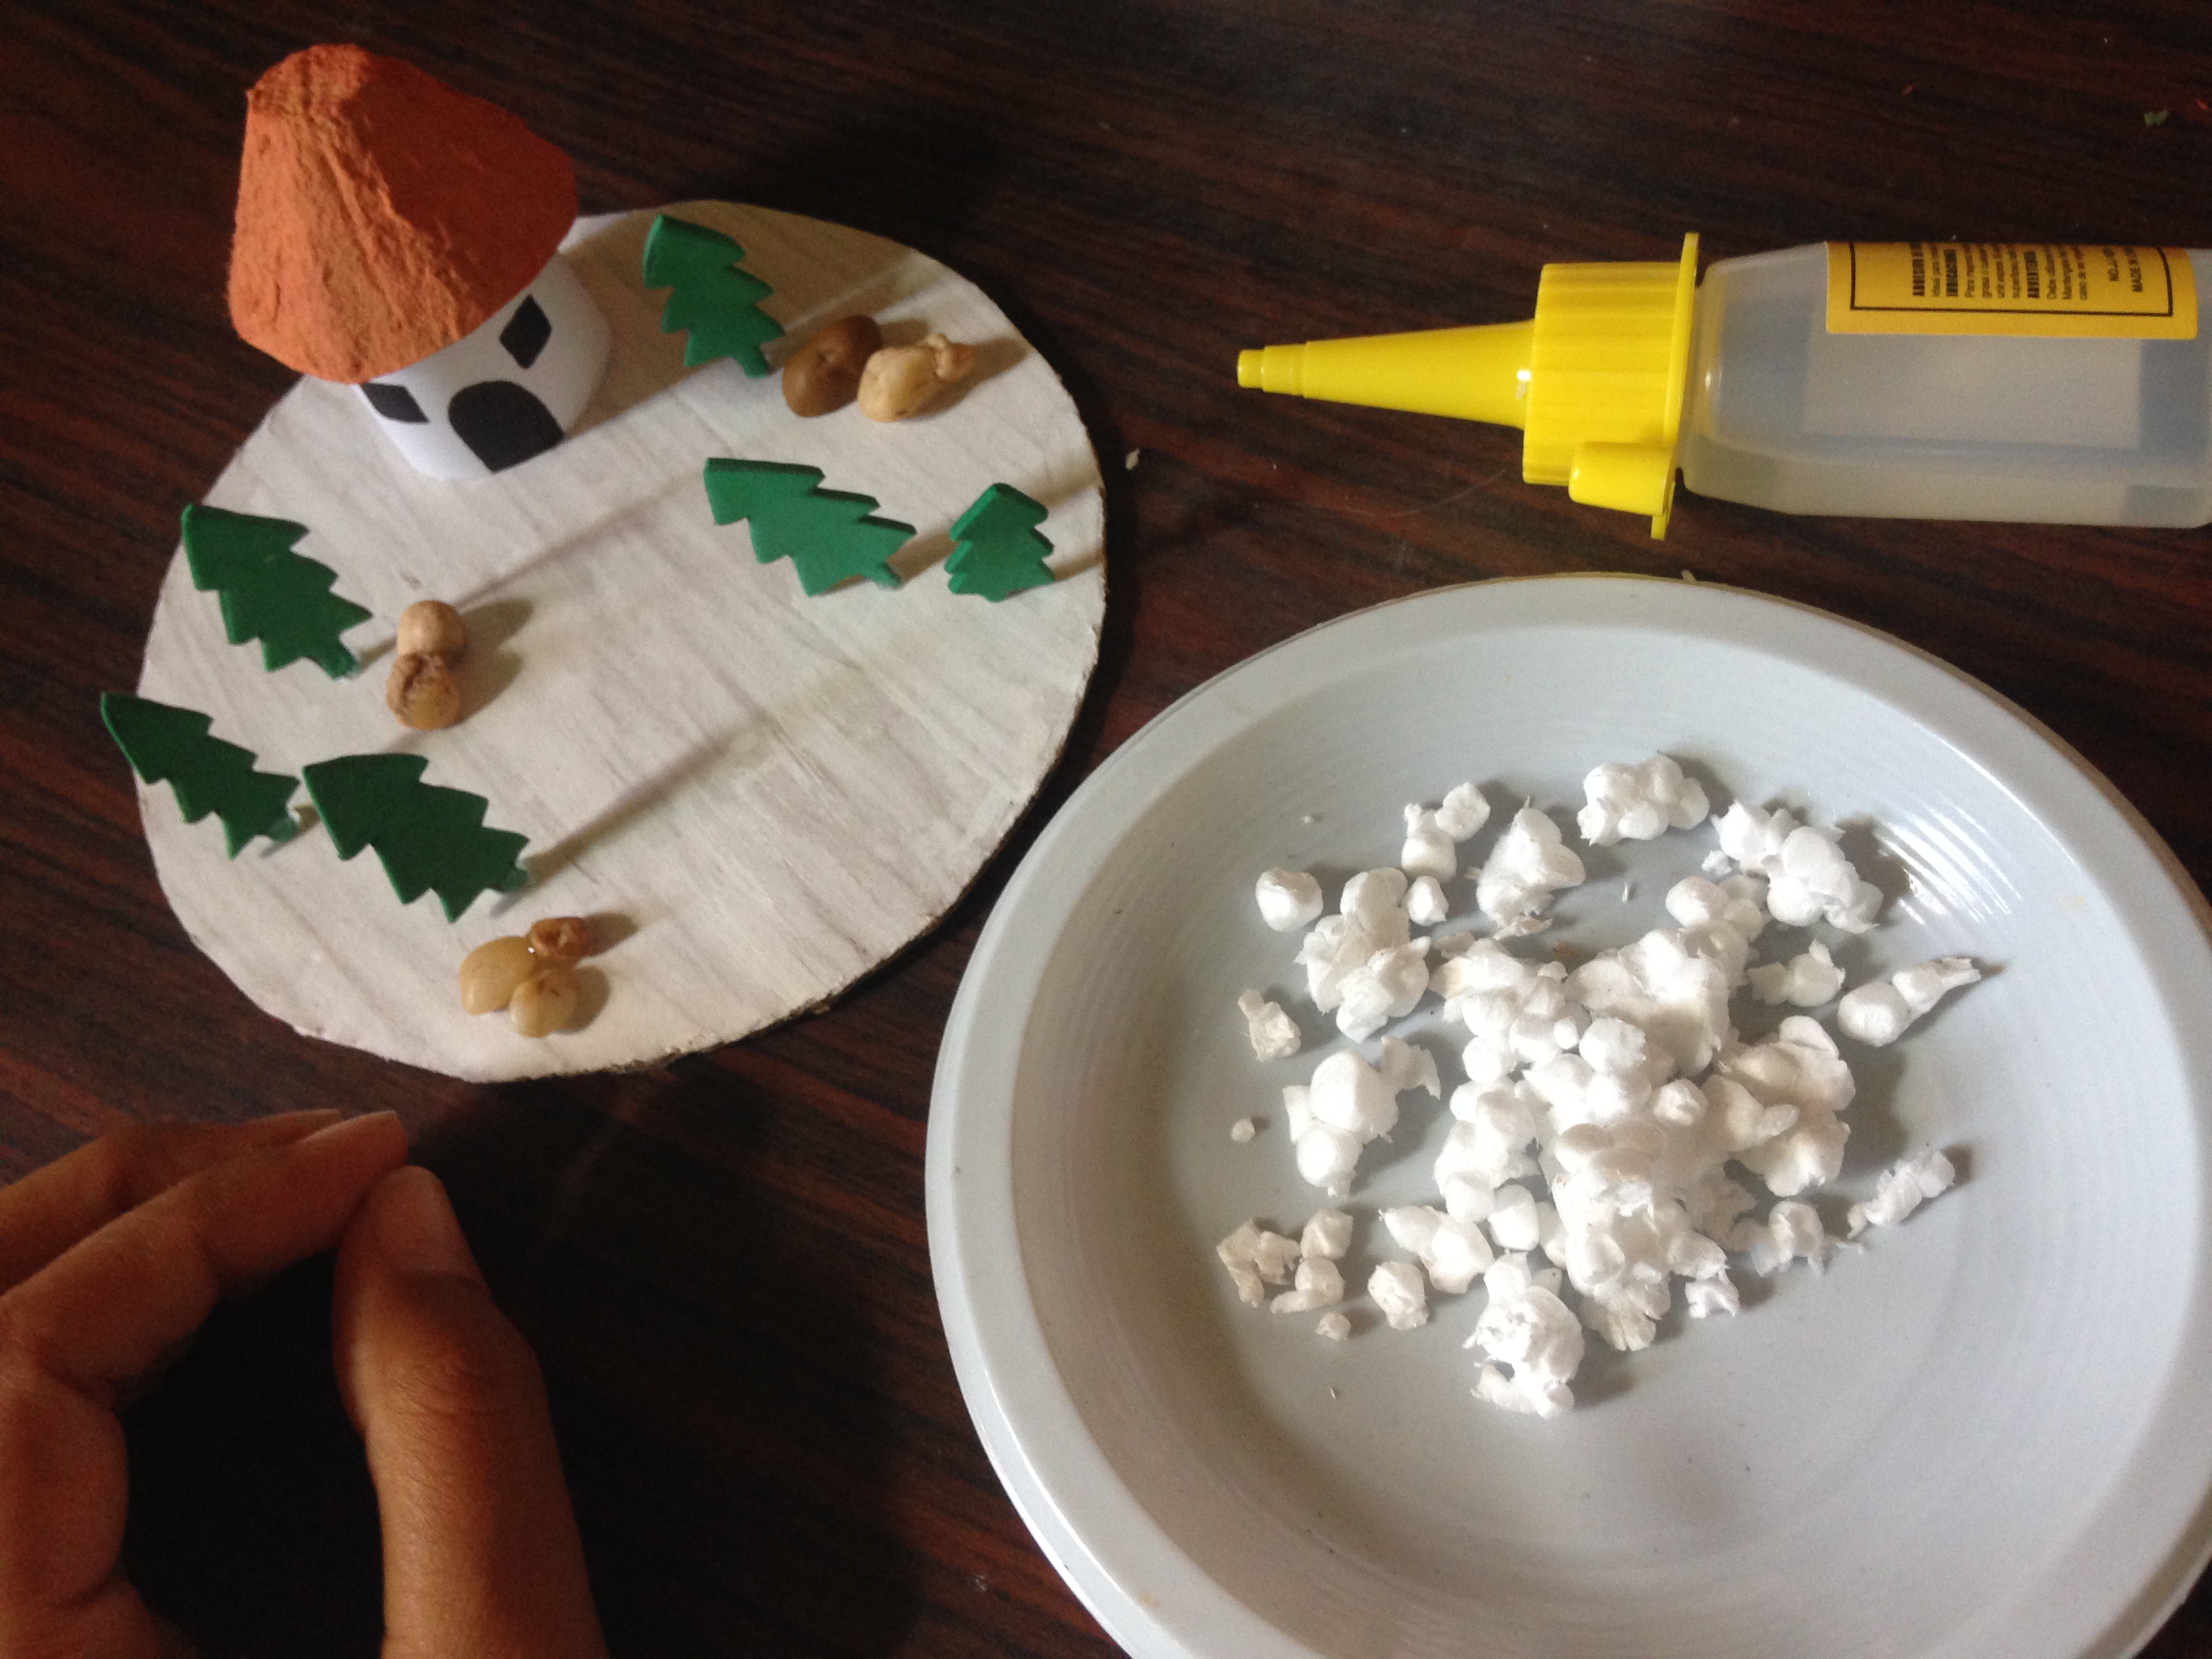
Paso 4
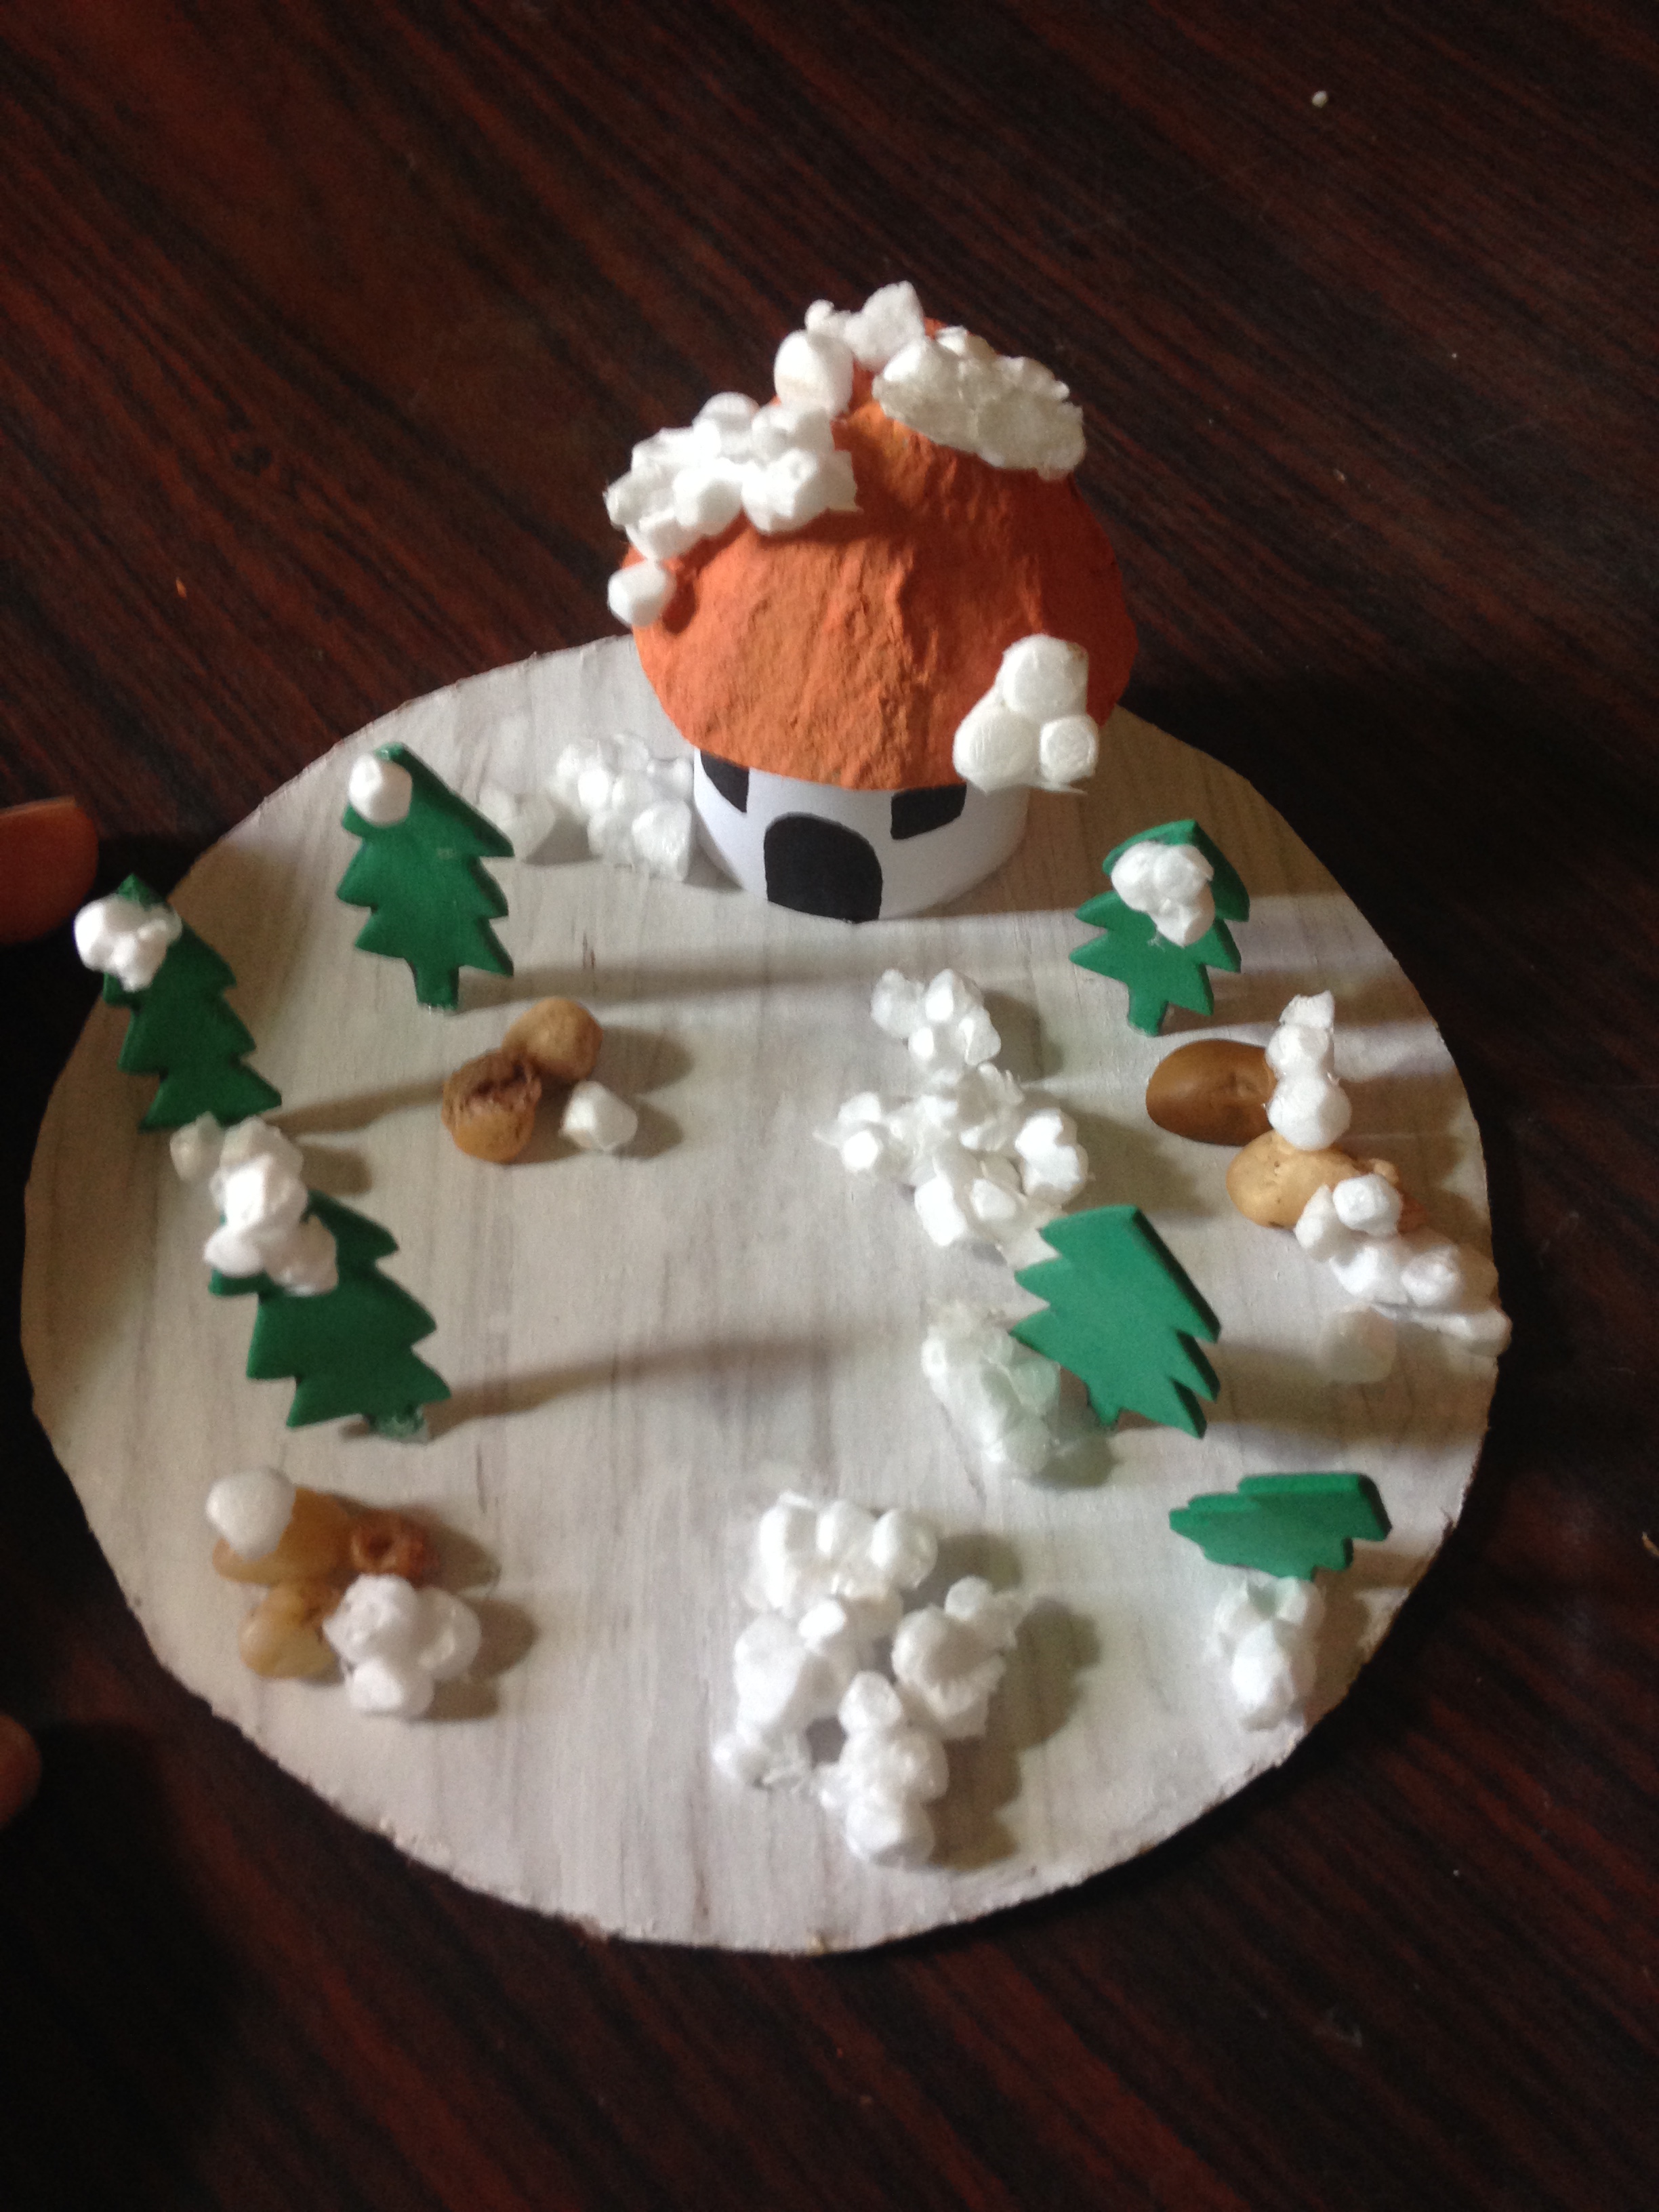
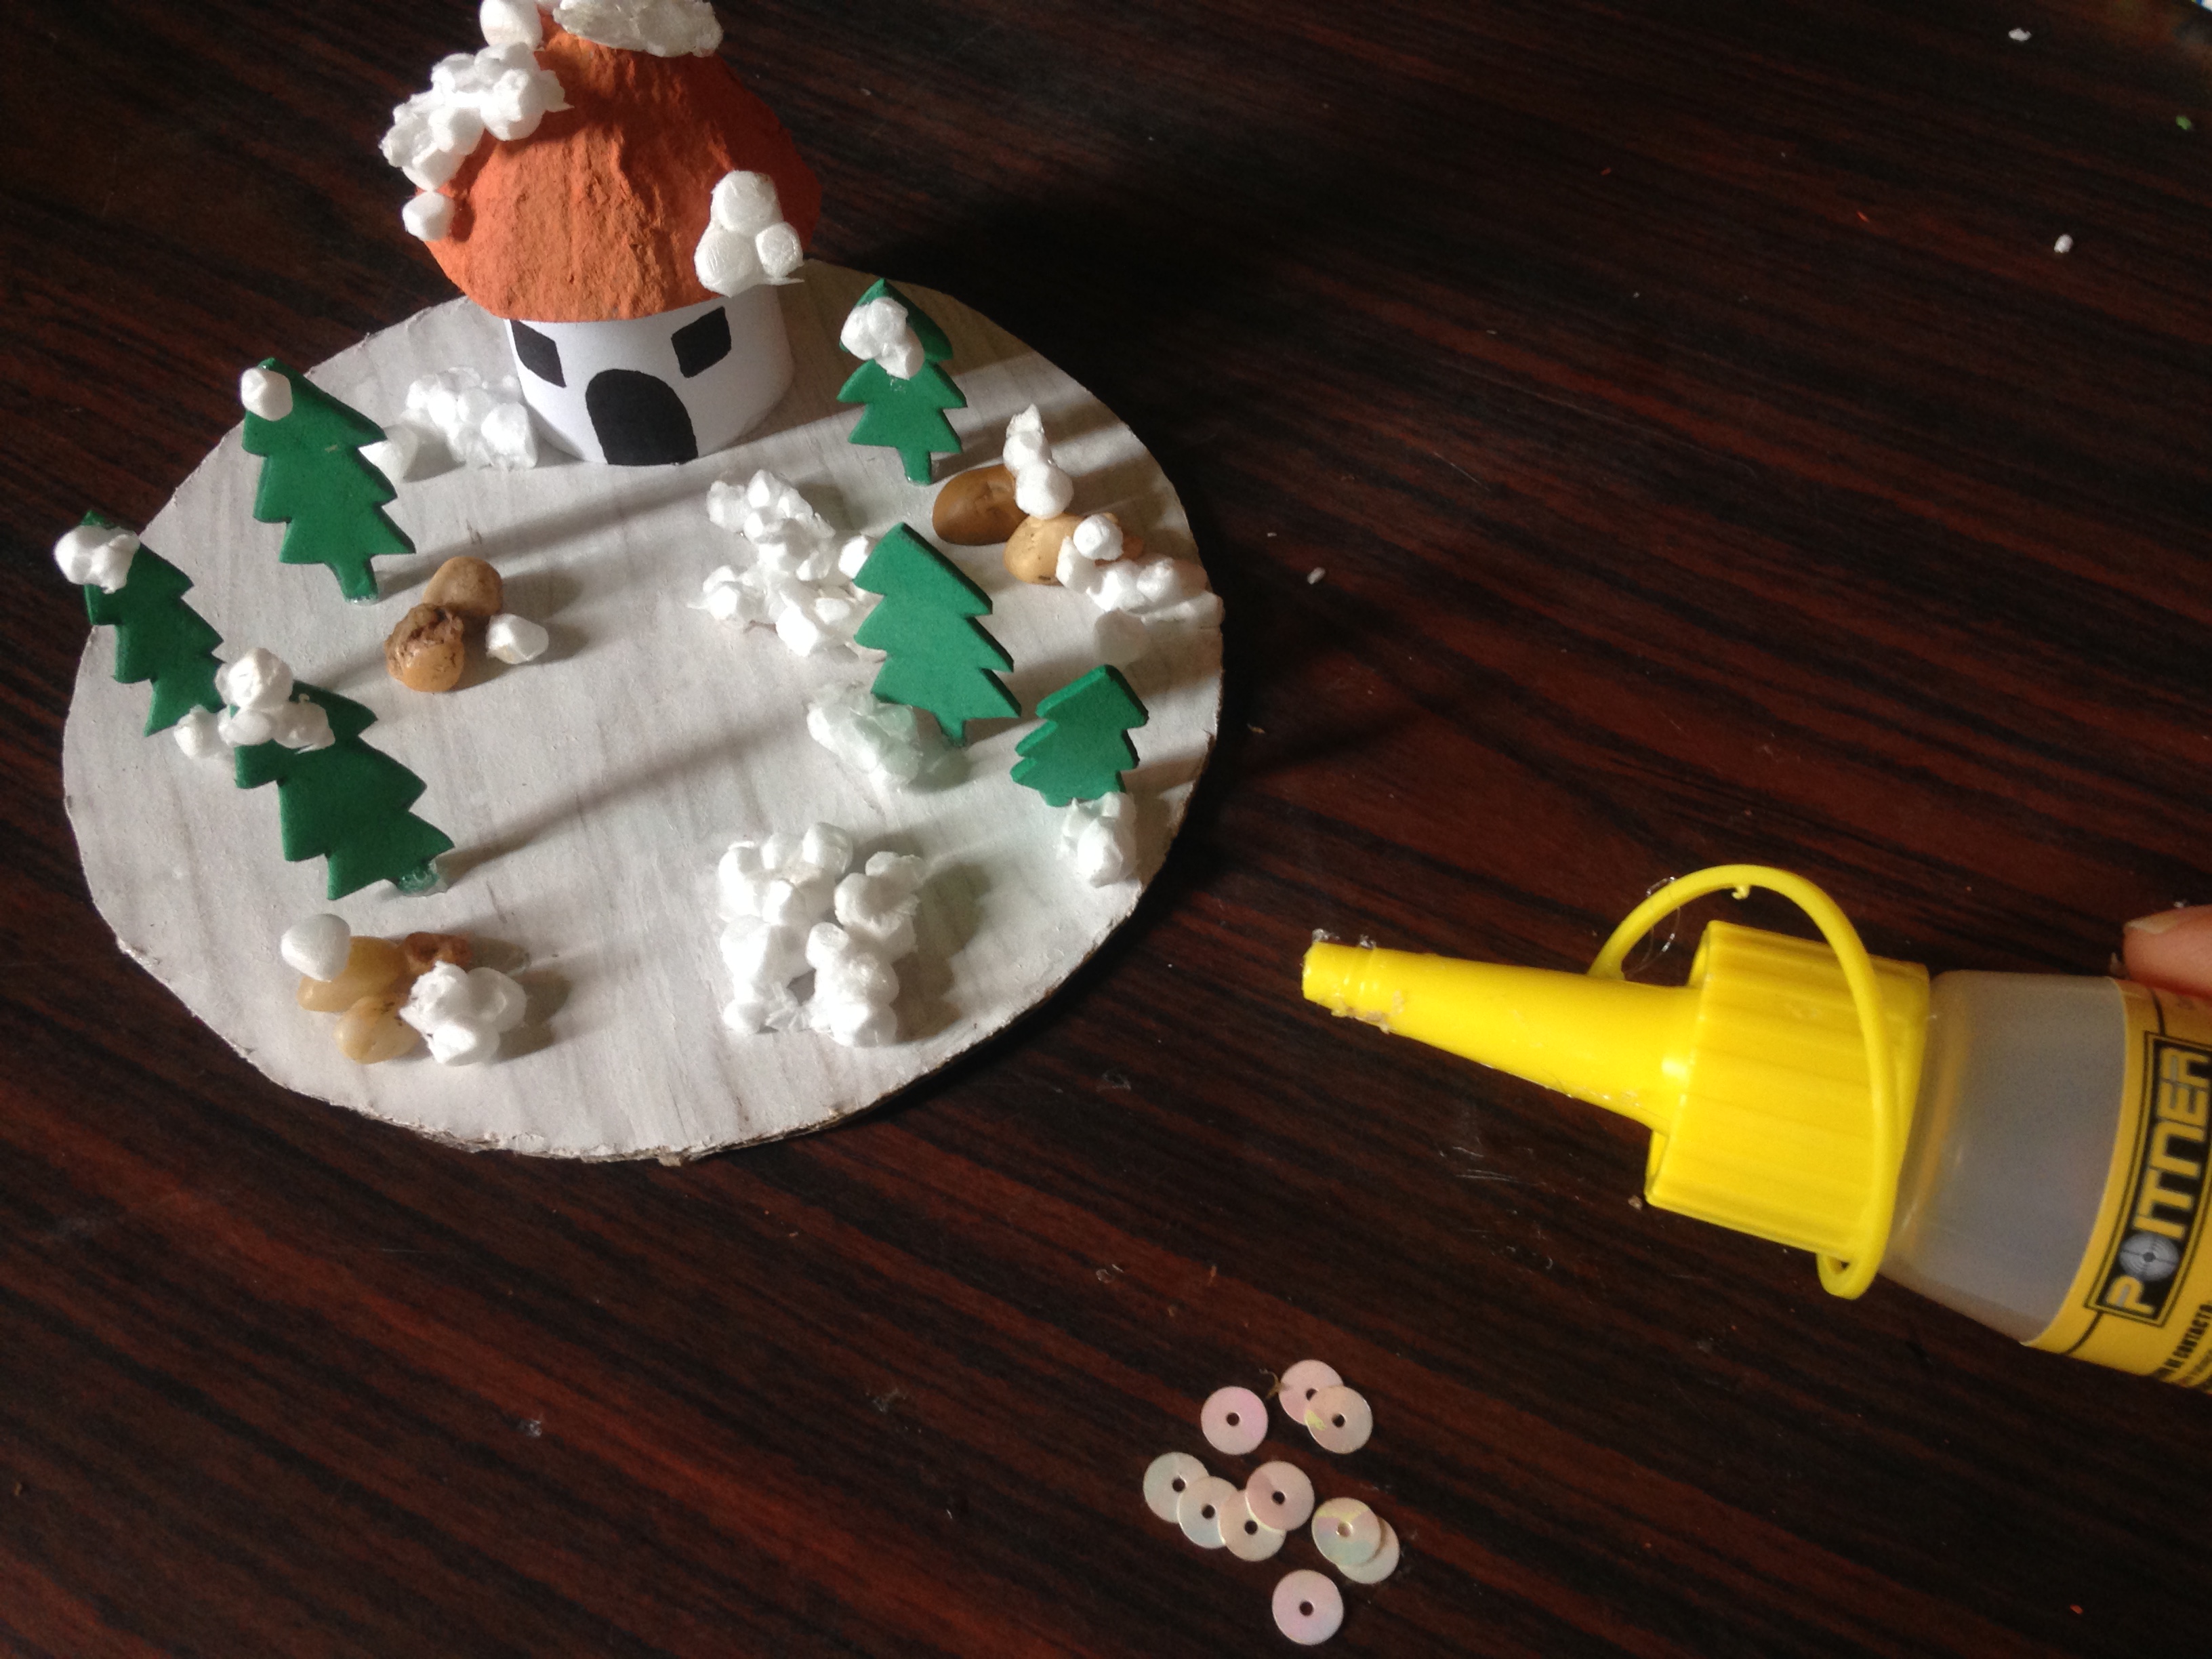
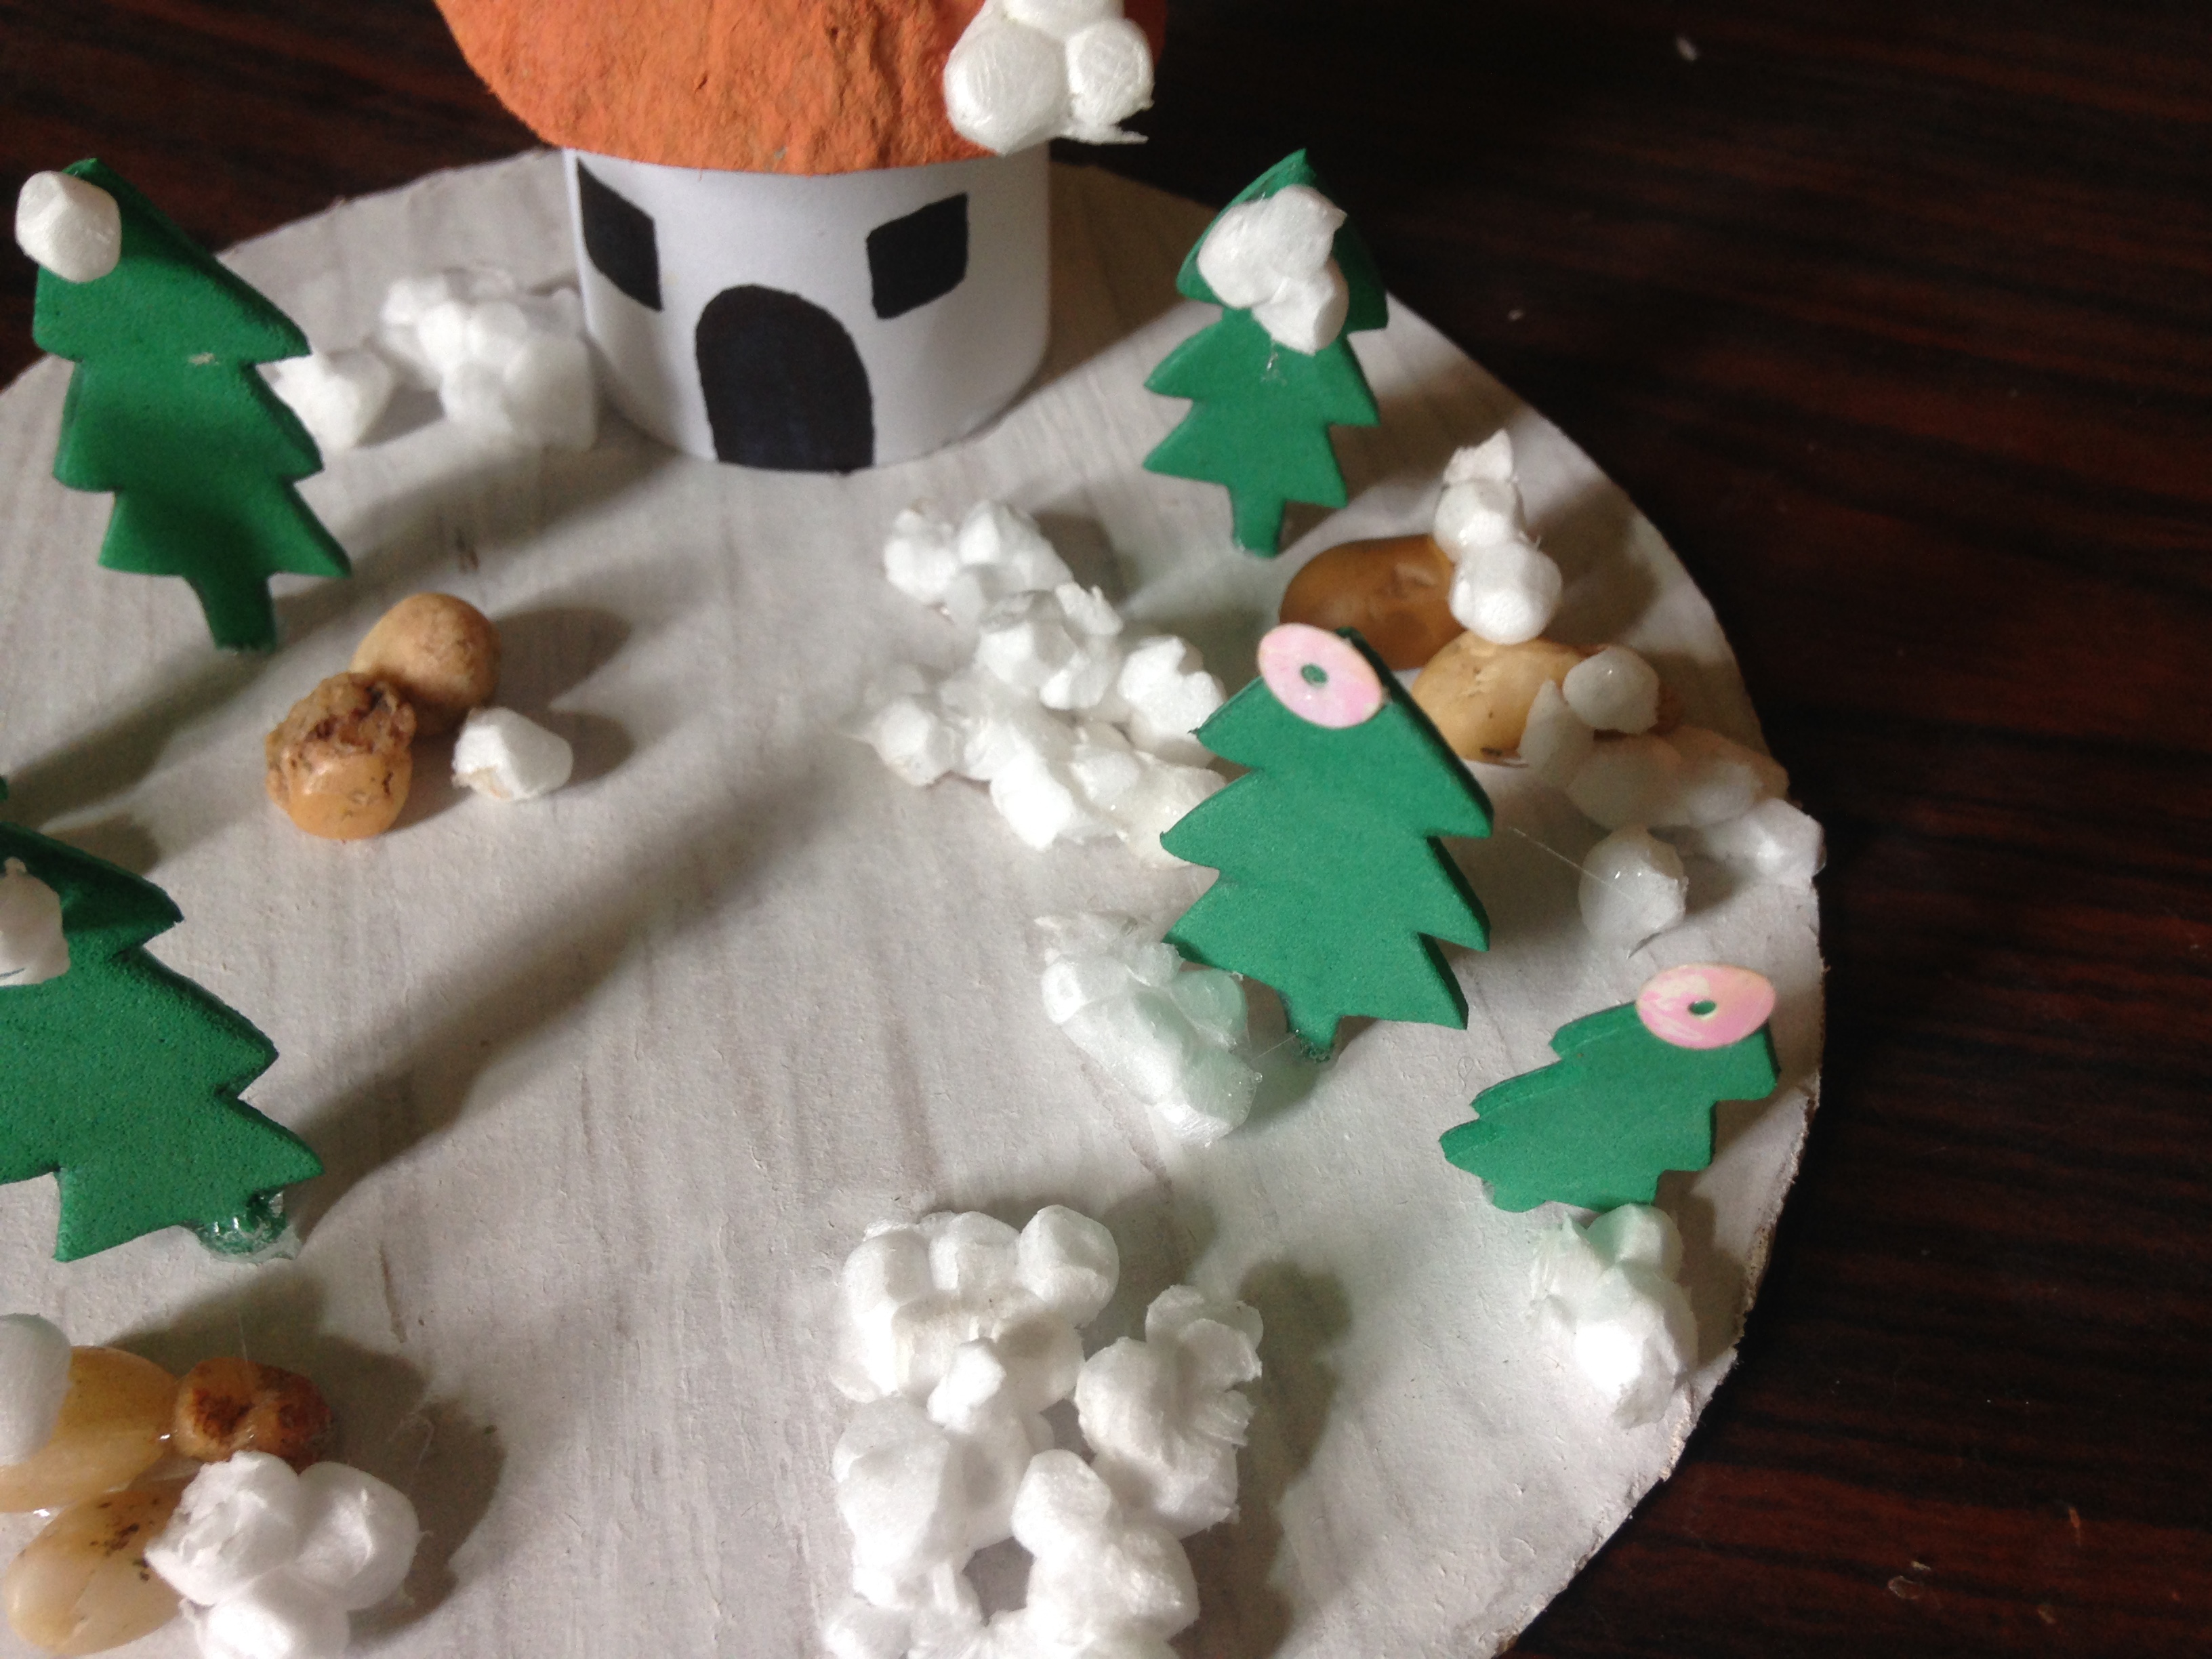
En los retazos de foamy verde vamos a dibujar unos pinos, yo hice 6 pero si quieres hacer mas ya queda a su preferencia, luego de recortarlos los pegaremos en la base de cartón redonda, los pegaremos en distantes partes, posteriormente tomaremos nuestras piedras pequeñas y también las pegaremos por toda nuestra base
Step 4
In the pieces of green foamy we are going to draw some pines, I made 6 but if you want to do more, it is already up to your preference, after cutting them we will glue them on the round cardboard base, we will glue them in distant parts, then we will take our small stones and we will also paste them all over our base

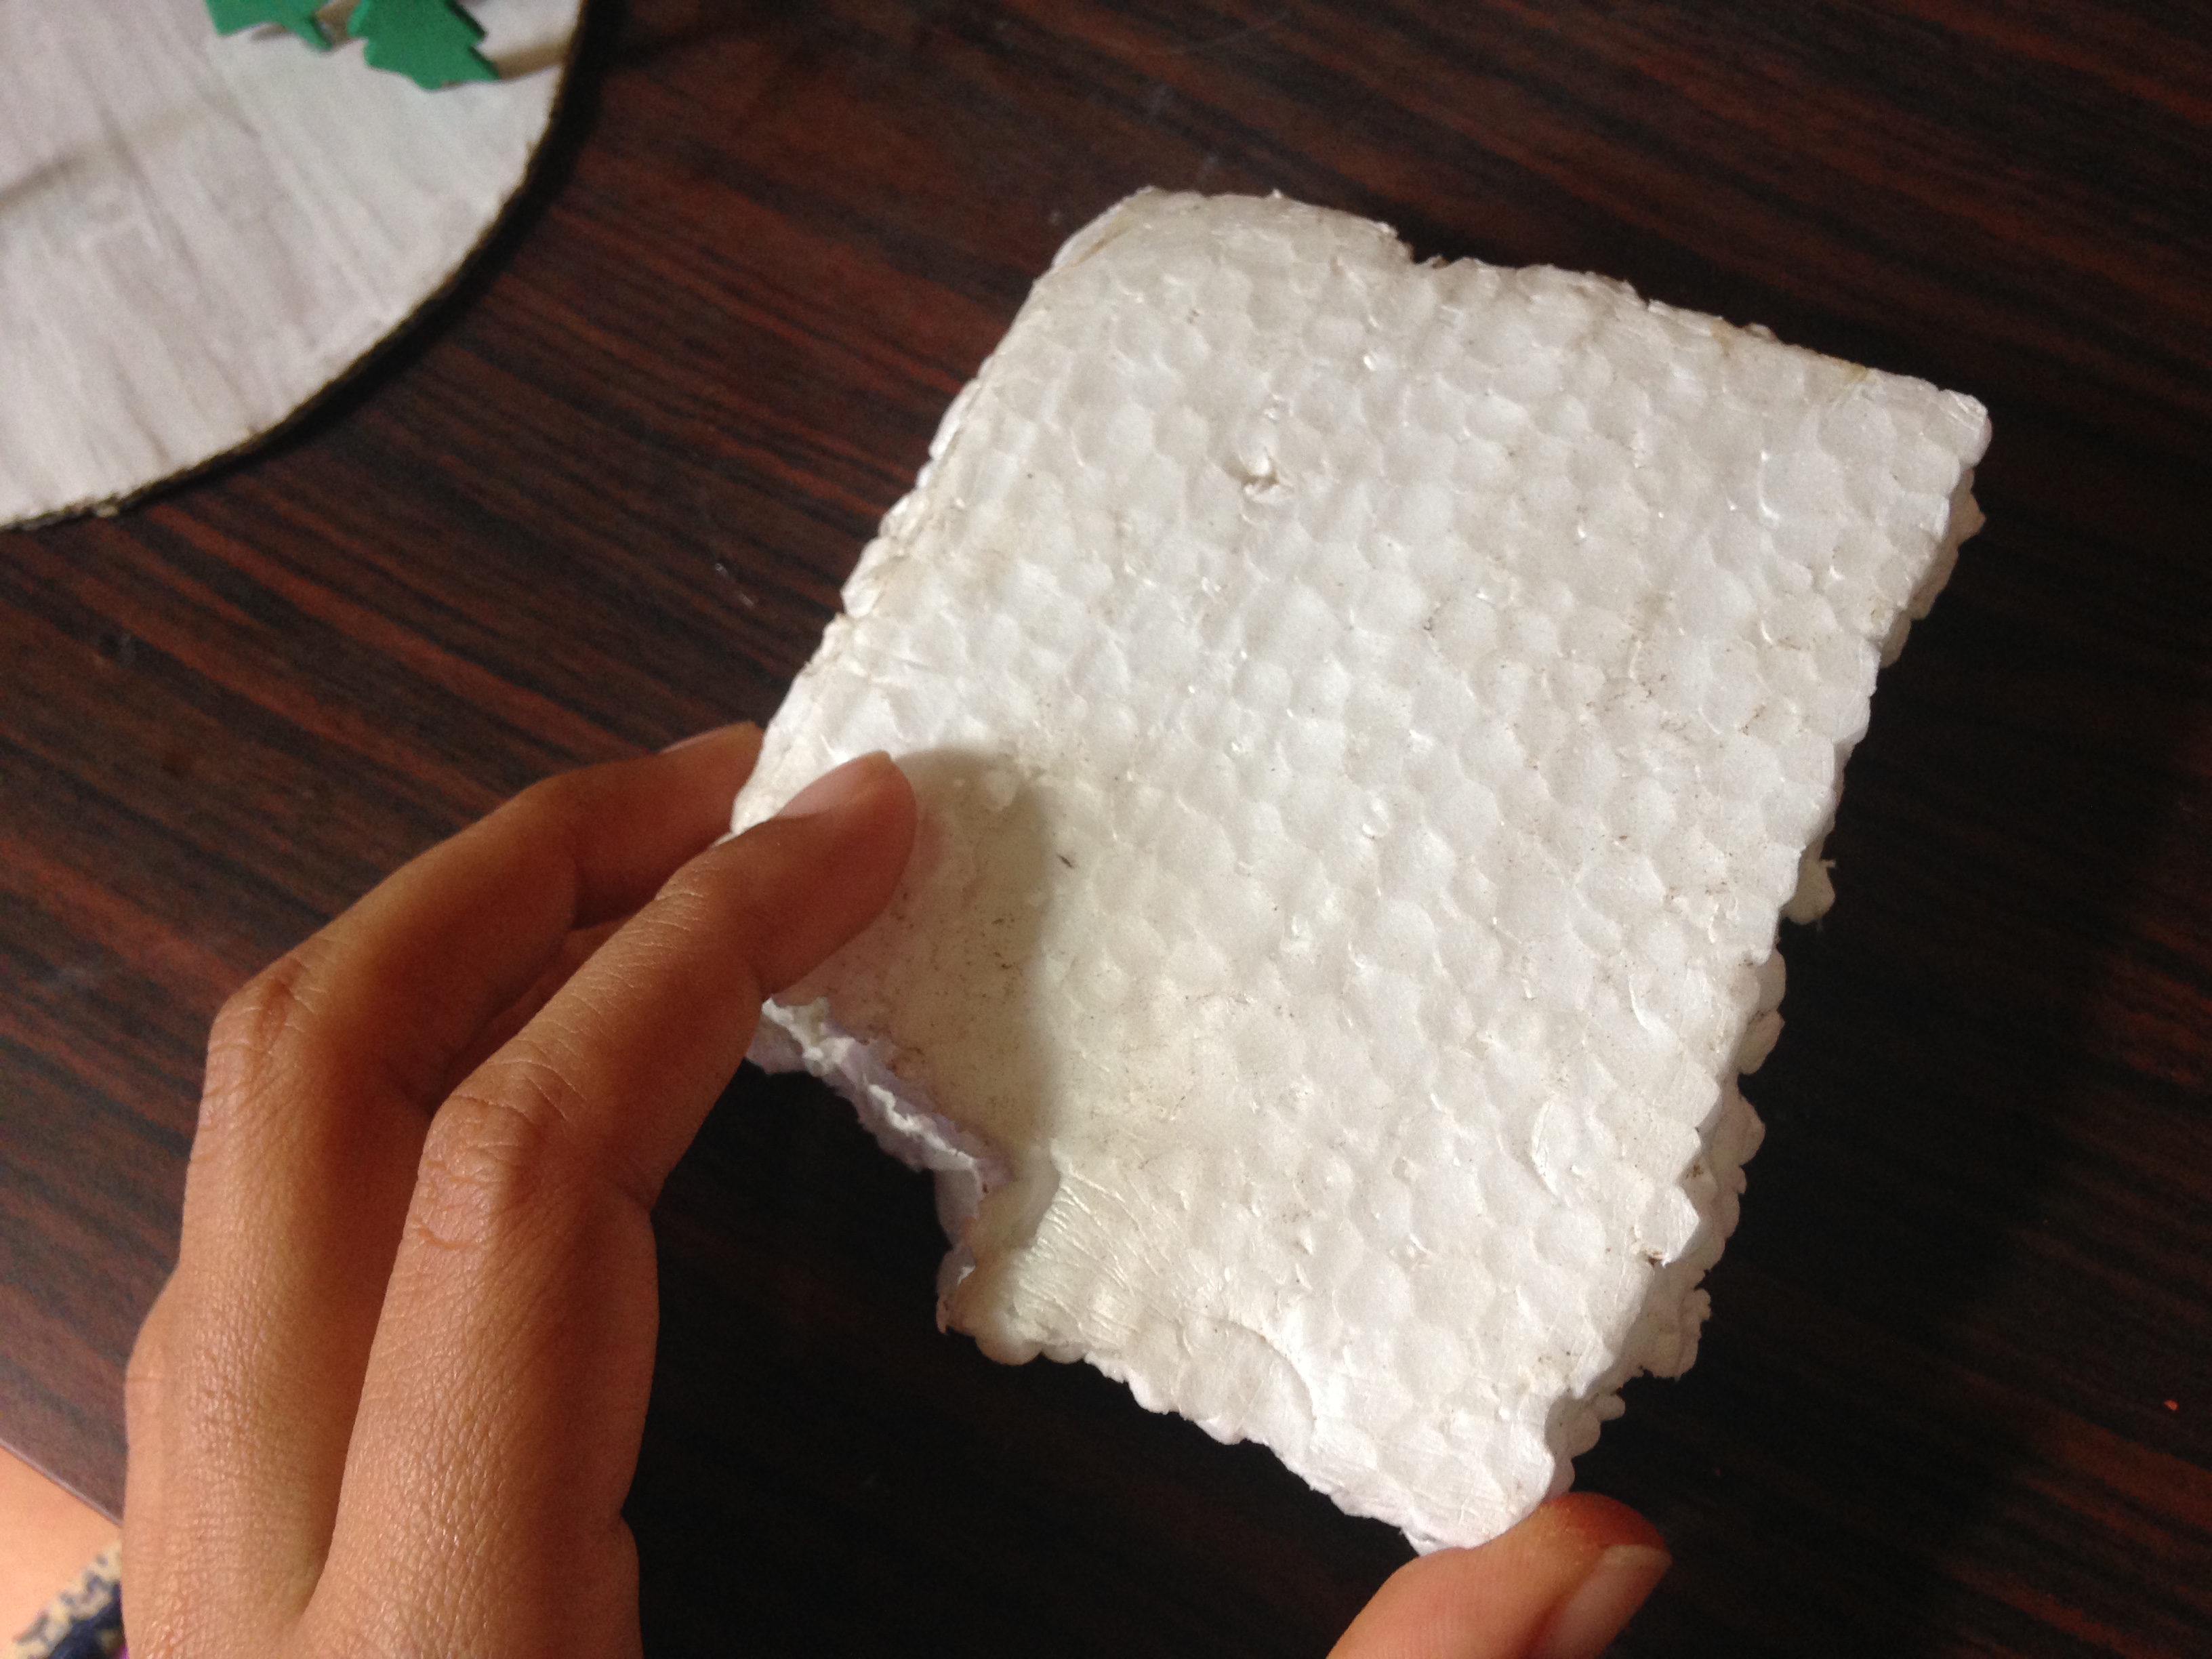
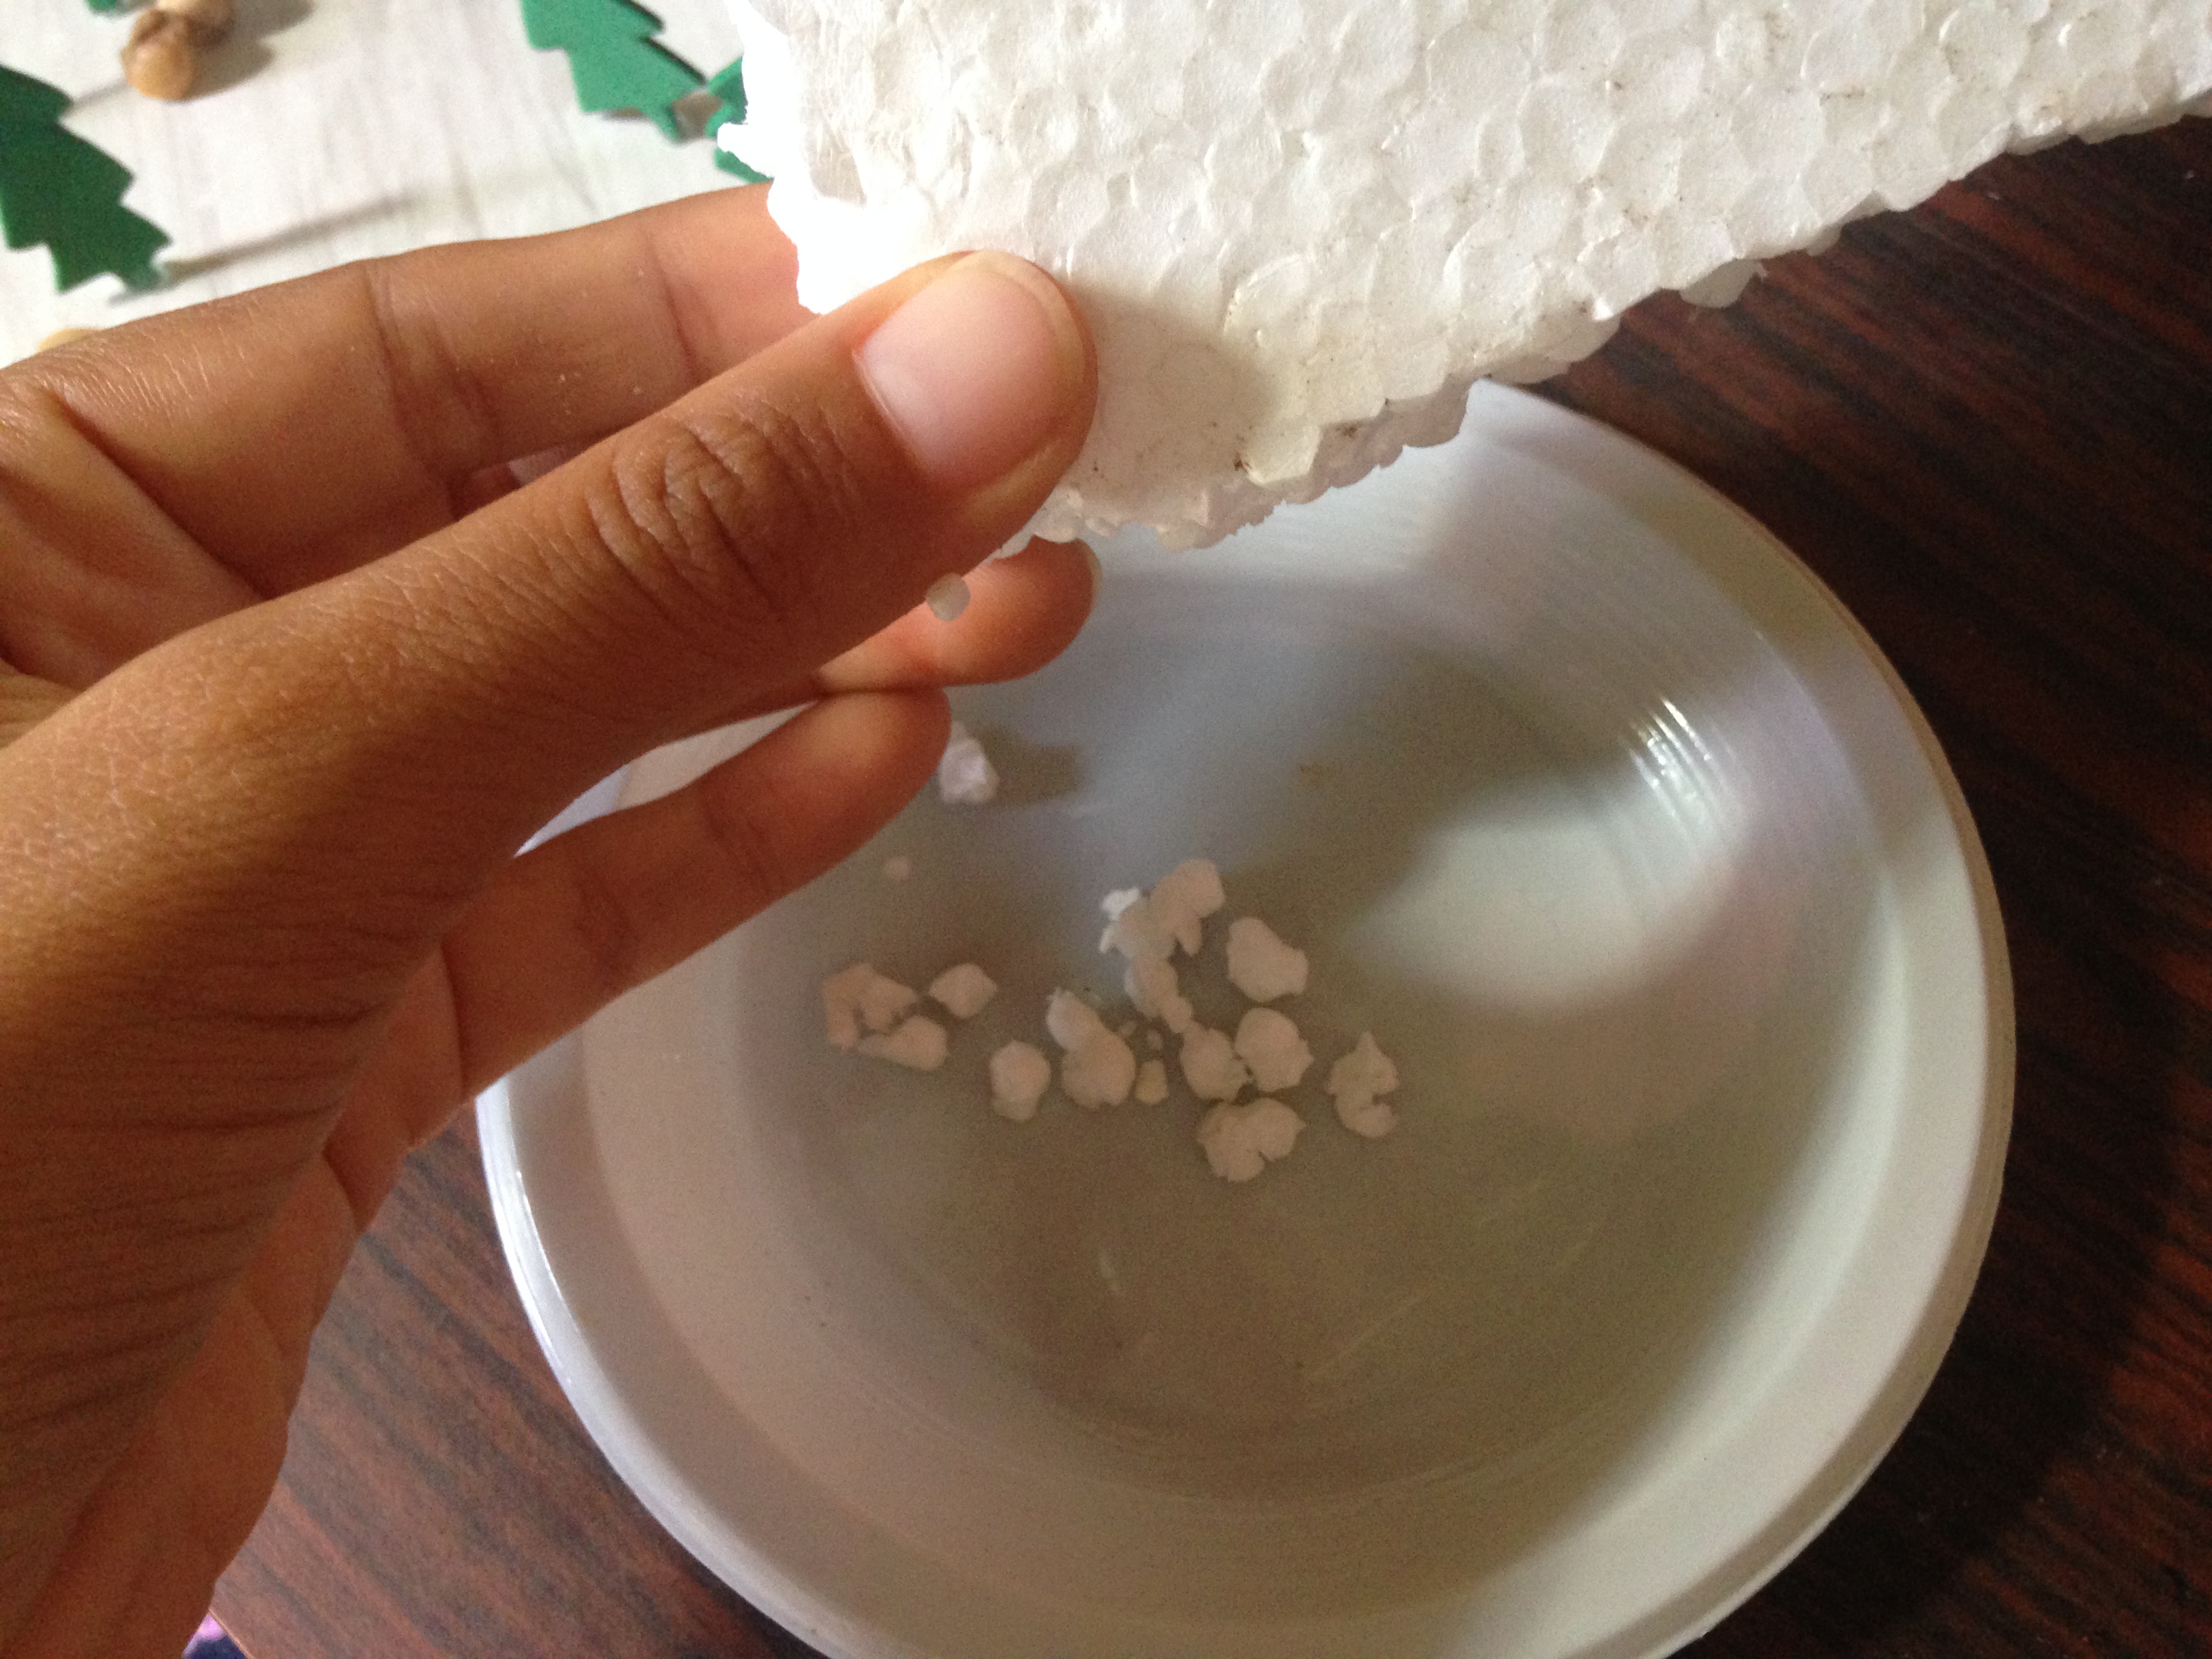
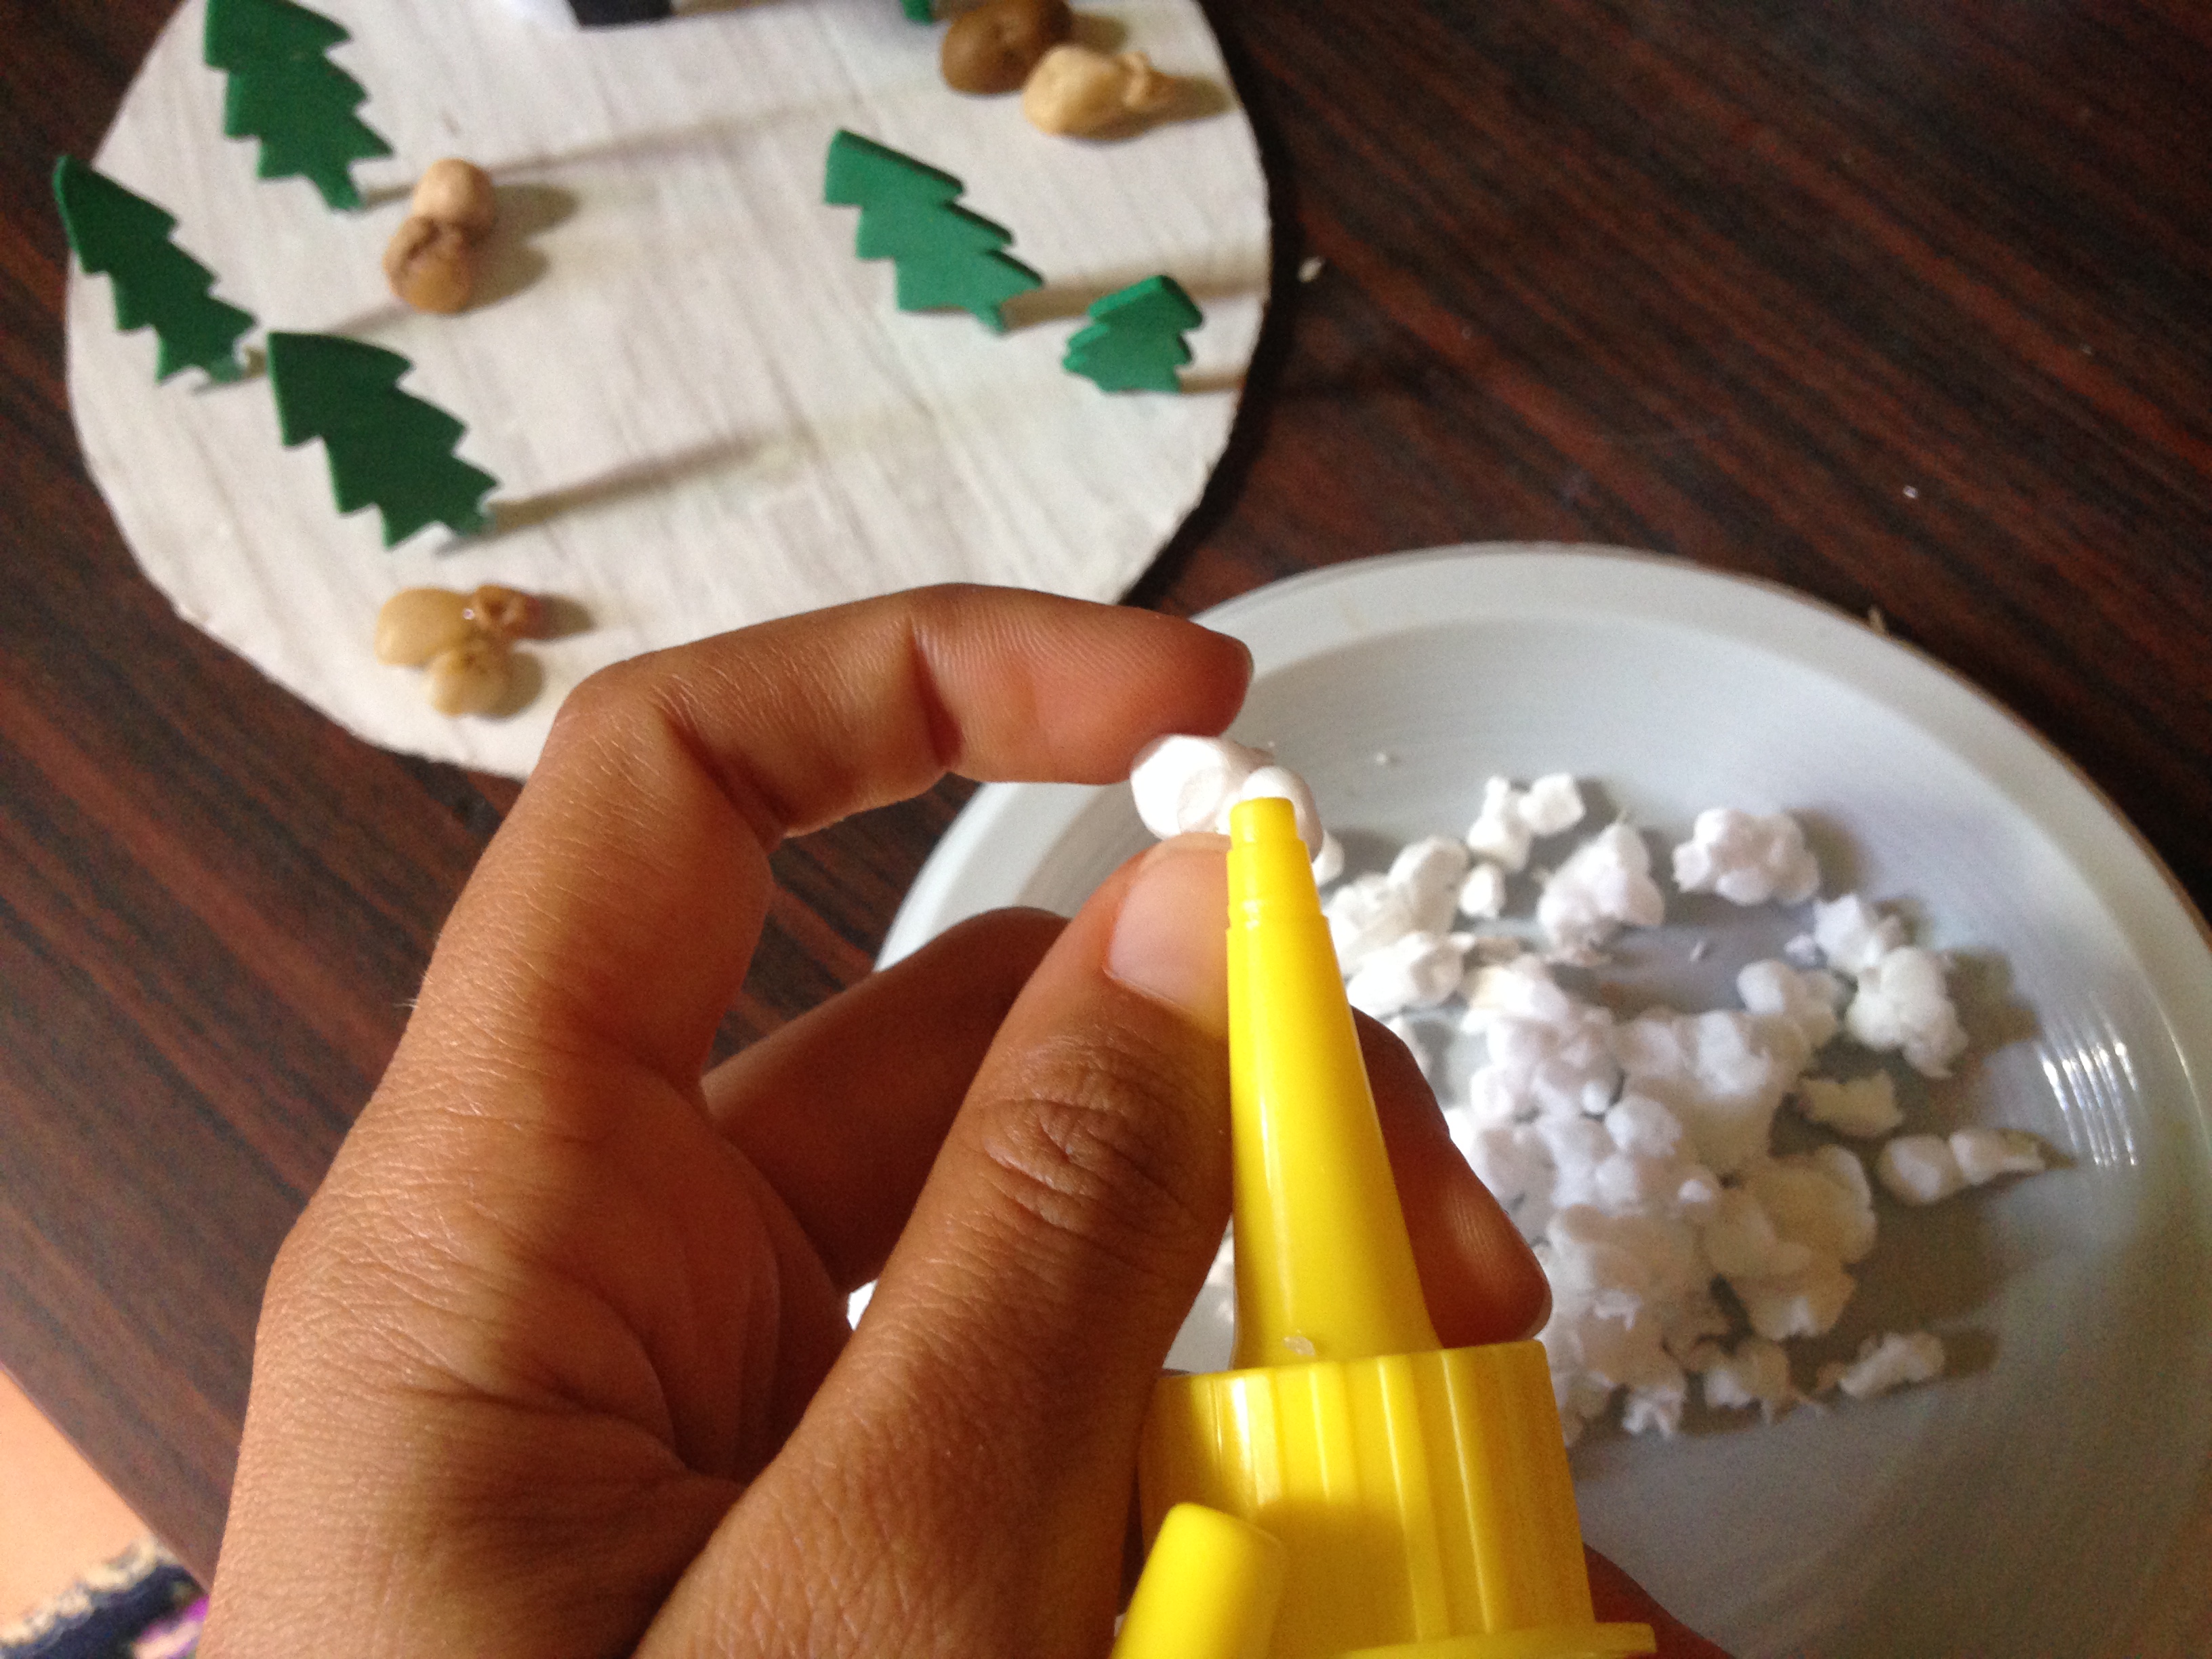
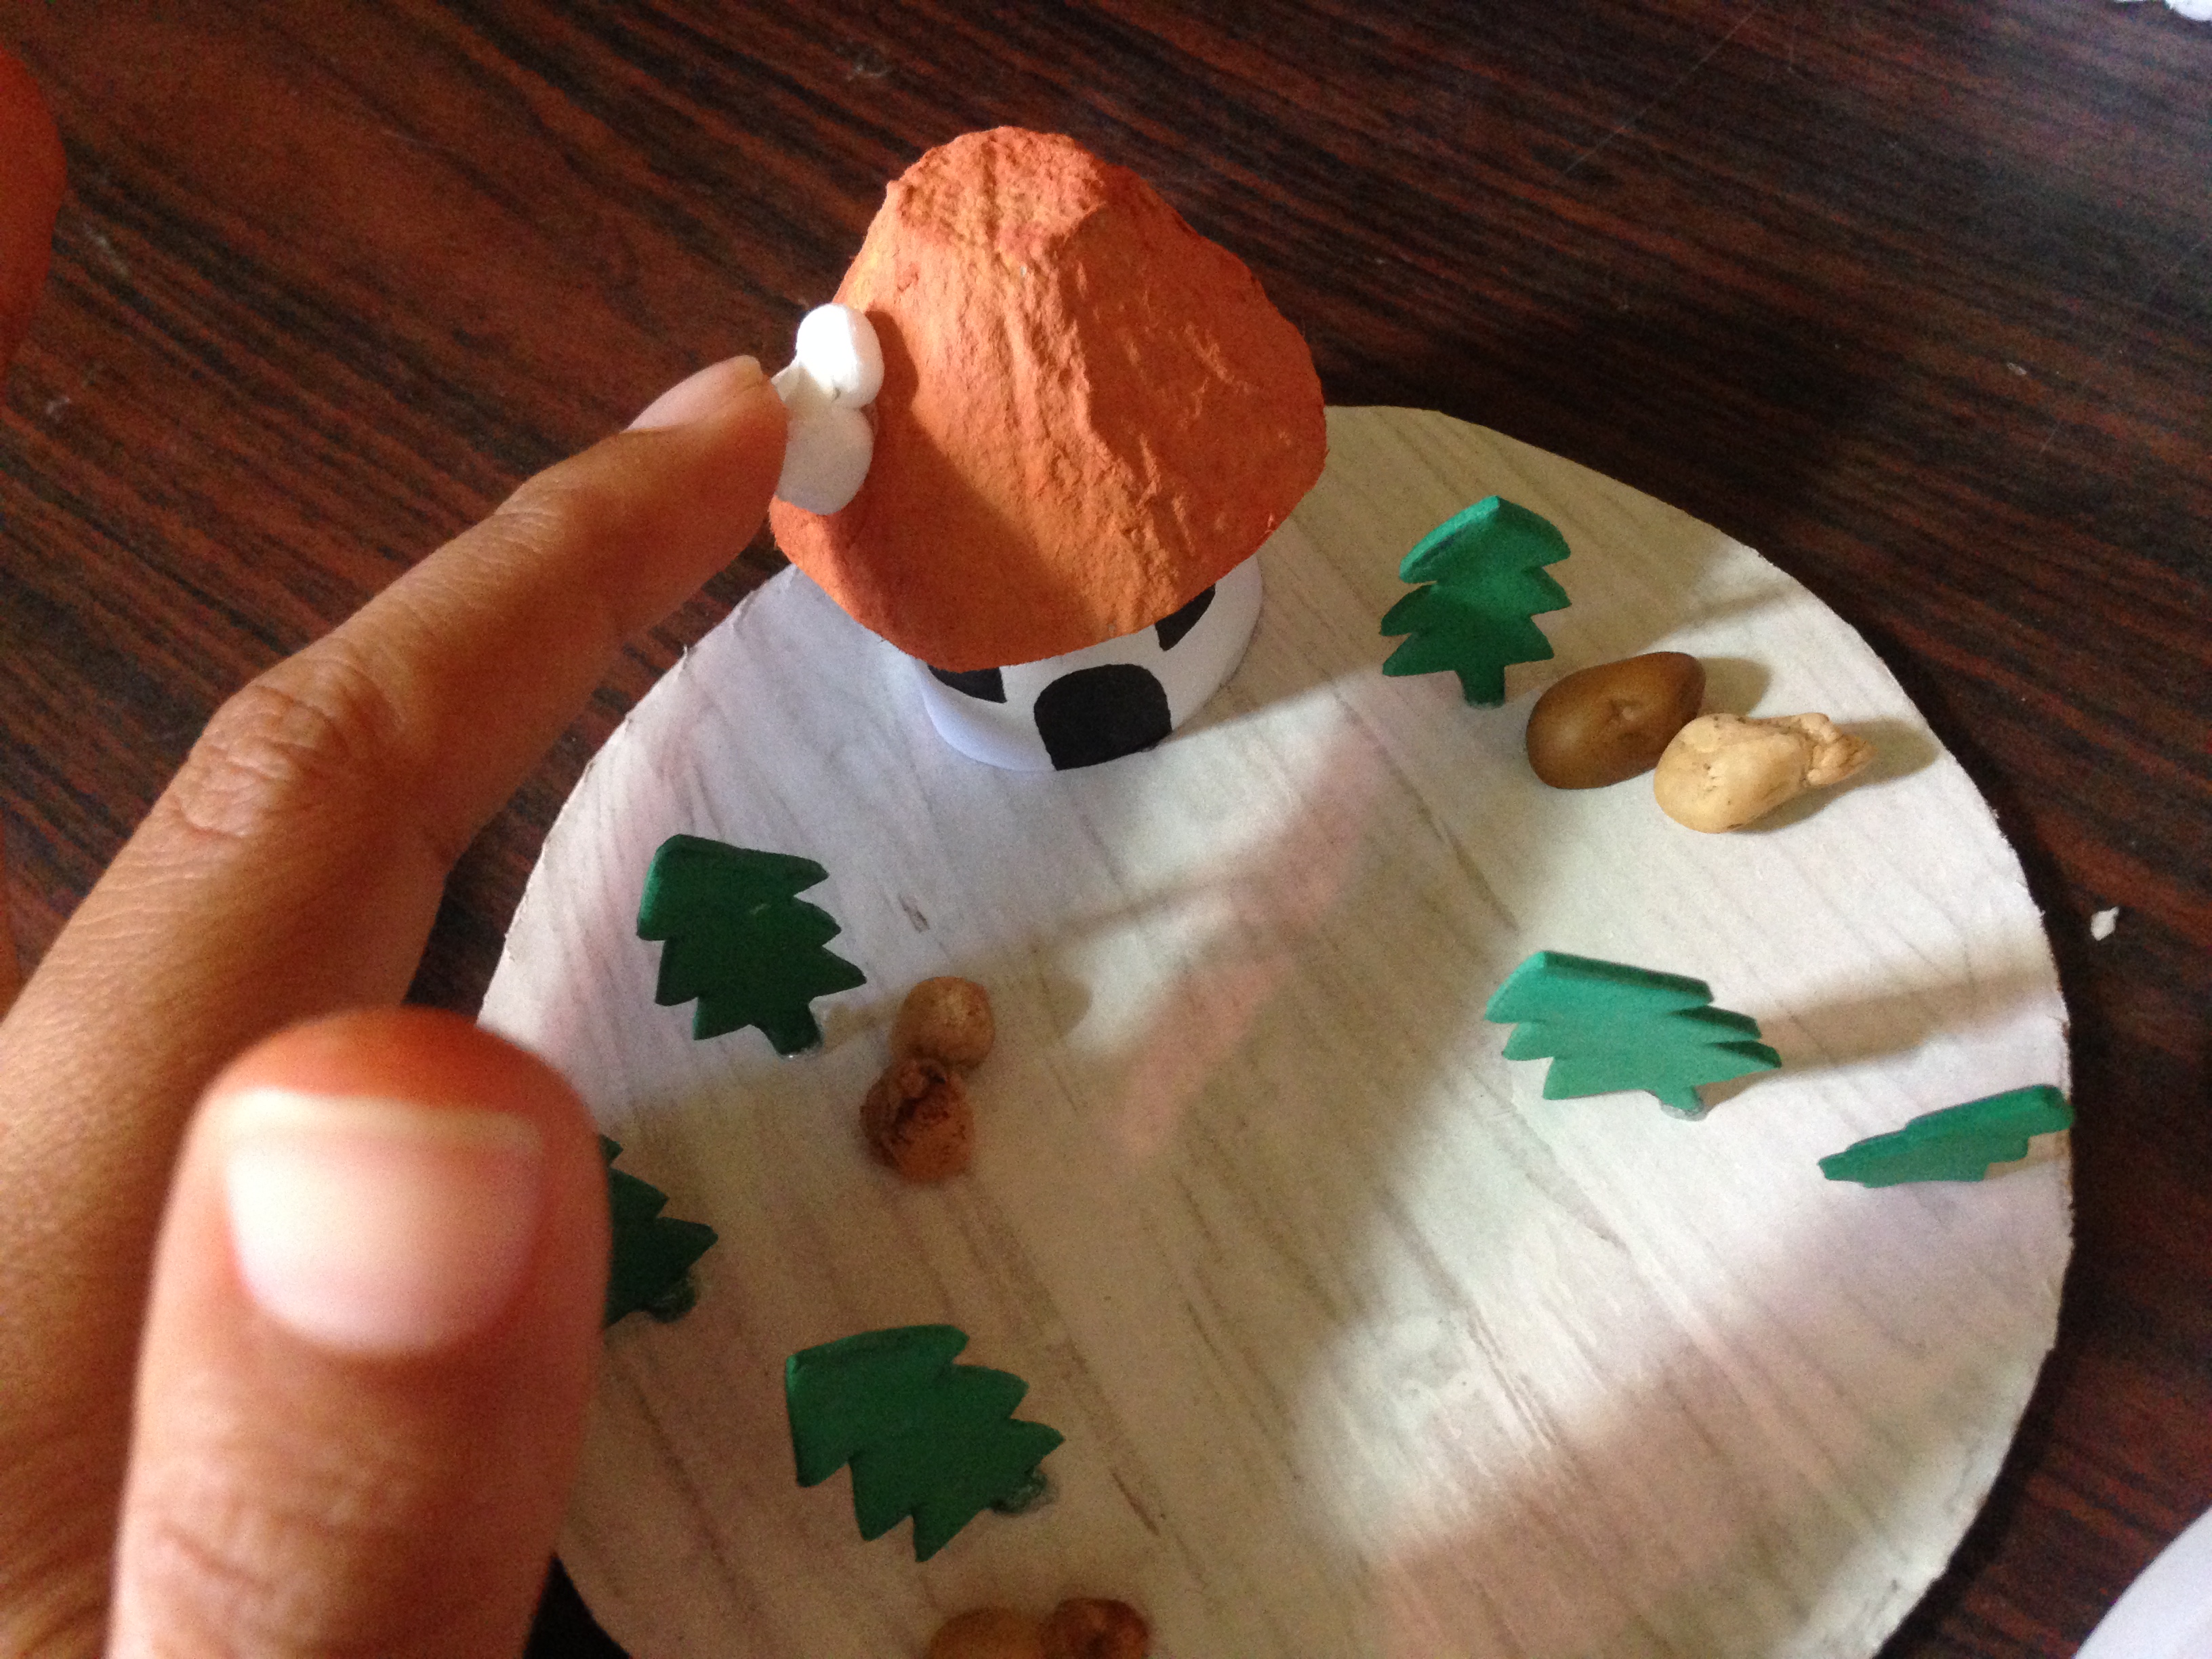
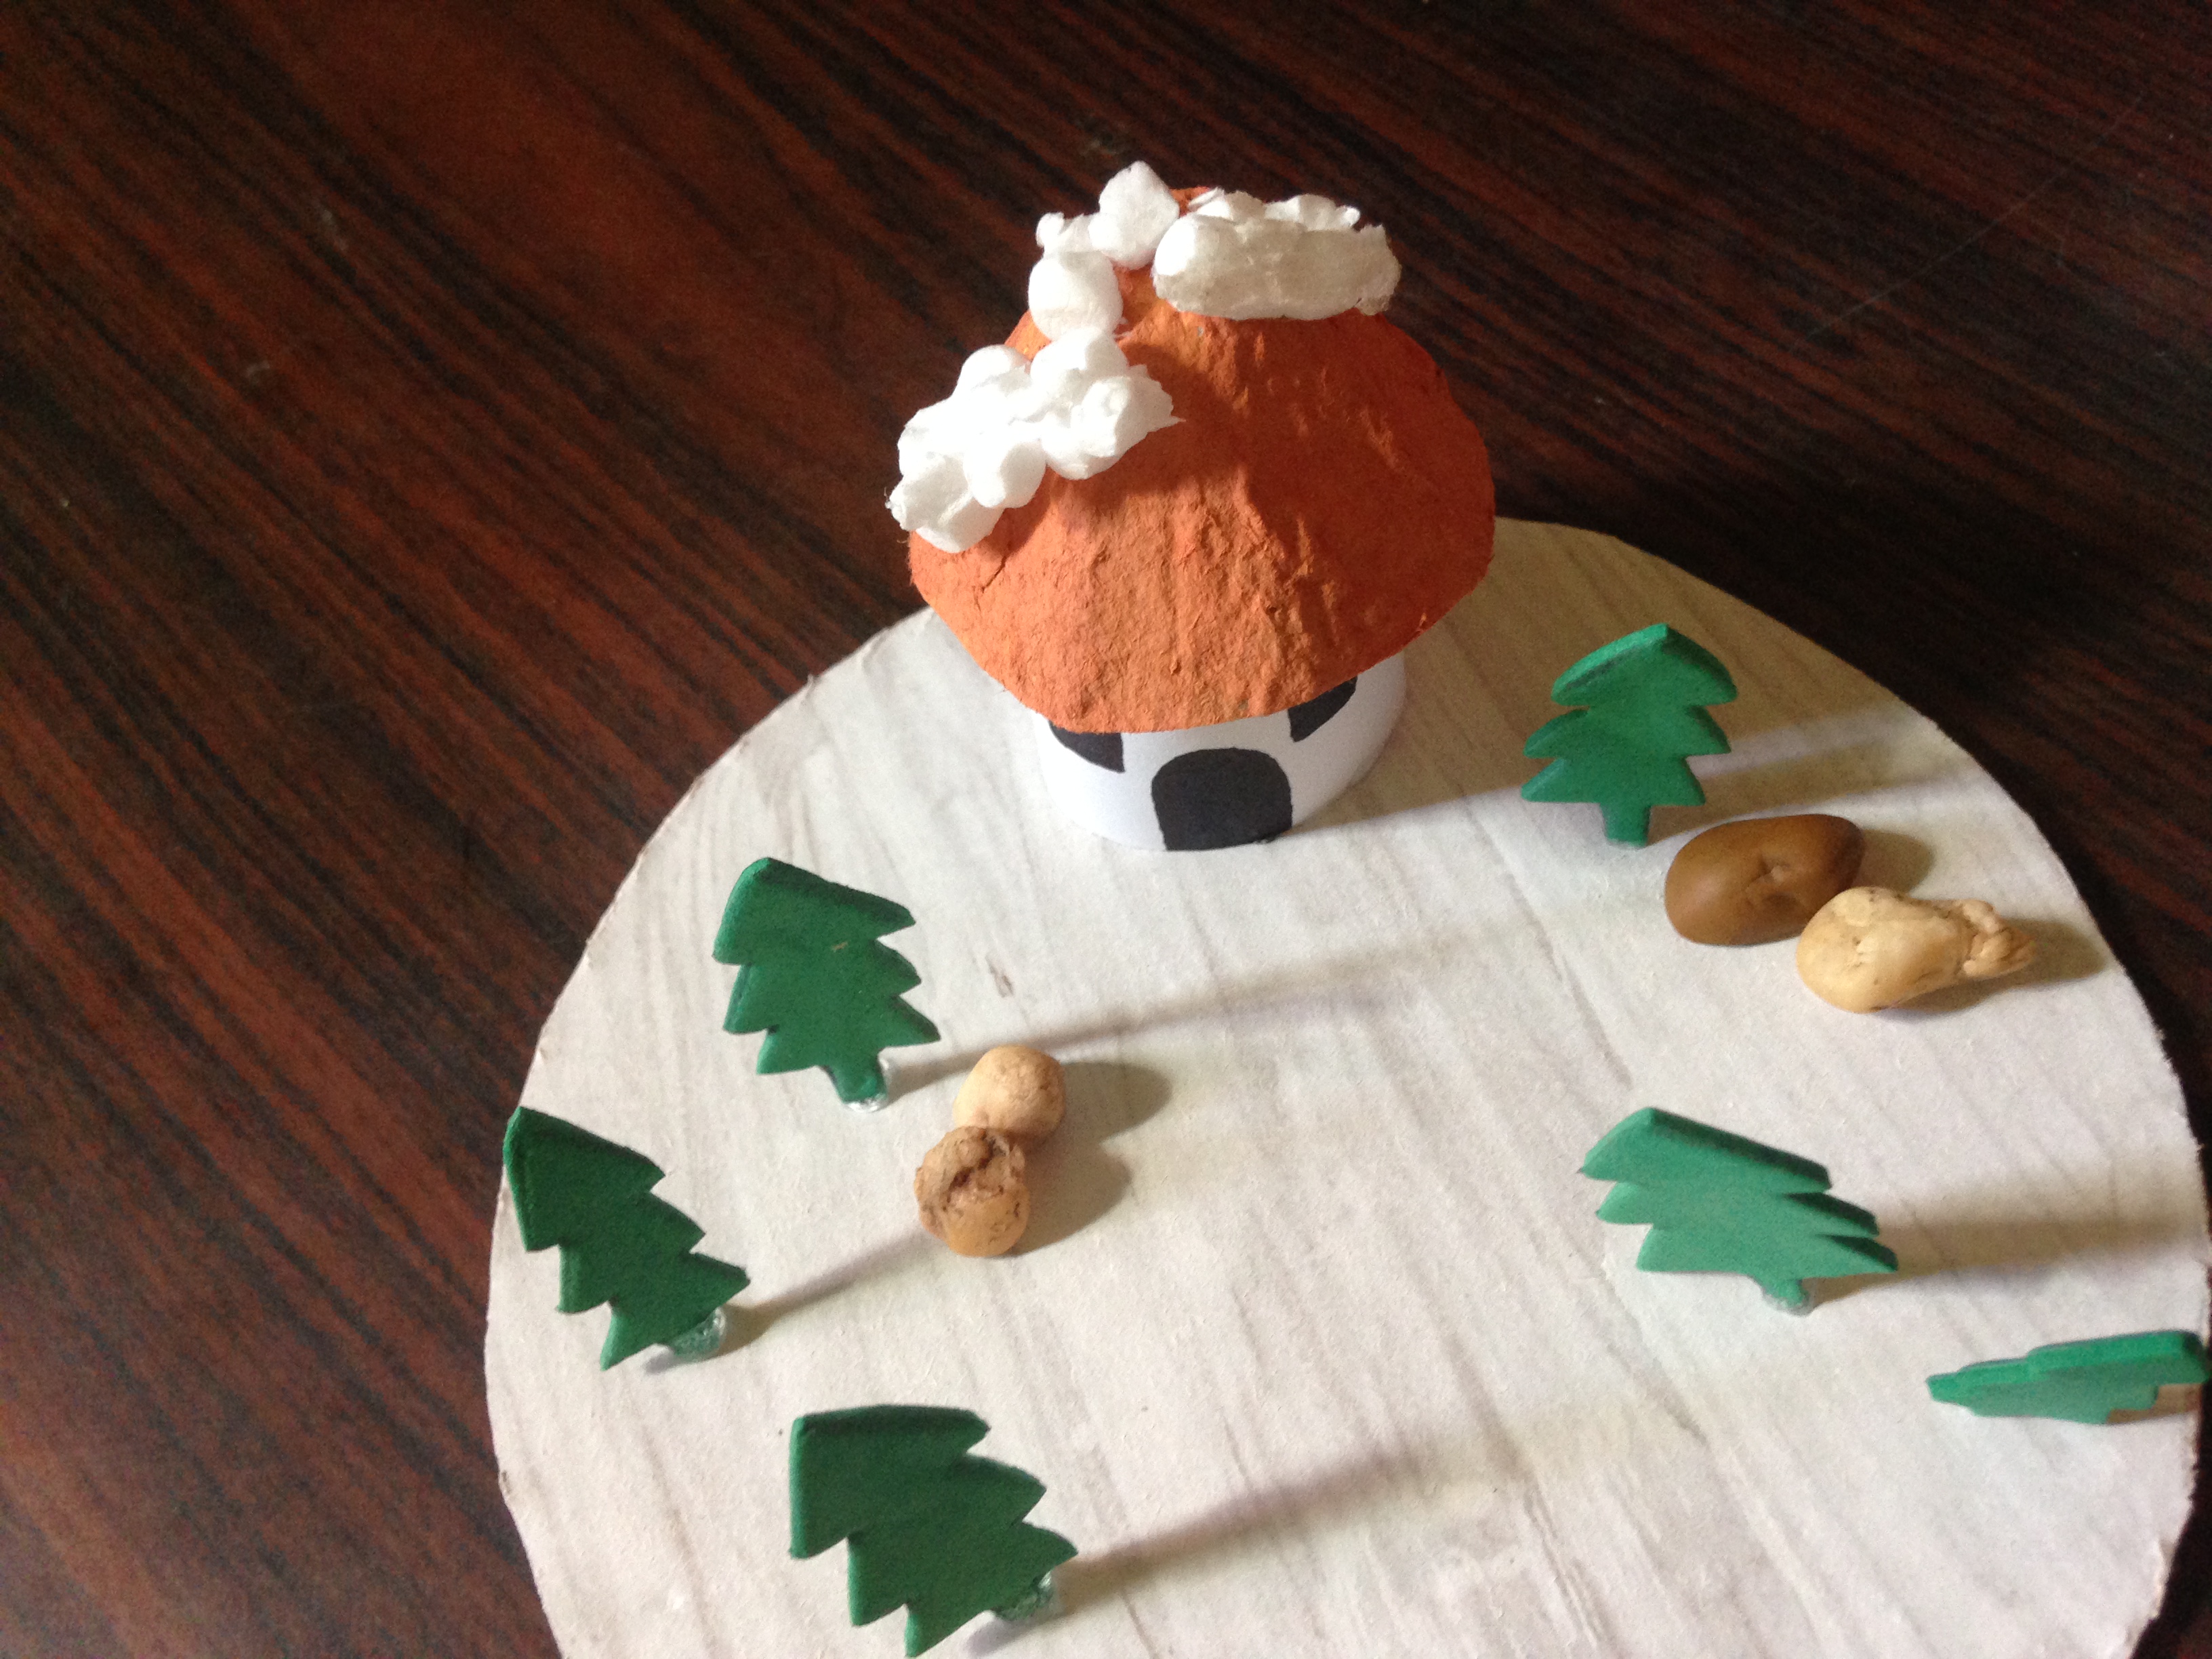
Paso 5
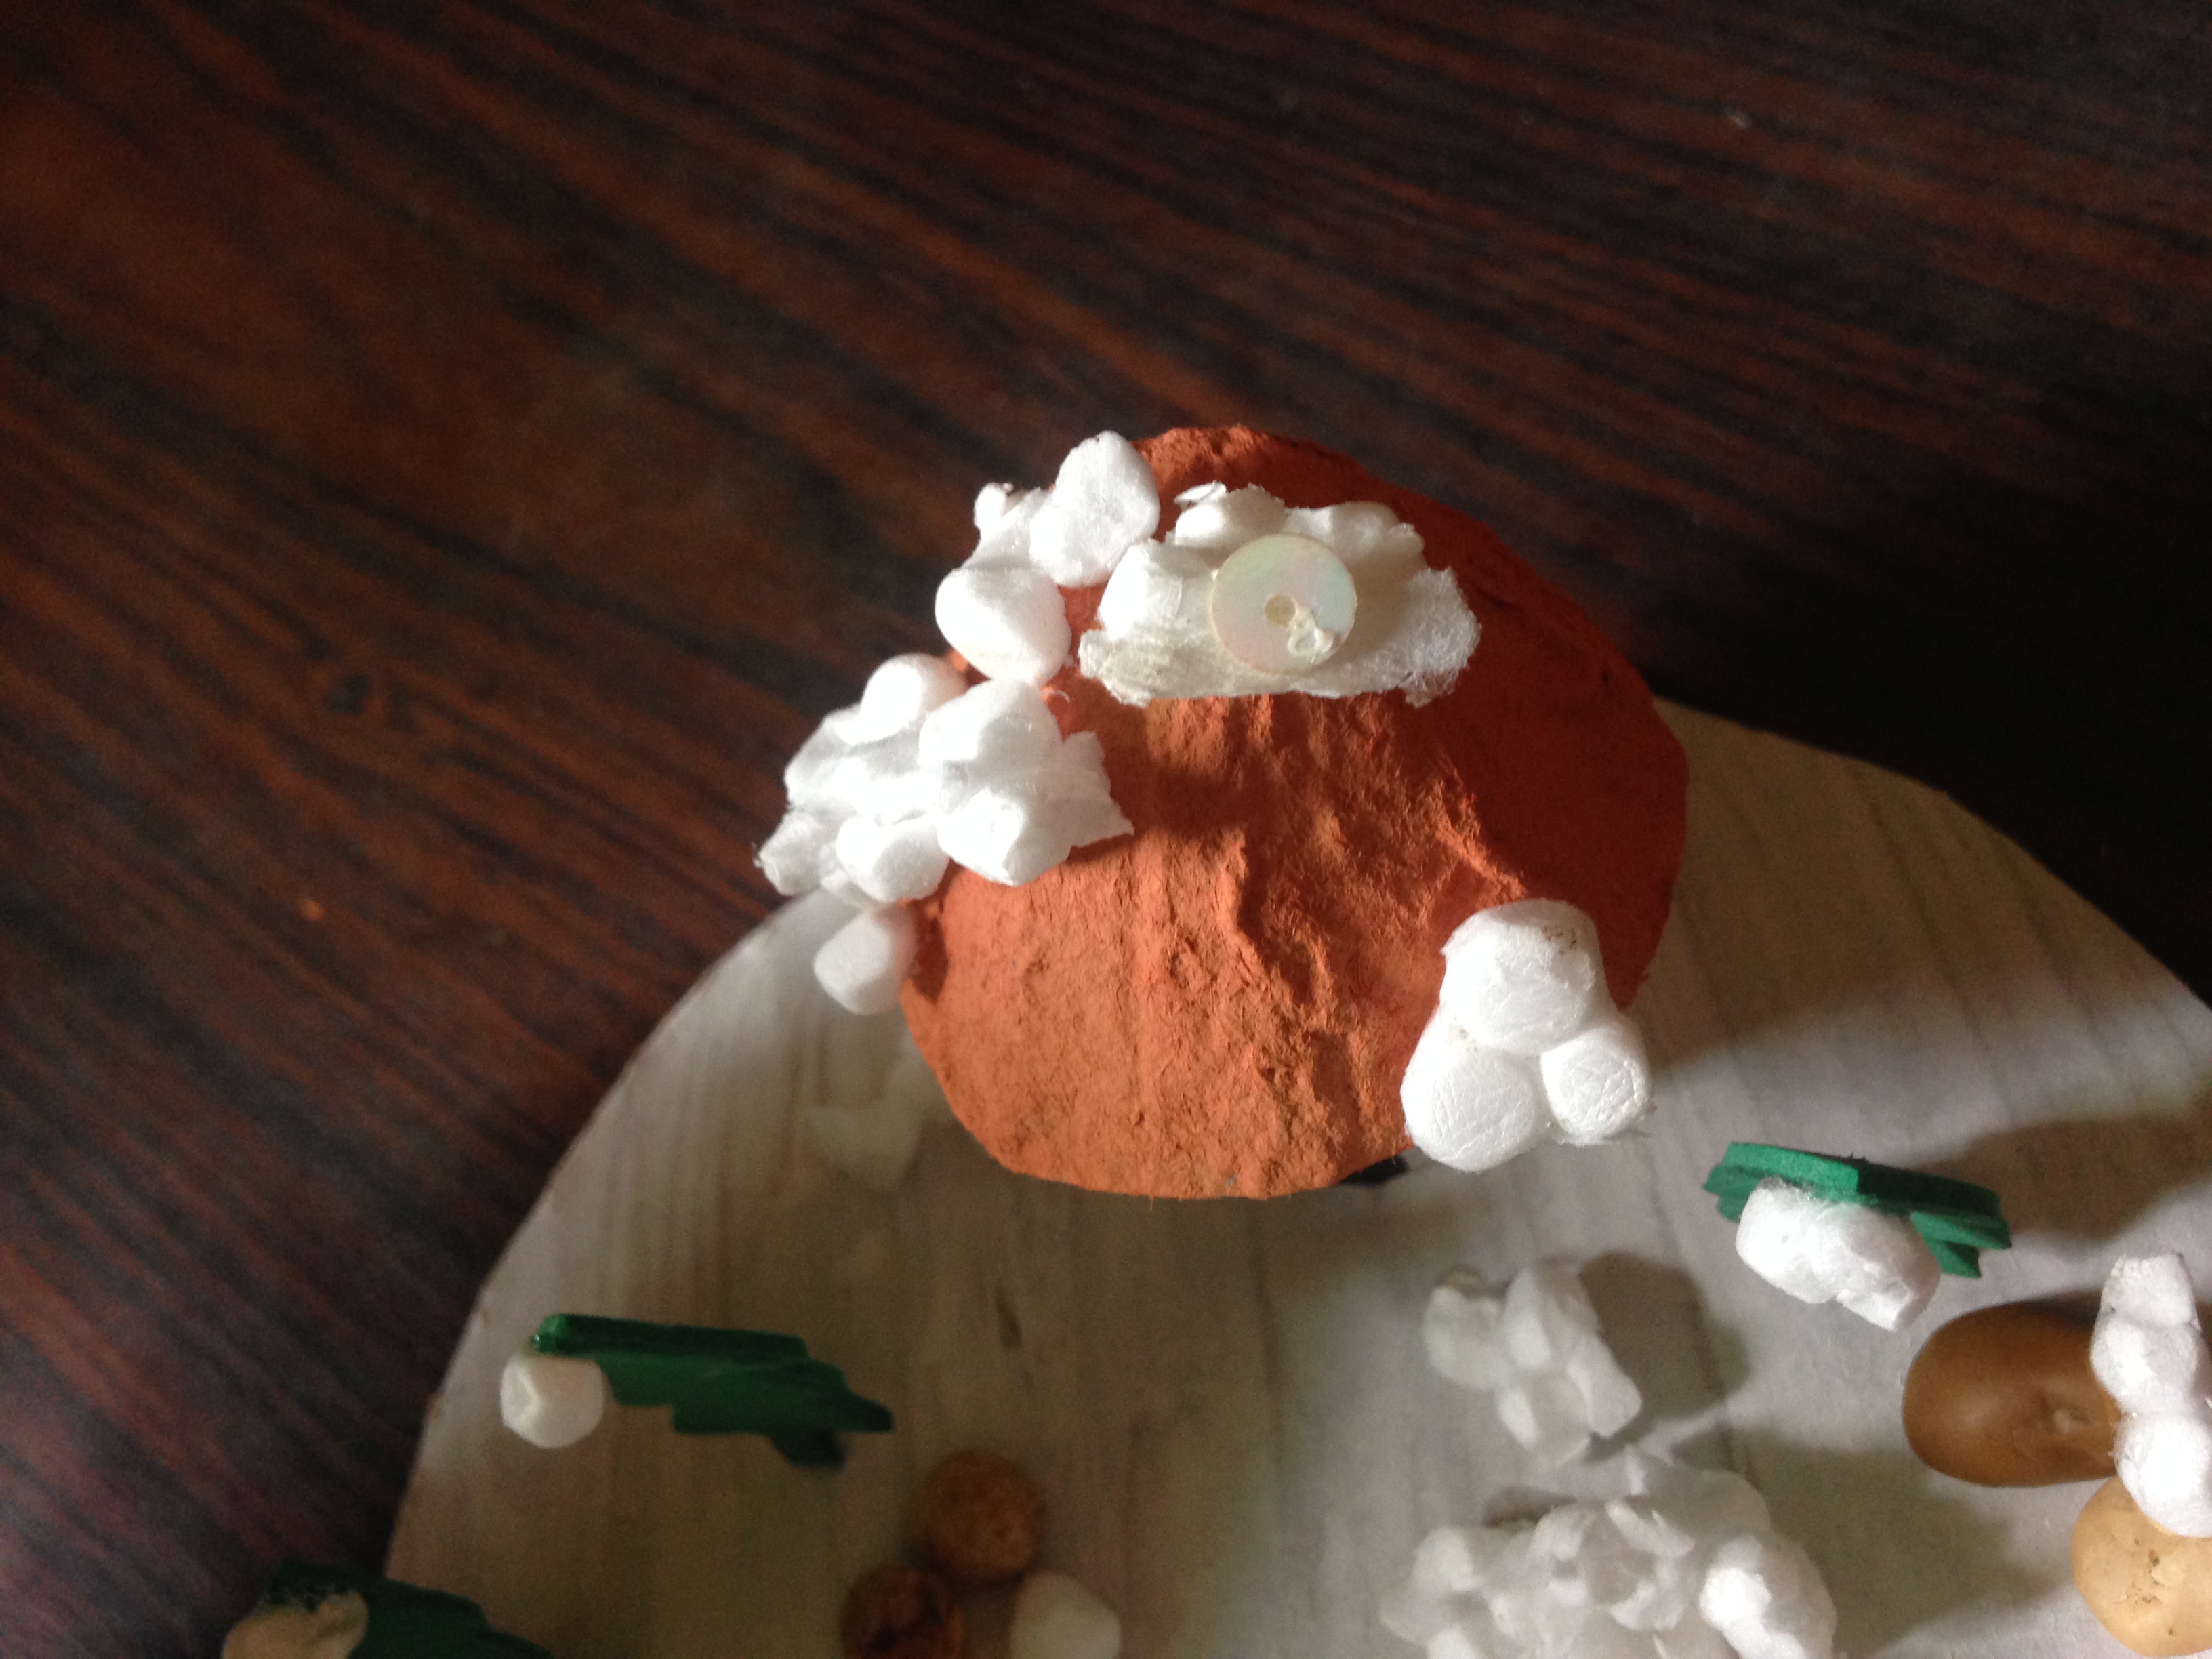
Ahora desmenuzamos el pedazo pequeño de anime para pegarlo sobre la casa, los pinos, las rocas y por toda la base para hacer el efecto de la nieve
Step 5
Now we crumble the small piece of anime to stick it on the house, the pines, the rocks and all over the base to make the effect of snow
Paso 6
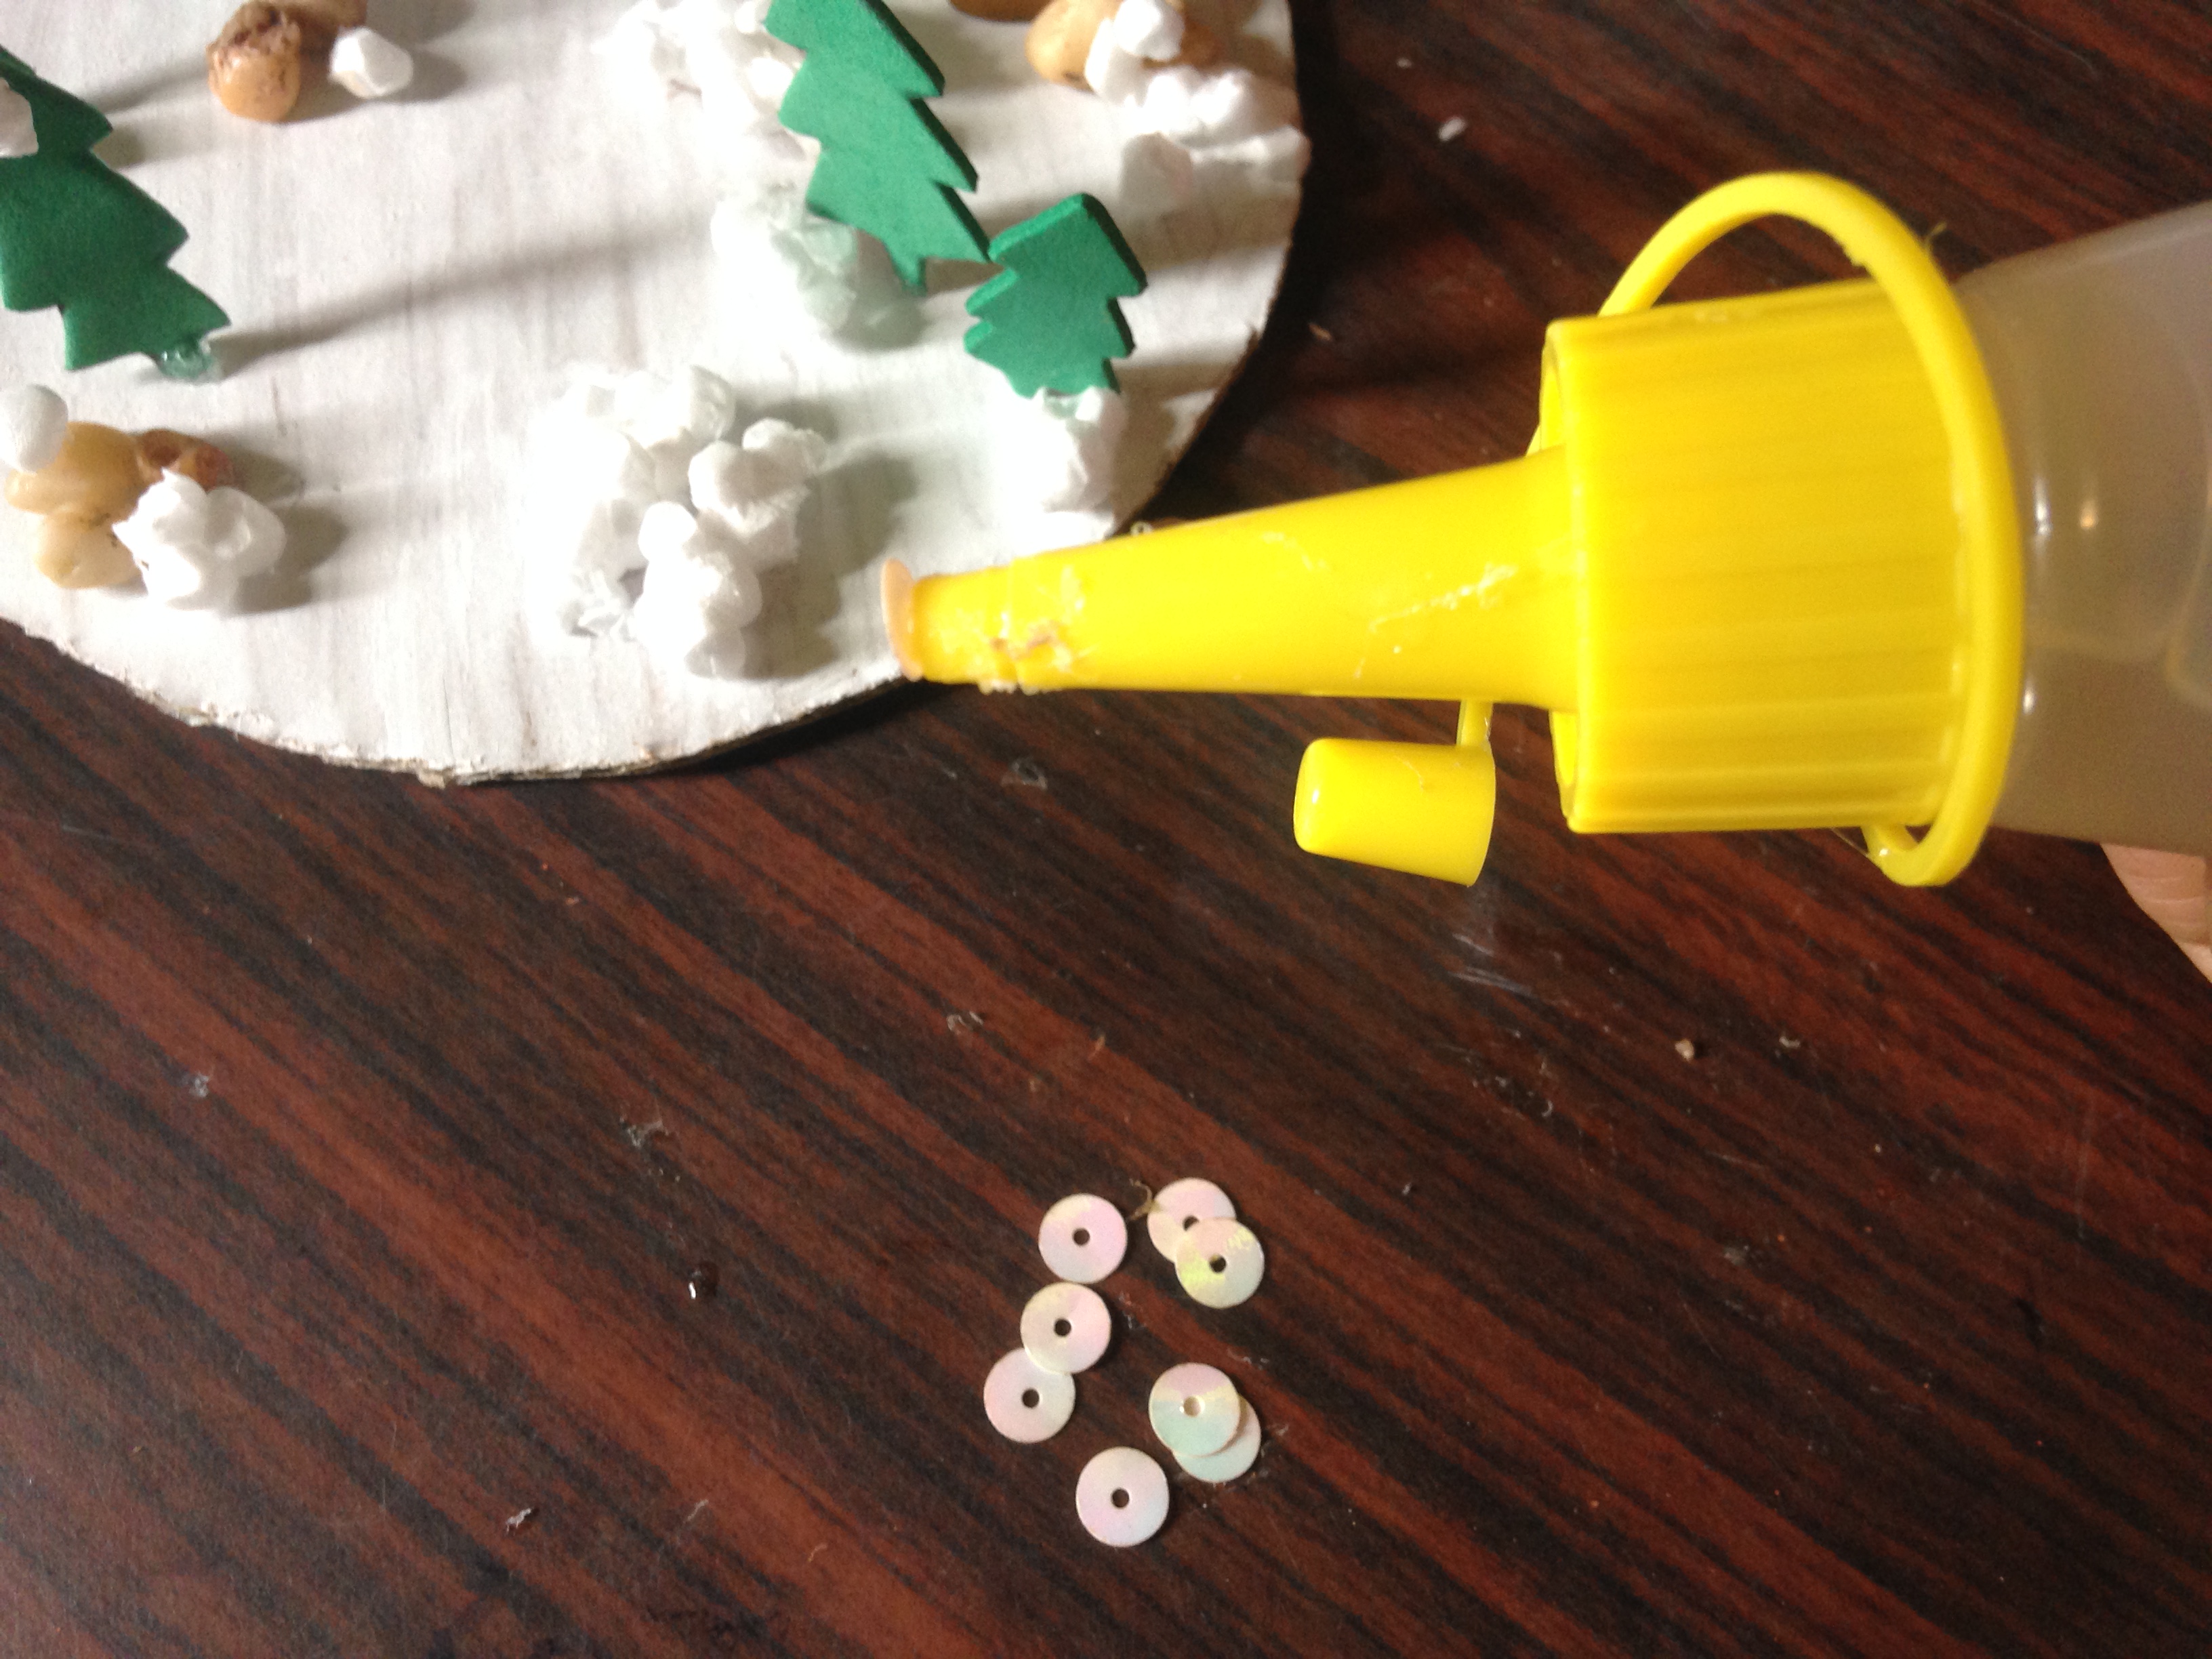
Para terminar pegaremos unas lentejuelas blancas como si fueran copos de nieve brillantes por todo nuestro adorno
Step 6
To finish we will stick some white sequins as if they were shiny snowflakes all over our ornament
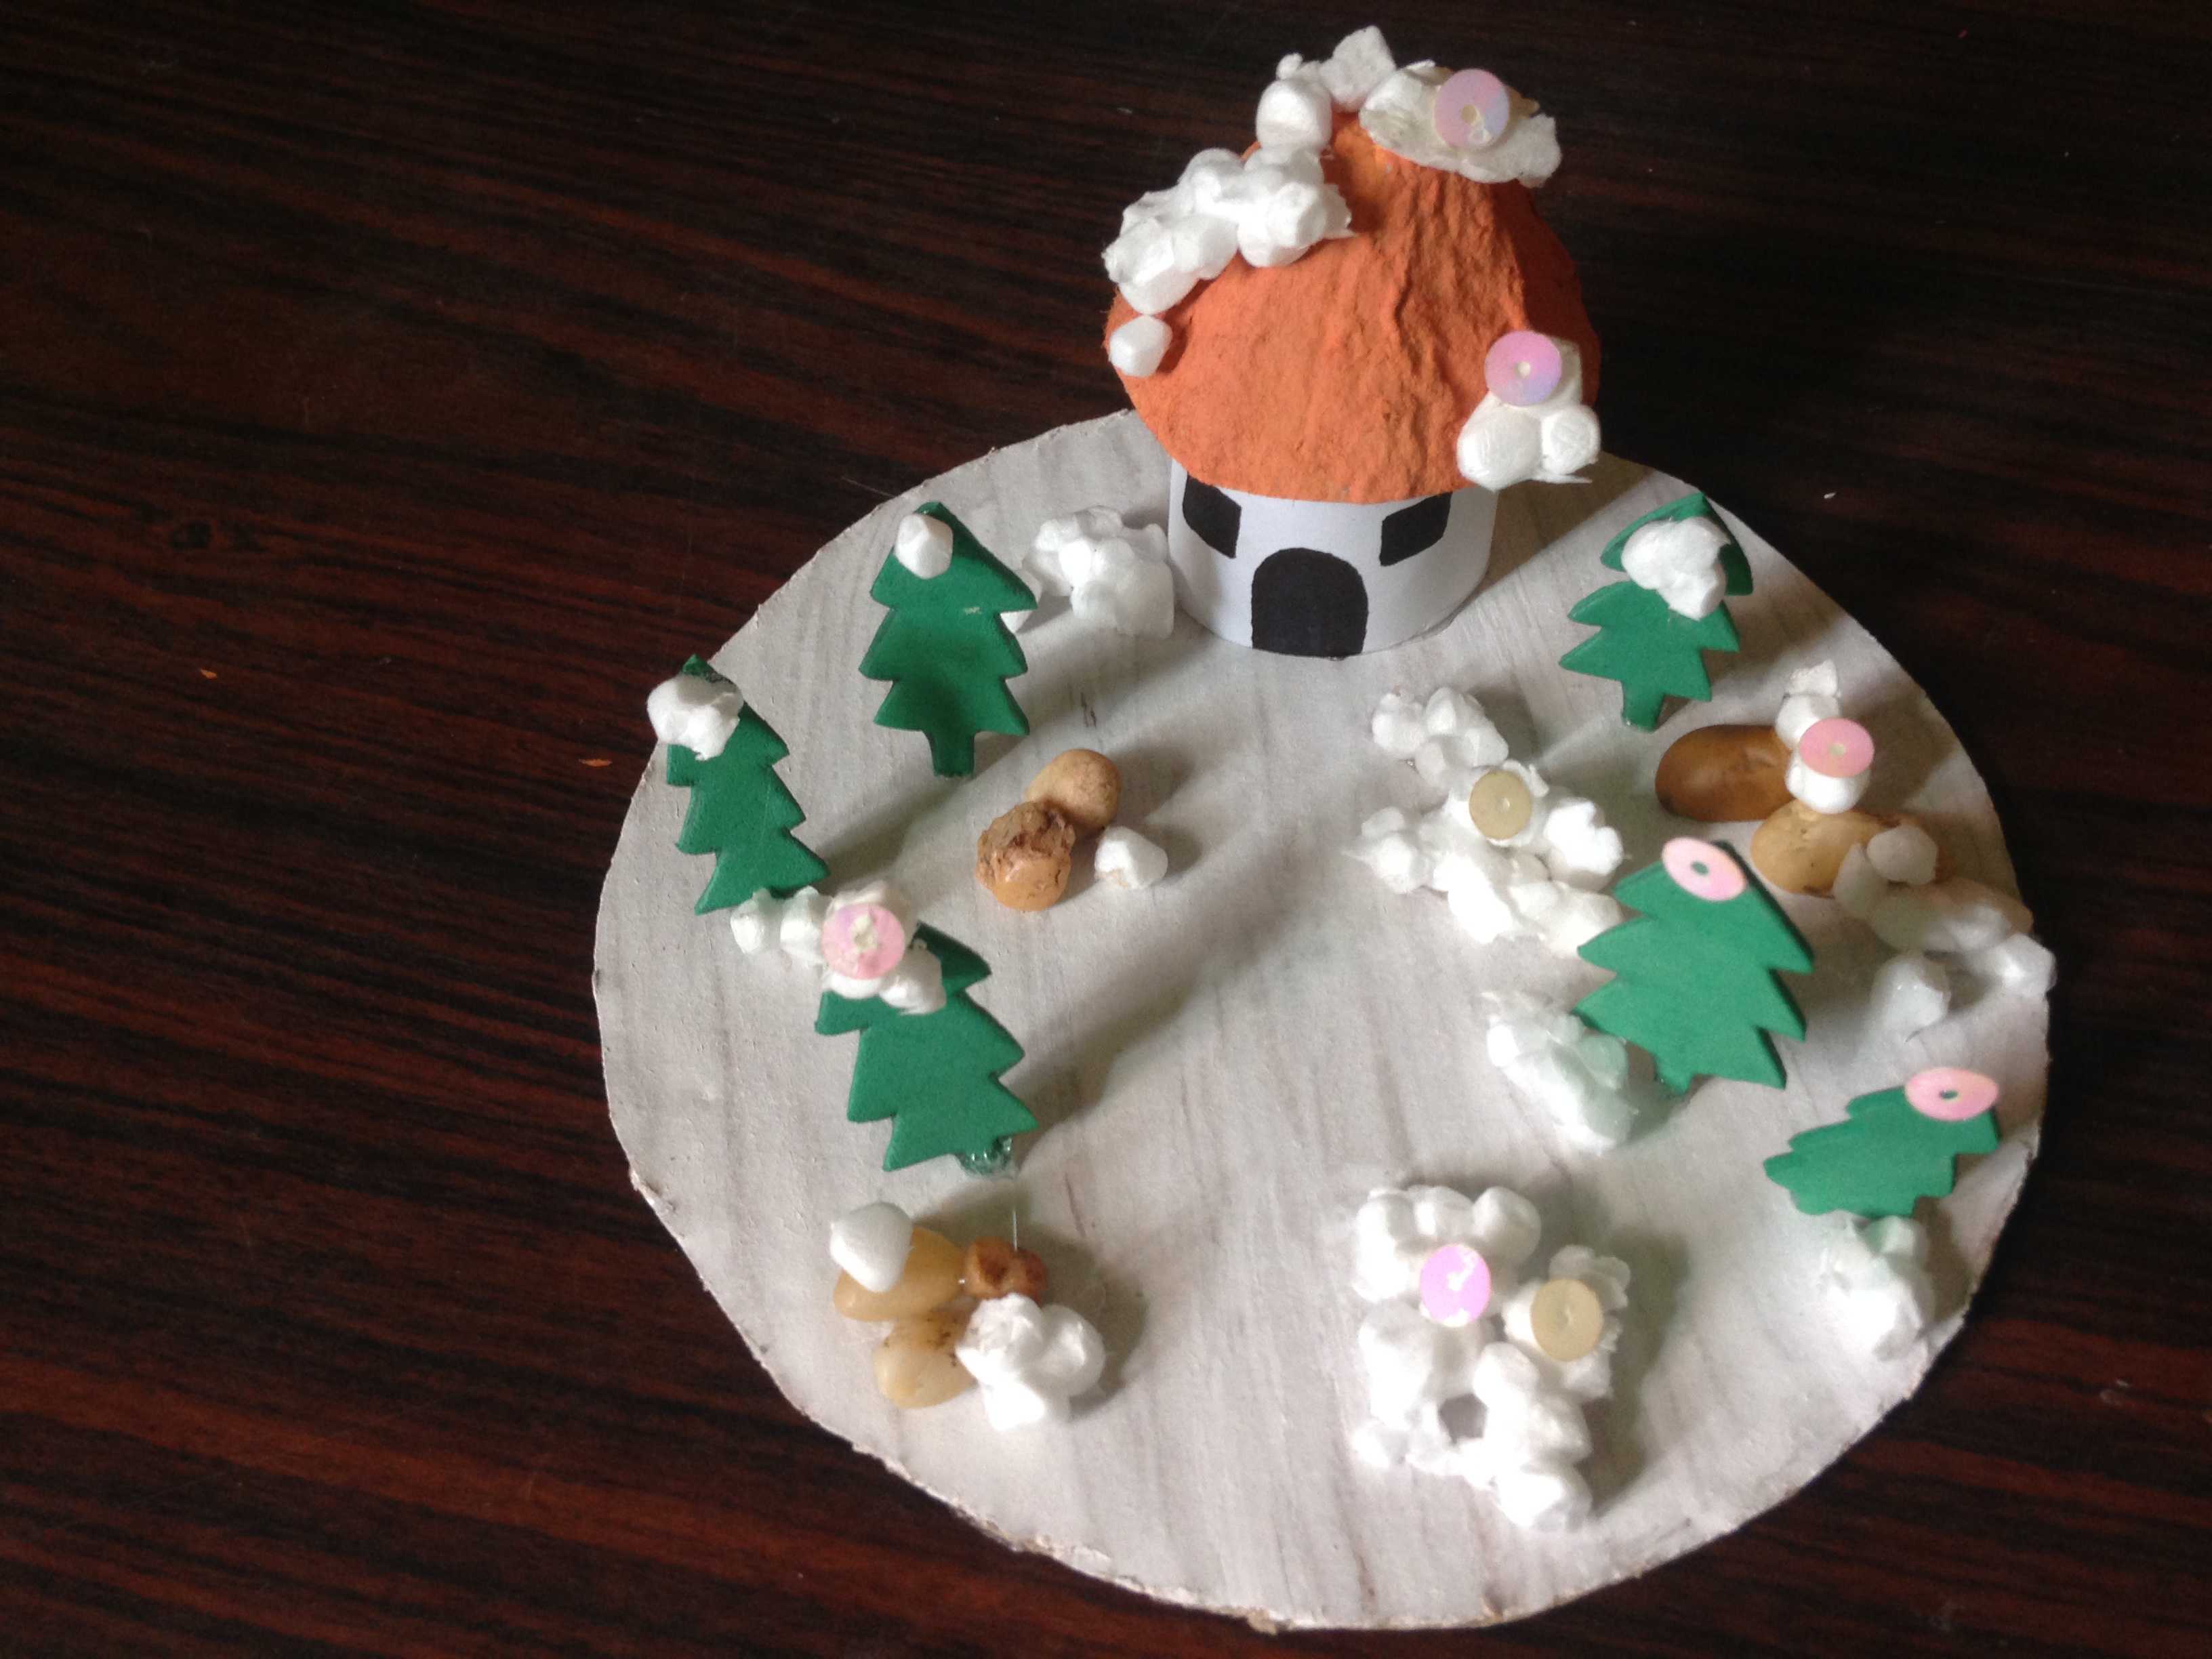
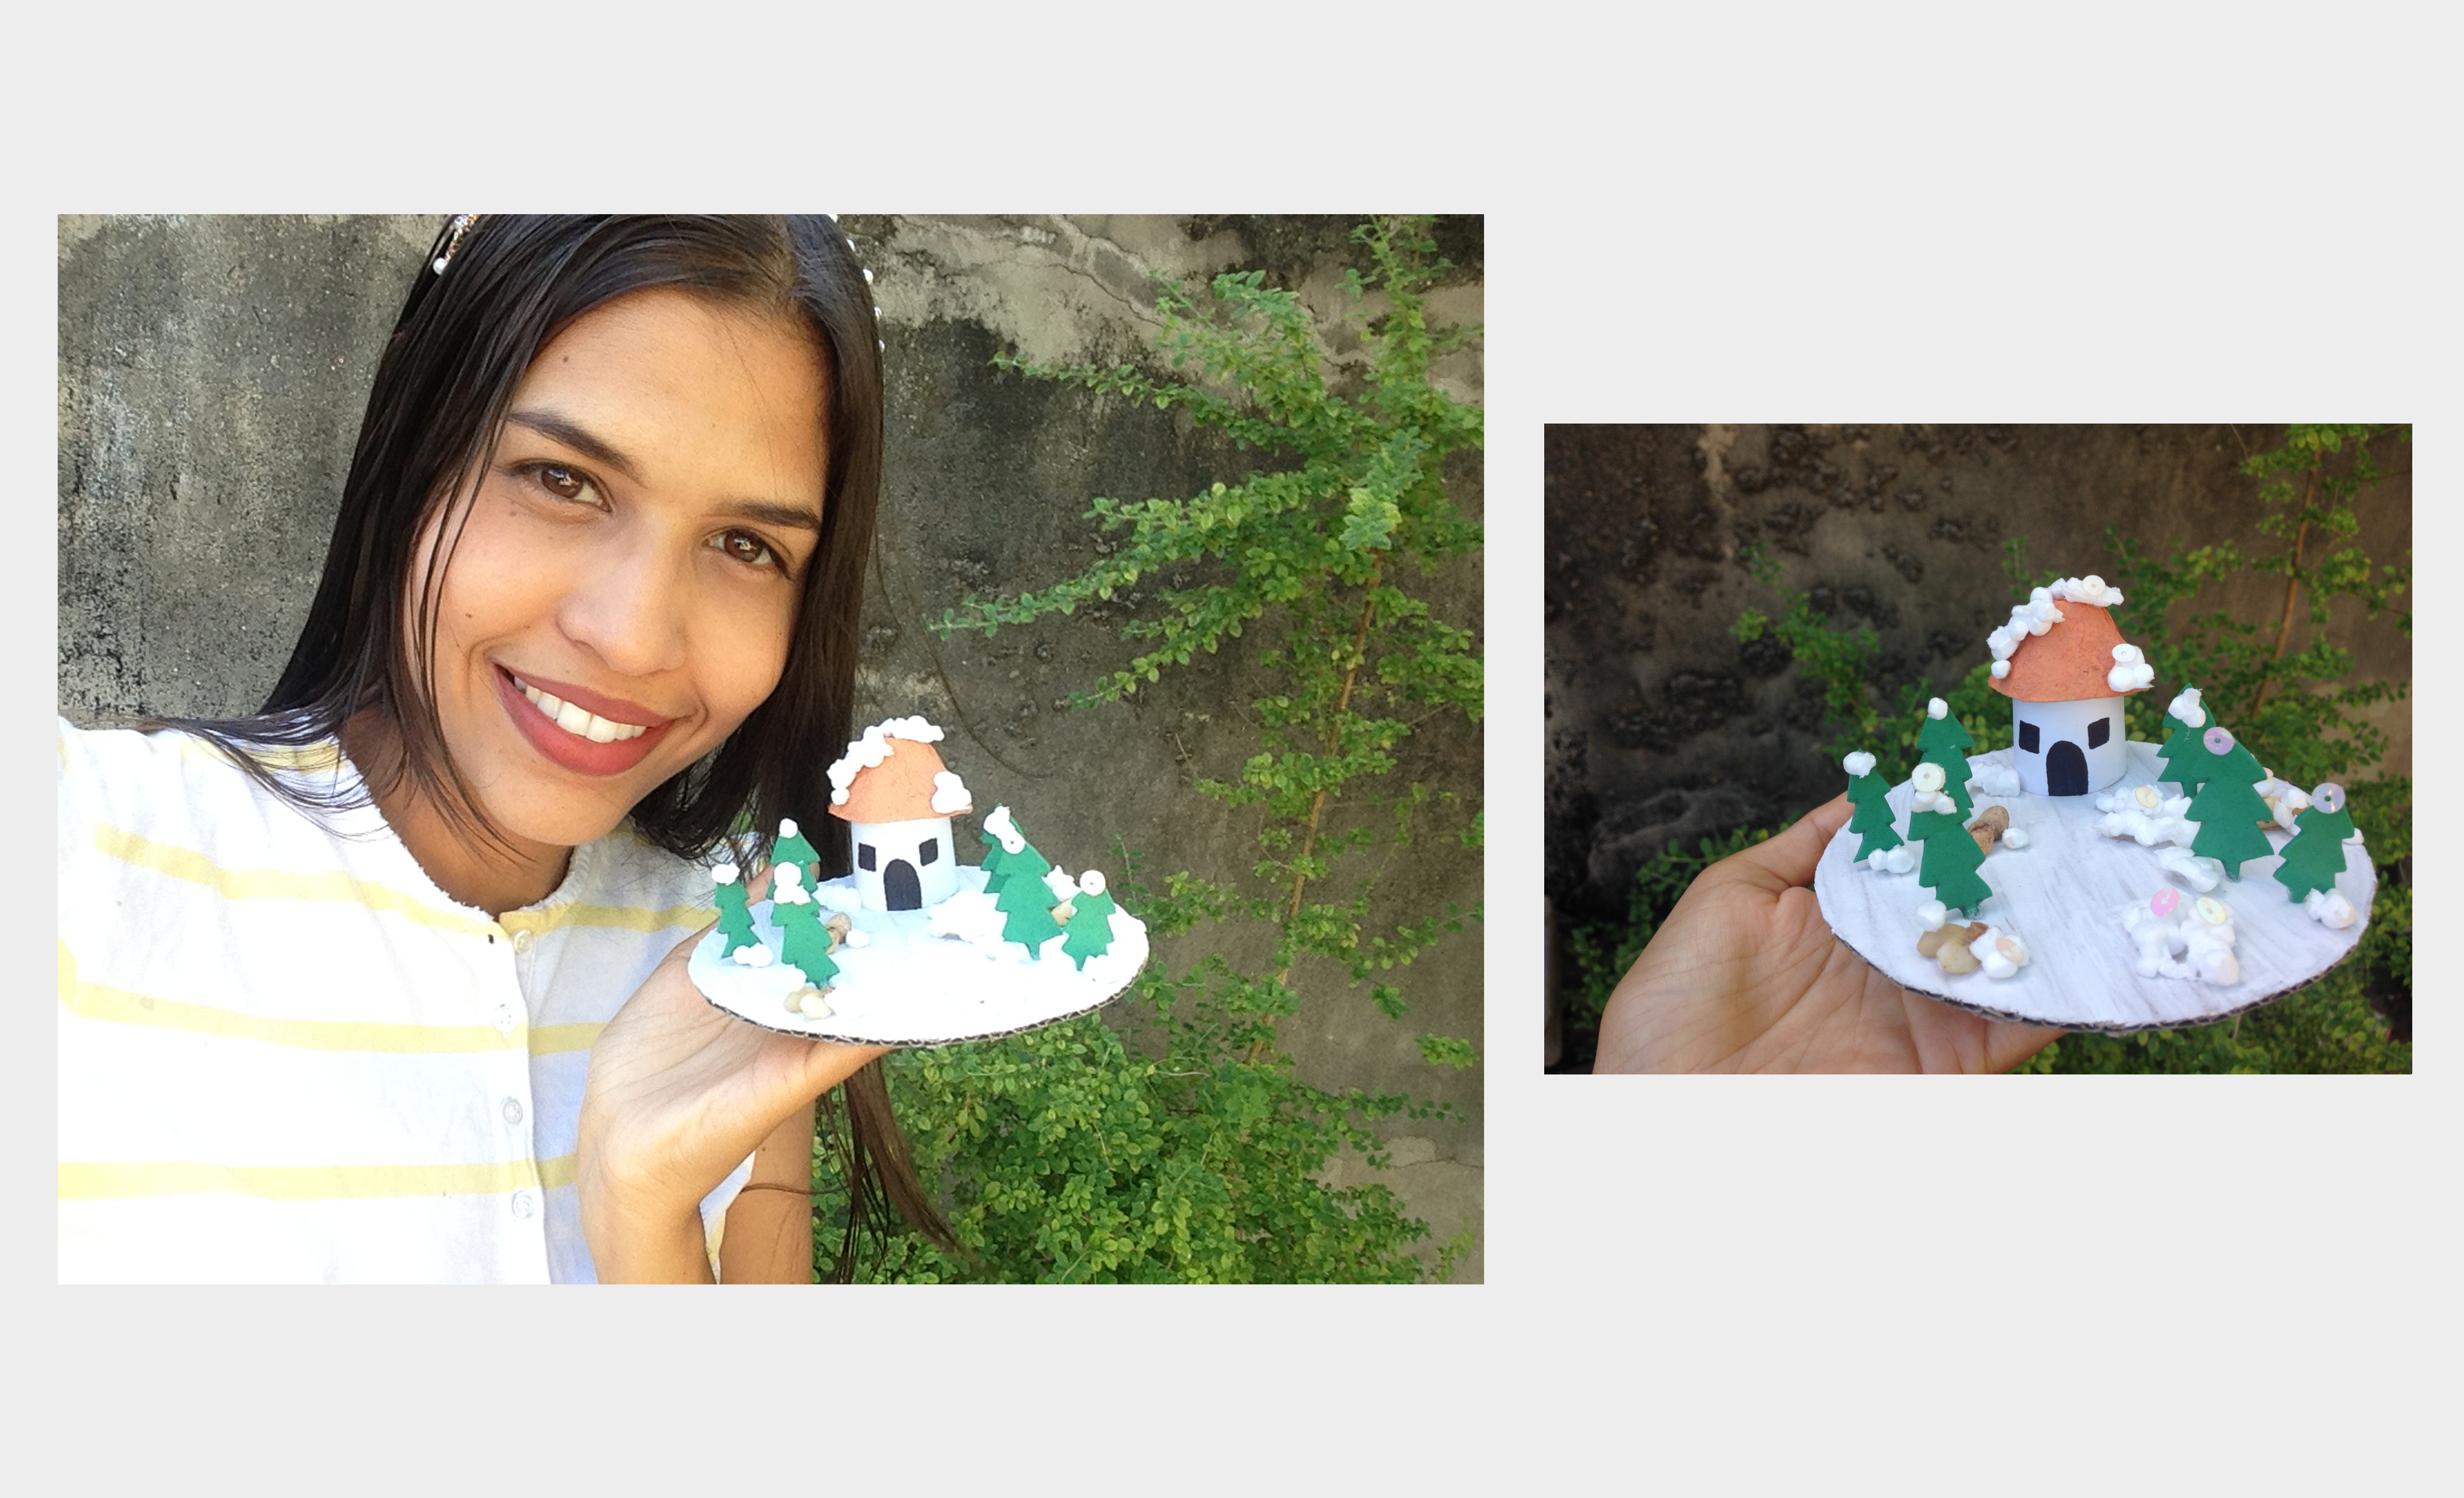
Ya hemos terminado, este adorno queda muy bonito y sobre todo es muy facil y economico de hacer, espero les sea de provecho
We have already finished, this ornament is very beautiful and above all it is very easy and economical to make, I hope it will be of benefit to you
.png)
Bye Bye