Hello to all my friends of this dear and appreciated community of @hive, it really is a pleasure for me that you are here visiting this little corner of crafts made with a lot of love, because they are made from the heart, because in my last publications I have been presenting a series of projects that I have been developing for my daughter's birthday, she is going to turn 10 years old and we decided to do it on the occasion of Hearts, because today I bring you a beautiful gift card with this motive, which We intend to deliver it to you that day with the messages full of love from your father, brother and mother, you can use it for other occasions for Mother's Day or give it to whoever you like, you can use it of your preference.

Materiales que necesitamos:
- Cartulinas de diferentes colores.
- Regla.
- Tijera
- Pega Blanca
- Lápiz y colores.
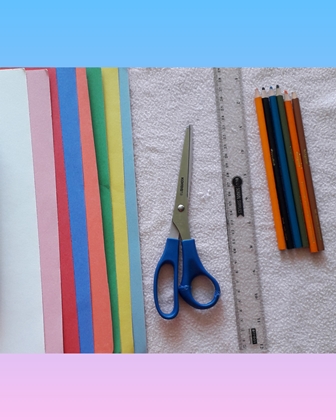
Materials we need:
- Cardboards of different colors.
- Rule.
- Scissors
- White Paste
- Pencil and colors.
Lo primero que hacemos es recortar un cuadrado de 7x7cts, lo doblamos a la mitad y dibujamos la mitad de un corazón para luego proceder a cortarlo y crear un corazón completo.
Luego procedemos a usar ese corazón como molde para calcar y recortar los demás, en total tenemos que hacer 7 corazones iguales.
Process:
The first thing we do is cut out a 7x7cts square, fold it in half and draw half a heart and then proceed to cut it and create a complete heart.
Then we proceed to use that heart as a mold to trace and cut the others, in total we have to make 7 equal hearts.


Una vez hecho esto trazamos una linea central que sera donde centraremos nuestros corazones los cuales iremos uno por uno dibujando sus pestañitas en cada una de las lineas que marcamos, tal como se ve en la foto.
Next we cut out a 5x28cts tita, then we take one of the hearts and mark its height and draw a line and then draw 6 more lines with 1 cts of separation.
Once this is done, we draw a central line that will be where we will center our hearts which we will go one by one drawing their little eyelashes on each of the lines that we mark, as seen in the photo.


We proceed to fold each of the lines that we marked and then glue the hearts one by one, centering them on the marks we made.


Then we take a cardboard of 40x30 cts and we fold it in half, this will be the base of our card, then we cut another piece of 5x20cts which we will paste transversely behind the strip of hearts and then place glue only in the corners and glue it on our base, as seen in the photos.


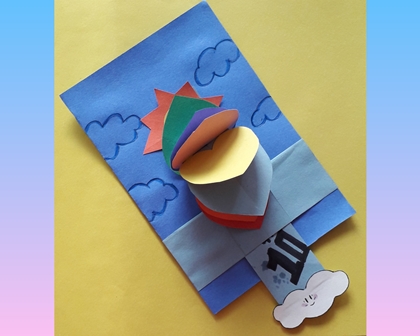
Now we cut a piece of 5x7cts which we will glue on the back of our strip of hearts without gluing it on the base, be guided by the photo, then we cut a beautiful sun and a beautiful cloud to which we will draw some beautiful faces and glue them at the top and bottom of our strip of hearts.


Una vez hecho esto decoramos la base con algunas nubes que le darán un toque especial al diseño.
We pull the strip of hearts down and there we can place a special message, the one that you want and addressed to whoever you want, ours of course is addressed to my daughter who is 10 years old.
Once this is done we decorate the base with some clouds that will give a special touch to the design.


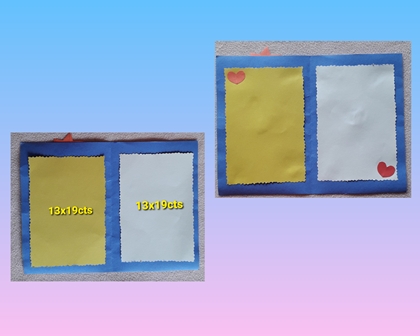
Finally we decorate the internal part of our card by cutting out two pieces of 13x19cts and we glue them, decorating with some hearts, in this area we can write a special message dedicated to the person who will receive the card.
Quedando de esta manera nuestra hermosa Tarjeta de Regalo de Corazones, un detalle especial para un día especial.
Thus, leaving our beautiful Hearts Gift Card, a special detail for a special day.


It is a very beautiful project, I hope you liked it and that you are encouraged to do it, we love the result and we are eager to use it on birthday! Thank you very much for visiting my little corner and I wait for you in a new opportunity where I will continue to bring you more news about my daughter's birthday.
Si desean conocer algunos de mis trabajos anteriores, aqui les dejo el link:
If you want to know some of my previous work, here is the link:
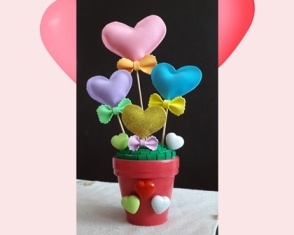
Como hacer un Centro de Mesa decorativo de Corazón!/How to make a Decorative Heart Centerpiece!
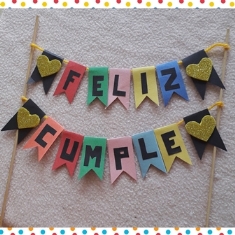
Como hacer un banderin de Feliz Cumpleaños para la torta! / How to make a Happy Birthday banner for the cake! Tutorial!
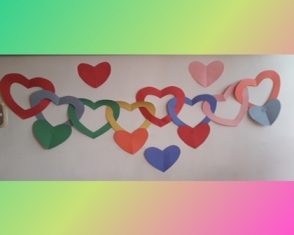
Guirnalda de Corazones para Cumpleaños o Día de los enamorados! / Garland of Hearts for Birthday or Valentine's Day!
Congratulations @lauraamerica! You have completed the following achievement on the Hive blockchain and have been rewarded with new badge(s) :
You can view your badges on your board And compare to others on the Ranking
If you no longer want to receive notifications, reply to this comment with the word
STOPTo support your work, I also upvoted your post!
Do not miss the last post from @hivebuzz:
Thank you for sharing this amazing post on HIVE!
Your content got selected by our fellow curator @saracampero & you just received a little thank you via an upvote from our non-profit curation initiative!
You will be featured in one of our recurring curation compilations and on our pinterest boards! Both are aiming to offer you a stage to widen your audience within and outside of the DIY scene of hive.
Join the official DIYHub community on HIVE and show us more of your amazing work and feel free to connect with us and other DIYers via our discord server!
If you want to support our goal to motivate other DIY/art/music/homesteading/... creators just delegate to us and earn 100% of your curation rewards!
Stay creative & hive on!