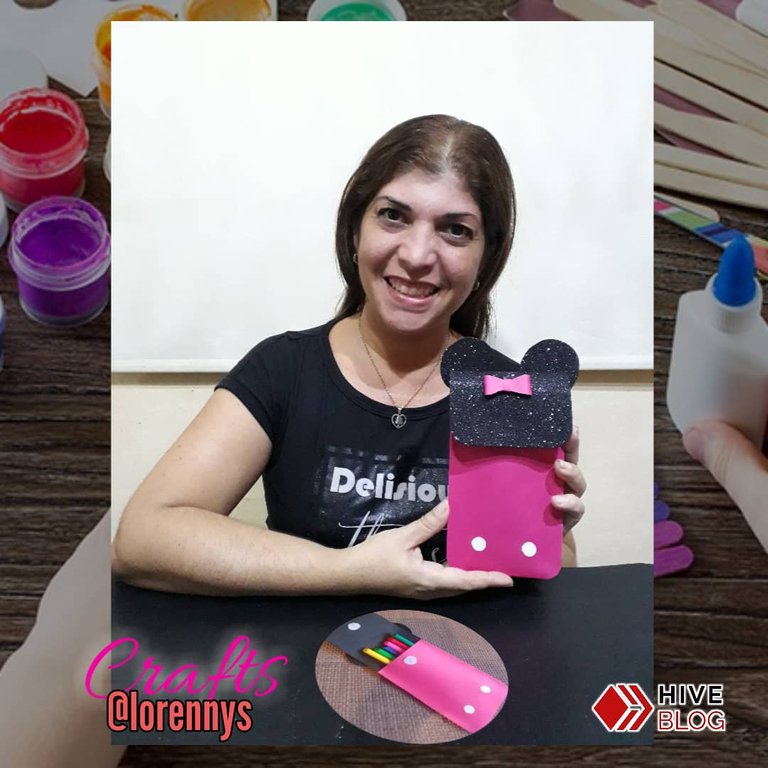
Feliz sábado queridos Hivers, espero que todos estén sanos y feliz disfrutando de sus hogares.
Happy Saturday dear Hivers, I hope you are all healthy and happy enjoying your homes.
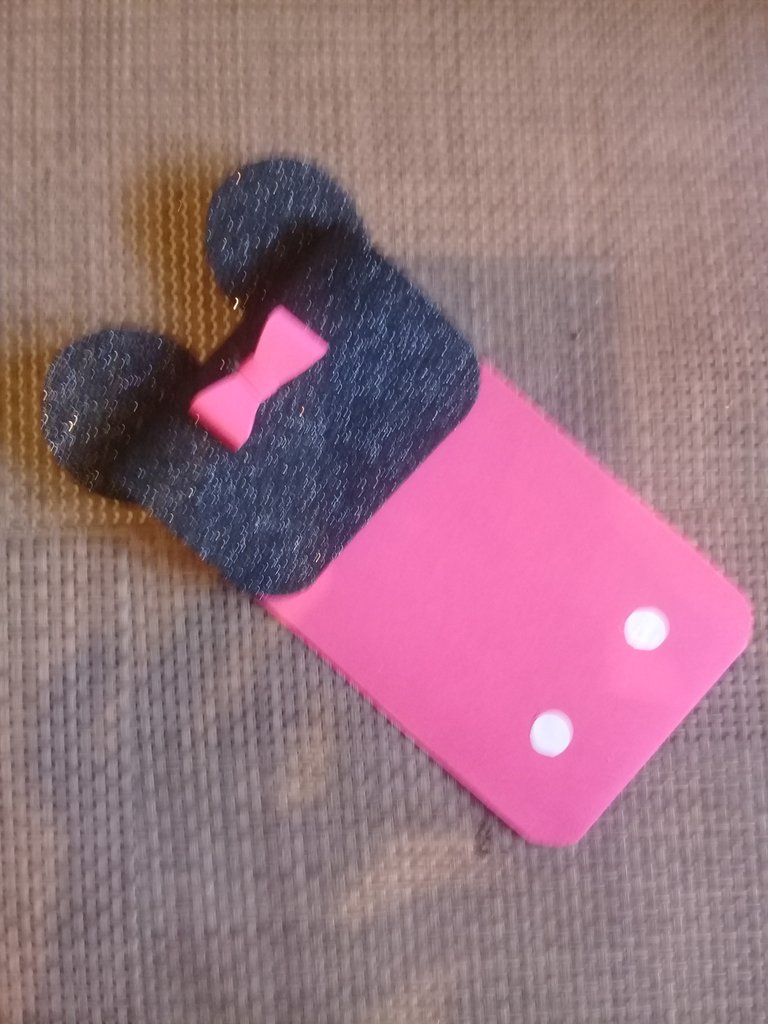
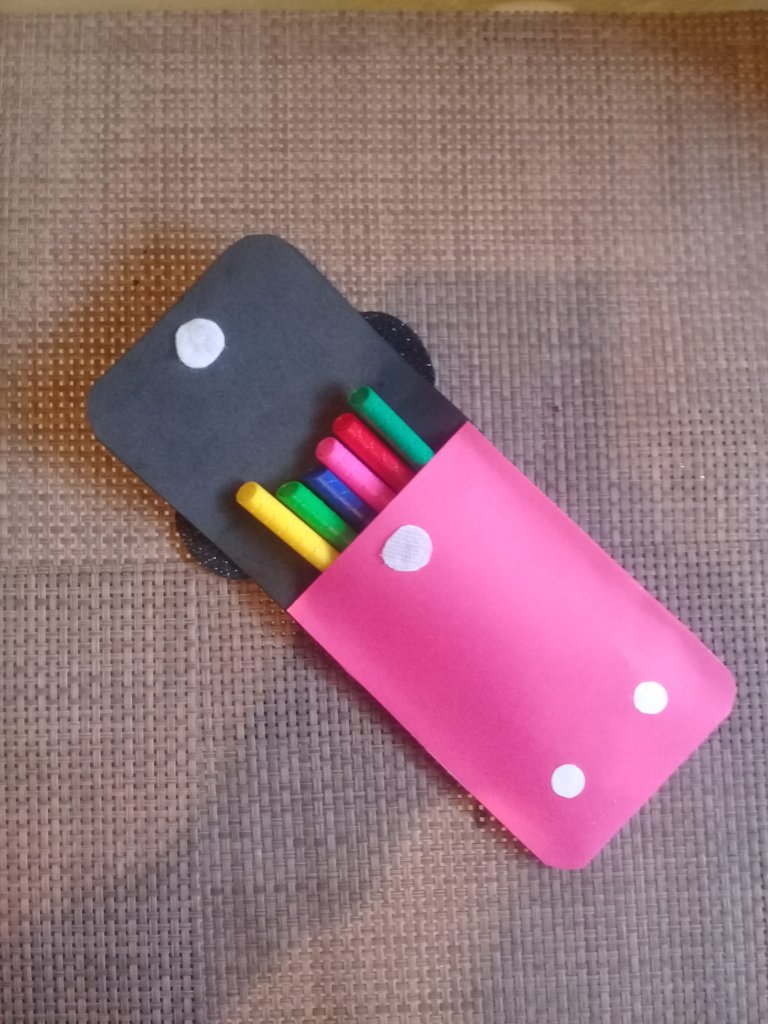
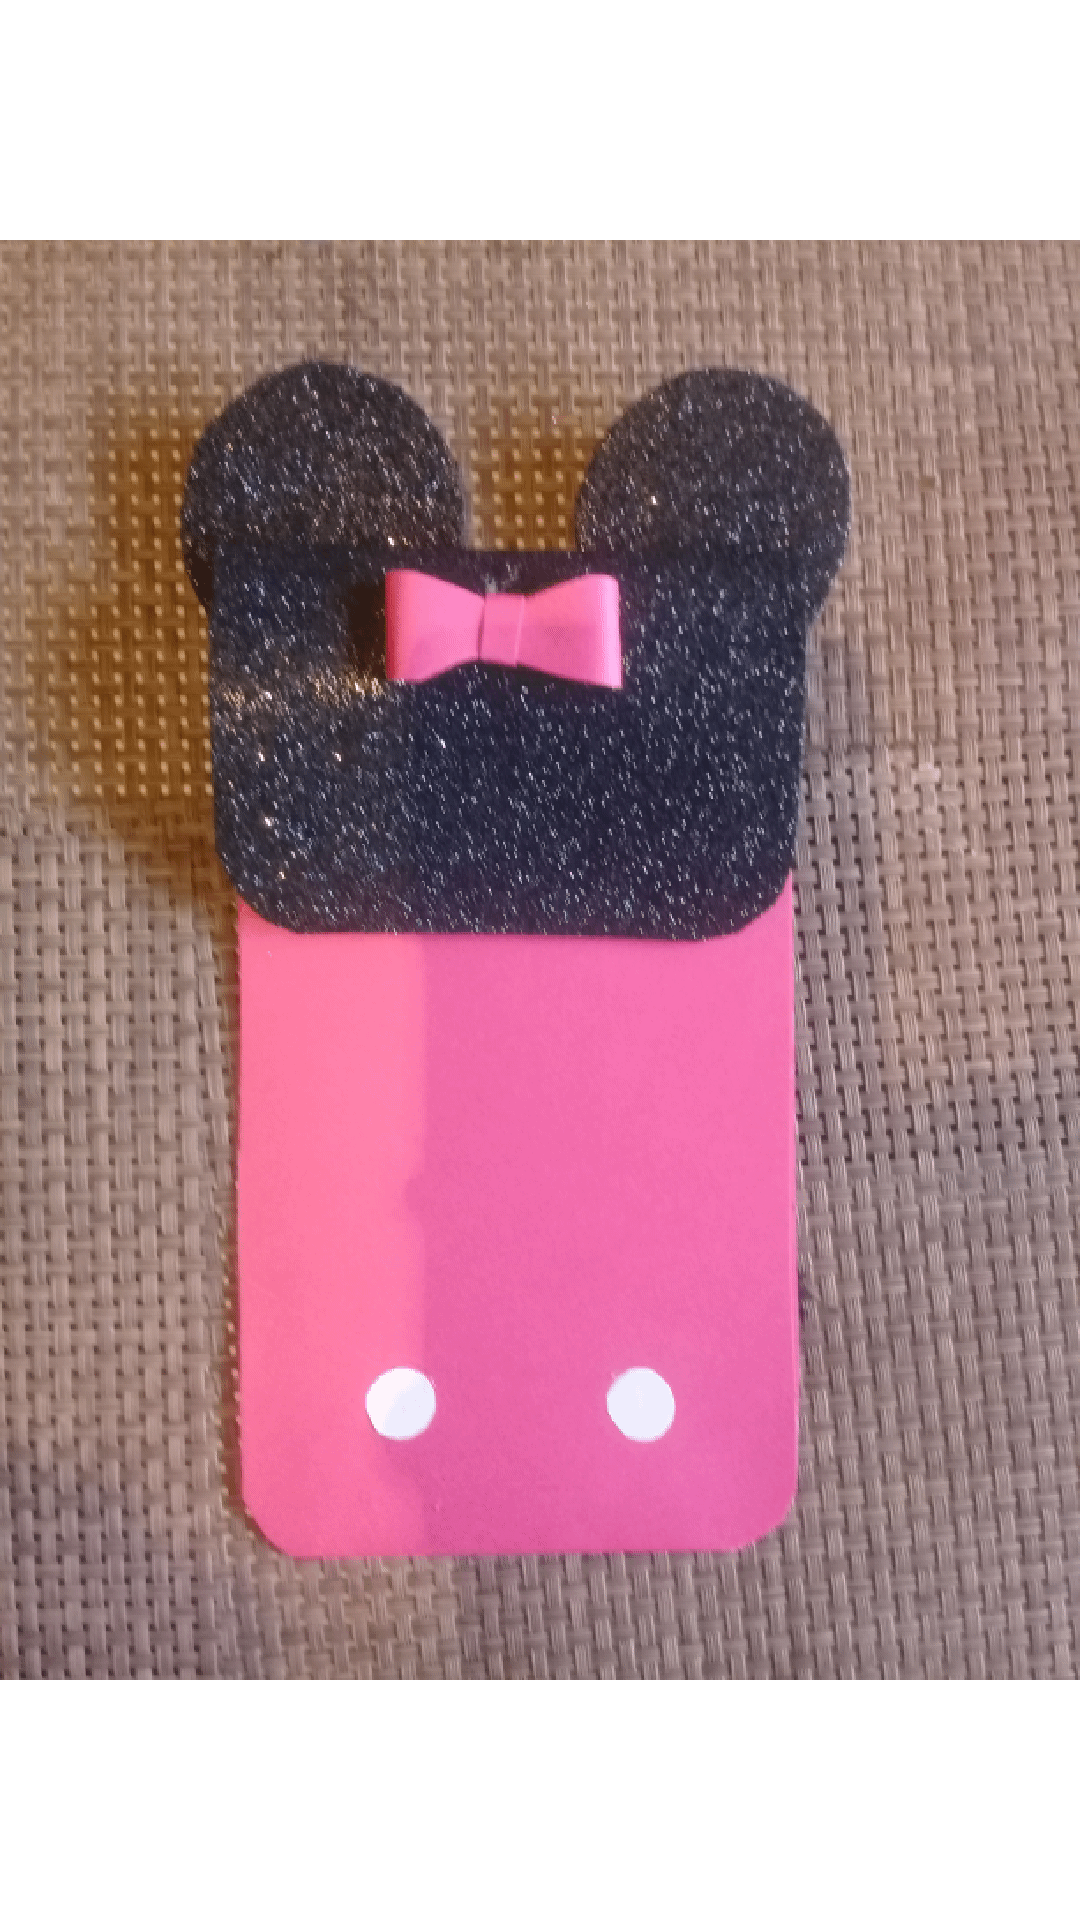
El proyecto de hoy es una bolsa muy practica, tanto para regalar como para llevar nuestros colores, lápices, marcadores, tijeras, joyas, chocolates y más.
Today's project is a very practical bag, both for gifts and for carrying our colors, pencils, markers, scissors, jewelry, chocolates and more.
Ahora bien vamos aprenda a hacer una bolsa de regalo DIY de Minnie Mouse .
Now let's learn how to make a DIY Minnie Mouse gift bag.
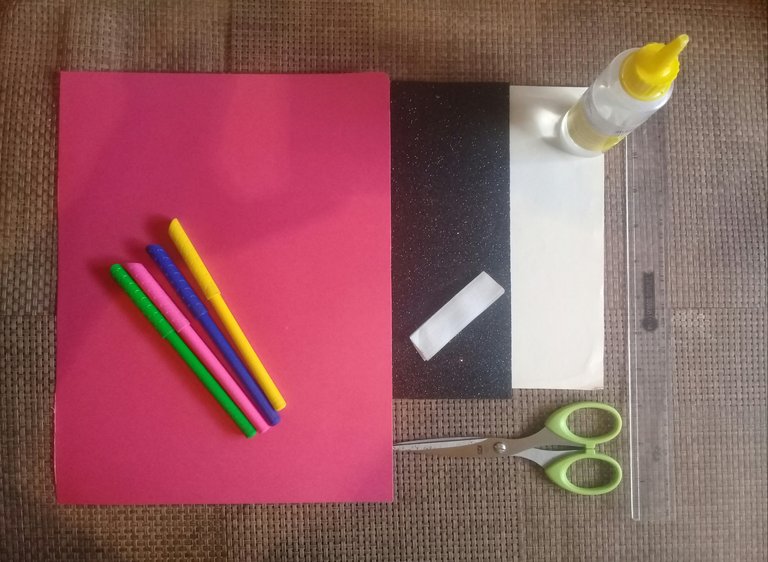
Materiales Necesarios:
- Cartulina Fuscia ( 10cm * 30cm)
- Foami de brillo negro ( 10 cm * 12 cm)
- Tijers
- silicon Pistola
- Marcador
- Regla
Necessary materials:
- Fuscia Card (10cm * 30cm)
- Black glitter foam (10cm * 12cm)
- Tijers
- Silicon Gun
- Marker
- Rule
En esta manualidad que es muy linda y simple, te ilustrare los pasos que debes seguir para realizarla hacer en unos pocos minutos.
In this craft that is very cute and simple, I will illustrate the steps you must follow to do it in a few minutes.
Pasos básicos muy sencillos que se mostrarán ahora:
Very simple basic steps to be shown now:
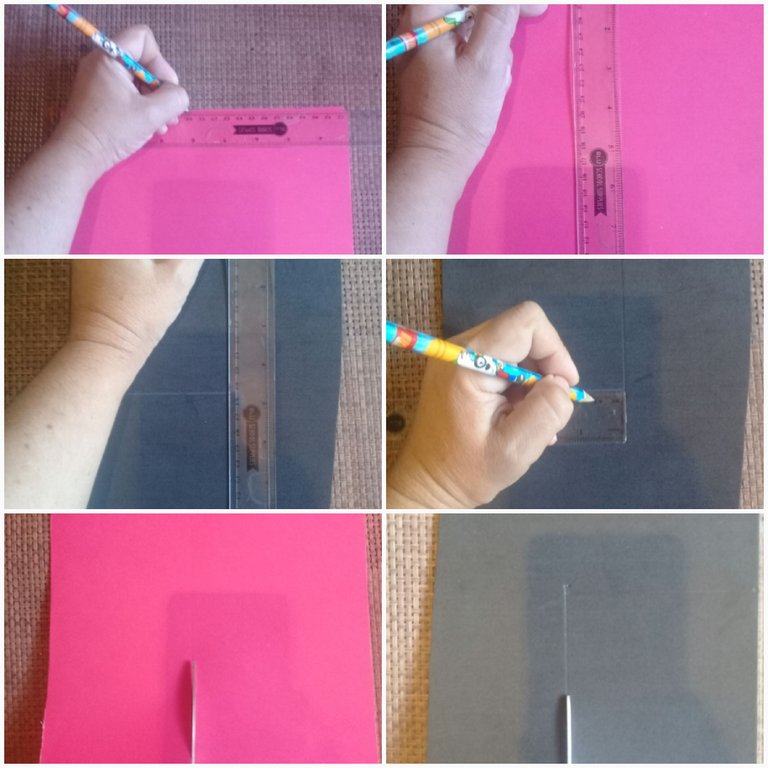
Comenzamos marcando la cartulina rosada con estas medidad ( 10cm * 30cm), y el foami negro brillante ( 10 cm * 12 cm) con la siguiente medidas.
We start by marking the pink cardboard with these measurements (10cm * 30cm), and the glossy black foami (10 cm * 12 cm) with the following measurements.

Aqui vamos a realizar un corte de semi círculo, en la base de la cartulina rosada Y pegamos los lados de la misma.
Here we are going to make a semi-circle cut, at the base of the pink card and glue the sides of it.

Despues hacemos el mismo corte en semi círculo, en la tapa negra y pegamos en la cartulina rosada.
Then we make the same cut in a semi circle, on the black cover and glue on the pink cardboard.
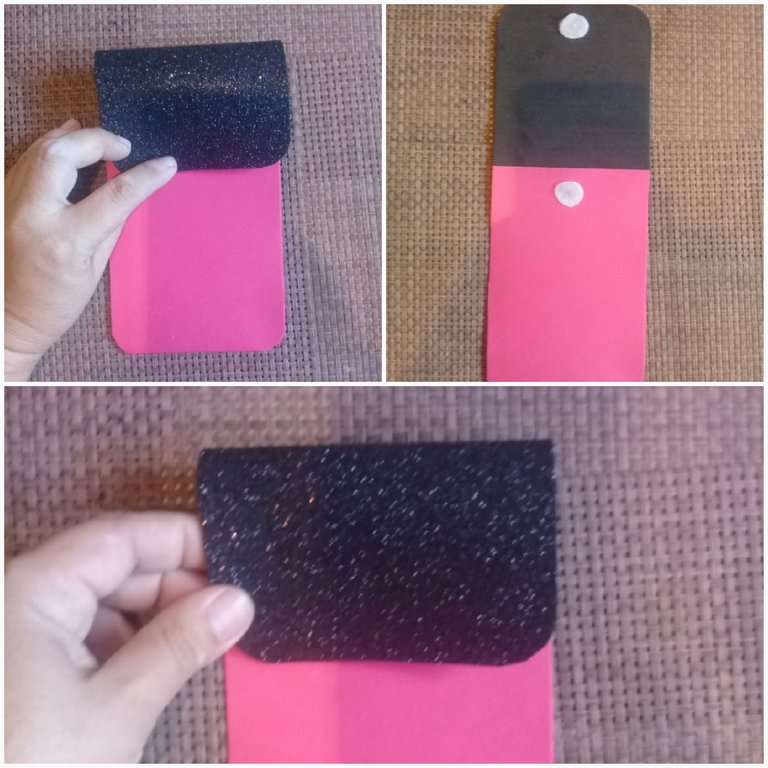
Este paso es muy sencillo, sólo colocaremos el cierre mágico en el lugar correspondiente y listo.
This step is very simple, we will only place the magic closure in the corresponding place and that's it.
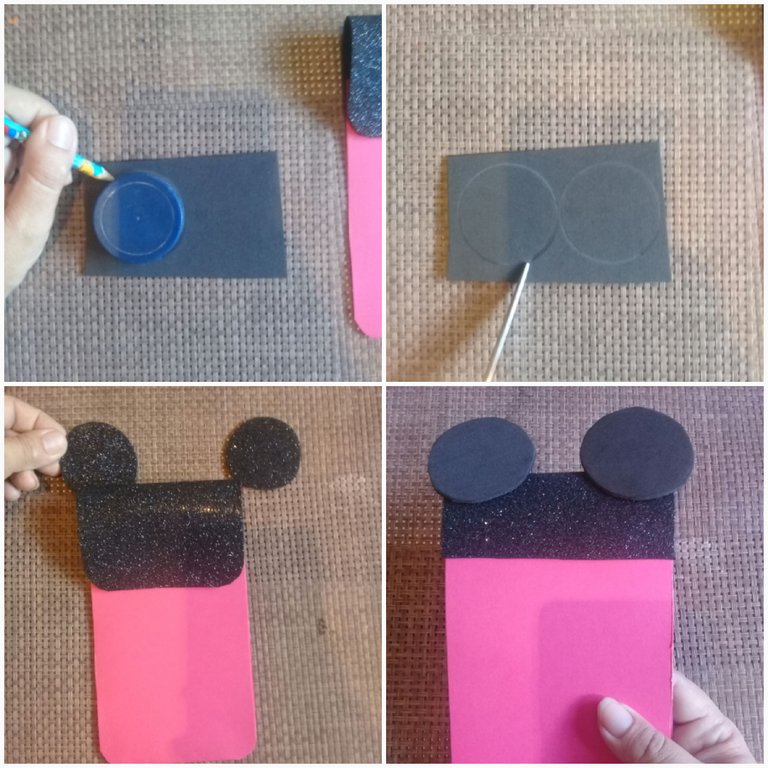
Vamos con una tapa a marcar en el foami negro, 2 círculos para simular unas orejas de Micky tu pegamos.
We go with a lid to mark on the black foami, 2 circles to simulate some Micky ears, you glue.
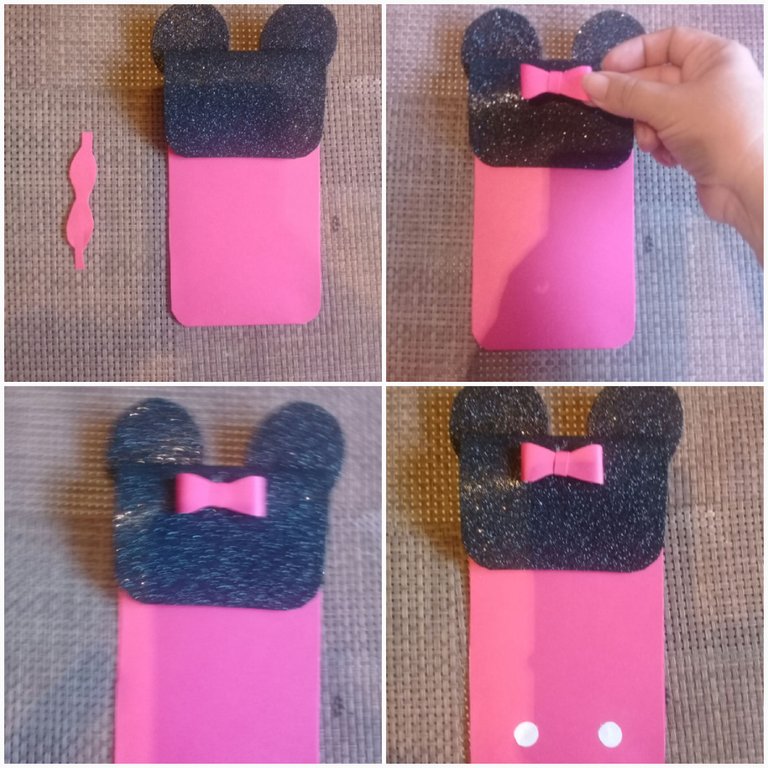
Ahora vamos a decorar haciendo un pequeño lazo y unos pies blanco.
Now we are going to decorate by making a small bow and some white feet.
Esta es una idea artesanal perfecta para hacer y divertirse. ¡Esta linda bolsa seguramente te encantará! Haz uno para ti o incluso puedes regalarlo a tus seres queridos. Feliz elaboración Animate !!
This is a perfect craft idea to make and have fun. You are sure to love this cute bag! Make one for yourself or you can even gift it to your loved ones. Happy crafting Animate !!