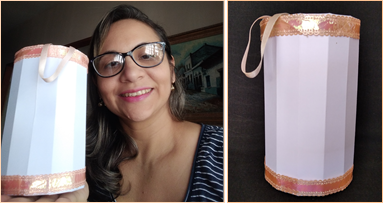
Saludos apreciados amigos, la envoltura de un obsequio no es solo la cubierta del regalo es algo que puede ser único y original. Mi proyecto de hoy consiste en Cómo hacer una caja cilíndrica con cartulina. Esta caja es realmente sencilla, fácil de hacer y la podemos adaptar al tamaño que deseamos. Su forma cilíndrica con pliegues hace que nuestros obsequios sean algo especial.
Greetings dear friends, the wrapping of a gift is not only the cover of the gift it is something that can be unique and original. My project today consists of How to make a cylindrical box with cardboard. This box is really simple, easy to make and we can adapt it to the size we want. Its cylindrical shape with pleats makes our gifts something special.

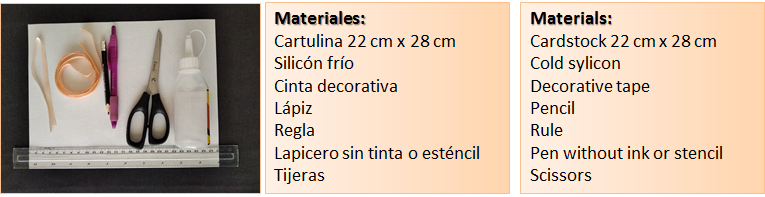
Para elaborar esta caja para regalos necesitamos:
To make this gift box we need:
Paso a paso:
En la cartulina trazamos dos lineas horizontales dejando 4 cm en la parte superior y 4 centímetros en la inferior. Para trazar las lineas en la cartulina utilizaremos el lapicero sin tinta, de manera de no dejar marcas con el lápiz en la cartulina.
Step by Step:
On the cardboard we draw two horizontal lines leaving 4 cm at the top and 4 cm at the bottom. To draw the lines on the cardboard we will use the pen without ink, so as not to leave marks with the pencil on the cardboard.
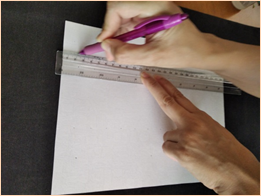
Para trazar las lineas verticales dejamos 2 cm de espacio entre cada linea en toda la cartulina, luego vamos marcando con el lapicero a lo largo de las lineas verticales.
To draw the vertical lines, we leave 2 cm of space between each line on all the cardboard, then we are marking with the pencil along the vertical lines.

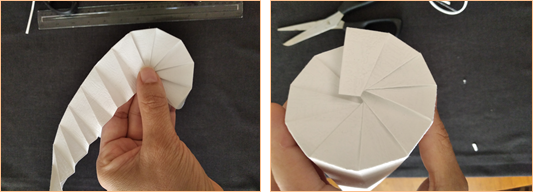
Una vez marcadas todas las líneas con el lapicero vamos doblando cada uno de los pliegues.
Once all the lines have been marked with the pen, we are folding each of the folds.
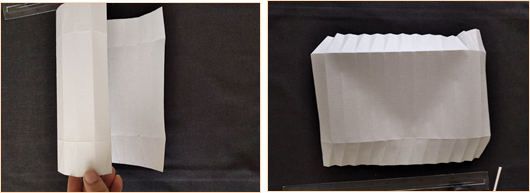
En la parte inferior vamos uniendo los pliegues de la caja trazando una curva suave hasta llegar al final de la cartulina.
At the bottom we are joining the folds of the box tracing a smooth curve until we reach the end of the cardboard.
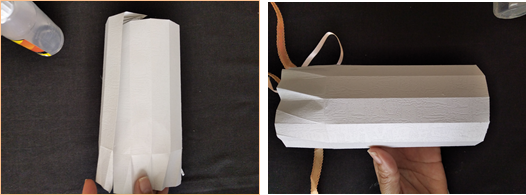
Para formar el cilindro pegamos con silicón frío ambos extremos de la cartulina.
To form the cylinder, we glue both ends of the cardboard with cold silicone.
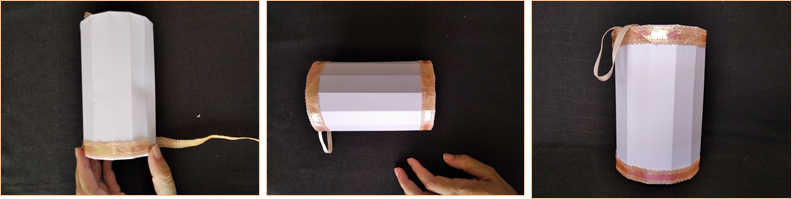
Para hacer fácil el acceso al interior de la caja pegamos una cinta delgada doblada en dos y unida en las puntas en un de los pliegues.
To make access to the inside of the box easy, we stick a thin tape folded in two and joined at the ends in one of the folds.
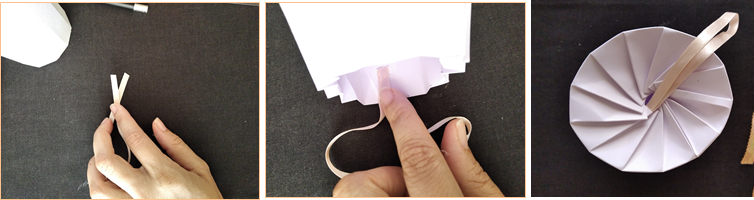
Para abrir la caja solo tenemos que halar la cinta y para cerrarla presionamos hacia dentro.
To open the box we only have to pull the tape and to close it we press inwards.
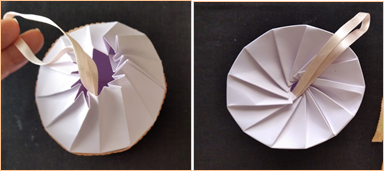
Por ultimo para adornarla colocamos una cinta decorativa en la parte superior e inferior alrededor de la caja cilíndrica.
Finally, to decorate it, we place a decorative ribbon at the top and bottom around the cylindrical box.
Como puedes observar esta caja es algo realmente fácil y sencilla de hacer. Podemos hacerla del color y decorarla como más nos guste.
As you can see, this box is something really easy and simple to do. We can make it in color and decorate it as we like best.

Que fácil y novedosa caja, muchas gracias por compartir tu idea.
Gracias por el apoyo a este post.🤗
!discovery 15 easy and creativo se senhora
Thank you.😊
This post was shared and voted inside the discord by the curators team of discovery-it
Join our community! hive-193212
Discovery-it is also a Witness, vote for us here
Delegate to us for passive income. Check our 80% fee-back Program
Thank you for the support you have given to my publications.