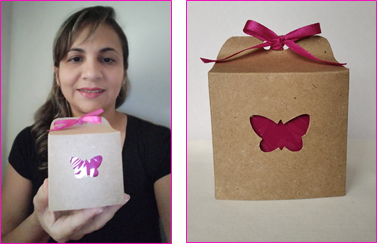
Saludos apreciada comunidad Hiver´s, en ocasiones se nos presentan eventos donde tenemos que entregar un detalle, un recuerdo para algún evento y queremos hacer de nuestro regalo algo especial, delicado y bonito, así que hoy les traigo cómo hacer una linda caja sorpresa.
Greetings dear Hiver´s community, sometimes we are presented with events where we have to deliver a detail, a souvenir for an event and we want to make our gift something special, delicate and beautiful, so today I bring you how to make a nice surprise box.

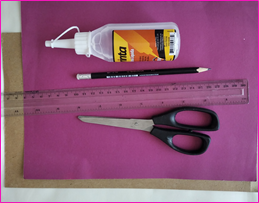
Materiales:
- Cartulina fucsia.
- Cartón delgado.
- Tijeras.
- Lápiz.
- Silicón frío.
Materials:
- Fuchsia cardboard.
- Thin cardboard.
- Scissors.
- Pencil.
- Cold sylicon.
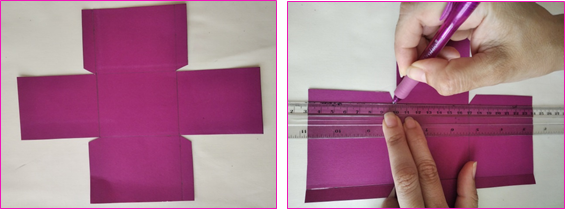
Paso 1:
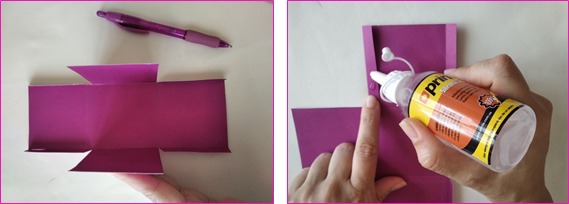
- En la cartulina fucsia marcar cuatro cubos de 7 cm cada uno. En los cubos laterales marcar dos pestañas de 1 cm cada una, con las que se unirán los lados de la caja.
Step 1:
- On the fuchsia cardboard, mark four cubes of 7 cm each. On the side cubes mark two tabs of 1 cm each, with which the sides of the box will be joined.
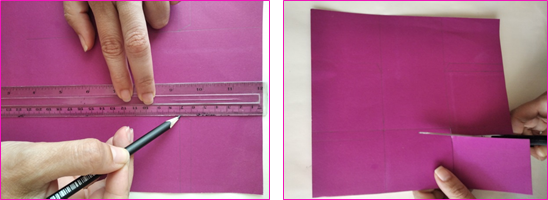
- Luego recortar la figura y con un lapicero sin tinta remarcar las líneas de división para hacer mas fácil el dobles de los lados.
- Then cut out the figure and with a pen without ink, highlight the division lines to make it easier to double the sides.
- Colocar el silicón frío en cada una de las pestañas y luego unir cada uno de los lados de la caja.
- Place the cold silicone on each of the tabs and then join each side of the box.
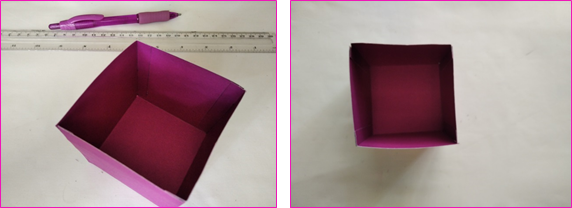
- Ya tenemos lista la primera parte de la caja.
- We already have the first part of the box ready.
Paso 2:
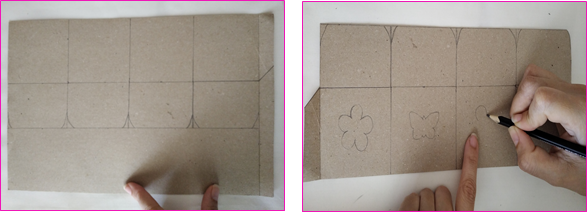
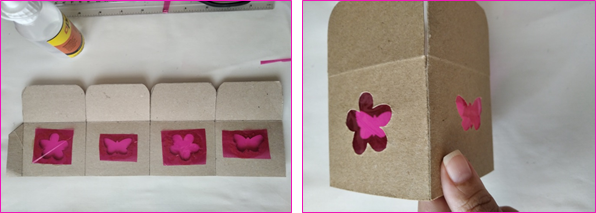
En este paso trabajaremos con el cartón delgado y armaremos la tapa del la caja. Para esto dibujé cuatro cubos de 7.5 cm cada uno, dejando una pestaña de 1 cm en el lado izquierdo del cartón.
Luego en la parte inferior y siguiendo las medidas de los cubos medir 5 cm que serán las pestañas que cerrarán la caja, para decorar la caja dibujé flores y mariposas en cada uno de los lados de la tapa, tal como lo muestra la figura.
Step 2:
In this step we will work with the thin cardboard and assemble the lid of the box. For this I drew four cubes of 7.5 cm each, leaving a 1 cm tab on the left side of the cardboard.
Then at the bottom and following the measurements of the cubes measure 5 cm which will be the tabs that will close the box, to decorate the box I drew flowers and butterflies on each side of the lid, as shown in the figure.
Paso 3:
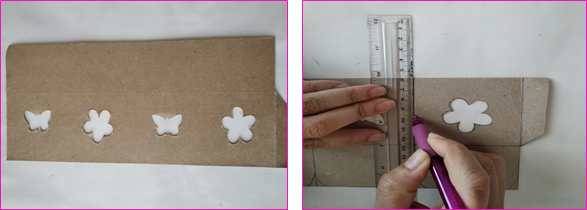
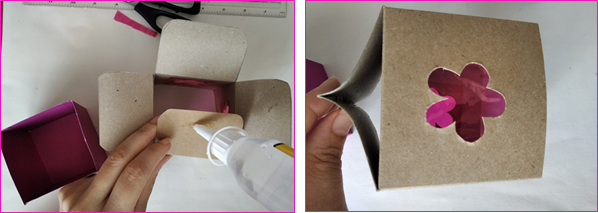
- Recortar cada una de las figuras dibujadas y con el lapicero sin tinta remarcar cada una de las líneas de división de la tapa.
Step 3:
- Cut out each of the figures drawn and with the pen without ink, highlight each of the division lines of the cover.
- Para hacer mas vistosa la caja coloqué retazos de papel celofán de color fucsia en cada una de las figuras en la parte interna de la caja. Luego uní ambos extremos de la caja.
- To make the box more attractive, I placed pieces of cellophane paper of fuchsia color in each of the figures on the inside of the box. Then I joined both ends of the box.
Paso 4:
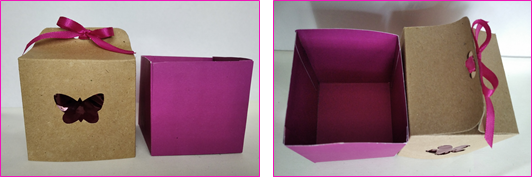
- En la parte superior de la caja con el silicón pegué las pestañas dejando dos, estas las uní en las punta de modo que quedaran levantadas como lo muestra la figura.
Step 4:
- At the top of the box with the silicone I glued the tabs leaving two, I joined them at the tips so that they were raised as shown in the figure.
- En las pestañas que están levantadas perforé dos orificios con el perforador y coloqué una cinta delgada fucsia atada con un lazo.
- On the raised tabs I drilled two holes with the piercer and placed a thin fuchsia ribbon tied with a bow.
De esta manera quedan estas cajas sorpresas. Les dejo fotografía de varios ángulos para que vean lo linda que se ven.
In this way these surprise boxes remain. I leave you photography from various angles so that you can see how beautiful they look.
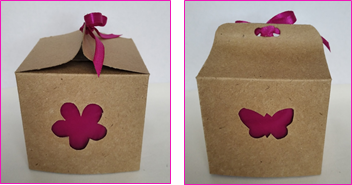
Estas cajas sorpresa son muy lindas y fáciles de hacer, no requieren de tanto material, puedes hacerlo con material que tengas en casa y solo tienes que dejar volar tu imaginación y creatividad.
These surprise boxes are very cute and easy to make, they do not require as much material, you can do it with material that you have at home and you just have to let your imagination and creativity fly.

@ɱαɾƈιαႦσɳ
Gracias por enseñarnos ese paso a paso muy original y creativo @marciabon. Saludos y más creaciones de ésta queremos ver.
Gracias @emiliocabrera, con gusto seguiré compartiendo en #hive mis creaciones. Espero ver pronto tu creaciones, se que también eres muy bueno desarrollando y creando ideas. Saludos.