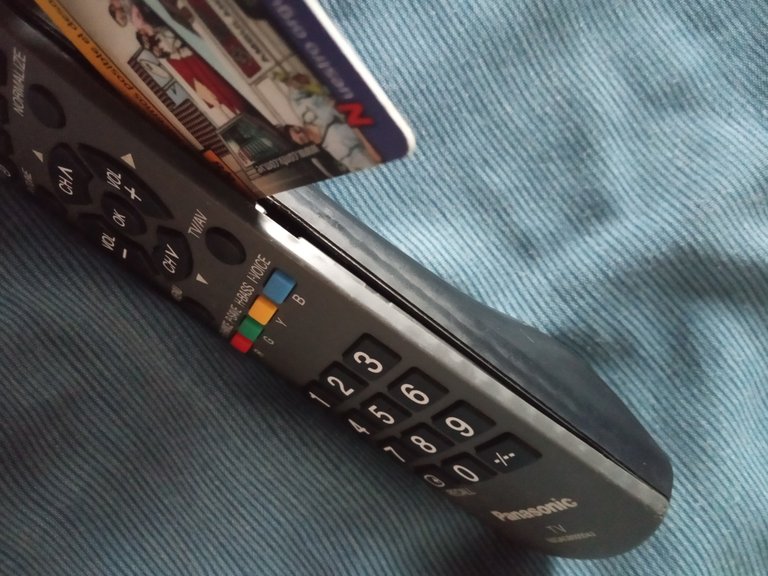
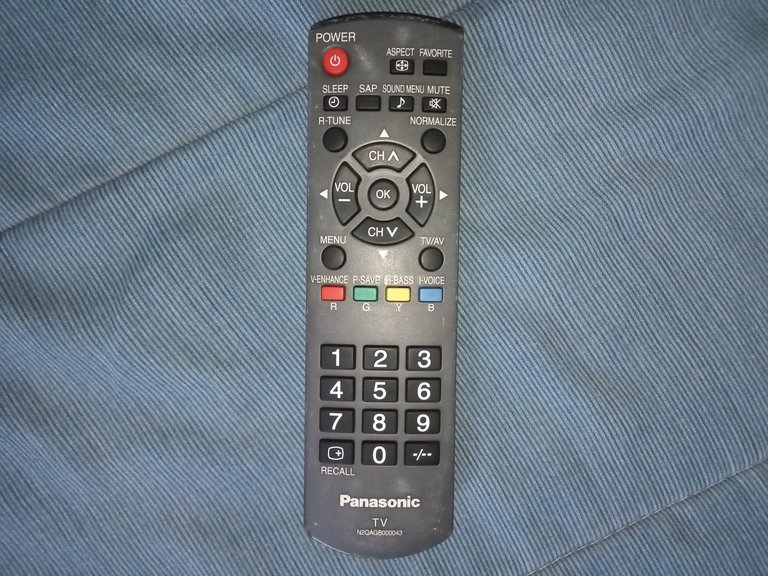
One of the things I use the most in our homes on a daily basis are remote controls, be it the television, the sound system, the air conditioning, among others. Usually what we do is just change the batteries when they stop working correctly, but we do not worry about the internal state of the control, which can eventually deteriorate due to dust and sweat of the hands, even by the The same sulfate that is generated at the connection poles of the batteries or the total deterioration released by the internal liquid that contains mercury, cadmium, nickel, lithium and this reaches the control circuit, an obstruction between the rubber contact and the circuit so it will necessarily need corrective maintenance to recover the optimal state of the control.
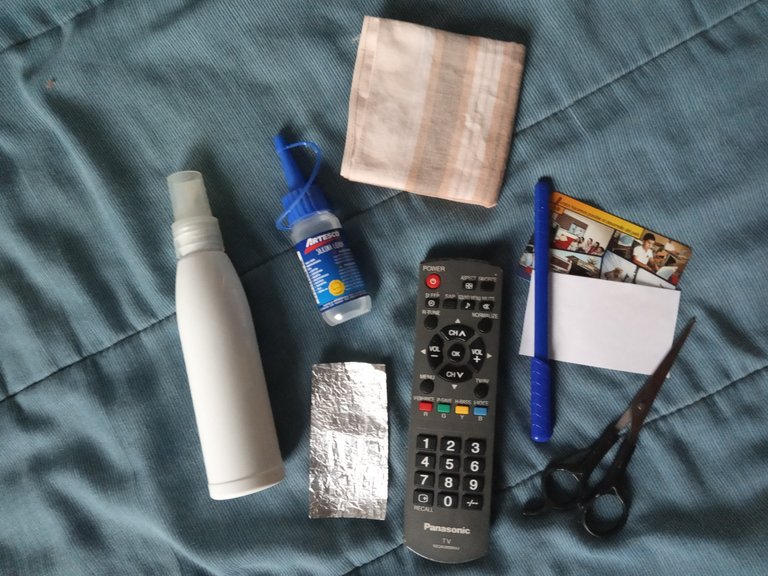
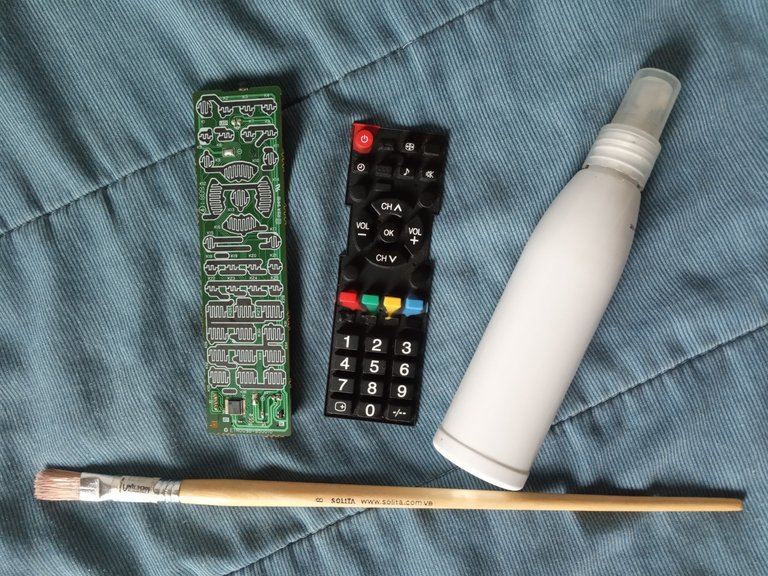
- Silicon líquido o goma blanca
- Alcohol
- Papel aluminio
- Tijeras
- Lapicero
- Trozo de papel blanco
- tarjeta plástica resistente
- toalla seca
- Liquid silicone or white rubber
- Alcohol
- Aluminum foil
- Scissors
- Pen
- Piece of white paper
- heavy duty plastic card
- Dry towel
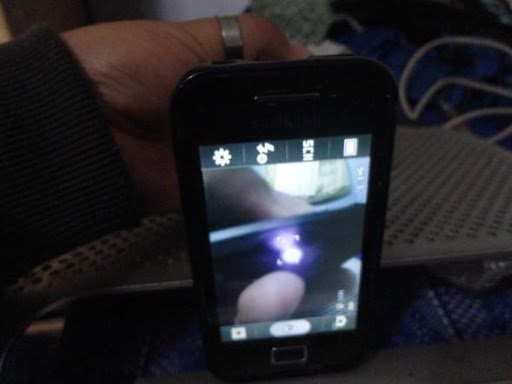
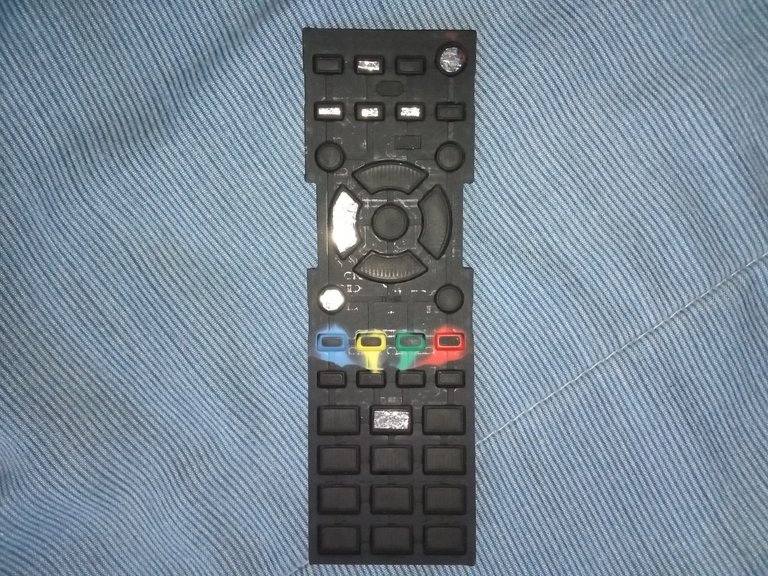
1- Verificar con la ayuda de la cámara de tu teléfono cuales botones presentan falla, para ello colocar el bombillo led aputando a la cámara del teléfono y presionar cada botón, los que no generan un encendido en el bombillo led que podrán observarse a través de la cámara, serán los que presentan un mal funcionamiento.
1- Verify with the help of the camera of your phone which buttons are faulty, for this place the led bulb pointing at the phone camera and press each button, which do not generate an ignition on the led bulb that can be seen through the camera will be the ones with a malfunction.
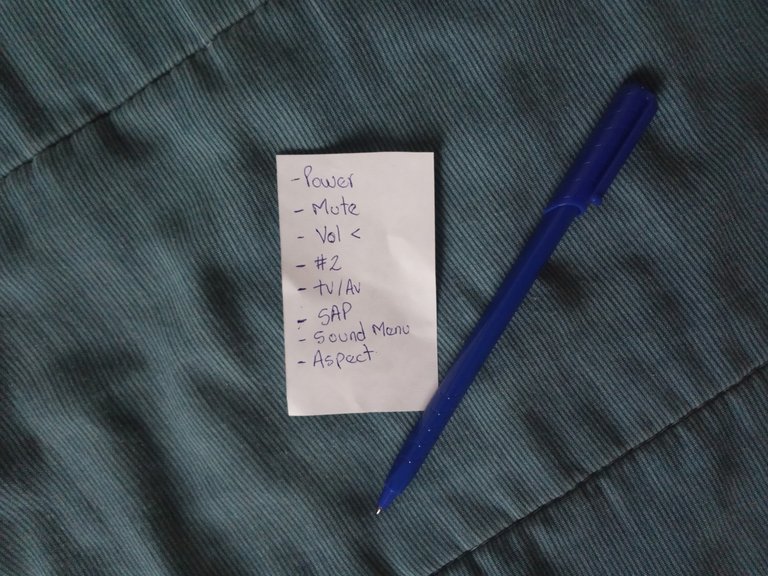
2- Anotar en el papel en el trozo de papel blanco los botones que deberán ser reparados.
2- Write on the paper on the piece of white paper the buttons that must be repaired.
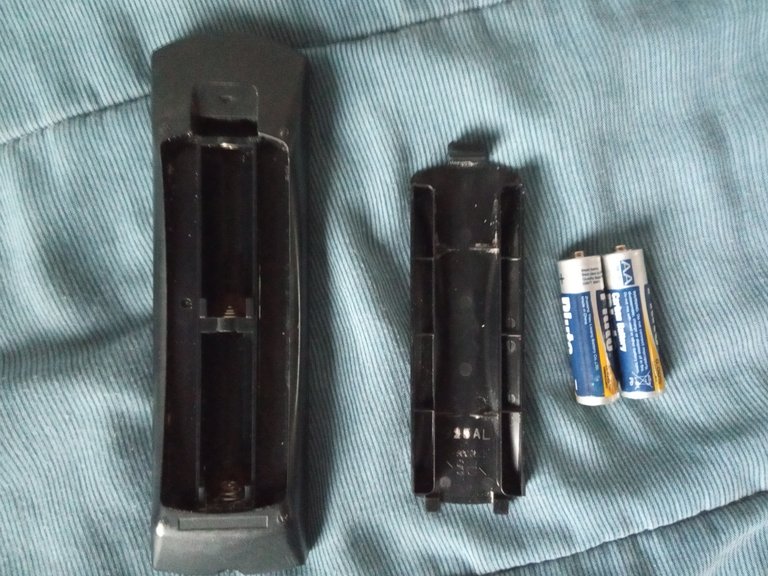
3- Retirar las baterías del control, verificar su estado y que no haya liquido aceitoso en la cavidad donde van las baterías, en caso de haber liquido, en este tutorial se le indicará que hacer.
3- Remove the batteries from the control, check their condition and that there has been no oily liquid in the cavity where the batteries go, if they have liquid, this tutorial will indicate what to do.
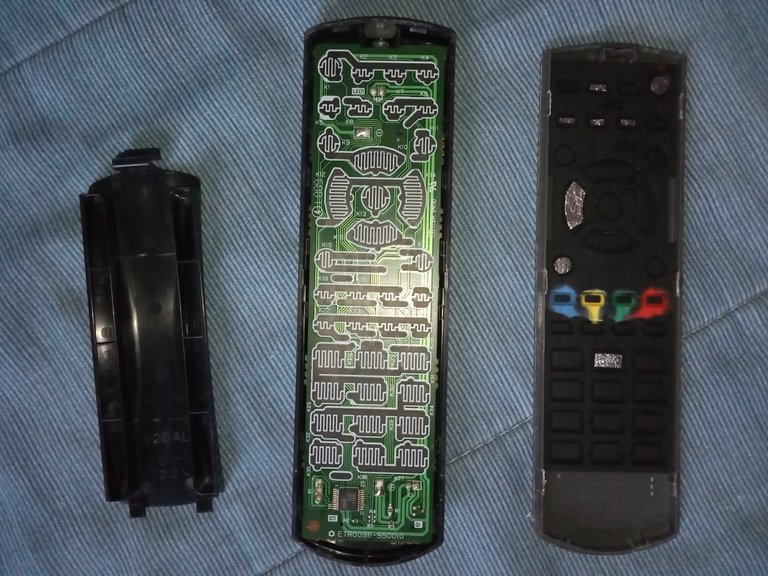
4- Verificar que el control no sea de tornillos, abrir con ayuda de la tarjeta plástica ejerciendo presión por los canales de unión del control para liberar los enganches.
4- Verify that the control is not screwed, open with the help of the plastic card applying pressure through the connection channels of the control to release the hooks.
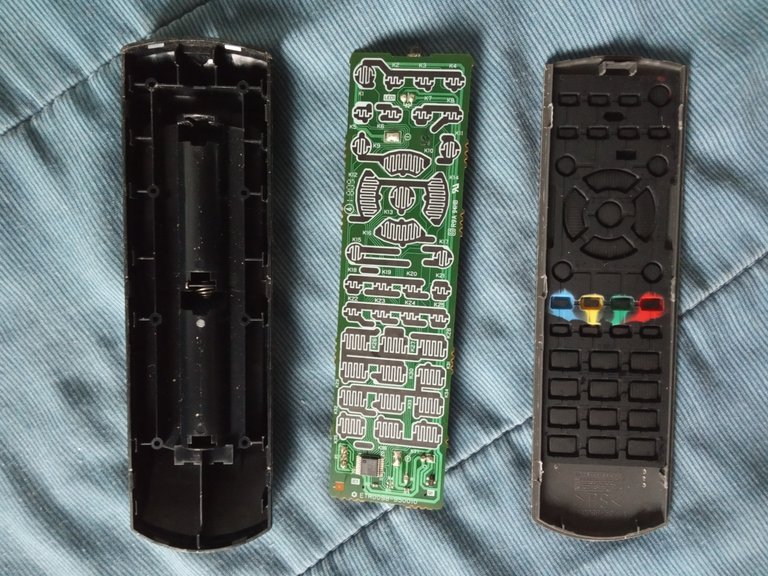
5- Separar las piezas del control e identificar si hay presencia de algún liquido aceitoso en la placa, en caso de haberlo, tomar la toalla seca, agregarle un poco de alcohol y limpiar suavemente la placa del circuito, especialmente los terminales de soldadura de la parte frontal y contactos de la parte reversa de la placa que dan conexión con las baterías. Limpiar y dejar secar completamente
5- Separate the control parts and identify if there is an oily liquid present on the plate, if any, take the dry towel, add a little alcohol and gently clean the circuit plate, especially the solder terminals of the front and contacts on the reverse side of the board that connect to the batteries. Clean and let dry completely.
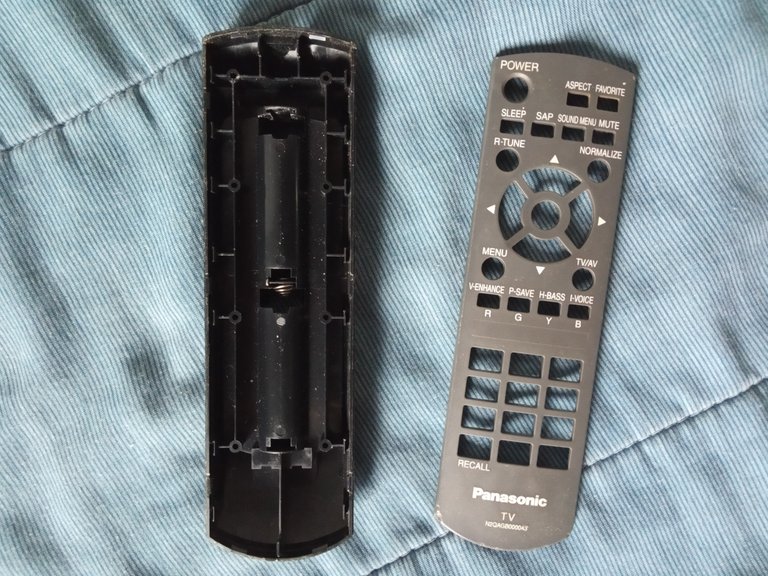
6- Limpiar con alcohol y una toalla seca o lavar con jabón y cepillo(a su preferencia) la carcasa del control remoto para eliminar grasa, polvo y residuos de liquido de las baterías. Posteriormente utilizar si es posible un secador para asegurar que no queden residuos de agua, o en su defecto dejar secar al sol por unas horas.
6- Clean the remote control housing with alcohol and a dry towel or wash with soap and a brush (to your preference) to remove grease, dust and liquid residue from the batteries. Later use if possible a dryer to ensure that there are no water residues, or failing to dry in the sun for a few hours.
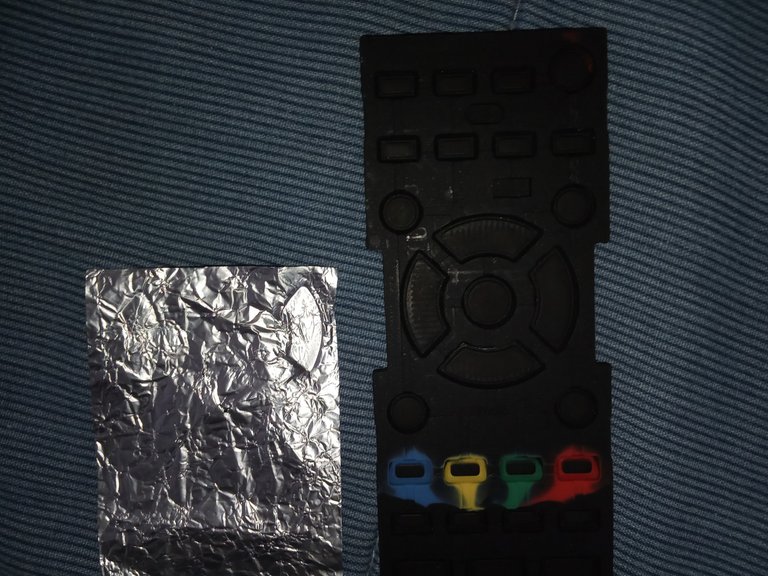
7- Sacar molde con papel aluminio de los botones que presentan falla, de preferencia presiona el papel sobrbe el boton para imprimir en el el tamaño exacto y recortar.
7- Remove mold with aluminum foil from the buttons that are faulty, preferably press the paper on the button to print the exact size and cut.
8 Pegar los moldes de los botones con silicon líquido o goma blanca, dejar secar por al menos 1 o 2 horas, en su defecto, proceder al ensamble y dejar el control boca abajo por el tiempo mencionado.
8- Glue the molds of the buttons with liquid silicone or white rubber, let them dry for at least 1 or 2 hours, otherwise, proceed to the assembly and leave the control upside down for the time mentioned.
9 Ensamblar el control remoto nuevamente.
9- Assemble the remote control again.
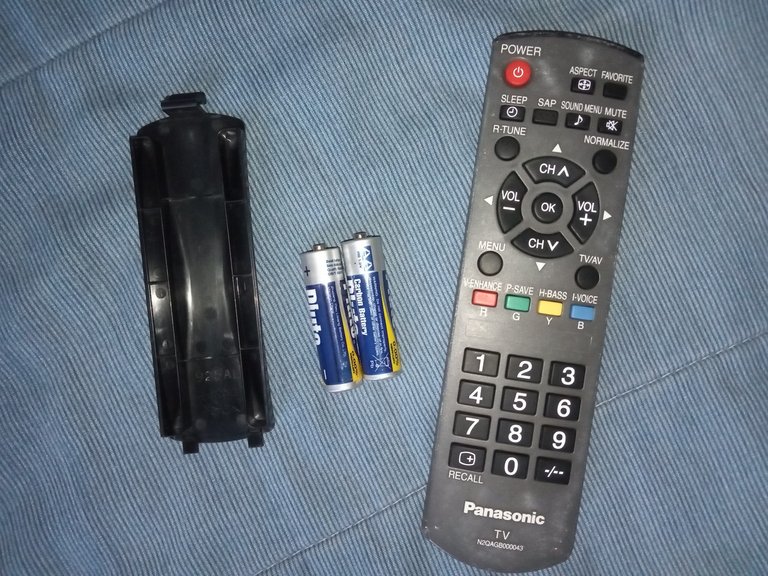
10 Colocar las baterías o cambiarlas por unas nuevas si las que tenia estaban dañadas y listo.
10- Put the batteries in or replace them with new ones if the ones you had were damaged and that's it.
On some occasions, if after cleaning and placing aluminum foil molds on the buttons of the control, and the control still does not work, it may be due to damage to the plate due to the liquid that came into contact with the circuit of the remote control plate, which can be repaired in some cases with a chemical bath, not recommended method of doing at home because you can spoil your control if you do not know how to do it.
¡Felicidades! Esta publicación obtuvo upvote y fue compartido por @la-colmena, un proyecto de Curación Manual para la comunidad hispana de Hive que cuenta con el respaldo de @curie.
Si te gusta el trabajo que hacemos, te invitamos a darle tu voto a este comentario y a votar como testigo por Curie.
Si quieres saber más sobre nuestro proyecto, acompáñanos en Discord: La Colmena.
Gracias por compartir, gran trabajo de redacción y ayuda para muchos!
This post was shared in the #spanish-curation channel in the Curation Collective Discord community for curators, and upvoted and reblogged by the @c2-spanish community account after manual review.
@c-squared runs a community witness. Please consider using one of your witness votes on us here
Congratulations @marcoquin! You have completed the following achievement on the Hive blockchain and have been rewarded with new badge(s) :
You can view your badges on your board And compare to others on the Ranking
If you no longer want to receive notifications, reply to this comment with the word
STOPTo support your work, I also upvoted your post!
Support the HiveBuzz project. Vote for our proposal!