.png) Foto tomada desde mi teléfono inteligente.
Foto tomada desde mi teléfono inteligente.Edición hecha por mi desde canva
Hello my dear friends, I hope you are well. I have always said that for me it is a pleasure to participate in contests and more if it is about crafts, because I love to create, so today I decided to join this initiative led by the friend @jennyzer, which encourages us to make a beautiful detail motivated to Mother's Day, with recycling materials. If you want to join this publication. Without further ado I will show you how to make a beautiful portrait holder, step by step:
.png)
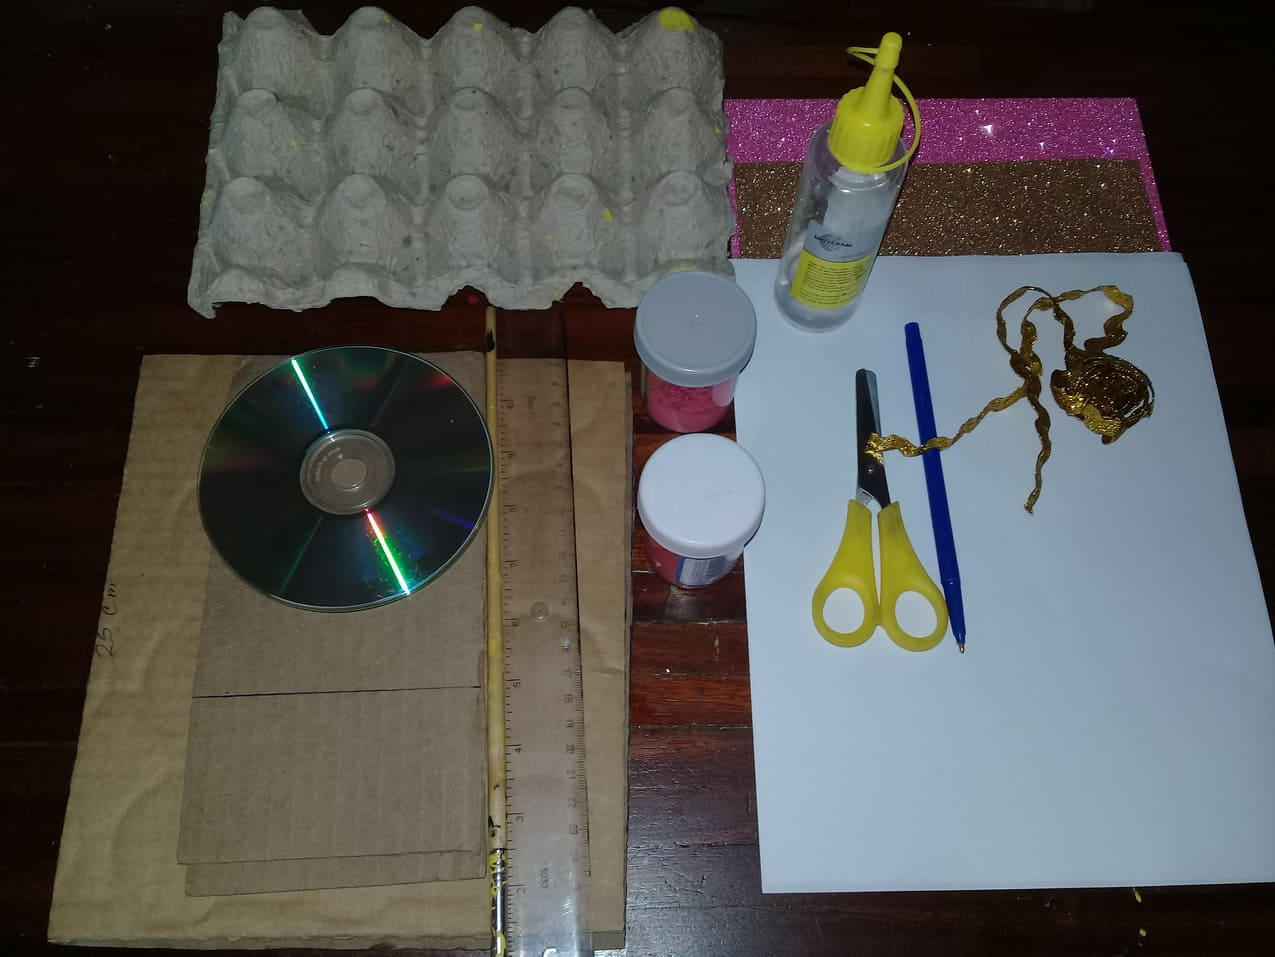
Los materiales a utilizar son:
- Un cartón de huevo.
- Dos piezas de carton.
- Un CD's
- Una regla.
- Un pincel.
- Tijera.
- Lapiz.
- Silicon liquido.
- 3 Hojas en blanco.
- Fo ami de color rosado y dorado.
- Cinta de color dorado.
The materials to be used are:
- One egg carton.
- Two pieces of cardboard.
- A CD's
- A ruler.
- A paintbrush.
- Scissors.
- Pencil.
- Liquid silicon.
- 3 blank sheets.
- Fo ami of pink and gold color.
- Gold color ribbon.
.png)
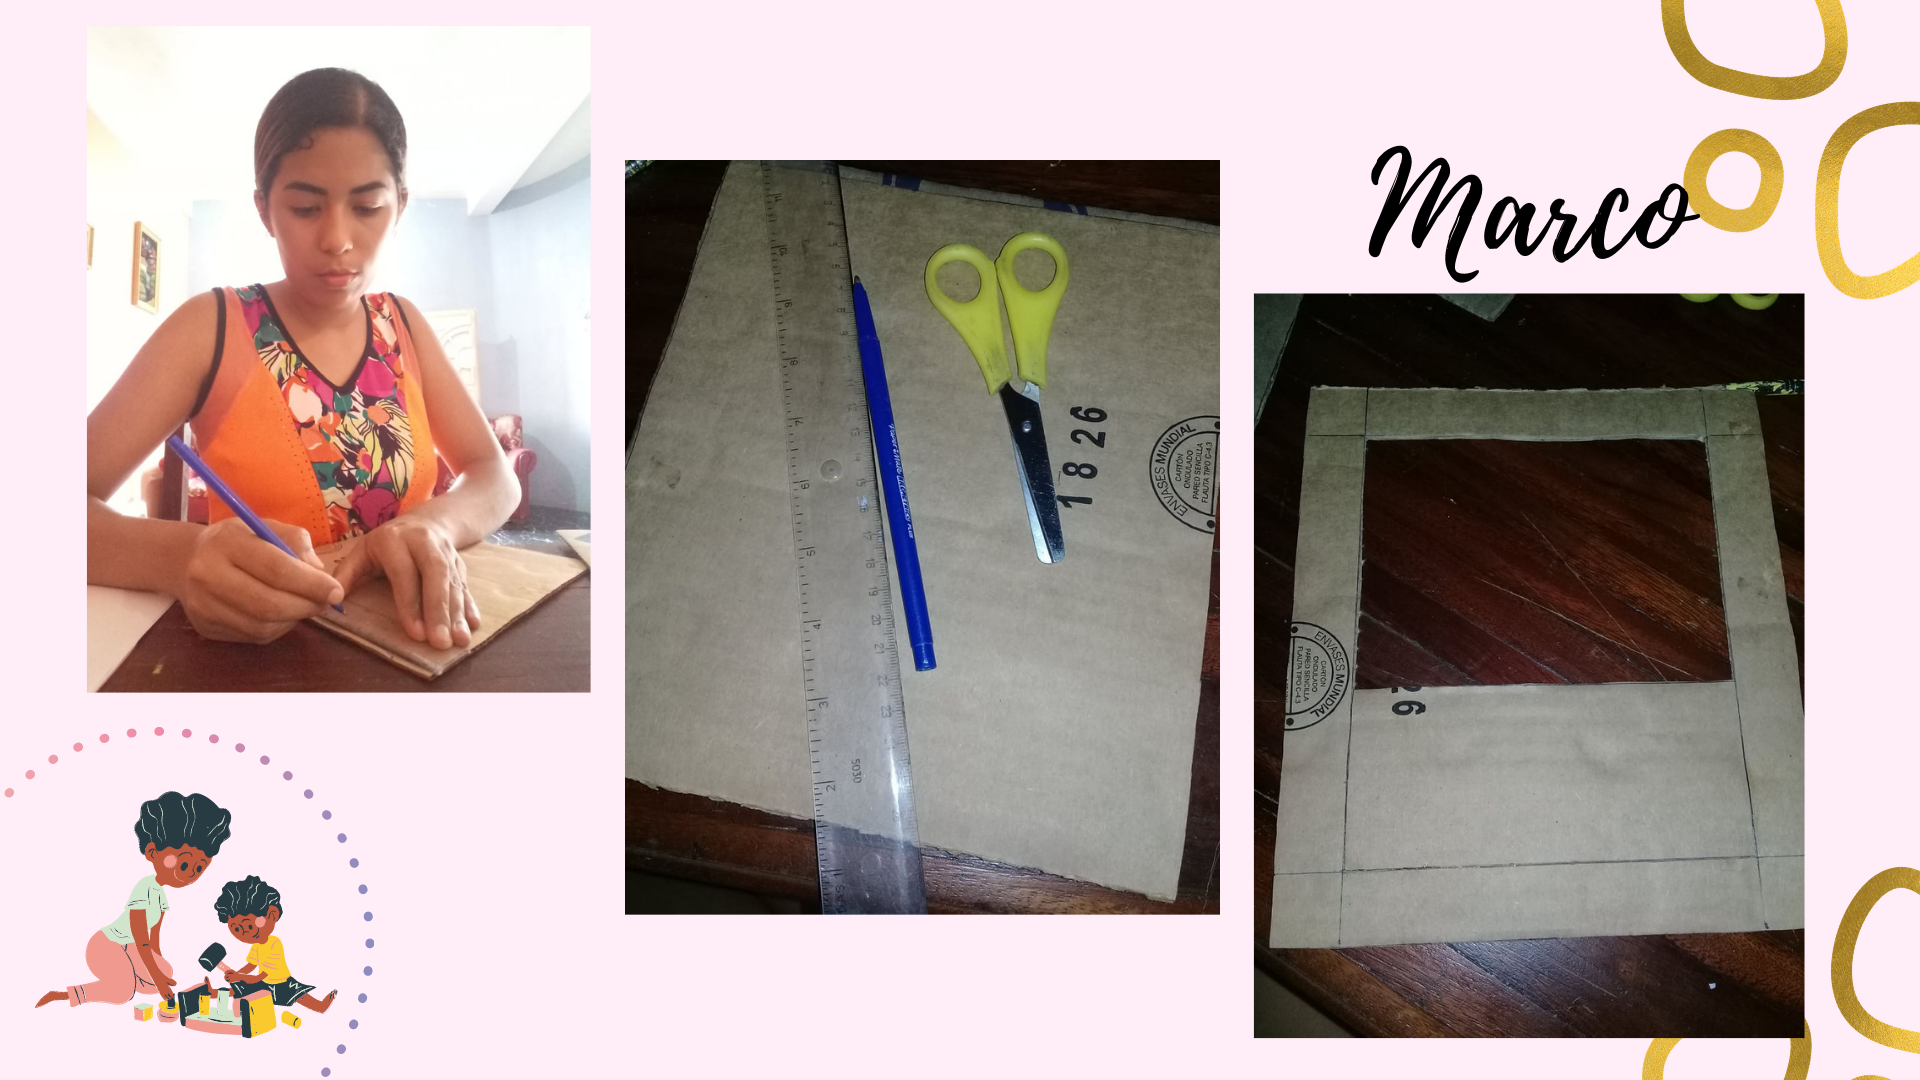
Paso 1: Lo primero que debemos hacer es tomar dos piezas de cartón, regla y lápiz. Con la regla medimos y sacamos dos cuadrados de 24.5 centímetro de alto y 21.0 centímetro de ancho, con un marco de 2.5 centímetros dejando en la parte inferior un ancho de 10.0 centímetros. Recortamos y nos quedara de la manera que muestro en el collage.
Step 1: The first thing to do is to take two pieces of cardboard, a ruler and a pencil. With the ruler we measure and take two squares of 24.5 centimeters high and 21.0 centimeters wide, with a frame of 2.5 centimeters leaving a width of 10.0 centimeters at the bottom. Cut it out and it will look like the way I show in the collage.
.png)
Paso 2: Ya teniendo la base de nuestro porta retrato, tomamos una hojas en blanco y con silicon liquido forramos la parte de atrás del porta retrato recortando el borde que nos sobra, luego las dos hoja en blanco que nos queda la arrugamos quedando como en forma de círculos, lo estiramos y forramos la parte de adelante dejando un borde de un 1.0 centímetro, ese borde lo pegamos en la parte de atrás de la pieza.
Step 2: Once we have the base of our portrait holder, we take a blank sheet and with liquid silicone we cover the back of the portrait holder cutting the edge that is left over, then the two blank sheets that we have left, we crumple them into circles, we stretch them and cover the front leaving a 1.0 centimeter edge, this edge we glue it on the back of the piece.
.png)
Paso 3: Tomamos pincel y la pintura de color rosado, pintamos en forma degradada nuestro porta retrato, al terminar lo dejamos secar al aire libre.
Step 3: We take a paintbrush and pink paint, we paint in a gradient way our portrait holder, when we finish we let it dry in the open air.
.png)
Paso 4: Tomamos el cartón de huevo y con la tijera sacamos cada una de las bases, en forma de cono grande y pequeño, luego le hacemos un corte en la parte de arriba, abajo, derecha e izquierda, formando así nuestro pétalos de las rosa, que en total serias 6 flores.
Step 4: We take the egg carton and with the scissors we remove each of the bases, in the shape of a large and small cone, then we make a cut on the top, bottom, right and left, thus forming our rose petals, which in total will be 6 flowers.
.png)
Paso 5: Pintamos nuestras flores de color rosado y la ponemos a secar al aire libre. Luego mientra se secan tomamos la cinta de color dorado y la pegamos con silicon liquido a nuestro porta retrato.
Step 5: We paint our flowers pink and put them to dry in the open air. Then while they are drying we take the gold ribbon and stick it with liquid silicon to our portrait holder.
.png)
Paso 6: Con la tijera recortamos el CD's en pequeños pedazos y con silicon liquido se lo pegamos a nuestro porta retrato. Luego en el foami rosado marcamos nuestras lecha de feliz día mama.
Step 6: With the scissors we cut the CD's in small pieces and with liquid silicone we glue it to our portrait holder. Then we mark our Happy Mother's Day on the pink foami.
.png)
Paso 7: Con silicon liquido pegamos de esta manera nuestras flores ya pintadas, las pequeñas encima de la flor grande, luego pegamos nuestro feliz día mama.
Step 7: With liquid silicon we glue our painted flowers in this way, the small ones on top of the big flower, then we glue our happy mother's day.

This is my fascinating result hive friends, I personally loved to create this beauty, with all the love and affection for those cute moms of this world, a beautiful detail for them who deserve all the nice things from us.
Congratulations @mariadiaz! You have completed the following achievement on the Hive blockchain and have been rewarded with new badge(s) :
Your next target is to reach 1250 upvotes.
You can view your badges on your board and compare yourself to others in the Ranking
If you no longer want to receive notifications, reply to this comment with the word
STOPSupport the HiveBuzz project. Vote for our proposal!
Es un detalle hermoso para mamá, algo que me encanta de esta creación es que integraste todos lo materiales reciclados que pudiste, mientras más mejor el punto de este challenge es reciclar, y por supuesto lo has logrado.
Muchas gracias!