¡Feliz Noche Comunidad Creativa! | Happy Night Creative Community !
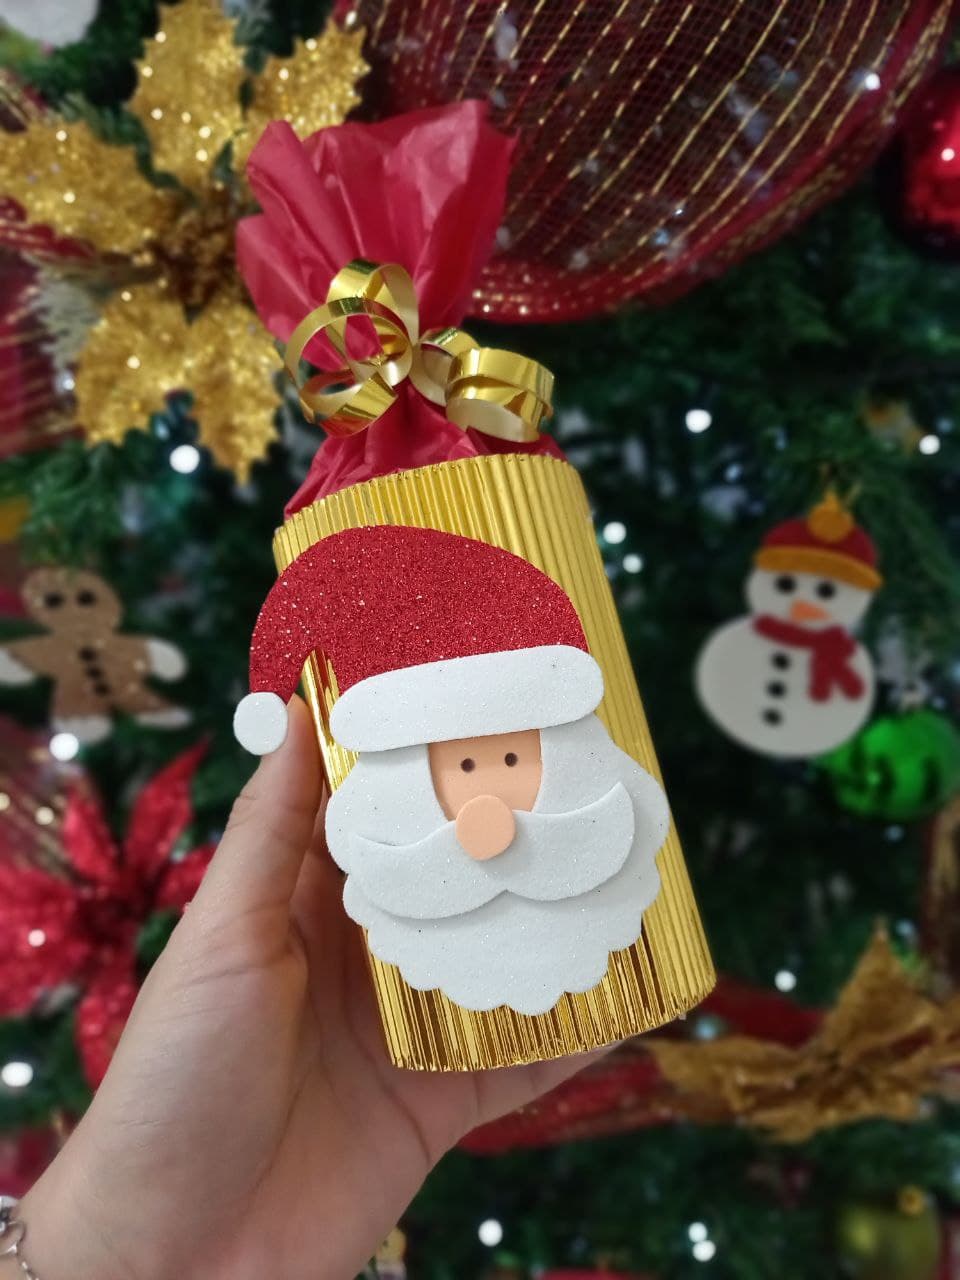
Cada día estamos más cerca de la navidad y yo me he propuesto trabajar en manualidades con motivos navideños para decorar en esta linda época, en esta ocasión les traigo un tutorial de un bello cotillón de Santa Claus, ideal para rellenar con dulces y obsequiar a los niños o simplemente para dar algún obsequio de manera original en lugar de usar las típicas bolsas de regalo, en lo personal a mí me encantó el resultado y no podía dejar de compartirlo con ustedes, así que aquí se los dejo.
Every day we are closer to Christmas and I proposed to work on crafts with Christmas motifs to decorate in this beautiful time, this time I bring you a tutorial of a beautiful Santa Claus party, ideal to fill with sweets and give to children or simply to give a gift in an original way instead of using the typical gift bags, personally I loved the result and could not stop sharing it with you, so here I leave them.

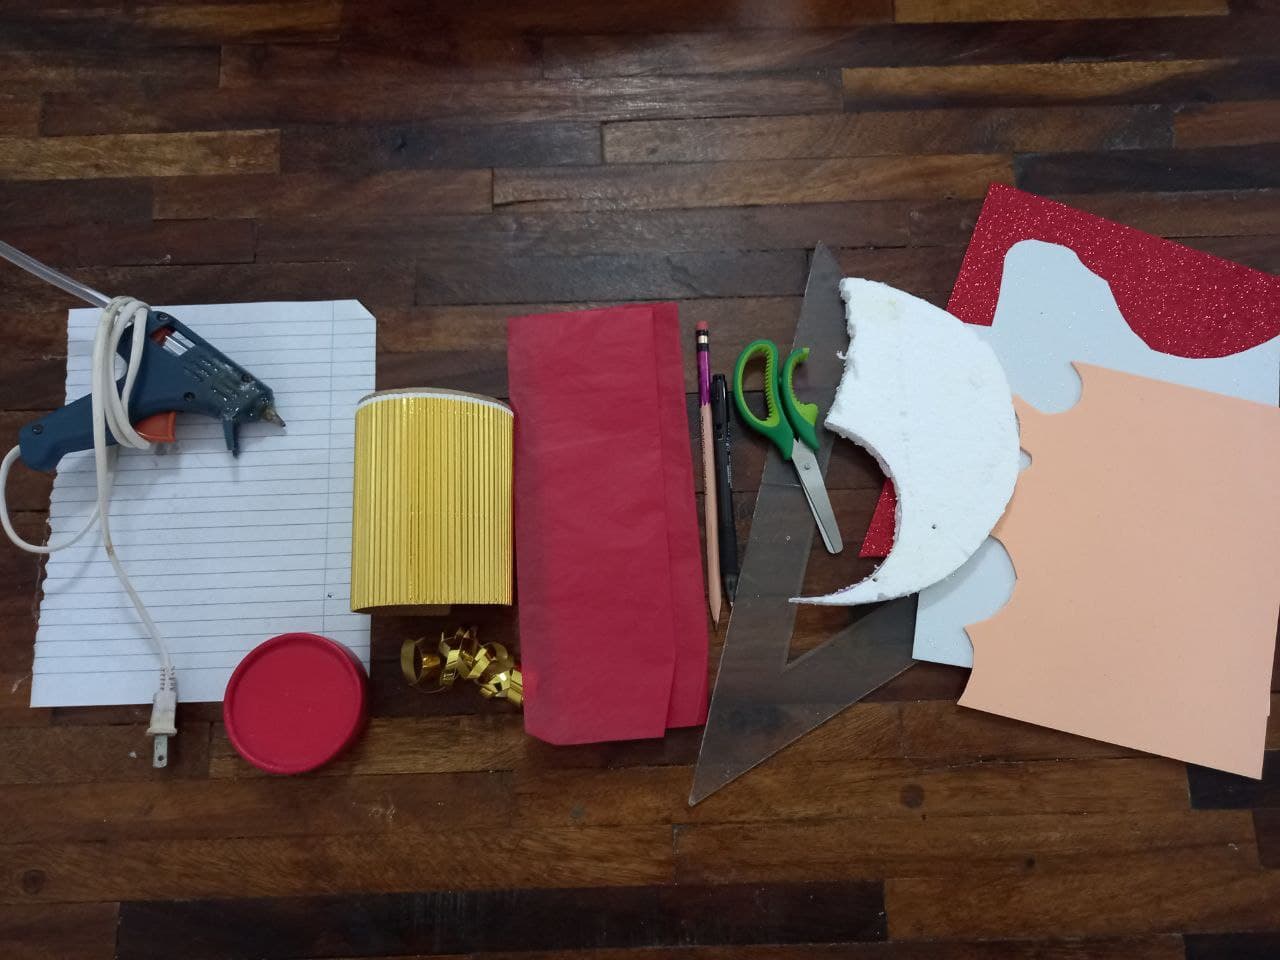
Materiales | Materials
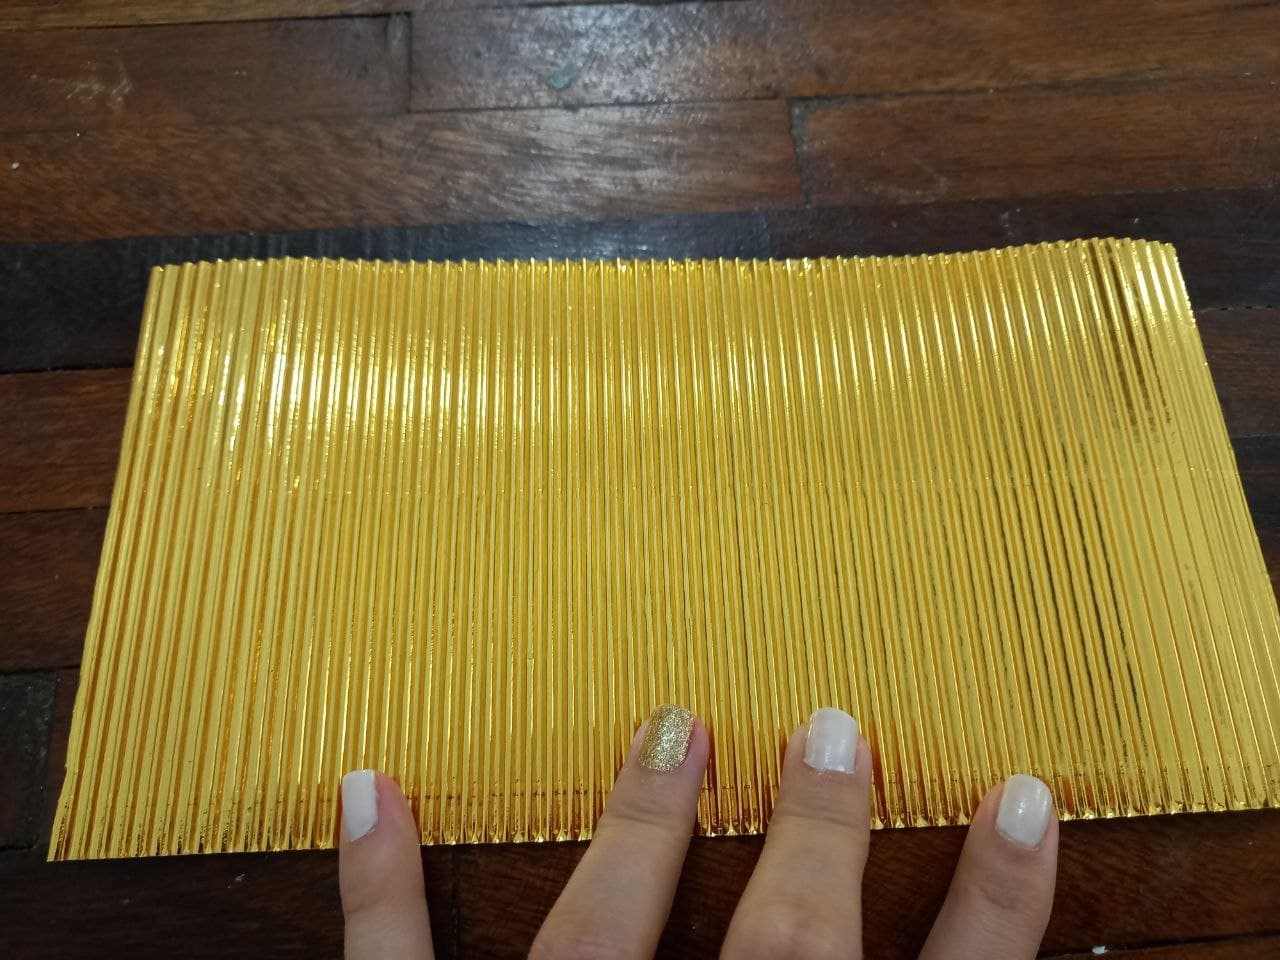
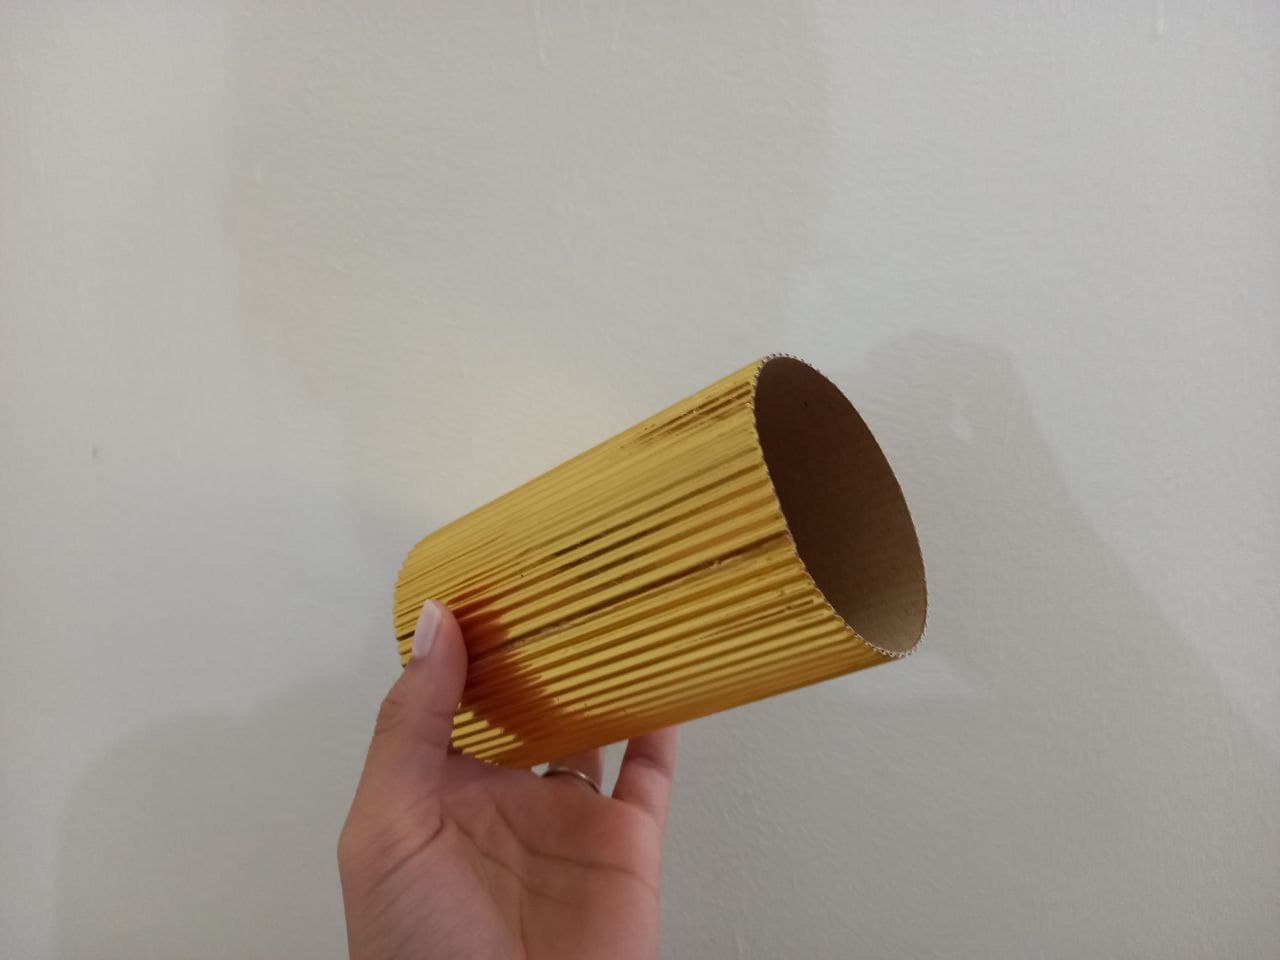
- Cartulina corrugada dorada metalizada.
- Foami escarchado rojo.
- Foami escarchado blanco.
- Foami color piel.
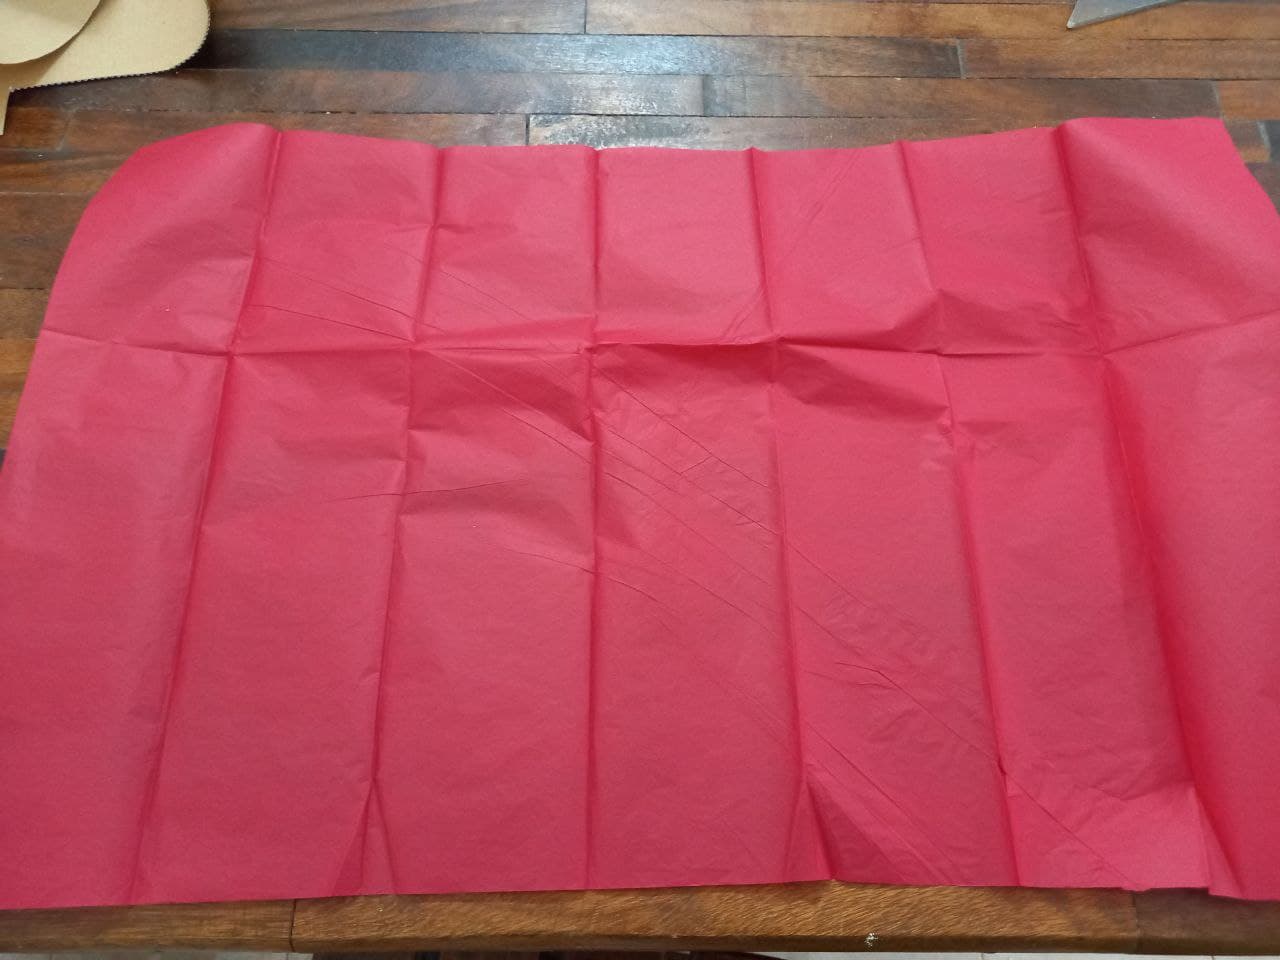
- Papel de seda rojo.
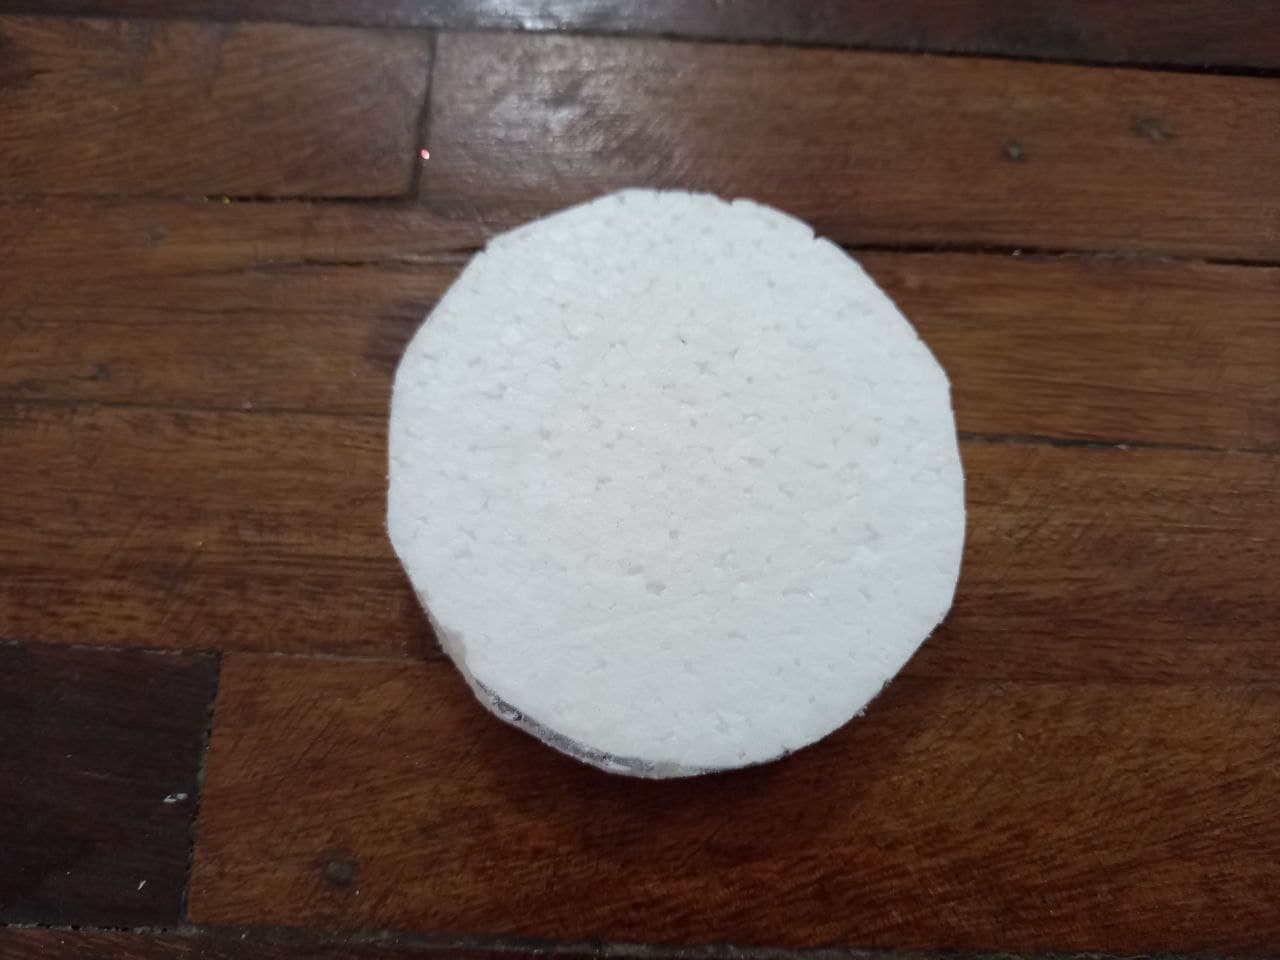
- Anime.
- Cinta de papel dorada.
- Hoja de papel.
- Lápiz.
- Tijera.
- Cutter.
- Regla.
- Silicón.
- Pistola de silicón.
- Objeto circular.
- Metallic gold corrugated cardboard.
- Red frosted foam.
- White frosted foam.
- Skin color foam.
- Red tissue paper.
- Anime.
- Gold paper tape.
- Paper sheet.
- Pencil.
- Scissor.
- Cutter.
- Rule.
- Silicone.
- Silicone gun.
- Circular object.
Procedimiento ✂ | Process ✂
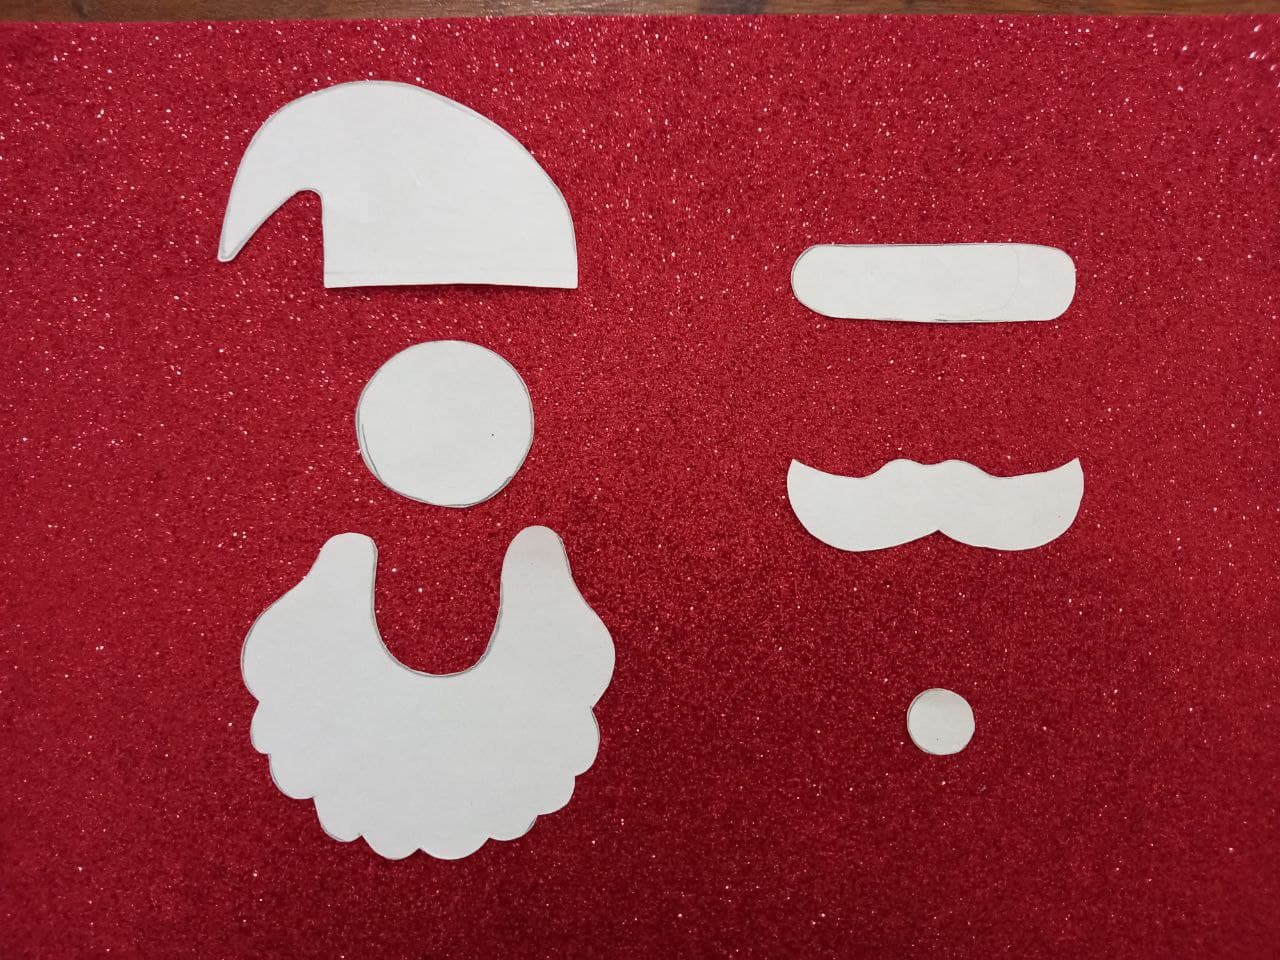
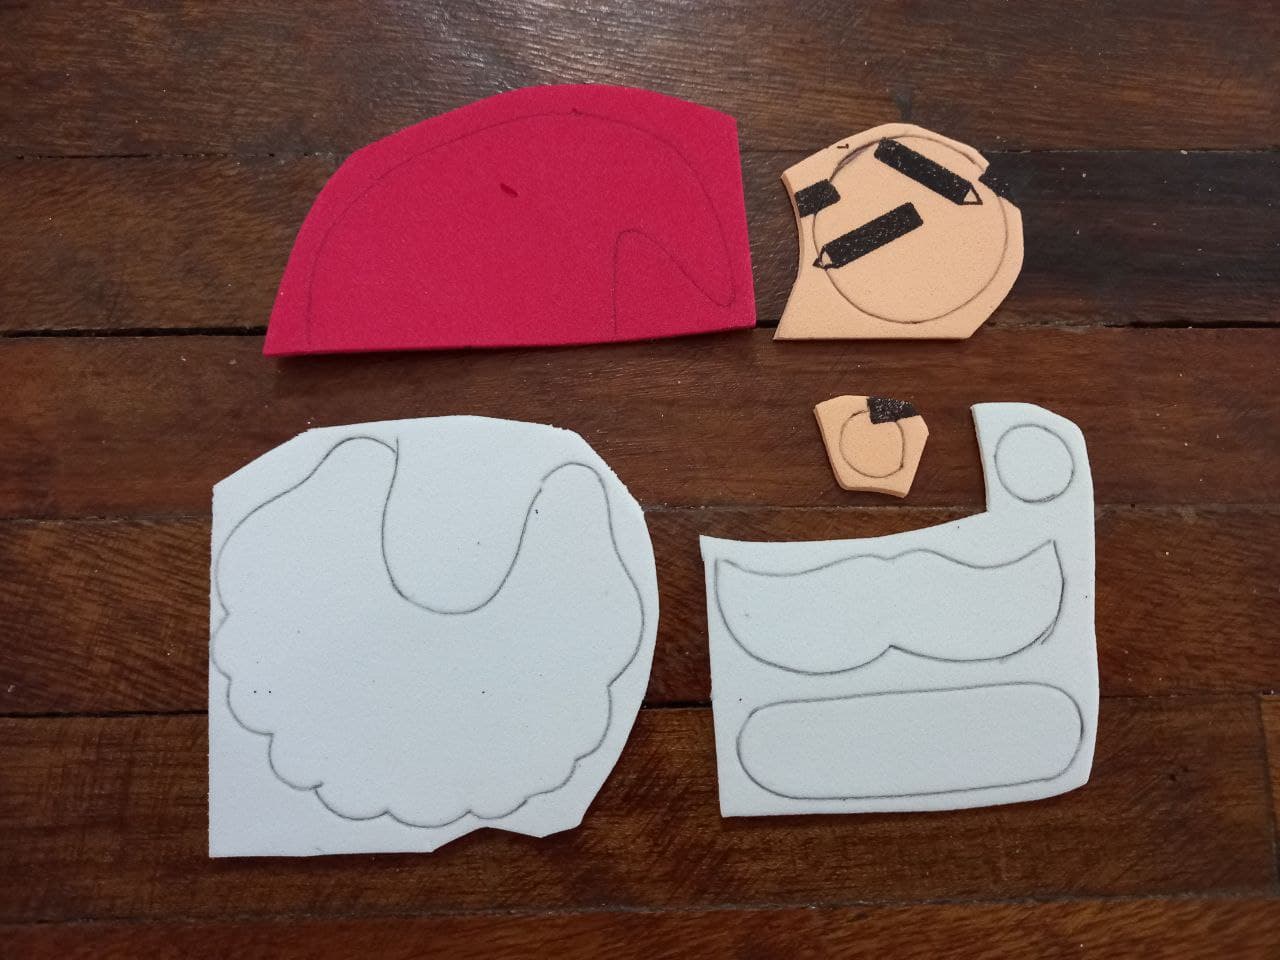
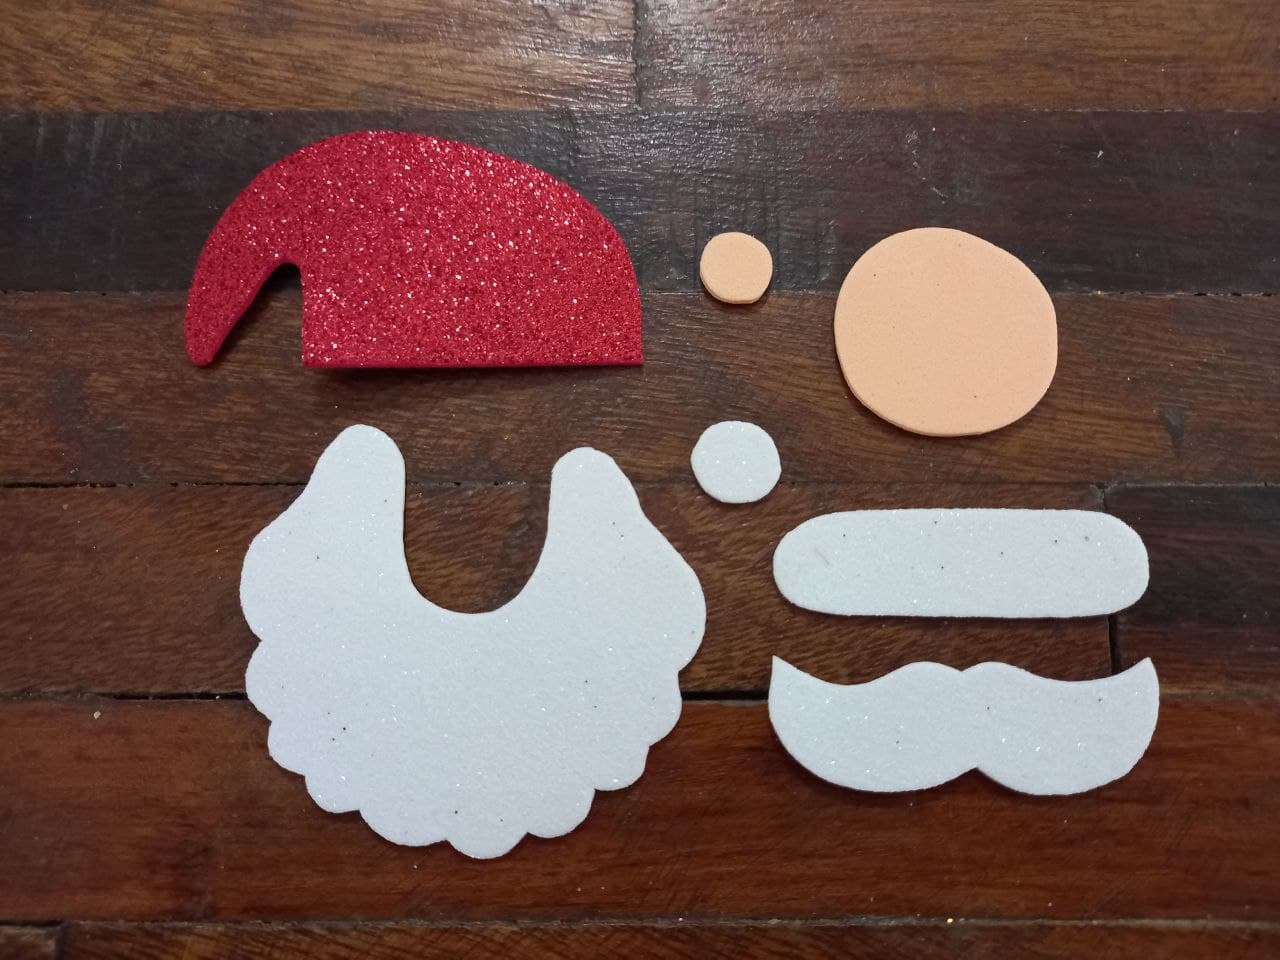
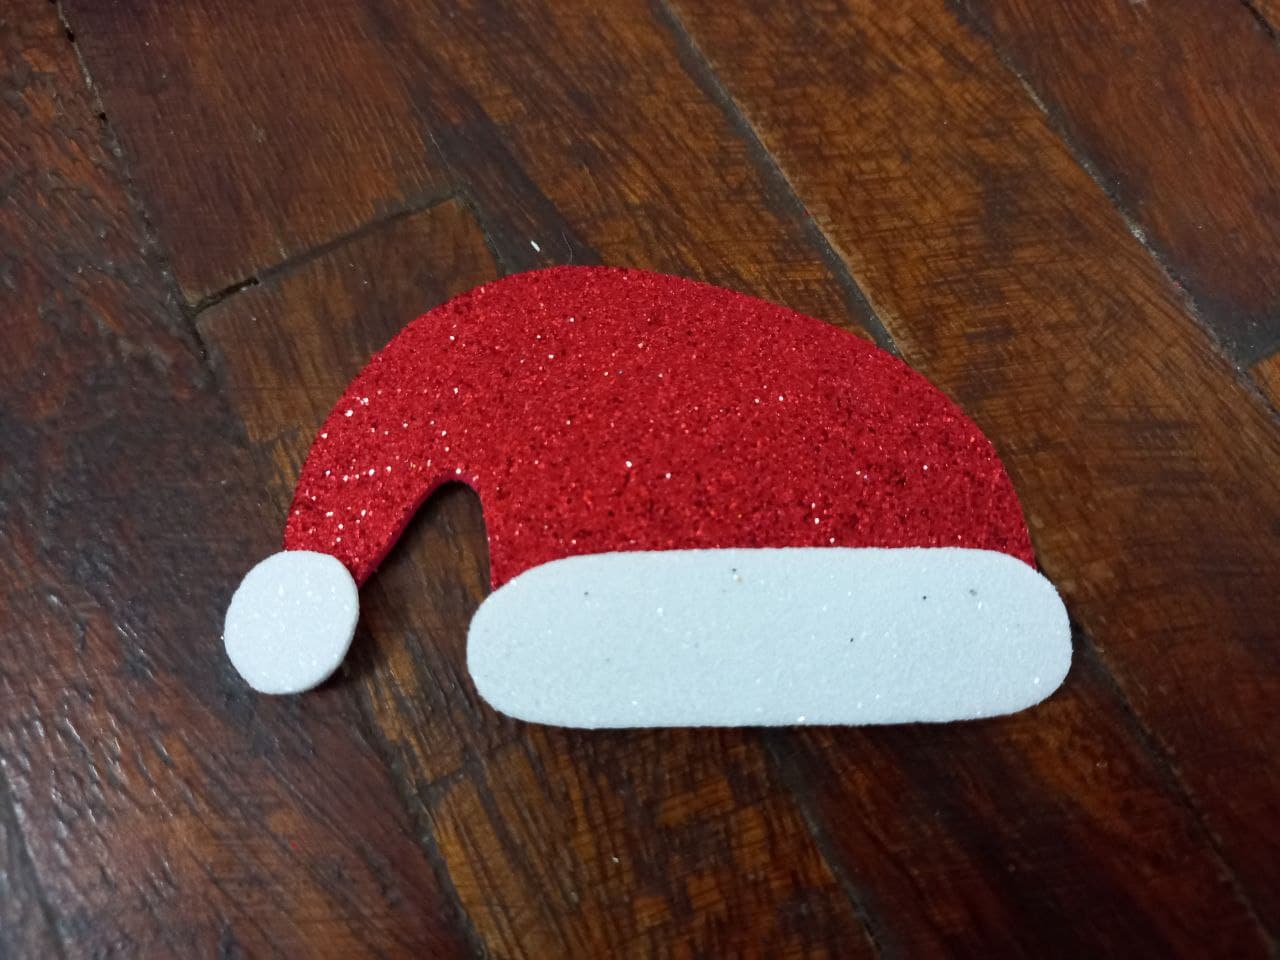
🎄 PASO 1. Lo primero es hacer en la hoja de papel el molde de Santa Claus, en mi caso lo hice por piezas para luego unirlas todas, una vez hechas recortamos y las pasamos al foami del color según corresponda, el gorro en rojo, el rostro y nariz en color piel, la barba, bigote, borde del gorro y pompón del gorro en blanco, luego recortamos todas las piezas.
🎄 STEP 1. The first thing is to make the Santa Claus mold on the sheet of paper, in my case I did it in pieces and then join them all, once done we cut them out and pass them to the foami of the color as appropriate, the hat in red, the face and nose in skin color, the beard, mustache, edge of the hat and pompom of the hat in white, then we cut out all the pieces.
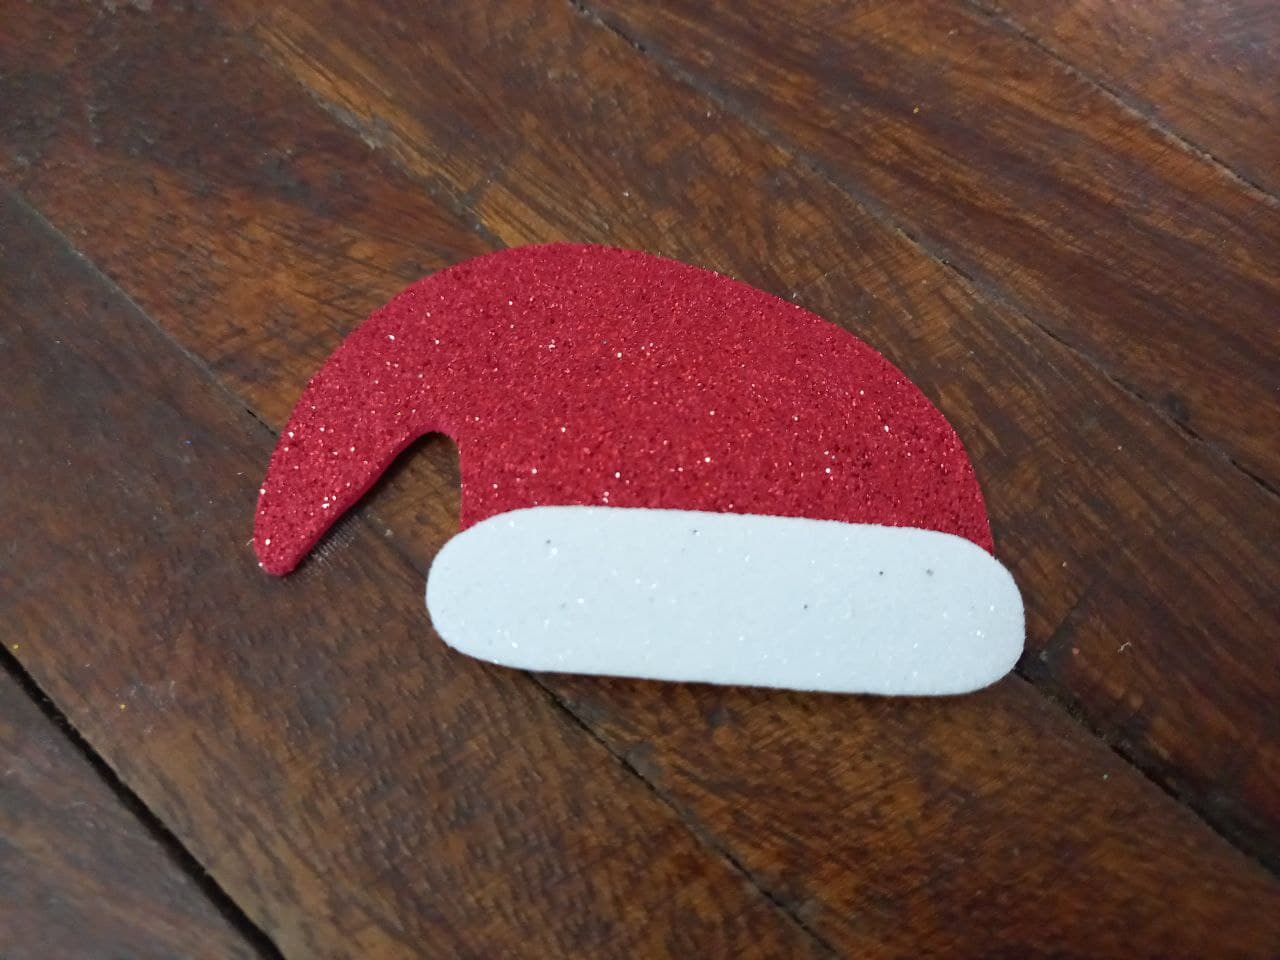
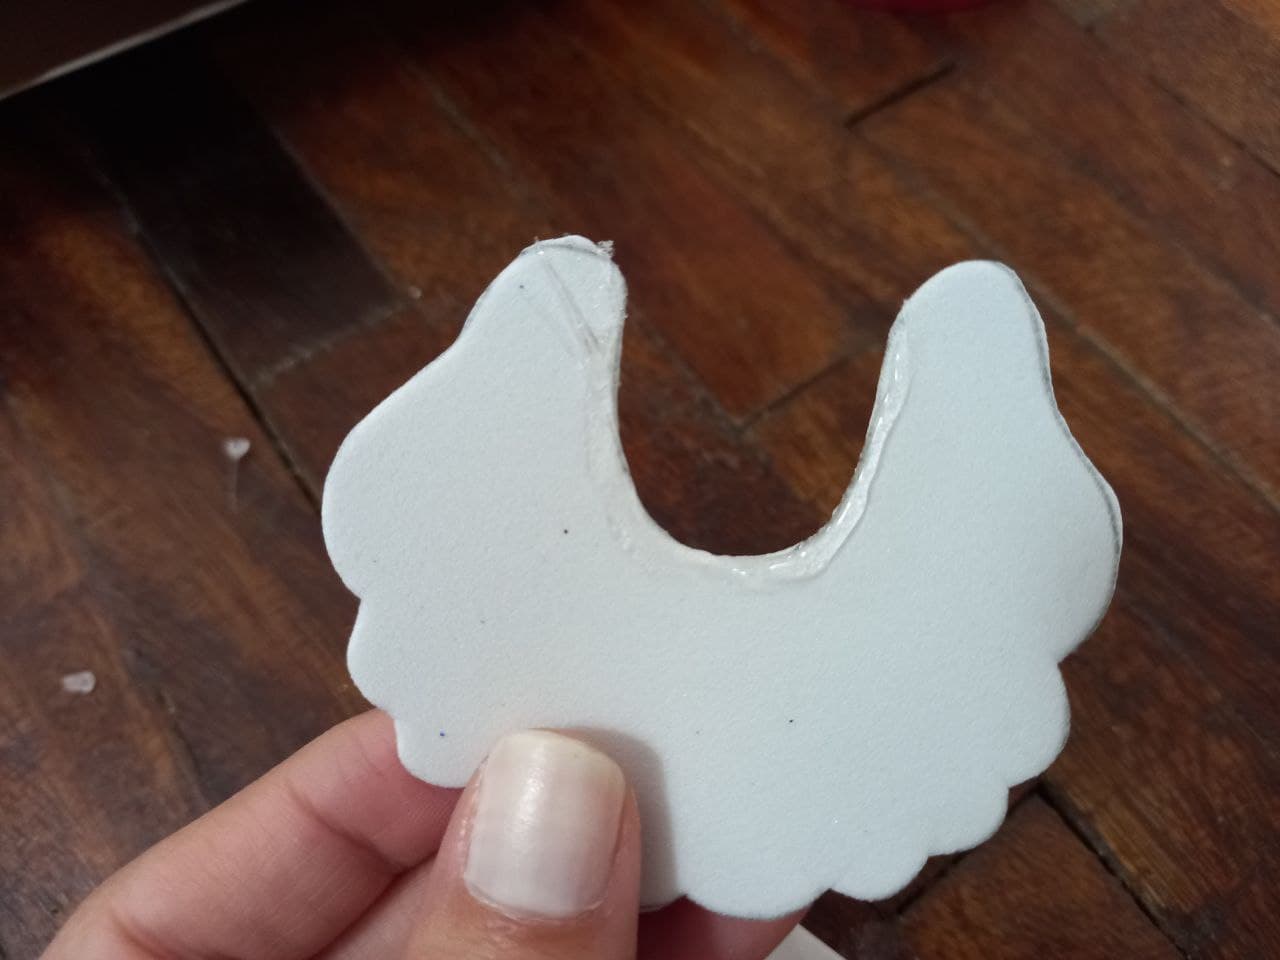
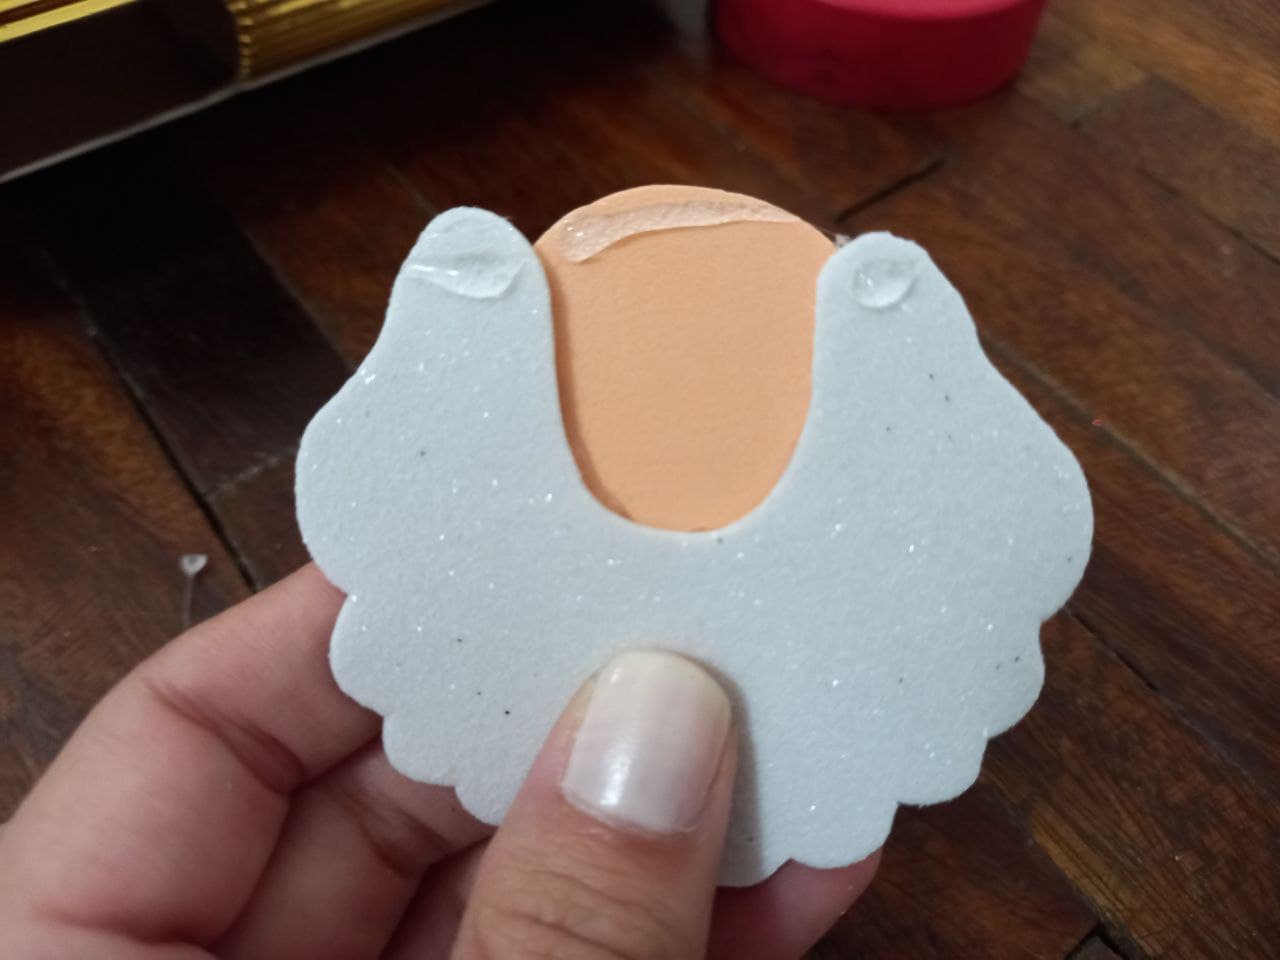
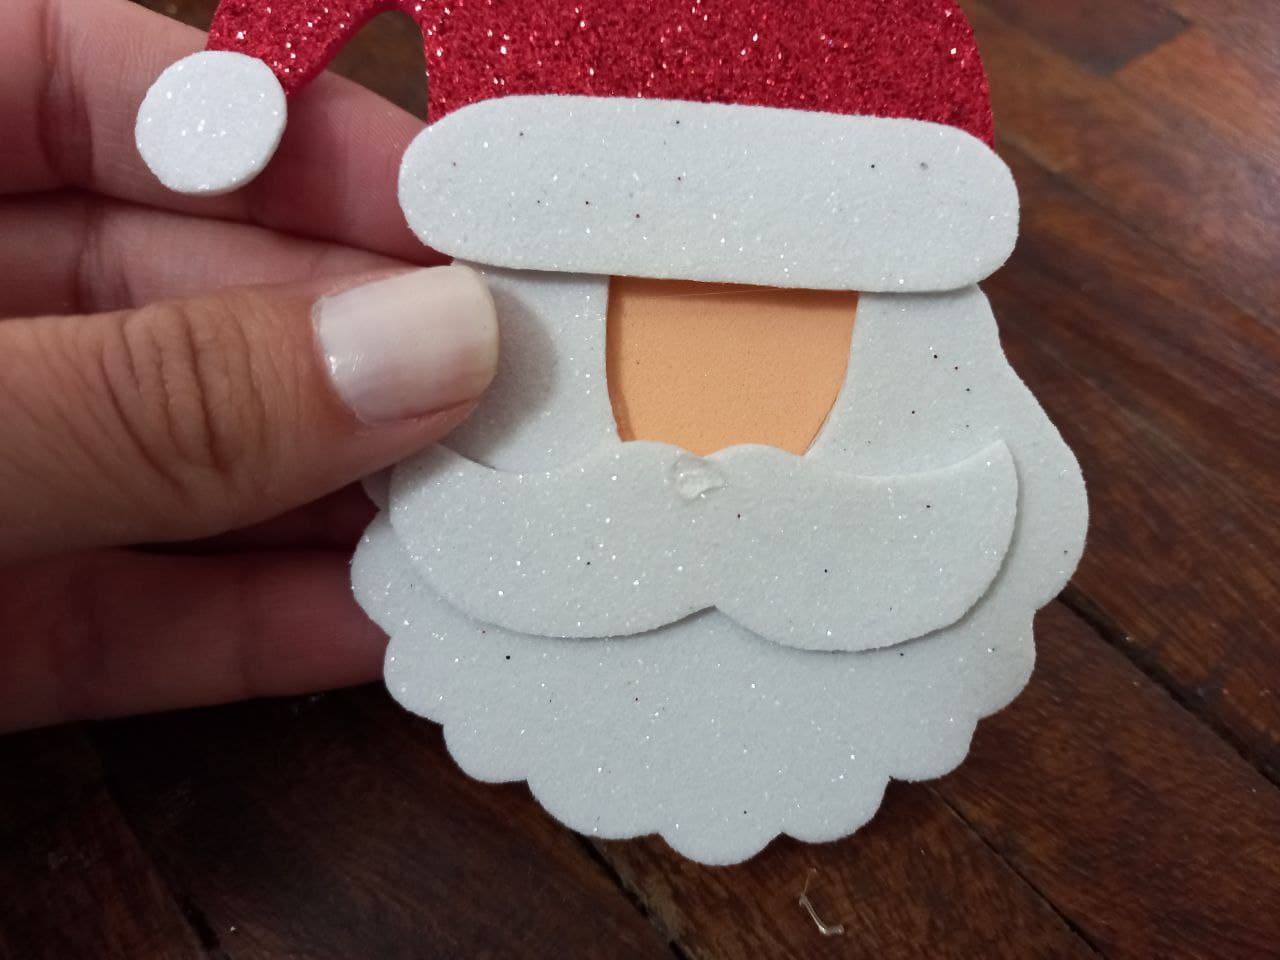
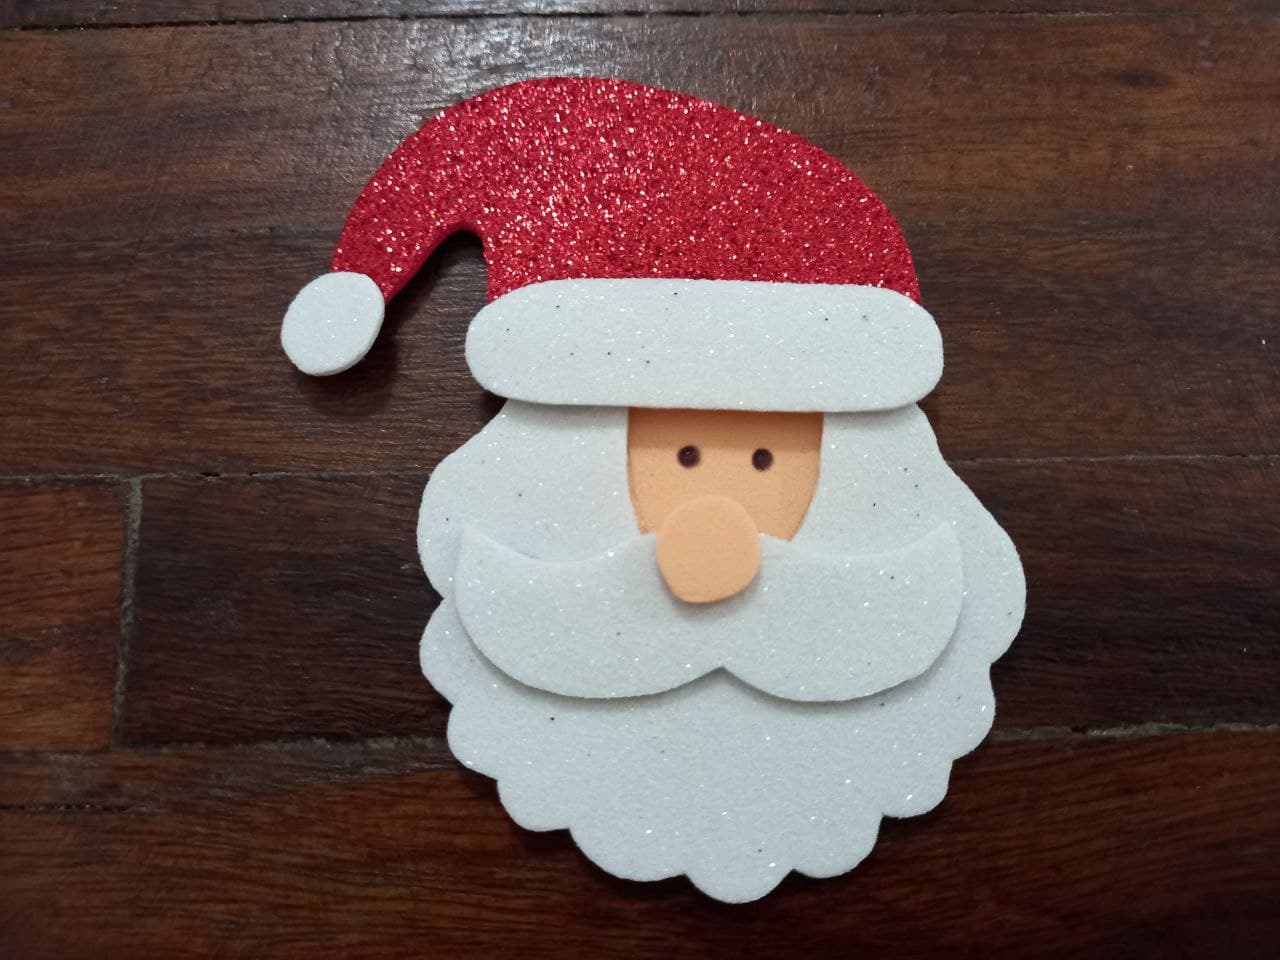
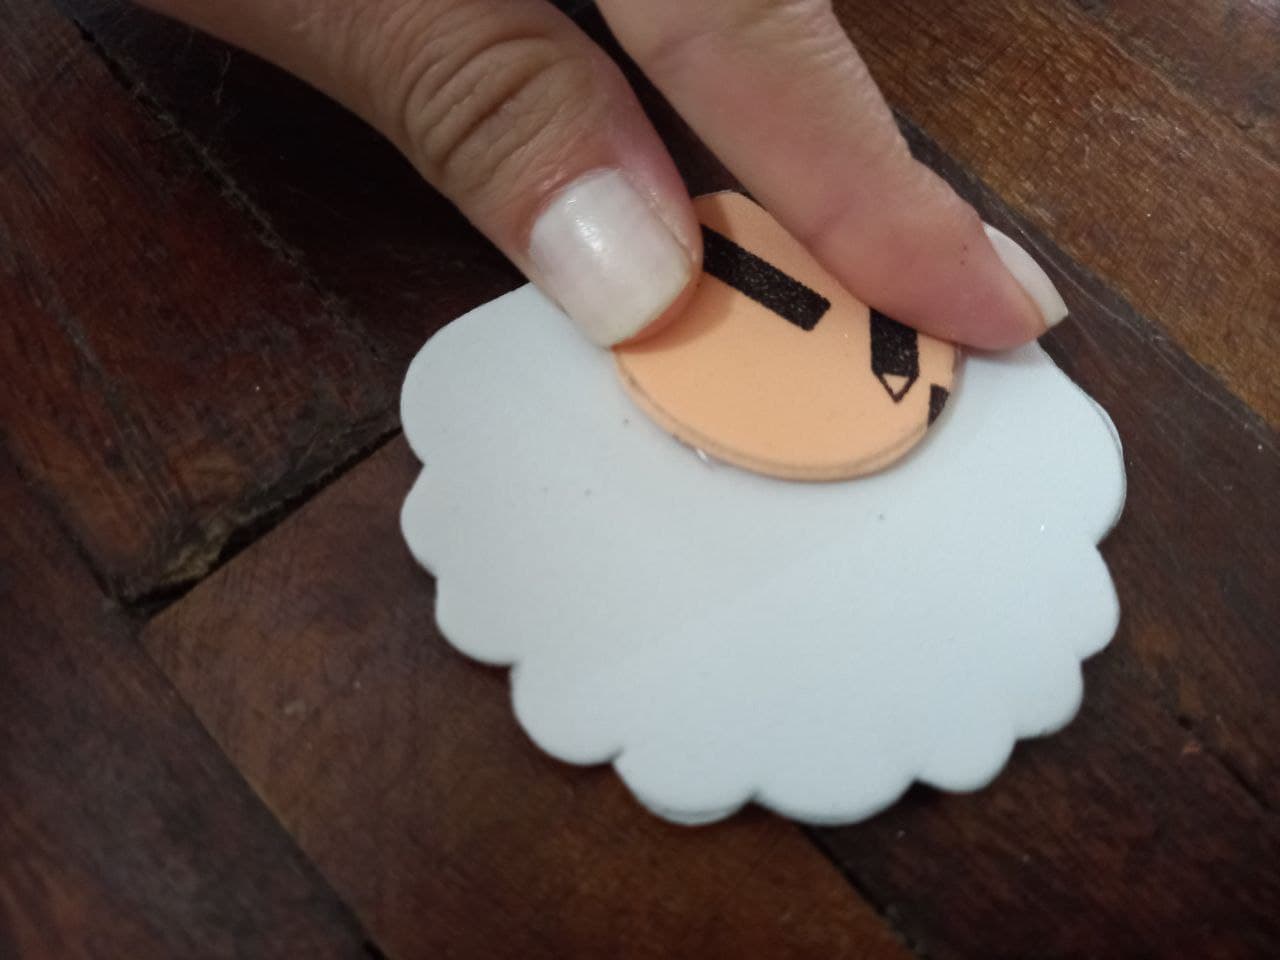
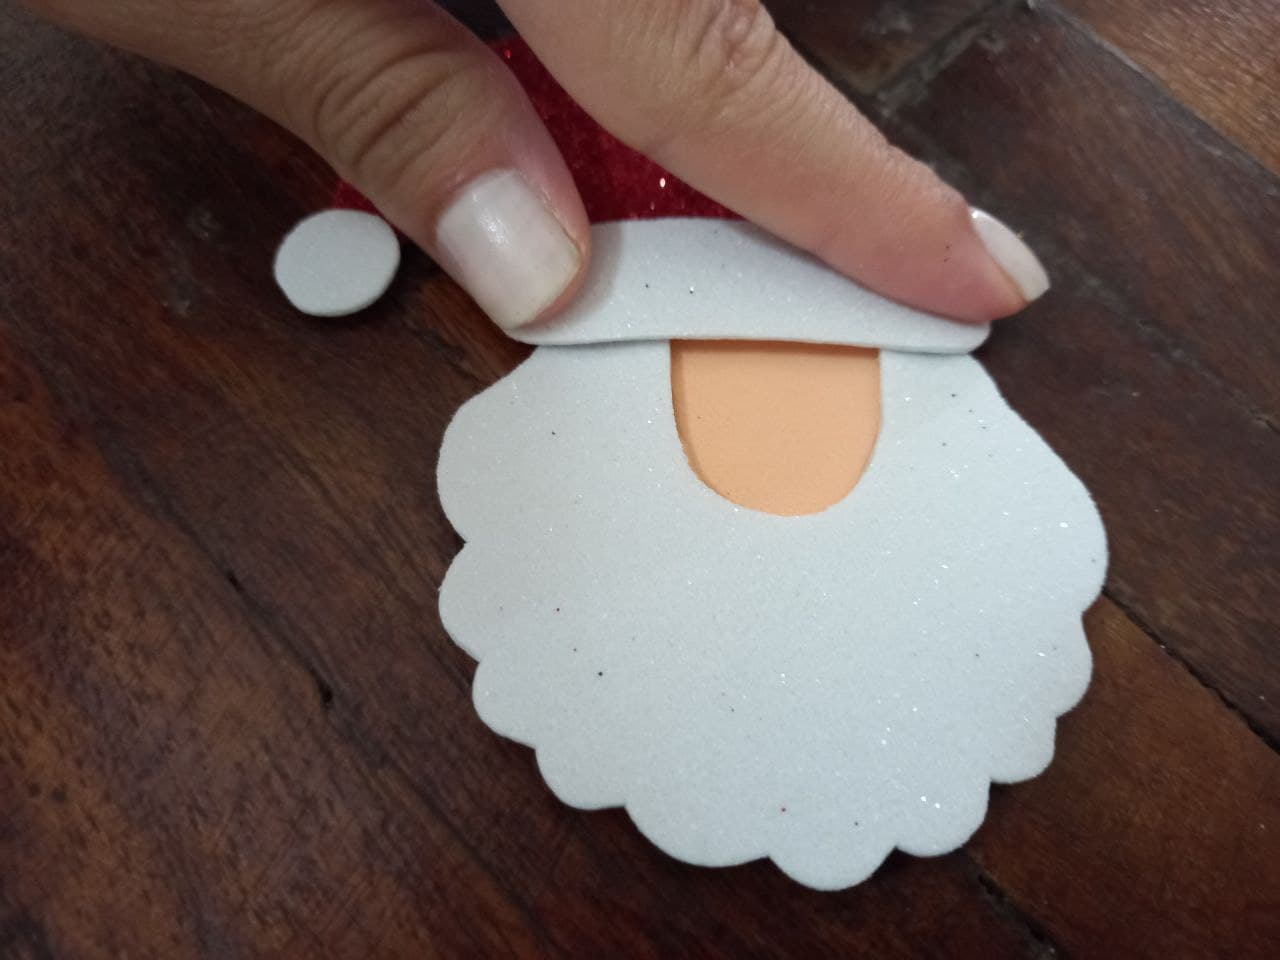
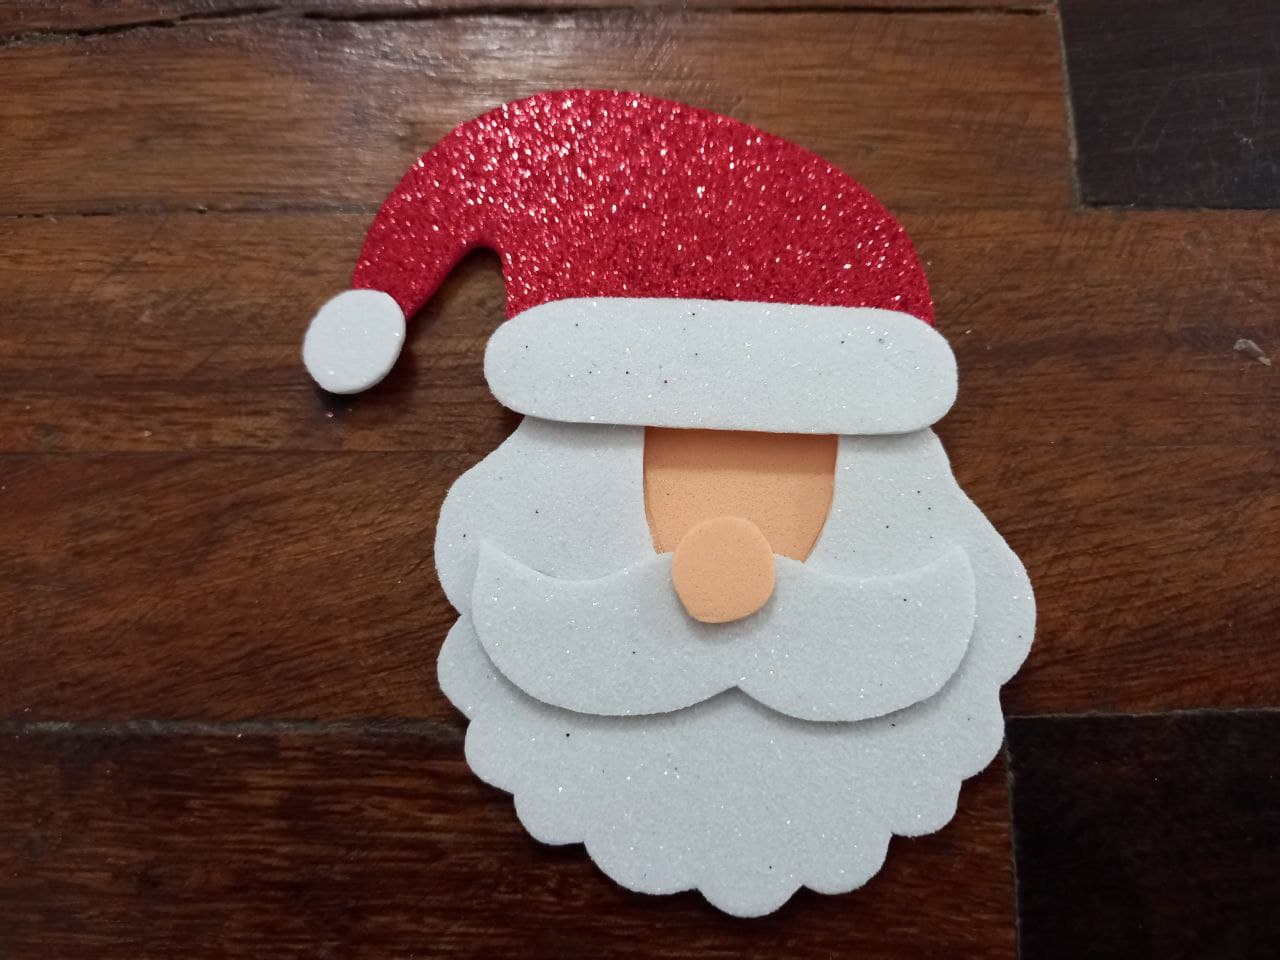
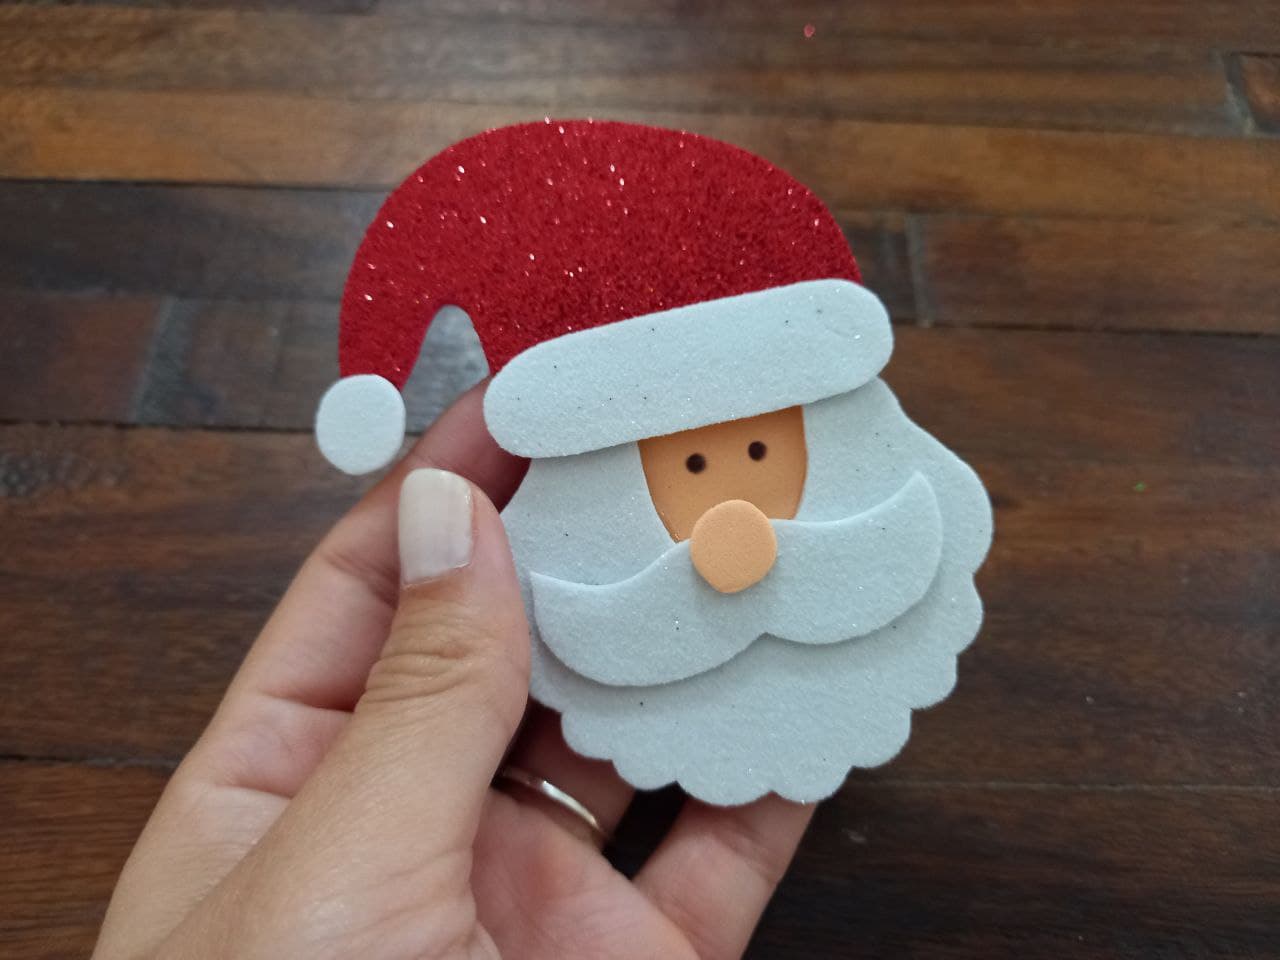
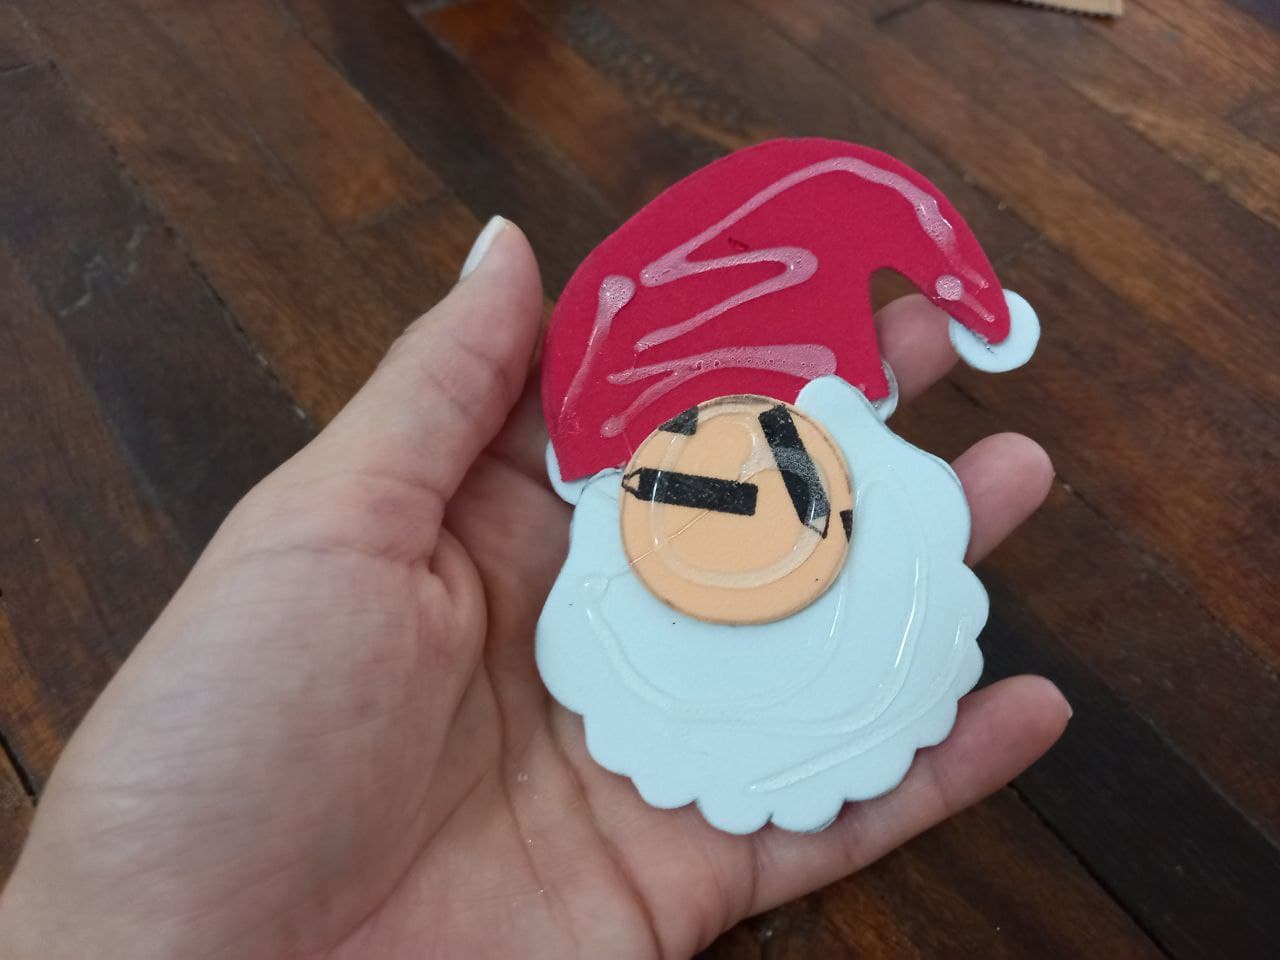
🎄PASO 2. Ahora comenzamos a formar al Santa Claus, pegamos el borde del gorro sobre la orilla inferior de este y el pompón en la punta del gorro, luego aplicamos silicon en la parte trasera de la orilla de la barba que tiene forma de U y sobre ella pegamos el rostro, luego aplicamos silicon sobre la orilla superior del rostro y pegamos el gorro, pegamos el bigote sobre la barba y sobre el bigote pegamos la nariz, para finalizar, con un lápiz o lapicero dibujamos 2 puntitos para hacer los ojos, y ya tenemos listo nuestro pequeño Santa Claus.
🎄STEP 2. Now we begin to form the Santa Claus, we glue the edge of the hat on the bottom edge of it and the pompom on the tip of the hat, then we apply silicone on the back of the edge of the beard that has U shape and on it we glue the face, then we apply silicone on the upper edge of the face and glue the cap, we glue the mustache on the beard and on the mustache we glue the nose, finally, with a pencil or pencil we draw 2 dots to make the eyes, and we have our little Santa Claus ready.
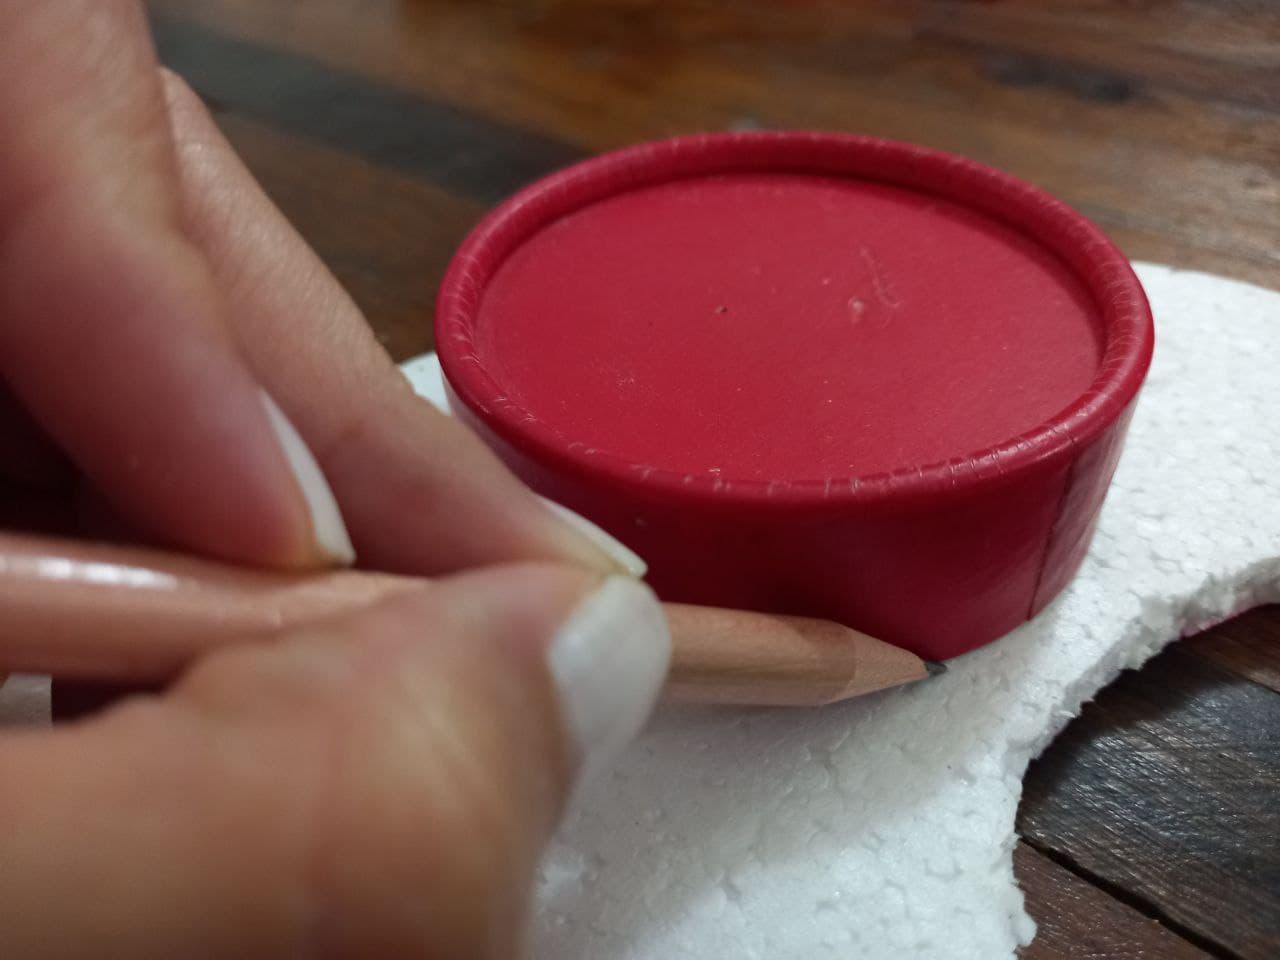
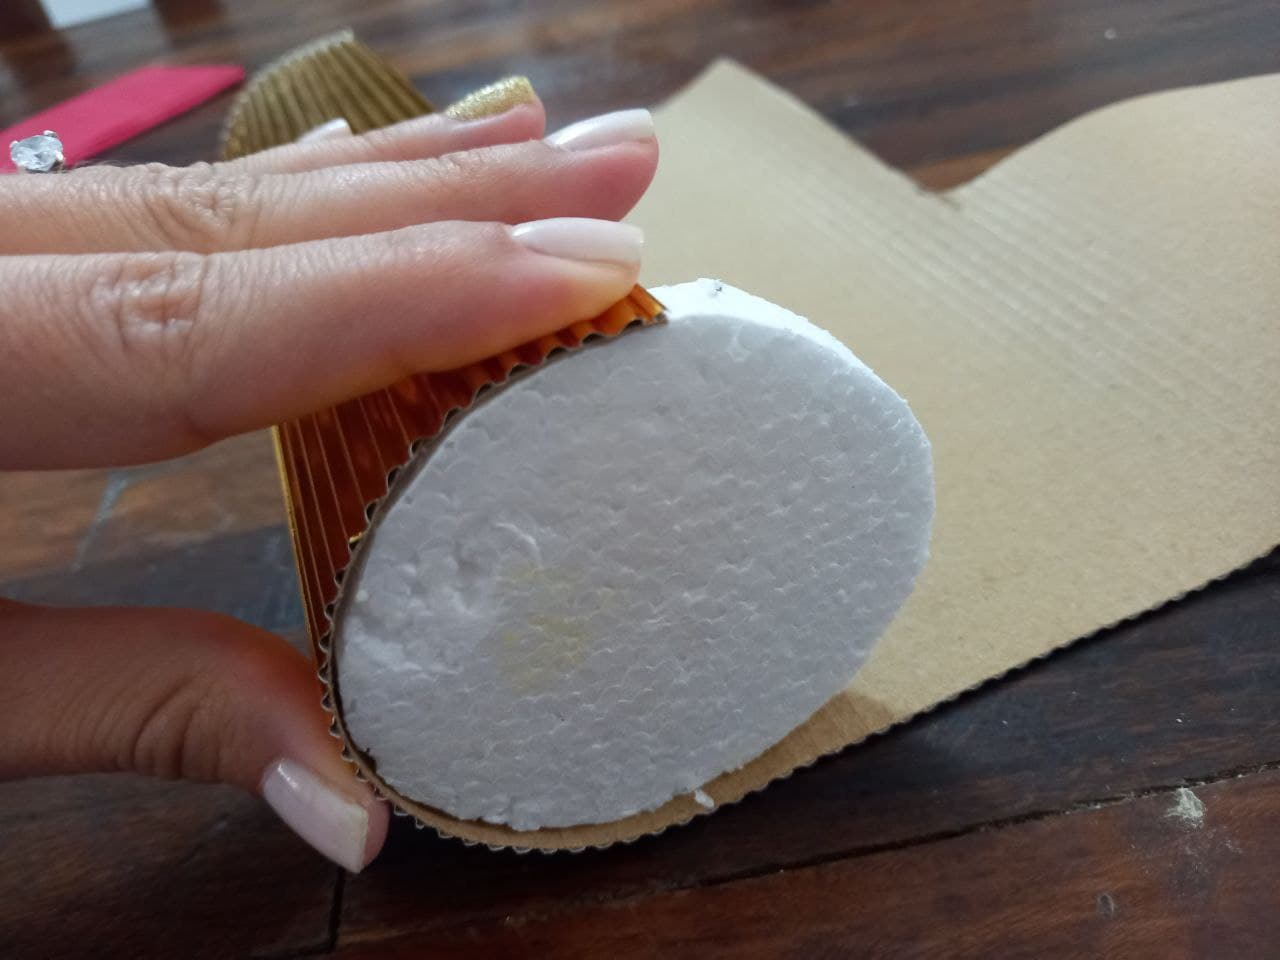
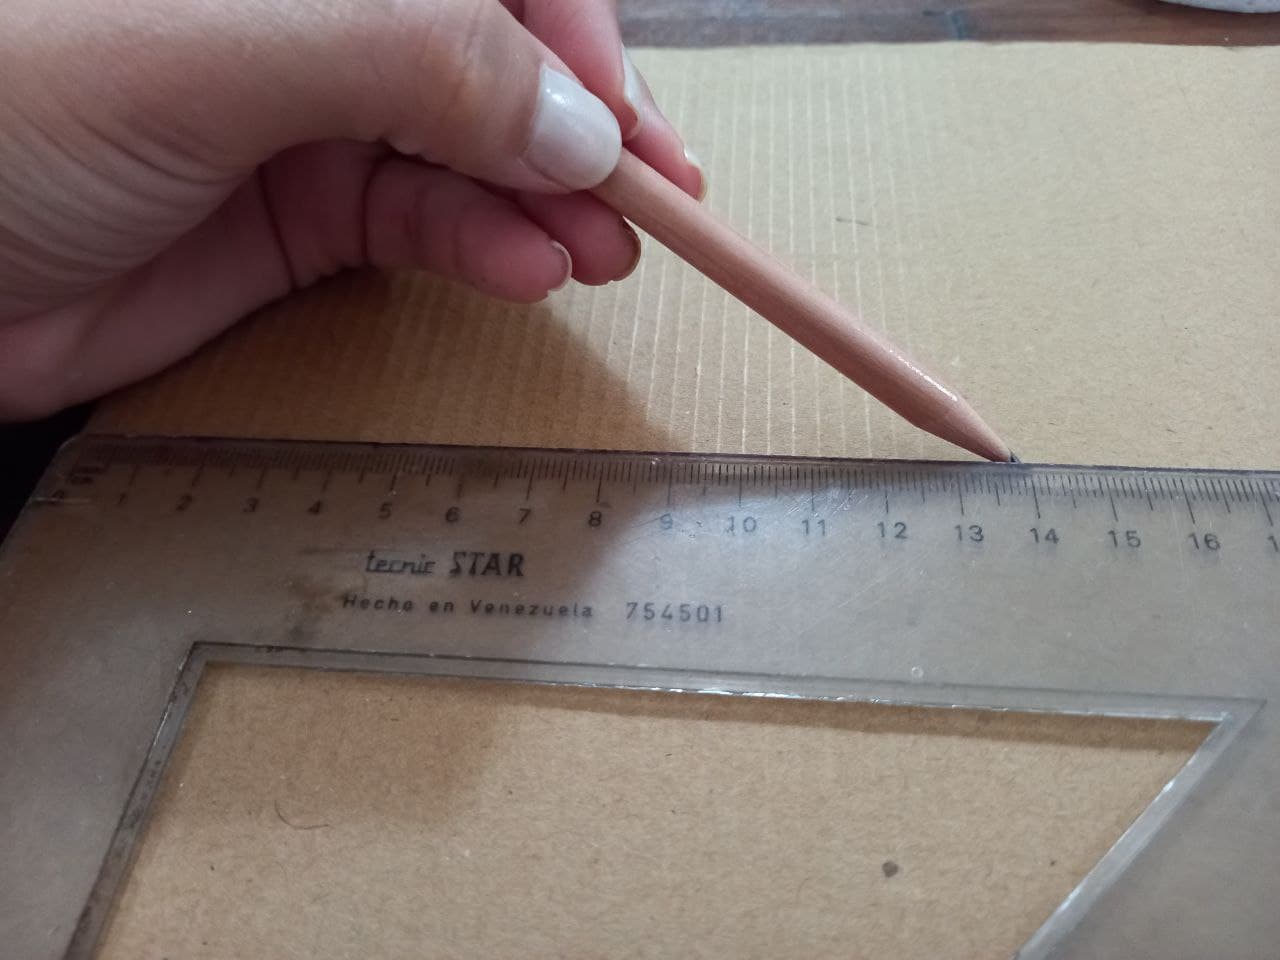
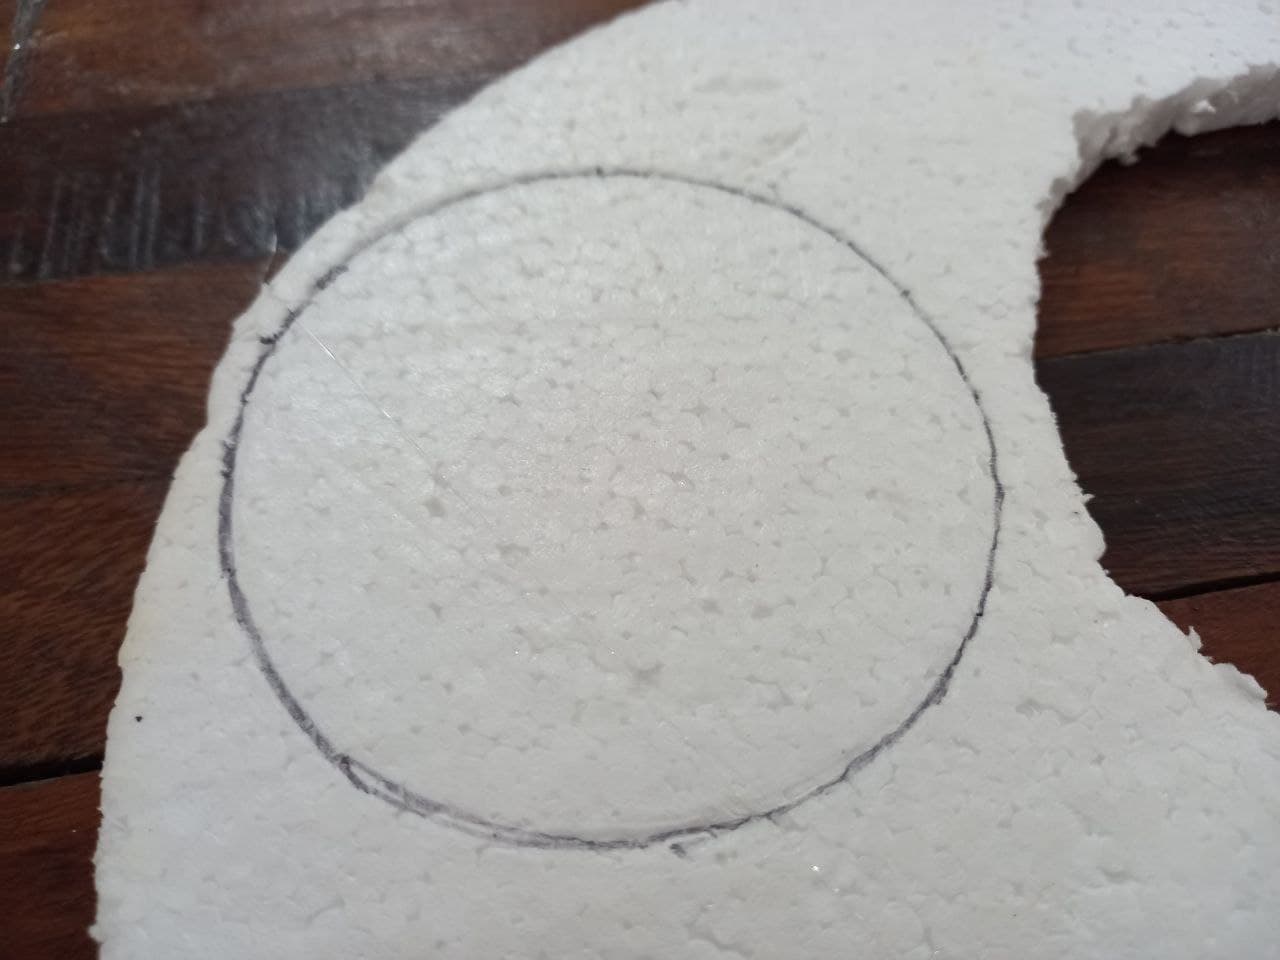
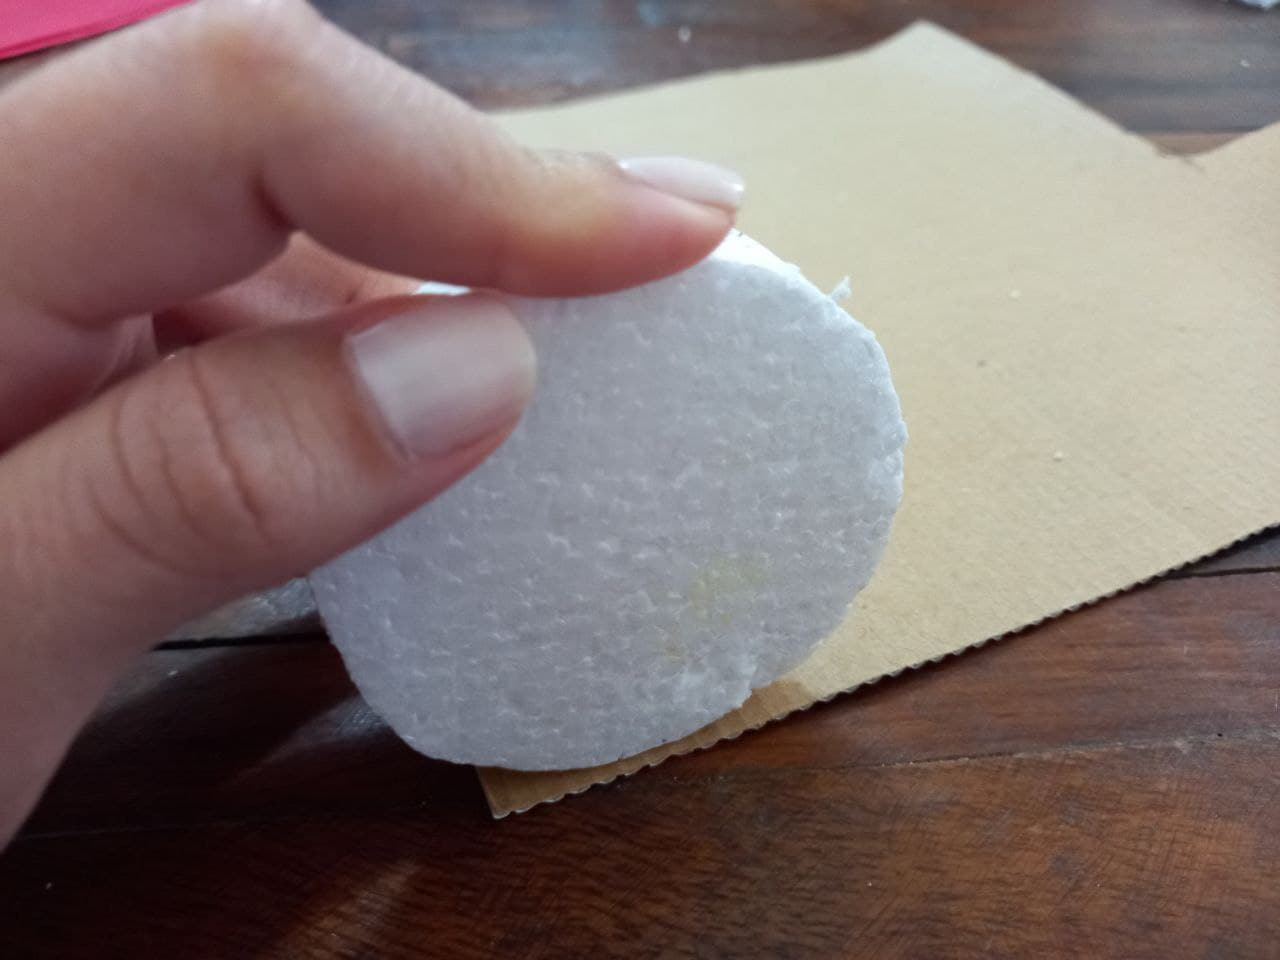
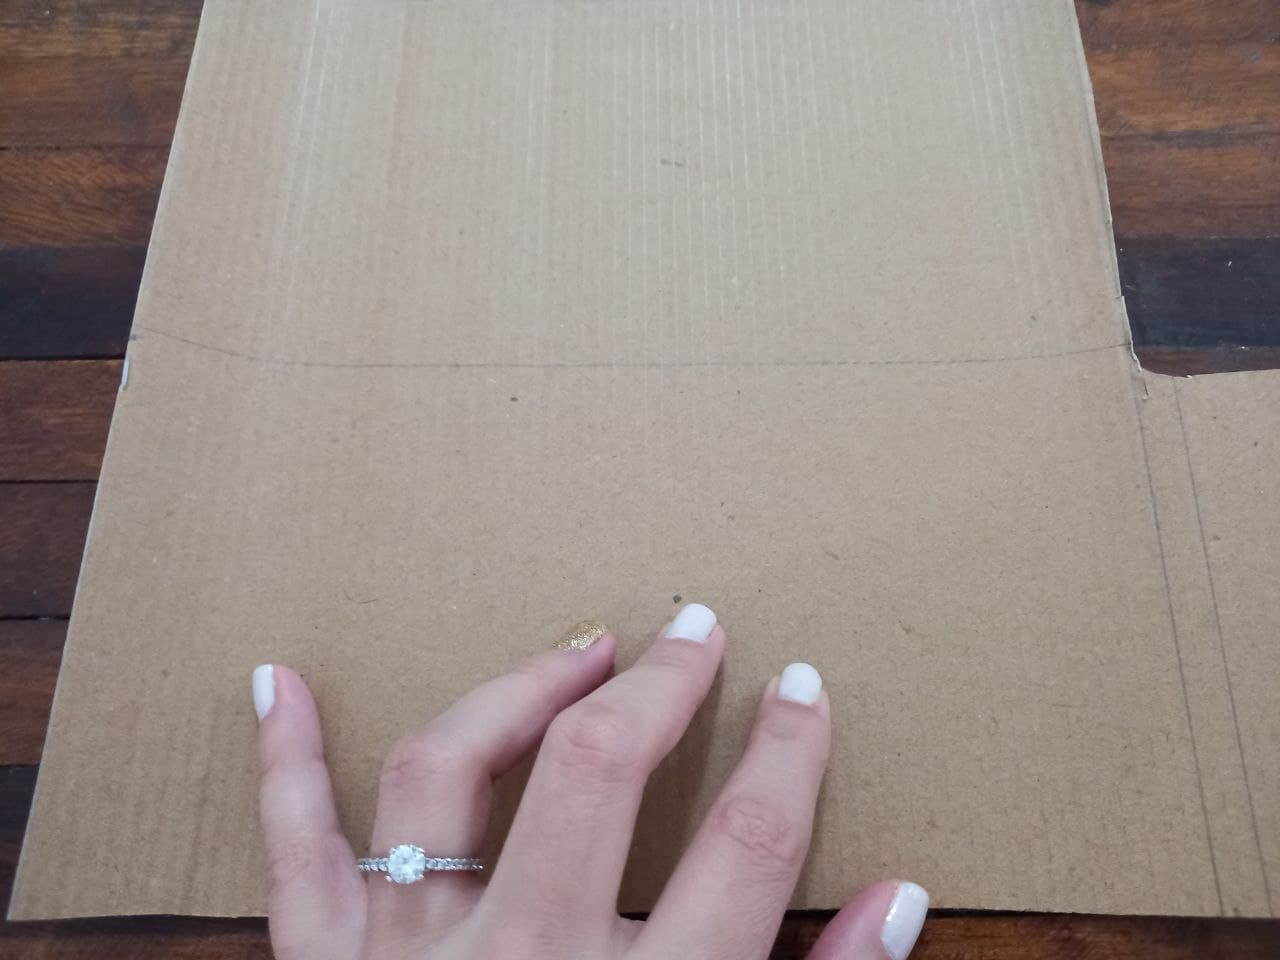
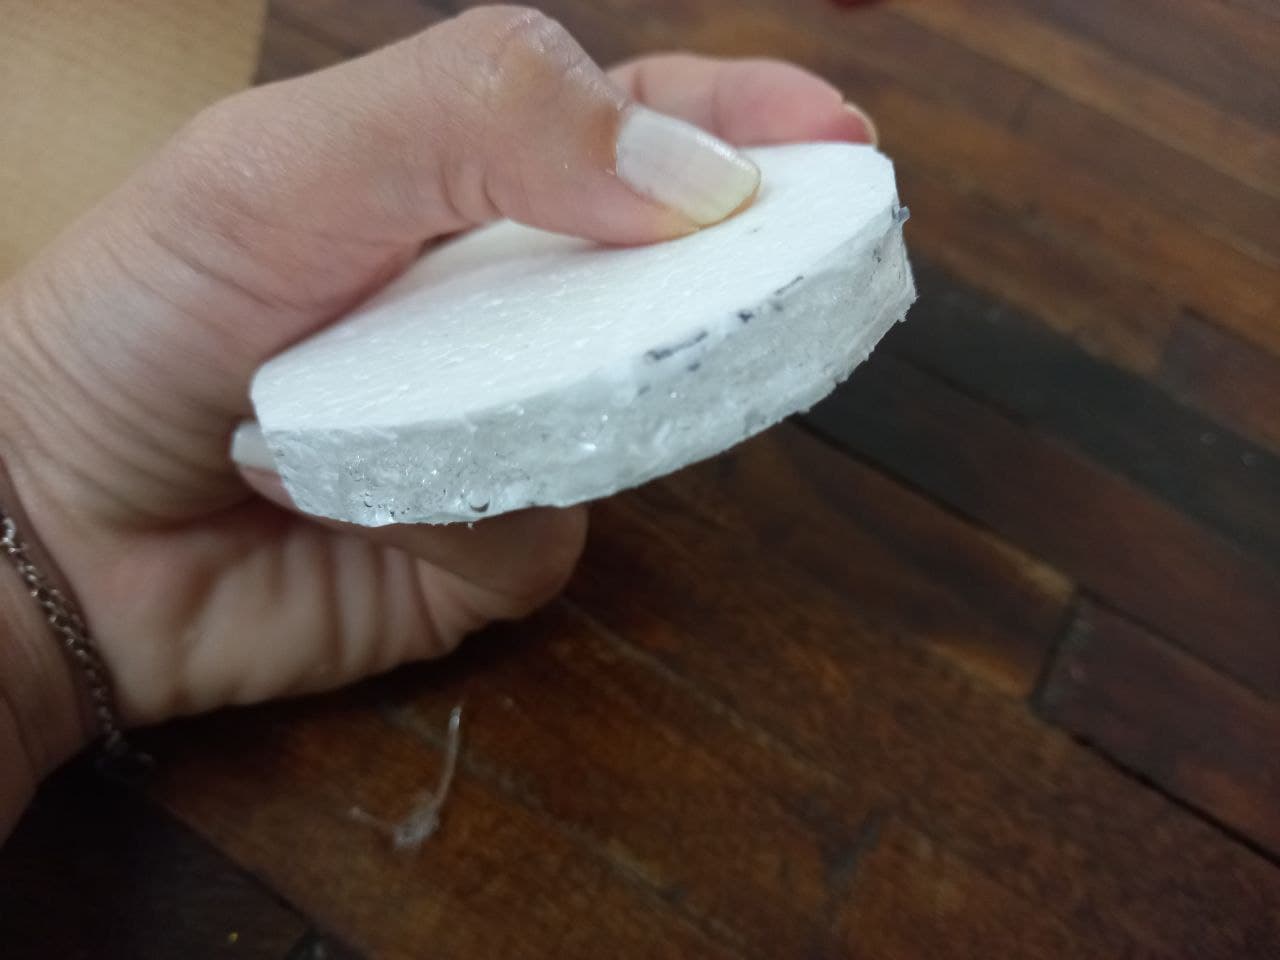
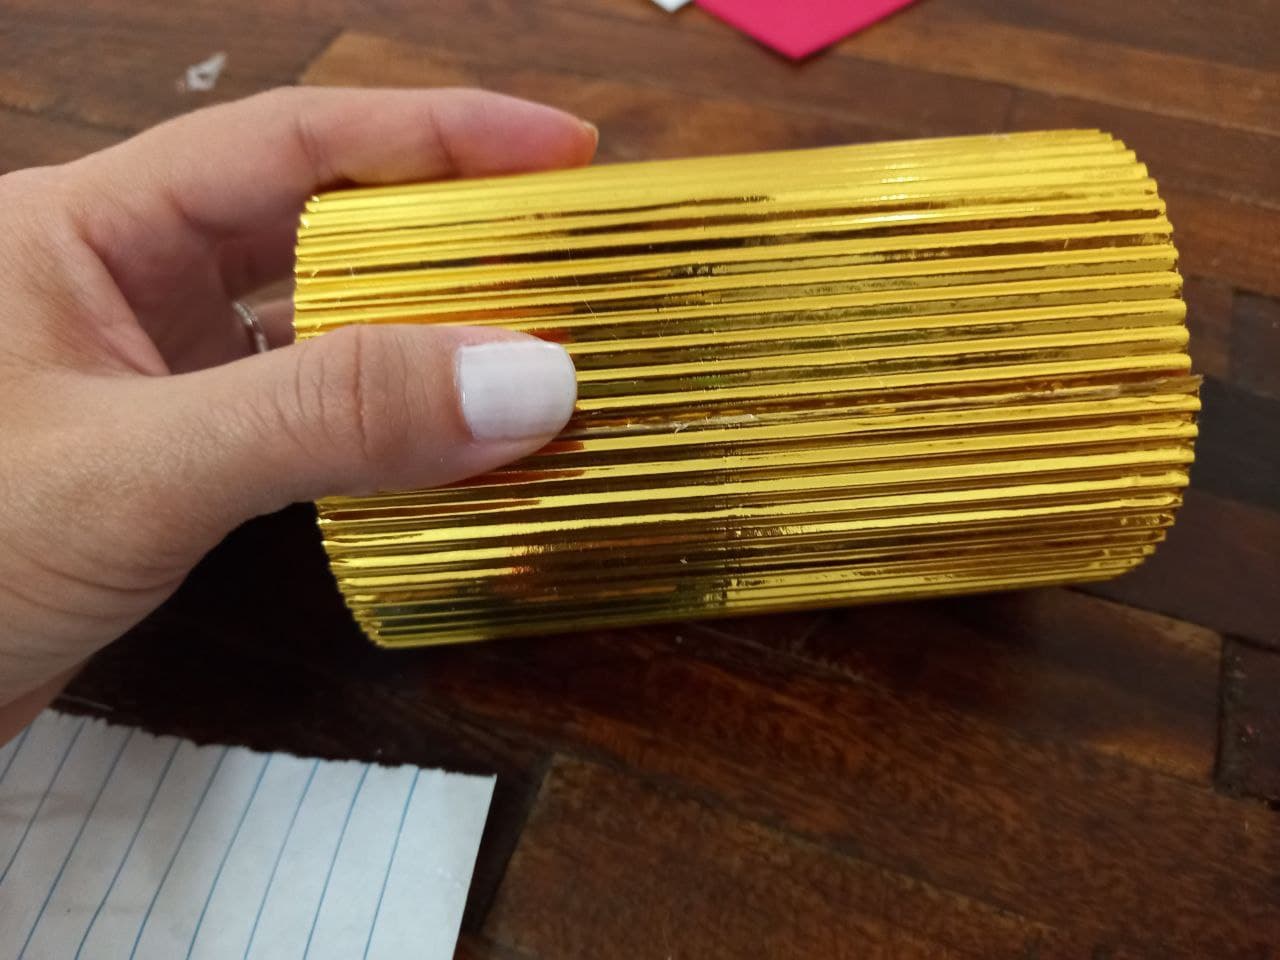
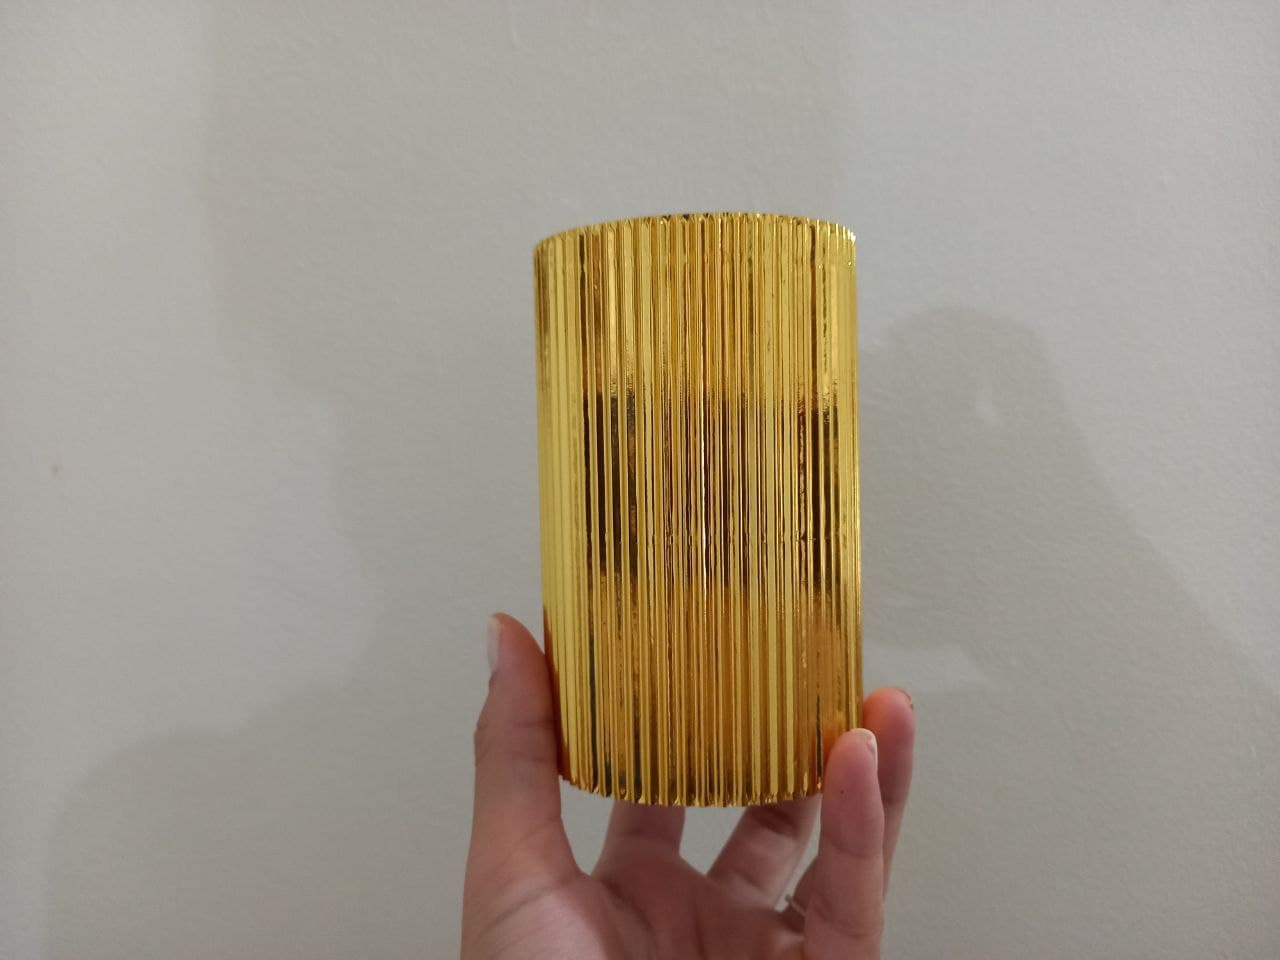
🎄 PASO 3. Es hora de hacer el cotillón, para ello tomaremos un objeto circular del tamaño de nuestra preferencia y vamos a hacer su forma en el anime, recortamos con un cutter o cuchillo y luego con ese círculo de anime mediremos la cartulina dorada enrollándolo en ella y marcamos con un lápiz la medida exacta que cubra todo el círculo, luego con una regla medimos el alto del cotillón, marcamos y recortamos.
🎄 STEP 3. It is time to make the party favors, for this we will take a circular object of the size of our preference and we will make its shape in the anime, we cut it with a cutter or knife and then with that anime circle we will measure roll it around the gold cardboard and mark with a pencil the exact measurement that covers the entire circle, then with a ruler we measure the height of the party favors, mark and cut.
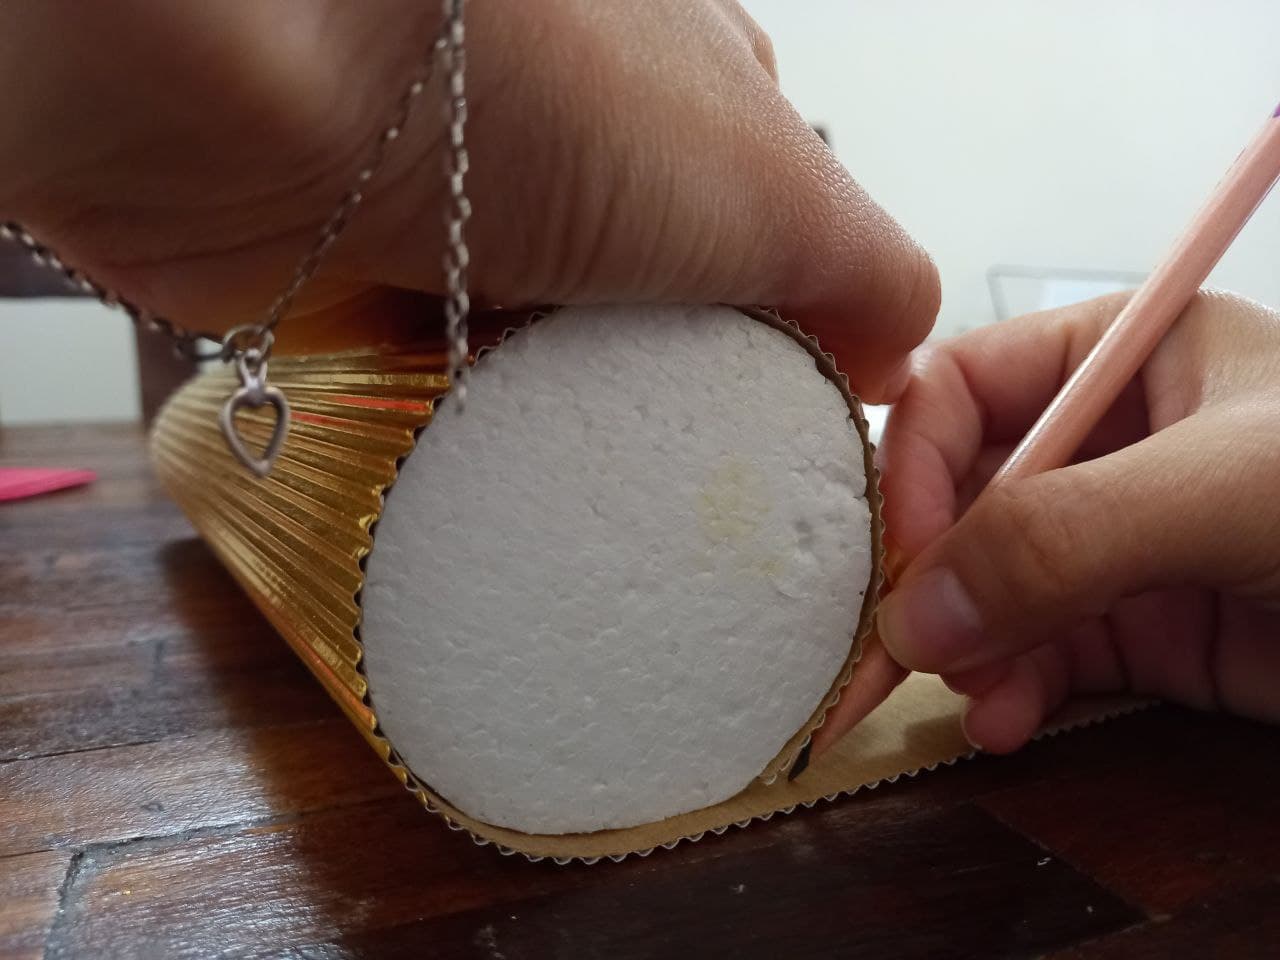
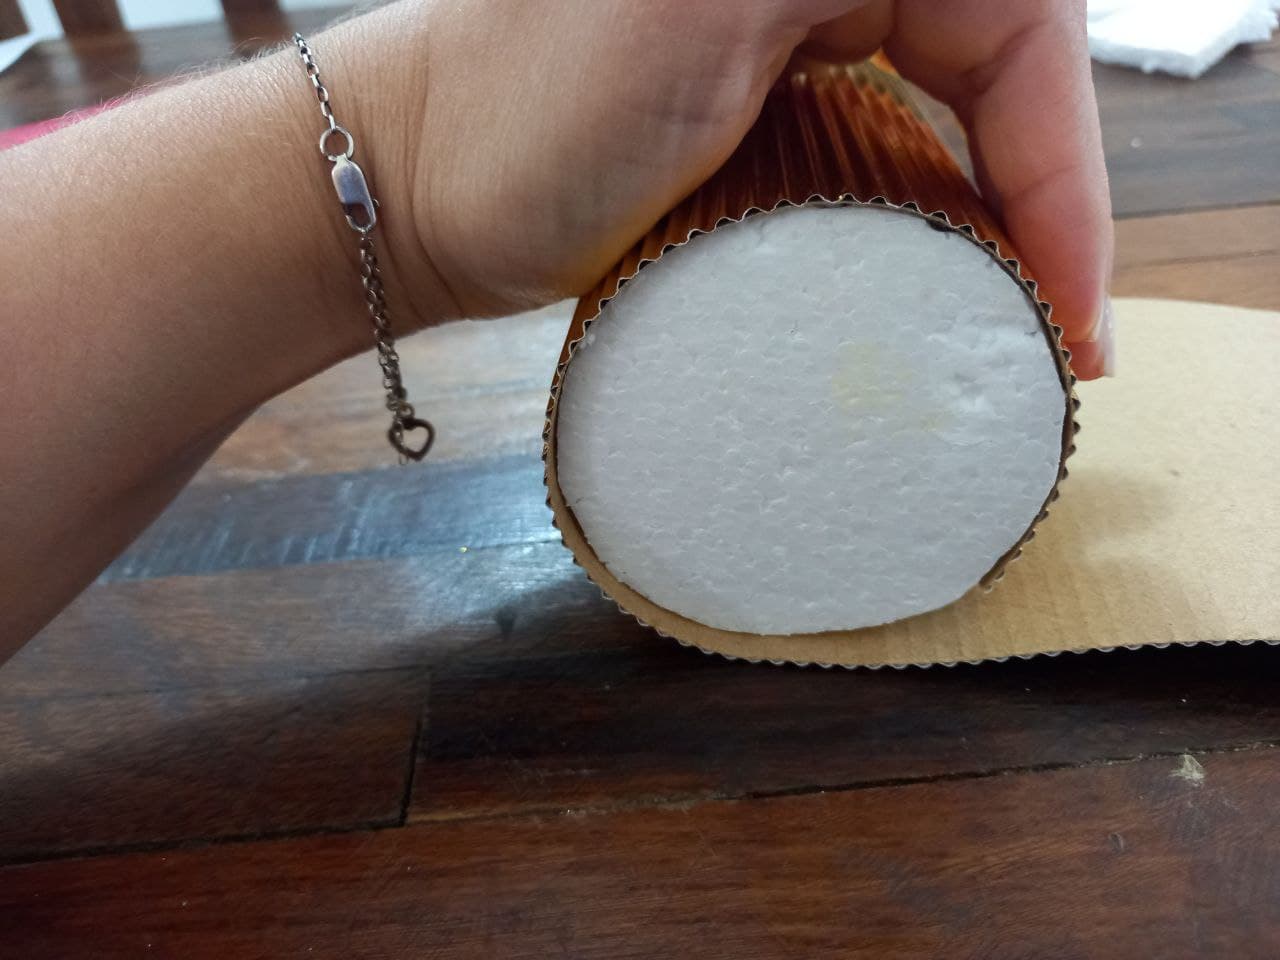
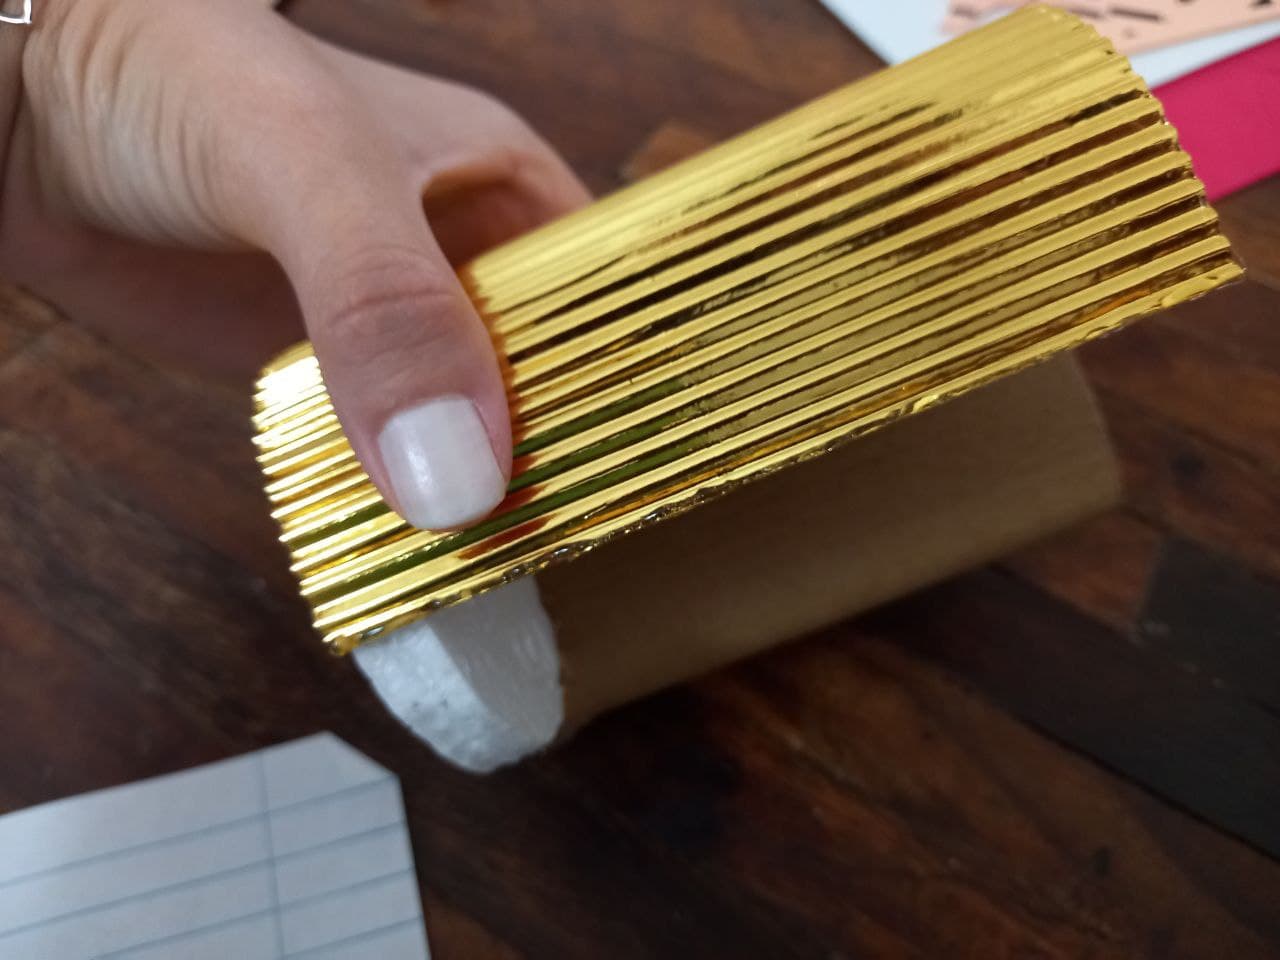
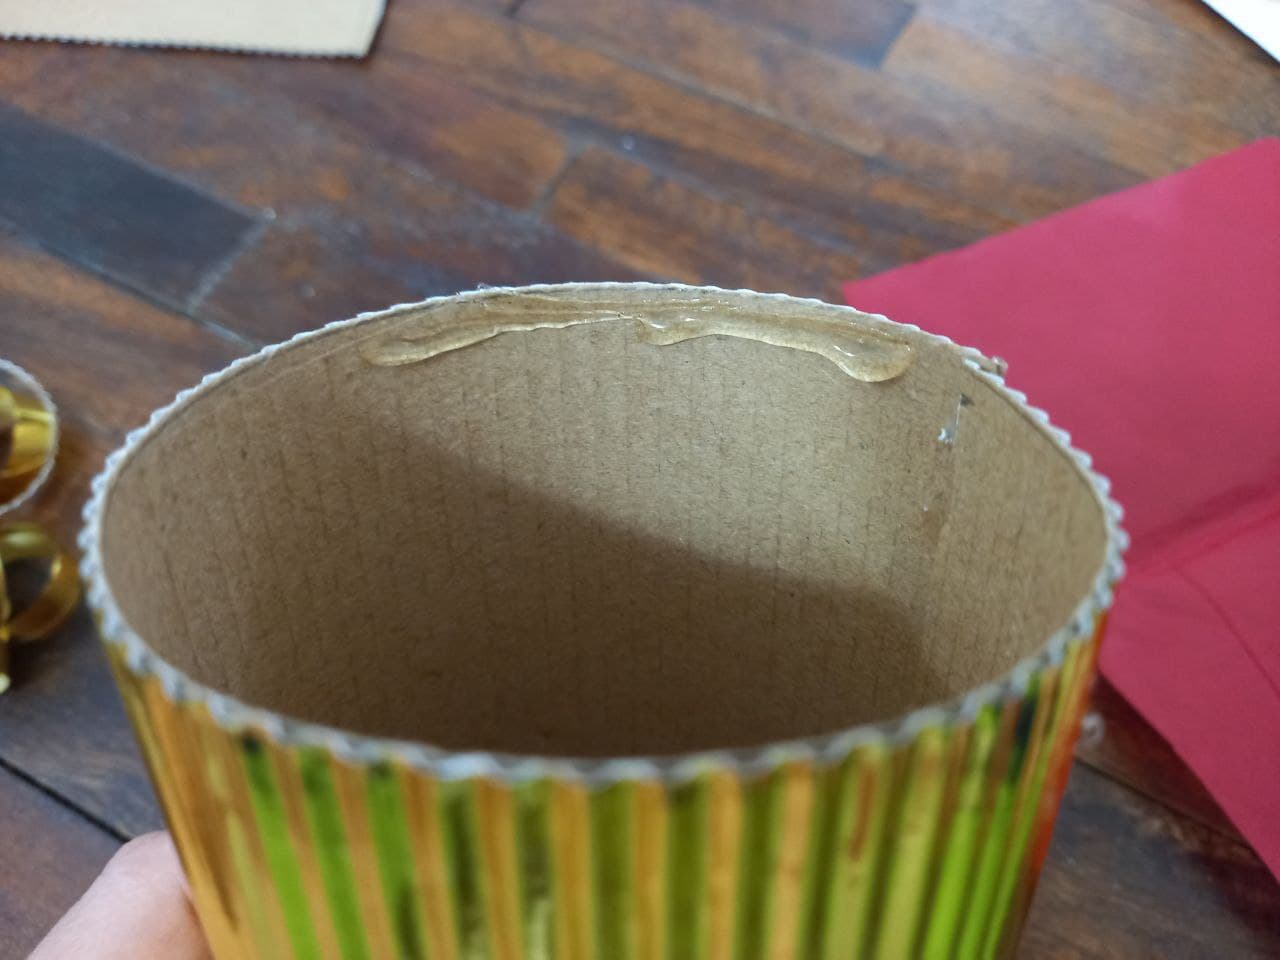
🎄 PASO 4. Aplicamos silicón en la orilla del circulo de anime y lo pegamos a una de las orillas de la pieza de cartulina y vamos enrollando hasta cerrar por completo y aplicamos silicón para unir las 2 puntas de la cartulina y ejercemos presión para que se pegue bien.
🎄 STEP 4. We apply silicone on the edge of the anime circle and glue it to one of the edges of the piece of cardboard and we roll until completely closed and apply silicone to join the 2 ends of the cardboard and exercise pressure so that it sticks well.

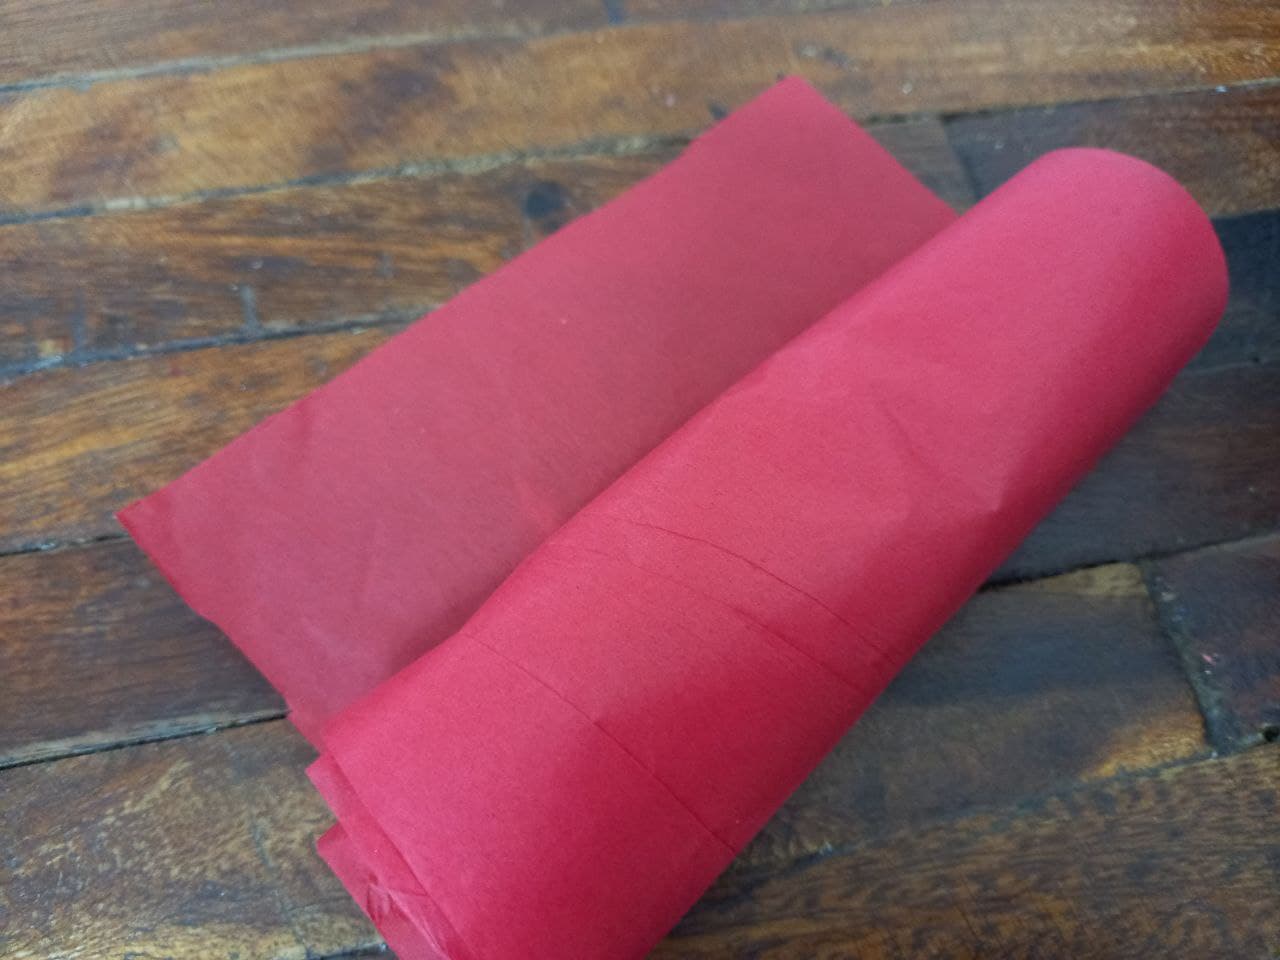
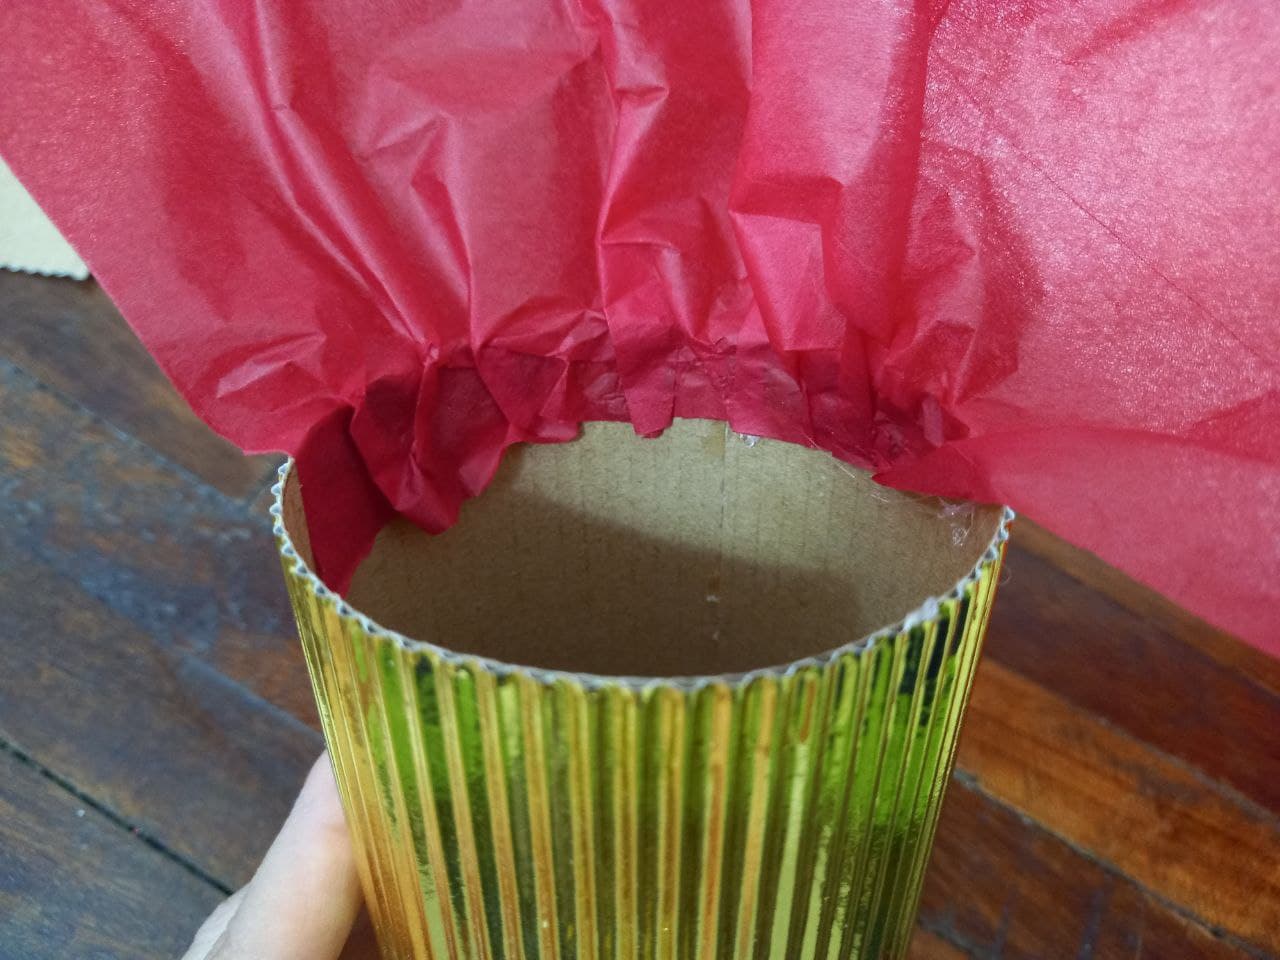
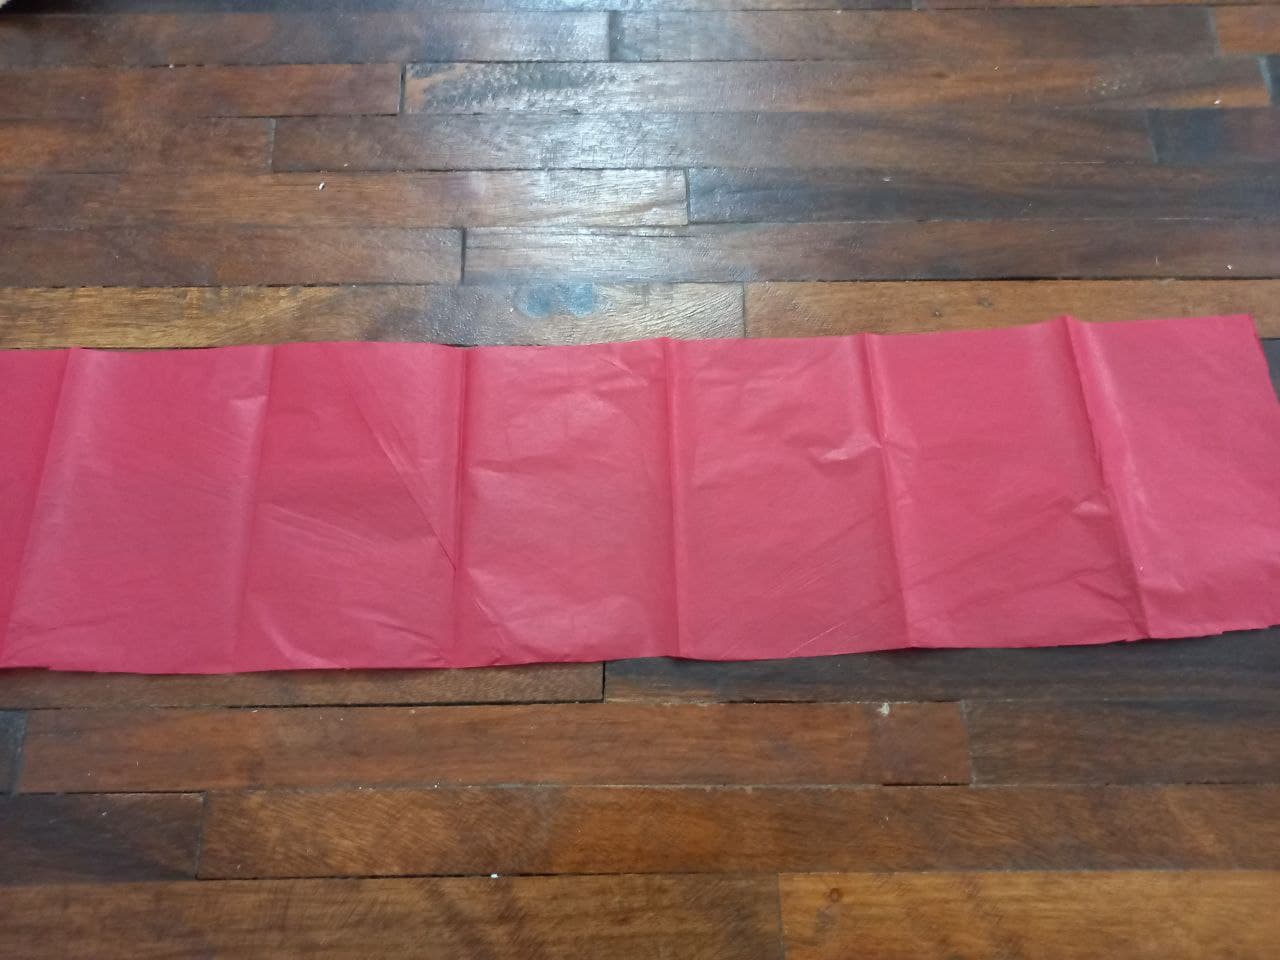
🎄PASO 5. Extendemos el papel de seda y recortamos una tira larga y un poco ancha, la enrollamos, aplicamos silicon en la orilla interna del cotillón y vamos pegando poco a poco el papel de seda dándole forma arruchada hasta llegar al final.
🎄 STEP 5. We spread the tissue paper and cut a long and slightly wide strip, roll it up, apply silicone to the inner edge of the party favors and gradually glue the tissue paper giving it a wrinkled shape until we reach the final.
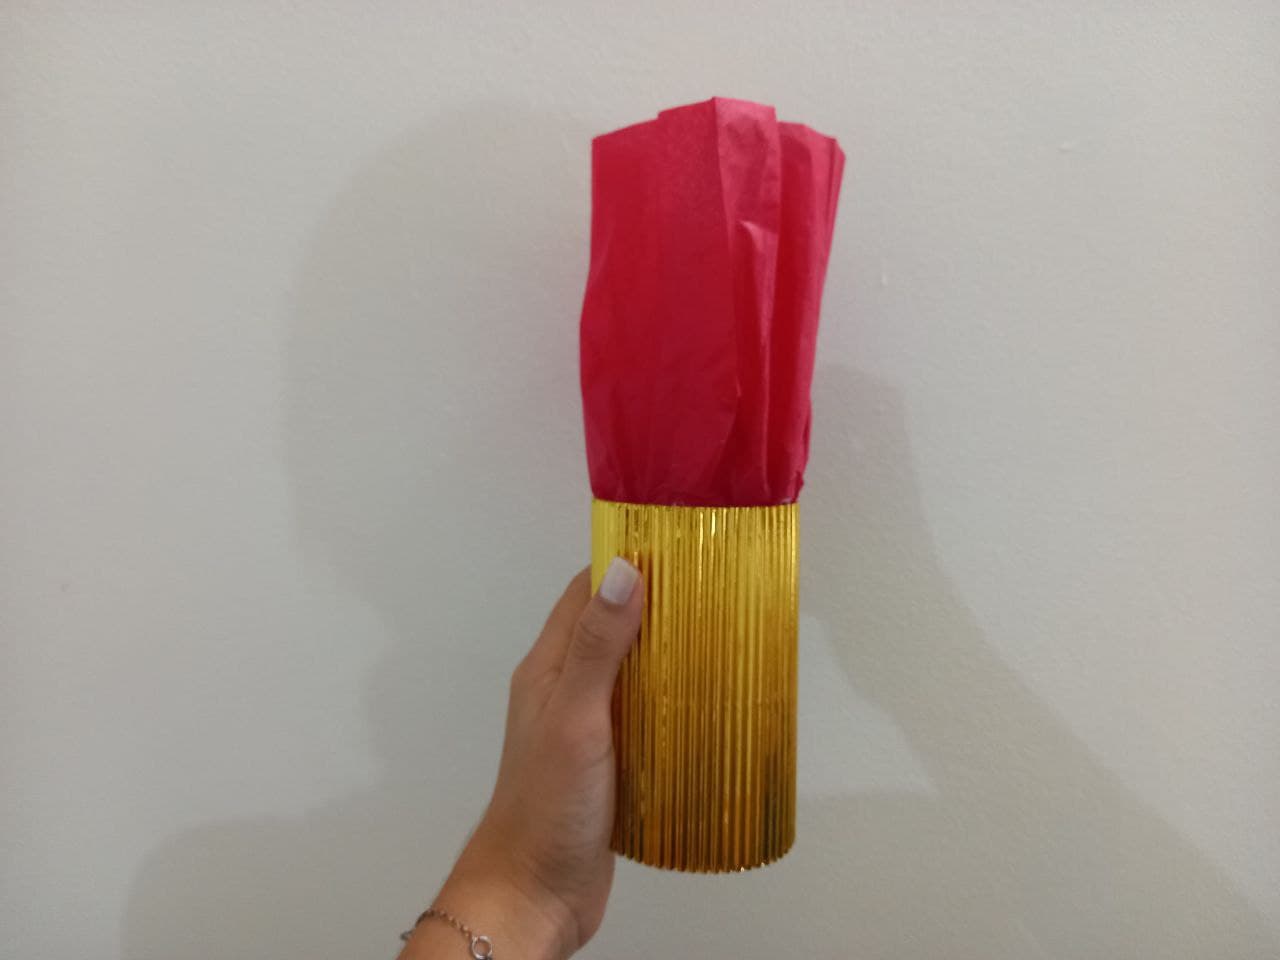
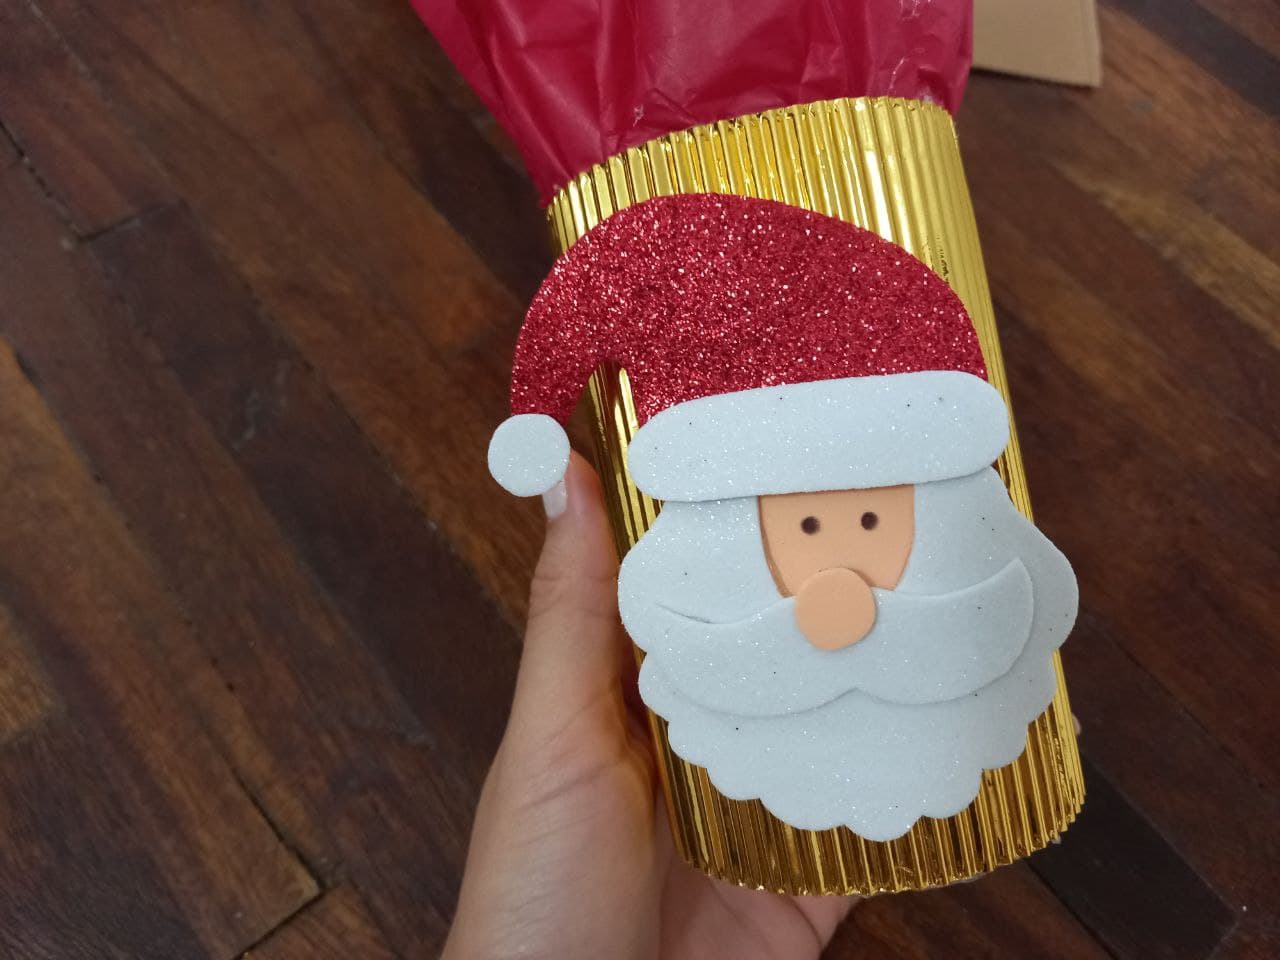
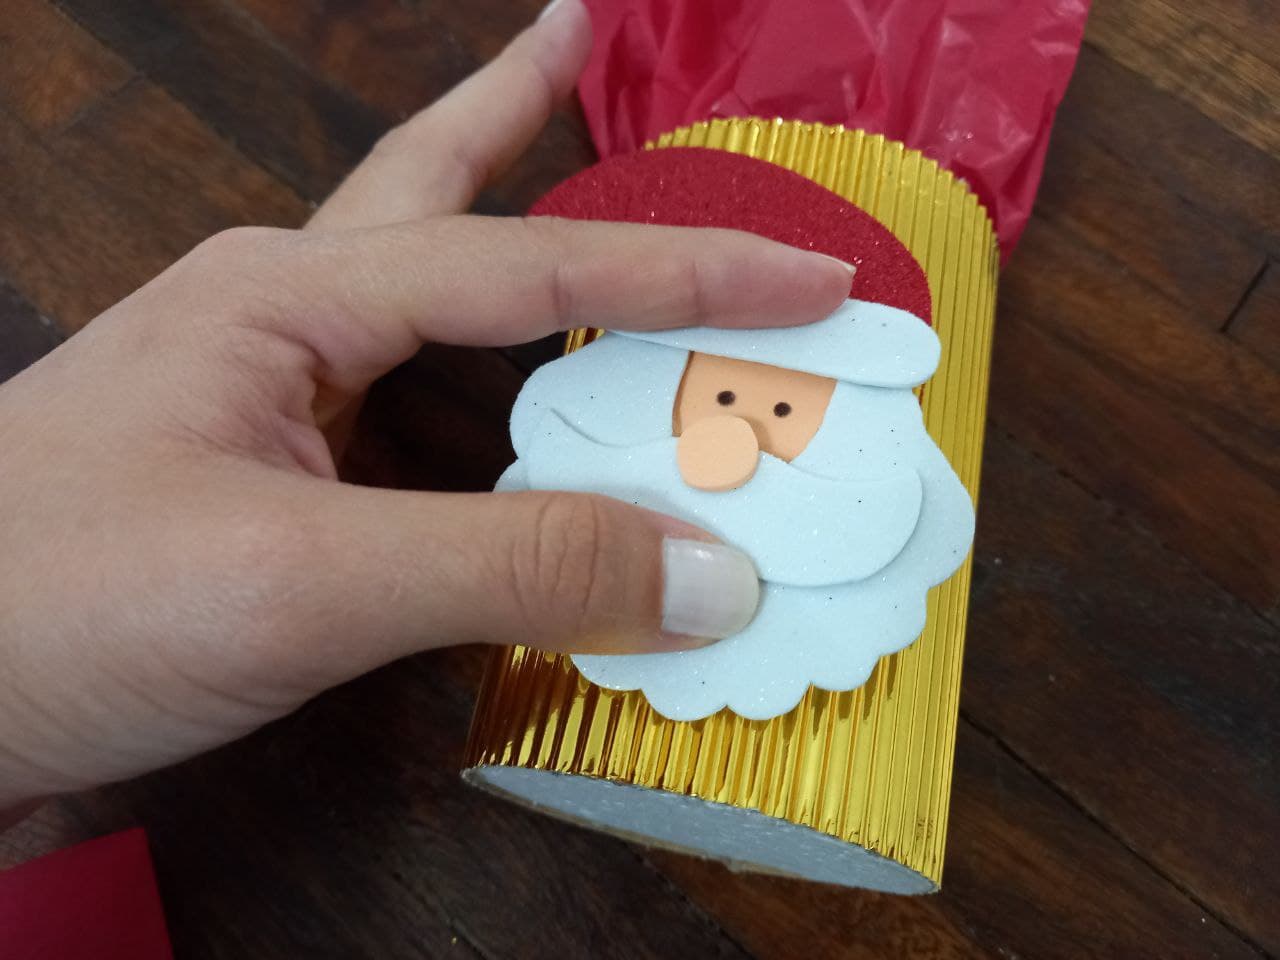
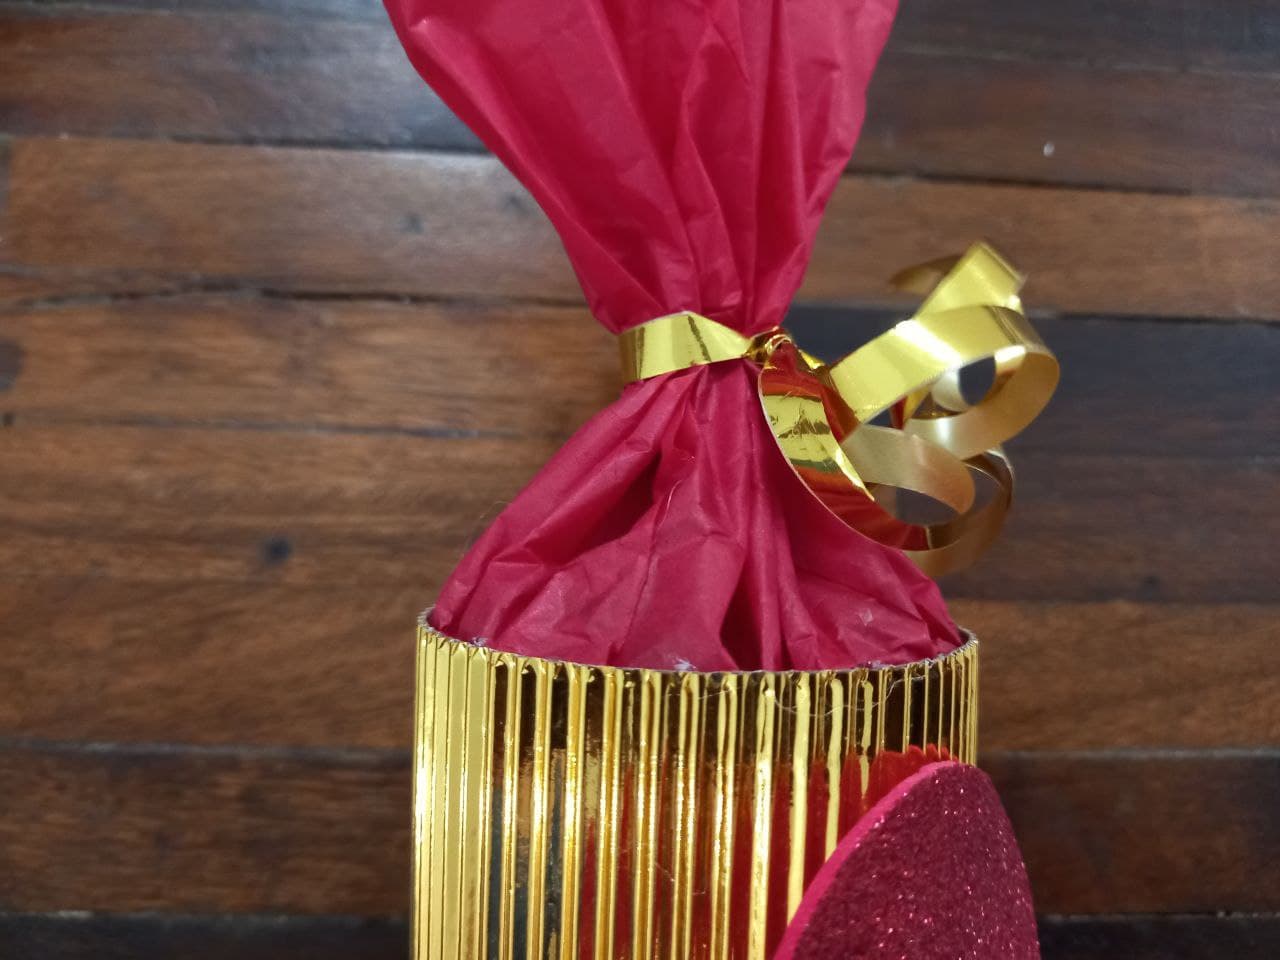
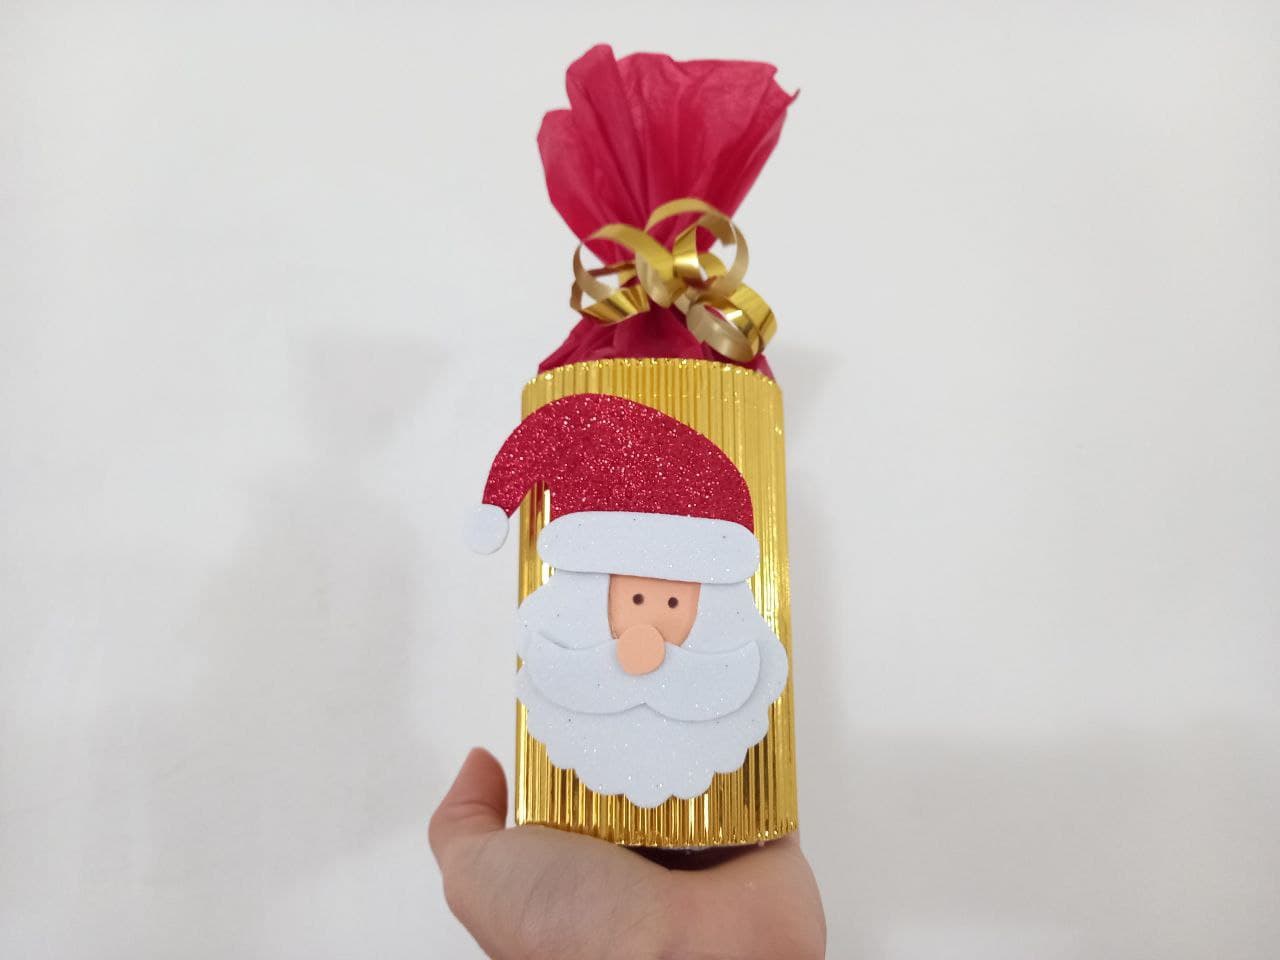
🎄PASO 6. Aplicamos silicon en la parte trasera del Santa Claus y lo pegamos en el cotillón justo en el centro, luego con la cinta dorada de papel hacemos un lazo o nudo alrededor del papel de seda.
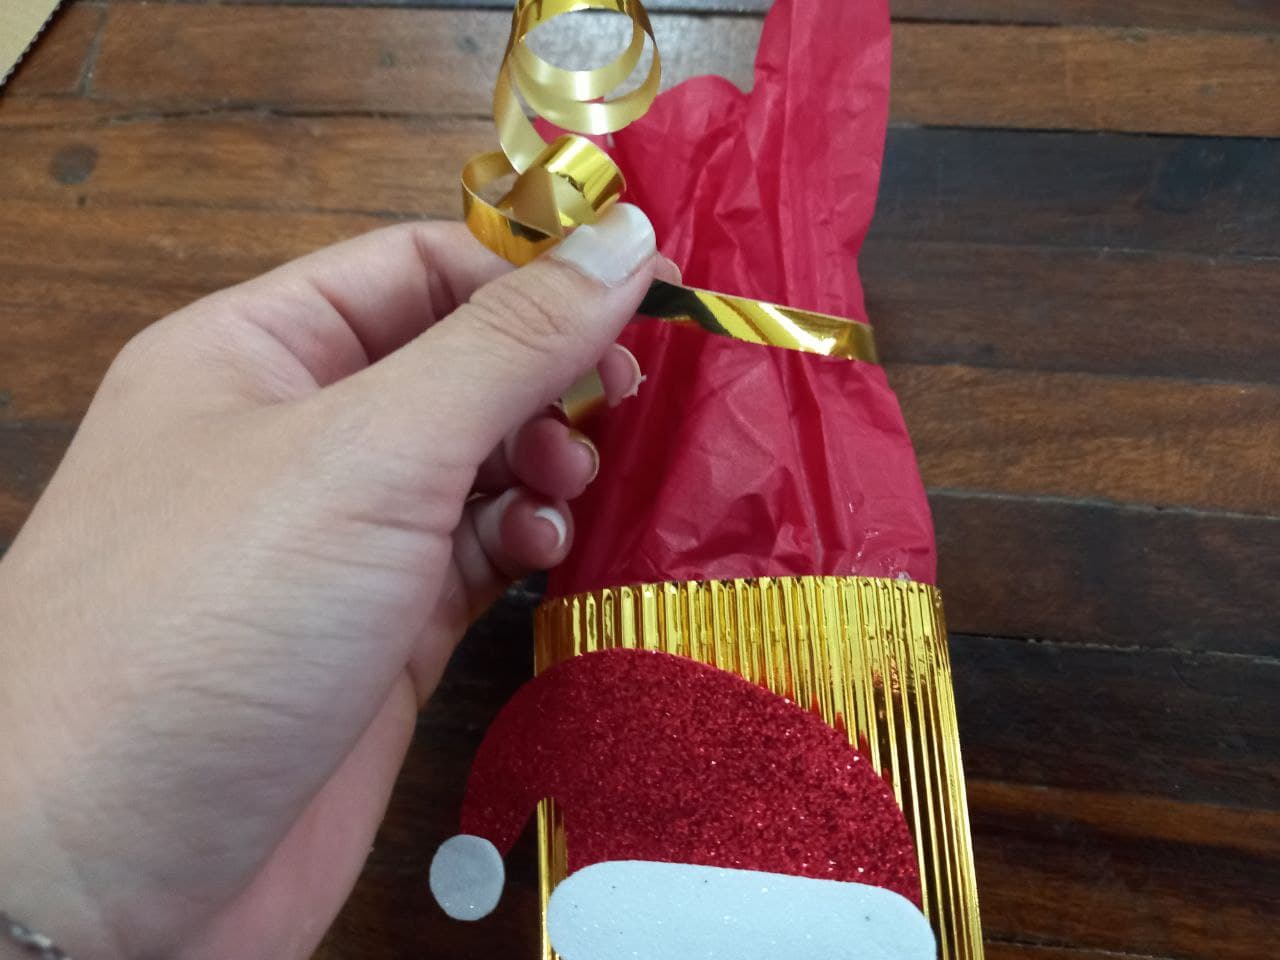
🎄 STEP 6. We apply silicone on the back of the Santa Claus and stick it on the party favors right in the center, then with the gold paper ribbon we make a loop or knot around the tissue paper.
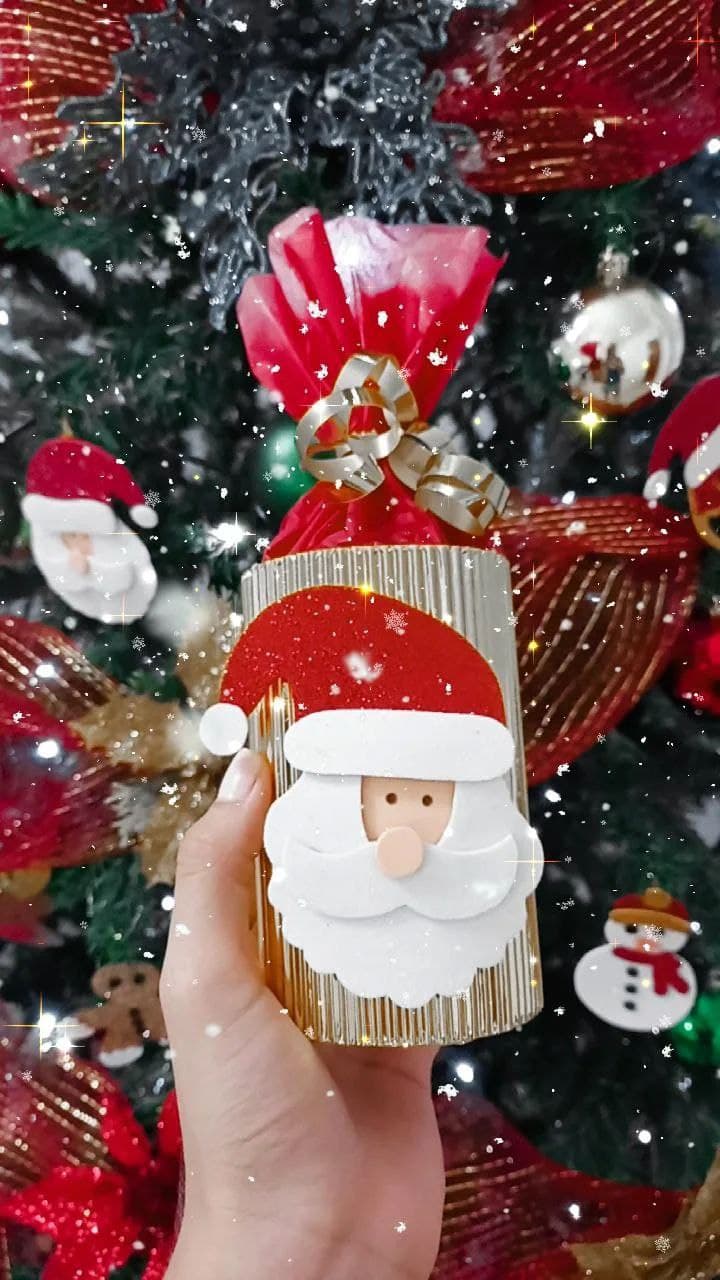
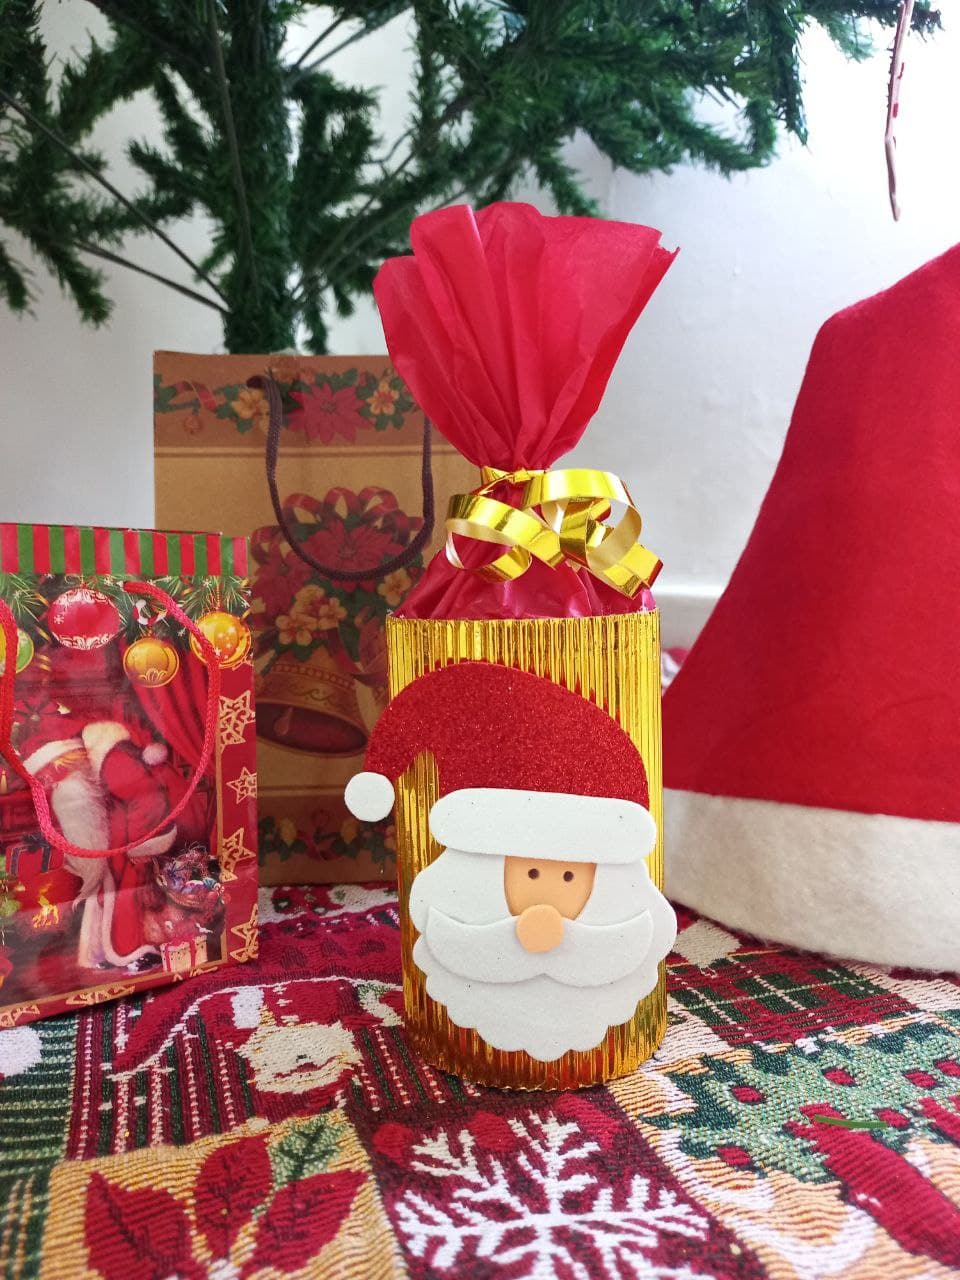
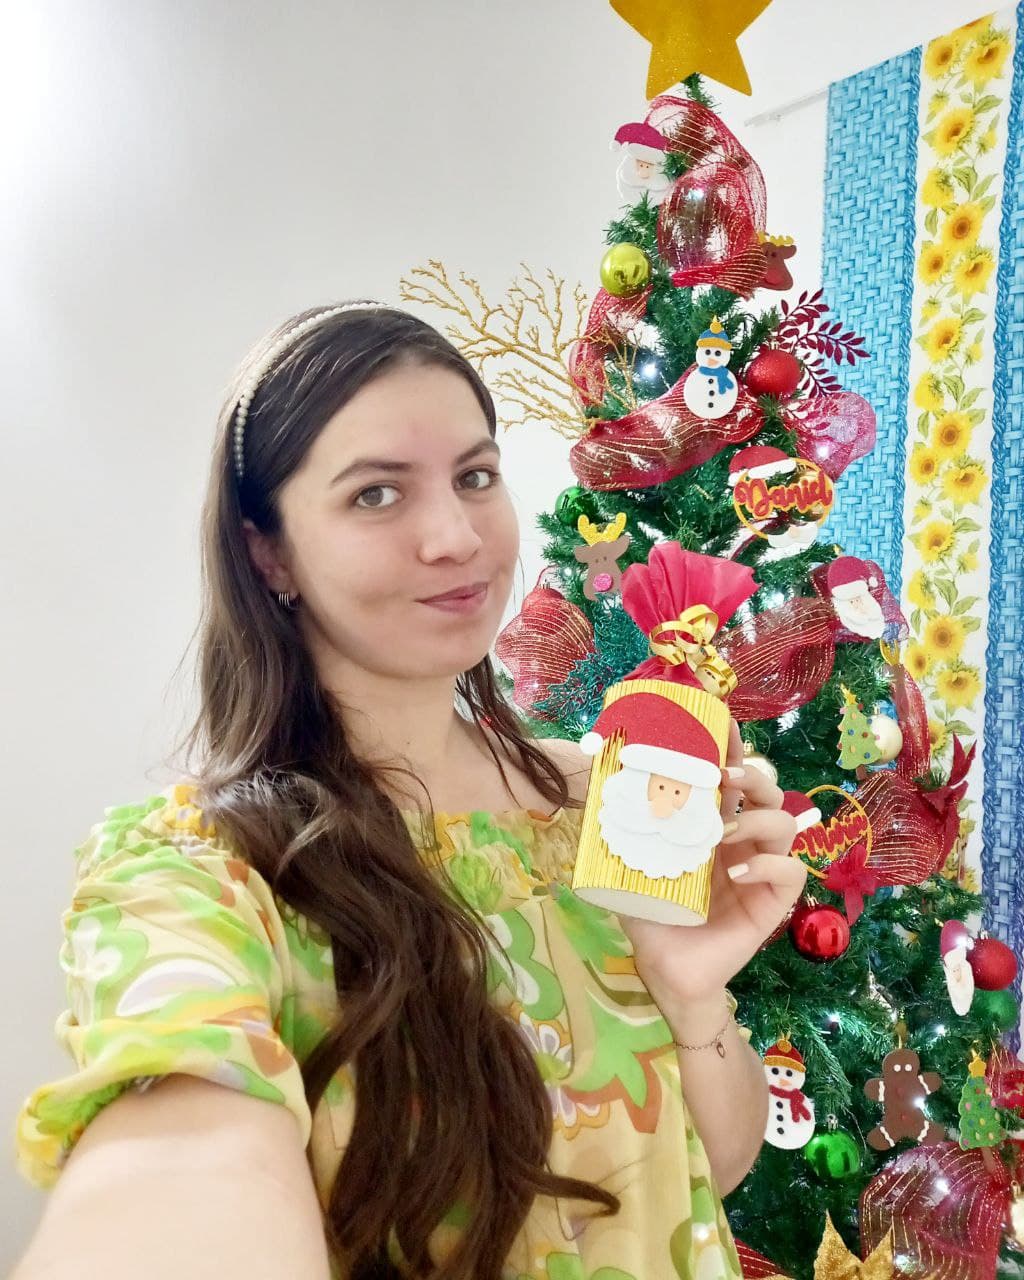
¡Y listo! Ya tenemos nuestro bello cotillón de Santa Claus para obsequiar en navidad o incluso para decorar, es ideal para regalar a los niños en navidad o para dar a un ser querido un detalle único y especial, espero que les haya gustado esta idea y este tutorial sea de ayuda para crear sus propias manualidades navideñas, nos vemos pronto con más ideas fáciles y lindas.
¡And ready! We already have our beautiful Santa Claus party to give at Christmas or even to decorate, it is ideal to give to children at Christmas or to give a loved one a unique and special detail, I hope you liked this idea and this tutorial is to help you create your own Christmas crafts, see you soon with more easy and cute ideas.
Todas las fotografías son de mi propiedad.
Fotografías capturadas con mi Samsung Galaxy A12
Nos vemos en mi próxima publicación.
¡Tengan un feliz día!
All photographs are my property.
Photos captured with my Samsung Galaxy A12
See you in my next post.
¡Have a happy day!