ENGLISH
Greetings Friends Hivers
First of all, a greeting to the appreciated Gems community. For those who don't know me, I am very passionate about music, art and crafts. I love recycling to create new and useful things.
In this opportunity, I want to share with you this idea to make a shopping bag that I think is great, because it is a simple task to perform, useful and with excellent results for entrepreneurship.
I invite you to join me to make this beautiful work.

MATERIALS
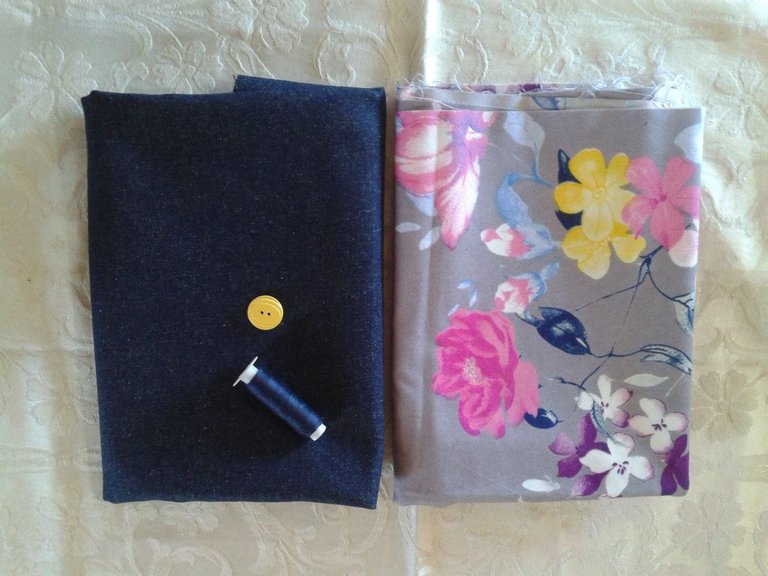
- Denim fabric
- Printed cotton fabric
- Thread
- (1) button
PROCEDURE
Step 1
The first thing we are going to do is to cut the fabric pieces to make the bag: external part of the bag, internal lining, straps for the hanging handles and pieces for a pocket, as shown in the following images.
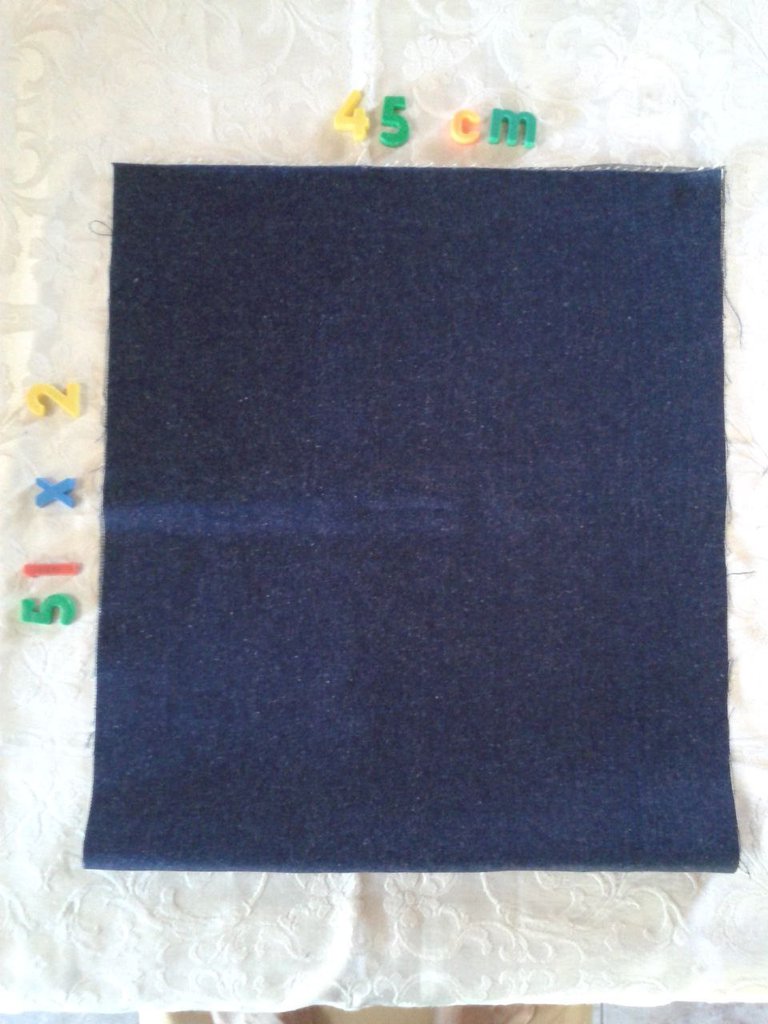
We are going to cut this piece 104 cm long by 45 cm wide. Fold it so that it is 51 x 45 to make the outside of the bag.
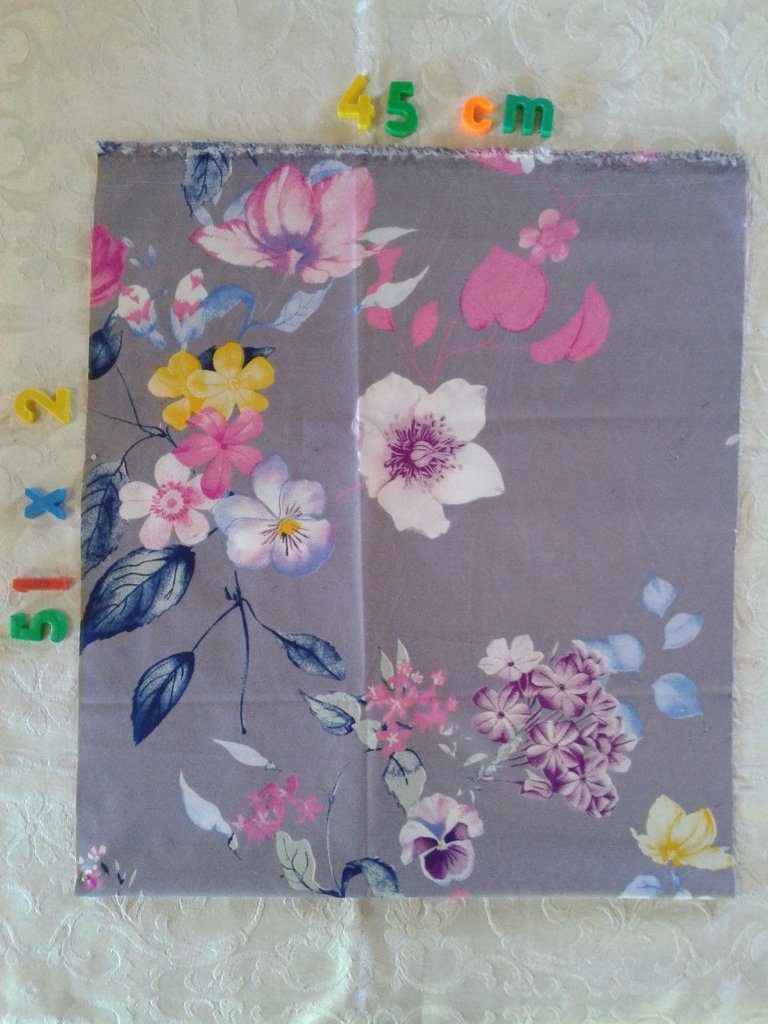
This piece of printed fabric for the lining is cut in the same way as the jeans.
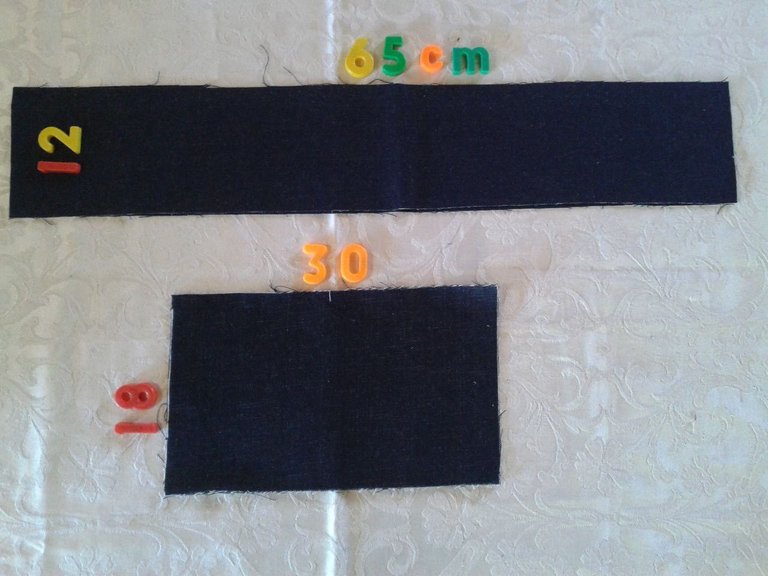
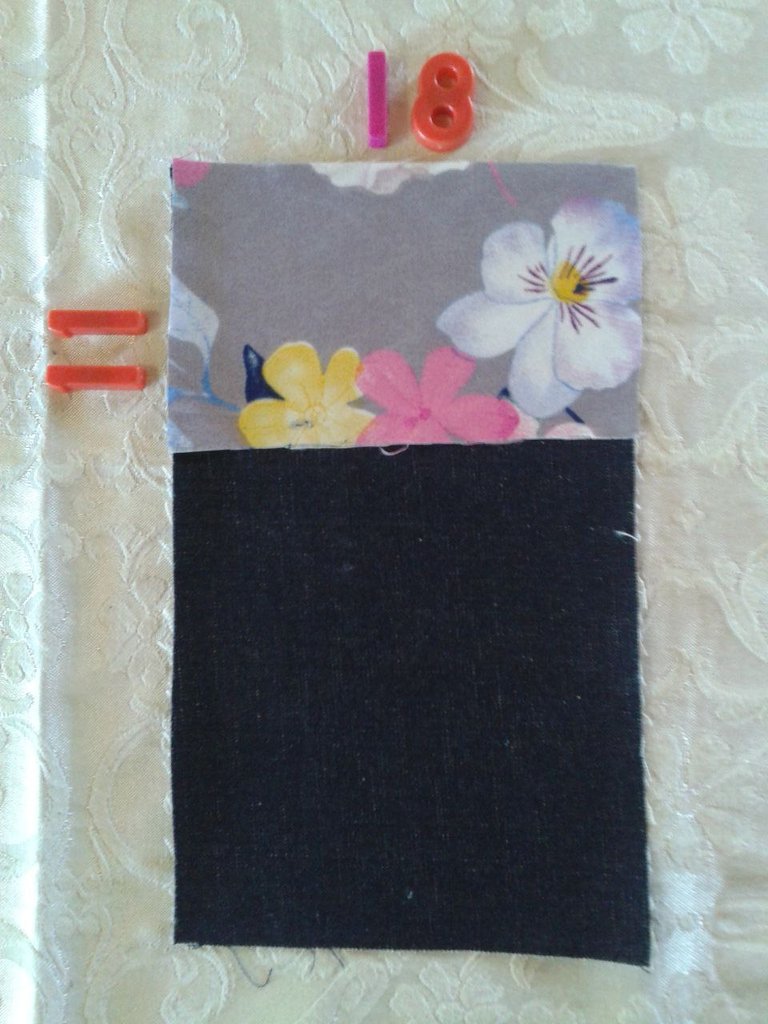
This image shows the pieces for the hanging handles and the pocket. Cut (2) pieces of 12 x 65cm and (2) of 18 x 30cm.
Cut a strip 11cm long by 4cm wide to make the pocket buttonhole.
Step 2
Once we have the pieces cut, we will first make the pocket as shown in the following images.
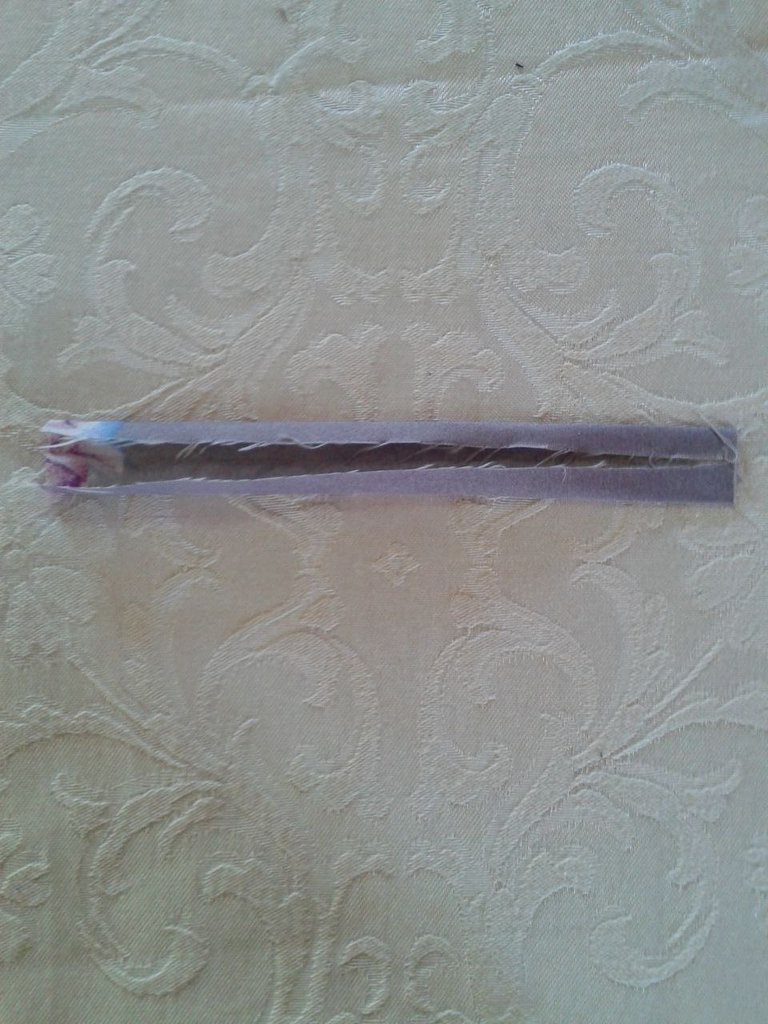
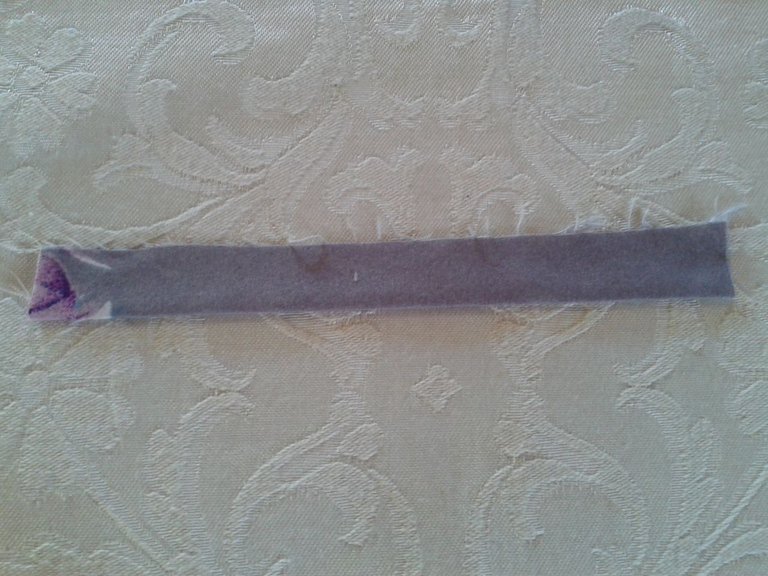
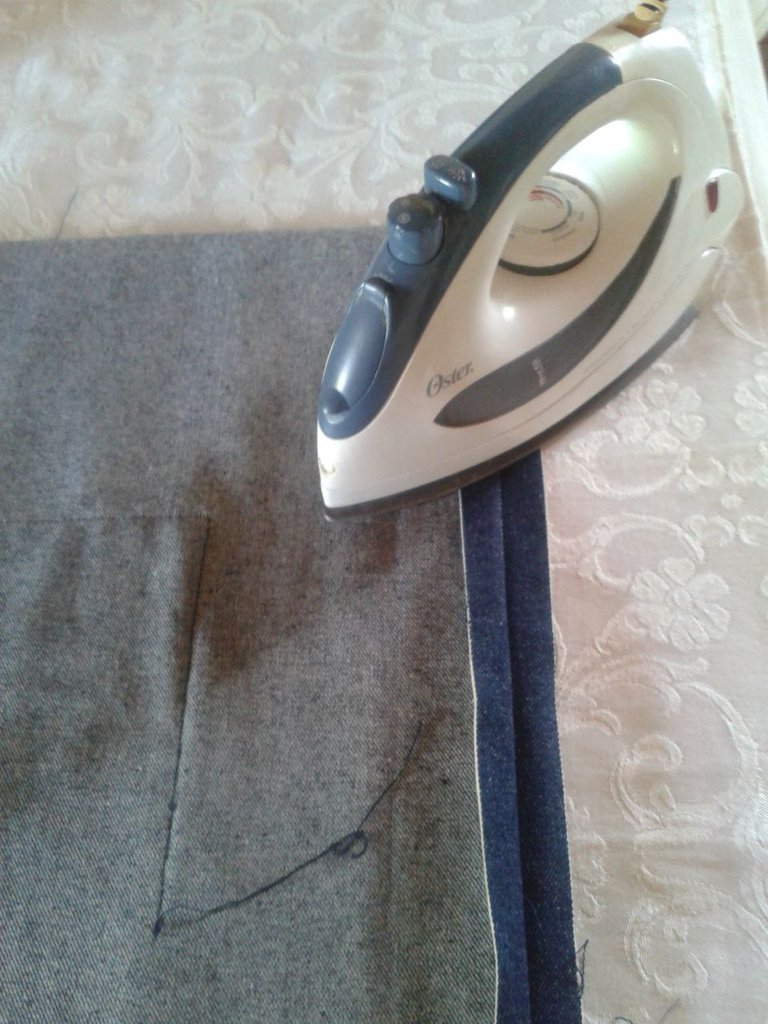
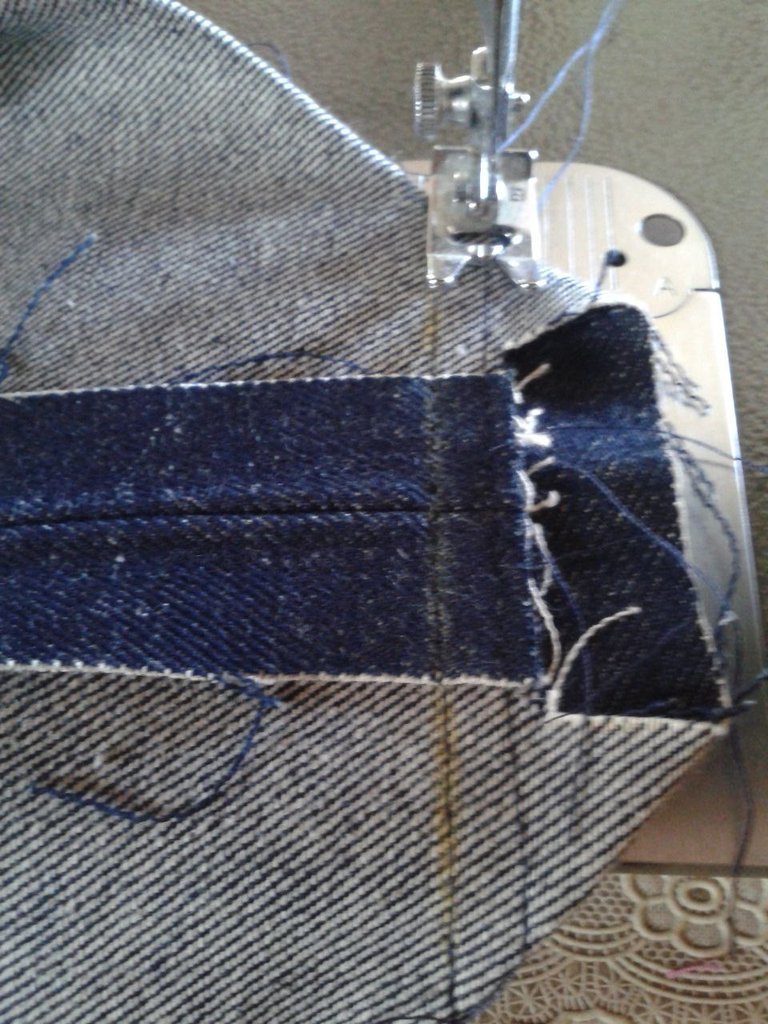
First we fold and iron the 11cm x 4cm strip of fabric and then sew it by machine.
Machine sew on both sides.

Then we sew the buttonhole strip on one of the pocket pieces.
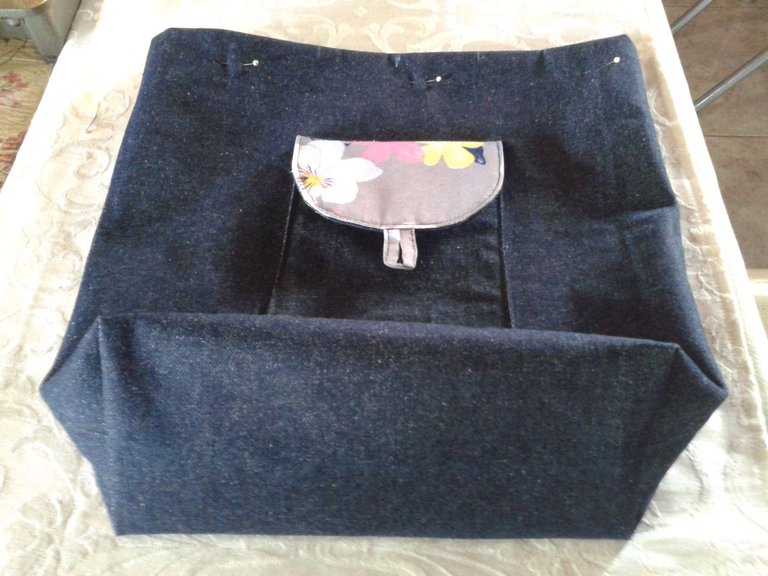
We can embellish the pocket by placing printed fabric on the other piece as shown in this image.
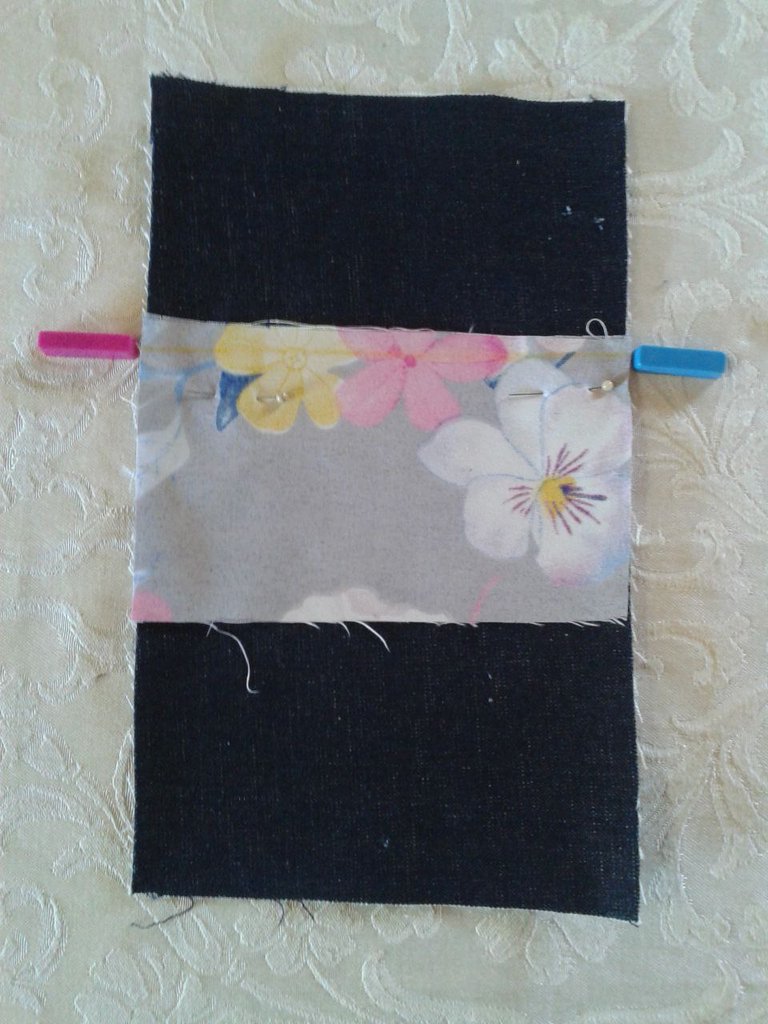
Place the printed fabric piece at a distance of 10cm from the top edge, leaving a 1cm seam allowance.
We sew by machine.
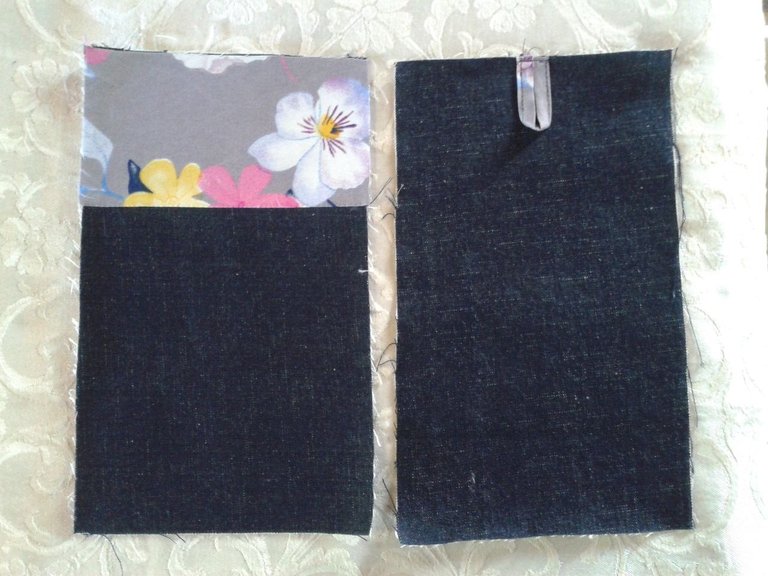
This is how the pieces to assemble the pocket look like.
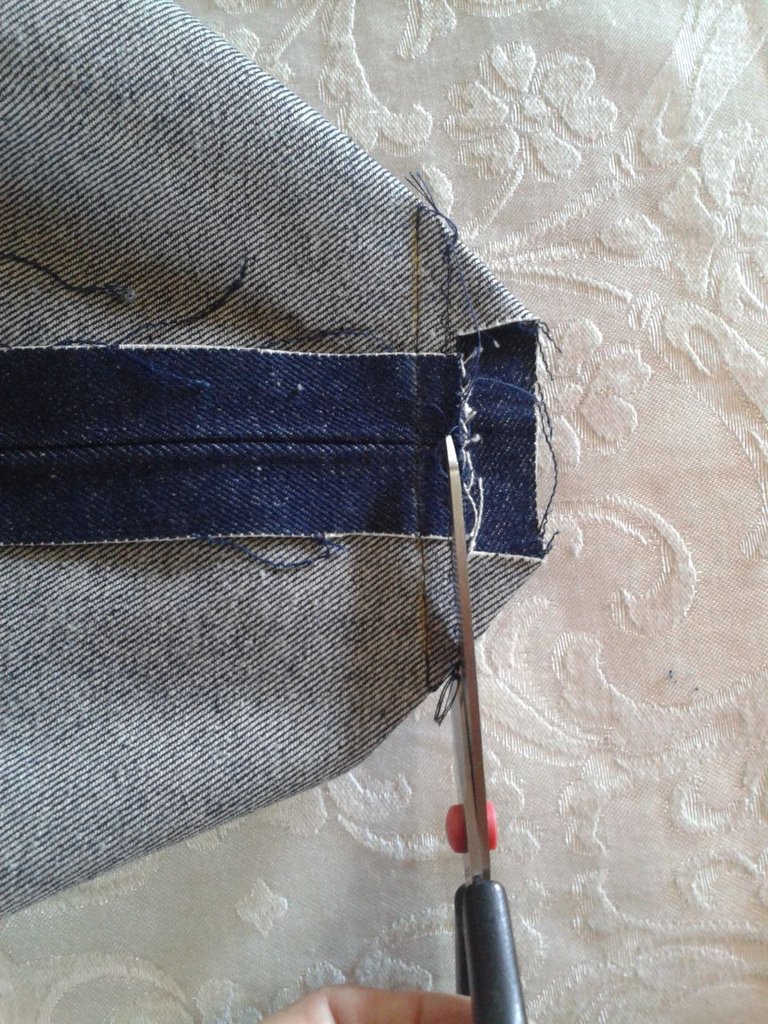
We place the pieces facing each other right side to right side and we will round the corners at the ends where the buttonhole and the printed part are located and then sew by machine leaving a 1cm seam allowance. Leave a space as seen in the lower end without sewing and then turn the piece over.
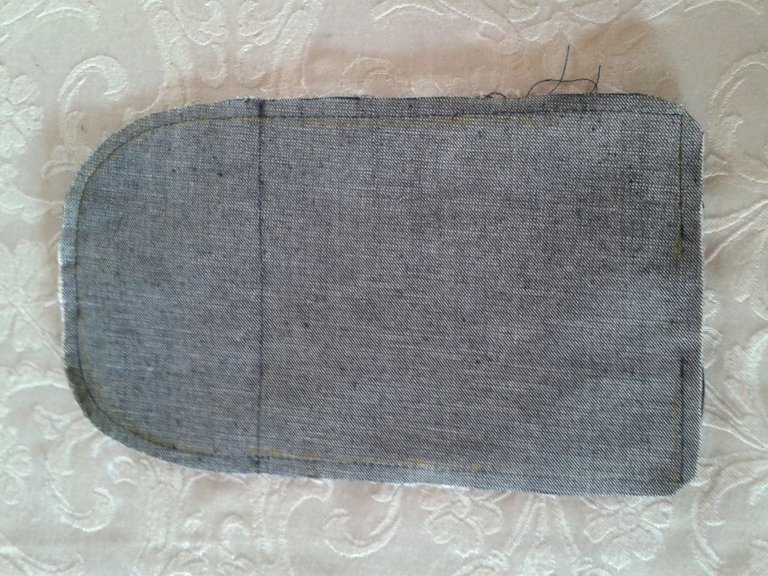
After sewing, we cut the excess in the corners where we rounded and we make small picks on the edge being careful not to reach the seam, so that when we turn the piece over it takes its shape well. Here we can see the space we left without sewing to turn the piece over.
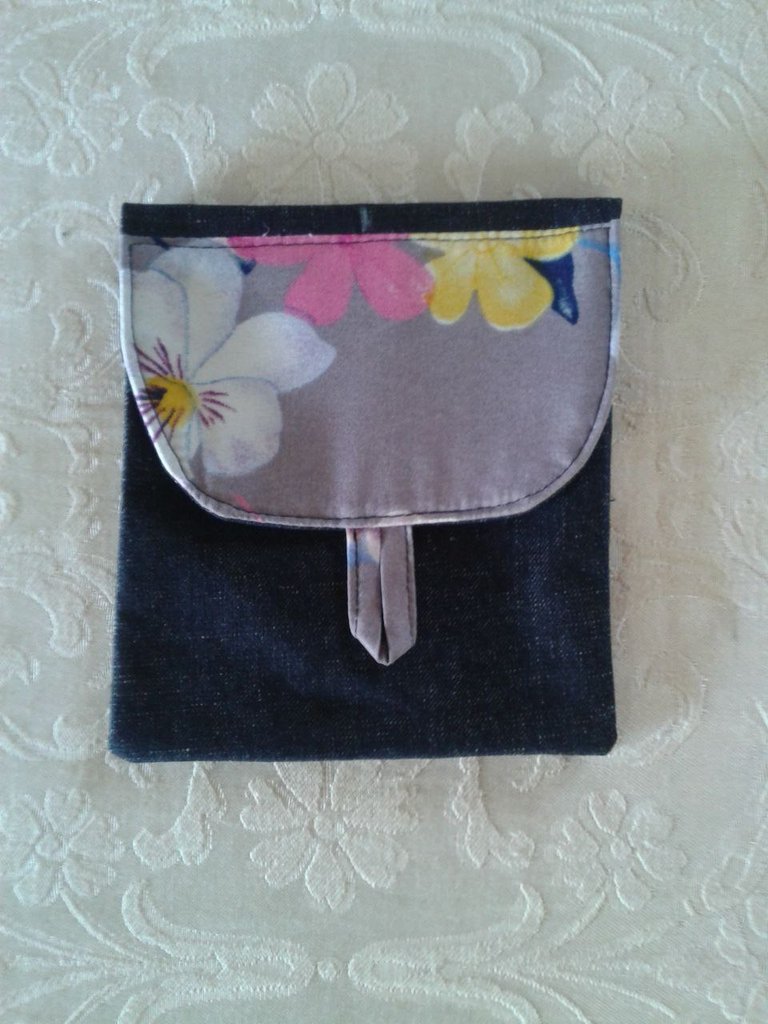
After turning the piece over, we iron it to settle the edges.

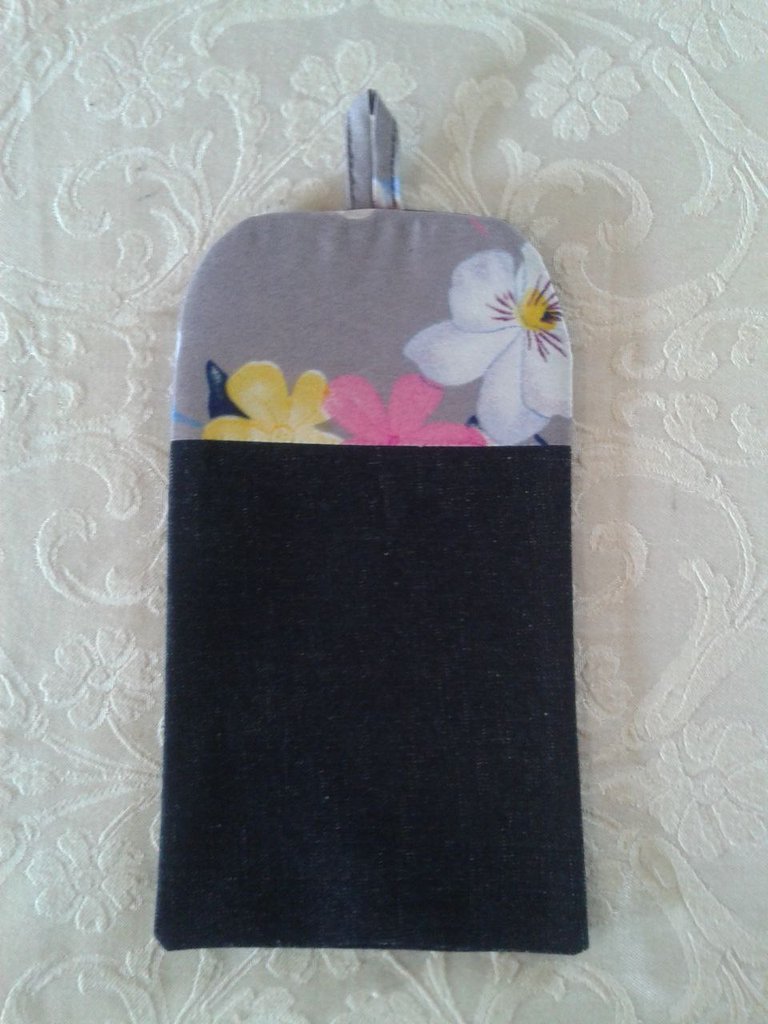
After ironing, we pass a seam in this part of the pocket only for stepping and decorating.
The pocket is now ready.
Step 3
Once we have the pocket, we proceed to glue it on the piece of jeans fabric that will form the outside of the bag, as shown in the following images.
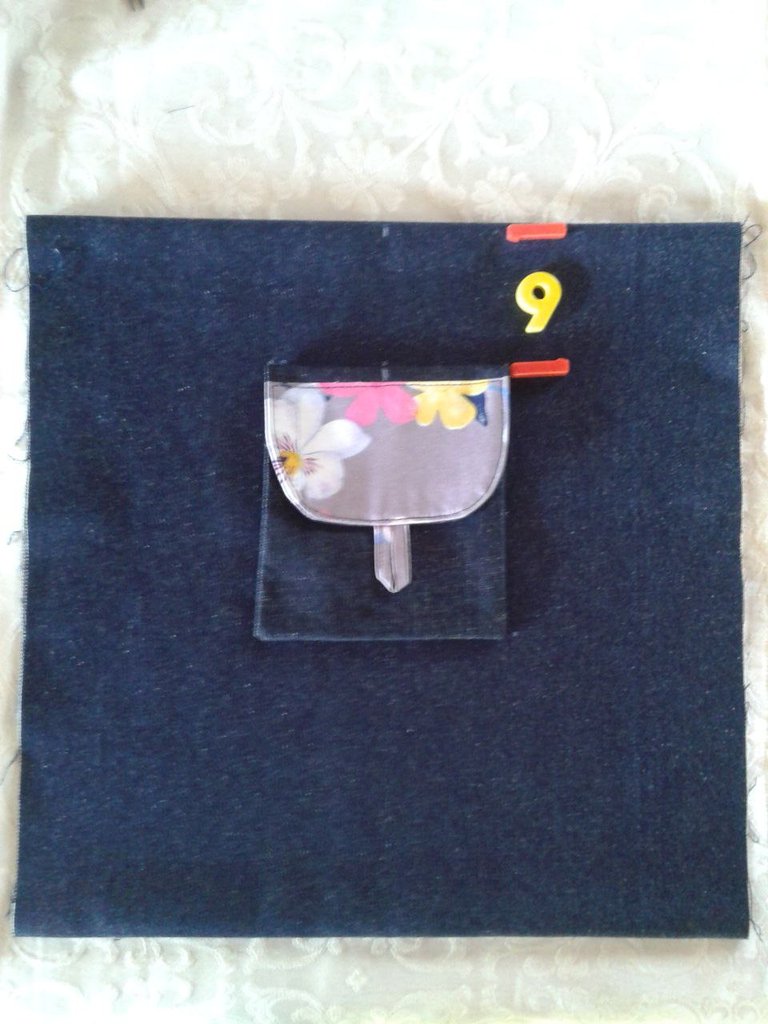
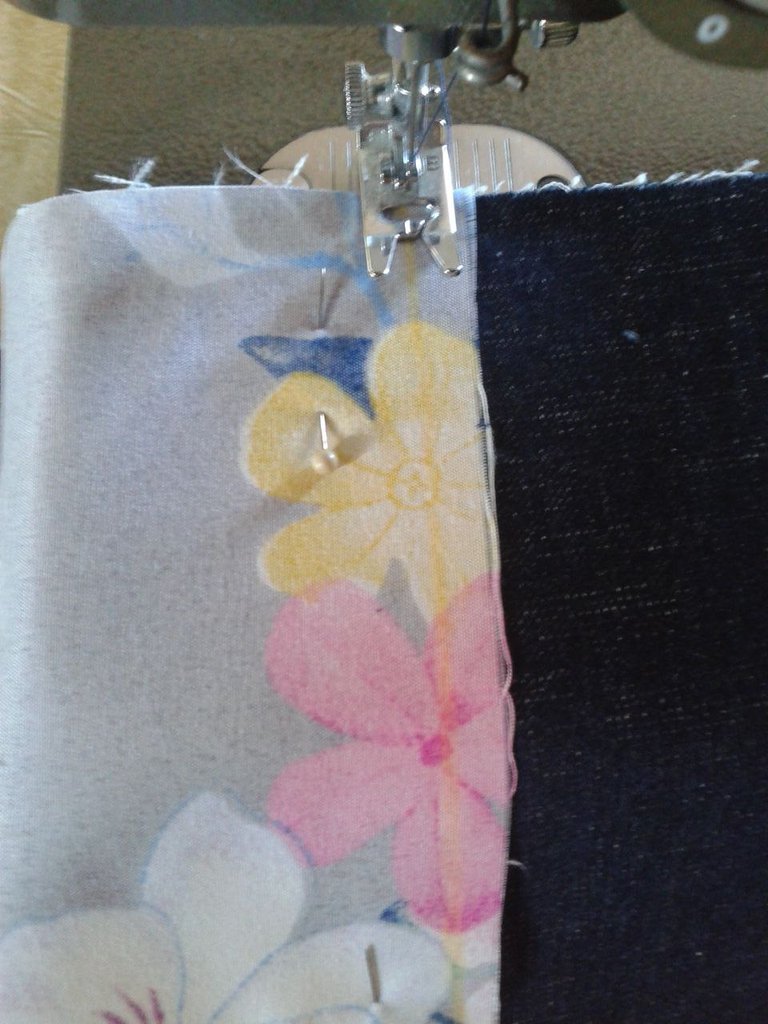
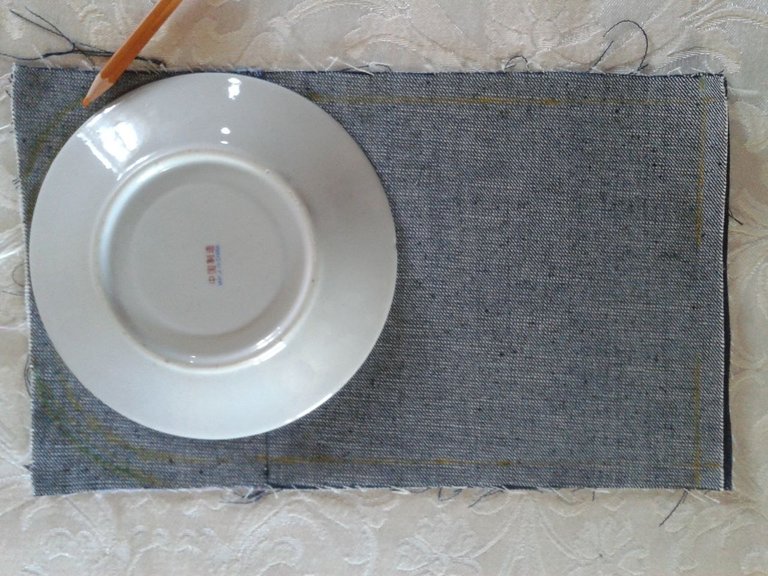
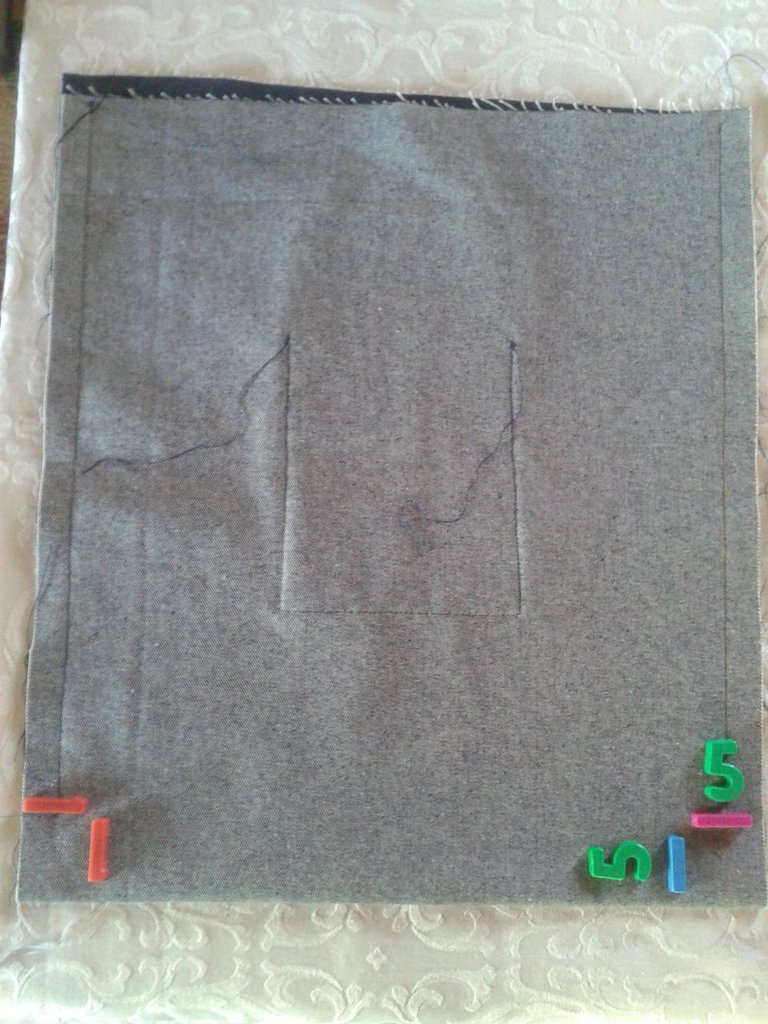
We are going to take the piece of jeans fabric, make a hem of 6cm at the top ends, mark the center of the piece to align the pocket and measure 9cm down to adjust the height. We can mark with chalk so that it is centered and verify that the side spaces are also equal.

This piece will be sewn by machine with a straight stitch, from the pink stitch down all the way to the blue stitch.
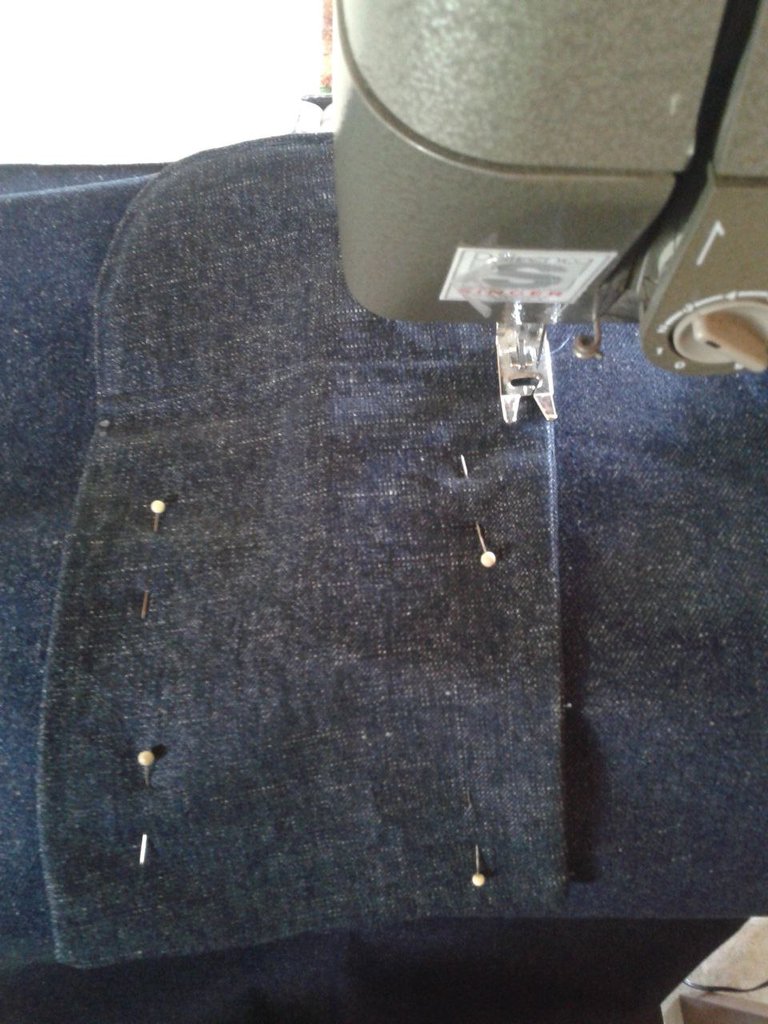
We fix with pins so that the piece does not move and sew carefully so as not to step on the hem we left at the upper end with the seam.
Step 4.
Once the pocket is attached, we will sew the jeans piece as shown below to form the outside of the bag.
We are going to sew the sides leaving 2cm seam allowance and at each corner of the bottom edge, we will leave a space of 5cm as shown.
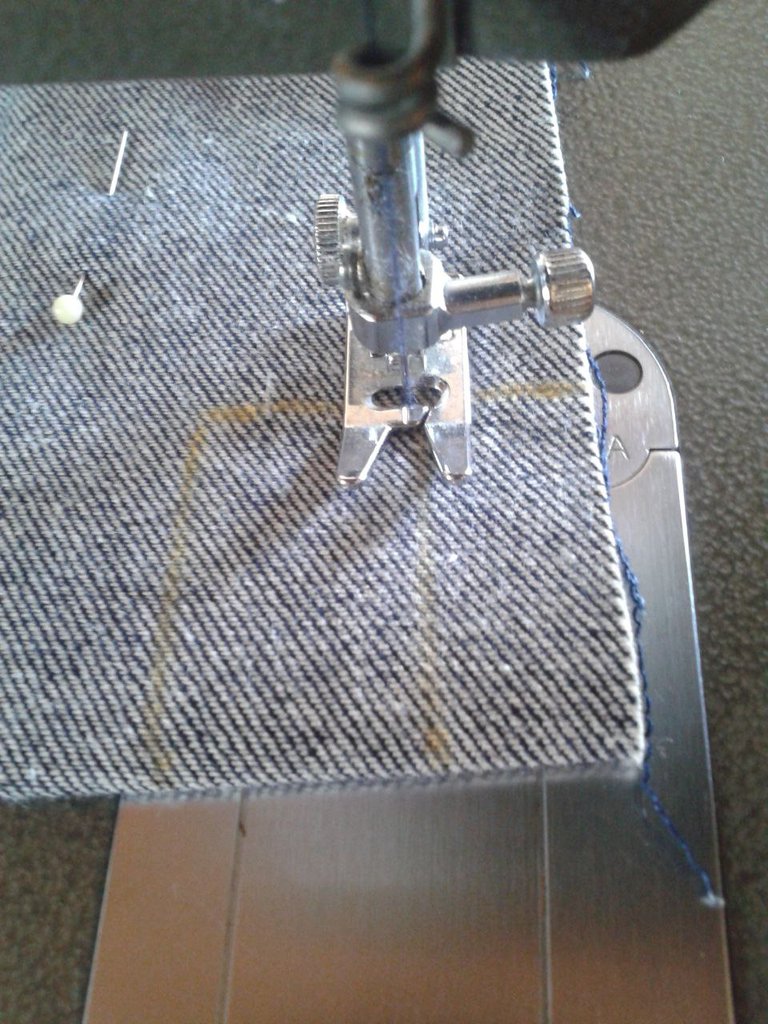
As shown, we sew from the top edge to where we have marked the 5cm.
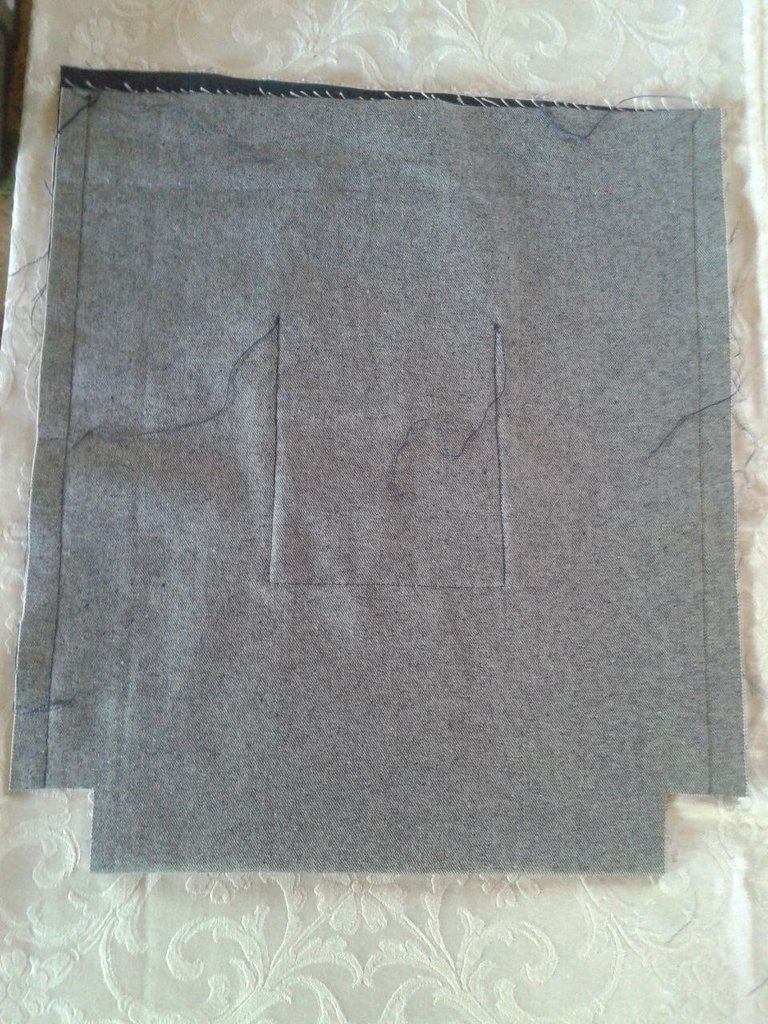
After sewing, we cut the marked spaces.
After ironing, we smooth the seams so that they remain open and as part of the decoration.
Then we align the corners where we cut the 5cm and sew to form the bottom of the bag.
We cut off the excess.
This part of the bag is now ready.
Step 5
The next step is to make the hanging handles as shown in the following images.

The first thing we are going to do is to iron the 12cm by 65cm strips, fold them in half and then with that guide, fold them again to leave the edges facing inwards as shown in this image.

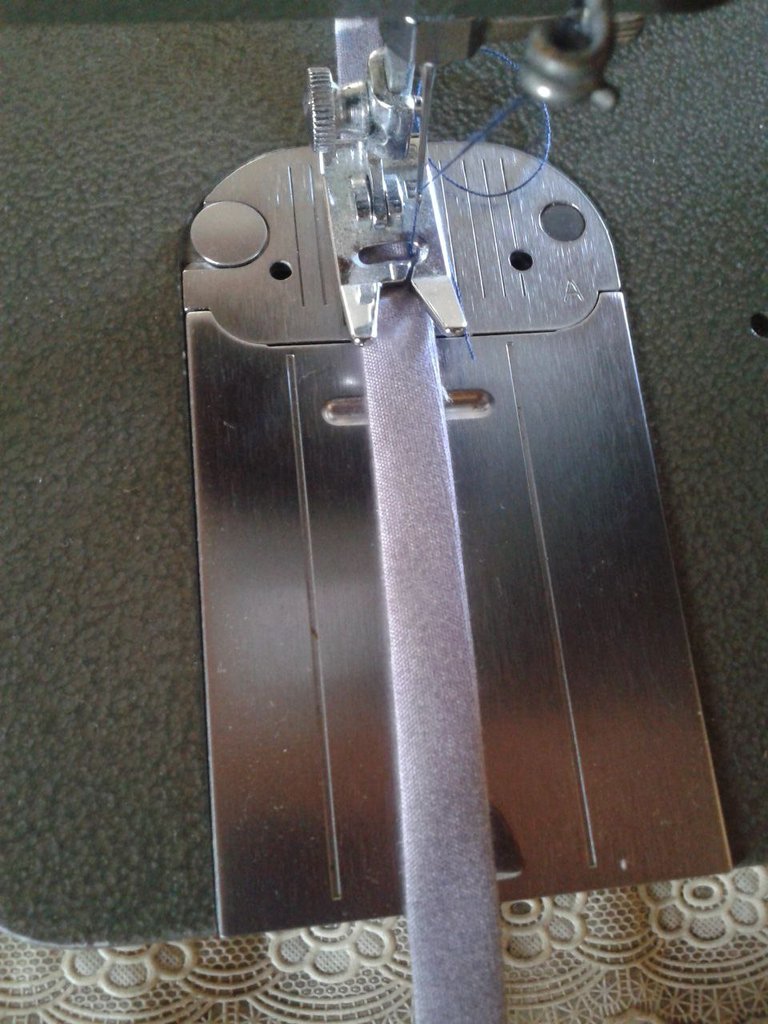
We sew on both sides to form the handles.
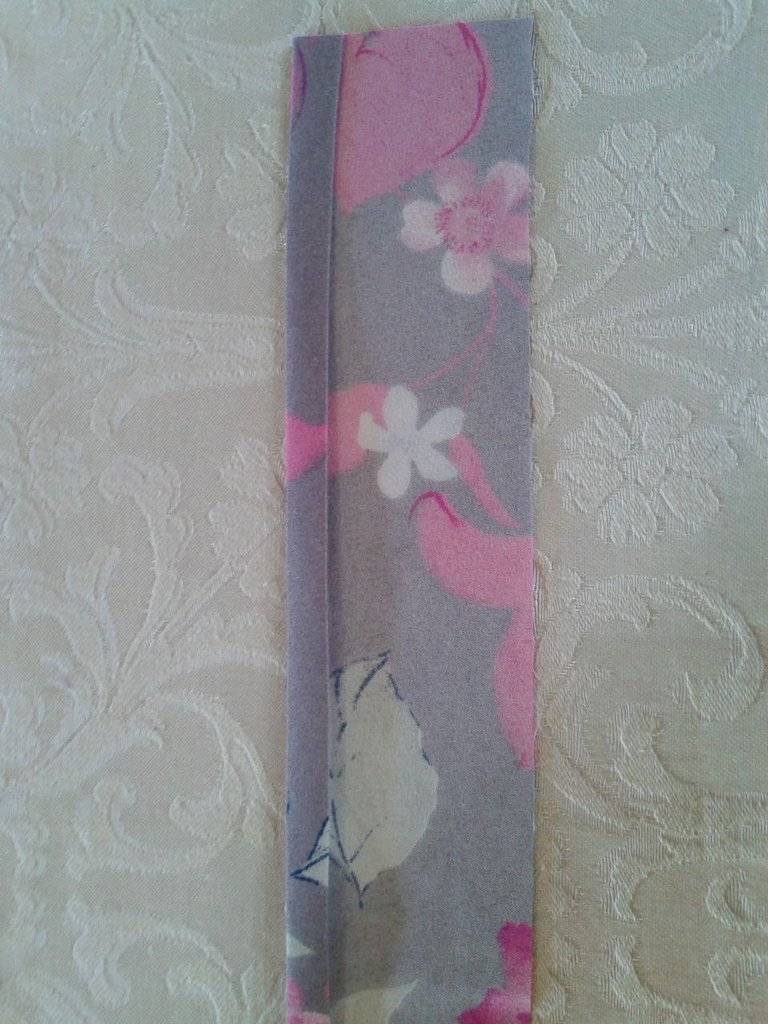
To give a decorative touch to the handles, I made some strips of printed fabric as shown in the image.
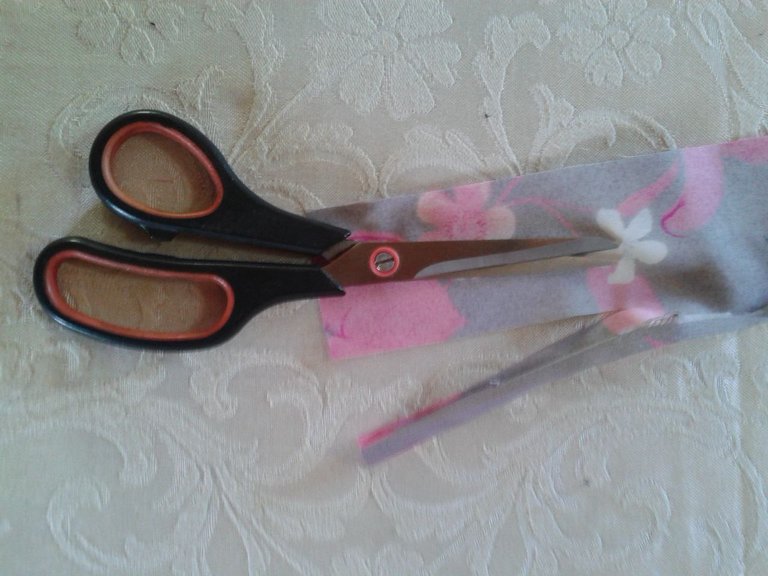
After doubling and ironing, trim the strips to form the ribbons.
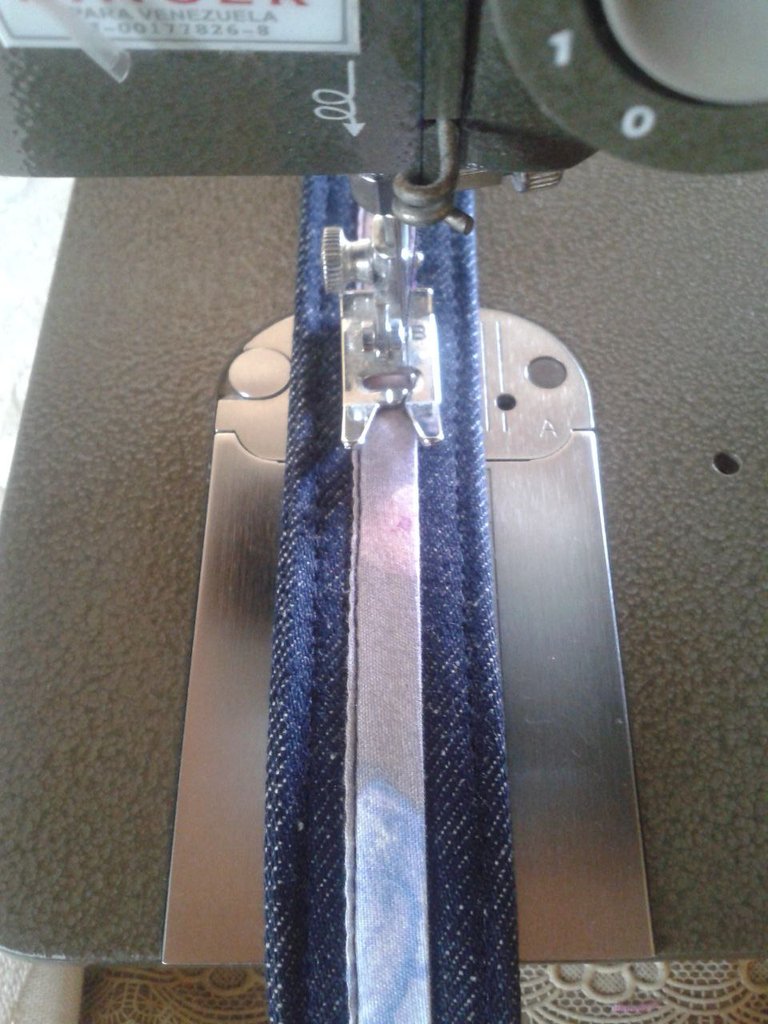
Now we glue the ribbons to the strips of jeans with straight stitching on both sides as shown.
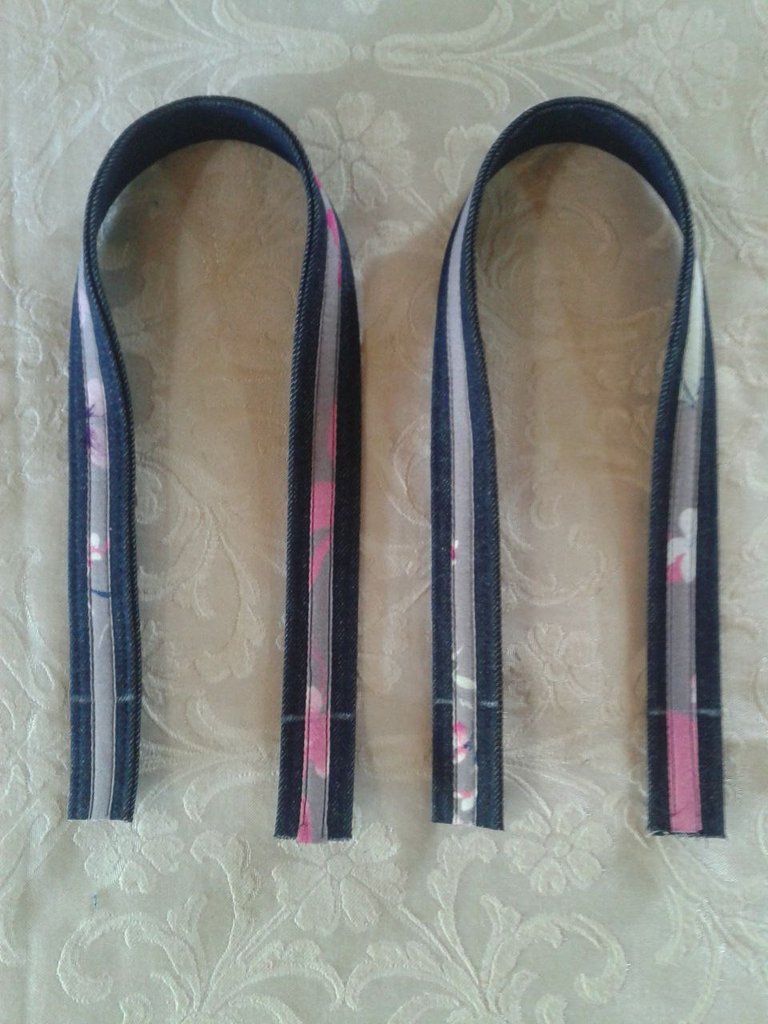
This is how the decorated hanging handles look.
Step 6
The next step is to attach the hanging handles to the bag, as shown below.

To glue the handles, we mark the center of the piece and from there, we mark 6.5 cm towards each side so that we have 13 cm between the edges of the handles as shown in the image. The spaces of the handle towards the sides should also be the same. The handle measures 65cm long, we will leave 5cm on each side to attach them to the bag and the other 55cm for hanging.
So that the handles do not move when sewing them by machine, it is better to place a bastilla and mark with chalk the lines where we are going to sew to make the work easier.

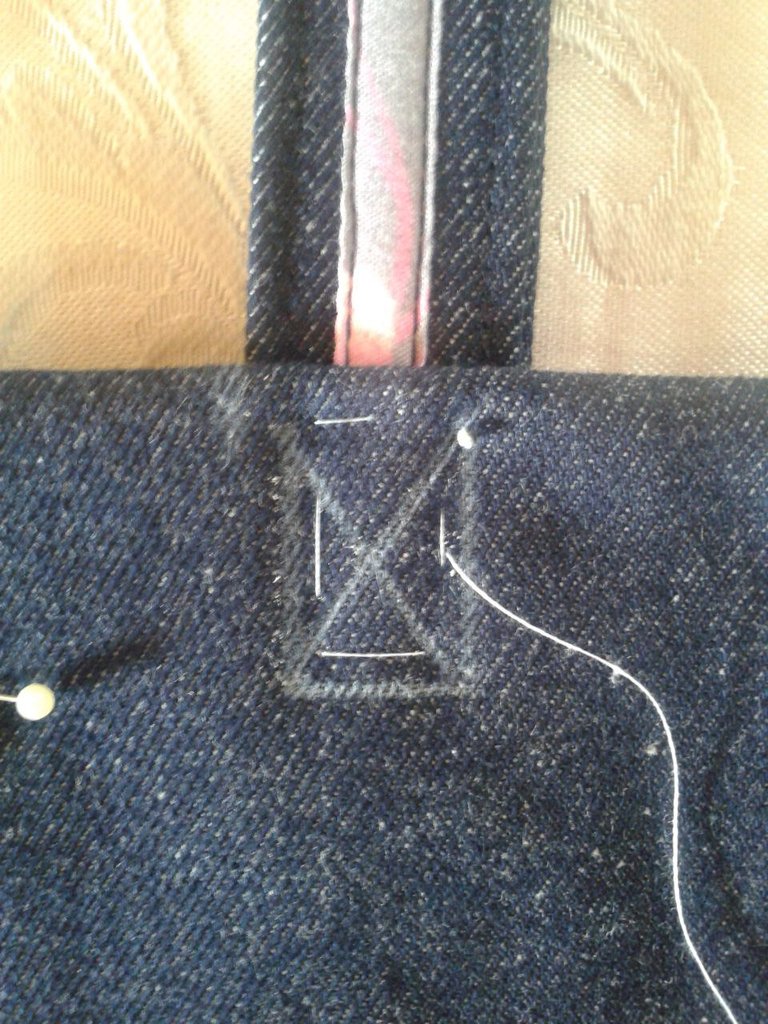
Sew 1/2cm from the edge, forming a rectangle 3cm high by 2cm wide and forming an "X" in the center as a reinforcement.
The bag is now ready with pocket and handles.
Step 7
Now we are going to make the lining of the bag with the printed cotton fabric. The procedure is the same, the difference is that in this piece we will not place a pocket.

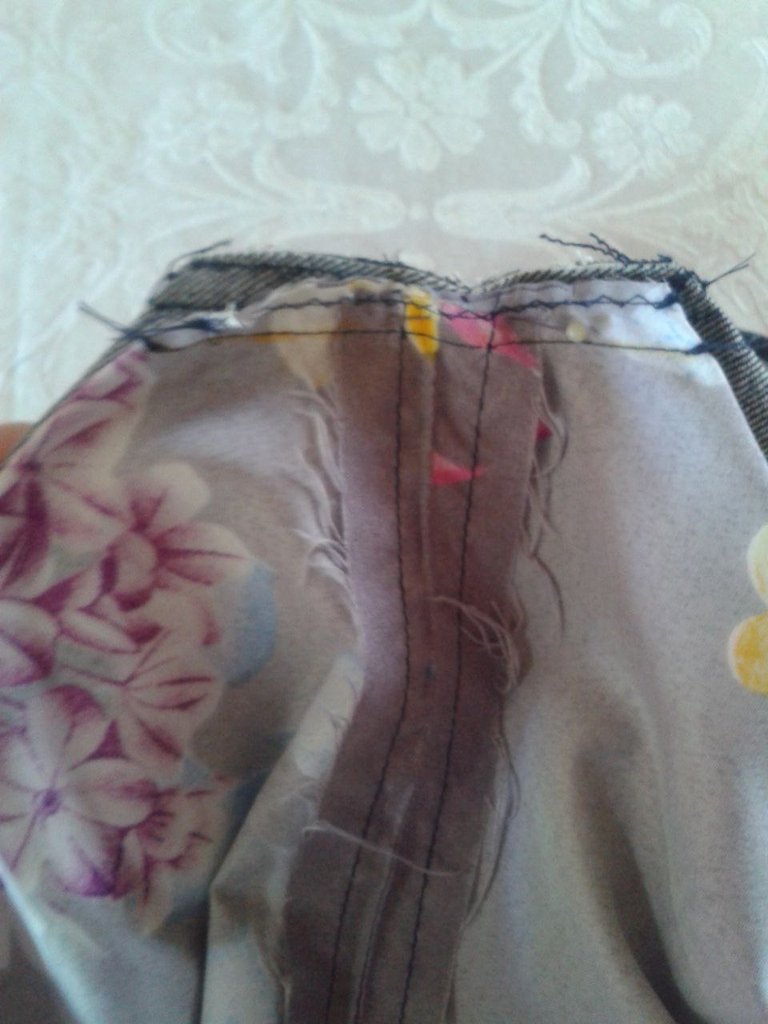
We sew in the same way, leaving 2cm seam allowance and the space of 5cm in each corner of the bottom edge and cut them as shown in the image.

Just like the jeans piece, I ironed the seams, repaired them, sewed the corners well aligned, cut the excess and this is the result. Now we have the lining that will be the reversible part of the bag.
Step 8
Now that we have the bag and the lining ready, we proceed to glue both pieces so that when we want to use the bag on both sides, they will be firm.
We sew by machine to join the bottoms of both pieces.
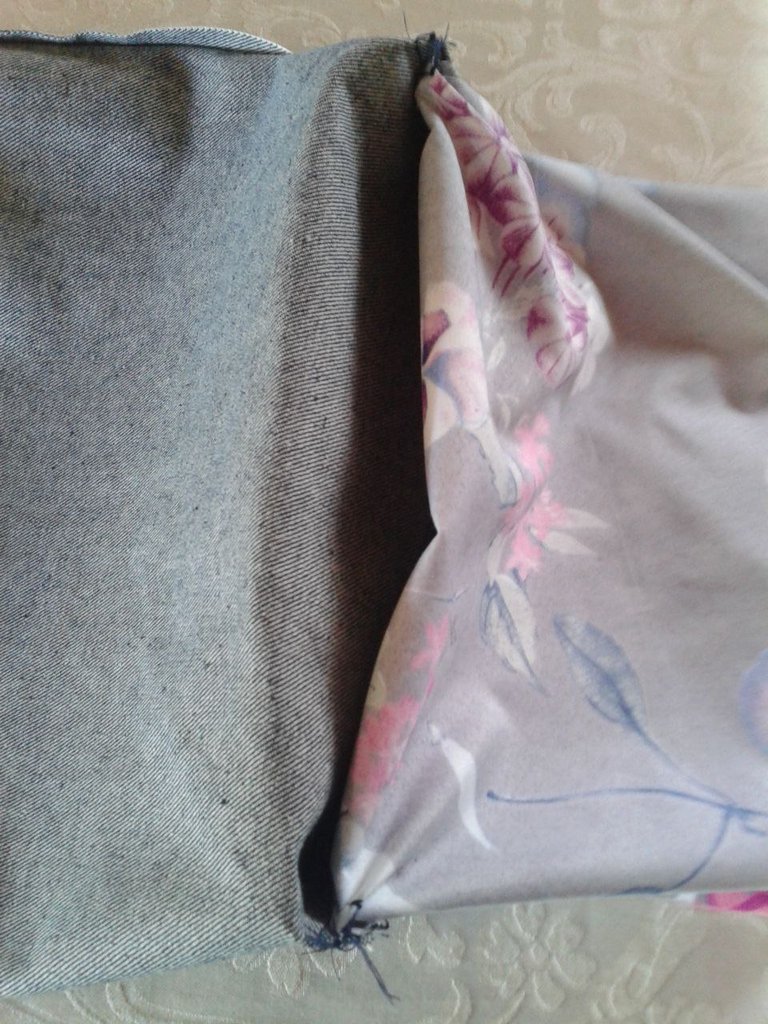
They will be joined in this way.
Step 9
To finish, the last step is to face the pieces of the bag already joined, iron the hems that we left at the ends of each piece, place a bastille so that they do not move and sew all around the contour with a straight stitch, leaving a minimum seam allowance as shown in the image.
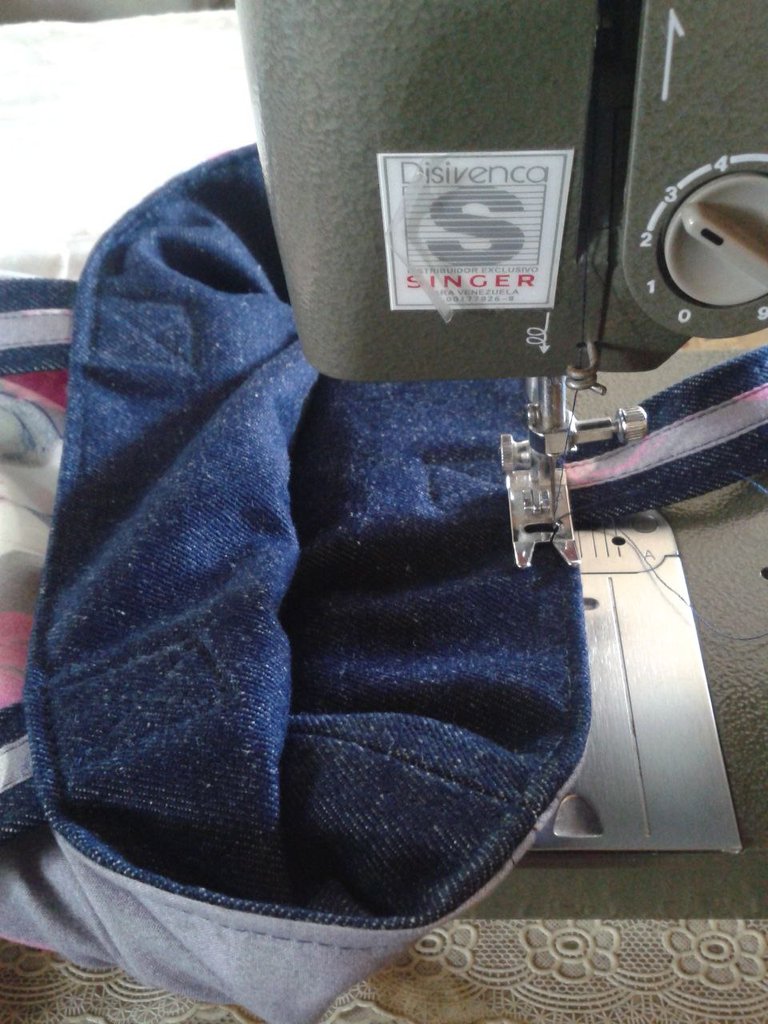
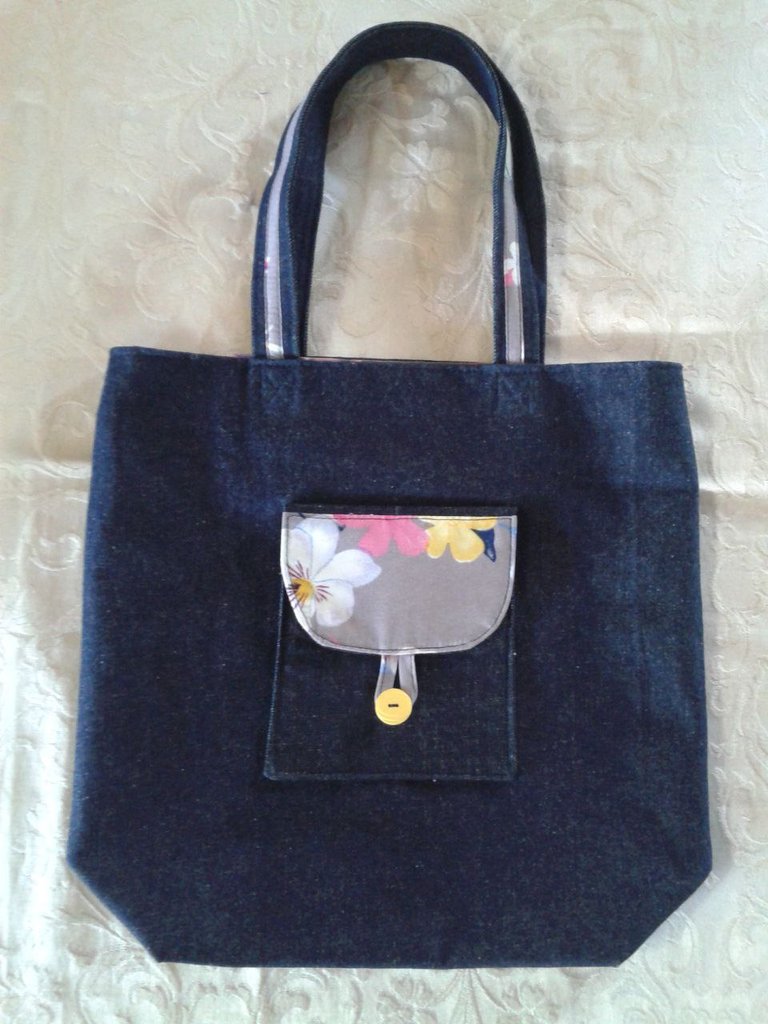
In the following images I show you this nice bag already finished and how it looks on both sides.


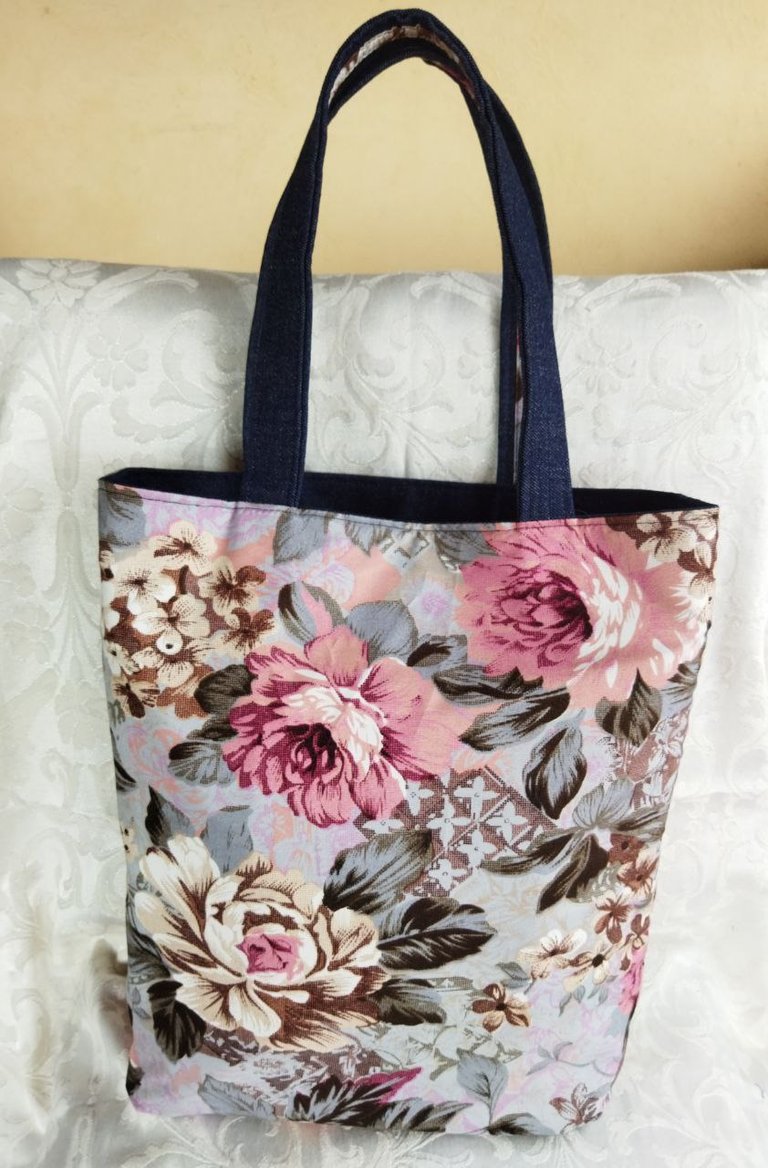
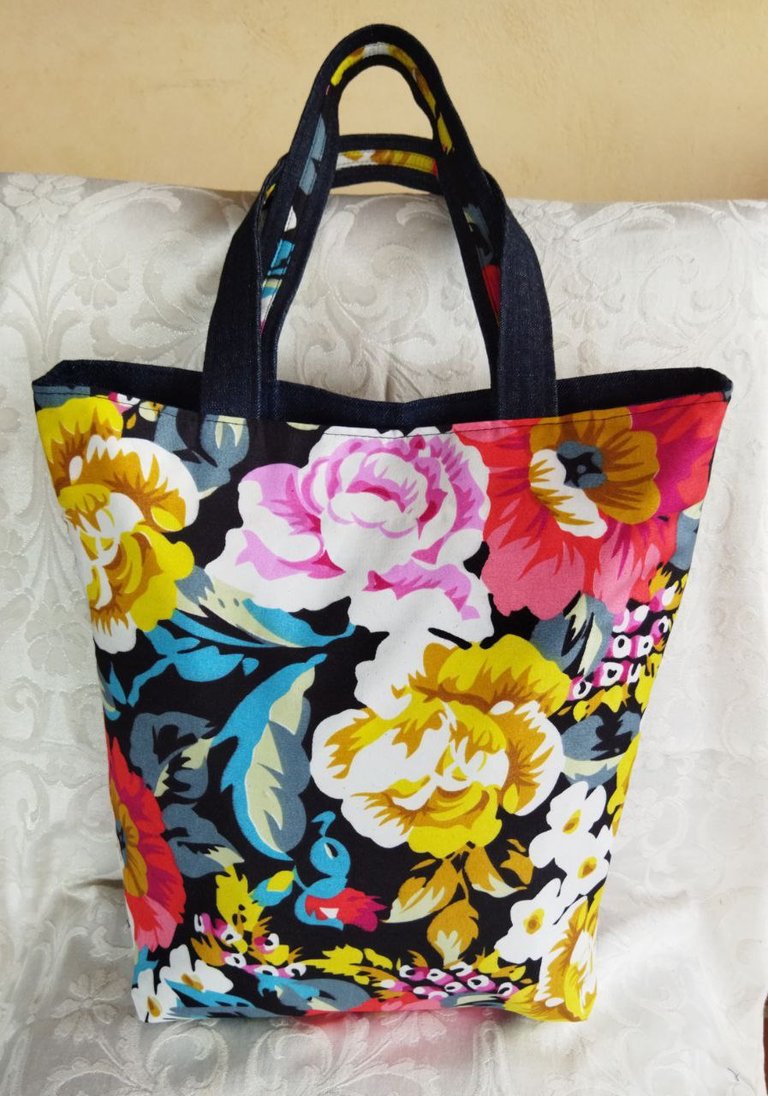
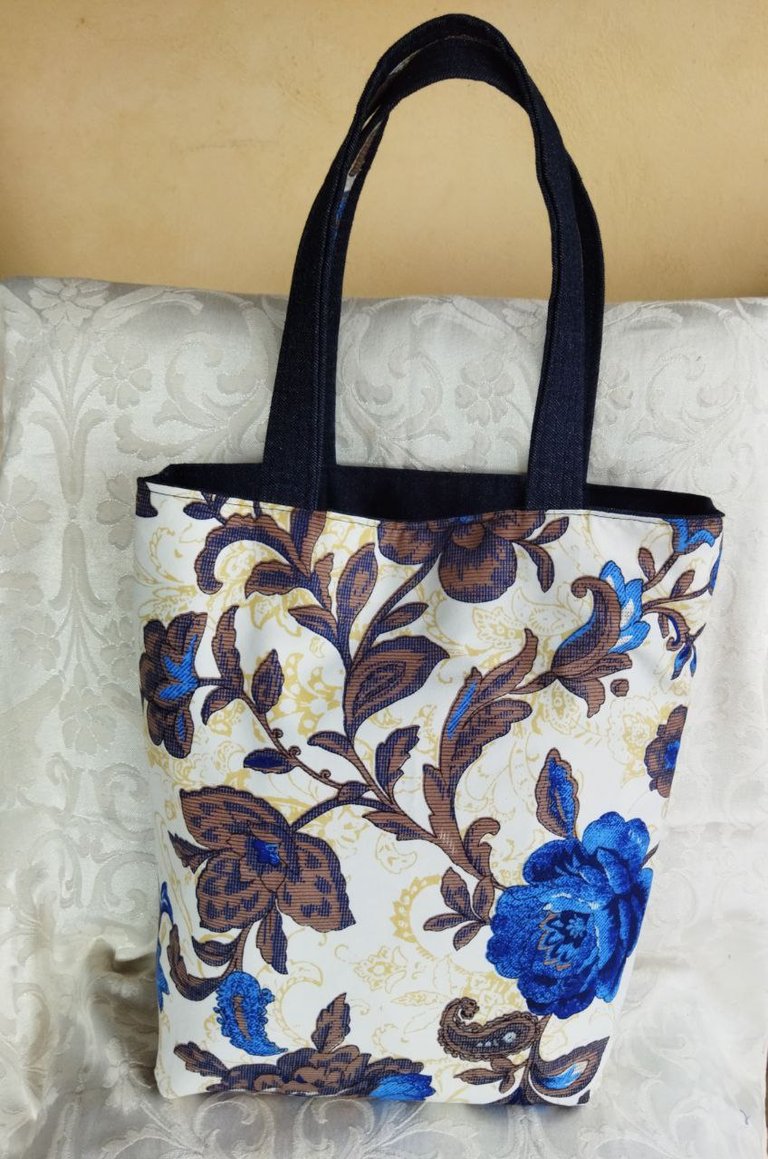
Here I share photos of the bags I have made with different types of prints, they have been very nice and elegant.
This way we have reached the end of this work and as you can see the result is very nice. I hope you liked the idea, that this tutorial will help you and that you will put it into practice.
This work is made with love and enthusiasm, infinitely grateful for your visit and support, a big hug and blessings!

ESPAÑOL
Un Saludo Amigos Hivers
Primero que nada, un saludo a la apreciada comunidad Gems. Para los que no me conocen, soy una gran apasionada de la música, el arte y las manualidades. Me encanta reciclar para crear cosas nuevas y útiles.
En esta oportunidad, quiero compartir con ustedes esta idea para hacer una bolsa de compras que me parece genial, porque es una labor sencilla de realizar, útil y con excelentes resultados para emprendimiento.
Los invito a que me acompañen para realizar este lindo trabajo.
MATERIALES
- Tela de jeans
- Tela de algodón estampada
- Hilo
- (1) botón
PROCEDIMIENTO
Paso 1
Lo primero que vamos a hacer es cortar las piezas de tela para fabricar el bolso: parte externa del bolso, forro interno, tiras para las asas colgantes y piezas para un bolsillo, como se muestra en las siguientes imágenes.
Esta pieza la vamos a cortar de 104 cm de largo por 45 cm de ancho. Doblamos para que nos quede de 51 x 45 para elaborar la parte externa del bolso.
Esta pieza de tela estampada para el forro, la cortamos igual que la de jeans.
En esta imagen se muestran las piezas para las asas colgantes y el bolsillo. Cortar (2) piezas de 12 x 65cm y (2) de 18 x 30cm.
Cortar una tira de 11cm de largo por 4cm de ancho para hacer el ojal del bolsillo.
Paso 2
Una vez que tenemos las piezas cortadas, vamos a elaborar primero el bolsillo como se muestra en las siguientes imágenes.
Primero doblamos y planchamos la tira de tela de 11cm x 4cm para luego coserla a máquina.
Cosemos a máquina por ambos lados.
Luego cosemos la tira para el ojal en una de las piezas del bolsillo.
Podemos adornar el bolsillo colocando tela estampada en la otra pieza como se muestra en esta imagen.
Colocamos la pieza de tela estampada a una distancia de 10cm del borde superior, dejando 1cm de margen de costura.
Cosemos a máquina.
Así quedan las piezas para armar el bolsillo.
Colocamos las piezas enfrentando derecho con derecho y vamos a redondear las esquinas en los extremos donde están ubicadas el ojal y la parte estampada para luego coser a máquina dejando 1cm de margen de costura. Dejar un espacio como se observa en el extremo inferior sin coser para luego voltear la pieza.
Después de coser, cortamos el excedente en las esquinas donde redondeamos y hacemos pequeños piquetes en la orilla con cuidado de no llegar a la costura, para que al voltear la pieza tome bien su forma. Aquí podemos observar el espacio que dejamos sin costura para voltear la pieza.
Después de voltear la pieza, la planchamos para asentar los bordes.
Después de planchar, pasamos una costura en esta parte del bolsillo solamente para pisar y decorar.
Ya tenemos el bolsillo listo.
Paso 3
Una vez que tenemos elaborado el bolsillo, procedemos a pegarlo en la pieza de tela de jeans con la que se formara la parte externa del bolso, como se muestra en las siguientes imágenes.
Vamos a tomar la pieza de tela de jeans, hacemos un dobladillo de 6cm en los extremos superiores, marcamos el centro de la pieza para alinear el bolsillo y medimos 9cm hacía abajo para ajustar la altura. Podemos marcar con tiza para que quede centrado y verificamos que los espacios laterales también queden iguales.
Esta pieza la vamos a coser a máquina con puntada recta, desde el punto rosado hacía abajo por todo el contorno hasta llegar al punto azul.
Fijamos con alfileres para que la pieza no se mueva y cosemos con cuidado para no pisar con la costura el dobladillo que dejamos en el extremo superior.
Paso 4
Una vez pegado el bolsillo, vamos a coser la pieza de jeans como se muestra a continuación, para formar la parte externa del bolso.
Vamos a coser los laterales dejando 2cm de margen de costura y en cada esquina del borde inferior, dejaremos un espacio de 5cm como se muestra.
Como se muestra, cosemos desde el borde superior hasta donde hemos marcado los 5cm.
Después de coser, cortamos los espacios marcados.
Luego planchamos, hacemos un repisado de las costuras para que queden abiertas y como parte de la decoración.
Luego alineamos las esquinas donde cortamos los 5cm y pasamos costura para formar el fondo del bolso.
Cortamos el excedente.
Ya tenemos lista esta parte del bolso.
Paso 5
El siguiente paso, es elaborar las asas colgantes como les muestro en las siguientes imágenes.
Lo primero que vamos a hacer es planchar las tiras de 12cm por 65cm, doblamos a la mitad y luego con esa guía, volvemos a doblar para dejar las orillas hacia adentro como se muestra en esta imagen.
Cosemos por ambos laterales para formar las asas.
Para darle un toque decorativo a las asas, hice unas tiras de tela estampada como muestro en la imagen.
Después de hacer el dobles y planchar, recorte las tiras para formar las cintas.
Ahora pegamos las cintas a las tiras de jeans con costura recta por ambos lados como se muestra.
Así quedan las asas colgantes decoradas.
Paso 6
El siguiente paso, es pegar las asas colgantes al bolso, como les muestro a continuación.
Para pegar las asas, marcamos el centro de la pieza y desde allí, marcamos 6,5 cm hacia cada lado para que nos queden 13cm entre los bordes de las asas como se muestra en la imagen. Los espacios del asa hacia los laterales deben quedar iguales también. El asa mide 65cm de largo, dejaremos 5cm de cada lado para fijarlas al bolso y los otros 55cm para colgar.
Para que las asas no se muevan al momento de coserlas a máquina, es mejor colocarle una bastilla y marcar con tiza las líneas por donde vamos a coser para que sea más fácil el trabajo.
Coser a 1/2cm del borde, formando un rectángulo de 3cm de alto por 2cm de ancho y formando una "X" en el centro como refuerzo.
Ya el bolso está listo con bolsillo y asas.
Paso 7
Ahora vamos a hacer el forro del bolso con la tela de algodón estampada. El procedimiento es el mismo, la diferencia es que en esta pieza no colocaremos bolsillo.
Cosemos de la misma manera, dejando 2cm de margen de costura y el espacio de 5cm en cada esquina del borde inferior y los cortamos como se muestra en la imagen.
Al igual que la pieza de jeans, a esta también le planché las costuras, las repisé, cosí las esquinas bien alineadas, corte el excedente y este es el resultado. Ya tenemos el forro que será la parte reversible del bolso.
Paso 8
Ahora que tenemos el bolso y el forro listos, procedemos a pegar ambas piezas para que cuando queramos usar el bolso por ambos lados, estén firmes.
Cosemos a máquina para unir los fondos de ambas piezas.
Quedarán unidos de esta manera.
Paso 9
Para terminar, el último paso es enfrentar las piezas del bolso ya unidas, planchamos los dobladillos que dejamos en los extremos de cada pieza, colocamos una bastilla para que no se muevan y cosemos por todo el contorno con puntada recta, dejando un margen de costura mínimo como se muestra en la imagen.
En las siguientes imágenes les muestro este lindo bolso ya terminado y como luce por ambos lados.
Aquí les comparto fotos de los bolsos que he hecho con diferentes tipos de estampado, han quedado muy bonitos y elegantes.
De esta manera hemos llegado al final de esta labor y como pueden ver el resultado es muy bonito. Espero que les haya gustado la idea, que este tutorial les ayude y la pongan en práctica.
Este trabajo esta hecho con mucho amor y entusiasmo, agradecida infinitamente por su visita y por el apoyo, un fuerte abrazo y bendiciones!
