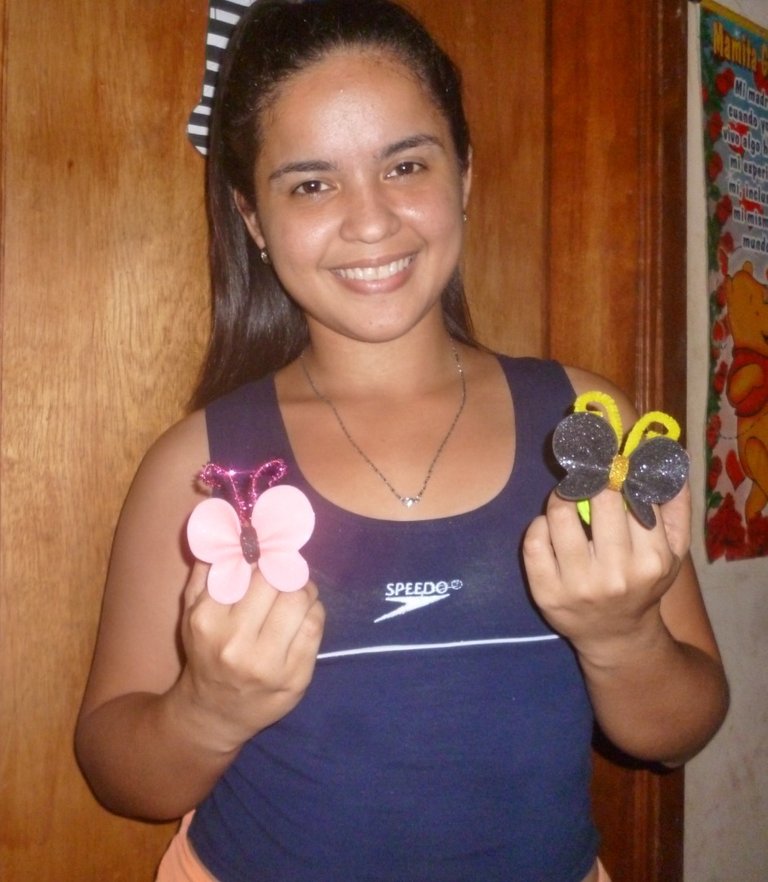
Buenas amigos de esta hermosa colmeda hoy les quiero mostrar y ense;a como elaborar estas hermosas coletas de mariposas, me motive a realizarla porque desde muy peque;a mi madre solia comprarme muchas de estas y ahora en la actualidad a ver una ni;a con coletas de mariposas dice que le recuerda cuando me las compraba asi que les quiero ense;ar a realizarlas.
Good friends of this beautiful colmeda today I want to show you and teach you how to make these beautiful butterfly pigtails, I was motivated to do it because from a very young age my mother used to buy me many of these and now today to see a girl with butterfly pigtails he says that it reminds him of when he used to buy them for me so I want to teach them how to make them.
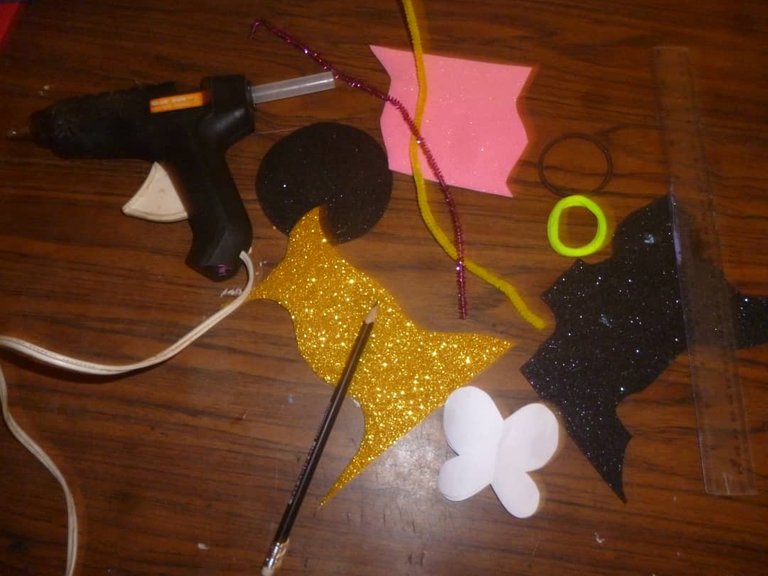
Materiales a utilizar.
+Foamis de colores negro, rosado y dorado
+Cilicon Caliente
+Tijera
+Lapiz
+Coletas
+Regla
+Limpia pipas
+Molde de mariposa.
The materials to use.
+Foamis in black, pink and gold colors
+Cilicon Hot
+Scissor
+pencil
- Pigtails
+Ruler
+Clean pipes
+Butterfly mold.
Empezaremos con el PASO A PASO
We will start with the STEP BY STEP
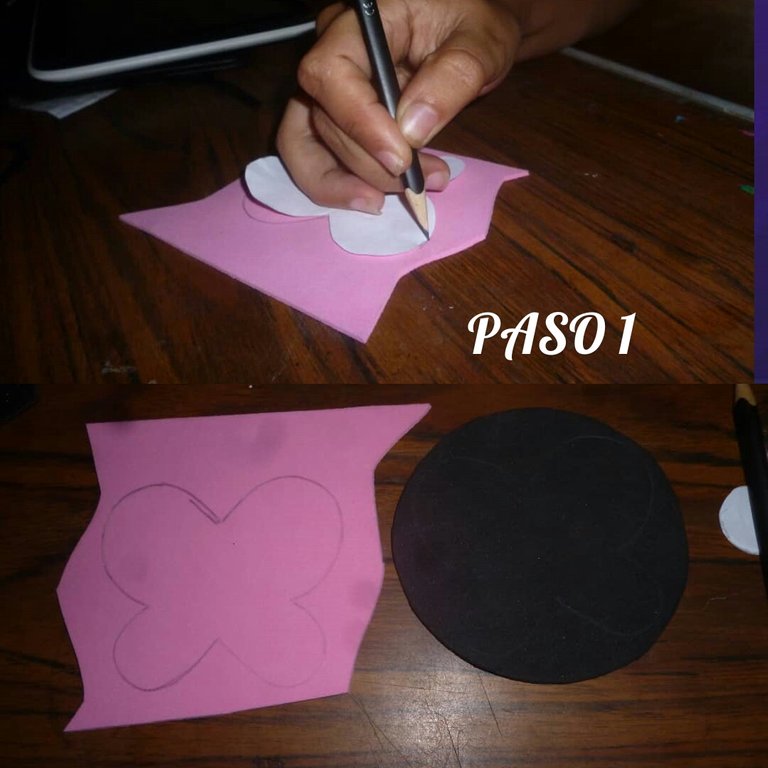
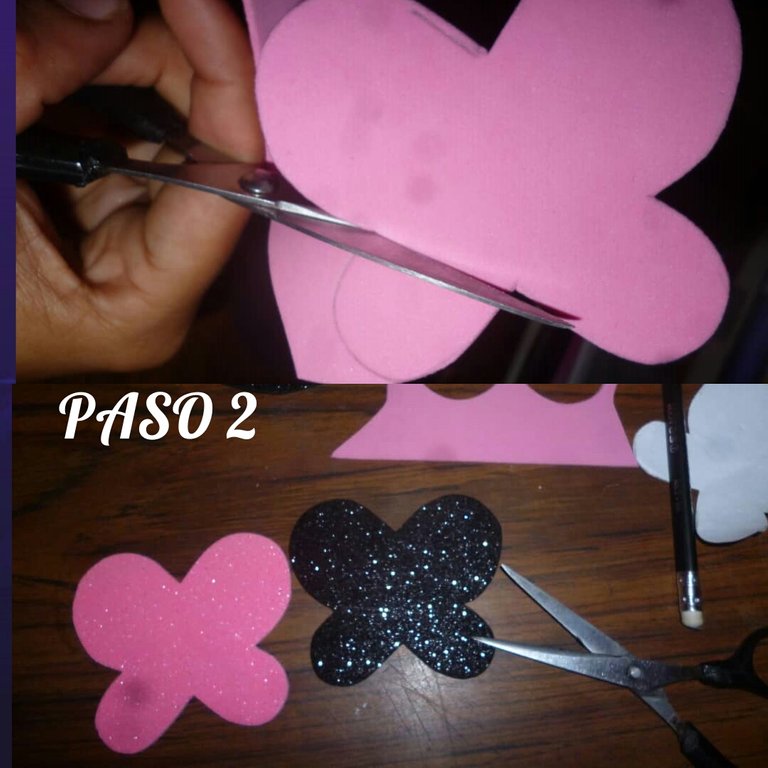
Paso 1.
Marcamos el molde en los foamis rosado y negro
We mark the mold in the pink and black foamis
Paso 2.
Ya marcados empezamos a recortar cuidadosamente, tratando de tener precision con la tijera y buen pulso.
Once marked, we begin to cut carefully, trying to have precision with the scissors and a good hand.
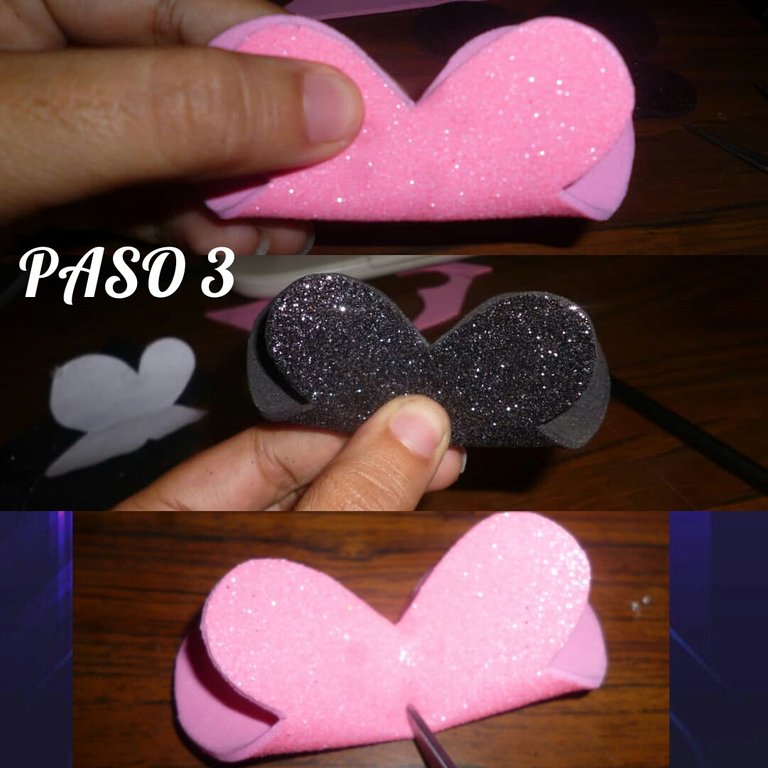
Paso 3.
Doblamos a la mitad y con la ayuda de la tijera precionamos en el centro para hacer una peque;a marca.
We fold in half and with the help of scissors we press in the center to make a small mark.
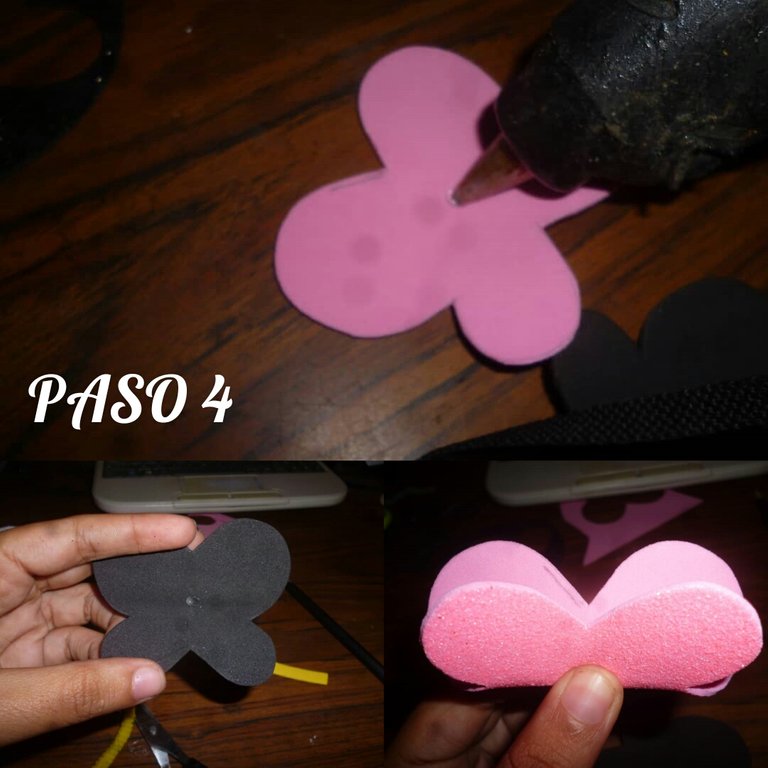
Paso 4.
En la marca que quedo con la tijera alli depositamos una gota de cilicon y precionamos con fuerza para asegurarnos que quede bien pegada
In the mark left with the scissors there we deposit a drop of cilicon and press hard to ensure that it is well glued
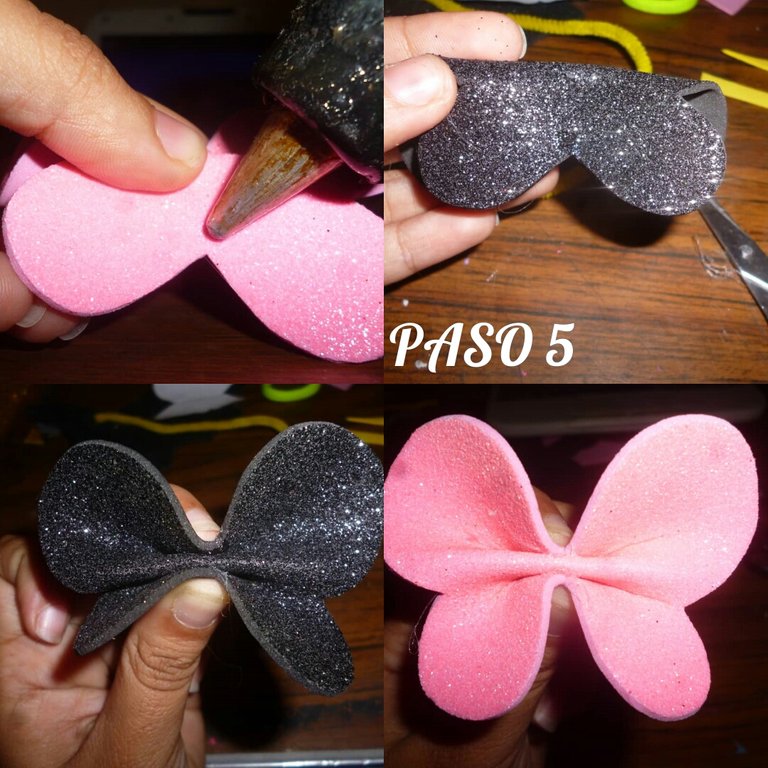
Paso 5.
En la parte inferior y superior agregamos una gota de cilicon, doblando de esta anera y sujetando nuevamente con fuerza para que pegue bien.
In the lower and upper part we add a drop of cilicon, folding in this way and holding again with force so that it sticks well.
Paso 6.
DOblamos el limpia pipas a una altura considerable y picamos el sobrante.
We bend the pipe cleaner to a considerable height and chop the excess.

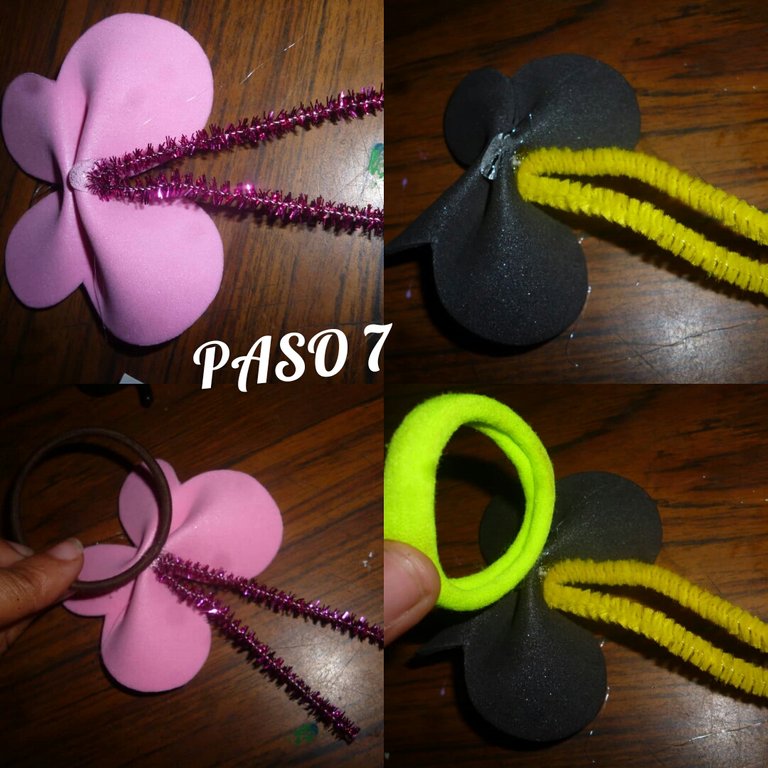
Pas 7.
En el dobles agregamos cilicon y pegamos a la mariposa y alli mismo pegamos la coleta, una vez que la peguemos en el lugar deseado para reforzarla le agregamos otro poquito de cilicon.
In the doubles we add cilicon and glue to the butterfly and right there we paste the ponytail, once we paste it in the desired place to reinforce it we add another little bit of cilicon.
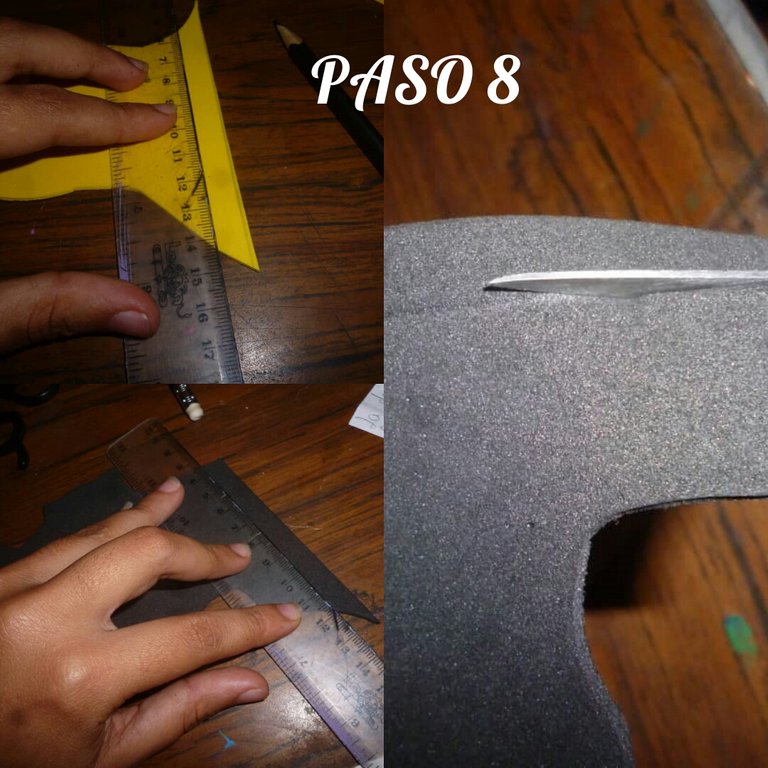
Paso 8.
Con la regla trazamos una linea para sacar una tira de foami del grosor que se desee y picamos.
With the ruler we draw a line to get a strip of foami of the desired thickness and chop.
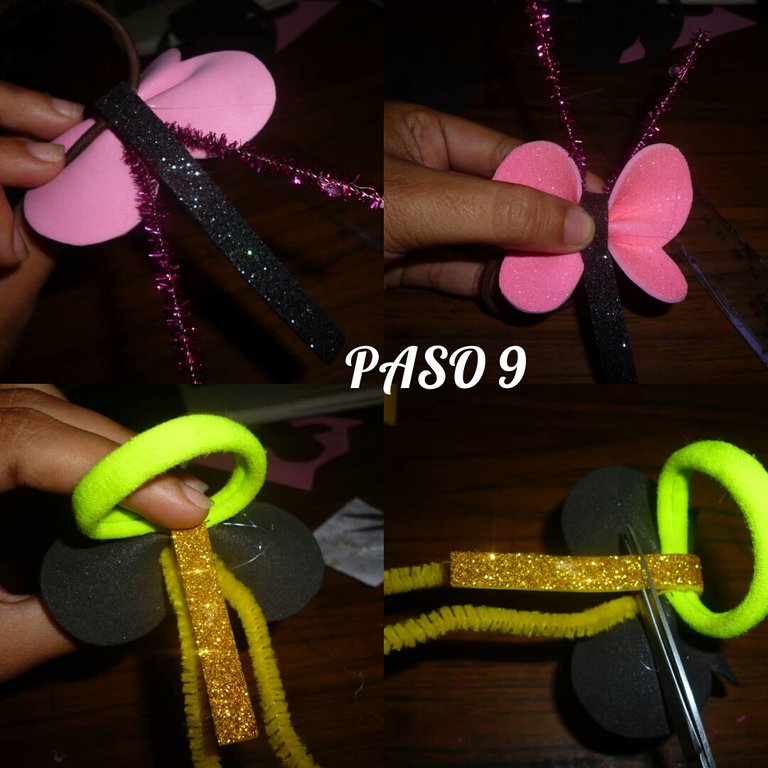
Paso 9.
Donde reforzamos la coleta empeamos a pegar la tira de foami dandole la vuelta a la mariposa, pegamos y cortamos el sobrante.
Where we reinforce the ponytail we start to paste the strip of foami turning the butterfly around, we paste and cut the excess.
Paso 10.
Con ayuda de nuestros dedos le hacemos un doble en la punta al limpia pipas para darle forma en las antenitas.
With the help of our fingers we double the tip of the pipe cleaner to shape it into the antennae.
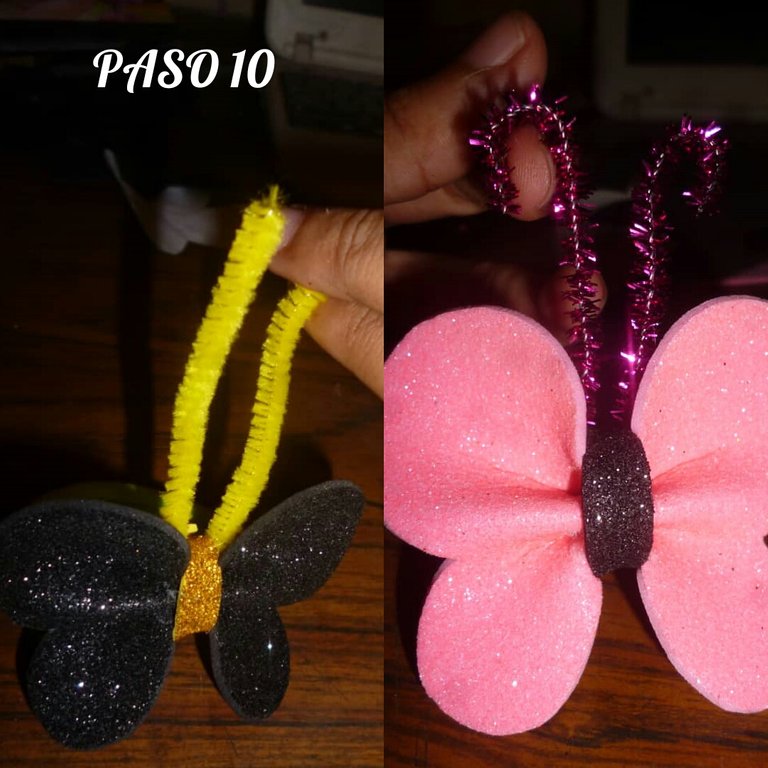
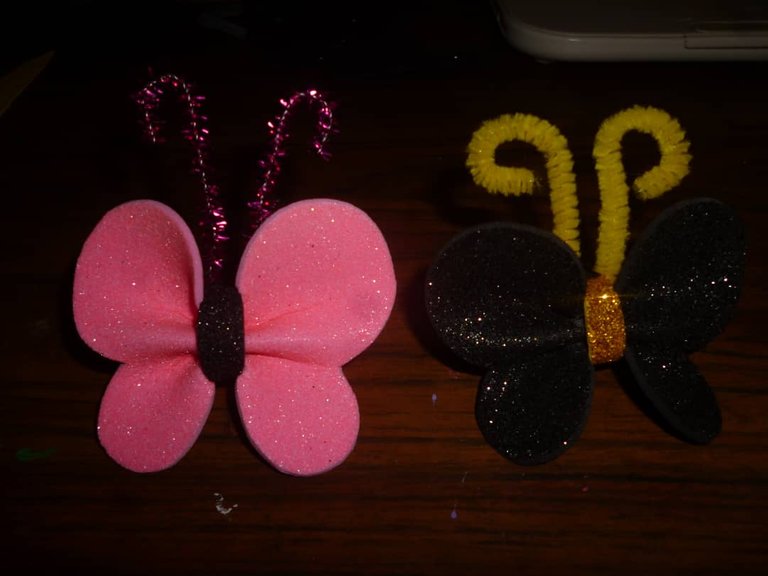
Y ASI QUEDAN NUESTRAS COLETAS EN FORMA DE MARIPOSAS
AND THIS IS HOW OUR COLETAS ARE IN THE FORM OF BUTTERFLIES