Hello dear Hive community, in these quarantines, my creativity has flourished a lot. Cleaning my sweet home, I found many books that if I am honest I do not remember I had them at home. Since the beginning of the quarantine, I have thoroughly enjoyed reading several books, especially those by author Pablo Coelho.
Quizás te ha pasado que cuando inicias leer un libro, luego de varias horas debes realizar una pausa, ya sea por las responsabilidades en tu hogar, o simplemente por ya tener tu vista un poco cansada. Y cuando cierra su libro, olvida por completo el número de la página donde dejó la lectura.
Perhaps it has happened to you that when you start reading a book, after several hours you should pause, either because of the responsibilities in your home, or simply because you already have a bit tired eyesight. And when you close your book you completely forget the number of the page where you left the reading.
A continuación el paso a paso de cómo realizar: Un separador de página de libro
Here is the step-by-step of how to carry out: A book page separator
Los materiales a utilizar:
- Fieltro en los colores: rosado, blanco, marrón claro y marrón oscuro.
- Perlas marrones o mostacillas.
- Silicón liquido.
- Aguja.
- Hilo.
- Cinta de raso.
- Tijera.
- Lápiz .
- Marcador.
- Tijera
The materials to use:
• Felt in the colors: pink, white, light brown and dark brown.
• Brown pearls or beads.
•Liquid silicone.
• Needle.
• Thread.
• satin ribbon.
•Scissors.
•Pencil .
•Marker.
•Scissors
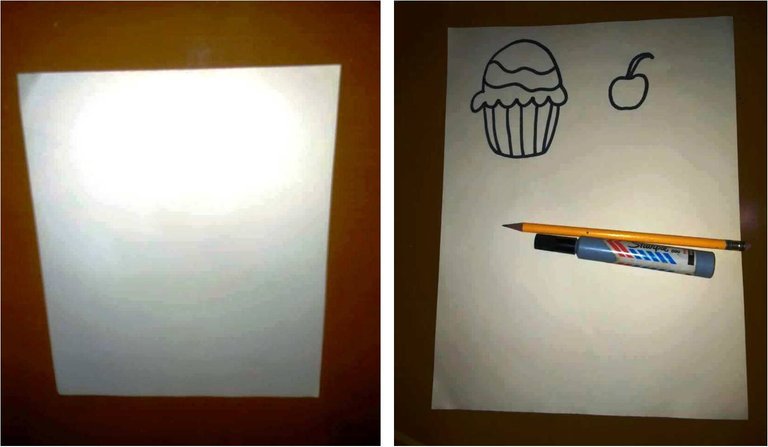
Paso 1
En una hoja o cartón debes hacer los patrones de las 2 imágenes de tu preferencia, elegí un cupcake y una cereza.
Step 1
On a sheet or cardboard you must make the patterns of the 2 images of your preference, I chose a cupcake and a cherry.
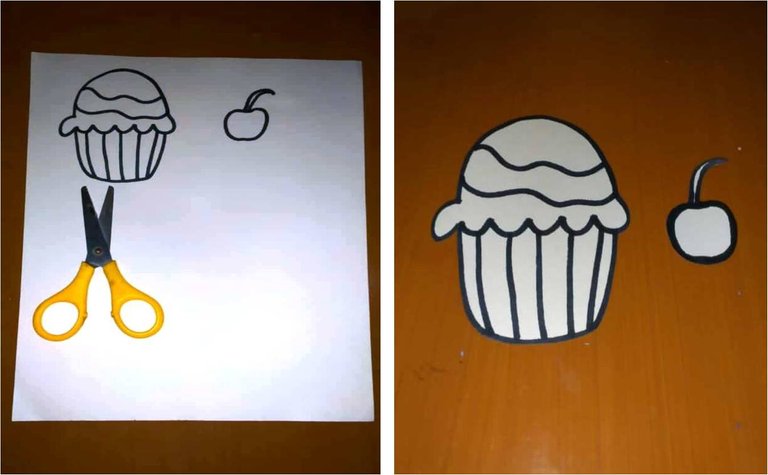
Paso 2
Luego, con el marcador, resalte los 2 dibujos que hizo y recórtelos con las tijeras.
Step 2
Then with the marker, highlight the 2 drawings you made and cut it out with the scissors.
Paso 3
Tome sus 2 patrones y en los fieltros seleccionados corte las piezas.
Step 3
Take your 2 patterns and on the selected felts cut out the pieces.
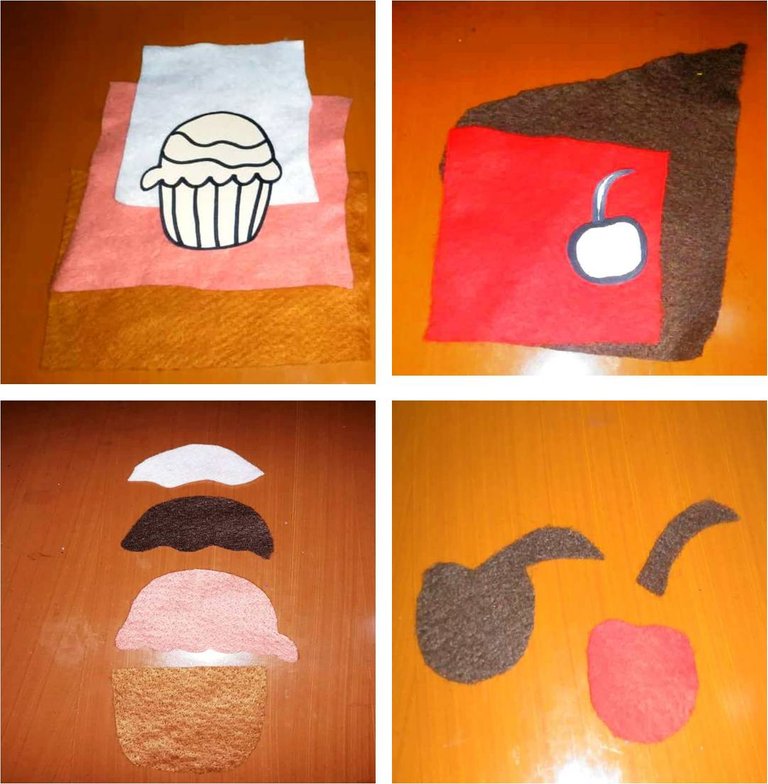
Paso 4
Debe quitar las piezas en la tela de fieltro de acuerdo con el patrón:
** Primero: ** Cortaremos las piezas del frente de nuestros cupcakes.
** Segundo: Recorta una pieza completa de color marrón claro, que será la base de nuestras cookies.
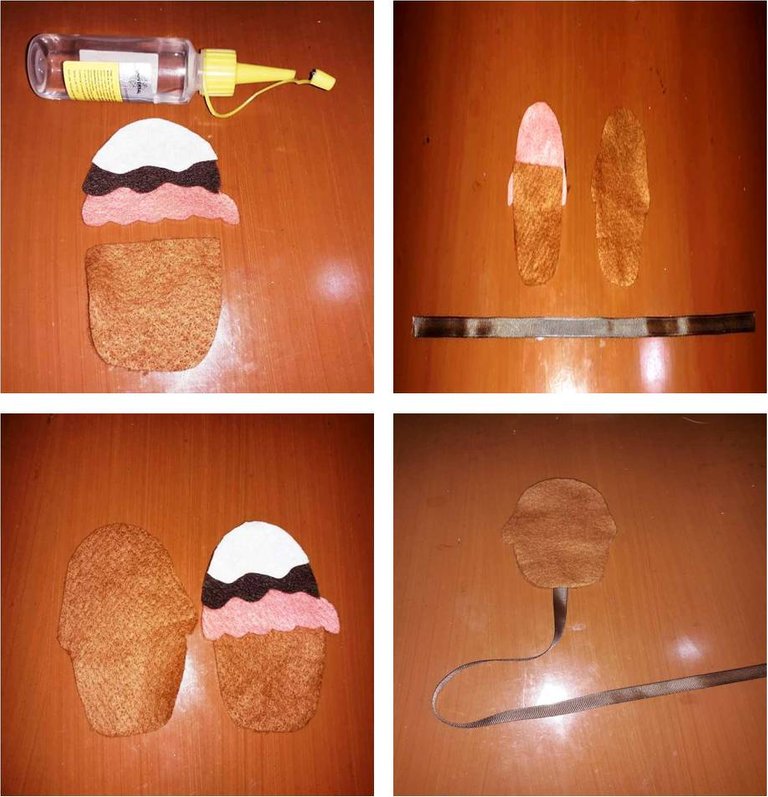
Con la ayuda de silicona líquida, pegue un extremo de la cinta de raso a la pieza posterior de color marrón claro. Luego coloca el frente de nuestros cupcakes en él.
Nota:Los colores seleccionados de fieltro simulan las crema de chocolate, fresa y vainilla.
Step 4
You must remove the pieces on the felt fabric according to the pattern:
** First: ** We will cut out the pieces from the front of our cupcakes.
** Second: Cut out a complete piece of light brown color, which will be the back base of our cookies.
With the help of liquid silicone, stick one end of the satin ribbon to the light brown back piece. Then place the front of our cupcakes on it.
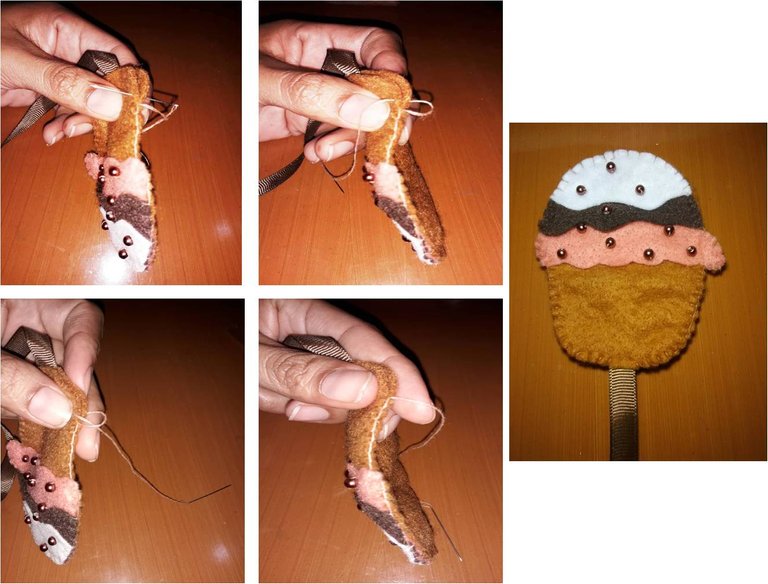
Paso 5
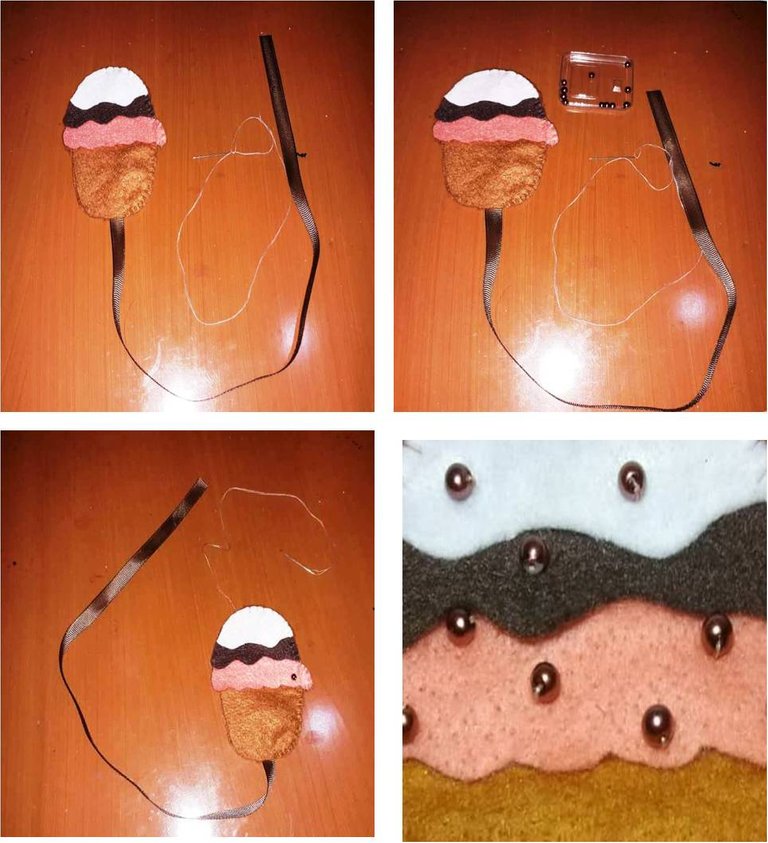
Enhebre la aguja con un hilo y haga un nudo al final del hilo, proceda a coser las piezas. Tome sus perlas marrones y comience a coser al azar una por una, todas las perlas, luego proceda a coser todo alrededor hasta que ambos lados de nuestros cupcakes de fieltro estén completamente unidos.
Step 5
Thread the needle with a thread and make a knot at the end of the thread, proceed to sew the pieces. Take your brown pearls and from inside start sewing randomly one by one, all pearls, then proceed to sew all around until both sides of our felt cupcakes are completely bonded.
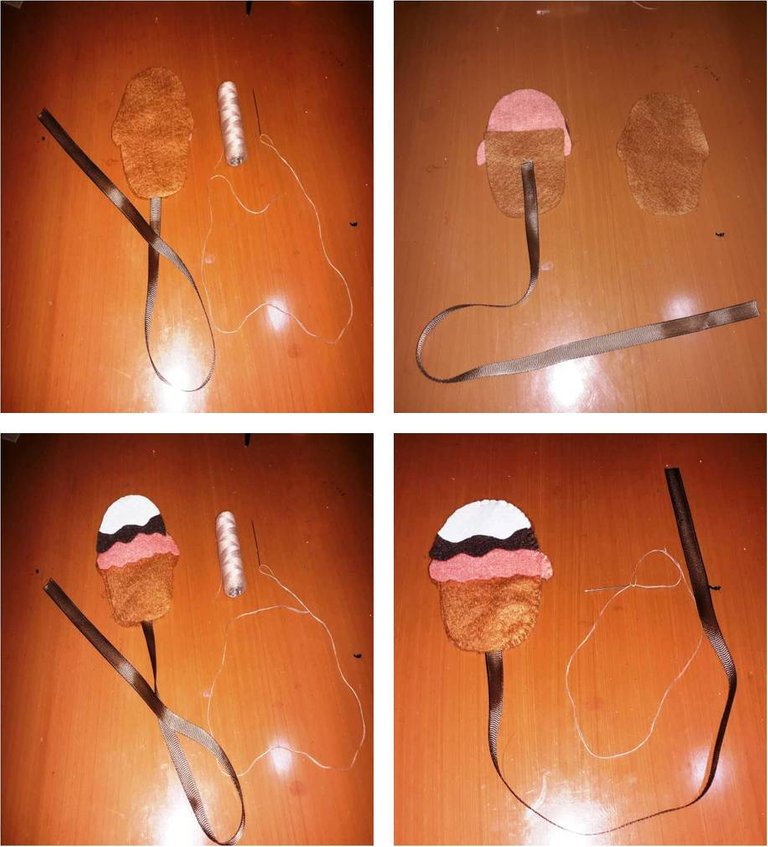
Cómo coser esta pieza
Nota: El tipo de costura utilizada se llama puntada feston.
How to sew this piece
Note: The type of seam used is called a feston stitch.
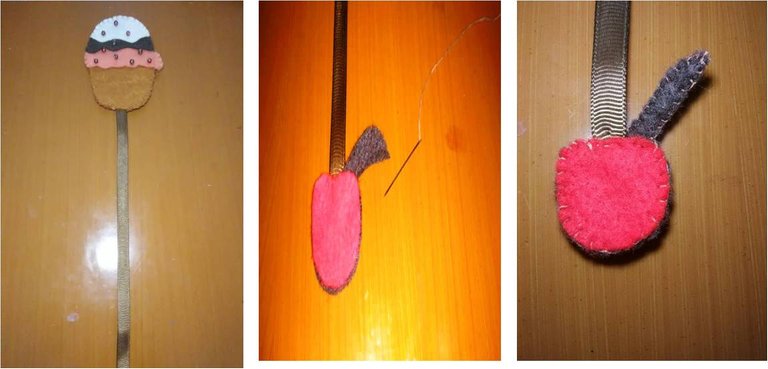
Parte 6
En el otro extremo de la cinta de raso, con el pegamento de silicona líquida, pegue la figura posterior del fieltro de cereza, luego coloque el otro lado superior de la figura de cereza y, con la ayuda de una aguja con hilo, cosa alrededor de la pieza , hasta que sea completamente seguro.
On the other end of the satin ribbon, with the liquid silicone glue, glue the back figure of the cherry felt, then attach the other top side of the cherry figure, and with the help of a needle with thread, sew around of the piece , until it is completely safe.
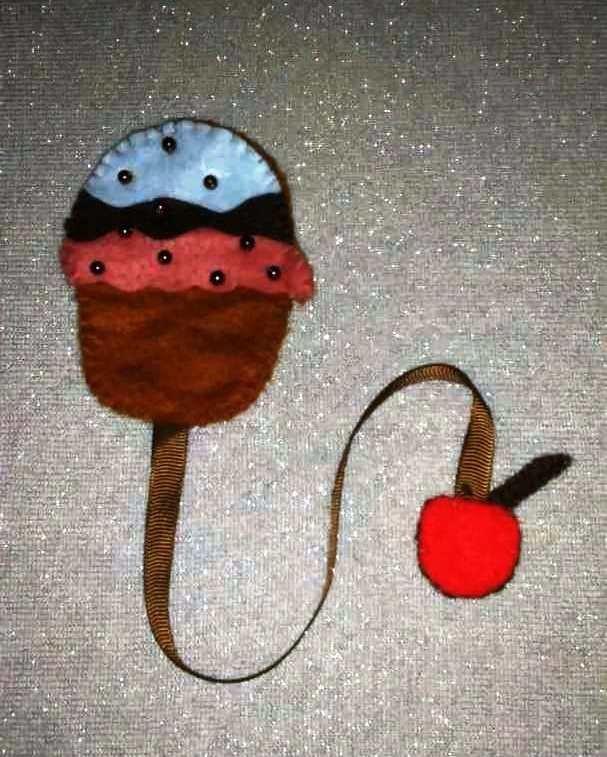
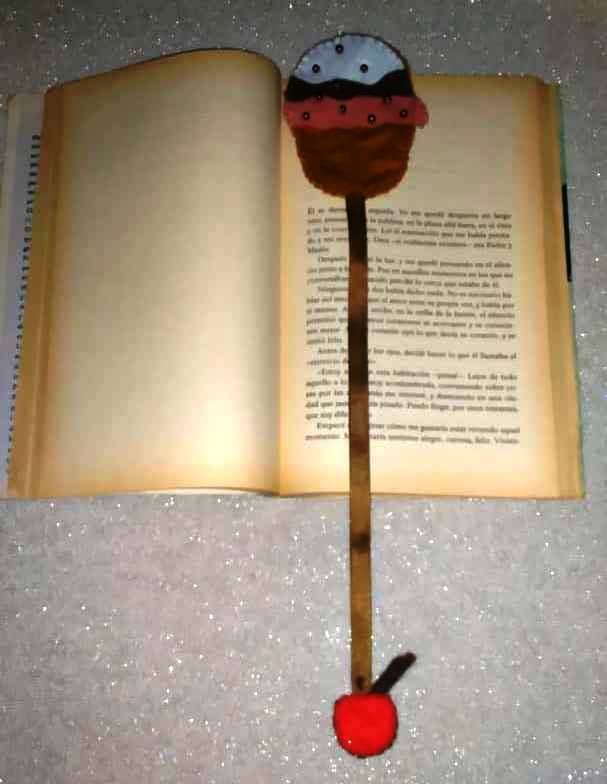
Resultado obtenido
Espero les guste y lo puedan realizar. El Separador de Páginas de Libro. Les será muy útil a la hora de disfrutar un libro.
I hope you like it and can do it. The Book Page Separator. It will be very useful when it comes to enjoying a book.
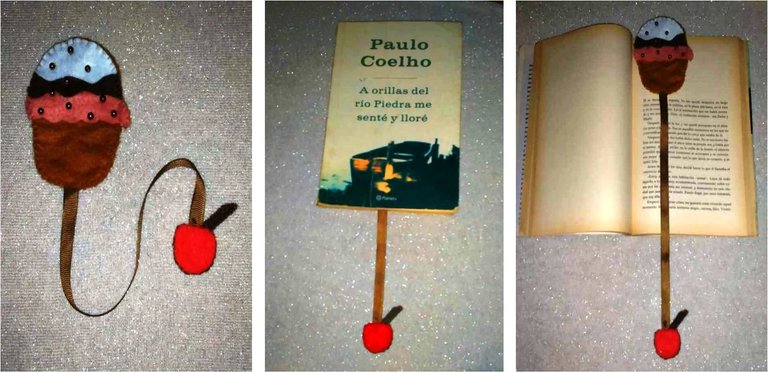
Las funciones que nos ofrece esta linda pieza son varias:El separador de página del libro; Nos permitirá no recurrir a los rayos o doblar sus páginas, y será perfecto si su vista está agotada. Y debe pausar la lectura para que sea más fácil reanudarla pronto.
The functions that this cute piece offers us are several: The book page separator; It will allow us not to resort to lightning or to fold its pages, and it will be perfect if your sight is exhausted. And you should pause reading to make it easier to resume with it soon.
Hasta un próximo post...
Until a next post...
Está cuarentena nos ha puesto muy creativos!. Excelente tu trabajo linda!..
Hola, feliz día, muchas gracias bella.
I like your creativity
This post has been appreciated and featured in daily quality content rewards. Keep up the good work