¡Un placer saludarles, amigos!
A pleasure to greet you, friends!
Hola amigos, les envío un saludo de vibrantes energías positivas. Hoy deseo compartir con ustedes este tutorial de dos preciosas vaquitas imantadas para decorar su nevera y poner un detalle bien alegre en la cocina. Que rico es ocuparnos en algo que nos gusta, nos relaja y que además tengamos la fortuna de mostrarlo en exclusiva para @Hive. La invitación es para que des rienda suelta a tu imaginación, te anímes y lo hagas tu misma!, ven y te muestro.
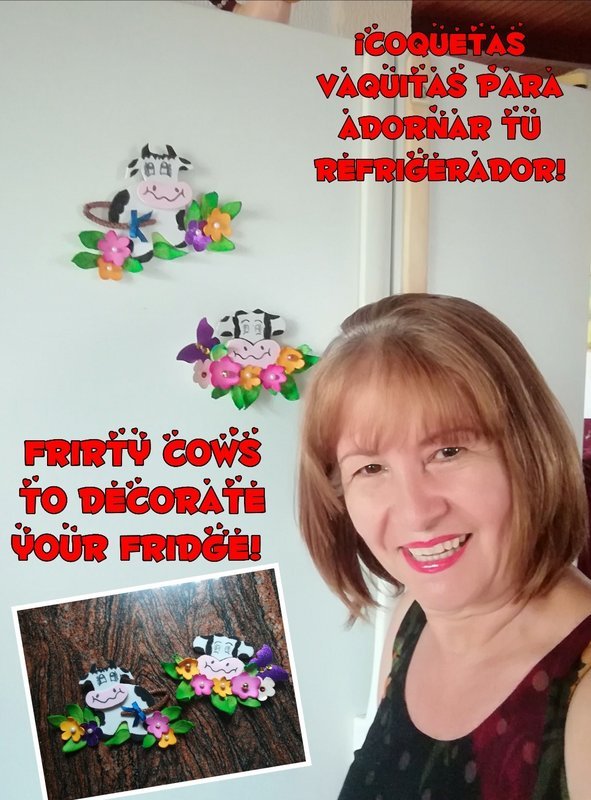
Hello friends, I send you a greeting of vibrant positive energies. Today I want to share with you this tutorial of two beautiful magnetized cows to decorate your fridge and put a very cheerful detail in the kitchen. How rich it is to take care of something that we like, relax us and that we also have the fortune to show it exclusively for @Hive. The invitation is for you to unleash your imagination, cheer up and do it yourself! Come and I'll show you.
Materiales // Materials
- Foami blanco,rosado,amarillo,fucsia, verde
- Pintura acrílica negra y pincel
- Cartón
- Cinta Azul
- Perlas
- Mecatillo u otro material para el rabo
- 2 Imanes
- Silicón
- Tijera
- Lápiz de grafito
- Marcador punta fina negro
- White, pink, yellow, fuchsia and green foam
- Black acrylic paint and brush
- Paperboard
- Blue Ribbon
- Pearls
- Mecatillo or other material for the tail
- 2 magnets
- Silicon
- Scissors
- Graphite pencil
- Black fine point marker

Paso a paso // Step by Step
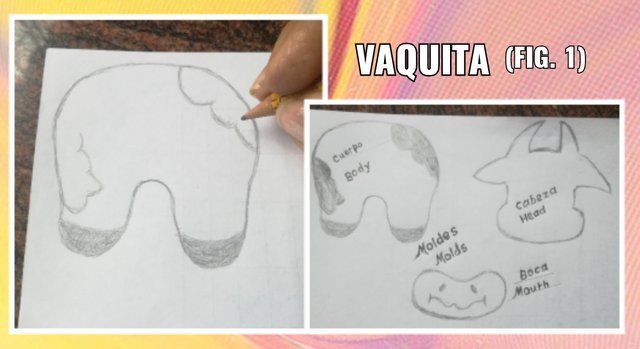
Primer paso:
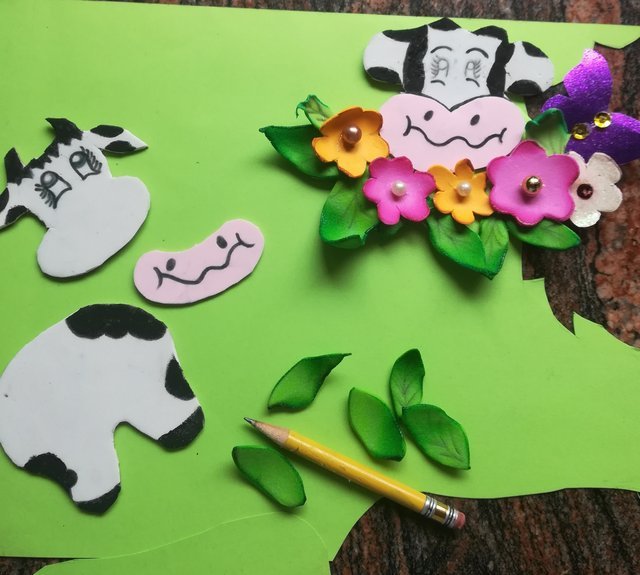
Pintaremos las figuras de dos vaquitas y luego las remarcamos en foami blanco. Debemos sacar por separado el cuerpo y la cabeza de las dos figuras.
Firt Step:
We will paint the figures of two vaquitas and then we will highlight them in white foami. We must separate the body and head of the two figures.
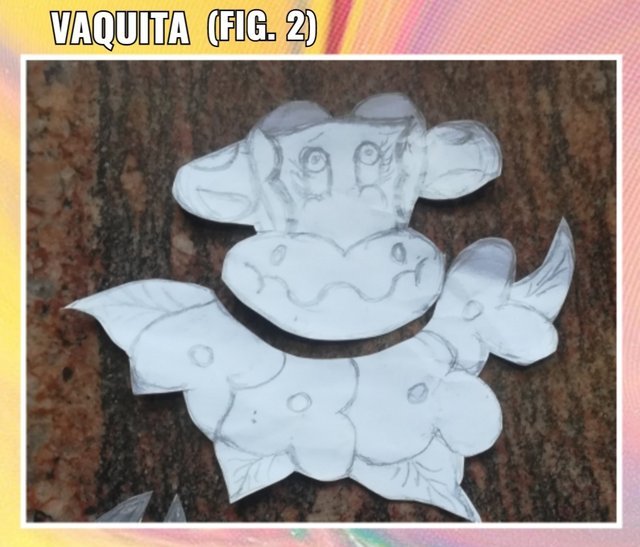
Segundo paso:
Para reforzar las figuras que hicimos en foami blanco las marcamos en cartón y procedemos a recortarlas. Primero pegamos el cuerpo, luego se superpone la cabeza y continuamos pegando la boca en la parte inferior de la cabeza.
Second Step:
To reinforce the figures that we made in white foami, we mark them on cardboard and proceed to cut them out. First we glue the body, then the head is overlapped and we continue to glue the mouth to the bottom of the head.

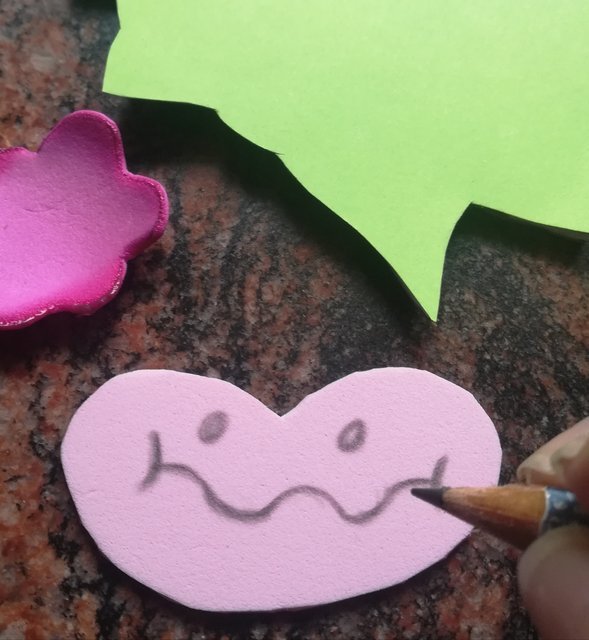
Tercer paso:
Las bocas se calcan y recortan en foami rosado y sus detalles al igual que los ojos se realizan usando un marcador negro.
Third Step:
The mouths are traced and cut out in pink foami and their details as well as the eyes are made using a black marker.
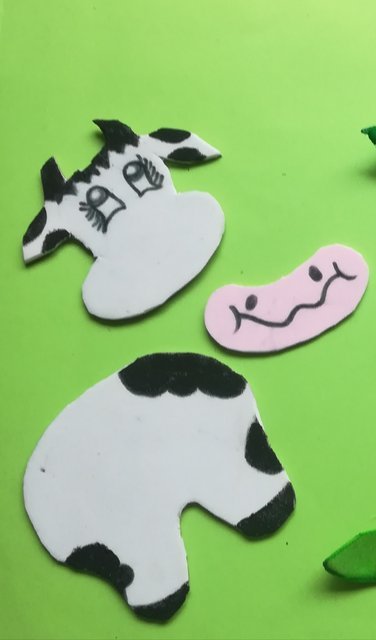
Cuarto paso:
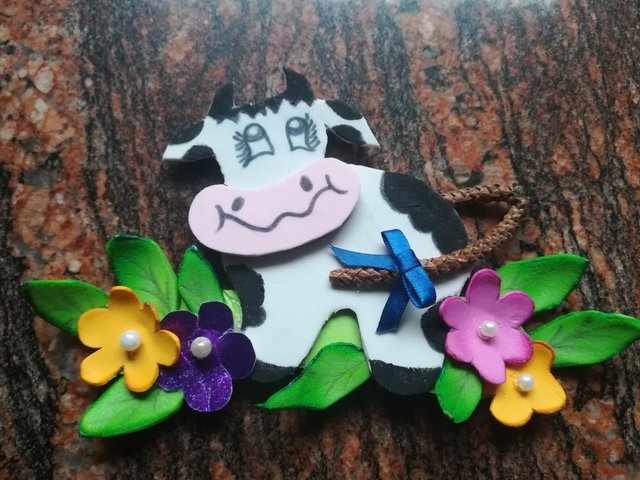
Ahora con pintura al frío de color negro pintamos las manchas en algunas partes de la cabeza, cuerpo y patas.
Fourth Step:
Now with cold black paint we paint the spots on some parts of the head, body and legs.
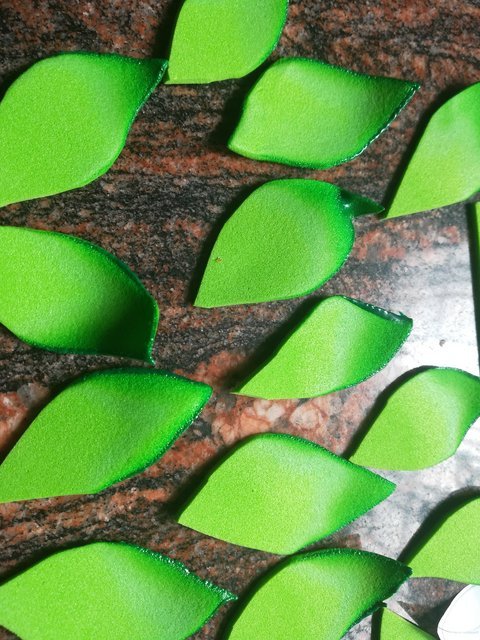
Quinto paso:
A continuación haremos unas hojas en foami verde y con la ayuda del lápiz de grafito afinaremos sus detalles.
Fifth Step:
Next we will make some leaves in green foami and with the help of the graphite pencil we will refine their details.
Sexto paso:
Hacemos unas flores de diferentes colores en foami, cartulina escarchada, una combinación de ambos o cualquier material que te sirva para este propósito. Recuerda la importancia de reciclar y reutilizar materiales. El centro de las flores se decoran con unas perlas.
Les daré un dato: Pasé rápidamente los bordes de las hojas y de las flores por el fuego de la cocina y estas adquieren otras tonalidades.
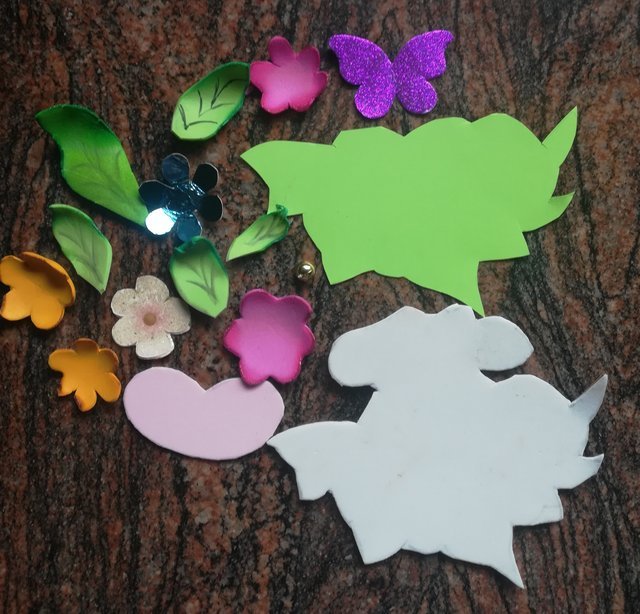
Step Six:
We make some flowers of different colors in foami, frosted cardboard, a combination of both or whatever material you use for this purpose. Remember the importance of recycling and reusing materials. The inside of the flowers are decorated with pearls.
I'll give you a tip: I quickly passed the edges of the leaves and flowers through the kitchen fire and they take on other shades.
Séptimo paso:
A esta vaquita le pegué con silicón su rabo. La cola está hecha con un material seco de una mata de pino y le puse un lazo con cinta azul.
Seventh Step:
I glued this little cow's tail with silicone. The tail is made with a dry material from a pine tree and I tied a bow with blue ribbon.
Octavo paso:
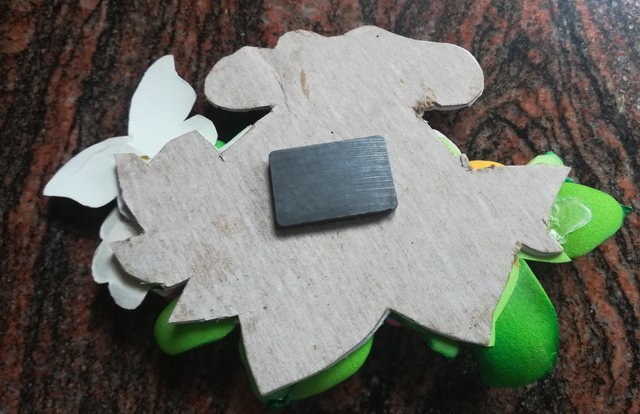
Finalmente en la parte posterior de las vaquitas les pegué un imán para adherirlas al refrigerador.
Eighth Step:
Finally, I glued a magnet to the back of the vaquitas to adhere them to the refrigerator.
Espero les haya gustado este trabajo creativo, es fácil y muy rápido de realizar.
I hope you liked this creative work, it is easy and very fast to do.
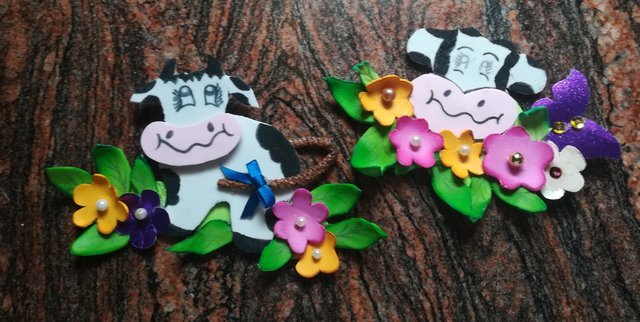
¡Así quedaron estas preciosas vaquitas! // This is how these beautiful vaquitas turned out!
Estos diseños imantados son muy fáciles de elaborar y puedes jugar con tu imaginación para emplear otros materiales con lindos colores. Espero te animes a elaborarlos y con mucho agrado leeré tus opiniones en los comentarios.
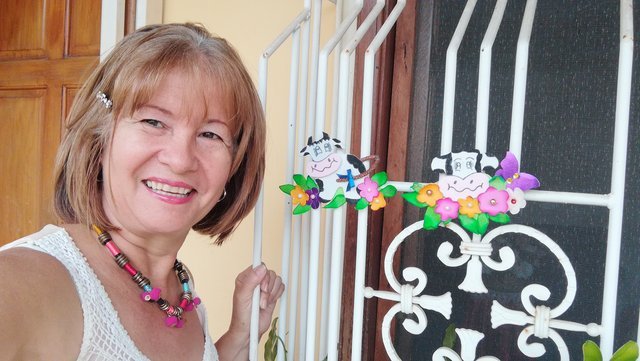
These magnetized designs are very easy to make and you can play with your imagination to use other materials with beautiful colors. I hope you are encouraged to elaborate them and I will be happy to read your opinions in the comments.
¡UN ABRAZO CARGADO DE BUENAS VIBRAS! // A HUG LOADED WITH GOOD VIBRES!
Fotos propias. Imágenes editadas por mí en FotoCollage.
Own photos. Images edited by me in FotoCollage.