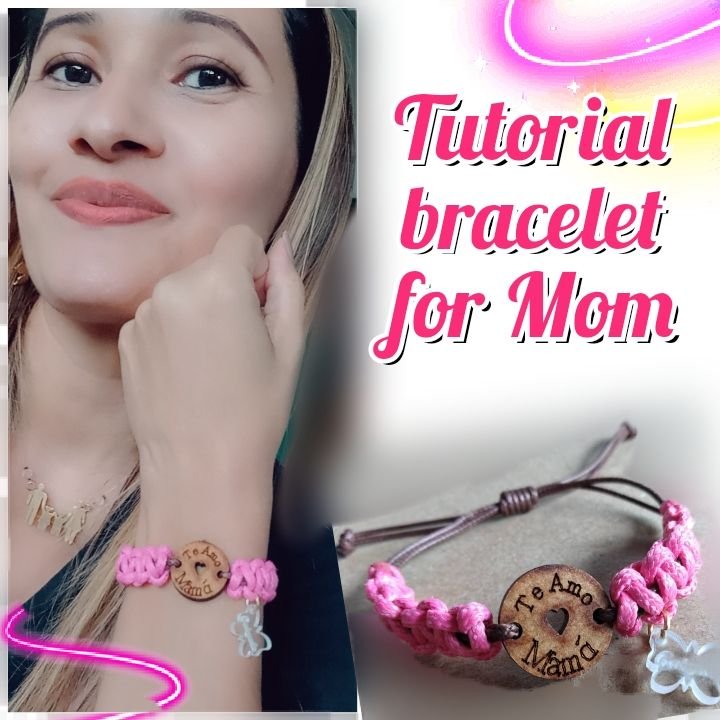
Mañana celebramos el Día de la madre y qué mejor que un detalle para consentir a mamá un detalle que podemos hacer nosotros mismos en nuestra casa con unos simples materiales sencillos de hacer así que les comparto este pequeño tutorial de una linda pulsera para mamá Espero que lo disfruten.

Tomorrow we celebrate Mother's Day and what better than a detail to pamper mom a detail that we can do ourselves at home with a few simple materials simple to make so I share with you this little tutorial of a nice bracelet for mom I hope you enjoy it.
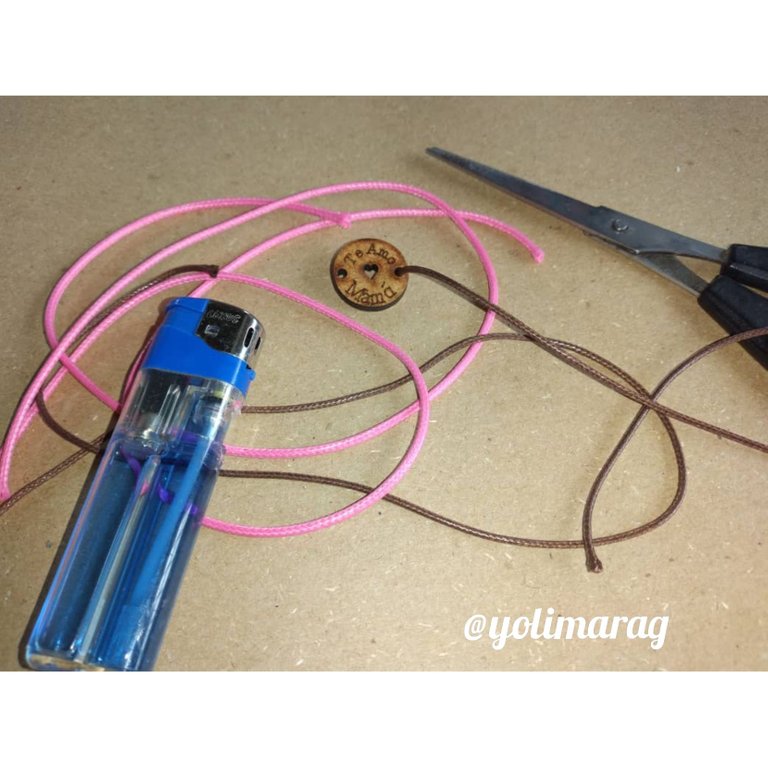
Materiales:
- 32cm Piel de serpiente #2
- 32cm piel de serpiente #4
- 1 dije
- 1 Dije te amo mamá
- Yesquero
- Tijera.
Materials:
- 32cm Snakeskin #2
- 32cm snakeskin #4
- 1 charm
- 1 charm I love you mom
- Tinder
- Scissors.
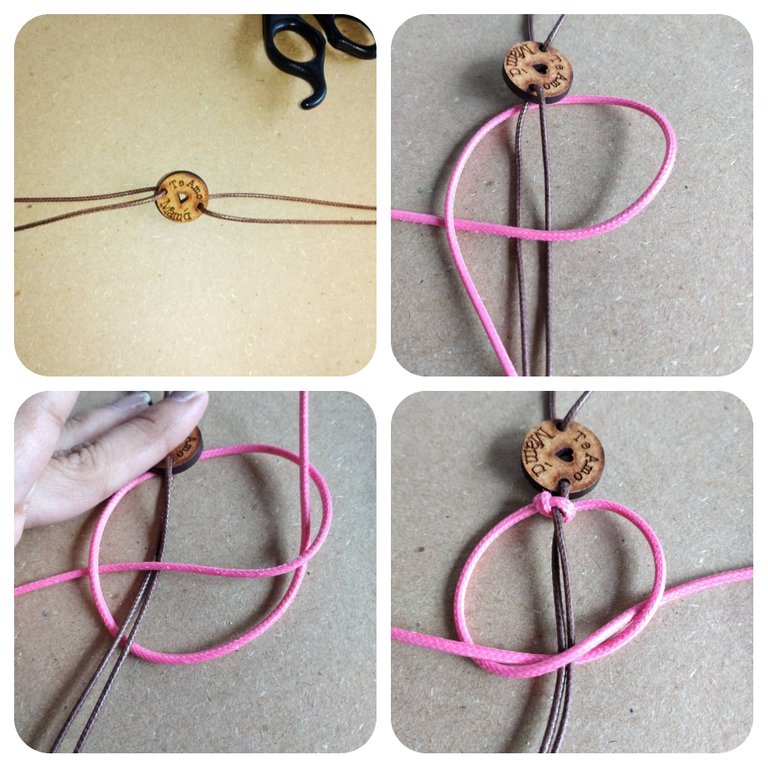
Lo primero que haremos es introducir nuestra piel de serpiente número 2 dentro del dije (Te amo mamá) uno en cada lado y luego vamos a proceder a hacer nuestro nudo plano en cada extremo de la piel de serpiente número 2, para ello necesitamos nuestra piel de serpiente número 4 y la pasamos por debajo de la piel de serpiente más pequeña, Luego hacemos como una p de un lado puede ser del lado derecho y del otro lado la pasamos por arriba y luego por debajo de todas las líneas guías e introducimos en la p que hicimos y cerramos. Haremos el mismo procedimiento del otro lado.
The first thing we will do is introduce our snakeskin number 2 inside the charm (I love you mom) one on each side and then we will proceed to make our flat knot on each end of the snakeskin number 2, for this we need our snakeskin number 4 and we pass it under the smaller snakeskin, Then we make like a p on one side can be on the right side and on the other side we pass it over and then under all the guide lines and introduce it in the p we made and close. We will do the same procedure on the other side.
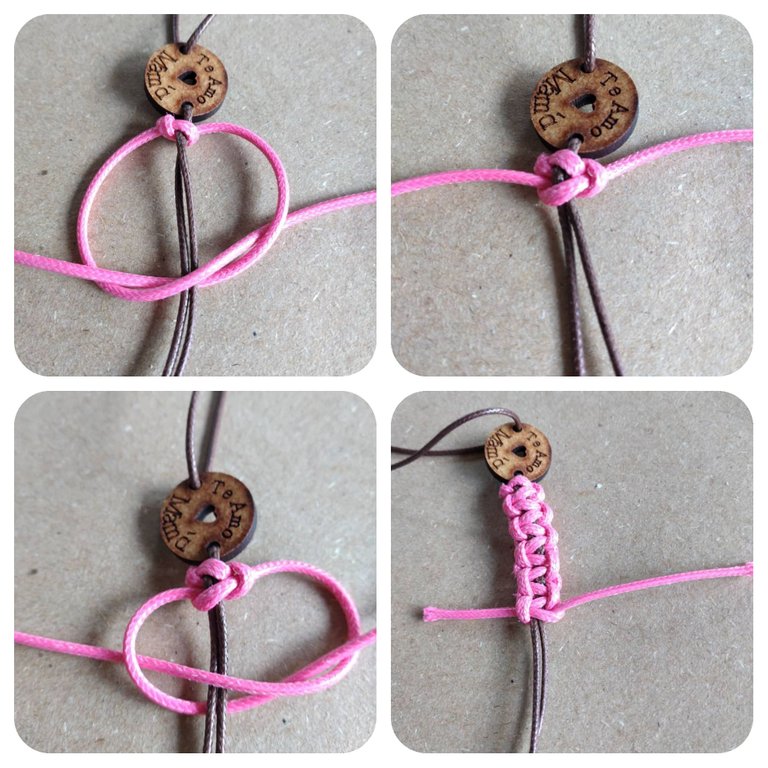
Vamos anudando de lado y lado hasta llegar al final donde no podamos anudar más.
We knot from side to side until we reach the end where we cannot knot any more.

Cortamos los excedentes y quemamos como se ve en la imagen.
Cut off the excess and burn as shown in the image.
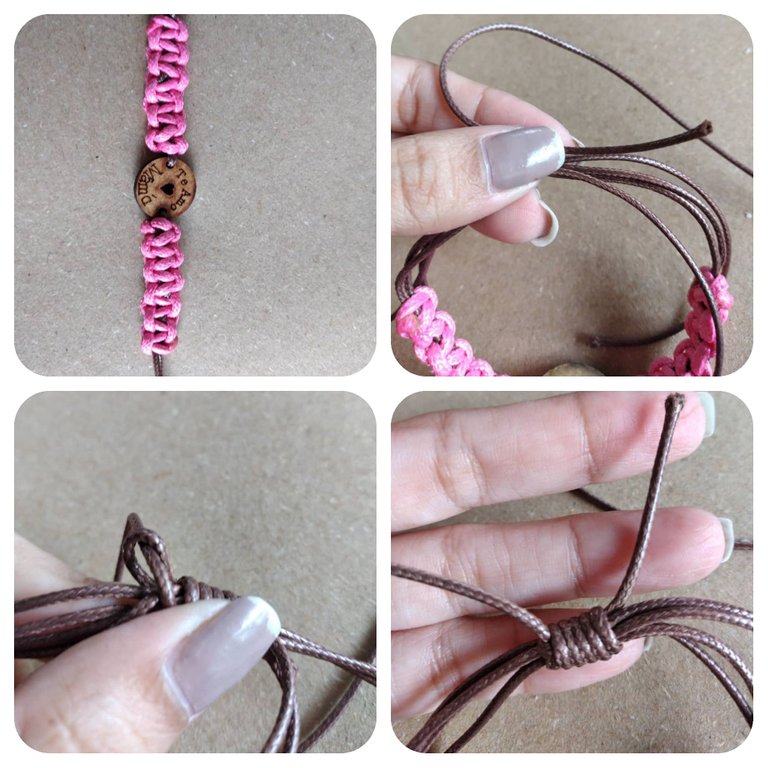
Cuando tenemos listos ambos lados vamos a colocar los extremos del lado a lado y vamos a cerrar nuestro pulsera con un nudo franciscano, el cual consiste en hacer un pequeño lazo entre las ambas tiras de los lados y vamos a enrollarlo y luego metemos el más largo por el lazo y halamos el otro extremo para cerrar.
When we have both sides ready we are going to place the ends side by side and we are going to close our bracelet with a Franciscan knot, which consists of making a small loop between the two strips of the sides and we are going to roll it up and then we put the longer one through the loop and pull the other end to close it.

Haremos al final de nuestras tiras unos pequeños nudos y quemamos para que no se deshilache.
We will make small knots at the end of our strips and burn them so that they do not fray.
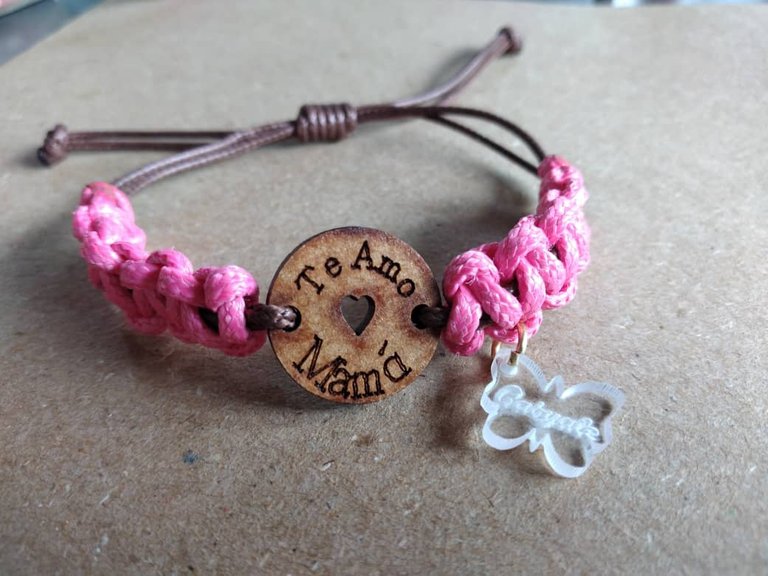
Por último introduzco un pequeño dije con una argolla en el nudo plano en la parte frontal para que se vea un poco más hermoso, este dije es el nombre de la marca y como tal queda lista nuestra pequeña en pulsera.
Espero que les gustará este pequeño tutorial, gracias por ser parte de mi blog, bendiciones 😘.
Finally I introduce a small pendant with a ring in the flat knot on the front to make it look a little more beautiful, this pendant is the name of the brand and as such is ready our little girl in bracelet.
I hope you will like this little tutorial, thanks for being part of my blog, blessings 😘.
Fotos principal editada con Canva.
Fotos de mi Autoría derechos reservados
Cámara: Samsung A20S
Traducido con www.DeepL.com/Translator (versión gratuita)
Photos edited with Canva
Photos by me Author's rights reserved
Quote> Camera: Samsung A20S
Translated with www.DeepL.com/Translator (free version)