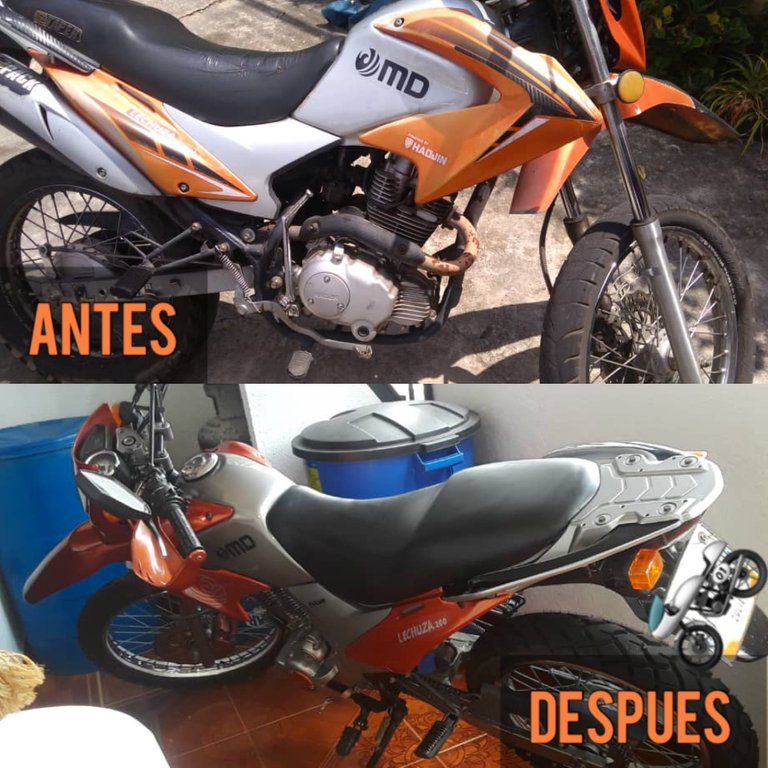

A little less than a year ago with my cousin I saw the opportunity to buy a motorcycle that was quite abandoned, as he dedicates himself to working fixing them, when he analyze the situation he saw that there was a good opportunity, taking advantage of the fact that I needed a vehicle to get around and this was at a very good price.
Hace poco menos de un año junto a mi primo vi la oportunidad de comprar una motocicleta que se encontraba bastante abandonada, como el se dedica a trabajar arreglándolas, al sacar cuentas vio que había una buena oportunidad, aprovechando que yo necesitaba un vehículo para desplazarme y esta se encontraba a muy buen precio.
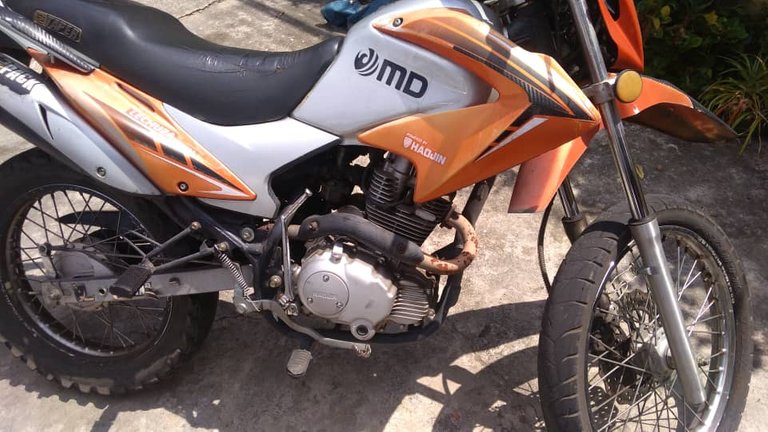
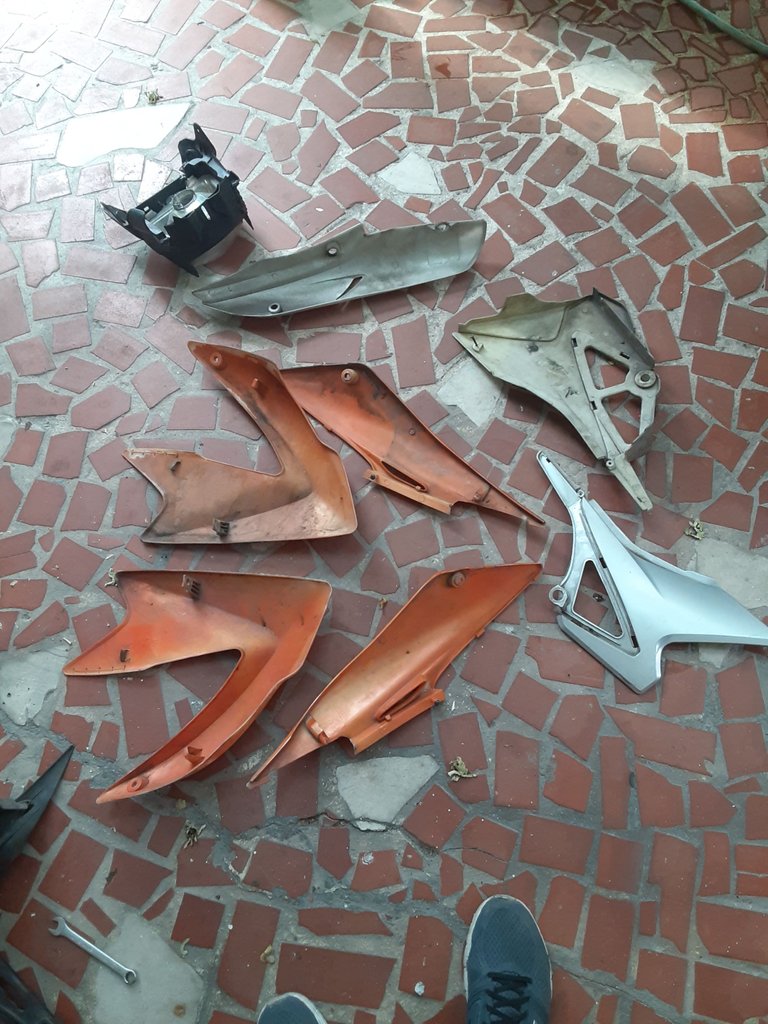
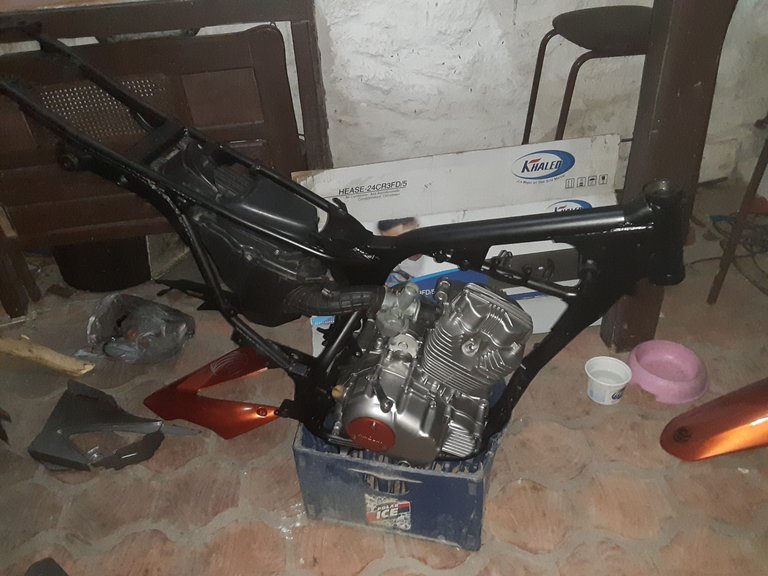
As you can see several pieces were rusted, it was not in the best condition.
Of course, the necessary work would not be little, it required painting completely, disassembling and remaking the engine, changing the brakes, tires, battery, all the electrical part, mirrors, lights, etc. And after about 6 months the work was completed, and I wanted to share with you part of the process and the results.
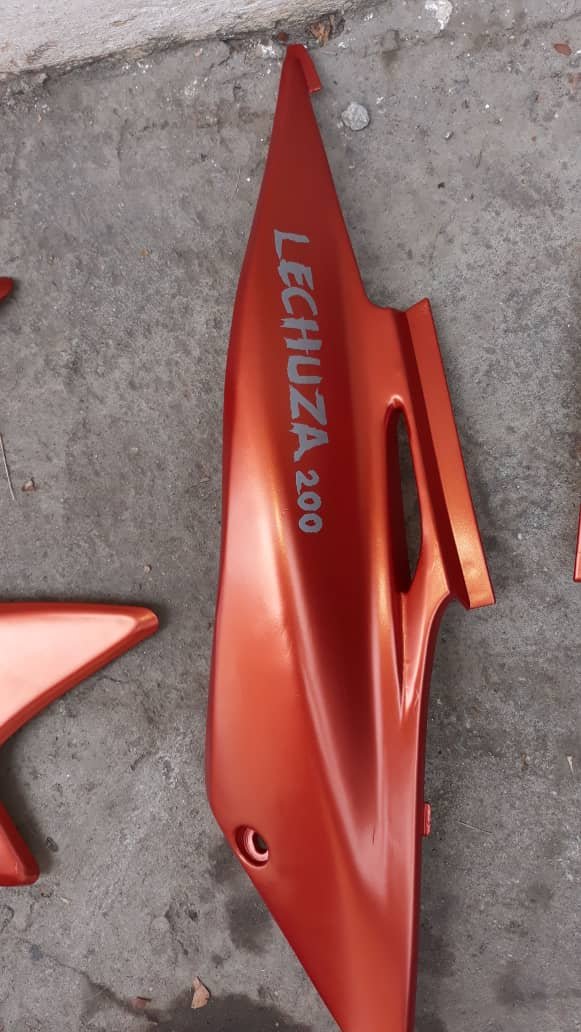
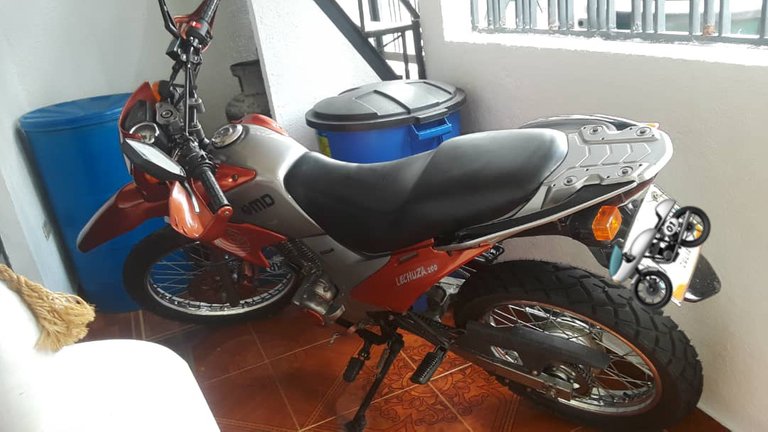
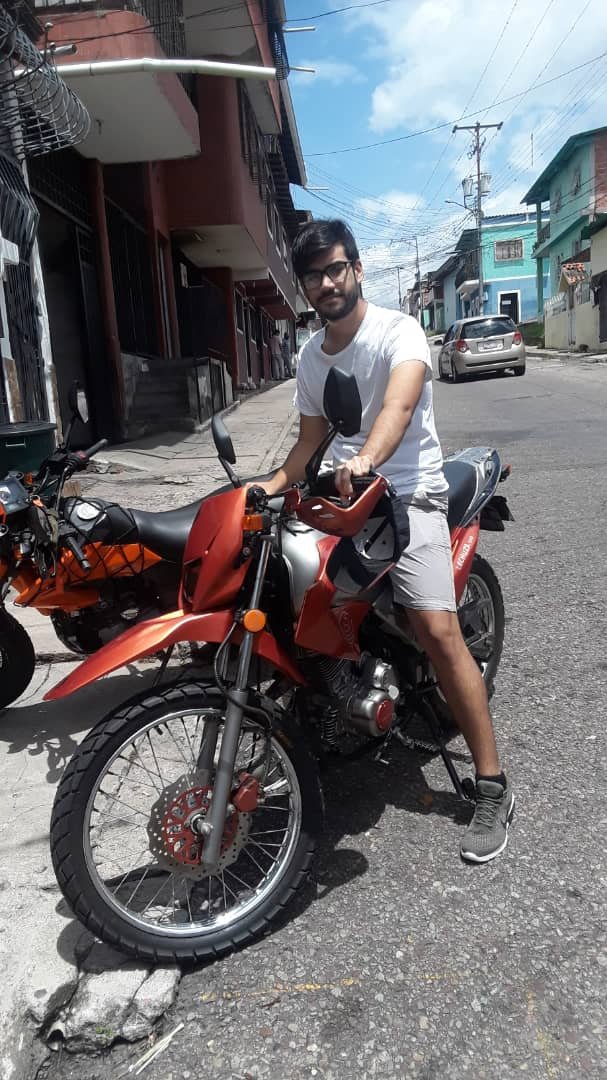
The motorcycle is a 200cc MD "Lechuza", orange with silver. Although at first she was not very attractive, I always saw potential for the future, with a little love and work.
Como pueden observar varias piezas se encontraban oxidadas, no estaba en las mejores condiciones.
Por supuesto, el trabajo necesario no sería poco, requería pintar completamente, desarmar y rehacer el motor, cambiar los frenos, los cauchos, la batería, toda la parte eléctrica, retrovisores, luces, etc. Y luego de unos 6 meses el trabajo estuvo completado, y quise compartir con ustedes parte del proceso y los resultados.
La motocicleta es una MD "Lechuza" de 200cc, naranja con plateado. Aunque al principio no era muy atractiva, siempre le vi potencial a futuro, con un poco de cariño y trabajo.
Primer Paso: Vamos a desarmarla
First Step: Lets disasemble it
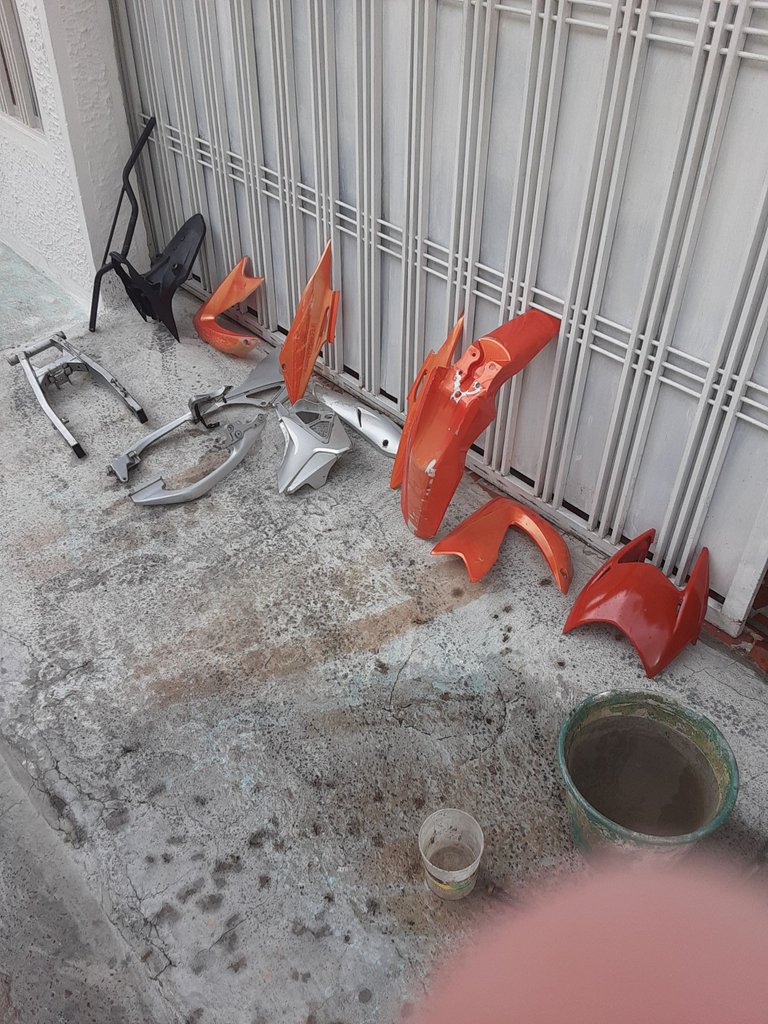
This is perhaps one of the most satisfactory parts of the whole process, and it serves a double function: On one hand, it is the starting point for the re-modeling process, and on the other hand, from here comes the first list of spare parts needed to fix it. properly. Althought in the future a couple more were needed.
Esta es quizá una de las partes más satisfactorias de todo el proceso, y sirve una doble función: Por un lado, es el punto de partida para re-modelar, y por otro lado, de aquí surge la primera lista de repuestos necesarios para arreglarla apropiadamente. Aunque luego un par más fueron necesitadas.

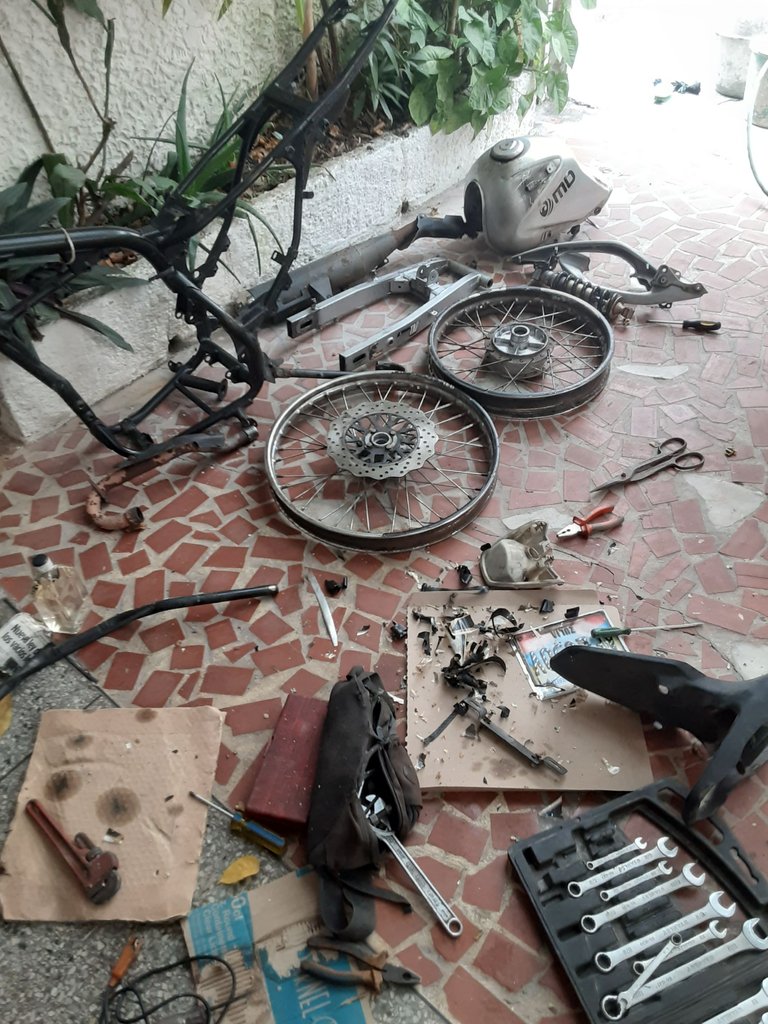
Extreme care must be taken here, thanks to my cousin's experience with this type of project we never had a problem with knowing where everything goes (when putting it together later). Very important considering that I don't know anything about mechanics.
Aquí debe tenerse extremo cuidado, gracias a la experiencia de mi primo con este tipo de proyectos nunca tuvimos problemas con saber en donde va cada cosa (Al luego armarla). Importantísimo considerando que no sé nada de mecánica.
Segundo Paso: Hora de las compras
Second Step: Time for shopping
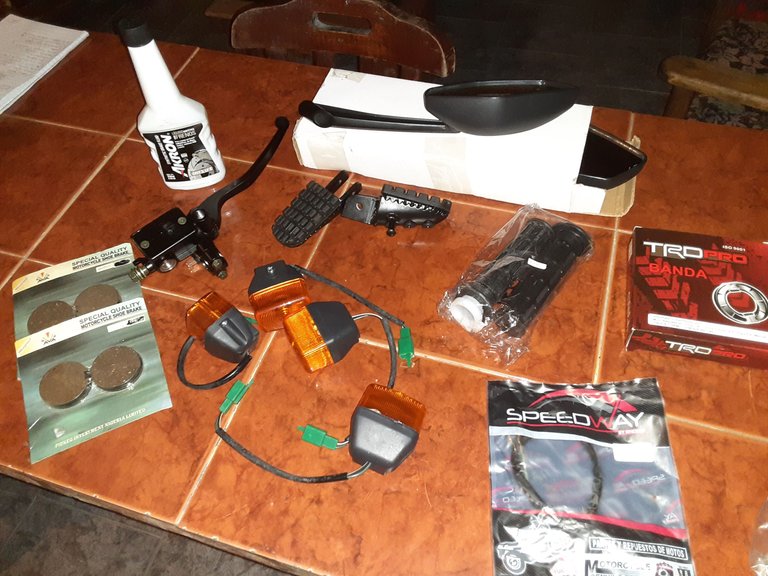
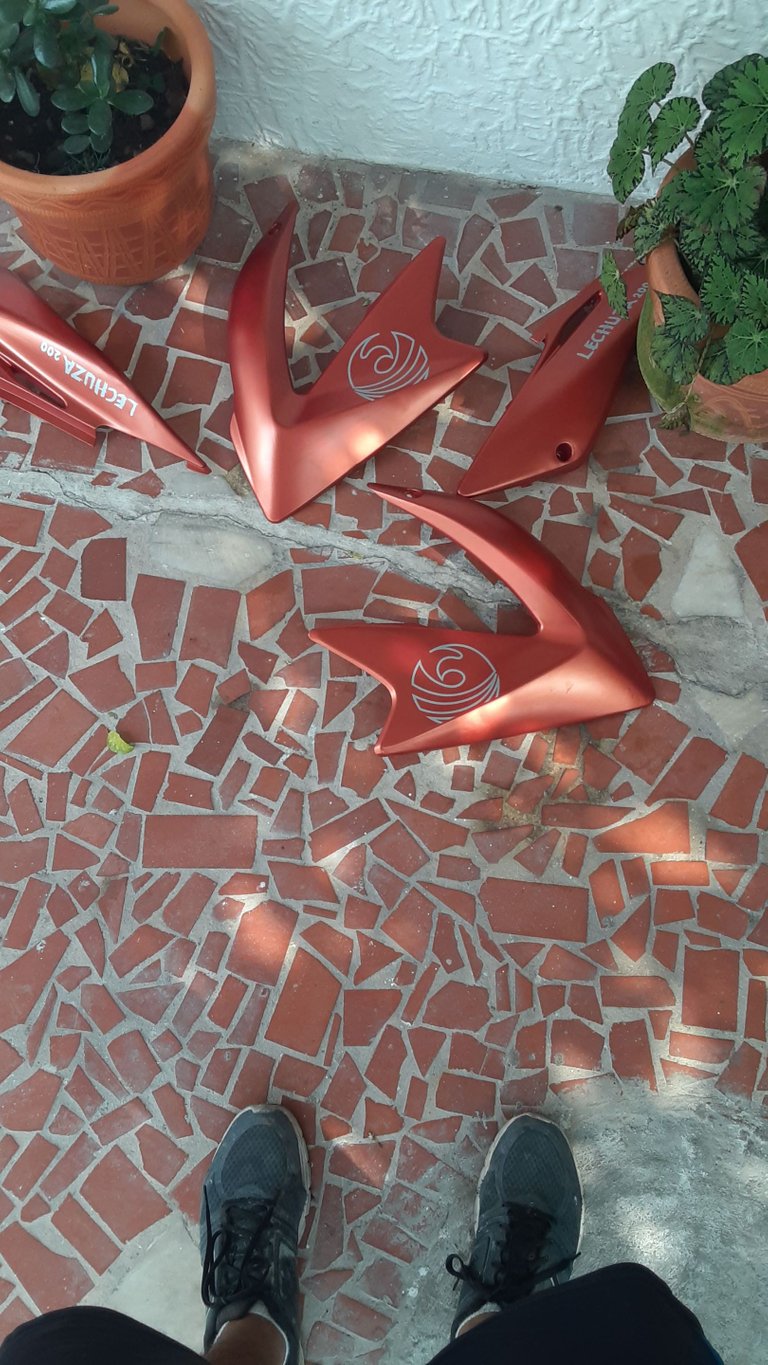
For me, shopping is simultaneously one of the funniest parts and one of the most frustrating one, part of the spare parts were obtained with extreme ease and others not so much, even later we had to adapt many spare parts that were not made for that motorcycle. What is the fun part? The aesthetic, choosing the new windbreaks, the new mirrors, controls and grips... Although we did not want it to look very personalized, we took a few creative liberties so that it had something unique.
Para mi las compras son simultáneamente una de las partes más divertidas y una de las más frustrantes, parte de los repuestos se conseguían con extrema facilidad y otros no tanto, incluso, posteriormente tuvimos que adaptar muchos repuestos que no estaban hechos para esa moto, ya que no conseguimos el correcto. ¿Qué es lo divertido? La parte estética, escoger como serán los nuevos cortavientos, los nuevos retrovisores, mandos y puños... Aunque no queríamos que se viera muy personalizada, si tomamos libertades creativas para que tuviese algo único.
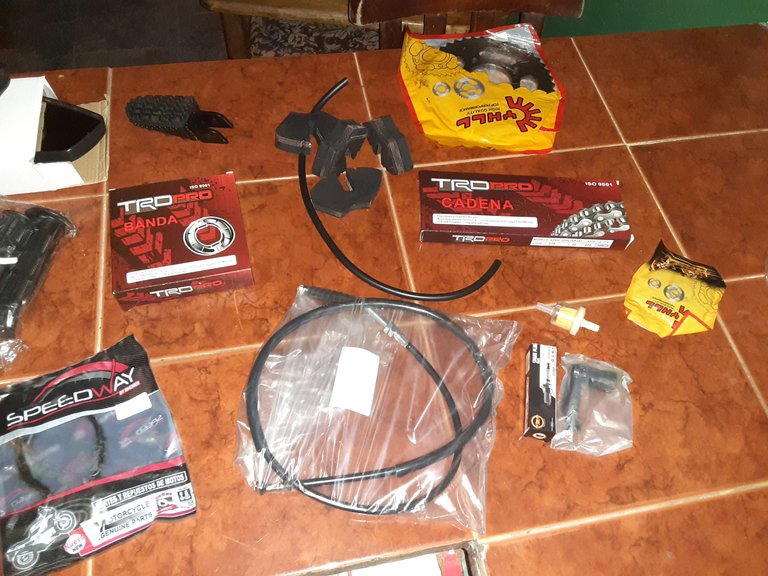
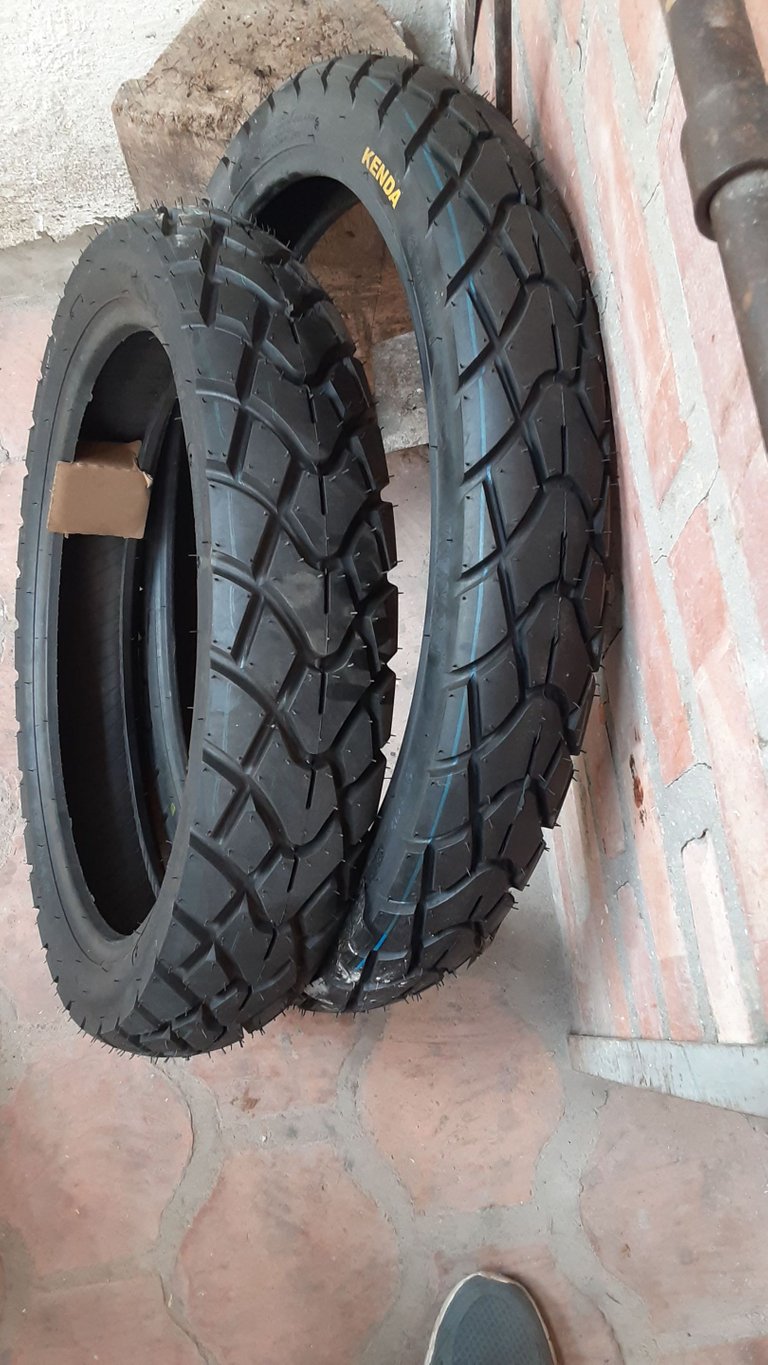
Part of the purchases were made in Colombia, I live on the border side for Venezuela so we had to make a small one-day trip for this, one of the most important things we found there was the ideal paint and the tires. For the paint I wanted a slightly brighter shade of orange (Almost Chrome) and a darker gray.
Parte de las compras se realizaron en Colombia, vivo en la frontera con Venezuela así que tuvimos que hacer un pequeño viaje de un día para esto, una de las cosas más importantes que encontramos allá fue la pintura ideal y los cauchos. Para la pintura quise un tono de naranja ligeramente más brillante (Casi cromado) y un gris más oscuro.
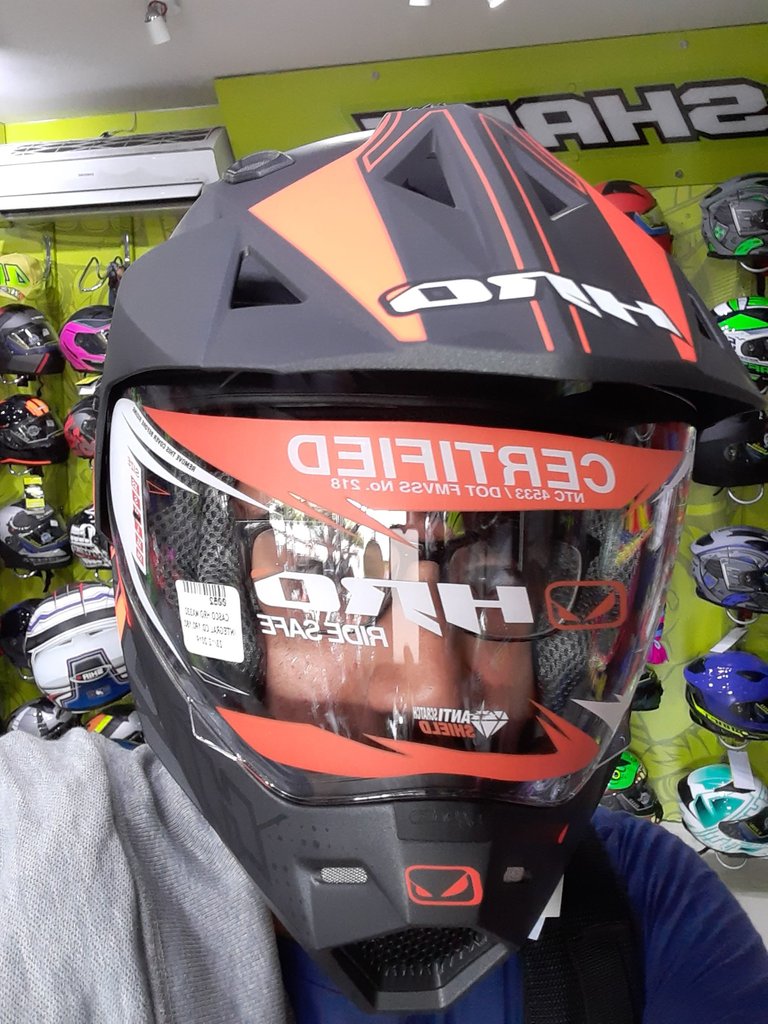
Another important purchase in Cúcuta-Colombia was the helmet, in the end we decided on this cross-type model, a bit uncomfortable since I wear glasses, but we were in love with the design and the silhouette.
Otra compra importante en Cúcuta-Colombia fue el casco, al final nos decidimos por este modelo tipo cross, un poco incómodo ya que uso lentes, pero estábamos enamorados con el diseño y la silueta.
In this part of the process I discovered that the painting would be quite long and tedious, I must also mention that we were learning as we went along (My cousin had no experience painting before) so there was a lot of trial and error.
En esta parte del proceso descubrí que la pintada sería bastante larga y tediosa, debo mencionar aparte que íbamos aprendiendo sobre la marcha (Mi primo no había pintado antes) así que hubo mucho ensayo y error.
Tercer Paso: Preparando las piezas para pintar, puliendo los rines
Third Step: Getting all the pieces ready for the paint job, polishing the rims
One of the parts that requires more work than painting is preparing the pieces to do it. Each "cover" of the motorcycle must be individually sanded, this implies removing the stickers that covered it, and using "mass" for the deep holes, making everything smooth and uniform. This took us several days, we finally got it done.
Una de las partes que requiere más trabajo que pintar, es preparar las piezas para hacerlo. Cada "tapa" de la motocicleta debe ser individualmente lijada, esto implica remover los stickers que la cubrían, y emplear "masa" para los huecos profundos, haciendo que toda quedara lisa y uniforme. Esto nos tomó varios días, finalmente lo logramos.
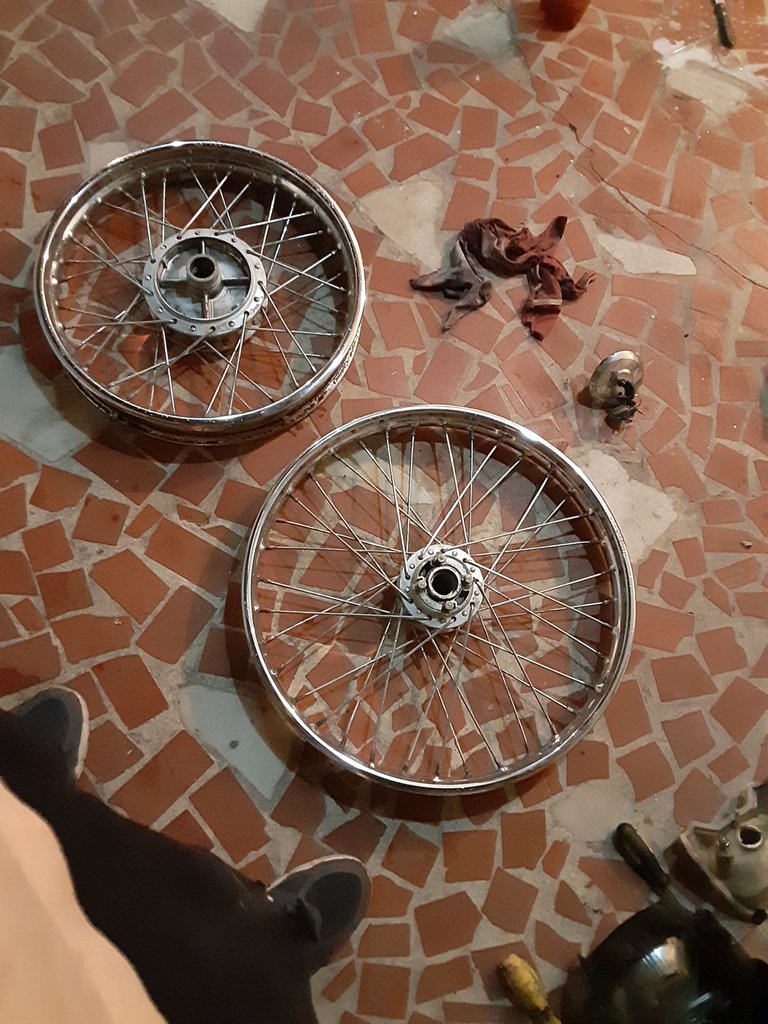
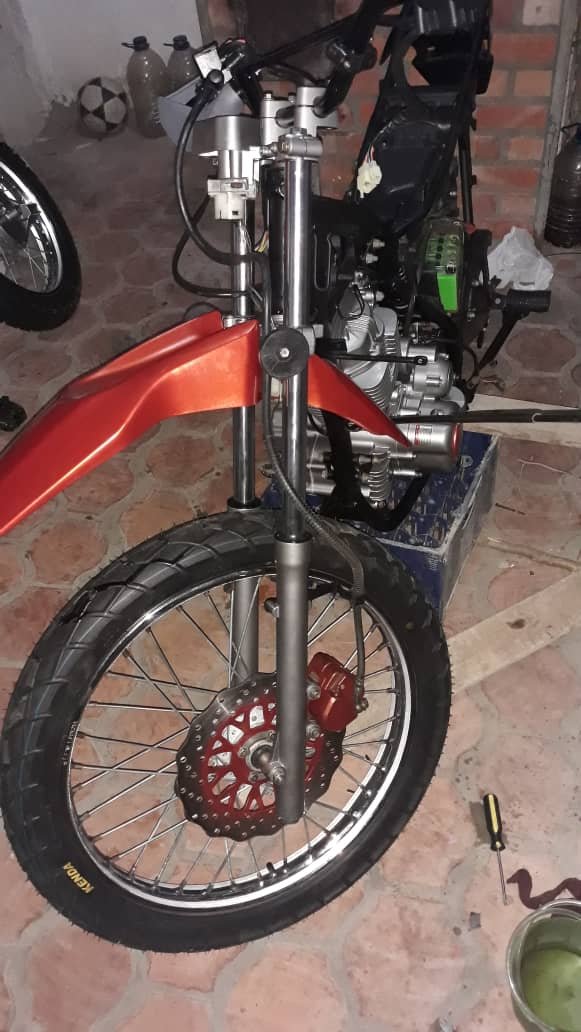
The rims, on the other hand, were polished, for this they had to be washed very well, all this in order to remove the grease that had accumulated over the years ... Then, with a special liquid called polishing, the result was great. Aesthetically the wheels of the owl are one of its most striking aspects, since these are not "paddle", and resemble those of a bicycle.
Los rines, por otro lado, fueron pulidos, para esto debían lavarse muy bien, todo esto con la finalidad de retirar la grasa que se había acumulado a lo largo de todos los años... Luego, con un liquido especial llamado pulitura, el resultado fue genial. Estéticamente los rines de la lechuza son uno de sus aspectos más llamativos, ya que estos no son de "paleta", y asemejan a los de una bicicleta.
Cuarto Paso: Vamos a pintar
Fourth Step: Let's paint
No matter how superficial the part of a motorcycle you want to paint is, it will always require to be completely disassembled.
No importa que tan superficial sea la pieza de una moto que quieras pintar, siempre va a requerir que esta se desmonte completamente.
The motorcycle must be painted in stages, obviously starting with the skeleton or "the burro" as it is colloquially called in my country, again, this resembles the one from a bicycle and is quite light, from there is is built the whole vehicle.
La moto debe ser pintada por etapas, empezando obviamente con el esqueleto o "burro" como se le dice coloquialmente en mi país, de nuevo, este asemeja al de una bicicleta y es bastante ligero, a partir de allí es que se construye todo el vehículo.
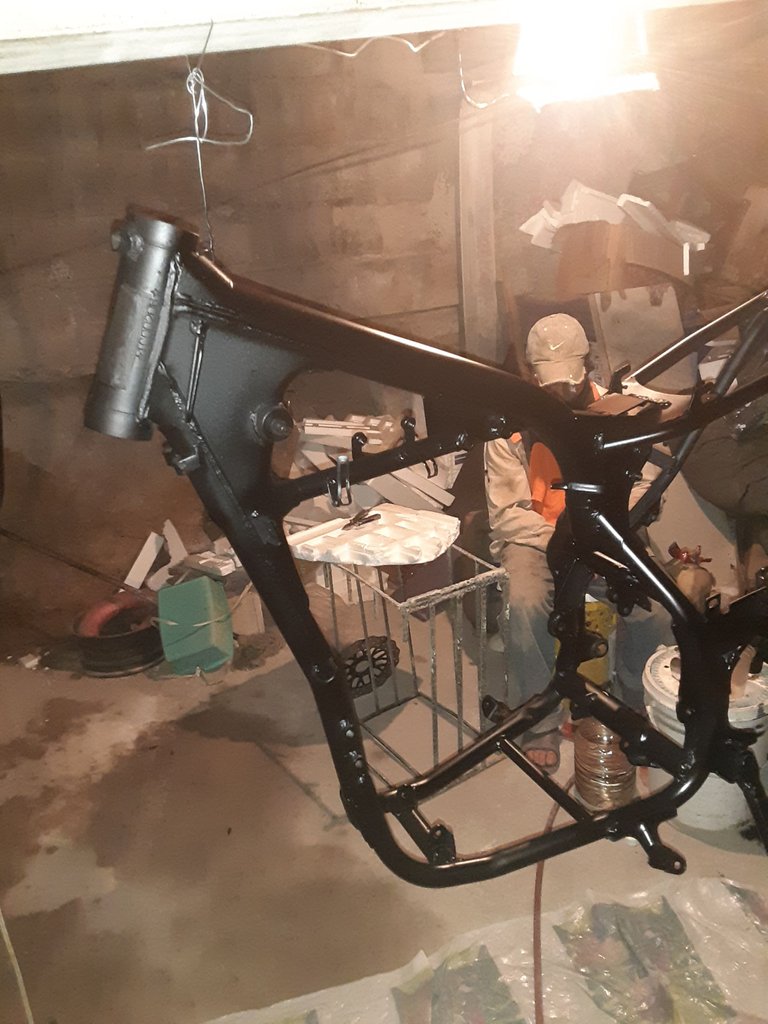
We decided to go for a semi-matte black, this means that it has the slight opacity of matte, but it is slightly brighter, a perfect balance.
It should be noted that all these pieces ALSO had to be well sanded. The pieces must first be painted with a white background and after drying, the corresponding color is used.
Decidimos ir por un negro semi-mate, esto quiere decir que cuenta con la ligera opacidad propia del mate, pero es ligeramente más brillante, un balance perfecto.
Cabe destacar que todas estas piezas TAMBIÉN debían ir bien lijadas. Las piezas deben pintarse primero con un fondo blanco y luego de secar, si va el color correspondiente.

Then the other covers were painted, and we left the tank for later ... It should be noted that this was a process of several days. And between my university and my cousin's work, it ended up taking a lot longer.
Luego se pintaron las demás tapas, y dejamos el tanque para después... Cabe destacar que esto fue un proceso de varios días. Y entre mi universidad y el trabajo de mi primo, se terminó alargando bastante más.
Why was the tank left for later?
¿Por qué se dejó el tanque para después?
Quinto Paso: Preparando el Tanque
Fifth Step: Getting the tank ready
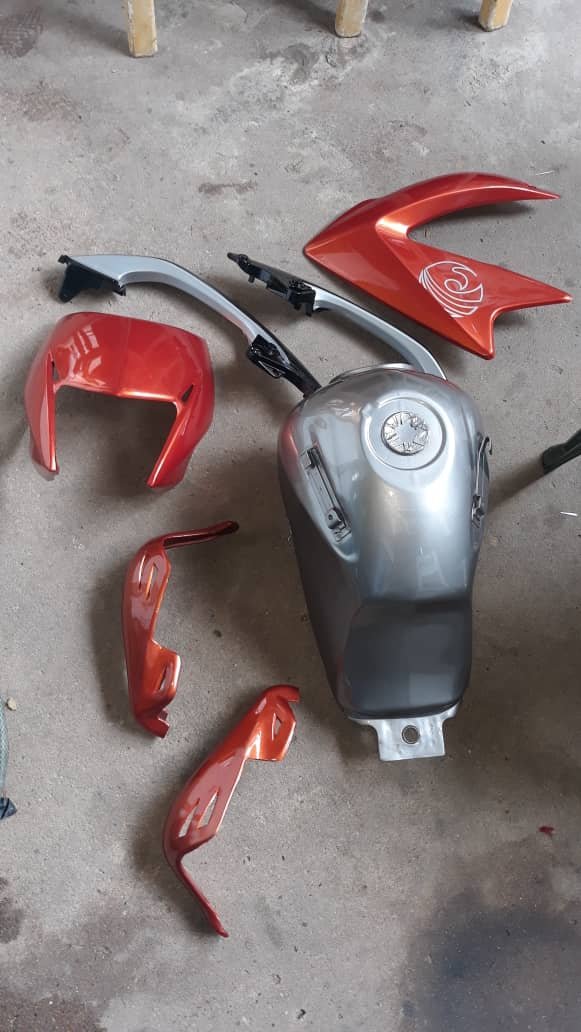
The original tank of the motorcycle was rusty and due to a budget issue we could not afford a new one, the painting had to be postponed because first we had to work on correcting this oxidation.
El tanque original de la motocicleta se encontraba oxidado y por una cuestión de presupuesto no podíamos costear uno nuevo, la pintada tuvo que postergarse porque primero debíamos trabajar en corregir esta oxidación.
So, we clean it using a special liquid that is poured into the tank and then closed and "whipped" with a lot of force, after a lot of water and a lot of shakes, haha. We managed to clean it completely.
After this, an acrylic layer is poured inside to protect it from further oxidation, as well as to prevent gasoline (when full) from coming into contact with the oxide, which could damage the engine.
Then the tank was finally painted.
Entonces, lo limpiamos usando un liquido especial que se vierte en el tanque para luego cerrar y "batir" con bastante fuerza, luego de bastante agua y bastantes batidas, jaja. Logramos limpiarlo completamente.
Luego de esto, se vierte una capa acrílica por dentro para protegerlo de oxidar más, así como evitar que la gasolina (cuando este lleno) entre en contacto con el oxido, pudiendo dañar el motor.
Luego, se pintó el tanque, finalmente.
Sexto Paso: Detalles Estéticos
Sixth Step: Aesthetic details
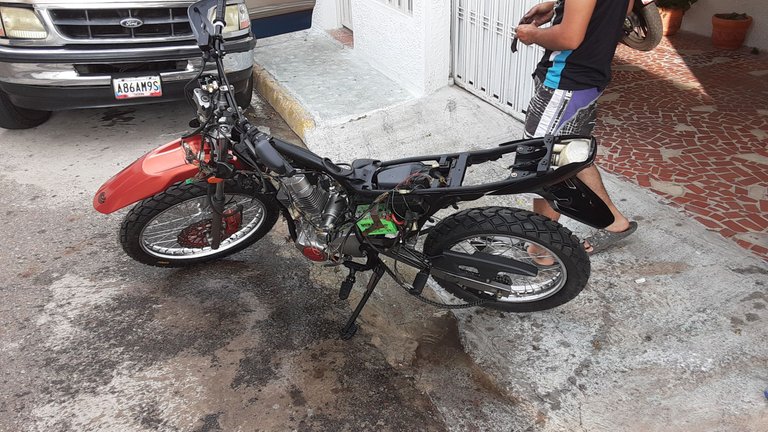
Here the project was already quite advanced, the motorcycle was beginning to be assembled, progress was visible.
Aquí ya el proyecto iba bastante avanzado, ya la motocicleta se estaba empezando a armar, se veía el progreso.
With the parts already painted, we looked for the stickers that would make up the final design, we also added a design on the wheels ... Everything progressively contributed to the final appearance.
Con las piezas ya pintadas buscamos los stickers que conformarían el diseño final, añadimos también un diseño en los rines... Todo progresivamente contribuyó al aspecto final.
Septimo Paso: Terminando la parte eléctrica y las primeras pruebas
Seventh Step: Finishing the electric part, and first tests
According to my cousin the electrical part was quite tedious, but in the end everything was adjusted well, something that I remember that gave quite a problem was the starting, for some reason it was impossible to start it from the button and the leg had to be used, eventually this problem was also solved.
Según mi primo la parte eléctrica fue bastante tediosa, pero al final se logró ajustar todo bien, algo que recuerdo que dio bastante problema fue el arranque, por alguna razón era imposible arrancarla desde el botón y debía usarse la pata, eventualmente este problema también se solucionó.
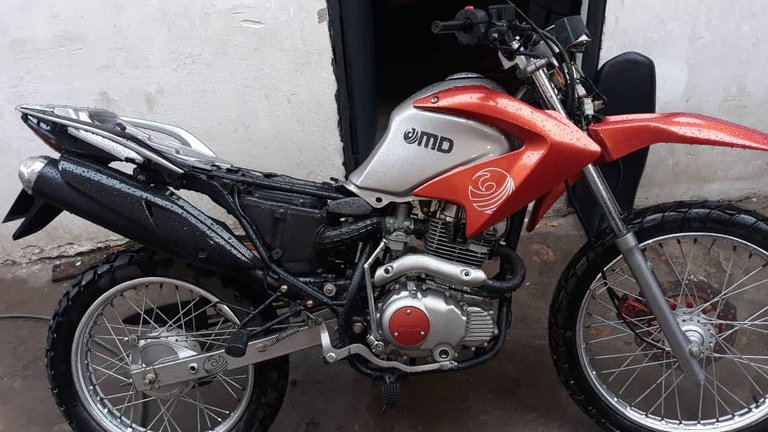
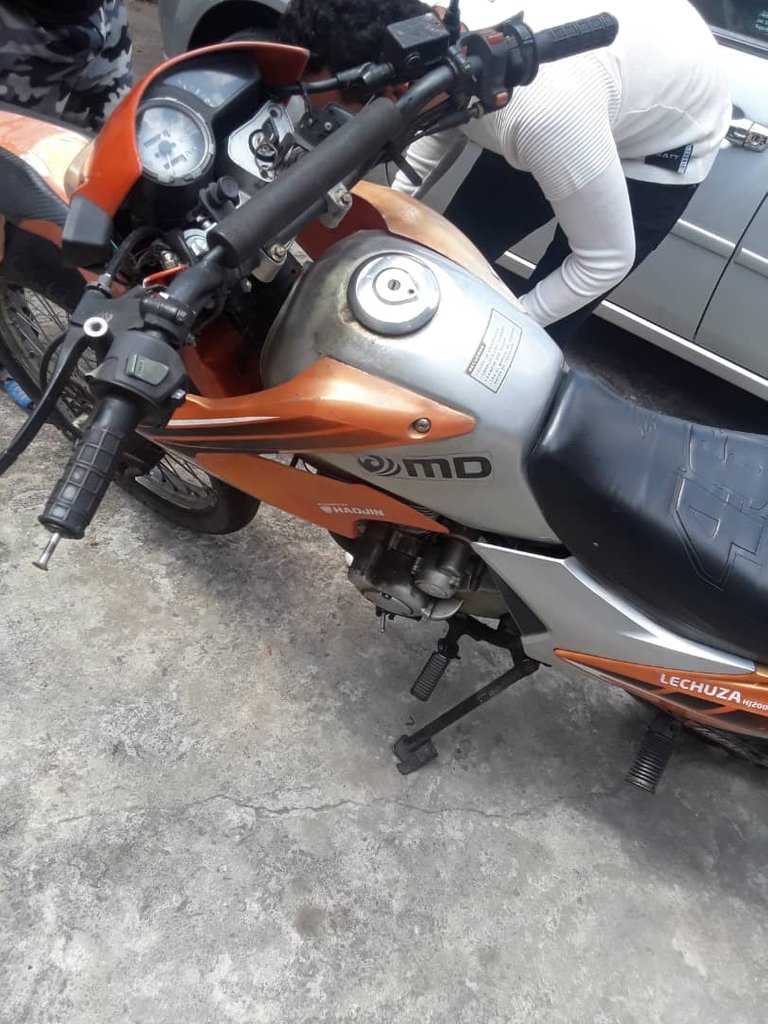
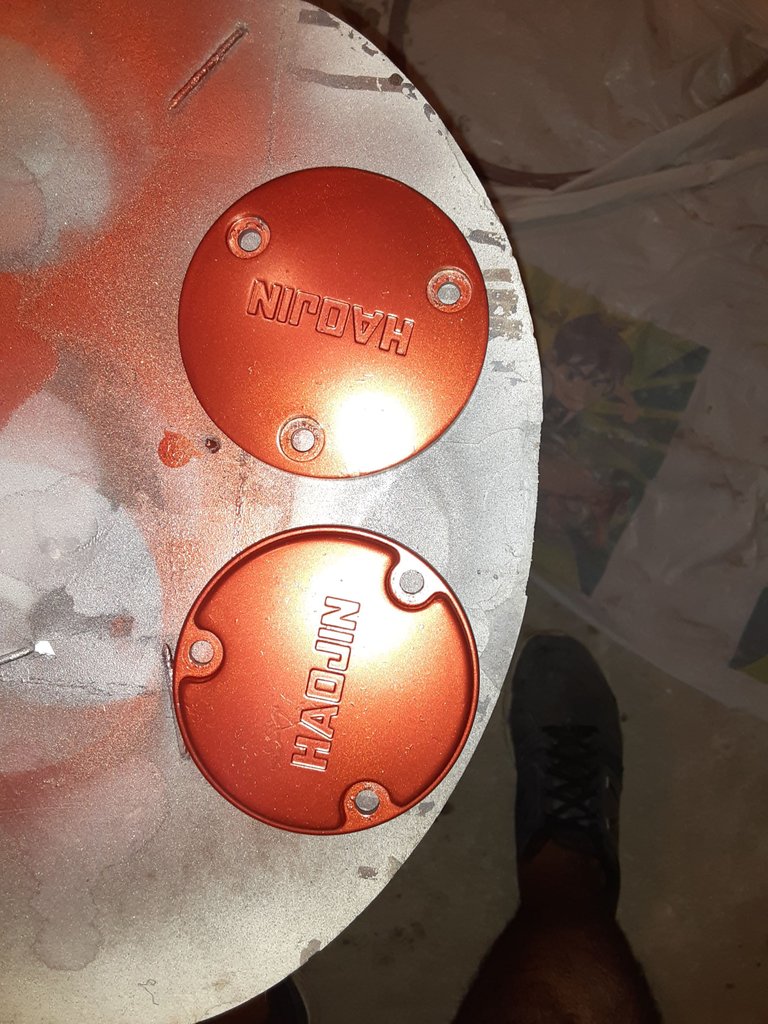
Despite the stress it caused over time I am satisfied with the results, we tried not to change too much to the original design, one of the few changes I made was to the cover of the exhaust pipe from gray to black, the same , darkening all the tones of the bike. The engine, for example, has a detail that we implemented(proposed by my Dad), painting the side covers in orange, it is those small details that give it a distinctive style.
A pesar del estrés que supuso a lo largo del tiempo estoy demasiado satisfecho con los resultados, tratamos de no cambiarle demasiado al diseño original, una de los pocos cambios que hice fue pasar la tapa que cubre el tubo de escape de gris a negro, igual, oscureciendo todos los tonos de la moto. El motor, por ejemplo, tiene un detalle que implementamos que nos gustó bastante (propuesto por mi Papá), pintar las tapas laterales de naranja, son esos pequeños detalles los que le dan un estilo distintivo.
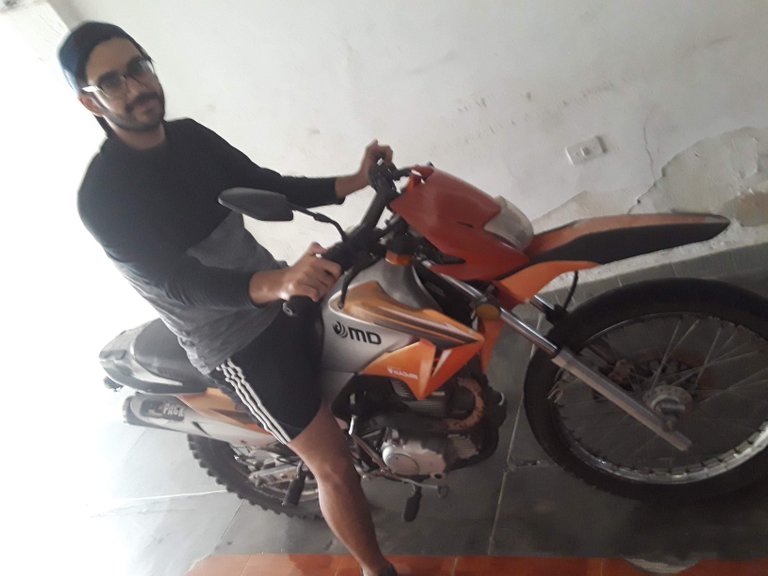
It was a project that took too much work, but we enjoyed every part of it.
The bike is quite powerful so it is a bit intimidating to ride, considering I have 0 experience, even so, I am practicing little by little with it.
Fue un proyecto que supuso demasiado trabajo, pero disfrutamos cada parte de ello.
La moto es bastante potente así que es un poco intimidante conducirla, considerando que tengo 0 experiencia, aún así, voy practicando poco a poco con ella.
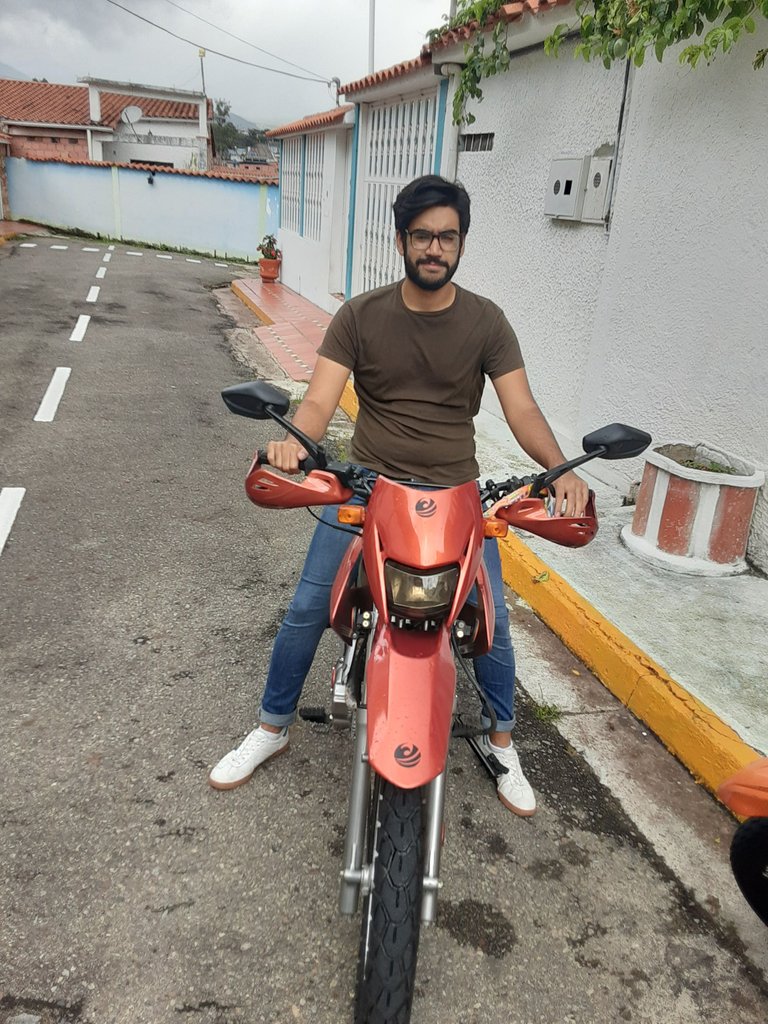
It's amazing how you can become attached to a material object when bringing it to its current state requires so much effort.
I hope you enjoy this post as I enjoyed doing this long project.
Es increíble como puedes encariñarte con un objeto material cuando llevarlo a su estado actual requiere tanto esfuerzo.
Espero disfrutaran este post como yo disfruté realizar este largo proyecto.
Antes/Before
Después/After
Twitter/Instagram: Alxxssss